Savory Baked Barbecue Chicken Thighs with Sweet Caramelized Onions

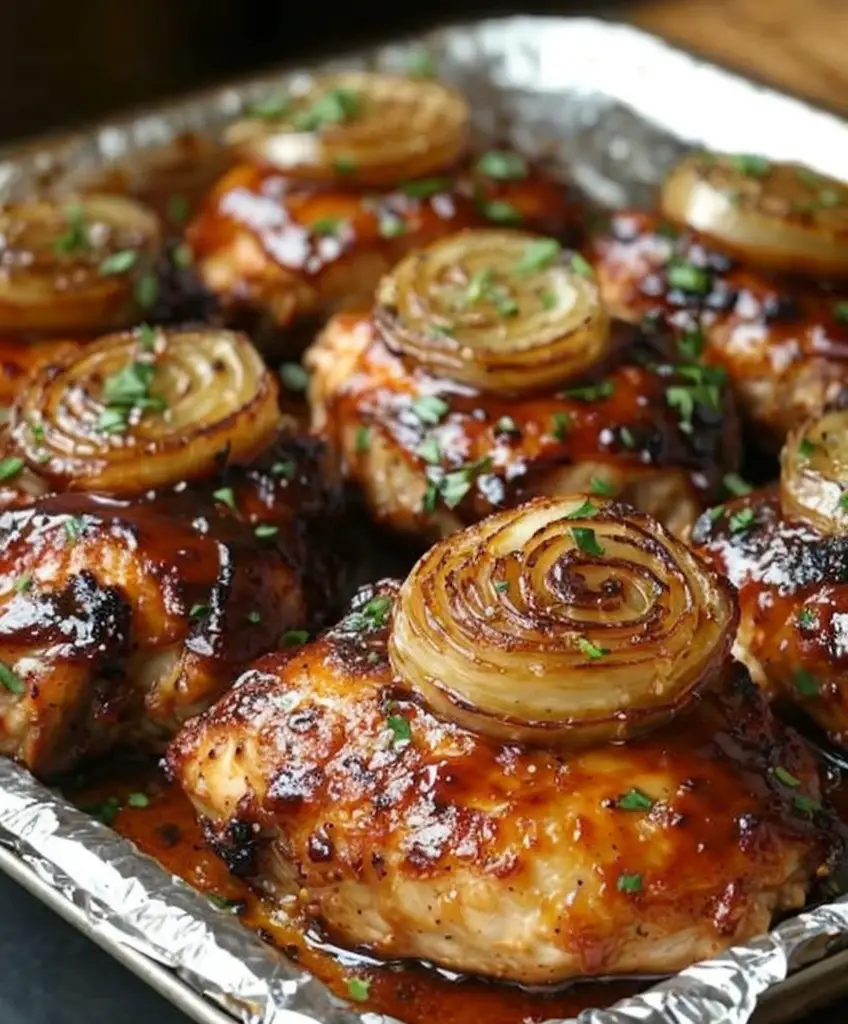
Baked Barbecue Chicken Thighs with Caramelized Onions: The Ultimate Comfort Meal

⚖️
Difficulty
Easy

⏲️
Prep Time
15 mins

🕒
Cook Time
45 mins

⏱️
Total Time
60 mins

🍽️
Servings
4

Baked Barbecue Chicken Thighs with Caramelized Onions is more than just a meal; it’s a celebration of flavors and comfort food at its finest. The juicy, tender chicken thighs baked to perfection bathed in rich, smoky barbecue sauce complement the sweet, buttery caramelized onions beautifully. Imagine gathering around the dinner table with your loved ones, the aroma of this delicious dish wafting through the air, creating an inviting atmosphere that entices everyone to dig in. This recipe promises not only a feast for the palate but also an experience that warms the heart.

The combination of succulent chicken and sweet onions creates a symphony of tastes that dances on your tongue. With each bite, expect a burst of savory barbecue paired with the melt-in-your-mouth texture of caramelized onions. This dish is perfect for casual family dinners or when entertaining friends at a barbecue. Its eye-catching presentation makes it a showstopper, while the ease of preparation leaves you plenty of time to enjoy the company of your guests.

Quick Recipe Highlights

  • Flavor Profile: Smoky barbecue meets the sweetness of caramelized onions for a perfect harmony of flavors.
  • Texture: Juicy chicken with a crispy exterior, contrasted by the soft, caramelized onions.
  • Aroma: Enticing aromas of barbecue and sweet onions blend beautifully as they cook.
  • Visual Appeal: A plate brimming with vibrant chicken thighs and golden onions, creating an inviting centerpiece.
  • Skill Level Needed: Perfect for novice cooks but delicious enough for seasoned chefs.
  • Special Equipment: Just a baking dish and a good knife for slicing onions.

Recipe Overview

  • Difficulty Level: This recipe is easy to follow, even for beginners in the kitchen. It involves simple cooking techniques that yield delicious results.
  • Category: Ideal for dinner, this recipe fits beautifully into casual family meals or friend gatherings.
  • Cuisine: Inspired by classic Southern barbecue flavors, combining elements from American culinary traditions.
  • Cost: Budget-friendly, as chicken thighs and onions are both affordable, making this dish accessible for all.
  • Season: Perfect for year-round enjoyment, but particularly satisfying in the warmer months when barbecues are plentiful.
  • Occasion: Great for daily meals or special gatherings like potlucks, family reunions, or summer barbecues.

Why You’ll Love This Recipe

The rich taste and tender texture of Baked Barbecue Chicken Thighs with Caramelized Onions will make it a frequent request at your dinner table. The chicken thighs soak up the barbecue sauce, infusing each bite with a delightful tanginess that contrasts beautifully with the sweet onions. This balance of flavors creates an unforgettable taste that leaves you craving more.

Convenience is key in today’s fast-paced world, and this recipe shines when it comes to ease of preparation. With only a handful of ingredients, you can have a hearty meal ready without spending hours in the kitchen. After a brief prep, your chicken thighs do all the work in the oven, letting you relax or attend to other tasks.

Nutritionally, chicken thighs are a great source of protein and essential nutrients. Paired with onions, which provide antioxidants and fiber, this dish is not only filling but also nourishing. Serve this dish guilt-free, knowing you’re indulging in a wholesome meal that supports your health.

This recipe is also perfect for social gatherings. Its inviting aromas and stunning presentation will spark conversation and fill your home with warmth. Share a plate at dinner parties or around the grill during summer outings, creating memorable moments with friends and family alike.

With affordable ingredients and accessible flavors, this dish is perfect for anyone on a budget. Chicken thighs offer excellent value while delivering on taste. Your guests will be none the wiser as they savor the deliciousness of this dish.

Historical Background and Cultural Significance

The origins of barbecue can be traced back to indigenous cooking methods, where meats were slow-cooked over open flames. The practice evolved over centuries, integrating various influences from settlers and immigrants, ultimately shaping the rich barbecue traditions we celebrate today. This dish pays tribute to those foundational techniques, emphasizing the fusion of flavors.

Culturally, barbecue carries deep significance, often serving as a focal point during gatherings and celebrations. Its communal nature encourages togetherness, making it a beloved cooking style worldwide. The act of sharing food, filled with rich traditions, strengthens bonds among friends and family.

Over time, barbecue recipes have evolved across different regions, leading to unique adaptations. From tangy sauces in the Carolinas to the sweet styles of Kansas City, each variation reflects local palates and available ingredients. This dish melds sweet and smoky flavors, capturing a bit of that rich heritage.

Regional variations are plentiful, as each area adds its twist. From the simple barbecue sauce to innovative flavor infusions, there’s a barbecue style to suit every taste bud. Each recipe evolution demonstrates the adaptability of barbecue across different cultures and tastes.

Ingredient Deep Dive

Chicken Thighs: Chicken thighs are flavorful and juicy, being a staple in many cuisines around the world. They are higher in fat compared to chicken breasts, making them richer and more tender, perfect for roasting or baking. When selecting, look for thighs with uniform color and no bruising for the best quality. Store them in the refrigerator for 1-2 days, or freeze for up to six months.

Barbecue Sauce: Barbecue sauce can vary by region, typically featuring sweet and tangy elements. Its roots stretch back to the Caribbean and American South, where various cultures contributed to its diverse flavors. This sauce not only adds flavor but also moisture to the chicken. Opt for a sauce that aligns with your taste preferences, whether sweet or smoky. Homemade versions allow for customization, while store-bought options provide convenience.

Onions: Onions are a vital ingredient in kitchens worldwide, celebrated for their versatility and flavor-enhancing qualities. They are rich in vitamins and minerals, offering health benefits like improved heart health. When selecting, choose firm onions without soft spots. Store them in a cool, dark place for optimal freshness, and avoid refrigeration to prevent sprouting. You can substitute with shallots or leeks for a different flavor profile.

Common Mistakes to Avoid

  • Overcooking the Chicken: Monitor the internal temperature to avoid drying out the chicken; aim for 165°F for moist, juicy thighs.
  • Using Low-Quality Sauce: A cheap barbecue sauce can lead to bland flavor; opt for a high-quality sauce for the best taste.
  • Neglecting to Caramelize Onions Properly: Allow onions to cook slowly to develop their sweetness; rushing this step can result in unpleasant raw flavors.
  • Skipping Marination: Marinating the chicken enhances flavor; do not skip this step, even if it’s just for a short time.
  • Not Prepping Ingredients First: Preparing ingredients beforehand can smooth the cooking process; take time to chop and measure before cooking.
  • Ignoring Cooking Time: Ovens can vary significantly; keep an eye on the food to prevent overcooking or burning.
  • Missing Flavor Enhancers: Don’t forget to season well; a bit of salt and pepper can elevate the dish dramatically.
  • Skipping the Rest Time: Allow the chicken to rest after cooking; this step retains juices for a more flavorful bite.

Essential Techniques

Caramelizing Onions: Caramelizing onions is crucial for flavor development. Cooking them low and slow allows natural sugars to break down, resulting in sweetness. Avoid high heat to prevent burning, and use a wide pan for even cooking.

Roasting Chicken: Roasting allows for even cooking and flavor enhancement. Start at a high temperature to lock in juices and finish with a lower temperature to ensure thorough cooking. Basting the chicken periodically with sauce can also boost flavor.

Pro Tips for Perfect Baked Barbecue Chicken Thighs

Experiment with different barbecue sauce varieties to find your favorite flavor profile.

Try marinating the chicken overnight for even deeper flavor penetration.

For added crunch, broil the chicken for the last few minutes of cooking.

Consider adding smoked paprika to the barbecue sauce for a deeper, more robust flavor.

Serve with fresh herbs sprinkled on top for a burst of freshness and color.

Accompany this dish with classic sides like coleslaw or cornbread for a complete meal.

Variations and Adaptations

Switching out chicken thighs for drumsticks or breasts can alter the cooking time and flavor.

Seasonal adaptations can include adding fresh herbs or changing the barbecue sauce to complement seasonal flavors.

For dietary modifications, use gluten-free barbecue sauce to accommodate gluten intolerances.

Experiment with different types of onions, such as red or sweet onions, for unique taste variations.

Incorporating fruits like pineapples or peaches in the sauce can provide a delightful sweetness.

For presentation, serve on a bed of greens for an eye-catching effect.

Serving and Presentation Guide

To present your dish beautifully, plate the chicken thighs and spoon caramelized onions generously over the top.

Add a sprinkle of freshly chopped parsley or cilantro for color and aroma.

Serve in vibrant, contrasting dishes that also hold the barbecue sauce to entice presentation.

Temperature is key; serve hot for the best flavors and textures to shine.

Consider portion control by offering individual servings or a family-style platter.

Wine and Beverage Pairing

A fruity red wine, such as Zinfandel or Merlot, pairs beautifully with the smoky flavors of barbecue.

For beer lovers, an amber ale or lager complements the sweetness of the sauce.

If you’re looking for non-alcoholic options, consider iced tea or a sparkling lemonade for brisk refreshment.

Serving at the correct temperature enhances the pairing experience, offering a delightful balance.

Storage and Shelf Life

To store, let the chicken cool before transferring it to airtight containers, where it can last up to three days in the refrigerator.

For extended freshness, freeze portions in vacuum-sealed bags, where they can remain tasty for up to three months.

Always check for signs of spoilage before consuming leftovers, such as an off smell or color variations.

When reheating, aim to bring the chicken back to a minimum internal temperature of 165°F.

Make Ahead Strategies

Prep ingredients the night before, chopping onions and measuring out spices for quicker cooking.

Assemble the dish fully except for cooking, then refrigerate it; this works well for busy evenings.

Ensure to assess quality after thawing if previously frozen, as some textures may change slightly.

Reheat in the oven for the best flavor retention; avoid the microwave when possible.

Scaling Instructions

To halve the recipe, adjust ingredient amounts precisely; timing may decrease slightly but check for doneness.

For larger gatherings, doubling or tripling the recipe works well; use extra large baking sheets or multiple pans.

Adjust cooking times based on the total volume, ensuring even cooking throughout the dish.

When scaling recipes, consider the storage needs for leftovers or any unconsumed amounts.

Nutritional Deep Dive

With a balanced macro breakdown, this dish provides healthy protein from chicken, essential fats, and carbohydrates from the sauce.

Micronutrient analysis shows benefits such as B vitamins and minerals important for health.

Nutritionally, this recipe supports overall wellness, especially as part of a balanced diet.

When portioning, be mindful of serving sizes for better weight management and mindful eating.

Dietary Adaptations

For gluten-free options, select a suitable sauce without cross-contamination risks.

Dairy-free adaptations are straightforward, as this recipe contains no dairy ingredients.

To align with keto and low-carb diets, opt for a lower-carb barbecue sauce version.

Paleo adaptations can focus on organic sauces and whole ingredients without preservatives.

Troubleshooting Guide

For texture issues, avoid high heat during caramelization, as this can lead to undesirable results.

If flavor seems off, revisit seasoning; a pinch of salt or additional herbs can elevate your dish.

For equipment challenges, potholes in oven temperatures can lead to uneven cooking; invest in a reliable thermometer.

Address timing concerns by prepping ingredients beforehand to streamline the cooking process.

Recipe Success Stories

Community feedback often highlights the explosive flavors of this dish, particularly among novice cooks.

Readers have shared their variations, showing endless possibilities for personalization with this recipe.

Many have praised how easy it is to adapt, whether swapping out proteins or spices.

Storytelling through photography tips helps others visualize their success in the kitchen with this dish.

Frequently Asked Questions

Can I use boneless chicken thighs? Yes, boneless chicken thighs can be used, but adjust cooking times since they may cook faster than bone-in thighs.

What type of barbecue sauce is best? Choose a barbecue sauce that suits your taste preferences—sweet, tangy, or spicy—to customize the dish.

Can I bake this dish in advance? Absolutely! You can prepare and assemble the dish a day ahead, then bake when ready to serve.

How do I prevent the chicken from drying out? Keep an eye on the cooking time, and use a meat thermometer to check for doneness at 165°F.

Is this recipe suitable for meal prep? Yes, it’s great for meal prep! Portion out leftovers into containers for easy reheating.

Can I substitute other proteins? Definitely! This recipe works well with pork, beef, or even grilled tofu for a vegetarian option.

How should leftovers be stored? Store in airtight containers in the refrigerator for up to three days, or freeze for longer storage.

What’s a good side dish? Classic sides like cornbread, coleslaw, or grilled vegetables pair beautifully with this dish.

Can I adjust the sweetness of the sauce? Yes, you can add honey or brown sugar for more sweetness, or vinegar for tanginess.

Will the recipe still work without caramelizing the onions? While you can skip caramelizing, it enhances flavor, so we recommend including that step for best results.

Additional Resources

Check out other barbecue recipes, including smoked ribs or grilled vegetables, for more ideas to complement your barbecue experience.

Technique guides for mastering baking and marinating will elevate your cooking skills.

Ingredient information can help you select the freshest products available at your local market.

Equip your kitchen with recommended tools that will make preparation easier and more enjoyable.

Join the Conversation

Share your own photos of this recipe on social media to inspire others in the cooking community.

Engage with fellow cooking enthusiasts by leaving reviews and suggestions in the comments section.

Explore creative adaptations of this dish and see how others enhance their recipes.

The Recipe

Baked Barbecue Chicken Thighs with Caramelized Onions

Serves: 4

Prep Time: 15 mins

Cook Time: 45 mins

Total Time: 60 mins

Kitchen Equipment Needed

  • Baking dish
  • Knife
  • Cutting board
  • Skillet
  • Meat thermometer

Ingredients

  • 4 bone-in chicken thighs
  • 1 cup barbecue sauce
  • 2 large onions, sliced
  • 2 tablespoons olive oil
  • Salt and pepper, to taste

Directions

  1. Preheat your oven to 375°F (190°C).
  2. In a skillet, heat olive oil over medium heat. Add sliced onions, seasoning with salt. Cook slowly, stirring occasionally until caramelized.
  3. Season chicken thighs with salt and pepper, then place them in the baking dish. Cover generously with barbecue sauce.
  4. Add the caramelized onions over the chicken before placing the dish in the oven.
  5. Bake for 45 minutes, ensuring internal temperature reaches 165°F (75°C).
  6. Let rest for a few minutes before serving to enhance flavor.

Recipe Notes

  • For an extra kick, add hot sauce to the barbecue sauce before coating the chicken.
  • You can substitute chicken thighs for drumsticks or breasts if preferred.
  • Leftovers can be stored in the refrigerator for up to 3 days and reheated thoroughly.

Indulge in Garlic Butter Lobster & Scallops for Dinner

Garlic Butter Lobster & Scallops: A Decadent Seafood Delight

⚖️
Difficulty
Moderate

⏲️
Prep Time
15 mins

🕒
Cook Time
20 mins

⏱️
Total Time
35 mins

🍽️
Servings
4

Indulge in a culinary experience that combines the luxurious flavors of garlic butter, succulent lobster, and tender scallops. This Garlic Butter Lobster & Scallops recipe is perfect for a romantic dinner or a special occasion. The rich, buttery sauce perfectly complements the sweetness of the seafood, creating a dish that is truly unforgettable. With every bite, you’ll savor the freshness and quality of these magnificent ingredients, taking your taste buds on a delightful journey.

This recipe not only brings the taste of the ocean to your kitchen but also provides a sense of extravagance that few dishes can match. The velvety garlic butter sauce envelops the tender scallops and lobster, enhancing their natural flavor while creating a beautiful glow that is visually appealing. Impress your guests with this elegant dish, and watch as they marvel at your culinary prowess.

Quick Recipe Highlights

  • Flavor Profile: The essence of rich garlic melds seamlessly with the sweetness of lobster and scallops, balanced by a hint of acidity from lemon juice.
  • Texture: Enjoy a delightful mix of textures: the tender snap of scallops contrasted with the succulent lobster meat creates a satisfying mouthfeel.
  • Aroma: The fragrant aroma of garlic and butter wafts through the air, inviting everyone to the table.
  • Visual Appeal: The dish showcases a stunning contrast of colors—golden butter against the deep red of lobster and the pearly sheen of scallops.
  • Skill Level Needed: This recipe is moderately difficult, requiring careful timing and technique, especially in handling seafood.
  • Special Equipment: Prepare this dish using a large skillet or sauté pan to properly cook the seafood and sauce.

Recipe Overview

  • Difficulty Level: With a moderate level of complexity, this recipe requires attention to detail and timing to ensure both the lobster and scallops are perfectly cooked.
  • Category: This dish falls under seafood entrees, making it an ideal choice for fancy dinners or celebrations.
  • Cuisine: Influenced by coastal culinary traditions, this recipe combines classic techniques with fresh, locally-sourced seafood.
  • Cost: The approximate cost of preparing this dish ranges from $40-$60 depending on the quality of seafood and where you purchase it.
  • Season: Best enjoyed year-round, but fresh seafood can often be more accessible during the summer and fall months.
  • Occasion: Perfect for special occasions such as anniversaries, birthdays, or any celebratory meal.

Why You’ll Love This Recipe

Indulging in Garlic Butter Lobster & Scallops allows you to experience a perfect harmony of flavors. The buttery richness, combined with a touch of garlic and a burst of lemon, creates a tasting experience that elevates the seafood to new heights. The texture of the lobster and scallops is tender yet firm, offering a delightful bite with every mouthful. The comforting aroma of garlic melted in butter adds an irresistible appeal that makes this dish unforgettable.

Convenience plays a crucial role in why you’ll love this recipe. With a quick preparation time and straightforward cooking instructions, you can create a gourmet experience in less than an hour. Ideal for home cooks looking to impress, this dish allows you to spend more time with your guests and less time in the kitchen. The ingredients are easy to find at your local market, making it accessible for many.

In addition to its delightful flavors, Garlic Butter Lobster & Scallops offers nutritional advantages, including high protein content and valuable omega-3 fatty acids. Seafood is known for its health benefits, contributing to heart health, brain function, and overall well-being. Enjoy this dish with the knowledge that you are nourishing your body while indulging your senses.

Hosting guests? This dish is sure to be a crowd-pleaser. The luxurious presentation of lobster and scallops bathed in garlic butter will leave a lasting impression. Be prepared for compliments on your culinary skills as guests savor each bite. This dish is perfect for entertaining and makes any gathering feel extra special.

Finally, consider the cost-effectiveness of this recipe. While seafood can sometimes seem expensive, by preparing it at home, you are saving on dining out while enjoying a similarly high-quality meal in the comfort of your own home. Plus, creating this decadent dish provides an opportunity to showcase your cooking abilities and encourages experimentation with flavors.

Historical Background and Cultural Significance

The origin of the Garlic Butter Lobster & Scallops dish can be traced back to coastal regions where seafood has always been a staple. Lobster has been a culinary delicacy for centuries, enjoyed by the elite and served in fine dining establishments. When combined with scallops, another prized seafood, this dish represents a celebration of the ocean’s bounty and reflects the cultural significance of seafood in coastal cuisine.

The cultural importance of seafood dishes like this one cannot be overstated. They symbolize not only the wealth of marine resources available but also a lifestyle tied to the sea. Communities along the coast have thrived on fishing and seafood cuisine, sharing traditional recipes passed down through generations. Special occasions often call for lavish seafood dishes, highlighting their significance in celebrations and gatherings.

Over time, the evolution of this recipe has seen various adaptations as chefs and home cooks experiment with flavors and ingredients. Modern variations incorporate elements from different cuisines, showcasing the versatility of garlic butter and seafood. With creativity at the forefront, the dish has adapted to meet contemporary tastes while preserving its classic roots.

Regional variations abound, particularly along the North American East Coast, where lobster is abundant. Each locale boasts unique takes, such as adding regional spices or infusing local flavors, enhancing the overall dish while paying homage to its heritage. From New England’s creamy versions to Cajun-inspired twists, the possibilities are endless.

Ingredient Deep Dive

Lobster: Lobster is not just a delicacy; it holds significant historical value as a food resource in coastal communities. Rich in protein and low in fat, lobster is packed with essential nutrients such as zinc and omega-3 fatty acids. When selecting lobster, opt for fresh, live specimens whenever possible; they should feel heavy for their size and have a clean, salty smell. Store lobster in a cool place but avoid keeping them in fresh water as it can kill them. If necessary, you can substitute lobster with shrimp or crab, albeit with a different flavor profile.

Scallops: These sweet, tender mollusks carry cultural importance, particularly in maritime regions where they are harvested. Scallops are known for being rich in protein and low in calories, making them ideal for healthy cooking. When purchasing, look for dry-packed scallops for superior quality, avoiding those that are “wet” as they often contain added preservatives that alter taste. Scallops can be stored in the fridge for a quick meal, while frozen options should be used within three months for best flavor. As a substitution, you could use sliced chicken breast for a different take—although the texture will vary significantly.

Common Mistakes to Avoid

  • Overcooking seafood: This leads to rubbery textures. Always monitor cooking time closely and remove from heat as soon as they turn opaque.
  • Using prepackaged seafood: Fresh is best. Prepackaged seafood often loses flavor and texture, diminishing the dish’s quality.
  • Not seasoning adequately: Salt and pepper enhance seafood flavors. Underseasoning leads to a bland dish.
  • Skimping on the garlic: Garlic is the star of the dish; don’t be afraid to use a generous amount for flavor and aroma.
  • Improperly handling seafood: Always keep seafood refrigerated before use and avoid cross-contamination with raw ingredients.
  • Neglecting the sauce: The garlic butter sauce is essential; make sure it’s well mixed and hot before adding the seafood.
  • Using the wrong kind of pan: A non-stick skillet is crucial for preventing seafood from sticking and maintaining proper cooking temperatures.
  • Failing to drain seafood properly: Any liquid left on the seafood can dilute the flavor of the dish; ensure they are patted dry before cooking.
  • Serving at the wrong temperature: Seafood dishes are best served warm, so ensure they are plated immediately after cooking.
  • Not allowing the flavors to meld: Let the finished dish sit for a few minutes off the heat to enhance the flavors before serving.

Essential Techniques

Proper Cooking of Seafood: Mastering the cooking process for lobster and scallops involves carefully timing each component for perfect doneness. When cooking, aim for a firm texture without being tough—this is achieved by observing visual and tactile cues. Seafood should be cooked until it is just opaque, typically around 3-5 minutes on each side. A seafood thermometer can help, as an internal temperature of 140°F is ideal.

Making the Garlic Butter Sauce: This technique is crucial for creating a flavorful base. Sauté minced garlic in butter over low heat until fragrant but not browned, which can introduce bitterness. Stir frequently to prevent burning. Experimenting with added herbs, like parsley or thyme, can enhance the sauce and contribute extra freshness. Lastly, incorporating lemon juice just before serving brightens flavors and balances richness.

Pro Tips for Perfect Garlic Butter Lobster & Scallops

Use fresh seafood wherever possible. Fresh ingredients will yield the best flavors and textures, ensuring that your dish stands out. Consider utilizing a seafood market or local fishmonger for premium selections.

Invest in high-quality butter. The richness of the dish relies on the flavor of the butter, so opt for a grass-fed option when available; it can significantly amplify the dish’s overall taste.

Don’t overcrowd the pan. Cooking in batches if necessary will ensure that each piece of seafood is perfectly cooked without steaming. Overcrowding can lead to uneven cooking and a watery dish.

Adjust seasoning throughout. Taste as you cook and adjust seasoning—this ensures that the final dish balances correctly. Flavor profiles change as they cook, so don’t skip this step.

Consider adding a splash of white wine. Deglazing the pan after cooking seafood can add depth while enhancing the overall flavor of the dish. The alcohol cooks off, leaving a lovely acidity.

Let it rest. After cooking, allow the seafood to rest for a few minutes. This helps retain moisture and allows the flavors to meld beautifully before serving.

Garnish smartly. Fresh herbs like parsley or chives can brighten the dish. Add these right before serving for a pop of color and additional flavor.

Pair with complementary sides. Serve with a fresh salad or garlic bread to soak up any leftover sauce, enhancing the overall dining experience.

Variations and Adaptations

Regional variations include incorporating local spices, such as Old Bay seasoning or Cajun blends, to add character to the dish. These spices elevate the flavor profile and celebrate regional culinary traditions.

Seasonal adaptations can also be made by swapping in vegetables that are fresher or more available, such as asparagus or zucchini, which add unique flavors and textures. Utilizing seasonal ingredients contributes freshness and sustainability.

For dietary modifications, consider using plant-based seafood alternatives for a vegan version. These substitutes can mimic the textures and flavors of lobster and scallops, allowing you to enjoy similar dishes without animal products.

Flavor variations can involve experimenting with different cheeses, such as adding Parmesan or a sprinkle of goat cheese, providing a unique twist and extra creaminess to the sauce.

Texture modifications can include adding a crispy topping, such as panko breadcrumbs mixed with herbs, providing a satisfying crunch alongside the tender seafood.

Presentation alternatives could involve serving in a clam shell for a unique touch that adds visual interest and intrigue to your seafood dish.

Serving and Presentation Guide

Plating techniques play a significant role in the overall enjoyment of the dish. Consider using a wide, shallow bowl to showcase the seafood beautifully, allowing the rich sauce to pool around the elements and deliver a visually stunning presentation.

Garnishing ideas might include a drizzle of extra garlic butter on top and a sprinkle of fresh chopped parsley for color. Bright slices of lemon can also serve as a decorative and functional touch.

Traditional accompaniments, such as crusty bread, are perfect for dipping into the luxurious garlic butter sauce. This not only complements the dish but also enhances the overall experience.

Modern serving suggestions may include pairing with an elegant side salad dressed lightly with vinaigrette, bringing a refreshing contrast to the richness of the seafood.

Temperature considerations are vital; serve the dish immediately after cooking while it’s still hot, ensuring optimal flavor and texture for your guests.

For portion control, aim for about one lobster tail and three scallops per serving. Adjust based on the size of the seafood, ensuring everyone gets a fair share of this delicacy.

Wine and Beverage Pairing

Pairing this Garlic Butter Lobster & Scallops dish with a crisp white wine, such as Chardonnay or Sauvignon Blanc, enhances its flavor profile. The acidity in the wine complements the richness of the butter and seafood beautifully.

For non-alcoholic alternatives, consider sparkling water with a twist of lemon or a refreshing iced tea that will cleanse the palate between bites without overpowering the dish.

If coffee or tea pairing applies, consider a light herbal tea, which can deliver a calming finish after the richness of the meal. The aromatic qualities will also enhance the dining experience.

Temperature considerations for serving wine are crucial; a slight chill on white wines elevates their refreshing qualities, ensuring perfect harmony with the seafood dish.

Serving suggestions include decanting the wine beforehand to allow it to breathe, heightening its flavor before pairing it with your exquisite meal.

Storage and Shelf Life

Storage methods for leftovers include placing them in an airtight container and refrigerating promptly. Properly stored, the dish will last for 1-2 days. Avoid freezing if possible, as seafood doesn’t reheat well without losing texture and flavor.

Temperature requirements suggest keeping the dish at or below 40°F if stored. If reheating is necessary, aim for gentle methods like a low oven heat or a skillet to avoid overcooking.

Container recommendations include glass containers with tight seals to prevent odor absorption from other foods in the refrigerator, ensuring your seafood retains its fresh taste.

Signs of spoilage might include off-putting smells, slimy texture, or discolorations. If any of these are detected, it’s best to discard the dish.

Reheating instructions involve taking care to heat gradually, ensuring even warmth throughout without cooking the seafood further. A few tablespoons of fresh butter can reinvigorate the flavors upon reheating.

For freezing guidelines, while not ideal, if you must freeze, do so immediately after cooking, using freezer-safe containers and consuming within a month for best quality.

Make Ahead Strategies

Prep timeline advice suggests chopping garlic and preparing the butter sauce a day ahead, storing it in the refrigerator. This shortens cooking time when you’re ready to serve the dish.

Storage between steps is vital; while the seafood should be cooked fresh, any sauces or sides can be prepped beforehand and refrigerated to maintain quality.

The quality impact assessment is crucial; precooked ingredients can lose texture and flavor if they remain too long in storage, so only prepare what’s necessary.

Assembly tips suggest assembling the dish just before serving to ensure the seafood is hot and the sauce is velvety, preventing any elements from becoming soggy.

Reheating guidelines indicate that any previously cooked seafood should only be warmed gently to prevent toughness, often best achieved in a sauté pan.

Fresh element additions can include tucking fresh herbs into the dish after cooking, adding layers of brightness and enhancing the flavors right before serving.

Scaling Instructions

Halving the recipe is simple; just divide each ingredient measurement by two while maintaining the cooking times as needed for the size reduction.

Doubling or tripling requires a larger skillet or multiple cooking batches to ensure the seafood cooks evenly without overcrowding—adjust cook times slightly.

Equipment adjustments mean ensuring you have sufficient space and tools (like extra pans) for larger batches, especially when scaling for a crowd.

Timing modifications are important; always check seafood doneness, particularly when scaling, as increased quantities can require slight adjustments in cook time.

Storage considerations should account for larger batches; the leftovers should be promptly stored in airtight containers to ensure freshness when scaling recipes.

Nutritional Deep Dive

The macro breakdown of this dish shows it to be high in protein and healthy fats, making it satisfying while also being nutrient-dense, ideal for health-conscious eaters.

Micronutrient analysis reveals that seafood is rich in essential nutrients such as vitamin B12, selenium, and zinc, vital for overall health and well-being.

Health benefits of enjoying seafood regularly include supporting cardiovascular health, reducing inflammation, and improving brain function due to omega-3 fatty acid content.

Dietary considerations indicate the dish is gluten-free and can be adapted for low-carb diets, while portions should be mindful, especially as seafood can contribute to higher cholesterol levels.

Portion analysis reveals that a reasonable serving size of this dish provides a balance of indulgence and nutrition, offering a satisfying meal without excessive calorie intake.

Weight management tips include enjoying this meal with plenty of fresh vegetables and smart portion control for a balanced approach to indulgence.

Dietary Adaptations

This recipe can be made gluten-free by ensuring any added sauces or seasonings are certified gluten-free, allowing those with dietary restrictions to enjoy without concern.

To create a dairy-free version, substitute butter with a plant-based alternative; almond or coconut oil works marvelously while providing a unique flavor twist.

A vegan adaptation could involve using plant-based lobster and scallop substitutes, allowing those with dairy and meat-free preferences to partake in the enjoyment.

For a low-carb version, serve alongside keto-friendly vegetables like zucchini noodles or roasted cauliflower to keep carbs in check while enjoying the luxurious flavors of the seafood.

The keto diet enthusiast can enjoy this dish as is, as it naturally fits within the principles of low-carb eating due to its base of rich proteins and healthy fats.

Moreover, Paleo followers can relish this dish without modifications since the main ingredients comply with the Paleo guidelines for whole foods.

Low-FODMAP adjustments may be necessary for sensitive individuals by substituting garlic with garlic-infused oil, maintaining flavor without triggering digestive issues.

Other specific diets can also be accommodated with tailored ingredient swaps and careful consideration of seasoning options for flavor without compromise.

Troubleshooting Guide

For texture issues, like rubbery seafood, ensure proper cooking time—if seafood is overcooked, it becomes tough; remove from heat at just the right moment to ensure tenderness.

If flavor balance is off, consider adjusting with fresh herbs or acid, such as a squeeze of lemon, which can elevate the flavors and restore harmony in the dish.

Temperature problems can occur when seafood sits too long after cooking. To avoid this, plate promptly and serve as soon as possible after preparation.

Equipment challenges, such as non-stick problems, can be avoided by preheating your skillet carefully before adding butter and seafood; this ensures even cooking and prevents sticking.

Ingredient substitutions should be approached cautiously; using inferior-quality seafood will result in a lackluster dish, so always strive for the freshest options possible.

Timing concerns can cause stress: if you’re cooking for others, coordinate nicely with side dishes to ensure everything comes together smoothly at once.

Recipe Success Stories

Community feedback on Garlic Butter Lobster & Scallops often praises its rich flavors and impressive presentation, making it a favorite among home cooks looking for a show-stopping entrée.

Variation successes, like incorporating different herbs or spices, have led to exciting adaptations, showcasing the versatility of this dish while maintaining its classic charm.

Adaptation stories from readers frequently highlight how they’ve tailored the recipe for special dietary needs without sacrificing flavor or enjoyment, further proving the dish’s flexibility.

Photography tips often emphasize the importance of lighting and garnishing to showcase the vibrant colors and textures beautifully, ensuring that each plate looks as good as it tastes.

Frequently Asked Questions

Can I use frozen seafood? It’s best to use fresh seafood when possible, but if frozen is what you have, ensure it is thawed completely before cooking. This will prevent uneven cooking and maintain quality.

How can I tell if lobster is cooked? Perfectly cooked lobster will turn bright red and opaque. Timing is essential, and it’s recommended to cook for about 8-12 minutes per pound depending on the cooking method used.

What’s the best way to reheat this dish? Reheat gently in a skillet on low heat. Adding a bit of butter will help maintain moisture and prevent rubbery textures.

Can I make this in advance? While seafood is best cooked fresh, you can prepare the sauce ahead of time. Cook the seafood just before serving for optimal texture and flavor.

Is this dish suitable for kids? Yes, this dish can be adapted to suit kids by reducing the garlic and spice levels. Additionally, serve it with kid-friendly sides to balance the meal.

What can I serve with Garlic Butter Lobster & Scallops? Consider pairing with a green salad, crusty bread, or a light vegetable side to keep the meal fresh and balanced.

Can I switch out the seafood? Yes! Feel free to swap lobster and scallops with other seafood like shrimp or crab based on preferences or availability.

What kind of pasta can I pair it with? If you’re looking to add pasta, a simple linguine tossed with olive oil can complement the flavors beautifully without overwhelming the dish.

Are there any vegetarian options for this recipe? For a vegetarian experience, consider using grilled vegetables or stuffed mushrooms in the garlic butter sauce as a delicious alternative.

How do I know if my scallops are fresh? Fresh scallops should be moist and translucent, with a sweet ocean smell. If they have a strong fishy odor or are dry, it’s best to discard them.

Additional Resources

For those looking for related recipes, consider checking out other seafood dishes, such as Sautéed Shrimp with Garlic and Lemon or Baked Salmon with Herb Butter. These provide a great array of flavors while highlighting the beauty of seafood.

Technique guides covering sautéing and searing seafood can enhance skills, ensuring proper cooking methods are utilized to achieve restaurant-quality results at home.

Ingredient information about how to select and store seafood can provide useful tips for maintaining quality, ensuring fresher meals each time you cook.

Equipment recommendations, including the right pans for seafood cooking, can help streamline your culinary experience, making it easier and more enjoyable.

Finally, exploring seasonal variations allows home chefs to cater their dishes to fresh, in-season ingredients, enhancing flavor and quality while enjoying culinary creativity.

Join the Conversation

Engage with the community by sharing your own experiences with Garlic Butter Lobster & Scallops on social media! Post your photos and inspire others with how you personalized this recipe.

Photography tips on capturing beautiful dishes can spark creativity among fellow cooks, encouraging them to showcase their culinary creations.

Recipe reviews and feedback encourage sharing what worked well and what can be improved, creating a space for growth and collaboration within the cooking community.

Community engagement motivates adaptation sharing, collecting diverse feedback that can inspire new ideas or variations worth exploring in the kitchen.

The Recipe

Garlic Butter Lobster & Scallops

Serves: 4

Prep Time: 15 mins

Cook Time: 20 mins

Total Time: 35 mins

Kitchen Equipment Needed

  • Large skillet or sauté pan
  • Spatula
  • Measuring cups and spoons
  • Sharp knife
  • Cutting board

Ingredients

  • 2 lobster tails
  • 12 scallops
  • ½ cup unsalted butter
  • 4 cloves garlic, minced
  • Juice of 1 lemon
  • Salt and pepper to taste
  • Fresh parsley for garnish

Directions

  1. In a large skillet, melt butter over medium heat. Add minced garlic and sauté until fragrant but not browned, about 1-2 minutes.
  2. Season lobster tails with salt and pepper. Add them to the skillet, cooking for about 5-6 minutes until they turn opaque.
  3. Remove lobster and set aside. In the same skillet, add scallops and cook for 2-3 minutes on each side until golden brown and opaque.
  4. Add lobster tails back to the skillet, pour in lemon juice, and gently mix to combine. Allow to heat for an additional minute.
  5. Plate the garlic butter lobster and scallops, garnishing with fresh parsley before serving.

Recipe Notes

  • For added flavor, consider adding a splash of white wine while cooking the seafood.
  • Leftovers can be stored in the refrigerator for up to two days; consume quickly to maintain freshness.

Delicious Filet Mignon with Creamy Parmesan Mustard Sauce Recipe

Filet Mignon with Parmesan Mustard Sauce: An Elegant Culinary Delight

⚖️
Difficulty
Moderate

⏲️
Prep Time
15 mins

🕒
Cook Time
20 mins

⏱️
Total Time
35 mins

🍽️
Servings
4

Indulging in a perfectly cooked Filet Mignon with Parmesan Mustard Sauce is akin to experiencing a symphony of flavors that dance on your palate. This succulent cut of beef, renowned for its tenderness and rich flavor, takes center stage, enhanced by a creamy Parmesan mustard sauce that adds a savory depth. Each bite delivers a melt-in-your-mouth experience, creating a memorable dining occasion whether it’s a regular weeknight meal or a special celebration.

The allure of this dish begins with its aroma, where the inviting scent of sizzling filet mingles with the sharp, tangy essence of mustard and the nutty notes of Parmesan. This aromatic combination creates an unforgettable dining atmosphere, making it a standout choice for dinner parties or romantic evenings. Moreover, the dish presents beautifully, with the golden sauce draped over the perfectly seared steak, offering a feast for the eyes as well as the taste buds.

Quick Recipe Highlights

  • Flavor Profile: This dish balances the rich, savory notes of filet mignon with the tanginess of mustard and the creaminess of Parmesan, creating a harmonious flavor experience.
  • Texture: The filet is tender and juicy while the sauce has a smooth, creamy consistency that envelops each bite.
  • Aroma: The dish boasts aromatic notes of grilled beef, sharp mustard, and nutty Parmesan, creating an inviting scent profile.
  • Visual Appeal: The vibrant sauce adds a striking contrast to the deep brown of the seared filet, garnishing with fresh herbs enhances its presentation.
  • Skill Level Needed: This recipe requires moderate cooking skills, particularly proficiency in preparing meat to the perfect doneness.
  • Special Equipment: A heavy skillet or grill pan, along with a meat thermometer for optimal results, is essential for this recipe.

Recipe Overview

  • Difficulty Level: This Filet Mignon with Parmesan Mustard Sauce is categorized as moderate due to the techniques involved in searing the meat and preparing the sauce perfectly.
  • Category: This dish falls under the category of main course, fitting perfectly as a centerpiece for a gourmet meal.
  • Cuisine: Drawing influences from classic French cuisine, this recipe showcases the sophistication of fine dining in a home-cooked meal.
  • Cost: While filet mignon can be costly, overall ingredient costs are reasonable considering the culinary experience this dish provides.
  • Season: Best enjoyed during colder months when diners crave rich, hearty meals, this dish shines in autumn and winter seasons.
  • Occasion: Perfect for special occasions, such as anniversaries or elegant dinner parties, this dish impresses guests with its refined flavor profile.

Why You’ll Love This Recipe

The taste and texture of this Filet Mignon with Parmesan Mustard Sauce are remarkable, making it a true feature in your culinary repertoire. The filet mignon is known for its buttery tenderness, which is accentuated by the tangy, creamy sauce that elevates the beef to new heights of flavor. Each bite offers a delicious combination of savory, rich notes that will keep you coming back for more, making it an instant favorite.

Convenience plays a crucial role in meal preparation, and this recipe fits the bill. With a total time of just 35 minutes, it’s quick enough for a weeknight affair yet elegant enough for entertaining guests. The sauce can be prepared while the filet cooks, making the process smooth and manageable. It’s perfect for those who want to impress without spending a whole day in the kitchen.

Additionally, this filet mignon recipe is packed with nutritional advantages. Filet mignon is a lean cut of beef rich in protein, contributing to muscle building and repair. Pairing it with the nutritious ingredients in the Parmesan mustard sauce, including mustard seeds and cheese, offers a well-rounded meal that provides essential nutrients in a clutch of flavor.

On social occasions, this dish shines. Imagine hosting friends for dinner and revealing a perfectly seared filet mignon adorned with a divine sauce as the grand finale to the meal. The presentation alone is enough to stir conversation and admiration, giving you the host’s satisfaction of providing a top-notch dining experience.

Lastly, the cost-effectiveness of preparing your filet mignon at home is immeasurable. While dining out often comes at a premium, creating this exquisite meal in your own kitchen not only saves money but also allows you to control ingredient quality. A homemade gourmet meal can rival any restaurant offering, making it accessible for the passionate cook to recreate fine dining at home.

Historical Background and Cultural Significance

The origins of filet mignon can be traced back to the culinary traditions of France, where it has been celebrated for centuries as a prime cut of beef. The name “filet mignon” translates to “dainty filet,” and it is often regarded as the most tender and flavorful cut of beef, making it a popular choice for discerning diners. With its rich history, this dish has become synonymous with gourmet dining and special occasions.

Culturally, filet mignon holds a significant place in French cuisine, embodying the artistry of cooking that emphasizes technique and presentation. Its presence on the menu of upscale restaurants across the world highlights its prestige as a culinary delight. Filet mignon serves as a celebration of not only the ingredients used but also the craft of the chef, who prepares it to perfection.

Over time, the evolution of filet mignon has seen variations in preparation and serving styles. While traditionally served with rich sauces, modern interpretations have led to unique pairings that include lighter sauces or bold accompaniments. As a dynamic piece of culinary history, filet mignon continues to inspire creativity in kitchens around the globe.

Regionally, variations of filet mignon can be found in various cultures, each adding its own unique twist. For instance, in some regions of the United States, filet mignon is often paired with robust barbecue sauces, while others may opt for refined herb-infused butters. The adaptability of this cut of meat demonstrates its universal appeal across culinary landscapes.

Ingredient Deep Dive

Filet Mignon: Known for its exceptional tenderness, filet mignon is cut from the tenderloin of the beef, a muscle that does little work, making it inherently soft. This cut is highly regarded in culinary circles, often served in high-end steak restaurants and featured in special occasions. Nutritionally, filet mignon is rich in protein and contains important vitamins and minerals such as iron and zinc. When selecting filet mignon, look for cuts that are bright red with even marbling for optimal flavor and juiciness. For storage, keep it in the refrigerator and use it within a few days or freeze for longer shelf life. As a substitution, consider other tender cuts like tenderloin steak if necessary.

Parmesan Cheese: This aged cheese is admired for its hard texture and strong, nutty flavor. Originating from Italy, Parmesan cheese has cultural significance as a cornerstone in Italian cooking, often grated over pasta dishes and used in sauces. From a nutritional aspect, Parmesan is protein-rich and provides calcium, making it a healthy addition to your meals in moderation. When choosing Parmesan, opt for block cheese to grate fresh, ensuring better flavor compared to pre-grated alternatives. Store in the refrigerator wrapped tightly in a cheese bag or wax paper. If you need a substitute, Pecorino Romano or Grana Padano can work well due to their similar texture and flavor profiles.

Mustard: This versatile condiment comes in numerous varieties, with Dijon mustard being a favored choice for this recipe due to its smooth texture and sharp flavor. Mustard has been a staple in culinary traditions for centuries, used to add acidity and depth to many dishes. Loaded with health benefits, mustard is low in calories and contains antioxidants that promote good health. For selection, opt for high-quality mustard free from preservatives for the best taste. Mustard can be stored in the refrigerator for an extended period, but always check for freshness. Alternatives like honey mustard or spicy brown mustard can bring unique flavors if needed.

Common Mistakes to Avoid

  • Overcooking the filet: Filet mignon should be cooked to medium-rare (130-135°F); using a meat thermometer is crucial. Overcooking can lead to a dry, less flavorful steak.
  • Skipping the resting period: Allowing the steak to rest after cooking is essential. This helps the juices redistribute, ensuring a moist filet when cut.
  • Not seasoning properly: Seasoning the filet generously with salt and pepper enhances the meat’s natural flavors. Failing to do so may result in a bland dish.
  • Using cold meat: Ensure the filet is at room temperature before cooking. This leads to more even cooking.
  • Ignoring pan temperature: A hot skillet is key for a good sear. Don’t place the steak in a cold pan or it will steam rather than brown.
  • Not letting the sauce thicken: Allow the Parmesan mustard sauce to simmer enough to thicken properly for maximum flavor and creaminess.
  • Skipping high-quality ingredients: Using lower-quality beef or cheese can compromise the flavor and texture of the dish. Always opt for the best cuts and artisanal cheeses.
  • Overcrowding the pan: Cooking too many filets at once can lower the pan temperature, preventing a good sear. Cook in smaller batches if necessary.
  • Neglecting to taste along the way: Always taste your sauce and adjust seasoning as necessary for a balanced flavor before serving.
  • Cutting the steak too early: Let the steak rest for at least five minutes before slicing to maintain its juices.

Essential Techniques

Searing: Searing the filet is crucial for developing a rich, caramelized flavor. The high heat creates a Maillard reaction, giving a wonderful crust. To master this technique, ensure your skillet is preheated, and use oil with a high smoke point. A common pitfall is overcrowding the pan, which lowers the temperature and prevents browning. Visual cues for success include a deep brown color on the meat’s surface and a fragrant aroma.

Making the Sauce: The sauce is a blend of flavors that brings the dish together. Start by deglazing the pan after cooking the filet to incorporate all the flavorful bits left behind. Simmer the sauce until slightly thickened for the right consistency. A common mistake is rushing this step or neglecting to taste for seasoning adjustments. When done right, the sauce should coat the back of a spoon without being too thick.

Pro Tips for Perfect Filet Mignon with Parmesan Mustard Sauce

1. Always use a meat thermometer to ensure the perfect level of doneness. Aim for 130°F for medium-rare, removing the steak a few degrees before to allow for carryover cooking.
2. Season your filet generously with salt at least 30 minutes before cooking to enhance its flavor.
3. For added depth, consider using a splash of white wine in your sauce for an elevated flavor profile.
4. If you’re preparing multiple filets, sear them in batches to maintain the temperature of the pan and achieve the best sear.
5. When making the sauce, whisk in a little of the steak drippings to enhance the flavor and richness.
6. Serve the filet mignon on warm plates to help maintain its temperature longer when served.
7. Garnish your dish with fresh herbs like parsley or chives for a pop of color and freshness.
8. Pair leftovers with a light salad the next day for a delightful and fulfilling lunch.

Variations and Adaptations

Regional variations of this dish can include using different sauces, such as a red wine reduction or a blue cheese topping. These alternatives can enhance or shift the flavor profile significantly, catering to varying tastes. Seasonal adaptations may involve incorporating seasonal vegetables on the side, such as asparagus in spring or root vegetables in winter, adding vibrant colors and nutrients.

For dietary modifications, consider using alternative meats like a high-quality turkey cut for those avoiding beef. For different flavor variations, you might explore using flavored mustards, such as honey mustard or spicy Dijon, which can alter the sauce’s sweetness or spice level. Texturally, you can add crushed nuts atop the filet for a crunchy contrast or opt for a smooth sauce blended with cream for a richer mouthfeel.

For presentation, consider serving the filet on a bed of creamy mashed potatoes or a fresh salad, providing visual contrast and a balanced meal that looks as good as it tastes.

Serving and Presentation Guide

Plating techniques for filet mignon should emphasize the steak as the star ingredient. Start with a generous drizzle of the Parmesan mustard sauce on the plate, then carefully place the filet atop it to create height on the plate. Garnishing with a sprig of fresh herbs adds a touch of color and freshness to the dish.

To elevate your presentation, consider traditional accompaniments like sautéed mushrooms or seasonal vegetables placed artfully around the plate. Modern serving suggestions include adding a small side of roasted garlic mashed potatoes or a colorful salad to add complexity to the dish.

Temperature considerations are vital; serve the filet mignon hot to enhance its flavors and juiciness. Finally, practice portion control by cutting the filet into smaller pieces for sharing, allowing guests to enjoy a small taste of its rich flavors.

Wine and Beverage Pairing

When it comes to wine pairings, a robust red such as Cabernet Sauvignon or Malbec perfectly complements the rich flavors of filet mignon. These full-bodied wines match the steak’s intensity while their tannins help balance the meal’s richness. For those preferring white, a Chardonnay with oak aging can offer a lovely contrast with its buttery notes.

For non-alcoholic alternatives, consider a rich, berry-flavored sparkling water that refreshes the palate between bites. If you’re serving this dish during a brunch, consider offering a rich coffee or espresso to complement the meal’s depth.

Temperature considerations are paramount; ensure your wine is served at the appropriate temperature—red wines should be slightly below room temperature while whites are best served chilled. Presentation suggestions include serving in elegant glassware that highlights the sensory experience of your meal.

Storage and Shelf Life

Proper storage methods for leftover filet mignon include placing it in an airtight container and refrigerating it immediately after cooling. This helps maintain its flavor and texture for up to three days. When reheating, gently warm the filet in the oven at low heat to avoid drying it out.

Temperature requirements are crucial; always store cooked filet mignon below 40°F in the refrigerator or below 0°F for freezing. Container recommendations include using glass containers for effective temperature control. Signs of spoilage in leftover filet mignon include off-odors, discoloration, or a slimy texture, indicating that it should not be consumed.

For freezing guidelines, wrap the steak tightly in plastic wrap and then in aluminum foil to prevent freezer burn. When ready to eat, thaw it in the refrigerator overnight before reheating gently to maintain its juiciness.

Make Ahead Strategies

Preparing filet mignon with Parmesan mustard sauce can be made easier with some make-ahead strategies. Consider seasoning your steak a day prior, allowing the flavors to penetrate. Sauce components can also be prepped in advance, such as grating the Parmesan and measuring out the mustard.

During assembly, rest the steak after cooking, allowing you to prepare the sauce simultaneously for efficiency. Quality impact assessment is crucial; ensure proteins are stored correctly before cooking.

Fresh element additions, such as herbs or garnishes, should be held until just before serving for maximum flavor. This keeps your dish vibrant and exciting while allowing you more time to enjoy with your guests.

Scaling Instructions

Scaling the filet mignon recipe can be easily accomplished by halving or doubling the ingredient amounts. When halving, you may not need a full serving of sauce; adjust based on taste preference. For doubling or tripling, ensure you have enough space on your cooking surface to sear multiple filets without crowding them.

Equipment adjustments should consider larger pans or multiple cooking vessels to ensure even cooking temperatures. Timing modifications may also be necessary; larger batches might take slightly longer to reach the desired doneness, so using a meat thermometer is essential.

Storage considerations become relevant when scaling; ensure that leftovers are properly divided into manageable portions for easy reheating later.

Nutritional Deep Dive

When examining the nutritional profile of filet mignon with Parmesan mustard sauce, its macro breakdown leans heavily on protein due to the lean beef, providing about 24 grams of protein per 3-ounce serving. Additionally, the dish brings in healthy fats from the Parmesan cheese and adds dynamism with its sauce components, balancing the overall meal.

Micronutrient analysis reveals that filet mignon is a staple source of iron, zinc, and B vitamins, essential for energy and overall health. The mustard sauce contributes antioxidants that enhance the meal’s nutritional benefits. For those watching dietary considerations, keeping portion sizes in mind can help manage caloric intake while still enjoying this delicious dish.

Weight management tips include pairing the steak with high-fiber sides like vegetables to create a nutrient-rich meal that satisfies hunger without excess calories.

Dietary Adaptations

For those following a gluten-free diet, this recipe fits seamlessly as it contains no gluten ingredients. However, double-check the label on mustard and Parmesan for hidden sources of gluten.

If you’re seeking a dairy-free adaptation, consider using nutritional yeast for a cheesy flavor while omitting the Parmesan cheese entirely. For vegan modifications, use tofu or a hearty plant-based protein that mimics the meat’s texture, served with a creamy cashew-based sauce instead.

For low-carb diets, serving the filet mignon with zucchini noodles or a fresh salad can keep your carbs in check while providing balance. Keto and Paleo enthusiasts may also enjoy the rich flavors without needing major adjustments to the dish.

Other specific diets, such as low-FODMAP, can adopt this recipe easily by ensuring that all ingredient selections adhere to FODMAP guidelines, providing yet another version of this delightful meal.

Troubleshooting Guide

Texture issues can arise if overcooked; adjusting cooking time and monitoring with a thermometer ensures that your filet mignon maintains a tender bite. Flavor balance may occur with too much salt; taste the sauce early to prevent such issues, adding water or cream as necessary.

Temperature problems often stem from inadequate pre-heating or undercooked meat. Always ensure your pan is hot enough before adding the filet to perfect the sear. Equipment challenges may happen with an unfamiliar stove or skillet; familiarizing yourself with your equipment will mitigate these problems over time.

Ingredient substitutions, such as different mustards or cheeses, should be tested to align with flavor profiles while maintaining the integrity of your dish. Finally, timing concerns may arise when preparing multiple dishes; strategizing a prep timeline will keep your meal on schedule.

Recipe Success Stories

Our community has enjoyed numerous feedback success stories about the Filet Mignon with Parmesan Mustard Sauce. Many readers have tried personal adaptations, sharing tips and tricks for excellence. Reader suggestions often include pairing the dish with creative sides or experimental ingredients to elevate the flavors—like adding a hint of horseradish for an extra kick.

Photography tips are also shared by our readers who love showcasing their finished dishes on social media, helping visualize the colorful garnishes or a perfectly seared filet ready for a feast. Join the conversation and share your unique experiences with this delectable recipe!

Frequently Asked Questions

1. Can I make the Parmesan mustard sauce in advance?
Yes, you can prepare the sauce a day in advance. Store it in the refrigerator and reheat gently on the stovetop before serving.

2. What should I serve with filet mignon?
Side dishes like creamy mashed potatoes, sautéed asparagus, or a fresh garden salad beautifully complement filet mignon.

3. How do I know when my filet mignon is done?
The best way is to use a meat thermometer; medium-rare is around 130°F. Make sure to check the temperature in the thickest part of the steak.

4. Can I freeze cooked filet mignon?
Yes, cooked filet mignon can be frozen for up to three months. Be sure to wrap it tightly to prevent freezer burn.

5. What is the best way to reheat leftover filet mignon?
The best method is to reheat in a low oven (about 250°F) until warmed through to retain moisture.

6. How do I achieve a perfect sear on my filet?
To achieve a perfect sear, ensure your skillet is hot before adding the filet. Use a high-smoke point oil to prevent burning, and avoid overcrowding the pan.

7. Is it necessary to let the steak rest?
Yes, allowing the filet to rest for 5-10 minutes after cooking helps the juices redistribute, resulting in a more tender steak.

8. How do I make the sauce less tangy?
If you find the sauce too tangy, you can add a touch of cream or sugar to balance the flavors.

9. Can I use a different cheese in the sauce?
Yes, other cheeses like Grana Padano or Pecorino Romano can be used as substitutes to provide a different flavor profile.

10. What are common dry rubs for filet mignon?
Common dry rubs include a mixture of salt, black pepper, garlic powder, and smoked paprika for added flavor depth.

Additional Resources

Explore related recipes, including our flavorful herb-crusted rack of lamb or luscious chicken marsala, to expand your gourmet repertoire. Engaging in technique guides will enhance your skills, with tips for perfecting searing, sauce making, and side dish pairing.

For ingredient information, practical blogs on meat cuts and how to choose quality cheese can be immensely helpful in crafting perfect dishes. Equipment recommendations give insights into must-have kitchen tools that help streamline your cooking process and build your culinary mastery.

Seasonal variations with produce and other meats are also perfect for tailoring your cooking to what’s fresh and delightful any time of year.

Join the Conversation

We invite you to join our culinary community by sharing your creations on social media platforms. Utilize hashtags to reach fellow cooking enthusiasts, and don’t hesitate to share your own photography tips for capturing your masterpiece.

Your recipe reviews and experiences not only motivate others but also enrich our community. Engage with other members and share your variations or adaptations of this filet mignon dish, creating new dialogues and exchanging flavor secrets.

The Recipe

Filet Mignon with Parmesan Mustard Sauce

Serves: 4

Prep Time: 15 mins

Cook Time: 20 mins

Total Time: 35 mins

Kitchen Equipment Needed

  • Heavy skillet or grill pan
  • Meat thermometer
  • Whisk
  • Knife
  • Cutting board

Ingredients

  • 4 filet mignon steaks, about 6 ounces each
  • Salt and freshly ground pepper to taste
  • 2 tablespoons olive oil
  • 1 cup heavy cream
  • 1/4 cup freshly grated Parmesan cheese
  • 3 tablespoons Dijon mustard
  • 2 cloves garlic, minced
  • 1 tablespoon fresh parsley, chopped (for garnish)

Directions

  1. Season both sides of the filet mignon steaks with salt and pepper.
  2. Heat olive oil in a heavy skillet over medium-high heat. Once hot, add the filet mignon and sear for 4-5 minutes per side for medium-rare.
  3. Remove steaks from the skillet and let them rest covered with foil for about 5 minutes.
  4. In the same skillet, lower the heat and add minced garlic, cooking for 1 minute until fragrant.
  5. Whisk in the heavy cream, Dijon mustard, and Parmesan cheese. Let the sauce simmer and thicken for about 5 minutes.
  6. Slice the filet and plate it, drizzling the Parmesan mustard sauce over the top.
  7. Garnish with freshly chopped parsley and serve immediately.

Recipe Notes

  • The meat should ideally be brought to room temperature before cooking for even cooking.
  • For meal prep, season the steaks a day ahead and store them covered in the refrigerator.
  • Feel free to adjust the amount of mustard based on your taste preference.

Delicious Potsticker Soup with Mushrooms and Bok Choy Recipe

Delicious Potsticker Soup with Mushrooms & Bok Choy

⚖️
Difficulty
Medium

⏲️
Prep Time
20 mins

🕒
Cook Time
30 mins

⏱️
Total Time
50 mins

🍽️
Servings
4 servings

Potsticker Soup with Mushrooms & Bok Choy is the ultimate comfort dish that beautifully combines savory flavors and delightful textures. The aroma wafts through the kitchen as the broth simmers, infusing the air with hints of garlic, ginger, and soy sauce. There’s something inherently soothing about a warm, hearty soup, and this one checks all the boxes. Imagine the tender potstickers gently floating in a savory broth, enriched by the earthiness of mushrooms and the crisp freshness of bok choy, creating a bowl that is as nourishing as it is delicious.

In this soup, every ingredient plays a key role. The potstickers, whether homemade or store-bought, provide a satisfying chew that contrasts wonderfully with the soft mushrooms and crunchy bok choy. The broth is a delicate balance of savory and umami notes, finished with a sprinkle of scallions for brightness. This recipe not only warms the soul but also nourishes the body, making it perfect for cozy dinners or as a comforting meal on chilly days.

Quick Recipe Highlights

  • Flavor Profile: A delightful blend of savory, umami notes from the broth paired with the tender potstickers.
  • Texture: A comforting mix of chewy potstickers, soft mushrooms, and crisp bok choy creates various satisfying mouthfeel.
  • Aroma: The intoxicating scent of garlic and ginger warms the kitchen, promising a delicious meal ahead.
  • Visual Appeal: The bright green bok choy and golden-brown potstickers make for an inviting and colorful presentation.
  • Skill Level Needed: This recipe is quite approachable, requiring basic cooking skills and patience.
  • Special Equipment: A large pot, knife, and cutting board are essential for preparing this soup effortlessly.

Recipe Overview

  • Difficulty Level: This Potsticker Soup is classified as medium difficulty but is quite manageable for those with basic cooking skills.
  • Category: This dish is perfect for a main course and works well as a family meal or for hosting guests.
  • Cuisine: Rooted in Asian culinary traditions, this recipe draws from Chinese potstickers and showcases flavors typically found in beloved Asian soups.
  • Cost: The ingredients are generally affordable, making this dish perfect for budget-conscious meal planning.
  • Season: Potsticker Soup is ideal for fall and winter months when hearty, warming meals are most appreciated.
  • Occasion: This soup is excellent for casual dinners, special occasions, or when hosting friends and family.

Why You’ll Love This Recipe

The blend of flavors in this Potsticker Soup is a standout feature that will keep you coming back for more. Each slurp delivers not just the warmth of the broth but also the satisfying chewiness of the potstickers, making every bite a pleasure. The earthy notes from the mushrooms complement the spontaneous bursts of flavor from the bok choy, creating a dish that feels both heartwarming and gourmet.

Convenience is another reason to love this recipe. With a relatively short prep time, you can have a delicious potsticker soup on the table in under an hour. The recipe allows for both using homemade potstickers for an extra touch or reaching for store-bought options for an even quicker meal. This flexibility makes it suitable for various occasions, whether you’re cooking for a family or whipping up a quick weeknight meal.

Nutritionally, this soup packs a punch. With protein from the potstickers and essential vitamins from the bok choy and mushrooms, it provides a well-rounded meal without excessive calories. The use of low-sodium broth also allows you to control flavors and healthiness, supporting a balanced diet while still satisfying cravings.

This dish is perfect for any gathering, making it a great centerpiece for social events. Whether served as an appetizer or main course, the communal nature of soup encourages sharing and conversation. Its allow-and-feature nature lets your guests personalize their bowls with additional toppings like fresh herbs or chili flakes.

Finally, it stands out for its cost-effectiveness. With affordable ingredients and the ability to make large batches, it’s perfect for meal prep or family dinners. You can easily make it ahead of time and enjoy leftovers, making this soup a great option in your weekly menu repertoire.

Historical Background and Cultural Significance

Potstickers, also known as “jiaozi,” have a rich history in Chinese cuisine, dating back thousands of years. Originating from Northern China, these dumplings are traditionally filled with a variety of meats and vegetables, showcasing the agricultural bounty of the region. Their preparation often involved a steaming method that ensures the filling is tender and juicy, with a crispy bottom when pan-fried. This method has beautifully transitioned into modern recipes, where potstickers are embraced globally in various forms.

The popularity of potstickers has only grown over the years, becoming a favorite in many cultures extending beyond their Chinese roots. In Western cuisine, potstickers have led to numerous adaptations and variations, making them a staple in both casual dining and gourmet restaurants. The combination of dumplings and broth to create potsticker soup reflects the innovative methods through which traditional recipes evolve while still honoring their original heritage.

Evolution is at the heart of this dish. As global culinary influences intertwine, variations of potsticker soup have made their mark, making use of local ingredients and adapting to modern dietary preferences. This adaptability highlights the versatility of traditional cuisines and how they can be reshaped to suit contemporary tastes.

Regionally, variations of potsticker soup can be seen in many Asian countries, with each culture adding its twist to this comforting dish. From the use of different types of dumpling wrappers to the addition of specific local ingredients, every region offers a unique flavor profile. This highlights not just the soup’s international appeal, but also the unifying pleasure found in sharing a meal.

Ingredient Deep Dive

Mushrooms
Mushrooms have long been celebrated in various cultures for their culinary and medicinal properties. In Asian cuisine, shiitake mushrooms are particularly valued for their rich umami flavor, making them an excellent addition to any dish, especially soup. Nutritionally, they are low in calories but packed with vitamins, minerals, and antioxidants. When selecting mushrooms, look for firm, unblemished caps, and store them in a paper bag in the refrigerator to maintain freshness. For alternative options, you can substitute with button or portobello mushrooms.

Bok Choy
Bok choy, also known as Chinese cabbage, has significant cultural importance in Asian cuisine. It’s celebrated not only for its delicate flavor but also for its nutritional benefits, being a great source of vitamins A, C, and K. When choosing bok choy, opt for heads with crisp, vibrant green leaves and firm white stems. Store it in the refrigerator crisper drawer and consume it within a week for optimal freshness. If bok choy isn’t available, other leafy greens like napa cabbage or spinach can serve as suitable substitutes.

Common Mistakes to Avoid

  • Overcrowding the pot: When cooking the potstickers, give them enough space in the pot to cook evenly. Overcrowding can lead to steaming instead of browning.
  • Under-seasoning the broth: Make sure to taste the broth and adjust soy sauce or seasoning as needed; otherwise, it may lack depth.
  • Not properly sealing dumplings: Ensure that the potstickers are well-sealed to prevent them from bursting during cooking, which can release filling into the broth.
  • Using the wrong type of mushrooms: Opt for stronger-flavor mushrooms like shiitake instead of mild types that may dilute the soup’s taste.
  • Cooking on high heat: Maintaining a medium heat allows for gentle simmering and prevents the broth from boiling over, preserving flavors.
  • Using stale ingredients: Always check the freshness of ingredients, especially vegetables, to ensure the best flavor and texture in your soup.
  • Not preheating the pot: Preheating your pot can help achieve better searing for potstickers when pan-frying.
  • Ignoring cooking times: Overcooking bok choy will lead to a mushy texture; add it only near the end of cooking to maintain its crunch.

Essential Techniques

Boiling and Pan-frying Dumplings:
This cooking method is essential for achieving a crispy bottom and tender filling. Start by lightly oiling the pan to prevent sticking, and place the potstickers flat side down. Allow them to sear before adding a small amount of water and covering them to steam. Visual cues for success include golden-brown bottoms and a slight bubbling of the water, indicating they’re cooking properly.

Making Homemade Broth:
Homemade broth is what elevates this soup. It’s vital to simmer ingredients like ginger, garlic, and scallions to maximize flavor. Master this technique by ensuring you’ve roasted the aromatics and then simmered them low and slow for the best results. Avoid boiling too rapidly, which could lead to cloudiness and an imbalance in flavor.

Pro Tips for Perfect Potsticker Soup

1. Make your own potstickers for a truly authentic touch, allowing you to customize fillings to your liking.
2. Use homemade broth if possible; it adds depth of flavor that canned versions often lack.
3. Chill the potstickers before frying – they hold together better when cold.
4. Add a splash of rice vinegar to the broth just before serving for a pleasant tang.
5. Incorporate different mushrooms for varied flavors and textures.
6. Adjust the soup’s thickness by adding more or less broth to suit your preferences.
7. To save time, prepare and freeze potstickers for quick meals later.
8. Use fresh herbs as garnish to enhance the soup’s presentation and flavor.

Variations and Adaptations

Explore various regional adaptations by experimenting with different seasonal vegetables like spinach, kale, or carrots for added nutrition. You can also alter the flavors by using different broth bases, such as chicken or vegetable stock. For dietary modifications, try a vegetarian version by substituting meat-filled dumplings with tofu or mushrooms.

For a twist, consider adding a touch of chili oil or Sriracha to introduce heat. If you prefer a richer soup, add coconut milk for a creamy texture; this can change the taste profile entirely while keeping the essence of the soup. You can also customize texture via the dumplings’ crunchiness, by either frying them longer or baking them before adding to the soup.

Serving and Presentation Guide

Present your Potsticker Soup in large, deep bowls to showcase its vibrant colors. Garnish with sliced scallions or fresh cilantro for a pop of color. Consider serving it with a side of soy sauce or chili oil for dipping your potstickers. When plating, use a ladle to ensure even distribution of broth and ingredients for each serving. Mind the temperature; serve the soup hot to fully enjoy the flavors.

Portion control is important—about 1-2 potstickers per serving allows room for broth and vegetables, making it a balanced meal. Consider serving warm crusty bread on the side to soak up the savory soup.

Wine and Beverage Pairing

Pair this warming Potsticker Soup with a light, refreshing white wine such as Sauvignon Blanc or Pinot Grigio, which complements the delicate flavors without overshadowing them. If you prefer something non-alcoholic, try a sparkling water infused with lemon or ginger for a refreshing contrast. Additionally, a hibiscus tea can provide floral notes that enhance the aromatic profile of the dish.

Temperature is key; ensure that white wine is served chilled to balance the heat of the soup. For a unique pairing, consider serving the dish with a light beer, such as a lager, which offers a crisp and clean finish that can play well with the rich flavors of the soup.

Storage and Shelf Life

To store leftover Potsticker Soup, allow it to cool completely before transferring it to an airtight container. Store in the refrigerator for up to three days. If you wish to freeze it, separate the potstickers and broth into individual portions to prevent sogginess, and use within three months.

Signs of spoilage include an off smell or discoloration. When reheating, use gentle heat either on the stovetop or in the microwave, making sure that it is heated through. Avoid rapid boiling to maintain the potstickers’ texture. If freezing, you can reheat the components separately to preserve the quality.

Make Ahead Strategies

Preparing this Potsticker Soup ahead of time can be a game-changer for busy weeknights. You can make the broth a day in advance, allowing the flavors to develop fully. Store it in the fridge until ready to use. You can also prepare potstickers ahead and freeze them before cooking; this will save time and allow you to cook them fresh only when needed.

When you’re ready to serve, simply bring the broth to a simmer, add the frozen potstickers directly, and let them cook together. Always store the broth and ingredients separately until the day of serving to keep the texture of the potstickers intact. Ensure that any fresh additions, like bok choy, are added toward the end for optimal crunch.

Scaling Instructions

Scaling this Potsticker Soup recipe is straightforward. To halve the recipe, simply divide all ingredients by two, paying attention to cooking times, which may need slight adjustments. For doubling, keep mindful of pot sizes; you may need to split the cooking into batches if your pot isn’t large enough for a crowd.

Be prepared to modify cooking times slightly when scaling due to varying heat distributions in larger batches. Maintain flavor integrity by not skimping on seasonings, and always taste as you adjust ingredient quantities. Store any leftovers correctly, and enjoy them within a few days.

Nutritional Deep Dive

This Potsticker Soup presents a nourishing blend of macronutrients, combining carbohydrates from the potstickers with protein from the filling, and an abundance of vitamins from the vegetables. This balance supports energy needs while delivering the essential nutrients your body craves.

Micronutrient analysis reveals that this dish is particularly rich in vitamins A, C, and K, thanks largely to the bok choy and mushrooms, which are essential for maintaining healthy skin, immune function, and bone health. With careful ingredient choices, this soup provides robust nutritional benefits without overwhelming calories, fitting into various dietary lifestyles.

For those mindful of weight management, serving sizes can be easily adjusted, allowing for filling meals without excess. The soup’s ingredients promote a sense of fullness while providing substantial flavor and feature low-calorie options, perfect for those aiming to maintain their weight or shed a few pounds.

Dietary Adaptations

If you’re looking to make this Potsticker Soup gluten-free, simply ensure that the potstickers are made with gluten-free wrappers and use tamari instead of soy sauce. For vegan versions, replace the meat filling in the potstickers with a mixture of tofu and vegetables, enhancing satisfaction and nutrition.

For those requiring low-carb options, consider skipping the potstickers altogether and load the soup with vegetables such as zucchini or mushrooms instead. A keto adaptation could include using cauliflower rice as a thickener or alternative base while keeping the essence of the soup.

If you’re following a paleo diet, focus on using clean, natural ingredients without processed elements while maintaining the heartiness of the dish. These adaptations provide ways to enjoy a classic recipe while catering to specific dietary needs.

Troubleshooting Guide

If you encounter texture issues with your potstickers, it’s often a sign they weren’t sealed properly or cooked at the right temperature. Ensure you press the edges tightly when filling them and heat your pan adequately before adding them for frying.

Flavor balance can sometimes seem off; adjust by adding more seasoning or acid—like a splash of vinegar or citrus juice can amplify the taste. If the broth becomes too salty during cooking, add water or more vegetables to dilute it, restoring a balanced flavor.

If equipment challenges arise, ensure your pot is large enough to accommodate the ingredients without overcrowding, which could impact overall cooking. Promptly address timing concerns by observing the potstickers and adjusting as necessary to ensure they are cooked through while maintaining their structural integrity.

Recipe Success Stories

Community feedback often highlights how approachable and satisfying this Potsticker Soup is. Home cooks share their experiences of experimenting with various fillings for the potstickers, showcasing the versatility and personal adaptation of the recipe.

Many readers have shared success stories through social media, posting their beautifully plated versions and often tagging friends to share the joy of cooking together. This interaction fuels community engagement and displays various iterations that inspire others to try new takes on the dish.

Photographic tips from audiences reveal how the dish benefits from natural lighting and close-up shots, enticing others to embrace the recipe and share among their circle. As requests for adaptations grow, it showcases the evolving nature of cooking, where the essence remains while accommodating diverse palates.

Frequently Asked Questions

Can I make this soup ahead of time?

Yes, you can prepare the broth ahead of time and store it in the refrigerator. However, it’s best to add the potstickers and bok choy just before serving for optimal freshness.

What type of mushrooms should I use?

Shiitake mushrooms are recommended for their robust flavor, but you can also utilize button mushrooms or portobello, depending on your taste preference.

Can I use store-bought potstickers?

Absolutely! Store-bought potstickers save time and are a convenient option, providing a fast way to enjoy this delicious soup.

How spicy is this soup?

The base recipe is not spicy, but you can adjust the heat by adding chili oil or Sriracha to suit your taste.

How long can I store leftovers?

Leftover soup can be stored in an airtight container in the fridge for up to three days. For longer storage, freeze portions separately.

What should I serve with this soup?

This soup can be served as a main dish, but pairing it with crusty bread or a simple salad could make it a more fulfilling meal.

Is this soup gluten-free?

To make it gluten-free, use gluten-free potsticker wrappers and tamari instead of soy sauce. Always check ingredient labels for hidden gluten.

Can I make this soup vegetarian?

Yes! Simply replace the meat fillings with tofu or vegetables, and use vegetable broth to maintain a vegetarian profile.

How do I adjust the recipe size?

You can easily scale this recipe by halving or doubling the ingredients, adjusting the cooking times slightly based on batch size.

What if my potstickers stick to the pot?

To prevent sticking, ensure the pan is adequately heated and lightly oiled before placing the potstickers inside.

Can I use different types of greens?

Absolutely. If bok choy is not available, you can substitute it with spinach, kale, or napa cabbage for similar textures and flavors.

Additional Resources

For those looking to expand their culinary skills, check out related recipes that incorporate dumplings, soups, and a variety of Asian cuisines. Consider exploring technique guides that delve deeper into making homemade dumplings or crafting rich broth from scratch.

Ingredient information on choosing the best produce, including mushrooms and leafy greens, can enrich your cooking experience. Additionally, consider equipment recommendations when investing in useful kitchen tools, making your cooking process more efficient and enjoyable.

Seasonal variations can inspire creative takes on this soup, allowing you to adapt based on your food preferences and availability of ingredients. Dive into seasonal produce guides for ideas on complementing ingredients that elevate the classic Potsticker Soup.

Join the Conversation

We invite you to share your experiences with this Potsticker Soup on social media! Snap a photo of your dish and tag us for a chance to be featured. Engage with other culinary enthusiasts as you swap tips, insights, and variations.

Photography tips can help you capture the essence of your meal beautifully, enhancing its appeal. We love hearing your recipe reviews, sharing successes, and even the flops that lead to learning opportunities.

Feel free to suggest your own twists on the recipe, whether it’s a unique filling for the potstickers or an innovative broth recipe. Community engagement fuels creativity in the kitchen, shaping future recipes and stories.

The Recipe

Potsticker Soup with Mushrooms & Bok Choy

Serves: 4 servings

Prep Time: 20 mins

Cook Time: 30 mins

Total Time: 50 mins

Kitchen Equipment Needed

  • Large pot
  • Knife and cutting board
  • Wooden spoon
  • Measuring cups and spoons

Ingredients

  • 1 pack (about 1 lb) of potstickers
  • 4 cups low-sodium chicken or vegetable broth
  • 1 cup shiitake mushrooms, sliced
  • 2 cups bok choy, chopped
  • 2 cloves garlic, minced
  • 1 tbsp fresh ginger, grated
  • 2 tbsp soy sauce or tamari
  • 2 green onions, sliced (for garnish)
  • 2 tbsp sesame oil
  • Salt and pepper to taste

Directions

  1. In a large pot, heat sesame oil over medium heat. Add garlic and ginger; sauté until fragrant.
  2. Pour in the broth and bring it to a simmer.
  3. Add the sliced mushrooms and soy sauce, allowing them to cook for about 5-7 minutes.
  4. Introduce the potstickers to the pot and cook according to package instructions, typically 8-10 minutes.
  5. Add the bok choy during the last 2-3 minutes of cooking.
  6. Season with salt and pepper to taste, and garnish with sliced green onions before serving.

Recipe Notes

  • For homemade potstickers, feel free to experiment with different fillings!
  • Leftovers can be stored for 3 days in the fridge or frozen in portions.
  • Adjust the spice level by adding sriracha or chili oil when serving.

Delicious Anti-Inflammatory Creamy Chicken Soup for Better Health

Anti-Inflammatory Creamy Chicken Soup: A Soothing Delight for Your Soul

⚖️
Difficulty
Easy

⏲️
Prep Time
15 mins

🕒
Cook Time
30 mins

⏱️
Total Time
45 mins

🍽️
Servings
4 servings

Indulge in a warm bowl of Anti-Inflammatory Creamy Chicken Soup, crafted specifically to soothe not just the taste buds but also your body. This velvety soup is packed with nutritious ingredients that support an anti-inflammatory diet, making it an ideal choice for anyone looking to alleviate inflammation naturally. The richness of creamy coconut milk combined with tender chicken and a medley of healthy vegetables creates a comforting hug in a bowl, perfect for the chilly evenings or anytime you need a little self-care.

The flavors of this delightful soup are meant to dance on your palate. Picture the savory notes of chicken mingling with the earthiness of thyme and rosemary, complementing the sweetness of carrots and the mild pungency of garlic. The creamy texture, brought to life by the coconut milk, makes every spoonful luxurious while being inherently healthy. This dish doesn’t just nourish your body; it also tantalizes your senses, making you feel like you’re enjoying a gourmet meal without the fuss.

Quick Recipe Highlights

  • Flavor Profile: The blend of coconut milk, tender chicken, and aromatic herbs creates a rich and satisfying soup that’s perfectly balanced.
  • Texture: Creamy and smooth, this soup offers comforting thickness complemented by chunks of soft chicken and vegetables.
  • Aroma: The inviting aroma of garlic and fresh herbs fills your kitchen, making it impossible to resist a taste.
  • Visual Appeal: A beautiful bowl of creamy yellow soup speckled with vibrant vegetables makes for an enticing presentation.
  • Skill Level Needed: This recipe is easy to prepare, making it accessible for novice cooks, yet satisfying for experienced chefs.
  • Special Equipment: A sharp knife, a large pot, and a whisk are all you need for this quick and easy recipe.

Recipe Overview

  • Difficulty Level: This recipe is easy to follow, requiring minimal cooking techniques. The straightforward instructions are perfect for those who are new to cooking.
  • Category: This creamy chicken soup falls under the categories of comforting main dishes and healthy meals, making it versatile for lunch or dinner.
  • Cuisine: With its use of classic herbs and spices, this soup embodies a fusion of traditional chicken soup with a modern, health-oriented twist.
  • Cost: The ingredients for this recipe are budget-friendly, with costs averaging around $15 for a family-sized batch.
  • Season: This soup is perfect for the winter months, providing warmth and nourishment during chilly weather.
  • Occasion: Whether you’re hosting a family dinner or needing a cozy meal for one, this soup fits the bill for all occasions.

Why You’ll Love This Recipe

This Anti-Inflammatory Creamy Chicken Soup brings together a harmonious blend of flavors and textures that is incredibly satisfying. The rich, creamy base paired with wholesome ingredients provides not only comfort but also nourishment for your body. Each bowl encapsulates the warmth of home cooking, inviting you to take a moment to unwind and enjoy a nutritious meal.

Convenience is another reason to love this soup. It comes together quickly, making it an excellent choice for busy weeknights or when unexpected guests arrive. You can easily prep the ingredients ahead of time and have a delicious and healthy meal ready in about 45 minutes, without sacrificing flavor or quality.

Nutritionally, this soup packs a powerful punch. Due to its anti-inflammatory ingredients such as ginger and turmeric, it supports your immune system and can help alleviate symptoms of inflammation. This makes it ideal for those looking to maintain a healthy lifestyle without compromising on taste.

Socially, this recipe serves as a great centerpiece for gatherings or family dinners. Sharing a hearty soup shows love and care, warming hearts and bellies alike. The delightful aroma wafting through your home will have everyone eagerly anticipating a bowl, encouraging shared moments together.

Cost-effectiveness is yet another bonus. With affordable ingredients, this dish allows you to create a wholesome meal without breaking the bank, making it not only a healthy option but also a wallet-friendly one that you can enjoy again and again.

Historical Background and Cultural Significance

Chicken soup has long been a staple in many cultures, often viewed as a healing dish. Its origins can be traced back to ancient civilizations, where it was commonly used to nourish and restore health. The belief that chicken soup can soothe the sick and bring comfort has transcended cultural boundaries, making it a universal remedy for ailments ranging from colds to emotional distress.

As this soup evolved, many variations appeared globally, from the herbed chicken soups of France to the spicy chicken dishes of Southeast Asia. Each region sprinkles its unique spices, herbs, and cooking techniques, enhancing both flavor and cultural significance. The version we present today combines the best of traditional comfort and modern health-consciousness, embracing the benefits of anti-inflammatory ingredients.

Today, we cherish creamy chicken soup as a go-to meal for both families and individuals. It evokes nostalgia and warmth, likely reminding many of their own childhood experiences of being cared for by a loved one during times of illness or post-adventure tiredness. This emotional connection helps to solidify the soup’s place in our culinary hearts.

Regional variations also reflect the diversity of ingredients available across the globe, with creative adaptations often becoming local favorites. Whether it’s a spicy twist from the Caribbean or a creamy version found in northern Europe, chicken soup continues to thrive in various cultures, uniting people through shared experiences of comfort and nourishment.

Ingredient Deep Dive

Chicken: Chicken is the heart of our soup, providing both protein and flavor. Historically, it has been a staple in many diets worldwide due to its versatility and availability. Nutritionally, chicken is rich in B vitamins and essential amino acids, promoting muscle growth and immune support. When selecting chicken, opt for free-range or organic varieties when possible to enhance flavor and texture. Proper storage involves refrigerating raw chicken and cooking it promptly to avoid spoilage.

Coconut Milk: This rich ingredient adds creaminess and a hint of sweetness to the soup while keeping it dairy-free. Cultures in tropical regions have enjoyed coconut milk in their diets for centuries, celebrated for its creamy texture and health benefits. It contains healthy fats, particularly medium-chain triglycerides, which are excellent for energy and metabolism. When selecting coconut milk, choose canned versions that are full-fat for optimal flavor. Store opened cans in the fridge, using them within a few days.

Common Mistakes to Avoid

  • Using low-quality chicken: Using inferior quality chicken can lead to tough meat and an unappetizing broth. Always opt for fresh or organic chicken for the best results.
  • Overcooking the chicken: Cooking the chicken for too long may make it dry and unpalatable. Aim for just tender, then remove it to prevent further cooking.
  • Neglecting aromatics: Skipping onions, garlic, or herbs can lead to a bland soup. Aromatics enhance the depth of flavor and should not be overlooked.
  • Ignoring simmer time: Failing to let the soup simmer can prevent flavors from fully developing. Allow it to simmer gently for optimal consistency and taste.
  • Using cold liquids: Adding cold broth or water can halt the cooking process.To maintain a steady temperature, add warm liquid to the pot.
  • Not seasoning adequately: Under-seasoning can result in a bland soup. Always taste and adjust the seasoning throughout the cooking process.
  • Skipping the whisk: Not whisking the coconut milk before adding it can lead to lumps in your soup. Always give it a good stir for a smooth texture.
  • Not adjusting for thickness: If your soup is too thick, you can add additional broth or water. Be sure to monitor consistency for a pleasant mouthfeel.
  • Disregarding the finish: Adding additional fresh herbs or a squeeze of citrus at the end elevates the flavor. Don’t forget these final touches!

Essential Techniques

Simmering: Simmering is essential in developing deep flavors in your soup. It allows the ingredients to release their natural essences without boiling away too quickly. Master this by keeping your pot at a gentle bubbling point and monitoring the heat closely. Look for small bubbles forming without a vigorous boil, which indicates your soup is simmering perfectly.

Whisking: Whisking is crucial when incorporating coconut milk into your soup to avoid lumps. Start by using a small bowl to mix a bit of warmed broth with the coconut milk. Gradually add it back into the pot while whisking consistently for a smooth consistency. When done correctly, your soup will be beautifully creamy and luxuriously thick.

Pro Tips for Perfect Anti-Inflammatory Creamy Chicken Soup

1. For extra flavor, sear the chicken in the pot before adding other ingredients. This creates a rich fond for the soup.
2. Add vegetables that complement the soup, like spinach or kale, towards the last few minutes for added nutrition and color.
3. Feel free to substitute chicken with turkey or a plant-based protein for a different flavor profile.
4. Use homemade broth if possible for the utmost in flavor and health benefits.
5. Enhance depth by adding a splash of lemon juice or apple cider vinegar right before serving.
6. Include a variety of spices like turmeric or black pepper to heighten the soup’s anti-inflammatory properties.
7. For a spicy kick, consider adding red pepper flakes or a dash of your favorite hot sauce.
8. Always let the soup cool completely before storing, ensuring freshness when reheating later.

Variations and Adaptations

For a regional twist, consider adding spices specific to a culture of your choice, such as cumin and coriander for an Indian flair, or use smoked paprika for a Spanish influence. Seasonal adaptations might include using butternut squash in the fall or fresh herbs like cilantro during summer. Dietary modifications are easily achieved by swapping chicken with chickpeas or tofu for a vegetarian option. Flavor variations can come from different bases—like vegetable broth instead of chicken—or incorporating citrus zest for a refreshing touch. You can also adapt the texture by blending part of the soup for a creamier consistency or adding cooked grains for heartiness. Presentation alternatives like serving in hollowed-out bread bowls or garnishing with roasted seeds will impress your guests.

Serving and Presentation Guide

Plating techniques play an essential role in presenting your soup. Use a shallow bowl to showcase the creamy texture, and garnish with fresh herbs or a swirl of coconut cream for contrast. Garnishing ideas such as crispy croutons or a sprinkle of nutritional yeast can enhance both visual appeal and flavor. Traditional accompaniments include crusty bread or a fresh green salad, while modern serving suggestions could involve pairing with a tangy dipping sauce or savory pastries. Ensure the soup is served warm, maintaining quality and flavor. For portion control, scoop even amounts into bowls to create uniform servings.

Wine and Beverage Pairing

Chardonnay pairs beautifully with creamy chicken soup thanks to its rich and buttery profile that complements the soup’s flavors. For a red option, consider a light Pinot Noir, offering a delicate balance without overpowering the dish. Non-alcoholic alternatives like sparkling water with a slice of lemon can refresh the palate and enhance the meal. If you enjoy coffee, a smooth, medium-roast coffee can evoke warmth, accentuating the comforting nature of the soup. Remember to serve beverages at appropriate temperatures; chilled for wines and room temperature for coffee.

Storage and Shelf Life

For storage methods, always cool your soup to room temperature before transferring it to airtight containers. Refrigerate and consume within 3 to 4 days for freshness, or freeze it for extended shelf life—up to 3 months. When reheating, ensure you do so gently on the stove to maintain flavor and texture. Avoid microwaving, as it may result in a rubbery consistency. Signs of spoilage include off-smells or strange colors. If you see any changes, it’s best to discard the soup.

Make Ahead Strategies

To prepare ahead, chop vegetables and season the chicken the day before, storing them in airtight containers in the fridge. You can also cook the soup completely and freeze portions, ensuring you leave space in containers to avoid explosions from expansion. Assessing quality impacts means knowing that freezing may slightly alter texture, but flavors will remain intact. When ready to serve, thaw in the fridge overnight and reheat gently. Consider adding fresh herbs or a squeeze of lemon just before serving to uplift the dish.

Scaling Instructions

When halving the recipe, remember that cooking times won’t change significantly, but ensure you use a smaller pot to maintain consistent heat. Doubling or tripling the recipe requires larger pots or stockpots; adjust the heat accordingly to cook evenly. Timing modifications may include longer simmering if making a larger batch. Ensure storage considerations allow for adequate cooling space before freezing or refrigerating larger amounts.

Nutritional Deep Dive

Analyzing macronutrients shows that each serving of the soup provides a balanced amount of protein, healthy fats from coconut milk, and fiber from vegetables. Micronutrient analysis highlights essential vitamins and minerals, including B-vitamins, potassium, and magnesium, all contributing to overall health. The health benefits are compounded with the soup’s anti-inflammatory properties, making it a great choice for anyone interested in boosting immunity. Portion analysis reveals it’s easy to control serving sizes, supporting weight management efforts.

Dietary Adaptations

For gluten-free diets, ensure all broths and seasonings used are certified gluten-free. Dairy-free options are covered with the use of coconut milk instead of dairy cream. For vegans, replace chicken with chickpeas or lentils to maintain protein content. Low-carb enthusiasts can skip the more starchy vegetables or use cauliflower in place of potatoes. Keto-friendly adaptations can also be achieved by integrating more fibrous vegetables, while maintaining a low carbohydrate count. Paleo diets are accommodated through the absence of grains or processed ingredients.

Troubleshooting Guide

If your soup turns out too thin, add a cornstarch slurry to thicken it up. If it’s too thick, just a little more broth or water can help adjust the consistency. For flavor balance issues, consider adding more herbs and spices progressively. If the soup is too hot, allow it to cool before serving. Equipment challenges can arise from using the wrong pots—stick with heavy-bottomed to avoid scorching. Ingredient substitutions can alter outcomes; always account for moisture and seasoning differences in replacements.

Recipe Success Stories

Community feedback on this Anti-Inflammatory Creamy Chicken Soup suggests that it has become a household favorite for many. Readers have shared how they adapted the recipe to accommodate dietary needs while retaining the comforting essence. Moreover, recipe variations shared by readers have opened up new flavor experiences, showing the versatility of this dish. Ample photography tips have also been shared, inspiring others to document their cooking adventures.

Frequently Asked Questions

Q1: Can I use leftover chicken for this soup?

Absolutely! Leftover roasted chicken or rotisserie chicken works perfectly and can save prep time. Just add it towards the end of the cooking process to warm it through.

Q2: Is there a way to make this soup spicier?

Yes! You can add crushed red pepper flakes or diced jalapeños during the cooking process to boost the heat level. Adjust according to your spice tolerance.

Q3: Can I freeze this soup?

Yes! This creamy chicken soup freezes well. Just ensure to store it in an airtight container, and it should hold up for about three months. Thaw in the fridge overnight before reheating.

Q4: Can I substitute coconut milk for regular cream?

Definitely! While coconut milk provides a unique flavor and health benefits, you can use regular cream if you prefer. Ensure to adjust other liquids as needed to maintain consistency.

Q5: How long does the leftovers last in the fridge?

Leftover soup can last in the fridge for up to four days. Be sure to store it in an airtight container for freshness.

Q6: What can I serve with the soup?

This soup pairs wonderfully with crusty bread, a fresh salad, or even crackers for dipping. You can also serve it alone for a light lunch or dinner.

Q7: Are there any vegetarian options for this recipe?

Yes! You can replace the chicken with chickpeas, lentils, or any hearty vegetables to maintain the texture and protein content in a vegetarian version of this soup.

Q8: What herbs work best in this soup?

Fresh herbs like thyme, rosemary, and parsley are excellent choices. You can add them towards the end for a burst of fresh flavor.

Q9: Can I make this recipe in a slow cooker?

Yes, you can! Cook on low for 4-6 hours or high for 2-3 hours. Add coconut milk towards the end to maintain its creaminess.

Q10: How can I add more vegetables to this soup?

You can incorporate multiple vegetables such as spinach, peas, or bell peppers. Add them according to their cook times to ensure they remain vibrant and tender.

Additional Resources

For more delicious ideas, check out my other comforting soup recipes such as Butternut Squash Soup or Tomato Basil Soup, both packed with flavors that warm the soul. Dive deep into technique guides that cover simmering, sautéing, and seasoning. Ingredient information is readily available for a range of healthy vegetables and grains that can elevate your meals. Additionally, explore equipment recommendations to enhance your cooking experience, focusing on tools that save time and improve efficiency.

Join the Conversation

I invite you to join our vibrant community on social media by sharing your own creations inspired by this Anti-Inflammatory Creamy Chicken Soup. Post your photos, share your variations, and leave reviews—we love to hear from you! Engage with other readers, swap tips, and participate in discussions around healthy cooking. Together, let’s celebrate delicious and nutritious recipes that bring joy and comfort to our kitchens!

The Recipe

Anti-Inflammatory Creamy Chicken Soup

Serves: 4 servings

Prep Time: 15 mins

Cook Time: 30 mins

Total Time: 45 mins

Kitchen Equipment Needed

  • Large pot
  • Sharp knife
  • Wooden spoon
  • Whisk
  • Airtight containers for storage

Ingredients

  • 1 lb boneless, skinless chicken breast, diced
  • 1 can (13.5 oz) coconut milk
  • 3 cups chicken or vegetable broth
  • 1 cup carrots, diced
  • 1 cup celery, diced
  • 1 medium onion, diced
  • 3 cloves garlic, minced
  • 1 tablespoon fresh ginger, grated
  • 1 teaspoon turmeric
  • 1 teaspoon thyme
  • Salt and pepper to taste
  • Fresh parsley for garnish

Directions

  1. In a large pot, heat olive oil over medium heat. Add diced onion, garlic, and ginger. Sauté until fragrant and onions are translucent.
  2. Add diced chicken and cook until browned, stirring occasionally—about 5-7 minutes.
  3. Stir in carrots, celery, turmeric, thyme, salt, and pepper. Cook for an additional 2 minutes.
  4. Pour in chicken broth and bring the mixture to a boil. Reduce heat and let simmer for 15-20 minutes until vegetables are tender.
  5. Stir in coconut milk and heat through. Adjust seasoning as needed before removing from heat.
  6. Serve hot, garnished with fresh parsley.

Recipe Notes

  • Feel free to add other vegetables like spinach or peas for additional flavor and nutrients.
  • You can substitute chicken with turkey or a plant-based protein for a different flavor experience.