Mouthwatering Mongolian Noodles with Ground Beef Recipe to Try

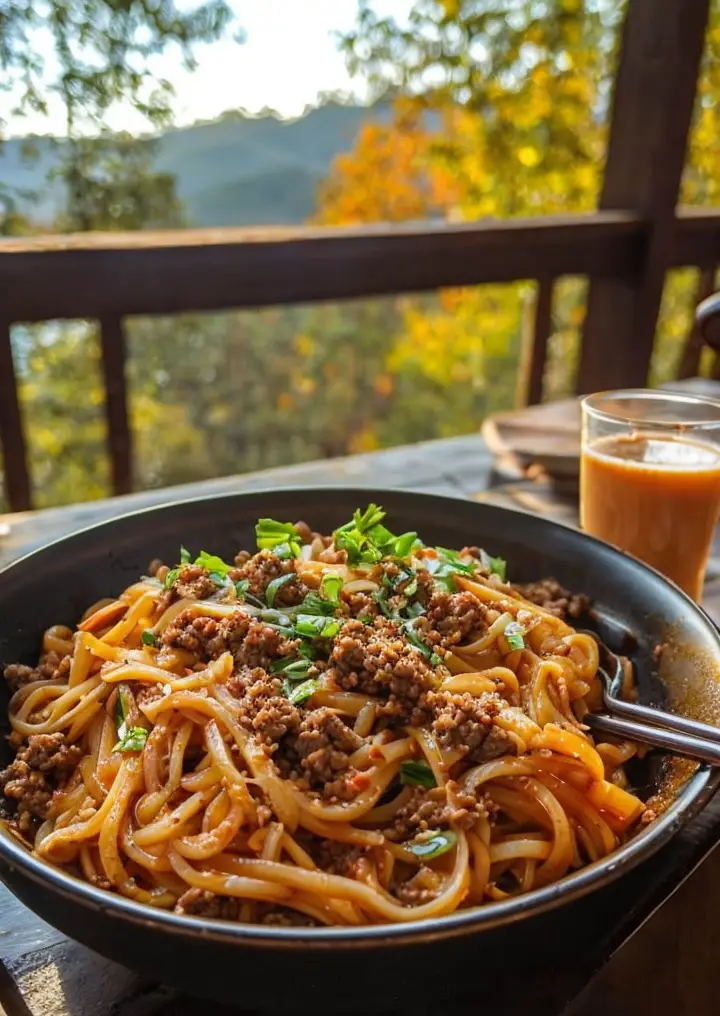
Mongolian Noodles with Ground Beef: A Flavorful Twist on a Classic Family Dish

⚖️
Difficulty
Easy

⏲️
Prep Time
15 mins

🕒
Cook Time
20 mins

⏱️
Total Time
35 mins

🍽️
Servings
4

Mongolian Noodles with Ground Beef is an irresistible dish that combines savory flavors with a satisfying texture. It’s a vibrant and hearty meal that can transform any weeknight dinner into a special occasion. The tender ground beef is richly seasoned and paired with colorful vegetables, creating a delightful medley. This recipe beautifully illustrates how simple ingredients can pack a flavor punch, making it an excellent choice for families and entertaining guests.

The moments spent in the kitchen preparing this dish are sure to be filled with excitement as the aromas fill your home. The stir-frying process creates a wonderful balance of tenderness and a slight crisp, enhancing the dish’s appeal. Topped with fresh herbs, you will feel an instant sense of comfort and gratification. Whether you are catering to children or culinary enthusiasts, Mongolian Noodles will surely please everyone at the table.

Quick Recipe Highlights

  • Flavor Profile: A harmonious balance of umami from the beef combined with the sweetness of the vegetables.
  • Texture: Each bite offers a delightful chewiness from the noodles and a satisfying crunch from fresh vegetables.
  • Aroma: Inviting scents of garlic and ginger mingle with savory soy sauce will awaken your senses.
  • Visual Appeal: Bright, colorful veggies contrast beautifully against the golden noodles, making for an attractive presentation.
  • Skill Level Needed: Perfect for novice cooks; no special skills are needed, just basic cooking techniques.
  • Special Equipment: Only requires a large skillet or wok for efficient cooking.

Recipe Overview

  • Difficulty Level: Easy, great for beginners looking to enhance their cooking skills with quick, flavorful dishes.
  • Category: Perfect for weeknight dinners, potlucks, or when you want a warm, comforting meal.
  • Cuisine: Inspired by Mongolian flavors, this dish brings an Asian twist to pasta concepts.
  • Cost: Approximately $15 for a full meal, making it budget-friendly while still being delicious.
  • Season: Enjoyable year-round, with the ability to adapt ingredients based on seasonal produce.
  • Occasion: Excellent for family dinners, gatherings with friends, or when you need a quick but impressive meal.

Why You’ll Love This Recipe

The union of flavors in this Mongolian Noodles recipe will leave a lasting impression on your taste buds. The beef’s rich umami couples perfectly with the crispness of the greens, creating a distinctive taste that is comforting yet exciting. With a blend of soy sauce and sesame oil, each bite bursts with depth, making it a delightful experience for every palate. It’s easy to see why this dish becomes a go-to for many families.

Convenience is another standout aspect of this recipe. With minimal prep time and straightforward cooking steps, you can quickly whip together a wholesome meal even on the busiest days. The one-pan method makes for a quick cleanup, allowing you to focus on what really matters—enjoying your meal and spending time with loved ones.

From a nutritional standpoint, Mongolian Noodles deliver a balanced profile with protein from the beef and an array of vitamins from the vegetables. This dish allows you to pack a variety of nutritious ingredients into one meal, ensuring that you’re nourishing your body without sacrificing flavor or enjoyment.

This recipe also holds a social aspect; it’s perfect for sharing and feeding larger groups. The bright colors and enticing aroma generate excitement around the dinner table, making it a centerpiece for family gatherings or casual dinner parties. Gathering around a hot plate of Mongolian Noodles encourages connection and conversation, fostering lasting memories.

Finally, cost-effectiveness makes this recipe a win. Using readily available ingredients, it is both affordable and satisfying. You can enjoy a gourmet-quality meal without breaking the bank, making it an invaluable addition to your weekly meal plans.

Historical Background and Cultural Significance

Mongolian cuisine often pays homage to its nomadic origins, characterized by hearty, meat-based dishes. This recipe, although influenced by American perceptions of Mongolian flavors, captures the spirit of robust, comforting meals common to the region. The introduction of noodles serves as a creative adaptation that bridges cultural cuisines.

Traditionally, Mongolian dishes emphasize meat, particularly from livestock, reflecting environmental realities. In contrast, this recipe incorporates noodles, offering a modern twist while still respecting its cultural roots. The blend of ingredients signifies adaptability, showcasing how traditional flavors can evolve over time.

As global influences take hold of culinary traditions, this dish highlights the fusion that defines contemporary cooking. The evolution from a simple meat-centric meal to one that includes vibrant vegetables and sauces embodies the impact of cross-cultural culinary exchange.

Regional variations continue to flourish, drawing upon local ingredients and preferences. While this recipe remains accessible and versatile, variations can include different proteins or vegetables, allowing cooks to personalize their version while paying homage to its roots.

Ingredient Deep Dive

Ground Beef
Ground beef is a staple in many kitchens worldwide and brings not only flavor but substance to dishes. It is rich in protein, vitamins, and iron, vital for energy and overall health. When selecting ground beef, look for meat with a good fat-to-lean ratio to enhance your dish’s flavor without overwhelming it with grease. Proper storage includes keeping it in the refrigerator for 1-2 days post-purchase or freezing for later use. Additionally, if you prefer a leaner option or are exploring dietary modifications, ground turkey or lentils can serve as excellent substitutes.

Vegetables
Fresh vegetables not only add color but also offer a window into nutritional diversity. Including bell peppers, carrots, and broccoli enhances the dish’s texture, flavor, and nutritional profile. These veggies are rich in vitamins A and C and offer dietary fiber, essential for digestion. Choose crisp, vibrant-skinned vegetables and store them in a cool place to maintain freshness. For a seasonal twist, consider substituting in squash in the autumn or snap peas in the spring for a delicious variation.

Common Mistakes to Avoid

  • Overcooking the beef can lead to a dry texture. Keep an eye on it and cook just until browned.
  • Using low-quality noodles can result in a mushy dish. Opt for fresh or high-quality noodles for the best results.
  • Skipping the marination for your ingredients can dampen the flavor. Take the time to let everything soak in the seasonings.
  • Not prepping ingredients beforehand leads to rushed cooking. Measure and chop everything before you start cooking.
  • Overcrowding the skillet can steam rather than stir-fry your ingredients. Cook in batches if necessary for proper browning.
  • Neglecting to taste as you cook prevents achieving a well-balanced flavor profile. Adjust seasonings as needed for your palate.
  • Forgetting to add an acid, like lime juice or vinegar, can make the dish taste flat. A touch of acidity brightens flavors significantly.
  • Failing to garnish can result in an uninspired dish. Fresh herbs or sesame seeds add texture and enhance presentation.

Essential Techniques

Stir-Frying
Stir-frying is a quick cooking method that requires high heat and minimal oil. It involves rapidly cooking ingredients in a wok or large pan, preserving both flavor and texture. To master stir-frying, ensure your ingredients are uniformly cut for even cooking. Use high heat to achieve a delightful sear but watch them closely to avoid burning. A well-stir-fried dish should have a vibrant color with a slightly caramelized surface.

Balancing Flavors
Understanding how to balance flavors is essential for a delicious dish. This involves combining salty, sweet, sour, and bitter elements to create a harmonious taste. To master this skill, start by tasting your dish as you cook and adjusting seasonings accordingly. If a dish feels too salty, add a touch of sweetness or acidity to counterbalance it. Paying attention to how these elements interact will elevate your cooking and turn ordinary meals into extraordinary ones.

Pro Tips for Perfect Mongolian Noodles

1. Use high-quality, fresh noodles for a chewy texture and quick cooking time.
2. Let the ground beef marinate for at least 15 minutes to absorb the flavors.
3. Adjust the spice level by adding chili sauce or crushed red pepper for heat.
4. Incorporate a variety of vegetables to enhance flavor and nutrition.
5. Keep the wok or pan hot to achieve the best sear and prevent sticking.
6. Always taste and adjust seasoning during the cooking process for a balanced flavor.
7. Don’t rush the cooking of your vegetables; allow them to soften slightly for full flavor.
8. Serve immediately to enjoy the best texture and flavor; this dish is best eaten fresh.

Variations and Adaptations

Incorporating regional flavors can turn your Mongolian Noodles into a unique dish. For instance, using kimchi instead of fresh veggies introduces a spicy, fermented element. Alternatively, consider a seasonal adaptation by including sautéed squash during fall or asparagus in spring for variety. If you have dietary restrictions, gluten-free soy sauce can replace regular soy sauce for a suitable variation. Experimenting with different proteins like tofu or shrimp gives a new texture, while cashews or peanuts can provide delightful crunch and added richness.

Serving and Presentation Guide

Plating your Mongolian Noodles is a chance to impress! Start with a mound of noodles at the center of the plate, arranging the vegetables and beef at the top or around the side. Garnish with fresh herbs like cilantro or scallions for a pop of color. A drizzle of sesame oil enhances richness and provides a visual cue of flavor. Serving in a warm bowl keeps everything cozy and appetizing, while appropriate portion sizes ensure satisfaction without overload.

Wine and Beverage Pairing

Wines that complement the robust flavors of Mongolian Noodles include a light-bodied red such as Pinot Noir, which balances the beef’s richness while enhancing the spices. Alternatively, a crisp white wine like Sauvignon Blanc can cut through the dish’s savory elements, providing a refreshing contrast. For non-alcoholic options, consider pairing with a chilled ginger ale or sparkling water with a slice of lime, enhancing the meal’s vibrant flavors.

Storage and Shelf Life

To store leftover Mongolian Noodles, transfer them to an airtight container and refrigerate for up to three days. When reheating, use a skillet over low heat to avoid overcooking. If you plan to store them for a longer period, freezing them is an option, ensuring they are well-sealed; they can last for up to three months. Signs of spoilage include an off smell or discoloration, so always check before serving. Enjoy leftovers as a quick lunch or dinner option, saving time and minimizing waste.

Make Ahead Strategies

Preparing Mongolian Noodles in advance is easy. You can chop vegetables and marinate the meat a day ahead, storing them separately in the refrigerator for maximum freshness. Noodles can also be cooked and set aside, ready to be added later. When you’re ready to assemble, heat the ingredients in a skillet, toss with the noodles, and your meal is ready. Always leave finishing touches like fresh herbs and garnishes until the last minute for the best appearance and flavor.

Scaling Instructions

Scaling this recipe is straightforward. To halve the ingredients, reduce each measurement by 50%. When doubling, make sure your skillet is large enough to accommodate the increase in volume; you may need to cook in batches. Pay close attention to cooking times, as larger quantities may require a few additional minutes, especially when simmering. If you enjoy serving a crowd, prepping extra servings allows you to stretch your culinary skills without compromising flavor.

Nutritional Deep Dive

Mongolian Noodles provide a balanced macronutrient profile, with a good mix of carbohydrates, protein, and healthy fats. The noodles serve as an excellent source of energy, while ground beef contributes valuable protein necessary for muscle repair and growth. Additionally, the inclusion of vegetables boosts micronutrient intake, providing key vitamins and minerals. With a focus on whole ingredients, this dish can fit into various dietary plans, helping with weight management.

Dietary Adaptations

For those requiring gluten-free options, substitute standard noodles with rice noodles or spiralized vegetables. To make the recipe dairy-free, ensure that sauces used do not include any dairy products. Vegan versions can utilize crumbled tofu in place of beef, pairing it with a mix of mushrooms for an umami flavor. Low-carb variations can involve using shirataki noodles or cauliflower rice, while still enjoying all the delightful flavors without excess carbohydrates.

Troubleshooting Guide

If your noodles come out mushy, ensure you’re not overcooking them. Check the package instructions for optimal cooking times. Seasoning too little can lead to blandness; taste as you go to find the right balance of flavors. If the dish seems greasy, consider using leaner meat or draining excess oil. Failed flavor adjustment can be fixed by incorporating a splash of soy sauce or a touch of sugar to complement savory elements. Keep an eye on cooking times for vegetables to ensure they’re tender-crisp but not overdone.

Recipe Success Stories

Readers have shared numerous positive experiences with this Mongolian Noodles recipe, noting how it quickly became a family favorite. Variations, like adding different proteins or vegetables, allowed them to make it their own while retaining core flavors. Photos shared in online forums showcase vibrant colors and appetizing presentations, inspiring others to give it a try. The overall feedback emphasizes convenience and taste, proving that this dish resonates with home cooks seeking satisfying and easy meal options.

Frequently Asked Questions

Can I use other proteins instead of ground beef?

Absolutely! You can use ground turkey, chicken, or even plant-based proteins like lentils or tofu. Each will impart a unique flavor, transforming the dish while maintaining its essence.

How do I store leftovers?

Store leftovers in an airtight container in the fridge for up to three days. You can also freeze them for up to three months for longer preservation, ensuring no waste.

What type of noodles work best?

Fresh egg noodles or rice noodles are ideal for their texture and flavor. However, you can also use ramen or udon noodles as good substitutes depending on your preference.

How can I make it healthier?

Incorporating more vegetables, using leaner meat cuts, or opting for whole grain noodles are great strategies. You can also reduce the amount of sauce to lower sodium content.

Can I make this dish vegan?

Yes! Substitute ground beef with crumbled tofu or a variety of mushrooms seasoned with soy sauce, ensuring that all sauces used are vegan-friendly.

Is it suitable for meal prep?

This recipe is perfect for meal prep! You can prepare the ingredients in advance and cook them fresh when needed. Just make sure to store components separately to maintain texture.

What should I serve with it?

Mongolian Noodles pair well with a simple side salad or steamed vegetables. You can also serve them with spring rolls for an extra crunch.

Are there any common substitutions?

If you’re out of soy sauce, tamari can be used as a gluten-free alternative. Brown sugar can also replace white sugar if needed to balance flavors.

Can I make this recipe gluten-free?

Yes! Use gluten-free noodles and soy sauce to ensure it fits gluten-free diets while still maintaining that same savory flavor profile.

How spicy can I make it?

Adjust the spice level by adding chili paste or fresh chili peppers. Start with a small amount and increase according to your taste preferences for an ideal heat.

How do I achieve perfect texture?

To get the desired texture, avoid overcooking the noodles and use high heat while stir-frying to quickly cook the beef and vegetables while retaining their crunch.

Additional Resources

Explore related recipes like Beef Stir-Fry or Vegan Noodle Bowls that complement the flavors of Mongolian Noodles. Technique guides for stir-frying will enhance your culinary skills, ensuring you’re fully equipped to make the most out of your cooking. Ingredient information on seasonal vegetables can inspire you to adjust the recipe according to what’s fresh and available. Discover recommended kitchen equipment and tools essential for a seamless cooking experience.

Join the Conversation

We invite you to share your experiences with this recipe! Post your culinary photographs on social media and tag us, allowing others to see how you’ve personalized Mongolian Noodles. We love hearing feedback and any variations you’ve tried. Engage with fellow food enthusiasts in the comments section, exchanging tips and ideas to further enhance everyone’s cooking journey.

The Recipe

Mongolian Noodles with Ground Beef

Serves: 4

Prep Time: 15 mins

Cook Time: 20 mins

Total Time: 35 mins

Kitchen Equipment Needed

  • Large skillet or wok
  • Cooking spoon or spatula
  • Measuring cups and spoons
  • Knife and cutting board

Ingredients

  • 8 oz of fresh or dried noodles
  • 1 lb ground beef
  • 1 bell pepper, sliced
  • 1 cup broccoli florets
  • 1 carrot, julienned
  • 3 cloves garlic, minced
  • 1 tbsp fresh ginger, minced
  • 1/4 cup soy sauce
  • 2 tbsp sesame oil
  • 2 green onions, chopped
  • Salt and pepper to taste
  • Optional: sesame seeds for garnish

Directions

  1. Cook the noodles according to package instructions and set aside.
  2. In a large skillet or wok, heat sesame oil over medium-high heat.
  3. Add minced garlic and ginger, sautéing until fragrant, about 1 minute.
  4. Add the ground beef, breaking it apart with a spatula, and cook until browned.
  5. Stir in the bell pepper, broccoli, and carrot; cook for an additional 5 minutes until veggies are tender.
  6. Add the cooked noodles and soy sauce to the skillet, tossing to combine thoroughly.
  7. Season with salt and pepper to taste and garnish with green onions and sesame seeds.
  8. Serve hot and enjoy your delightful Mongolian Noodles!

Recipe Notes

  • Feel free to add your favorite vegetables or adjust the sauce according to your preferences.
  • You can substitute ground beef for ground turkey or a plant-based option.
  • For a spicy kick, include chili paste or fresh chilies during cooking.
  • Leftovers can be stored in the fridge for up to three days.

Delicious Peach Upside-Down Mini Cakes for Summer Celebrations

Irresistible Peach Upside-Down Mini Cakes: A Sweet Summer Delight

⚖️
Difficulty
Easy

⏲️
Prep Time
15 mins

🕒
Cook Time
20 mins

⏱️
Total Time
35 mins

🍽️
Servings
8 mini cakes

Peach upside-down mini cakes are the perfect treat for summer gatherings, bringing a delightful twist to your dessert table. With the sweetness of ripe peaches caramelized on top of fluffy vanilla cake, these mini cakes not only charm the eyes but also tantalize your taste buds. They are simply irresistible and ideal for any occasion, whether it’s a family barbecue or a casual picnic.

This recipe showcases the beautiful balance of textures and flavors—each bite offers a tender crumb paired with the juicy, syrupy peaches on top, creating an explosion of summer flavors. As you pull these cakes out of the oven, the aroma of sweet peaches mingling with vanilla will have everyone eagerly waiting to indulge in this delightful treat.

Quick Recipe Highlights

  • Flavor Profile: Sweet peaches combined with light vanilla cake create a harmonious burst of summer flavors that will delight your palate.
  • Texture: Each mini cake has a soft, moist texture with a slightly crisp top from the caramelized peaches, delivering a perfect bite every time.
  • Aroma: The irresistible scent of baked peaches mingling with vanilla and buttery notes will fill your kitchen, beckoning everyone to the dessert table.
  • Visual Appeal: These mini cakes are visually stunning, with the bright yellow and orange of the peaches creating an eye-catching presentation.
  • Skill Level Needed: This recipe is easy to follow, making it perfect for novice bakers while still impressive for experienced cooks.
  • Special Equipment: You will need a muffin tin or individual cake molds to create these charming little treats.

Recipe Overview

  • Difficulty Level: These mini cakes are easy enough for beginner bakers, requiring just a few basic techniques like mixing and baking.
  • Category: This peach upside-down cake falls under desserts, specifically cakes, and is perfect for summer celebrations.
  • Cuisine: Rooted in classic American baking, the upside-down cake uses locally-sourced fruit, echoing the culinary tradition of seasonal cooking.
  • Cost: This recipe is budget-friendly, requiring common pantry ingredients along with fresh peaches which can be found at local markets in summer.
  • Season: Best enjoyed during peach season (late spring to early summer), when these fruits are at their juiciest and sweetest.
  • Occasion: These mini cakes make a great addition to barbecues, birthday parties, or any summer festivity where a sweet touch will brighten the day.

Why You’ll Love This Recipe

The taste and texture of these irresistible peach upside-down mini cakes are sure to win over any audience. The bright, sunny flavor of the peaches complements the soft, airy cake, creating a cake that feels as light as it is indulgent. The caramelization of the peaches produces a delightful contrast to the vanilla base, ensuring each bite is a celebration of flavor.

The convenience of this recipe makes it a must-try for summer gatherings. With only a short prep and cook time, you can whip up these delicious mini cakes quickly. They’re easily made ahead, which means you can spend more time enjoying the company of friends and family while still serving a exquisite dessert.

Nutritionally, peaches are loaded with vitamins A and C, fiber, and antioxidants, making these mini cakes a sweeter yet healthier option compared to other desserts. The use of fresh fruit not only enhances flavor but also provides some nutritional benefits that make each bite guilt-free.

The social aspect of sharing these delightful mini cakes is undeniable. Their unique presentation and charming size make them an inviting treat for guests, sparking conversations and smiles. Whether served at a gathering or brought to a potluck, these cakes can create memorable experiences.

Lastly, the cost-effectiveness of this recipe should not be overlooked. With simple ingredients that are easily accessible, you can create an impressive dessert without breaking the bank. Plus, the ability to scale the recipe means you can adjust the serving size depending on your needs, making it perfect for any occasion.

Historical Background and Cultural Significance

The origin of upside-down cakes can be traced back to ancient practices of baking in cast iron skillets, where fruits were placed at the bottom to caramelize while being baked. This tradition evolved in American kitchens, especially during the 1920s when fruits like pineapples made a splash in desserts.

Peach upside-down cakes, specifically, highlight local produce and the bounty of fresh fruits available during the summer months. This dish resonates with the agricultural traditions of peach-growing regions, where the fruit is celebrated and showcased in various recipes.

Over the years, this recipe has undergone many evolutions, adapting to modern baking techniques while maintaining its nostalgic roots. From the original versions baked in large pans to the contemporary mini cakes, this dessert continues to capture the hearts of many.

Regional variations abound, with some adding nuances like spices or using different stone fruits. While peaches may be the star of this recipe, the adaptability of the upside-down cake allows for creativity, making it a versatile dessert spanning many cultures and kitchens.

Ingredient Deep Dive

Peaches: Peaches have a rich history, originating in China but now cultivated worldwide. They are not just delicious but also packed with vitamins, minerals, and antioxidants. When selecting peaches, look for those that are firm but yield slightly to pressure, indicating ripeness. Store them at room temperature until ripe, then refrigerate to preserve freshness. If peaches are not available, consider substituting with nectarines or plums for a unique twist.

Flour: Flour serves as the backbone of many baked goods, including cakes. The choice of flour can affect the texture; all-purpose flour is ideal for this recipe, providing the right balance for fluffy mini cakes. When selecting flour, look for freshness to avoid stale flavors. Store it in an airtight container to prolong its shelf life, and if gluten-free options are needed, almond or coconut flour can be used, keeping in mind that modifications in liquid ratios may be necessary.

Common Mistakes to Avoid

  • Choosing Overripe Peaches: Overripe peaches can turn mushy and affect the texture of the cake. Ensure to select firm peaches for optimal sweetness and texture.
  • Using Cold Ingredients: Baking requires that your ingredients, especially eggs and butter, be at room temperature to ensure even mixing and baking. Cold ingredients can lead to a dense and unevenly baked cake.
  • Skipping Measuring: Accurate measurements are crucial in baking. Skipping this step can lead to imbalances in flavor and texture, potentially ruining the cake.
  • Overmixing the Batter: While it’s tempting to thoroughly mix, overmixing can lead to tougher cakes. Mix just until the ingredients are combined for a light, fluffy texture.
  • Not Preheating the Oven: Always preheat your oven before baking. Placing the batter in a cold oven can affect the rise and overall texture of your cake.
  • Neglecting to Grease the Molds: Properly greasing your muffin tin or cake molds ensures easy release after baking. Neglecting this step can lead to broken cakes.
  • Baking at the Wrong Temperature: Each oven is different, so check that your oven is calibrated correctly. Baking at either too low or too high of a temperature can result in uneven baking.
  • Skipping the Cooling Time: Allow your mini cakes to cool slightly before removing them from the molds. Skipping this step can cause them to break apart.
  • Serving Without Toppings: While these cakes are delicious alone, adding a dollop of whipped cream or serving with ice cream can elevate your dessert to the next level.

Essential Techniques

Mixing Batter: Understanding how to properly mix your batter is crucial for ensuring that your mini cakes rise and have the right texture. Start by creaming butter and sugar until light and fluffy—it helps incorporate air into the batter. Add eggs one at a time, mixing until fully blended before adding dry ingredients. To master this technique, avoid overmixing and be gentle when folding in any additional dry ingredients.

Caramelizing Peaches: Caramelizing the peaches not only enhances their flavor but also creates a beautiful presentation. To achieve perfect caramelization, always use moderate heat and ensure that the peaches are evenly coated in butter and sugar. Watch for a golden brown color, which indicates they are ready to layer on the batter. Common pitfalls include using too high heat, which can lead to burnt peaches, or not cooking long enough for proper sweetness.

Pro Tips for Perfect Irresistible Peach Upside-Down Mini Cakes

1. Always choose ripe, but firm peaches for the best flavor. If they’re underripe, they won’t caramelize properly, and if they’re overripe, they can become mushy.
2. Line your muffin tin with paper liners for easier cleanup and to help maintain the mini cake’s shape.
3. Give the caramel a bit of extra time on the stove to enhance its depth of flavor, but keep a close watch to avoid burning.
4. After inverting the cakes, allow them to cool in the tin for a few minutes before transferring them to a wire rack; this helps prevent sticking.
5. Feel free to enhance the flavor by adding cinnamon or nutmeg to the batter for an extra layer of warmth.
6. Top your mini cakes with fresh whipped cream or a scoop of vanilla ice cream for a delicious contrast to the sweetness of the peaches.
7. Consider drizzling a simple glaze over the top once cooled for an elegant finish.
8. These cakes freeze wonderfully! Store them in an airtight container to enjoy later.

Variations and Adaptations

If you’re feeling adventurous, try replacing peaches with other fruits like plums, cherries, or even apples, creating different flavor profiles. For a seasonal twist, consider incorporating a mix of berries in addition to the peaches during summer for a vibrant look.

Dietary modifications are also possible; you can make a gluten-free version by substituting all-purpose flour with a gluten-free blend or almond flour. If you’re looking for a lower-sugar treat, consider using honey or maple syrup in place of sugar, adjusting the liquid in the batter to maintain consistency.

For those who are more health-conscious, incorporating whole wheat flour can add a nutty flavor and additional fiber to the cakes. You can also explore adding zest from lemons or limes to the batter for a refreshing citrus note that pairs beautifully with the sweetness of the peaches.

Serving and Presentation Guide

When serving these mini cakes, presentation is everything! You can use a large serving platter to showcase them, stacking them for a whimsical look. Consider garnishing each mini cake with a sprig of mint for a pop of color and freshness. A drizzle of warm caramel sauce or a scattering of toasted nuts can provide an elegant finish to the cakes.

Temperature matters; serve these mini peach cakes either warm or at room temperature. Pair them with a scoop of vanilla ice cream or whipped cream to add a rich creamy texture that complements the peaches.

For a more sophisticated touch, serve with an espresso or flavored coffee to enhance the dessert experience. And don’t forget to keep portion sizes in mind—mini cakes are rich, so a small serving per person is often enough to satisfy.

Wine and Beverage Pairing

For a delightful pairing, opt for a light, fruity white wine such as Moscato or a sparkling Prosecco. These options will complement the sweetness of the peaches beautifully. If you prefer red, a chilled Lambrusco will offer a slight fizz that balances the rich flavors.

For non-alcoholic options, consider iced tea with a hint of peach or lemonade, which will tie in the flavors of the cake while serving as a refreshing counterpart on hot summer days. A chilled herbal tea can also enhance the dessert’s warm flavors, particularly if infused with mint or vanilla.

When serving coffee or tea, consider a light roast coffee with fruity notes to enhance the peach flavor, or serve with a chai latte for a spicy contrast.

Storage and Shelf Life

To store your peach upside-down mini cakes, keep them in an airtight container at room temperature for up to three days. If you want to extend their freshness, consider refrigerating them, where they can last up to a week.

When freezing, wrap each cooled mini cake in plastic wrap and place them in a freezer-safe bag. They can be stored in the freezer for up to three months. To enjoy, simply thaw overnight in the refrigerator and warm slightly in the microwave before serving.

Signs of spoilage include a sour smell or a change in texture; always check before consuming. Reheating should be done gently to prevent the cakes from drying out—consider microwaving them in short intervals.

Make Ahead Strategies

These mini cakes can be prepped ahead of time, making them perfect for entertaining. You can prepare the batter a day in advance; simply store it in the fridge until you’re ready to bake.

If you want to assemble everything the night before, prepare the caramelized peaches and place them in the molds, then top with batter before baking. This allows the flavors to meld beautifully overnight.

For optimal freshness, avoid adding any toppings or garnishes until just before serving. This ensures that the whipped cream or ice cream maintains its texture and doesn’t become soggy.

If you plan to serve the cakes at a later date, store them fully baked, and simply reheat for a couple of minutes before enjoying with your favorite accompaniments.

Scaling Instructions

Scaling this peach upside-down mini cake recipe is easy! If you want to halve the recipe, simply reduce all ingredient measurements by half, ensuring you also account for bake times, as smaller cakes may cook quicker.

When doubling or tripling the recipe for larger gatherings, be aware that the bake time may vary slightly. Use two muffin tins to bake more at once, ensuring that there’s enough space between them in the oven for air to circulate.

If you are using larger tins for standard-sized cakes, remember that bake times will differ. Always watch for doneness indicators, such as a toothpick coming out clean, rather than solely relying on time as a measure.

Nutritional Deep Dive

Each mini cake packs a delightful combination of nutrients, with peaches offering vitamins A and C while being low in calories. An average serving provides around 150 calories, making them a reasonable treat.

When considering macronutrients, the cake is primarily composed of carbohydrates, with minimal protein found in the eggs and flour. On the other hand, using whole wheat flour can add some additional fiber and help with digestion.

For those managing weight, portion control is essential, especially since these mini cakes can be quite rich. Balancing them with a side of fresh fruit or a salad can create a satisfying meal without overindulging on dessert.

Keep in mind allergy information, too; this cake contains gluten and dairy due to the flour and butter. Always consider gluten-free flour alternatives for those avoiding gluten, and feel free to substitute with plant-based butter for a dairy-free version.

Dietary Adaptations

Transforming this recipe for specific dietary needs is achievable with a few substitutions. For a gluten-free option, replace all-purpose flour with a gluten-free flour blend, but it’s essential to adjust the liquid requirements to maintain moisture.

Dairy-free adaptations can be made by substituting butter with coconut oil or plant-based butter and using a dairy-free milk alternative. These changes will still deliver delicious results without compromising on flavor.

For vegan versions, replace eggs with flaxseed or a commercial egg substitute, ensuring to adjust the liquid for consistency. Otherwise, consider using applesauce for moisture and sweetness to maintain fluffiness in the cake.

If you’re following a low-carb or keto diet, look for low-carb flour alternatives such as almond or coconut flour, and adjust the sweetener accordingly to enhance the dessert without raising carbs excessively.

Troubleshooting Guide

If your mini cakes turn out dense, it’s likely due to overmixing the batter or using cold ingredients. Always ensure ingredients are at room temperature, and stop mixing once everything is just combined.

A flavor imbalance, perhaps too sweet, can often be fixed by balancing with a hint of citrus. Adding a touch of lemon or lime zest to the batter elevates the taste profile beautifully.

For cakes that are not rising properly, check your baking powder’s freshness; expired leavening agents can greatly affect the texture. Additionally, make sure your oven is accurately calibrated.

If you encounter ingredient substitution issues, such as needing gluten-free options, always have a reliable reference for conversion ratios and baking techniques for different ingredients.

Recipe Success Stories

Community feedback for the peach upside-down mini cakes has been overwhelmingly positive. Many readers rave about these cakes for their light texture and vibrant flavors, often sharing personal variations that they’ve tried.

Several bakers have adapted these mini cakes for different occasions, whether it’s for birthdays, family gatherings, or brunches, and loved how easy they were to customize.

Photography tips abound, with many suggesting capturing the moment when the cakes are inverted, highlighting the beautiful caramelization of the peaches.

Encouraging readers to share their successes online has fostered a sense of community within the baking space, where everyone’s variations and adventures are celebrated.

Frequently Asked Questions

1. Can I use frozen peaches instead of fresh ones? Yes, frozen peaches can work well in this recipe, especially if they are thawed and drained of excess moisture. Be mindful that frozen fruits may release more liquid during baking, which could affect texture slightly.

2. How can I tell when the cakes are done baking? Use the toothpick test! Insert a toothpick in the center of one of the mini cakes; if it comes out clean or with a few crumbs, they are finished baking.

3. Can these mini cakes be made ahead of time? Absolutely! You can prepare them a day in advance and store them in an airtight container. They can also be frozen for later enjoyment.

4. What can I use if I don’t have muffin tins? If muffin tins aren’t available, consider using small ramekins or oven-safe cups to achieve the same mini-cake effect.

5. How do I prevent the cakes from sticking to the pan? Make sure to properly grease your pans with butter or non-stick spray. You can also line the bottom with parchment paper for added insurance against sticking.

6. Are there any gluten-free options for this recipe? Yes, you can substitute all-purpose flour for a gluten-free flour blend, making sure to adjust liquid ratios as needed for consistency.

7. Can I add spices to the batter? Absolutely! Consider adding a teaspoon of cinnamon or nutmeg for warmth. These spices pair beautifully with the sweetness of the peaches.

8. How long can I store the cakes for? Stored in an airtight container, the mini cakes can last for up to three days at room temperature and up to a week in the refrigerator.

9. Can I use other fruits for this recipe? Yes, feel free to get creative! Other fruits like apricots, plums, or nectarines can be used and will give you deliciously unique mini cakes.

10. Is there a dairy-free version of this cake? Yes, use plant-based butter and a dairy-free milk substitute to create a delicious dairy-free version without compromising taste.

Additional Resources

If you enjoyed this recipe, consider exploring related dessert recipes such as classic pineapple upside-down cake, berry cobbler, or fruit tarts.

For those looking to refine their baking skills, consider checking out technique guides on cake making, from mixing batter to mastering oven temperatures.

Additionally, regular seasonal variations can keep your dessert repertoire fresh—learning to bake with seasonal fruits allows you to enjoy year-round flavor variety.

Investing in reliable kitchen equipment, like non-stick bakeware and quality mixing tools, can make a significant difference in your overall baking success.

Join the Conversation

I invite you to share your experiences with the peach upside-down mini cakes by connecting with us on social media. Showcase your beautiful photos, modifications, and any tips you’ve gained through baking these delightful treats.

Photography tips are always welcome, as capturing the vibrant colors of the cakes can inspire fellow bakers. Engaging with our community through recipe reviews helps us all connect better and learn in our culinary journeys.

Consider discussing your favorite variations or adaptations of this recipe, creating a welcoming forum for baking enthusiasts. Your input enriches our community and supports budding bakers to explore and enjoy the art of creating delicious desserts!

The Recipe

Irresistible Peach Upside-Down Mini Cakes

Serves: 8 mini cakes

Prep Time: 15 mins

Cook Time: 20 mins

Total Time: 35 mins

Kitchen Equipment Needed

  • Muffin tin or individual cake molds
  • Mixing bowls
  • Measuring cups and spoons
  • Whisk or electric mixer
  • Spatula

Ingredients

  • 4 ripe peaches, pitted and sliced
  • 1/4 cup unsalted butter
  • 3/4 cup brown sugar
  • 1 1/2 cups all-purpose flour
  • 1 cup granulated sugar
  • 1/2 cup milk
  • 2 large eggs
  • 1 teaspoon vanilla extract
  • 2 teaspoons baking powder
  • 1/2 teaspoon salt

Directions

  1. Preheat your oven to 350°F (175°C) and grease the muffin tin or line with paper liners.
  2. In a saucepan, melt the butter and brown sugar over medium heat. Stir until combined and bubbly.
  3. Pour the caramel mixture into the bottom of each mold and arrange the peach slices on top.
  4. In a mixing bowl, combine the flour, baking powder, and salt. In another bowl, mix the sugar, eggs, milk, and vanilla until well combined.
  5. Gradually add the dry ingredients to the wet ingredients, mixing until just combined.
  6. Pour the batter over the peaches in the muffin tin, filling each mold about 3/4 full.
  7. Bake for 20-25 minutes or until a toothpick inserted into the center comes out clean.
  8. Allow to cool in the pan for 5 minutes, then invert onto a serving plate.

Recipe Notes

  • For best taste, use fresh, ripe peaches during the summer months.
  • Variations: Substitute peaches with your choice of fruits like cherries or plums for a different flavor profile.
  • The cakes can be stored in an airtight container and enjoyed within three days.
  • For a fun twist, drizzle with a caramel or chocolate sauce before serving.

Melt-in-Your-Mouth Italian Pot Roast Recipe for Ultimate Comfort Food

Melt-in-Your-Mouth Italian Pot Roast: The Ultimate Comfort Food

⚖️
Difficulty
Medium

⏲️
Prep Time
30 mins

🕒
Cook Time
2 hrs

⏱️
Total Time
2 hrs 30 mins

🍽️
Servings
6 servings

There’s nothing quite like a warm, hearty meal to cozy up with, and this Melt-in-Your-Mouth Italian Pot Roast recipe delivers just that. The rich flavors of tender beef, fragrant herbs, and a medley of colorful vegetables come together to create a dish that tantalizes the senses. Imagine savoring each bite as the juicy meat falls apart effortlessly, soaking up the savory sauce infused with aromatic Italian spices. This pot roast isn’t just food; it’s a comforting embrace, perfect for family gatherings or a cozy evening at home.

As you take your first forkful, the combination of perfectly cooked meat and subtly sweet vegetables will delight your palate. The tender beef, slow-cooked to perfection, provides a robust flavor that pairs beautifully with the brightness of tomatoes and the earthiness of herbs. It’s a dish that evokes memories of Sunday dinners, surrounded by loved ones, sharing stories and laughter. The balance of flavors and textures makes this Melt-in-Your-Mouth Italian Pot Roast not just a meal, but an experience to cherish.

Quick Recipe Highlights

  • Flavor Profile: A delightful fusion of savory beef and herbs, enhanced by the sweetness of carrots and the acidity of tomatoes.
  • Texture: Expect a delightful contrast as the tender meat melts in your mouth, complemented by the slight crunch of fresh vegetables.
  • Aroma: The inviting aroma of garlic, rosemary, and thyme fills your kitchen, creating an irresistible ambiance.
  • Visual Appeal: A vibrant display of rich, golden-brown meat contrasted with a colorful assortment of veggies makes for an enticing presentation.
  • Skill Level Needed: While the recipe is straightforward, some experience with braising techniques will enhance your results.
  • Special Equipment: A heavy-duty Dutch oven is ideal for even cooking and proper heat retention.

Recipe Overview

  • Difficulty Level: This Melt-in-Your-Mouth Italian Pot Roast is rated as medium difficulty, suitable for home cooks who enjoy trying their hand at comforting slow-cooked meals.
  • Category: Perfect as a main dish, this pot roast fits beautifully into any family dinner or special occasion menu.
  • Cuisine: Drawing its roots from Italian culinary traditions, this dish showcases classic flavors and techniques synonymous with hearty, rustic Italian cooking.
  • Cost: Economically appealing, this recipe utilizes affordable cuts of beef supplemented with seasonal vegetables, making it a cost-effective choice.
  • Season: Best enjoyed in the fall and winter months, the warmth of pot roast makes it a go-to comfort food during chilly evenings.
  • Occasion: Ideal for family gatherings, holiday feasts, and potluck parties, this pot roast is sure to please a crowd.

Why You’ll Love This Recipe

On the first bite, this Italian Pot Roast captivates with its rich, savory flavor and tender texture that melts away as you savor it. The carefully chosen blend of herbs adds an aromatic punch that elevates the simplest of ingredients into something truly extraordinary. This dish embodies comfort food at its finest, making it perfect for cozy family dinners or casual gatherings with friends.

The convenience of this Melt-in-Your-Mouth Italian Pot Roast is unmatched; throw everything together in a single pot, and let the oven do the work. After a couple of hours, you will be welcomed home by the enticing aroma wafting through your kitchen. Not only will this dish warm your belly, but it requires minimal effort, allowing you to spend quality time with your loved ones.

Not to mention, this pot roast is a hearty meal loaded with nutritional benefits. Beef is a great source of protein that fills you up, while the variety of vegetables adds essential vitamins and minerals to your diet. Moreover, because everything is cooked together, the flavors meld beautifully, providing a well-rounded dish that is as good for your body as it is for your soul.

Social occasions become more memorable with this recipe, as it invites people to gather around the table and share a meal. This pot roast not only nourishes but also sparks conversations and laughter, creating lasting memories. Imagine friends coming together, plates laden with mouthwatering meals, sharing stories over a comforting dish that warms both the heart and the home.

Cost-effectiveness makes this recipe even more appealing, as it serves multiple people without breaking the bank. You get a hearty meal for the whole family with simple, affordable ingredients that are often staples in the pantry. It’s an excellent way to feed a crowd while ensuring everyone leaves satisfied and happy.

Historical Background and Cultural Significance

The origin of pot roast can be traced back to the traditional cooking methods of our ancestors, who would braise tougher cuts of meat to achieve tenderness and depth of flavor. Italian pot roast, known as “brasato,” brings forth a cultural tale of frugality and resourcefulness, transforming humble ingredients into a dish fit for special occasions. This historical significance nurtures a connection to those who once gathered around the table to share what they had, fostering a sense of community and belonging.

Culinary traditions throughout Italy celebrate slow-cooked dishes that showcase regional ingredients, allowing families to pass down recipes through generations. These time-honored recipes reflect the heart and soul of Italian cuisine, which emphasizes both flavor and simplicity. The Melt-in-Your-Mouth Italian Pot Roast embodies those ideals, providing a taste of Italy with each delectable bite.

Over the years, this recipe has evolved, with modern adaptations incorporating local ingredients while honoring traditional cooking techniques. As global access to diverse flavors increases, pot roast recipes have expanded, introducing various spins while retaining the essence of comfort and warmth that defines the dish.

Regional variations of pot roast spark exciting discussions at dinner tables across cultures, with each family adding their unique twist. From the herbs used to the types of cuts chosen, these adaptations represent the locale’s culture, climate, and culinary preferences while showcasing how food can unite us despite differences.

Ingredient Deep Dive

Beef Chuck Roast: This cut is a culinary staple for pot roast, known for its rich flavor and marbling. Originating from the shoulder of the cow, beef chuck is not only cost-effective but also ideal for slow cooking, as the connective tissue breaks down, yielding a tender, juicy result. Nutritionally, beef is rich in protein and essential vitamins like B12 and iron, making it a powerhouse for energy and blood health. When selecting, look for well-marbled cuts with a bright red color, and store it in the coldest part of your fridge. For substitutions, consider brisket or round roast as alternatives, but be aware that texture may vary.

Carrots: Sweet and tender, carrots add a natural sweetness and vibrant color to any pot roast. Historically revered for their health benefits, carrots are packed with beta-carotene, fiber, and vitamins, supporting good vision and digestion. When selecting, opt for firm, brightly colored carrots. Their sweet flavor deepens during cooking, enhancing the overall dish. Store carrots unwashed in a cool, dark place or in the refrigerator for optimal freshness, and consider using parsnips or sweet potatoes for a fun twist.

Common Mistakes to Avoid

  • Not searing the meat: Skipping the searing step can result in a lack of flavor development, leaving your pot roast dull.
  • Using the wrong cut of meat: Choosing a lean cut instead of a tougher one can lead to dry, chewy meat. Always opt for cuts that benefit from slow cooking.
  • Overcrowding the pot: Packing too many ingredients into the pot can prevent even cooking, leading to uneven texture and flavor.
  • Not allowing the roast to rest: Cutting into the roast immediately can release juices, resulting in a dry outcome. Allow it to rest for at least 15 minutes.
  • Skipping the aromatics: Neglecting onions and garlic diminishes the flavor base, leaving your pot roast less aromatic.
  • Not tasting the braising liquid: Always taste and adjust seasonings before cooking; this ensures the resulting sauce is well-balanced.
  • Cooking at too high of a temperature: Slow cooking is key to this dish’s success; high temperatures can make the meat tough instead of tender.
  • Ignoring the recommended cooking time: Rushing the cooking time can prevent the meat from achieving that melt-in-your-mouth quality.
  • Not using a heavy pot: A lightweight pot may not distribute heat evenly, resulting in uneven cooking.
  • Overlooking ingredient quality: Always choose fresh, high-quality ingredients to ensure the best flavor and texture.

Essential Techniques

Searing the Meat: This process is crucial for developing deep flavors that enhance your pot roast. Start with a preheated heavy pot and ensure the meat is dry before placing it in. Mastering this technique involves patience; turn the meat only when it naturally releases from the pot. Watch for a caramelized, brown crust to form, signaling success.

Deglazing the Pan: Once the meat is removed, deglazing is important to capture all the flavorful bits stuck to the pot. Add wine or broth to the hot pan, scraping the bottom with a wooden spoon to release these flavors. This not only adds depth to your braising liquid but also prevents burning.

Pro Tips for Perfect Melt-in-Your-Mouth Italian Pot Roast

1. Choose the right cut of beef: Opt for cuts like chuck roast or brisket that offer the necessary fat and connective tissue for tenderness.

2. Don’t rush the searing: Take your time to develop a rich crust; this enhances the depth of flavor.

3. Use a quality broth: The braising liquid elevates your dish, so choose low-sodium, flavorful broth for added richness.

4. Balance your seasonings: Always taste and adjust seasonings; sometimes a little extra salt or acidity can elevate the dish dramatically.

5. Consider herb bundles: Using a bouquet garni allows for easy removal of herbs after cooking, ensuring a clean flavor.

6. Trust the cooking time: The key to melt-in-your-mouth tenderness is low and slow; resist the urge to check too frequently.

7. Save the juices: Always reserve the braising liquid after cooking; it can be used to enrich sauces or soups later.

8. Experiment with vegetables: While carrots and potatoes are traditional, feel free to add mushrooms, celery, or parsnips for variety.

Variations and Adaptations

Regional variations of pot roast can be exciting to explore. For instance, in Southern Italy, you might find pot roast cooked with olives and capers, introducing a briny dimension. Seasonal adaptations could involve adding winter squash or root vegetables during colder months, enhancing nutrition and flavor. Dietary modifications can include substituting beef for turkey or a plant-based meat alternative for a lighter twist, catering to those with specific dietary preferences.

Serving and Presentation Guide

When serving your Italian Pot Roast, consider using shallow bowls for a rustic, hearty presentation. Ladle the braising liquid over the top to enhance moisture and flavor. You can garnish the dish with fresh herbs like parsley or thyme for a pop of color and freshness. To elevate the experience, serve with crusty bread for soaking up the flavorful juices, and consider pairing with a bright salad for contrast. Make sure to serve at a warm temperature, ensuring comfort in every bite, and adjust portion sizes based on your guests’ appetites.

Wine and Beverage Pairing

Choosing the right wine can elevate your meal significantly. A rich red wine like Chianti pairs beautifully, echoing the Italian flavors in the pot roast. Alternatively, a full-bodied Merlot or Barbera enhances the flavors without overpowering the dish. For non-alcoholic options, a sparkling grape juice can provide a refreshing contrast, or consider serving Italian soda for a fun twist. When pairing, always serve at the proper temperature to ensure optimal taste; red wines are typically best enjoyed at room temperature to express their full flavor.

Storage and Shelf Life

Leftover pot roast can be stored in an airtight container in the refrigerator for up to four days. Ensure it cools completely before sealing to maintain freshness. For longer storage, freeze the pot roast in portions, ensuring it’s well-packed to prevent freezer burn. Signs of spoilage include an off-putting smell or discoloration, so always check before consuming. When reheating, add a splash of broth to restore moisture, and warm it gently on the stovetop to retain tenderness.

Make Ahead Strategies

This pot roast is perfect for make-ahead strategies. You can prep the ingredients a day in advance, ensuring time-saving efficiency on the day of cooking. Alternatively, cook the roast completely, cool, and store it in the fridge, allowing the flavors to develop even further overnight. To serve, reheat slowly and add fresh herbs for a burst of brightness just before serving. This offers stress-free entertaining while delivering rich, comforting flavors.

Scaling Instructions

Halving the recipe is straightforward; simply divide the ingredients by two, but be cautious with cooking times—check for doneness at least 30 minutes earlier for optimal tenderness. For doubling or tripling, ensure you have a pot large enough to accommodate the increase. This may require cooking in batches to ensure even heat distribution. Be mindful that scaling up may affect sauce thickness, so adjust the liquid ratio appropriately. Proper storage is crucial when scaling to avoid waste, so plan your meal sizes accordingly.

Nutritional Deep Dive

This Italian Pot Roast is not only delicious but provides a solid macro breakdown: a serving typically contains high protein from the beef, moderate carbohydrates from vegetables, and healthy fats from the cooking process. The iron from beef, combined with the vitamins from carrots and other veggies, creates a well-rounded meal. Additionally, this dish can be tailored to fit various dietary needs, ensuring satisfaction while maintaining balance and nutrition for all diet types.

Dietary Adaptations

For those following a gluten-free diet, ensure that all stock and sauces used are certified gluten-free. Dairy-free variations can be achieved by avoiding creamy sauces and focusing on the rich, natural broth. Vegans can substitute the beef with jackfruit or plant-based meat alternatives, ensuring a flavorful infusion of seasonings. Low-carb enthusiasts can reduce or eliminate the root veggies and serve the pot roast over a bed of sautéed spinach or cauliflower rice instead. Each adaptation proves that comfort food can cater to various dietary preferences without compromising taste.

Troubleshooting Guide

If your pot roast isn’t as tender as expected, it likely needs more cooking time; check it often until it reaches the desired fall-apart consistency. Flavor balance can be adjusted with additional seasonings during cooking; a splash of vinegar can brighten flavors if too rich. Temperature issues arise from improper heat settings; ensure you’re cooking low and slow. Equipment challenges may occur with insufficient pot size—use a larger vessel if necessary for proper heat distribution.

Recipe Success Stories

Our community has been thrilled with their variations on this incredible pot roast. Many enjoy experimenting with different herb combinations to tailor the dish to their family’s tastes. Readers have reported success with using red wine instead of broth for added depth, while others rave about the simplicity of this dish for entertaining. Families share heartwarming stories of gathering around the table, bonding over shared meals and creating memories, showcasing the universal love for this Italian classic.

Frequently Asked Questions

Can I use a slow cooker for this recipe? Absolutely! Cook the roast on low for 6-8 hours or high for 4-5 hours until it reaches tenderness.

What other vegetables can I add? Feel free to experiment with mushrooms, turnips, or even green beans as tasty additions.

Can I substitute the beef? Yes! Turkey or chicken can work well, but adjust cooking times based on the meat’s characteristics.

How do I know when the roast is done? Your pot roast is ready when it is fork-tender; an internal temperature of 190°F indicates optimal tenderness.

Is it safe to reheat leftovers? Yes, ensure that leftovers are heated to at least 165°F for safety, adding moisture to combat dryness.

Can I freeze the pot roast? Definitely! Freeze leftovers in portioned airtight bags for easy meals later, ensuring to label them with dates.

What sides pair well with this dish? Traditional pasta, creamy polenta, or a robust salad make for delightful and complementary sides.

Can I cook it the night before? Sure! It often tastes better after the flavors meld overnight; just reheat gently.

What can I do with leftover pot roast? Shred it for sandwiches, add to sauces for pasta, or mix into soups for another meal.

Can I make this dish in advance? Yes! It’s an excellent make-ahead option that enhances flavors when allowed to rest.

Additional Resources

Explore related recipes that elevate your comfort food game, like Garlic Mashed Potatoes or Classic Italian Meatballs. Dive into technique guides on mastering braising or enhancing flavor profiles, and discover ingredient information useful for selecting high-quality produce. If you’re interested in seasonal variations, check out spring veggie adaptations or summer accompaniments that can transform your pot roast into a whole new experience.

Join the Conversation

We invite you to share your experiences cooking this Melt-in-Your-Mouth Italian Pot Roast! Join us on social media for a vibrant community sharing photography tips, variations, and personal twists on this classic recipe. Your feedback and recipe reviews help others find joy in cooking and create meaningful connections, opening the door for new culinary adventures. Let’s celebrate the love of cooking together!

The Recipe

Melt-in-Your-Mouth Italian Pot Roast

Serves: 6 servings

Prep Time: 30 mins

Cook Time: 2 hrs

Total Time: 2 hrs 30 mins

Kitchen Equipment Needed

  • Heavy-duty Dutch oven
  • Wooden spoon
  • Meat thermometer
  • Sharp knife
  • Cutting board

Ingredients

  • 3-4 pounds beef chuck roast
  • 2 tablespoons olive oil
  • 1 large onion, chopped
  • 4 cloves garlic, minced
  • 4 medium carrots, cut into chunks
  • 3 medium potatoes, cut into quarters
  • 1 can (14 oz) diced tomatoes, with juices
  • 2 cups beef broth
  • 2 tablespoons tomato paste
  • 1 teaspoon dried thyme
  • 1 teaspoon dried rosemary
  • Salt and pepper to taste

Directions

  1. Preheat your oven to 300°F (150°C).
  2. In a heavy-duty Dutch oven, heat olive oil over medium-high heat.
  3. Season the beef chuck roast generously with salt and pepper on all sides.
  4. Sear the roast in the hot oil for about 4-5 minutes per side, until browned. Remove and set aside.
  5. Add the chopped onions and minced garlic to the pot, cooking until softened, about 2-3 minutes.
  6. Stir in the diced tomatoes, broth, and tomato paste, bringing to a simmer. Add thyme and rosemary.
  7. Return the seared roast to the pot, submerging it in the liquid. Add carrots and potatoes around the roast.
  8. Cover with a lid and transfer to the preheated oven. Cook for about 2 hours or until meat is fork-tender.
  9. Remove from oven, let the roast rest for 15 minutes before slicing and serving with the vegetables and gravy.

Recipe Notes

  • For an added depth of flavor, consider adding a splash of red wine during the deglazing.
  • Leftovers can be stored in the fridge for up to 4 days or frozen for later use.
  • Feel free to adapt the vegetables based on what you have on hand or what is seasonally available.

Indulge in Surf and Turf Filet Mignon with Lobster Tails

Surf and Turf Filet Mignon with Lobster Tails: A Luxurious Dinner Delight

⚖️
Difficulty
Intermediate

⏲️
Prep Time
30 mins

🕒
Cook Time
40 mins

⏱️
Total Time
70 mins

🍽️
Servings
2

Surf and Turf Filet Mignon with Lobster Tails is the epitome of culinary indulgence, ideal for impressing guests or celebrating special occasions. This dish combines the rich, buttery flavor of perfectly cooked filet mignon with the succulent sweetness of lobster tails, creating a harmonious balance that tantalizes the taste buds. With its combination of gourmet ingredients and sophisticated preparation, this recipe will elevate your dining experience.

Imagine the satisfying sizzle of steak on the grill, complemented by the aroma of the lobster tails, brushed with garlic butter. The vibrant colors of the dish—golden brown filet mingling with the gleaming white of the lobster meat—will make for an unforgettable visual feast. Each bite offers a melt-in-your-mouth tenderness that is simply irresistible, making this a cherished recipe in your mealtime repertoire.

Quick Recipe Highlights

  • Flavor Profile: This dish features a rich umami flavor from the filet mignon, contrasted by the sweet, oceanic taste of the lobster, with layers of garlic and butter enhancing every bite.
  • Texture: The filet mignon provides a tender, juicy texture, while the lobster tails offer a firm yet delicate mouthfeel, perfectly cooked to prevent any chewiness.
  • Aroma: The combined aromas of seared beef and fragrant garlic butter contribute a mouthwatering scent that fills the kitchen, welcoming everyone to the table.
  • Visual Appeal: Serve on a large white platter, garnished with fresh herbs for contrast, showcasing the rich, golden lobster and the perfectly cooked steak.
  • Skill Level Needed: This recipe is suitable for those with some intermediate cooking experience, as it requires timing and attention to achieve perfect results with both proteins.
  • Special Equipment: A grill or grill pan, a lobster pot (for boiling), and a meat thermometer ensure precise cooking for both the filet and the lobster tails.

Recipe Overview

  • Difficulty Level: Cooking Surf and Turf typically requires some finesse, especially in timing, to ensure that both the steak and lobster are cooked to perfection without any overcooking.
  • Category: This dish fits perfectly within the fine dining category, suitable for romantic dinners, special occasions, or upscale gatherings.
  • Cuisine: Surf and Turf is a classic American culinary tradition influenced by steakhouse menus, integrating elements of seafood from coastal cuisines.
  • Cost: Preparing this meal may require a higher budget due to the premium ingredients, with costs primarily driven by the quality of meat and seafood chosen.
  • Season: Best enjoyed year-round, this recipe shines brightly during summer barbecues and festive winter dinners, making it a versatile choice.
  • Occasion: Celebrate anniversaries, special date nights, or major holidays like New Year’s Eve with this impressive and delicious dish.

Why You’ll Love This Recipe

The taste and texture of Surf and Turf Filet Mignon with Lobster Tails create an unforgettable dining experience. The filet mignon offers a buttery richness that pairs beautifully with the sweet and succulent lobster, resulting in an exquisite flavor combination that tantalizes the palate. Every mouthful melds the two textures: the juicy, tender steak against the firm, buttery lobster, truly a delight for any meat and seafood lover.

Convenience and preparation benefits abound with this recipe. While it may seem complex, the steps are quite manageable and allow for preparation ahead of time. The steak can be marinated or seasoned beforehand, while the lobster requires minimal prep. This allows you to have more time to focus on serving your guests or enjoying the occasion.

Not only is this dish a feast for the senses, but it also offers nutritional advantages. The filet mignon is an excellent source of protein and essential nutrients such as iron and Vitamin B12, while lobster tail provides omega-3 fatty acids and low saturated fat, making it a relatively healthy choice when enjoyed in moderation.

Serving Surf and Turf at a gathering instantly elevates the social aspect of dining. It serves as a conversation starter and ensures that your guests feel special. This dish heralds celebrations and brings people together around the table, encapsulating the spirit of culinary romance.

Lastly, despite its high-end reputation, this recipe can be made in the comfort of your home without breaking the bank when managed properly. By selecting ingredients wisely, you can achieve gourmet results and craftsmanship worthy of a five-star restaurant right in your kitchen.

Historical Background and Cultural Significance

The origins of Surf and Turf can be traced back to the lavish dining experiences offered in steakhouses, particularly popularized in the United States during the mid-20th century. The concept celebrates the best of both land and sea, appealing to diverse culinary preferences. While steak and seafood have long been enjoyed separately, this combination rose in fame as fine dining evolved and diners sought decadence.

Surf and Turf brings together elements from various culinary traditions, notably American and coastal cuisines. The dish reflects the cultural melding of flavors, often representing celebration and indulgence in traditional American dining settings, where families and friends gather together to share joyful moments.

Over the years, the recipe has evolved, incorporating different cooking techniques, sauces, and pairings, like garlic butter or herbs, showcasing the versatility of the ingredients. Today, it adapts sophisticated ingredients and customizations, allowing each cook to express their creativity while paying homage to the traditional combination.

Regional variations of surf and turf exist, like the New Zealand lamb and crayfish or the classic combination of filet mignon with shrimp in Southern cuisine. Each version reflects local ingredients and personal preferences while maintaining the quintessential indulgence of this celebrated dish.

Ingredient Deep Dive

Filet Mignon: Often regarded as the most tender cut of beef, filet mignon is cut from the tenderloin section of the cow. Its luxurious flavor and buttery texture make it a popular choice for special occasions. For best results, seek out high-quality, grass-fed beef and look for a deep red color with good marbling, as this will enhance flavor and tenderness. Store filet mignon in the refrigerator and use it within a few days of purchase for optimal freshness. If unavailable, consider sirloin or ribeye as alternatives.

Lobster Tails: Lobster is a delicacy that symbolizes celebration in many cultures, known for its sweet, tender meat and luxurious reputation. Selecting live lobster or frozen tails can make a culinary adventure at home. Look for fresh lobster with a firm shell and slight ocean scent. Store lobster tails in the coldest part of your refrigerator or freeze them if necessary. If lobster isn’t available, shrimp or crab could serve as reasonable substitutes, though they will alter the flavor profile.

Common Mistakes to Avoid

  • Overcooking the filet mignon can lead to dry meat; always use a meat thermometer to check doneness.
  • Failing to let the meat rest after cooking can result in loss of juices, leaving the steak dry. Allow at least 5-10 minutes resting time.
  • Not seasoning the steak adequately can result in bland flavor. Use salt and pepper generously.
  • Cooking lobster at too high a temperature can lead to rubbery meat; steam or boil gently.
  • Ignoring the lobster tail’s shell when preparing; split it carefully to allow for even cooking.
  • Using the same cutting board for raw meat and seafood can lead to cross-contamination; always keep them separate.
  • Rushing the marinade process can lead to under-flavored steak; let it marinate for a minimum of 1 hour or overnight.
  • Skipping the use of a thermometer can lead to inaccuracies in cooking times, jeopardizing both proteins’ doneness.
  • Forgetting to pair with suitable sides; rich steak and lobster benefit from complementing vegetables or starches.
  • Failing to prepare sauces in advance, which can lead to chaos in the kitchen when it’s time to serve.

Essential Techniques

Grilling the Steak: Searing steak on a hot grill creates a flavorful crust through the Maillard reaction, enhancing taste. Preheat the grill properly and use a meat thermometer to reach desired doneness without guesswork.

Preparing Lobster Tails: Boiling or steaming lobster requires careful attention to time for perfect tenderness. Score the shell for easier cooking and presentation, ensuring even heating and a beautiful display upon serving.

Pro Tips for Perfect Surf and Turf Filet Mignon with Lobster Tails

1. Use high-quality, grass-fed filet mignon for superior flavor and tenderness—this small investment will greatly enhance your dish.

2. Season your filet mignon well with salt and pepper before cooking to elevate the beef’s natural flavors.

3. Allow both the steak and lobster to reach room temperature before cooking for more even results.

4. Always start cooking the lobster tails before the steak, as they usually require slightly longer cooking time.

5. Use butter and garlic to baste the lobster while it cooks, enhancing flavor and richness even further.

6. Experiment with herbs and spices while grilling to personalize your Surf and Turf, adding a unique twist to this classic dish.

7. Consider making a complementary sauce, such as a garlic butter or herb sauce, to drizzle over the finished dish for extra flavor.

8. Make sure to serve your surf and turf immediately after cooking, as it is best enjoyed fresh and at temperature.

Variations and Adaptations

For regional variations, try swapping filet mignon for local meats, or lobster for another catch, like shrimp or scallops, for a fresher twist. Seasonal adaptations include adding seasonal vegetables or creating a unique salsa or glaze, making this dish suit the seasons beautifully. Dietary modifications can cater to preferences like using turkey or chicken instead of beef for a lighter version, or opting for firm tofu for plant-based adaptations, though flavors will vary. Flavor variations can also be created by marinating either protein in different herbs or spices to give a new essence to your dish.

Serving and Presentation Guide

Plating techniques are essential in making this dish shine. Place the filet mignon and lobster tail elegantly on oversized white plates to create a beautiful contrast. Consider garnishing with fresh herbs like parsley or chives for visual enhancement. Traditional accompaniments might include buttery mashed potatoes, sautéed asparagus, or a fresh garden salad, while modern dining suggests offering an array of dipping sauces, like garlic aioli or a light seafood vinaigrette. Be mindful of serving temperatures, ensuring both proteins are served hot while also considering portions for a balanced meal.

Wine and Beverage Pairing

For an exquisite pairing, opt for a full-bodied red wine, such as Cabernet Sauvignon, which beautifully complements the richness of both the filet mignon and lobster. If you prefer white wine, a buttery Chardonnay can enhance the flavors of the seafood. Non-alcoholic alternatives such as sparkling water with a splash of lemon add a refreshing touch, while coffee after the meal can act as a nice digestif to round off the experience. Be sure to serve wine at appropriate temperatures for the best flavor experience.

Storage and Shelf Life

Store any leftover cooked meat in an airtight container within the refrigerator, where it will last for up to three days. Ensure that the lobster is kept in separate containers if possible to maintain optimal flavor. If you wish to freeze leftovers, tightly wrap portions in plastic wrap and place in a freezer-safe container, where it can last for up to three months. When reheating, do so gently, either in the oven or microwave, and consider adding a bit of butter to restore moisture.

Make Ahead Strategies

Prep ahead by marinating your filet mignon overnight to enhance flavor. Lobster tails can be prepared the same day but cutting and cleaning can be done in advance. You can also prepare any sides in the morning or the day before, making it a breeze when dinner time comes. If making sauces from scratch, consider having them made ahead of time, keeping refrigerated until you’re ready to serve. Refresh elements like herbs or citrus zest right before serving for a burst of freshness.

Scaling Instructions

If halving this recipe for a smaller occasion, adjust the cooking times slightly as your proteins will require less time. Doubling or tripling the recipe can easily be achieved, just ensure sufficient grill space and adjust your burner settings accordingly for even cooking. When adjusting portions, be mindful of the cut sizes, and consider a larger pan for cooking multiple lobsters or steaks simultaneously. Storing leftovers will also require larger containers, so plan appropriately.

Nutritional Deep Dive

Surf and Turf Filet Mignon with Lobster Tails provides an elegant macro breakdown; high in protein due to the beef and lobster while being rich in essential vitamins and minerals, such as iron, zinc, and omega-3 fatty acids. The dish, when complemented by wholesome veggies, can be part of a balanced meal. However, account for overall portion control as the calorie count can rise, especially with butter and sauces included. Moderation is key to enjoy this delightful dish while maintaining a healthy diet.

Dietary Adaptations

For gluten-free adaptations, this recipe naturally contains no gluten but be sure to avoid pre-seasoned sauces that may carry gluten. For a dairy-free approach, simply replace butter with a dairy-free alternative or olive oil. Vegans looking for a plant-based option can substitute filet mignon for marinated mushrooms or eggplant while opting for a hearty plant-based seafood alternative to replace lobster. Low-carb, keto, or paleo enthusiasts will enjoy this recipe as is, offering low carbohydrate choices with no grains or legumes present.

Troubleshooting Guide

If your filet mignon comes out tough to chew, it may have been overcooked or not tenderized properly, ensure to check doneness with a thermometer. If the lobster seems rubbery, it’s likely was overcooked as well; keep a close eye during the cooking process. Should the flavors feel one-dimensional, consider adding a squeeze of fresh lemon juice or ingredients like Worcestershire sauce. If timing is off, invest in a good timer that will alert you when each component is ready instead of overcooking everything.

Recipe Success Stories

Many have shared their experiences revamping this classic recipe, with variations drawn from personal tastes, creating numerous delicious adaptations. Readers have reported their guests were astounded by the flavors and textures, echoing feelings of joy and satisfaction at the table. Suggestions from home cooks have included pairing with zingy side salads or zesty salsas, opening up new pathways of flavors that enhance traditional serving methods. Plus, those looking to showcase their creations on social media have expressed that this is a particularly photogenic dish, adding to the fun of food photography.

Frequently Asked Questions

Q: Can I use frozen lobster tails?
A: Yes! Just ensure they are properly thawed before cooking to guarantee even cooking times.

Q: What is the best way to tell if my steak is cooked to the right doneness?
A: Invest in a meat thermometer. For medium-rare, aim for 130°F, for medium, 140°F, and 150°F for medium-well.

Q: How can I ensure my lobster doesn’t become tough?
A: Lobster cooks quickly, so steaming or boiling for just 5-10 minutes typically yields the best result. Watch closely!

Q: Is it necessary to marinate filet mignon?
A: While not required, marinating helps to add flavor and tenderize the meat, enhancing the overall dish.

Q: What sides pair well with Surf and Turf?
A: Consider classic choices like garlic mashed potatoes, grilled asparagus, or a light garden salad for balance.

Q: How should I store leftovers?
A: Place leftovers in sealed containers and refrigerate for up to three days, or freeze for more extended storage.

Q: Can I prepare the lobster ahead of time?
A: It’s best to cook lobster fresh to prevent it from becoming rubbery. However, you can prep it for quick assembly later!

Q: How long can I keep leftover cooked steak?
A: Cooked steak can be stored in the fridge for 3-4 days; be sure to cool and store promptly for safety.

Q: What is the best cooking method for filet mignon?
A: Grilling or pan-searing with butter is most common, providing the best caramelization and flavor.

Q: How can I make this recipe more suitable for kids?
A: Consider reducing the size of the steak and lobster portions, or opt for simpler preparation techniques like baking.

Additional Resources

For those seeking more culinary inspiration, be sure to explore related recipes focusing on steak, seafood, or gourmet meals that showcase key cooking techniques. Technique guides on grilling or sous vide cooking can enhance your cooking abilities further while revealing new methods for creating beautiful dishes. Ingredient information regarding sourcing high-quality meats and seafood will also be beneficial for future culinary endeavors, ensuring your meals remain delectable and fresh. Finally, seasonal variations can help you adapt this recipe throughout the year while featuring local ingredients.

Join the Conversation

We invite you to share your experiences cooking Surf and Turf Filet Mignon with Lobster Tails! Engage with our community through social media platforms by posting your successful attempts or sharing your unique adaptations. Feedback and reviews of your experiences are invaluable, opening discussions that enhance our cooking community while sharing insights into recipe variations and unique angles. Let’s celebrate our love for cooking and share the joy this delightful dish brings to the table!

The Recipe

Surf and Turf Filet Mignon with Lobster Tails

Serves: 2

Prep Time: 30 mins

Cook Time: 40 mins

Total Time: 70 mins

Kitchen Equipment Needed

  • Grill or grill pan
  • Lobster pot or large saucepan
  • Meat thermometer
  • Cutting board
  • Chef’s knife

Ingredients

  • 2 filet mignon steaks (6 oz each)
  • 2 lobster tails
  • 4 tablespoons unsalted butter
  • 3 cloves garlic, minced
  • Salt and pepper to taste
  • Fresh parsley, chopped (for garnish)
  • Olive oil (for grilling)

Directions

  1. Preheat the grill to high heat.
  2. Season the filet mignon generously with salt and pepper.
  3. Split the lobster tails in half lengthwise and season with salt and garlic.
  4. Brush the lobster with melted butter and set aside.
  5. Grill the filet mignon for about 4-5 minutes on each side for medium-rare.
  6. During the last 5 minutes of cooking the steak, place lobster tails meat-side down on the grill.
  7. Cook lobster tails for 4-5 minutes, brushing with garlic butter.
  8. Remove steak from grill; let rest for 5 minutes before serving.
  9. Serve the filet mignon with grilled lobster tails, garnished with fresh parsley.

Recipe Notes

  • For a more intense flavor, marinate filet mignon in garlic and herbs a few hours before grilling.
  • Feel free to customize the sides based on your preference for a complete meal.
  • Ingredient substitutions can include shrimp or chicken for variation.

Indulge in Steak with Creamy Peppercorn Sauce and Fries

Steak with Creamy Peppercorn Sauce and Fries: A Luxurious Dinner Delight

⚖️
Difficulty
Medium

⏲️
Prep Time
15 mins

🕒
Cook Time
25 mins

⏱️
Total Time
40 mins

🍽️
Servings
4

Steak with Creamy Peppercorn Sauce is not just a meal; it’s an experience that tantalizes your palate. The rich, buttery sauce with its peppery nuances transforms a simply grilled steak into a gourmet dish. As you take your first bite, the savory warmth of the steak coupled with the creamy, aromatic sauce creates a luxurious symphony of flavors. Paired with perfectly cooked fries, this dish offers a delightful contrast between protein and carbs, ensuring every diner walks away satisfied.

Imagine the mouthwatering aroma wafting through your kitchen as the steak sizzles, coaxing your senses into anticipation. The visual allure of a well-seared steak drizzled with a velvety peppercorn sauce invites anyone to the table. Ultimately, this recipe is perfect for those special occasions or an indulgent weeknight treat, making it a timeless classic in any culinary repertoire.

Quick Recipe Highlights

  • Flavor Profile: A delightful blend of savory, creamy, and slightly spicy from the peppercorns.
  • Texture: The steak is juicy and tender, while the sauce is smooth and luscious, complemented by crispy fries.
  • Aroma: Inviting notes of garlic, butter, and fresh pepper excite the senses.
  • Visual Appeal: Beautifully seared steak topped with a rich sauce served alongside golden, crispy fries.
  • Skill Level Needed: A basic understanding of steak cooking techniques and sauce preparation is required.
  • Special Equipment: A heavy skillet or cast-iron pan for optimal searing.

Recipe Overview

  • Difficulty Level: This meal falls into the medium category due to the need for precise cooking times and sauce preparation skills.
  • Category: Perfect for dinner or special occasions, this dish embodies the essence of sumptuous home-cooked meals.
  • Cuisine: Drawing inspiration from classic French cuisine, this dish showcases a sophisticated approach to steak and sauces.
  • Cost: Expect a reasonable price point based on steak cuts and ingredients, making it accessible for a home-cooked gourmet dinner.
  • Season: Ideal for any season, this hearty dish warms up cool evenings, while it encourages social gatherings.
  • Occasion: Wonderful for date nights, holiday dinners, and celebratory occasions where impressive dishes are called for.

Why You’ll Love This Recipe

This Steak with Creamy Peppercorn Sauce recipe will captivate your taste buds with its harmonious blend of flavors and textures. The peppercorn sauce complements the rich taste of the steak, creating a bold yet balanced dish that feels indulgent and satisfying. With the added texture of the crispy fries, every bite is a delightful experience that keeps you coming back for more.

In terms of convenience, this recipe is straightforward and quicker than you might think. The steps are clearly laid out, making it accessible for both novice cooks and seasoned chefs alike. The beauty of this dish is its ability to elevate a simple dinner at home into a restaurant-quality experience, impressing your guests without overwhelming you in the kitchen.

Nutritionally, steak provides a robust source of protein, which is essential for muscle repair and overall health. When prepared with fresh ingredients and paired with wholesome sides, this dish can fit nicely into a balanced diet. The creamy peppercorn sauce, made with high-quality dairy, offers a delightful touch without straying too far from a nutritious profile.

Socially, sharing a beautifully plated steak with creamy peppercorn sauce and fries can enhance any dining experience. It fosters conversation and connection as everyone gathers around the table, enjoying good food and great company. This meal is perfect for celebrating milestones or simply enjoying a relaxing evening with family and friends.

Lastly, the cost-effectiveness of this recipe assures that indulging in a fabulous meal doesn’t have to break the bank. The ingredients are commonly found, and when selected carefully, can yield a great return on your investment in flavor and satisfaction, making it a go-to for home cooks seeking to impress.

Historical Background and Cultural Significance

The origins of steak with creamy peppercorn sauce can be traced back to classic French cooking, where sauces often elevate the main ingredient to new heights. Traditionally, steak dishes have been a staple in French cuisine, reflecting the country’s rich culinary traditions and techniques that emphasize the harmony between flavors and textures.

In many cultures, steak represents luxury and celebration. For numerous families, indulging in a well-cooked steak is a way to commemorate special occasions, reinforcing its cultural importance as a dish associated with gatherings and significant life events. The creaminess of the sauce adds an elegant touch, making it suitable for fine dining as well as cozy family dinners.

Over the years, this recipe has evolved, adapting to the preferences and ingredients available in various regions. Modern interpretations may include variations of the sauce or alternative cooking methods, which allow the classic dish to remain relevant while catering to contemporary tastes and dietary needs.

Regional variations also exist, with different countries adding their twist to the classic recipe. For instance, some may incorporate local herbs or spices, infusing the dish with unique flavors that represent their culinary heritage and make each version special in its own right.

Ingredient Deep Dive

Steak
Steak is a quintessential dish in many cultures and its history runs deep, often symbolizing celebration and abundance. Historically, high-quality cuts were reserved for special occasions, making them a mark of status. Nutritionally, steak is packed with protein, essential for muscle repair, and provides significant amounts of iron, which plays a crucial role in energy production.

When selecting steak, opt for cuts that exhibit marbling for enhanced flavor and tenderness. Aged steak can also offer a deeper, more complex taste profile. Store steak in the fridge for up to 3-5 days; it should remain vacuum-sealed or tightly wrapped in plastic. For substitutions, consider turkey or chicken for a lighter protein option, or try plant-based alternatives like tofu for a vegetarian meal.

Creamy Peppercorn Sauce
The tradition of utilizing peppercorns in sauces can be traced back to several European cuisines, enhancing various meats with its sharpness. This sauce is cherished for its ability to elevate dishes with depth and warmth. The base of the sauce, often made with heavy cream, brings richness and complements the spice of the peppercorns, contributing to a decadent flavor profile.

When preparing this sauce, fresh peppercorns are preferred for their robust flavor. Remember to store the sauce in an airtight container in the refrigerator, where it can last for about a week. If you need an alternative, consider using a white sauce or béchamel with added spices like mustard or smoked paprika for variation.

Common Mistakes to Avoid

  • Choosing the wrong cut of steak: Opt for a cut with enough marbling for tenderness; lean cuts can be tough when overcooked.
  • Overcooking the steak: Using a meat thermometer ensures perfect doneness and avoids turning meat into dry, chewy steak.
  • Rushing the sauce: Allow the sauce to thicken properly; this requires patience for the best flavor and consistency.
  • Not seasoning the steak in advance: A good marinade or seasoning mix enhances flavor; don’t skip this step!
  • Using too high heat initially: Start on high to sear and then lower the heat to finish cooking for a perfect crust and juicy interior.
  • Neglecting to rest the meat: Resting allows juices to redistribute, which leads to a juicier final product.
  • Not tasting as you go: Adjust the seasoning gradually; flavors evolve throughout cooking.
  • Forgetting about side dishes: Both steak and fries should be served hot—time your sides to finish simultaneously for optimal temperature.

Essential Techniques

For optimal results, mastering the technique of searing the steak is crucial. Searing enhances caramelization, providing a rich crust that enhances the overall flavor. Begin by heating a heavy skillet until hot, adding oil just before the steak to avoid burning. Look for deep browning and flip only once for best results.

Creating a creamy sauce requires an understanding of emulsification. By gradually whisking in heavy cream and ensuring the mixture simmers gently, you’ll achieve a rich, smooth texture without breaking the sauce. Avoid boiling it too vigorously as this can lead to separation or a curdled appearance.

Pro Tips for Perfect Steak with Creamy Peppercorn Sauce

Choosing the right cut of steak is essential; opt for ribeye or filet mignon for tenderness and flavor. Bring your steak to room temperature before cooking for more even cooking. Use a cast-iron skillet for improved heat retention and searing quality.

Don’t rush the resting phase after cooking; allow the steak to sit for at least 5-10 minutes to enhance juiciness. For the sauce, fresh peppercorns create a more vibrant flavor—don’t be afraid to adjust the quantity to match your spice preference.

Always taste and adjust the seasoning for your sauce before serving; a little extra salt or acidity can elevate the dish. Finally, ensure to serve the dish hot and freshly plated for an impressive presentation.

Variations and Adaptations

Regional variations of steak and peppercorn sauce can add unique twists to the classic recipe. For example, using local herbs like chimichurri can infuse the dish with fresh, vibrant flavors that suit various palates. Seasonal adaptations may include incorporating fresh vegetables as sides or seasonal sauces that complement the main ingredients well.

Dietary modifications can also be embraced, such as using an alternative cream base like cashew cream or coconut cream for a dairy-free option. For flavor variations, consider incorporating spices like smoked paprika or garlic powder for added depth. With texture modifications, try serving with sweet potato fries for a healthier twist or grilling the steak to impart a smoky flavor.

When it comes to presentation, garnishing with fresh herbs like parsley or thyme not only enhances the visual appeal but also adds an aromatic touch. You can also serve the dish on a wooden board for a rustic look or arrange the fries in a cone for a fun, appealing design.

Serving and Presentation Guide

Plating your Steak with Creamy Peppercorn Sauce beautifully enhances the dining experience. Start by placing the steak at the center of the plate, crowning it with a generous drizzle of creamy sauce. For garnishing, sprinkle chopped fresh herbs such as parsley or chives for a burst of color and flavor.

Consider using a large, shallow bowl to create depth; add the fries artfully on the side or beneath the steak to maintain the visual height. Traditional accompaniments like a light salad of arugula and cherry tomatoes can provide freshness, creating a balanced plate with a variety of colors.

Serve the dish at the right temperature—warm steak is key to retaining its juiciness. Portion control is important; aim to serve around a 6-8 ounce steak portion per person, with a similar serving of fries to maintain a well-rounded meal.

Wine and Beverage Pairing

When it comes to pairing wine with steak in a creamy peppercorn sauce, a bold red wine is the way to go. Consider a full-bodied Cabernet Sauvignon which complements the richness of the steak and sauce, enhancing its flavors.

If you’re looking for non-alcoholic alternatives, a sparkling grape juice or a well-crafted mocktail can serve as refreshing companions. For those interested in coffee pairings, a rich, dark roast brewed as an espresso can beautifully contrast the flavors of the dish without overpowering them.

Temperature is crucial for all beverages; serve red wine slightly cooler than room temperature, while sparkling drinks should be chilled for a refreshing taste. Consider offering water with lemon as an option to cleanse the palate if guests desire.

Storage and Shelf Life

Storing leftovers properly is key to maintaining the quality of your Steak with Creamy Peppercorn Sauce. Once cooled, place the steak and sauce in airtight containers, ensuring minimal air exposure to prolong freshness. Refrigerated, the dish should last about 3-4 days without significant loss of flavor.

Temperature requirements are essential; ensure your fridge is set below 40°F (4°C) to keep food safe. For container recommendations, opt for glass containers that seal well to avoid leaks and facilitate reheating. Before reheating, inspect the food for any unpleasant odors or changes in texture, as this can indicate spoilage.

Reheating should be done gently; consider using the oven or microwave on a low setting to prevent the steak from becoming tough. If you plan to freeze the dish, do so before adding the creamy sauce, as this may separate when thawed and reheated. Properly stored, the steak can last up to 3 months in the freezer, ensuring that delicious flavors remain intact.

Make Ahead Strategies

If you’re planning to serve Steak with Creamy Peppercorn Sauce for an upcoming event, consider prepping ahead to ease your cooking burden on the day. Marinating the steak a few hours prior or overnight enhances the flavor and tenderness of the meat.

You can also prepare the creamy peppercorn sauce in advance; simply warm it up before serving to maintain its consistency. Store the sauce in the fridge, where it can last up to a week. For garnishes such as chopped herbs or bacon bits, prepare them ahead of time to streamline the serving process.

Assess the quality impact of preparing the dish a day ahead—sometimes, flavors develop more fully when allowed to meld. However, be cautious; avoid cooking the steak too far in advance as it could compromise its texture.

Lastly, consider reheating guidelines: gently warm the steak to restore its temperature without overcooking, and add fresh elements, like a sprinkle of chopped herbs or freshly cracked pepper, just before serving for that fresh touch.

Scaling Instructions

When scaling the Steak with Creamy Peppercorn Sauce recipe for a larger gathering, be mindful of the ingredients’ proportions. Halving the recipe is straightforward; simply divide the quantity of each ingredient accordingly while keeping the cooking times similar since they remain the same for smaller portions.

Doubling or tripling requires attention to the size of your cooking equipment; ensure you have a large enough skillet to sear multiple steaks simultaneously without overcrowding, which can lead to uneven cooking. Adjust your timing slightly for larger batches; monitoring the internal temperature of the steaks remains critical.

Storing considerations should also be taken into account; you may need multiple containers if storing leftovers. Keeping flavor profiles in mind, the creamy sauce may need a little extra whisking after scaling to achieve consistent thickness and flavor.

Always taste as you go when scaling recipes; slight differences can arise based on ingredient variances or cooking techniques, and adjusting spices or flavors on the fly can help maintain flavor integrity.

Nutritional Deep Dive

Analyzing the nutrition in Steak with Creamy Peppercorn Sauce reveals essential components that contribute to a wholesome diet. The main ingredient, steak, is an excellent source of protein, containing essential amino acids that support muscle growth and restoration. A typical portion may contain around 25-30 grams of protein, catering to the dietary needs of active individuals.

Macro breakdown shows the presence of healthy fats, especially when using grass-fed beef, providing beneficial omega-3 fatty acids. The creamy peppercorn sauce, while rich, adds some carbohydrates through cream, offering a quick energy boost. However, mindful consumption is encouraged to balance out total calorie intake.

Micronutritional advantages shouldn’t be overlooked; steak and the accompanying sauce will typically offer notable amounts of vitamins and minerals, including iron, zinc, and B vitamins which play significant roles in oxygen transport and energy production. Be sure to account for overall dietary balances, mindful of portion sizes when enjoying this indulgent preparation.

Dietary Adaptations

Various dietary adaptations exist to ensure the Steak with Creamy Peppercorn Sauce recipe caters to everyone’s needs. For a gluten-free version, simply ensure all sauces and seasoning blends are free of gluten-laden ingredients. Most steaks naturally fit into this category without modification.

Dairy-free adaptations can be achieved by substituting heavy cream with coconut cream or a non-dairy heavy cream alternative. These options maintain the richness while ensuring a delicious, creamy texture without lactose. For vegan selections, consider using grilled portobello mushrooms as a substitute for steak, combined with a cashew-based peppercorn sauce.

Low-carb enthusiasts might swap fries for a cauliflower mash, providing a satisfying alternative without the extra carbs. Similarly, keto followers can enjoy this delightful meal without worrying about exceeding their carb limits.

When it comes to low-FODMAP diets, modifying the creamy sauce by omitting garlic or using garlic-infused oil provides flavor without disrupting gut health, ensuring all diners can relish this sumptuous dish.

Troubleshooting Guide

If you encounter texture issues with your steak, perhaps it turned out tough or chewy. Ensure the meat is cooked to the appropriate temperature, and always allow it to rest post-cooking. If overcooked, consider slicing it thinly against the grain to improve mouthfeel.

In cases of flavor balance problems, if the sauce is too salty or bland, gradually adjust it by adding more cream or a pinch of sugar to balance the flavors. If using fresh pepper, be cautious with quantity; it’s easier to add than to fix an overly peppery sauce.

Temperature problems often arise if the steak cools too fast; be sure to serve it immediately after cooking or use a warming tray. For equipment challenges, if a skillet isn’t available, a grill works well for perfecting the steak; just keep an eye on the cooking time.

Ingredient substitutions might not always yield the same results; if unable to use heavy cream, a thick coconut milk can surpass expectations while preserving a creamy texture.

Timing concerns arise often when preparing multiple dishes; ensure to stagger cooking times to allow everything to finish and be served hot. This probably requires planning or help in the kitchen to maintain organization.

Recipe Success Stories

Community feedback often highlights the ease and elegance associated with this Steak with Creamy Peppercorn Sauce recipe. Many readers have shared their adaptation experiences, praising the guidance and flavor balance, noting it was the star dish of their celebrations.

Variations, such as mushroom steak or using a different sauce base, have led to successful outcomes, encouraging others to experiment with their versions while enjoying the delicious core elements of this dish. Readers have found joy in utilizing fresh herbs and local ingredients to enhance their experience while following the recipe.

Photographic successes have flooded social media, showcasing beautifully plated dishes that encourage viewer interaction and engagement. The appeal of well-cooked steak with a velvety peppercorn sauce has inspired many to join the meal-prepping movement, with the recipe serving as a frequent go-to for gatherings.

Overall, the story of this recipe highlights how a simple approach to steak can lead to unforgettable experiences, bringing friends and family together to enjoy a rich, delightful meal that truly leaves a lasting impression.

Frequently Asked Questions

1. Can I use frozen steak for this recipe?
Yes, but for best results, thaw the steak in the refrigerator overnight before cooking. This helps maintain texture and flavor while ensuring even cooking.

2. What type of steak is best for creamy peppercorn sauce?
Ribeye or filet mignon are excellent choices due to their tenderness and flavor. Sirloin can also work well if you prefer a leaner cut.

3. Can I prepare the creamy sauce ahead of time?
Absolutely! You can prepare the sauce in advance and store it in the refrigerator, rewarming it when ready to serve. This makes meal prep easier.

4. What can I substitute for heavy cream?
For a dairy-free version, consider using coconut cream or cashew cream. In a pinch, evaporated milk may also provide a decent consistency.

5. How do I know when the steak is done?
Using a meat thermometer is the best way to ensure perfect doneness—145°F (63°C) for medium-rare, 160°F (71°C) for medium, and 170°F (77°C) for well done.

6. What sides pair well with this dish?
Classic fries, roasted vegetables, or a fresh salad are great companions. Additionally, garlic bread or a creamy mashed potato can enhance the dining experience.

7. Is this recipe suitable for meal prep?
Yes! You can prep all components in advance. Store them separately and assemble before serving to maintain texture and flavor.

8. Can I make this recipe gluten-free?
Yes, both the steak and the creamy sauce can be made gluten-free by ensuring all ingredients are certified gluten-free, particularly the broth or seasonings used.

9. How do I store leftovers?
Store leftovers in airtight containers in the fridge for up to 4 days. Make sure to reheat the steak gently to avoid toughness.

10. Can I scale this recipe for a larger group?
Yes, simply increase ingredient amounts according to the number of servings desired, and adjust cooking times and equipment as needed to accommodate larger portions.

Additional Resources

To further explore the culinary world of steak and sauces, check out related recipes that complement the richness of Steak with Creamy Peppercorn Sauce. Technique guides on proper cooking methods for various cuts of meat provide valuable insights for future cooking endeavors.

Digging deeper into ingredient information enhances your knowledge about quality selection for meats and dairy, ensuring you’ll select the best for your dishes. Equipment recommendations can aid in choosing the right tools to bring out the best flavors and textures in your meals.

Seasonal variations of steak recipes can inspire new ways to enjoy this classic dish all year round, utilizing fresh produce and local flavors that change with the seasons.

Join the Conversation

Engage with our culinary community by sharing your own experiences cooking this Steak with Creamy Peppercorn Sauce. We’d love to see your variations and adaptations, so don’t hesitate to post photos on social media.

Share your feedback and recipe reviews to help others discover the joy of this dish. Your insights could inspire innovative twists that further merge traditional and modern cooking styles.

If you have any additional tips or tricks from your own kitchen, join the conversation below! Your contribution can enhance our growing community, making this recipe a beloved staple for enthusiasts everywhere.

The Recipe

Steak with Creamy Peppercorn Sauce

Serves: 4

Prep Time: 15 mins

Cook Time: 25 mins

Total Time: 40 mins

Kitchen Equipment Needed

  • Heavy skillet or cast-iron pan
  • Meat thermometer
  • Whisk
  • Airtight containers for storage

Ingredients

  • 4 (6-8 oz) ribeye steaks
  • 2 tablespoons olive oil
  • 1 cup heavy cream
  • 2 tablespoons whole peppercorns
  • 2 cloves garlic, minced
  • Salt to taste
  • Fresh parsley for garnish
  • Fries, for serving

Directions

  1. Heat the olive oil in a heavy skillet over medium-high heat.
  2. Season the steaks with salt and prepare to add them to the hot skillet.
  3. Sear the steaks for 4-5 minutes on each side for medium-rare.
  4. Remove the steaks from skillet and let them rest on a plate.
  5. In the same skillet, add the garlic and cook until fragrant, about 30 seconds.
  6. Pour in the heavy cream and allow it to simmer gently.
  7. Crush the peppercorns and add them to the sauce; stir to combine.
  8. Simmer the sauce for about 5 minutes until thickened slightly.
  9. Serve the steaks topped with creamy peppercorn sauce and accompany with fries and garnished with parsley.

Recipe Notes

  • Feel free to experiment with different cuts of steak based on your preference.
  • For more depth, consider adding a splash of brandy to the sauce before the cream.
  • If you prefer a milder sauce, reduce the quantity of peppercorns used.