Ultimate Guide to Cooking A5 Wagyu Steak Perfectly

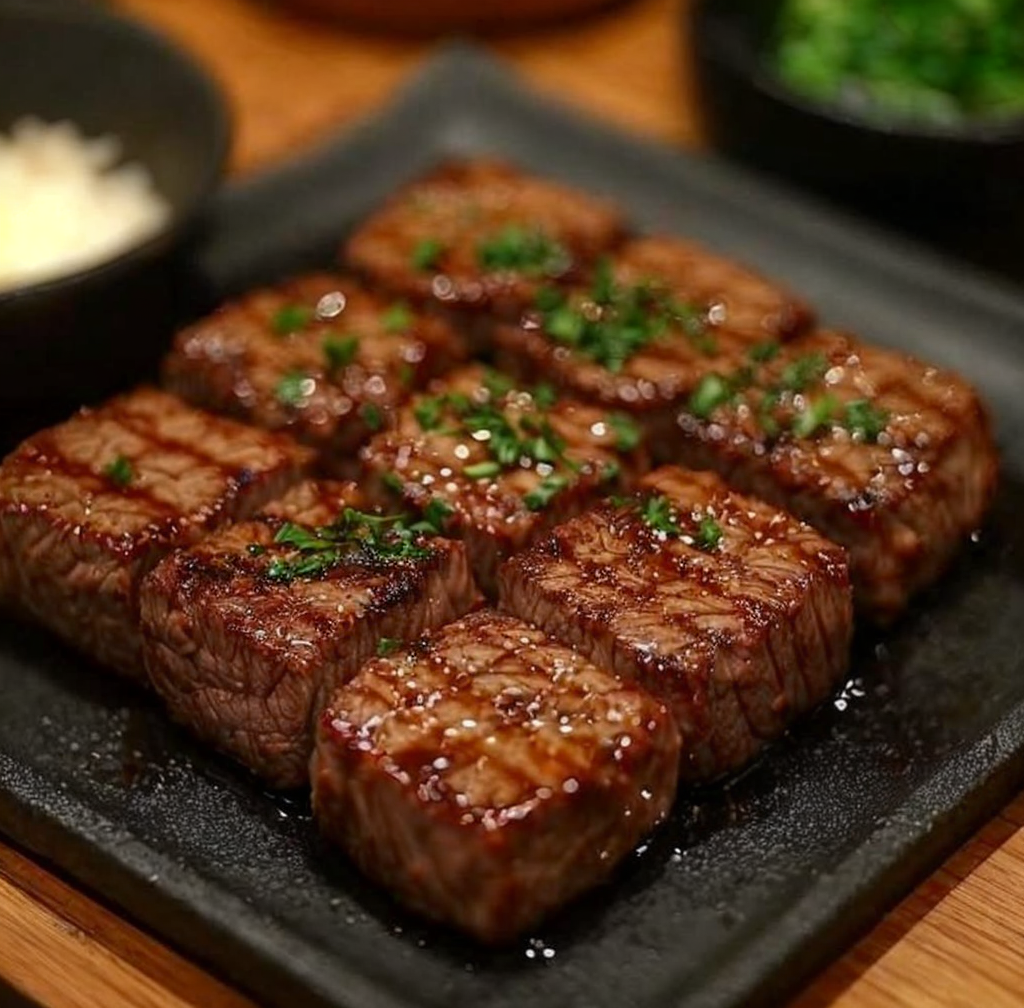
A5 Wagyu Steak: The Ultimate Indulgence in Luxury Dining

⚖️
Difficulty
Moderate

⏲️
Prep Time
15 mins

🕒
Cook Time
10 mins

⏱️
Total Time
25 mins

🍽️
Servings
2

Experience the epitome of luxury with A5 Wagyu Steak, a dish that tantalizes the taste buds and ignites the senses. The marbling in A5 Wagyu boasts high-fat content that brings out a buttery richness in flavor, elevating this steak to a realm only found in the finest steakhouses. With its origins rooted deeply in Japan, this steak is not just a meal; it’s an experience, embodying the art of meticulous farming practices that yield unmatched quality and taste.

As you prepare your A5 Wagyu Steak, you’ll appreciate the irresistible aroma wafting through your kitchen, promising a savory delight. The moment you slice through the rare, perfectly cooked pink interior, you’ll encounter a melt-in-your-mouth texture that transforms your dining table into a gourmet journey. This dish is best served simply, allowing the rich flavors to shine without distraction.

Quick Recipe Highlights

  • Flavor Profile: A5 Wagyu Steak offers an indulgent flavor experience, with a delicate sweetness balanced by a rich umami that lingers pleasantly on the palate.
  • Texture: The outstanding marbling of A5 Wagyu creates a buttery, smooth sensation that melts in your mouth, making every bite a luxurious delight.
  • Aroma: Expect an enticing aroma of grilled savory beef with hints of nuttiness, a result of the unique rearing methods employed to breed Wagyu cattle.
  • Visual Appeal: The vibrant marbled patterns across the steak create an enticing sight, elevating the dish’s presentation on your plate.
  • Skill Level Needed: While cooking a perfect A5 Wagyu Steak requires attention and technique, even novice cooks can achieve impressive results with patience and practice.
  • Special Equipment: A high-quality cast-iron skillet or grill is essential for attaining the optimal sear and flavor extraction of the Wagyu fat.

Recipe Overview

  • Difficulty Level: Cooking A5 Wagyu Steak is moderate in difficulty due to the need for precise temperature control and timing, yet it can be learned with a little practice.
  • Category: This recipe fits under the category of gourmet meats, ideal for special occasions and fine dining experiences.
  • Cuisine: The influence of Japanese culinary traditions is evident in the finesse of preparing A5 Wagyu, reflecting a culture that values quality ingredients and aesthetics.
  • Cost: A5 Wagyu can be on the pricier side due to its gourmet status, typically costing between $100 to $300 per pound, reflecting its premium quality.
  • Season: Enjoy A5 Wagyu year-round, but it’s particularly fitting for celebrations and special gatherings that call for an extra touch of indulgence.
  • Occasion: Ideal for anniversaries, romantic dinners, or any holiday, serving A5 Wagyu is a gesture that conveys thoughtfulness and appreciation.

Why You’ll Love This Recipe

The taste and texture appeal of A5 Wagyu Steak is unrivaled. Each succulent bite offers an exceptional presentation of flavor, giving you a taste experience that is luxurious and satisfying. The umami richness paired with the tender, melt-in-your-mouth texture makes this steak a true delicacy.

Convenience and preparation benefits make A5 Wagyu an attractive option for those who desire a high-end meal without extensive culinary expertise. With only a few steps—sourcing quality meat and cooking it to perfection—you can achieve restaurant-level results in your own kitchen.

Nutritionally, this choice offers a premium source of protein while being a treat that’s appreciated in moderation. The fat content in A5 Wagyu provides omega-3 fatty acids, which are beneficial for heart health and can aid in overall well-being, balancing indulgence with nutrition.

Socially, serving A5 Wagyu engages your guests, sparks conversation, and offers a shared experience that elevates any occasion. As friends or family savor each bite, the shared delight turns your meal into an event to remember.

Cost-effectiveness may sound counterintuitive given the price tag, but considering this steak’s uniqueness and the quality of experience provided, it becomes an investment in culinary artistry. When entertaining, offering something as exclusive as A5 Wagyu creates lasting impressions without needing to prepare complex dishes.

Historical Background and Cultural Significance

A5 Wagyu Steak traces its roots back to Japan, where it is derived from specific cattle breeds, known for their genetic predisposition to intense marbling. This legacy begins with farmers who raised these cattle under strict conditions that enhanced their characteristics, often massaged and fed special diets to enrich flavor and texture.

Culturally, Wagyu represents the pinnacle of Japan’s culinary pride, synonymous with luxury dining. The reverence for Wagyu is echoed in the meticulous care involved in its production, showcasing a commitment to quality that resonates with Japanese cuisine’s core values—harmony and respect for ingredients.

The evolution of this recipe reflects changes in dining trends and the growing global appreciation for fine foods. As people discover the pleasure of gourmet meats, A5 Wagyu has made its way into mainstream culinary experiences, becoming a sought-after dish in high-end restaurants around the world.

Regional variations of Wagyu also exist, adapting to local flavors and cooking styles, allowing the richness of A5 to shine through various culinary lenses, from traditional Japanese methods to modern gastronomic interpretations.

Ingredient Deep Dive

Wagyu beef is a central ingredient in this recipe, historically significant in its production and cultural context. Rich in healthy fats, Wagyu beef is highly marbled, delivering flavor and tenderness that sets it apart from conventional beef. When selecting Wagyu, look for A5 grade to ensure the highest quality, as indicated by its impressive marbling and texture.

Next is salt, a simple yet crucial ingredient that enhances flavor. Opt for coarse sea salt or kosher salt for even seasoning. Store salt in a cool, dry place to maintain its potency and substitute with specialty salts, if desired, for additional flavor notes.

Finally, fresh herbs such as rosemary or thyme can be used to enhance aroma and elevate the dish. Choose vibrant herbs, and store them in the refrigerator. They can be substituted with dried versions, but fresh herbs offer a more intense flavor.

Common Mistakes to Avoid

  • Not resting the steak: Allowing the A5 Wagyu to rest after cooking is essential for keeping it juicy and flavorful. Cutting into it immediately lets the juices escape, leading to a dry result.
  • Overcooking: A5 Wagyu is best served rare to medium-rare. Overcooking destroys its revered texture and flavor. Use a meat thermometer to ensure accurate cooking temperatures.
  • Skipping seasoning: Don’t overlook the importance of seasoning your steak. A simple sprinkle of salt prior to cooking enhances the natural flavors of the meat.
  • Using the wrong cooking method: A high-quality cast-iron skillet or grill is crucial for achieving the right sear without drying out the steak.
  • Not letting the steak acclimate: Allow your A5 Wagyu to come to room temperature before cooking. Cold steak won’t sear properly, impacting texture and flavor.
  • Neglecting to cut against the grain: Slice the steak against the grain to maximize tenderness. Cutting with the grain can lead to chewier bites.
  • Rushing the process: Good things take time. Let the steak rest and the flavors develop during the cooking process for a truly indulgent experience.
  • Ignoring personal taste preferences: Everyone’s ideal steak doneness may vary. Be attentive to your and your guests’ preferences when cooking.

Essential Techniques

Searing the steak is crucial as it caramelizes the meat’s surface, enhancing flavor and creating a delicious crust. Master the technique by preheating your skillet or grill thoroughly before adding the steak, ensuring the fat renders beautifully. Watch for visual cues like a rich golden-brown color to know when it’s time to flip.

Resting the steak is essential to preserving moisture and enhancing flavor. After cooking, let the steak rest for at least 5-10 minutes covered loosely with foil. This allows the juices to redistribute, resulting in a more succulent bite.

Pro Tips for Perfect A5 Wagyu Steak

Select only the best quality A5 Wagyu from reputable suppliers; this ensures an authentic and satisfying experience. Check for a marbling score of A5 for the utmost tenderness and flavor.

Season generously with coarse sea salt just before cooking to draw out the natural flavors while enhancing the meat’s richness. Combining salt with a touch of cracked pepper can elevate the taste.

Use high smoke point oils sparingly for cooking, such as grapeseed or avocado oil, which complement the steak without overwhelming its natural flavors during the searing process.

Cook with a meat thermometer to ensure precise doneness; aim for 120-125°F for a perfect rare steak. Remove it from the heat slightly before reaching this point, as it will continue to cook while resting.

Take care to slice your steak correctly after resting, cutting against the grain to retain tenderness in each bite. A sharp knife will help achieve clean, perfect slices.

Experiment with garnishing your A5 Wagyu Steak with a light drizzle of truffle oil or a sprinkle of fleur de sel to accentuate the inherent flavors further.

Variations and Adaptations

Regional variations of A5 Wagyu could include different marinades or spice blends, influenced by local traditions. For instance, using a yuzu marinade can add a citrusy twist to the steak that celebrates Japanese influence.

Seasonal adaptations might involve adding fresh herbs or a summer fruit glaze to bring seasonal flavor profiles to your dish. Grilled peaches or apricots can complement the richness of the beef perfectly.

Dietary modifications can be made by offering sides that cater to specific diets, such as cauliflower mash in place of traditional mashed potatoes, providing a lower-carb option.

Explore texture variations by using different cooking methods, like sous-vide, which can achieve perfectly cooked meat with a different mouthfeel while preserving the juiciness of the steak.

Presentation alternatives can vary from beautifully plated sides to rustic serving on a wooden board. Add vibrant greens like arugula or microgreens to elevate visual appeal.

Serving and Presentation Guide

Plating A5 Wagyu Steak should be an art form. Use warm plates to maintain temperature, and consider serving the steak sliced, displaying the enticing pink interior. Garnish with fresh herbs or edible flowers for visual contrast and a gourmet touch.

Garnishing ideas can range from a light drizzle of high-quality olive oil to a sprinkle of flaky sea salt, enhancing the natural flavors while adding elegance.

Traditional accompaniments include creamy mashed potatoes or seasonal vegetables sautéed in garlic. These sides allow the richness of the beef to shine while providing balance.

Modern serving suggestions add a twist by introducing unique elements, like a charred corn salsa or a vibrant chimichurri, bringing freshness that complements the steak seamlessly.

Temperature considerations are crucial; serve your A5 Wagyu Steak at medium-rare to rare to showcase its luxurious qualities fully.

Maintain proper portion control; serving about 4-6 ounces of A5 Wagyu per person, paired with appropriate sides, ensures a balanced meal.

Wine and Beverage Pairing

For wine pairings, consider full-bodied red wines like Cabernet Sauvignon, whose bold flavors complement the richness of A5 Wagyu while cutting through its fatty textures. A Pinot Noir also pairs beautifully, offering a softer alternative without overpowering the meat.

Non-alcoholic alternatives, such as sparkling water infused with citrus, can refresh the palate without overshadowing the steak’s flavors, making it ideal for non-drinkers.

Coffee or tea pairings could include a strong, rich coffee that balances the steak’s heaviness or a smooth black tea that offers a counterpoint without added sweetness.

Temperature considerations for your wine should be noted; serve reds slightly below room temperature for optimal taste, while sparkling water should be chilled to refresh the palate.

Offering serving suggestions for these beverages can enhance your dining experience—consider decanting your wine to elevate its aromas and flavors before serving alongside the meal.

Storage and Shelf Life

Store your leftover A5 Wagyu Steak properly in an airtight container in the refrigerator if not consumed immediately. It should stay fresh for 2 to 3 days, retaining its flavor and quality with careful handling.

For longer storage, vacuum-sealing the steak can extend its shelf life. Keep the sealed portions in the freezer, where they can be stored for up to 6 months without losing quality.

Signs of spoilage include an off smell or a dull, grey color, indicating that the meat is no longer fresh. Always use your best judgment when consuming or reheating leftovers.

When reheating, do so gently; use an oven set to low temperatures—around 250°F—to retain moisture without overcooking the meat.

Freezing guidelines ensure the best results when defrosting; always do so in the refrigerator overnight for gradual thawing to maintain optimal texture.

Make Ahead Strategies

Prep timelines can be enhanced by marinating the steak several hours before cooking, allowing flavors to penetrate. Marinades using soy sauce, garlic, or ginger bring out a deeper flavor profile.

Storage between steps involves keeping prepped ingredients like sides in the fridge or even par-cooking veggies to save time on serving day, allowing for a quick assembly when you are ready to feast.

Assessing the quality impact of preparing in advance is vital; generally, marinating or seasoning ahead can enhance flavors significantly, while pre-cooked elements should be reheated gently to keep quality intact.

Assembly tips involve arranging your beautiful sides and portions of steak on the plate, prioritizing aesthetics and encouraging diners to indulge visually and gastronomically simultaneously.

When reheating, be mindful of adding fresh herbs or toppings just before serving to maintain vibrancy; this fresh touch can amplify the dish’s appeal upon serving.

Scaling Instructions

Halving the recipe involves simply adjusting ingredient quantities, ensuring cooking time is still managed for best results. Again, ensuring all portions remain even for a uniform cooking experience is important.

For doubling or tripling the recipe, consider the cook surface area; larger portions may require batch cooking to avoid overcrowding, which disrupts proper searing and flavor development.

Equipment adjustments are essential as you scale; using larger pans or multiple pans for cooking may be necessary for larger gatherings.

Timing modifications are crucial; consider using a meat thermometer across varying quantities, ensuring they hit target temperatures across multiple steaks for consistency.

When considering storage for larger recipes, ensure all portions are accounted for in individual servings to maximize freshness upon consumption post-event.

Nutritional Deep Dive

The macro breakdown of A5 Wagyu reveals high levels of protein alongside significant fat content, distinguishing it as a calorie-dense food, but one that provides a satisfying source of energy.

Micronutrient analysis of A5 Wagyu typically shows iron and vitamin B12 concentrations, essential for maintaining good health and preventing deficiencies in a balanced diet.

While indulging in A5 Wagyu, consider the health benefits derived from its omega-3 fatty acids, which can help reduce the risk of certain chronic diseases when consumed appropriately.

Dietary considerations should center around moderation; due to its richness, enjoying A5 Wagyu occasionally is recommended for maintaining a balanced intake of nutrients without excess fat.

Portion analysis reveals that even small servings of A5 Wagyu can lead to satisfaction due to its intense flavor and quality, making it a good example of enjoying less for more.

Weight management tips suggest incorporating A5 Wagyu into a balanced meal alongside vegetables and grains, facilitating a complete, nutritious dining experience while indulging.

Dietary Adaptations

For gluten-free adaptations, ensure no soy products that contain gluten are included in marinades, and opt for gluten-free seasoning blends to enhance steak flavor.

Dairy-free needs can cater to those avoiding dairy by focusing purely on herbs and spices for flavor, steering clear of any butter used in sauces or sides.

Vegan adaptations might instead focus on plant-based meals that capture the essence of A5 Wagyu’s rich flavors, through umami-rich ingredients like mushrooms or miso combined with grains and vegetables.

Low-carb meals can integrate A5 Wagyu efficiently by pairing it with non-starchy vegetables, enriching the meal while keeping carb counts minimal.

Keto variations can leverage the high-fat content, which provides a great fit for those following this dietary path, showcasing Wagyu alongside healthy fats and low-carb vegetables.

Paleo enthusiasts would find A5 Wagyu a perfect match, aligning with dietary principles focused on pure, unprocessed foods and high-quality proteins.

Low-FODMAP adaptations should emphasis the selection of herbs and sauces that are gentle on digestion, avoiding any high-FODMAP additions that might trigger discomfort.

Troubleshooting Guide

Texture issues often stem from overcooking A5 Wagyu. If steak turns tough or chewy, reassess the cooking method and ensure a thermometer is being used for accuracy to prevent this.

Flavor balance can be compromised if the steak lacks seasoning. If the flavor seems flat, consider incorporating more salt or finish with a dash of soy sauce or rich stock for depth.

Temperature problems may arise if the skillet is not properly heated before cooking. Ensure maximum heat during the initial cooking phase for a proper sear, allowing for optimal flavors to develop.

Equipment challenges could come from the inability to maintain high heat; ensure your skillet or grill material can withstand high temperatures, substituting with cast iron if necessary for best results.

Ingredient substitutions gone wrong—such as using inferior-quality meats—can negatively affect the final dish. Always source A5 Wagyu from reputable suppliers for the ideal outcome.

Timing concerns can occur when people are not aware that resting the meat is paramount. Advise on the necessity of resting post-cooking, which is vital for preserving moisture and flavor.

Recipe Success Stories

Community feedback often highlights the transformative experience of preparing A5 Wagyu Steak, with many sharing their own take on recipes and adaptations, reinforcing the idea that even the same cut of meat can yield personal interpretations.

Variation successes showcase how readers have experimented with different marinades or sides, leading to unique results that emphasize the versatility of this luxurious protein.

Adaptation stories reveal the excitement of hosting gatherings where A5 Wagyu becomes the centerpiece, creating memorable dining experiences that visitors rave about long after the meal.

Readers often suggest pairings they’ve found success with, opening avenues for new flavors that can enhance A5 Wagyu without overshadowing its fine quality.

Photography tips shared among the community offer insight into capturing the beauty of the dish, encouraging aspiring cooks to document their culinary achievements and share the joy of A5 Wagyu with others.

Frequently Asked Questions

What is A5 Wagyu?

A5 Wagyu is the highest grading of Wagyu beef, known for its exceptional marbling, tenderness, and flavor. The ‘A’ refers to yield grade, while ‘5’ denotes a high level of marbling and quality.

How should A5 Wagyu be cooked?

The best way to cook A5 Wagyu is to sear it quickly over high heat to develop a crust, while maintaining a rare or medium-rare center. This preserves its tenderness and enhances its rich flavors.

Can A5 Wagyu be grilled?

Yes, A5 Wagyu can be grilled. Ensure the grill is preheated thoroughly to achieve a good sear while maintaining the steak’s juiciness. A high-heat grill helps render the fat effectively.

Is A5 Wagyu healthy?

While A5 Wagyu is rich in fat and calories, it contains healthy omega-3 and omega-6 fatty acids. Enjoy it in moderation as part of a balanced diet to reap the benefits without excessive caloric intake.

Where can I buy A5 Wagyu?

A5 Wagyu can be purchased from specialty butchers, gourmet grocery stores, or online retailers that specialize in high-quality meat. Verify the source to ensure authenticity.

How do you store leftover A5 Wagyu?

Store leftover A5 Wagyu in an airtight container in the refrigerator for up to three days. To extend freshness, consider vacuum-sealing and freezing it for later enjoyment.

What sides pair best with A5 Wagyu?

Traditional sides like creamy mashed potatoes or roasted seasonal vegetables complement A5 Wagyu beautifully, providing balance to its rich flavors. Alternatively, fresh salads can introduce a refreshing contrast.

Can A5 Wagyu be used in recipes other than steak?

A5 Wagyu offers versatility and can also be used in dishes like stir-fries or as a topping for gourmet burgers, though many prefer to enjoy it simply to appreciate its quality.

How long does A5 Wagyu take to cook?

Cooking time for A5 Wagyu varies based on thickness. Generally, a steak will take about 10 minutes to reach medium-rare after searing, depending on size and starting temperature.

What’s the best way to slice A5 Wagyu?

Slice A5 Wagyu steak against the grain for maximum tenderness. This technique breaks up the muscle fibers, making every bite melt in your mouth.

Additional Resources

Explore related recipes such as gourmet sides or sauce pairings that complement A5 Wagyu Steak, enhancing your dining experience with perfect accompaniments.

Consider technique guides that delve into methods for searing, seasoning, or smoking meats, equipping you with the knowledge to elevate future meals.

Ingredient information resources can provide in-depth insights into sourcing high-quality Wagyu beef, helping you recognize authenticity and quality when shopping.

Equipment recommendations can highlight the best cookware to achieve premium results, ensuring that you have the right tools to prepare and serve A5 Wagyu successfully.

Stay tuned for seasonal variations, which can inspire you to adapt dishes throughout the year, incorporating fresh, in-season produce to change your A5 Wagyu experience.

Join the Conversation

Engage with us on social media to share your A5 Wagyu Steak experiences, modifications, and photos. We love seeing how you embrace this luxurious cut in your kitchen!

Photography tips for capturing the beauty of your A5 Wagyu Steak can help you present your dishes to impress. Utilize natural lighting and focus on details to enhance visual appeal in your posts.

Provide and review your personal success with A5 Wagyu, offering insights and suggestions for future indulgence. Your feedback can help others navigate their cooking journeys.

Community engagement through sharing tricks and tips contributes to a rich tapestry of culinary knowledge, empowering others to savor the joy of cooking and dining with A5 Wagyu.

With your variations and innovations, you can help us celebrate the delightful adaptations and presentations of A5 Wagyu everywhere. Join in, and let’s explore gourmet dining together!

The Recipe

A5 Wagyu Steak

Serves: 2

Prep Time: 15 mins

Cook Time: 10 mins

Total Time: 25 mins

Kitchen Equipment Needed

  • Cast iron skillet or grill
  • Sharp knife
  • Meat thermometer
  • Cutting board

Ingredients

  • 2 A5 Wagyu steaks (about 8 oz each)
  • Coarse sea salt, to taste
  • Freshly cracked black pepper, to taste
  • Oil with a high smoke point (such as grapeseed or avocado)
  • Fresh herbs for garnish (optional)

Directions

  1. Remove the A5 Wagyu steaks from the refrigerator and let them sit at room temperature for about 30 minutes.
  2. Preheat your cast iron skillet over high heat until very hot, then add a small amount of oil, ensuring it covers the bottom evenly.
  3. Season both sides of the steaks generously with coarse sea salt and cracked black pepper.
  4. Carefully place the seasoned steak in the skillet, searing for about 3-4 minutes on each side for a rare finish, or till it reaches your desired doneness.
  5. Use a meat thermometer to check for doneness: aim for 120-125°F for rare, 130-135°F for medium rare.
  6. Remove the steak from the skillet and let it rest on a cutting board covered loosely with foil for 5-10 minutes.
  7. Slice against the grain and serve immediately, garnished with fresh herbs if desired.

Recipe Notes

  • For deeper flavor, consider marinating the steak in a mixture of soy sauce and ginger for a few hours prior to cooking.
  • Experiment with different cooking fats, using butter or flavored oils while basting the steak during cooking for enhanced taste.
  • Pair with seasonal vegetables or a simple salad for a complete meal.

Delicious Fettuccine Alfredo with Chicken, Sundried Tomatoes, and Spinach

Delicious Fettuccine Alfredo with Chicken, Sundried Tomatoes & Spinach: A Creamy Pasta Delight

⚖️
Difficulty
Medium

⏲️
Prep Time
15 mins

🕒
Cook Time
20 mins

⏱️
Total Time
35 mins

🍽️
Servings
4 servings

This Fettuccine Alfredo with Chicken, Sundried Tomatoes, and Spinach is a creamy, delicious dish that promises to warm your heart and satisfy your cravings. With tender chicken pieces nestled among luscious, twirling fettuccine, each bite bursts with flavors complemented by the punchy taste of sun-dried tomatoes and the vibrant color of fresh spinach. The mildly garlicky cream sauce ties everything together, creating a dish that is not only comforting but irresistibly tasty.

Imagine sitting down to a heaping plate of fettuccine alfredo, the rich aroma wafting through the air as you prepare to dig in. The sauce glistens with creamy goodness, while the vibrant pops of green from the spinach and the rich, earthy tones of the tomatoes create an inviting visual appeal. This recipe offers a perfect balance of taste, texture, and convenience, making it a delightful choice for both weeknight dinners and special occasions.

Quick Recipe Highlights

  • Flavor Profile: This dish features a rich and creamy sauce with a hint of garlic, balanced by the vibrant acidity of sundried tomatoes and the freshness of spinach.
  • Texture: The fettuccine provides a perfect base with its thick, soft noodles, while the chicken adds a lovely tenderness, and the sundried tomatoes offer a delightful chew.
  • Aroma: The aroma is a warm blend of fresh garlic, creamy butter, and the savory scent of chicken, enhanced by the sweet notes from the sundried tomatoes.
  • Visual Appeal: The colorful contrast of green spinach, bright red sundried tomatoes, and creamy white sauce makes for a stunning presentation.
  • Skill Level Needed: This dish is considered medium difficulty, making it accessible for home cooks looking to build their culinary skills.
  • Special Equipment: You’ll need a large pot for boiling pasta, a frying pan, and a colander for draining, making this recipe easy to execute with basic kitchen equipment.

Recipe Overview

  • Difficulty Level: Cooking Fettuccine Alfredo with Chicken, Sundried Tomatoes, and Spinach is a medium-level culinary task that requires basic skills like sautéing and boiling but results in an impressive dish.
  • Category: This dish falls under the pasta and comfort food categories, perfectly suited for hearty meals.
  • Cuisine: Originating from Italy, this dish embraces traditional Italian cooking while incorporating local flavors and ingredients, resulting in a fusion that pleases a wide audience.
  • Cost: Ingredients for this dish are relatively affordable, with the main costs coming from the fresh chicken and high-quality pasta, making it budget-friendly.
  • Season: Fettuccine Alfredo can be enjoyed year-round, but its creamy and rich flavors make it particularly comforting during the colder months.
  • Occasion: Ideal for family dinners or casual gatherings, this dish can impress guests without requiring too much time spent in the kitchen.

Why You’ll Love This Recipe

The taste and texture of this Fettuccine Alfredo with Chicken, Sundried Tomatoes, and Spinach are nothing short of spectacular. The silky alfredo sauce cascades over the fettuccine, making each bite a luxurious experience. The tender chicken adds heartiness, while the sundried tomatoes contribute bursts of flavor that elevate the dish. Spinach introduces freshness and a pop of color, making the entire dish not only delicious but also visually appealing.

Convenience is at the heart of this dish. With a total time of just 35 minutes, it’s perfect for busy weeknights when you want something comforting without spending hours cooking. The one-pot preparation allows flavors to meld beautifully, and the straightforward steps make it easy to whip up, whether you are cooking for yourself or a family gathering.

Nutritionally, the chicken provides a good source of protein, while spinach adds vital nutrients like vitamins A and C, and iron. Sundried tomatoes offer dietary fiber and antioxidants, making this dish not only indulgent but healthy as well.

Socially, preparing this Fettuccine Alfredo lends itself well to gatherings. Its creamy richness encourages sharing, and it pairs well with various side dishes and beverages, making it a versatile choice for hosting friends and family.

Lastly, the affordability of the ingredients means you can create a gourmet-style meal at home without breaking the bank. The combination of high-quality pasta, fresh vegetables, and chicken keeps the cost manageable while ensuring you don’t sacrifice flavor or richness.

Historical Background and Cultural Significance

Fettuccine Alfredo originated in Rome during the early 20th century, created by Alfredo di Lelio to cater to his pregnant wife who craved a dish rich in flavor and comfort. The recipe quickly gained popularity among visitors to the restaurant, cementing its status in Italian cuisine. With its creamy texture and decadent flavor, Fettuccine Alfredo became a staple of Italian-American cooking after being popularized in the United States through films and travelers.

Culturally, this dish represents a significant aspect of Italian customs—celebrating family and togetherness through shared meals. It has evolved to include various modifications and ingredients, adapting to regional preferences and personal tastes, but the essence of the dish remains unchanged.

As culinary traditions merge, Fettuccine Alfredo has inspired numerous adaptations—such as the inclusion of grilled chicken or vegetables—reflecting the creativity found in Italian kitchens worldwide. In American cuisine, for instance, the dish is often enhanced with various proteins and can be found on numerous restaurant menus.

Regional variations include the use of different pastas, such as penne or rigatoni, and the introduction of unique ingredients reflecting local flavors. Despite these variations, the core elements of cream, cheese, and pasta remain constant, highlighting the dish’s versatile nature and cultural significance in both Italy and beyond.

Ingredient Deep Dive

– **Fettuccine**: This wide pasta is key to holding the creamy sauce. Traditionally made from flour and egg, it has a rich history in Italian cooking. Fettuccine is a source of carbohydrates and provides energy, and should be cooked al dente for the best texture.
– **Chicken**: Offering a lean protein option, chicken is versatile and can be grilled, baked, or sautéed. Select fresh chicken for the best flavor and texture, and store it properly to avoid spoilage. Substitute with shrimp or tofu for variations.
– **Sundried Tomatoes**: These concentrated bursts of flavor add depth to the dish. Rich in vitamins and minerals, choose packed-in-oil or dry versions, and store in a cool, dark place. Consider rehydrating dry tomatoes before use to enhance their flavor profile.
– **Spinach**: Fresh spinach not only adds a pop of color but also boosts the nutritional value of the dish. It’s rich in iron and antioxidants. Look for bright green leaves and store them refrigerated in a breathable bag. Alternatively, you can use frozen spinach for convenience.
– **Cream**: The base of the Alfredo sauce provides its creamy texture. Opt for heavy cream for richness, and consider alternatives like half-and-half for a lighter version. Store any leftover cream in the fridge for up to a week.

Common Mistakes to Avoid

  • Overcooking the pasta can result in mushy noodles. Always cook al dente so the pasta remains firm and holds up in the sauce.
  • Using low-quality cream will lead to a lackluster sauce that lacks the desired richness. Use heavy cream for the best results.
  • Not seasoning the sauce properly can lead to blandness. Don’t forget to taste and adjust the seasoning as needed.
  • Adding the cheese too quickly can create clumps. Gradually incorporate cheese into the sauce while stirring over low heat.
  • Skipping the sauté step can result in a lack of flavor base. Properly sauté garlic and onions before adding them to the sauce.
  • Not letting the sauce simmer can prevent it from thickening. Give it time to achieve that silky texture.
  • Forgetting to add pasta water can hinder sauce consistency. Save a cup to adjust the thickness of the sauce.
  • Neglecting fresh ingredients can lead to a lack of balance. Always choose the freshest ingredients for enhanced flavor.
  • Overloading the dish with too many ingredients can lead to an unbalanced flavor profile. Keep it simple to let core flavors shine through.
  • Not considering dietary preferences can limit your audience. Be open to ingredient substitutions for greater inclusivity.

Essential Techniques

– **Cooking Pasta**: Cooking pasta correctly is crucial for excellent texture. Always use a large pot with plenty of water and salt it well. Taste for doneness before draining.
– **Making Alfredo Sauce**: Mastering the sauce involves combining cream, butter, and cheese over low heat, whisking continuously. Avoid high heat, which can curdle the sauce.
– **Sautéing Ingredients**: Sauté garlic and chicken to infuse the dish with flavor. Use medium heat and avoid overcrowding the pan to ensure proper browning.
– **Emulsifying Sauce**: Combining the pasta with the sauce requires a little technique. Use reserved pasta water as necessary to achieve perfect consistency without being too thick or watery.
– **Garnishing**: Adding fresh herbs like parsley or a sprinkle of parmesan enhances presentation. Keep garnishes fresh and relevant to the dish for best results.

Pro Tips for Perfect Fettuccine Alfredo with Chicken, Sundried Tomatoes & Spinach

– Use homemade alfredo sauce for a richer flavor and creamier texture that store-bought cannot match. A quick blend of cream, garlic, and parmesan will elevate the dish.
– Incorporate fresh herbs like basil or parsley in the sauce for brightness and added flavor depth.
– Adjust the thickness of your sauce with reserved pasta water for silky consistency.
– Grill or sauté the chicken with a light seasoning beforehand for an extra flavor boost before incorporating it into the pasta.
– Experiment with different types of cheese, such as mozzarella or fontina, for a unique twist on the classic flavor.
– Consider adding a pinch of nutmeg to the sauce. It complements the cream and cheese beautifully.
– For a lighter version, use half-and-half instead of heavy cream, and add a squeeze of lemon juice for brightness.
– Leftover pasta can be turned into a delicious pasta bake with a little creativity!

Variations and Adaptations

– **Regional variations**: In northern Italy, dishes like “alfredo” often include peas and bacon for added texture and flavor.
– **Seasonal adaptations**: In summer, consider incorporating fresh garden vegetables like zucchini or asparagus to keep the dish light and refreshing.
– **Dietary modifications**: For a gluten-free version, swap traditional pasta for gluten-free fettuccine, ensuring it can be cooked similarly.
– **Flavor variations**: Add fresh lemon zest to give the dish a bright, zesty flavor that cuts through the creaminess.
– **Texture modifications**: For added crunch, top with toasted pine nuts or breadcrumbs just before serving.
– **Presentation alternatives**: Serve in individual bowls or plates with a sprig of fresh basil on top for an elegant touch.

Serving and Presentation Guide

Plating techniques can significantly enhance your dining experience. Twirl the fettuccine into nests on a warm plate for an inviting look. Garnish liberally with freshly grated parmesan and a sprinkle of vibrant parsley to uplift the visuals. Serve with crusty garlic bread or a side salad to create a well-rounded meal.

Temperature is key when serving; fettuccine Alfredo is best enjoyed freshly made and warm. Ensure your pasta and sauce are both heated just before plating. For portion control, using a kitchen scale or measuring tools can help serve even dishes, ensuring each plate looks appealing and satisfying.

Consider pouring the sauce over the pasta just before serving to maintain its creamy texture and avoid any clumping during serving.

Wine and Beverage Pairing

For wine pairings, a crisp Chardonnay complements the rich flavors of the Alfredo sauce while offering refreshing acidity. Consider a light Pinot Grigio for a more nuanced pairing that will delight the palate.

If you’re looking for non-alcoholic options, sparkling water with a wedge of lemon can refresh and cleanse the palate between bites. For coffee lovers, a smooth Americano pairs wonderfully with Fettuccine Alfredo, providing a lovely contrast.

Temperature matters when serving wine; chilled wines will enhance the creaminess of the dish. Serve white wines fresh out of the refrigerator for the best experience.

Storage and Shelf Life

To keep leftovers, store the Fettuccine Alfredo in an airtight container in the refrigerator for up to three days. Ensure the container is sealed well to avoid drying out or absorbing odors from the fridge.

For longer storage, freeze the dish for up to two months. Use freezer-safe containers or bags, leaving space for expansion. Be cautious of reheating; use the stovetop method with a bit of added cream or water to help restore the pasta’s texture while warming it gently.

Signs of spoilage include off odors, changes in texture, or visible mold. Always reheat visual checks to ensure a safe eating experience.

Make Ahead Strategies

Prepare components of the Fettuccine Alfredo in advance to streamline ready-to-eat serving. Cook the pasta ahead of time and cool it before storing it in the refrigerator, preventing clumps.

Consider prepping the chicken and sauce beforehand. Cook and store them separately for easy assembly. When you’re ready to serve, reheat the sauce and sauté the chicken, then combine with freshly cooked pasta.

Store all ingredients in airtight containers to ensure freshness and flavor. Do remember integrating fresh elements like spinach right before serving for optimal taste and vibrant color.

Scaling Instructions

Scaling this recipe is simple; for halving, reduce each ingredient by half, cutting down on cooking times accordingly. Adjust the portion sizes to maintain balance.

When doubling or tripling the recipe, consider using larger pots or multiple batches to ensure the pasta cooks evenly. Keep an eye on timing for sauces, as larger quantities may require slightly more cooking.

If serving at a large gathering, creating a buffet-style setup with self-serve stations can let guests customize their plates effortlessly.

Nutritional Deep Dive

In terms of macro breakdown, a standard serving provides a balanced ratio of carbohydrates from pasta, protein from chicken, and fats from cream. This fulfilling combination supports energy and satiety.

Micronutrient analysis reveals essential vitamins and minerals present in spinach, such as vitamins A and K, while sundried tomatoes introduce antioxidants.

Fettuccine Alfredo can be part of a balanced diet when consumed in moderation. Portion analysis is crucial; being mindful of serving sizes can assist in weight management without sacrificing enjoyment.

Consider low-calorie modifications, such as substituting cream for lighter alternatives and reducing the cheese quantity while maintaining flavor.

Dietary Adaptations

For a gluten-free option, replace traditional pasta with gluten-free alternatives made from ingredients like chickpeas or brown rice, ensuring everyone can enjoy this comfort food.

For a dairy-free twist, substitute heavy cream with coconut milk or cashew cream while exploring vegan cheese or nutritional yeast for a cheesy flavor. This adaptation allows those following plant-based diets to savor this dish too.

You can also create a low-carb version by swapping fettuccine for spiralized zucchini or cauliflower rice, keeping the satisfying flavors of Alfredo intact while catering to dietary preferences.

Additional adaptations can include keto-friendly modifications with more protein and fats, maintaining a rich taste through different cheese sources if preferred.

Troubleshooting Guide

For texture issues, such as a clumpy sauce, gently reheat while whisking vigorously. Adding more cream or pasta water can help restore a smooth texture.

If the flavors feel off, balance the richness with fresh lemon juice or additional herbs to brighten the dish. Always allow flavors to meld before serving.

For temperature problems, avoid using high heat when reheating to prevent cheese from becoming rubbery or separating from the sauce. Gentle heat is key.

Should ingredient substitutions be necessary, ensure that replacements offer similar flavor profiles and textures to maintain the dish’s integrity.

Timing concerns during cooking can be mitigated by preparing components in advance when needed, allowing for better management during preparation.

Recipe Success Stories

Community feedback often praises the simplicity and flavor profile of Fettuccine Alfredo. Many home cooks share stories of personal twists they’ve added, enhancing their signature version of the dish.

Successes with variations, such as adding grilled vegetables or unique proteins, have turned this classic recipe into a creative canvas for those adventurous in the kitchen.

Readers suggest photographic tips while preparing the dish, emphasizing the stunning color contrasts that attract even the pickiest eaters to dish it up for themselves.

Adaptation stories further highlight how this dish serves as a great base allowing home cooks to explore and create based on their ingredient preferences and seasonal availability.

Frequently Asked Questions

Can I use different types of pasta?

Absolutely! While fettuccine is traditional, you can use any pasta you enjoy, such as penne, spaghetti, or even gluten-free varieties.

How do I reheat leftovers without ruining the sauce?

Reheat leftovers gently on the stovetop over low heat. Add a splash of cream or pasta water to help restore the sauce’s creamy texture.

Is this dish suitable for freezing?

Yes, this dish can be frozen. Store in an airtight container for up to two months. Thaw in the fridge overnight before reheating.

Can I make this recipe vegetarian?

Yes! Simply omit the chicken and consider adding more vegetables like mushrooms or bell peppers for added texture.

What can I use instead of cream for a lighter version?

You can substitute heavy cream with half-and-half or even Greek yogurt; just be aware of the flavor and consistency change.

How spicy is this dish?

This Fettuccine Alfredo is naturally mild. For heat, you can add red pepper flakes or freshly cracked black pepper to taste.

What’s the best way to store sundried tomatoes?

Store opened sundried tomatoes in oil in the refrigerator, ensuring they are fully submerged in oil to maximize shelf life.

Can I make this recipe dairy-free?

Yes, use dairy-free cream alternatives and vegan cheese options to create a delicious dairy-free version of Fettuccine Alfredo.

Is homemade Alfredo better than store-bought?

Homemade Alfredo is typically richer and fresher, allowing for more control over flavors and textures compared to store-bought versions.

What wine pairs best with this dish?

A chilled Chardonnay or Pinot Grigio works well with the creaminess of the Alfredo while providing a refreshing counterpart.

Additional Resources

Explore related recipes like Chicken Alfredo Bake or Vegetable Pasta Primavera for more comforting meals. Furthermore, consider checking out technique guides on making homemade pasta or perfecting your alfredo sauce.

Ingredient information, such as the nutritional benefits of pasta choices or ideal chicken cuts, can enhance your cooking knowledge. In addition, equipment recommendations for tools such as pasta makers or saucepans can elevate your culinary experience during preparation.

For seasonal variations, review ingredient guide lists to complement the Fettuccine Alfredo with perfect seasonal fare.

Join the Conversation

We’d love to hear your take on this Fettuccine Alfredo with Chicken, Sundried Tomatoes, and Spinach! Share your experiences and variations on social media using our hashtag.

Photography enthusiasts are encouraged to capture the beauty of their creations and post them online to inspire others.

Feel free to leave recipe reviews, engaging with our community, and share your tips or recipes that complement this classic pasta dish.

Explore the wonderful world of cooking together with us as we uncover flavors that bring people together!

The Recipe

Fettuccine Alfredo with Chicken, Sundried Tomatoes & Spinach

Serves: 4 servings

Prep Time: 15 mins

Cook Time: 20 mins

Total Time: 35 mins

Kitchen Equipment Needed

  • Large pot
  • Frying pan
  • Colander
  • Wooden spoon
  • Measuring cups and spoons
  • Cutting board
  • Knife

Ingredients

  • 8 oz fettuccine pasta
  • 2 boneless, skinless chicken breasts, cut into bite-sized pieces
  • 1 cup heavy cream
  • ½ cup grated Parmesan cheese
  • ½ cup sundried tomatoes, chopped
  • 2 cups fresh spinach
  • 2 tablespoons olive oil
  • 2 cloves garlic, minced
  • Salt and pepper to taste
  • Optional: Fresh basil or parsley for garnish

Directions

  1. Cook fettuccine according to package instructions until al dente. Drain and set aside, reserving 1 cup of pasta water.
  2. In a large frying pan, heat olive oil over medium heat. Add chicken pieces, seasoning with salt and pepper. Cook until browned and cooked through, approximately 5-7 minutes.
  3. Add garlic and sauté until fragrant, about 1 minute. Stir in sundried tomatoes and spinach, cooking until the spinach wilts.
  4. Pour in the heavy cream, bring to a simmer, and add the reserved pasta water to achieve desired consistency.
  5. Stir in the cooked fettuccine, tossing to coat in the creamy sauce.
  6. Remove from heat and gently mix in the Parmesan cheese until melted and fully incorporated into the sauce.
  7. Serve immediately, garnished with fresh herbs if desired.

Recipe Notes

  • For a lighter sauce, substitute heavy cream with half-and-half.
  • Feel free to add your favorite vegetables or proteins!
  • This dish is best served fresh but can be stored for up to 3 days in the fridge.

Delicious Homemade Moose Tracks Ice Cream Recipe to Enjoy

Homemade Moose Tracks Ice Cream: A Decadent Delight

⚖️
Difficulty
Moderate

⏲️
Prep Time
30 mins

🕒
Cook Time
0 mins

⏱️
Total Time
4 hours

🍽️
Servings
6 servings

Indulge in the creamy goodness of homemade Moose Tracks Ice Cream, a delightful treat that combines rich vanilla ice cream, chocolate fudge, and crunchy peanut butter cups. This heavenly concoction embodies the ultimate ice cream experience, perfect for warm summer days or cozy winter evenings. Each bite delivers a burst of flavor, making it a favorite among both kids and adults alike. The blend of smooth ice cream with the rich, gooey fudge creates a decadent dessert that is hard to resist.

Making Moose Tracks Ice Cream at home allows you to control the quality of the ingredients while adding your personal touch. You can customize the sweetness and richness according to your preference. Imagine the satisfaction of scooping into a bowl of velvety ice cream swirled with gooey chocolate and sprinkled with bits of peanut butter cups, offering a treat that is both nostalgic and fulfilling.

Quick Recipe Highlights

  • Flavor Profile: This ice cream features a luscious vanilla base complemented by swirls of chocolate fudge and chunks of peanut butter cups.
  • Texture: Expect a creamy, smooth texture, punctuated by the delightful crunch of the peanut butter cups.
  • Aroma: The enticing aroma of freshly made vanilla ice cream mingles perfectly with rich chocolate and peanut butter undertones.
  • Visual Appeal: The striking contrast of white ice cream with dark fudge swirls and colorful candy pieces makes for an inviting dish.
  • Skill Level Needed: This dish requires basic mixing and freezing skills, making it achievable for beginner bakers.
  • Special Equipment: You’ll need an ice cream maker and a mixing bowl to create this delightful dessert.

Recipe Overview

  • Difficulty Level: The recipe is classified as moderate due to the necessity of using an ice cream maker, but it involves straightforward mixing and freezing techniques.
  • Category: This dessert falls under the category of frozen treats, ideal for summertime or as a sweet ending to any meal.
  • Cuisine: While Moose Tracks has a playful, American origin, variations can be found in different cultures that enjoy rich, creamy desserts.
  • Cost: Making your own ice cream can be cost-effective as staple ingredients like cream and sugar are less expensive than premium store-bought options.
  • Season: This recipe is best enjoyed in warmer months but can be a family favorite year-round.
  • Occasion: Perfect for weekend barbecues, birthdays, or simply as a special treat at the end of a long day.

Why You’ll Love This Recipe

Moose Tracks Ice Cream’s sweet and creamy flavor pairs perfectly with the rich chocolate fudge and nutty peanut butter cups. Rather than a one-dimensional flavor, each spoonful presents a playful mix of contrasting textures—smooth ice cream dances harmoniously with crunchy candy bits. With a homemade touch, this ice cream can be adjusted to meet dietary needs and can provide a guilt-free indulgence when made with natural sweeteners or organic ingredients.

Convenience is another attractive aspect of this ice cream recipe. While some desserts can be time-consuming, making ice cream is surprisingly straightforward and requires little active preparation time. Once the base is created, all you need to do is churn it and let it freeze. This makes it an easy option for those spontaneous moments when a sweet craving hits or for entertaining guests without a lot of fuss.

As with many homemade dishes, there are nutritional advantages to making your ice cream from scratch. You have complete control over the ingredients, allowing you to opt for healthier options like low-fat dairy or plant-based alternatives. This not only results in a tasty treat but can also accommodate various dietary preferences.

Social gatherings are an ideal opportunity to showcase your homemade Moose Tracks Ice Cream, as it serves as a conversation starter. Guests marvel at the unique creation and appreciate the effort put into making something delicious. It encourages interaction as they share their preferences and experiences with ice cream, expanding the engagement beyond just eating.

Cost-effectiveness is a significant consideration, especially for families. Homemade ice cream yields several servings at a fraction of the cost of store-bought alternatives. Additionally, the ability to make larger batches saves trips to the grocery store or ice cream shop.

Historical Background and Cultural Significance

The origin of Moose Tracks Ice Cream is rooted in American ice cream culture, popularized by the Moose Tracks brand. Its unique combination of vanilla, fudge, and peanut butter cups appeals to a wide range of taste preferences and has made it a classic flavor in ice cream parlors across the country. While exact origins are often anecdotal, it is believed that Moose Tracks was inspired by the need for a truly decadent ice cream flavor that could cater to diverse tastes.

Culturally, ice cream has long represented indulgence and celebration. From childhood treats to sophisticated dessert menus, various flavors—like Moose Tracks—usher in feelings of nostalgia and joy. This particular flavor stands out for its playfulness, inviting people of all ages to share in a delightful dessert experience that resonates with memories of summer and family gatherings.

The evolution of the Moose Tracks recipe showcases an intriguing blend of flavors and textures, capturing the imagination of ice cream lovers. Over the years, recipes have adapted to include different types of chocolate, various nutty treats, and even dairy-free bases, allowing for creative freedom in a traditional favorite.

Regional variations of Moose Tracks Ice Cream can be found across the United States, with different locales incorporating local ingredients. For example, some artisans may include locally sourced fudge or regional candy brands, adding a unique twist to the base recipe and showcasing regional culinary creativity.

Ingredient Deep Dive

Vanilla Ice Cream: Vanilla has long been celebrated as a classic flavor with origins in Mesoamerica, where the vanilla orchid was harvested and used to flavor drinks and sweets. Rich in antioxidants, vanilla may have health benefits, and quality selections can be found by looking for organic, grade A beans. Proper storage in a cool, dark place helps maintain its quality, while extracts can often substitute for whole beans.

Chocolate Fudge: Fudge can be traced back to 19th-century America, and its smooth texture makes it a favorite in many desserts. Made from sugar, butter, and cocoa, it provides an irresistible sweetness. When selecting chocolate fudge, look for higher cocoa content for less sugar, and store it in a cool, airtight container to prevent drying out.

Peanut Butter Cups: The beloved peanut butter cup originated in the early 1920s and has become a staple in many dessert recipes. With a balance of protein and healthy fats, peanut butter cups provide both flavor and energy. When choosing peanut butter cups, consider opting for organic options with minimal additives, and store them in a cool place to keep them fresh. If you have nut allergies, there are plenty of alternatives made from sunflower seed butter available.

Common Mistakes to Avoid

  • Not chilling the ice cream base sufficiently: Your ice cream needs to be well-chilled before churning to ensure a smooth texture.
  • Overchurning the ice cream: Churn until it reaches a soft-serve consistency; overchurning can result in an overly hard final product.
  • Using low-quality chocolate: For the best flavor, always use high-quality chocolate for fudge preparation.
  • Not mixing in the fudge and peanut butter cups properly: Take care to swirl the fudge and fold in the cups evenly for a balanced flavor.
  • Skipping the cooling phase before freezing: Allow your ice cream base to cool entirely before freezing to prevent ice crystals.
  • Storing ice cream in an unsealed container: Always cover your ice cream tightly to avoid freezer burn and maintain freshness.
  • Not allowing the ice cream to soften before scooping: Letting it sit at room temperature for a few minutes makes for easier scooping.
  • Ignoring flavor balance: Remember to taste your base and adjust the sweetness if necessary before freezing.
  • Rushing the freezing process: Give your ice cream ample time to freeze to achieve the right consistency.
  • Using too few peanut butter cups: Be generous with the mix-ins to enhance texture and flavor.

Essential Techniques

Churning: Churning ice cream is essential as it introduces air into the mixture, creating a lighter texture. To master this technique, ensure that your mixture is cold before pouring it into the machine. Common pitfalls include overfilled ice cream makers that may lead to improper churning. Look for a doubled volume in the ice cream as a cue for success.

Swirling: Mastering the swirl technique allows for a beautiful presentation and balanced flavor distribution. Use a spatula to fold the fudge syrup into the ice cream gently, creating a marbled effect rather than a complete mix. Make sure not to overmix to preserve the distinct ribbons of flavor.

Incorporating Mix-Ins: To incorporate add-ins such as peanut butter cups, be sure they are chopped into bite-sized pieces. Add them in during the last few minutes of churning to prevent them from breaking apart. A visual cue of success is when you can still see bits of the mix-ins while ensuring they are evenly dispersed throughout the ice cream.

Pro Tips for Perfect Homemade Moose Tracks Ice Cream

1. Always start with cold ingredients. Chilling your cream and milk before making the base will enhance the texture.
2. Consider adding a splash of vanilla extract to deepen the flavor of your ice cream base.
3. For an extra kick, fold in a hint of sea salt to your fudge to enhance its flavor profile.
4. Use a quality ice cream maker to ensure even churning and freezing for better texture.
5. Experiment with using dark or white chocolate for different flavor dimensions in your fudge.
6. Allow your ice cream to sit at room temperature for a few minutes before serving for easier scooping.
7. Make sure your container is freezer-safe and airtight; a metal container works best for ice cream storage.
8. Consider adding caramel or other flavored syrups alongside the fudge for more complexity.

Variations and Adaptations

Regional variations of Moose Tracks Ice Cream may include local sweets such as caramel or maple candies. Seasonal adaptations can introduce flavors like pumpkin spice in the autumn or peppermint during the winter holidays. For dietary adaptations, consider using dairy-free cream or nut butter alternatives for a vegan version. Flavor variations such as cookie dough or fruit swirls can also add a new twist. Texture modifications can be achieved by adding various nuts or crisps for added crunch. Presentation alternatives include serving in homemade waffle cones or topped with whipped cream and sprinkles for delightful aesthetics.

Serving and Presentation Guide

When plating your homemade Moose Tracks Ice Cream, consider using a tall glass or bowl to showcase the vibrant swirls. Garnishing with extra peanut butter cups or drizzling additional fudge over the top can elevate its visual appeal. Traditional accompaniments include a warm chocolate brownie or a shortbread cookie to balance the sweetness. Modern serving suggestions could feature a sprinkle of sea salt or a dusting of cocoa powder for a refined touch. Make sure to serve your ice cream at the right temperature to ensure optimal creaminess—too cold can lead to a brittle texture while too warm could become soupy. Portion control can be managed using an ice cream scoop that yields consistent servings.

Wine and Beverage Pairing

Pair your rich Moose Tracks Ice Cream with a sweet dessert wine like Riesling, which offers a fruity counterpart to the chocolate. For non-alcoholic alternatives, a rich hot chocolate or an iced coffee would complement the dessert perfectly. If you’re serving the ice cream at a gathering, consider topping it with a splash of your favorite liqueur for an adult twist. Ensure that the temperature of any paired beverage complements the coolness of the ice cream to enhance overall enjoyment.

Storage and Shelf Life

To maintain the quality of your homemade Moose Tracks Ice Cream, store it in an airtight container, ensuring that it is well-sealed to prevent ice crystals. Optimal freezer temperature should be below 0°F (-18°C) for the best results. Signs of spoilage include an off smell or visible ice crystals on the surface, indicating freezer burn. If you’re storing for more than two weeks, consider transferring to a different container to preserve freshness. When it’s time to enjoy, allow it to soften slightly at room temperature for easier scooping.

Make Ahead Strategies

Strategically preparing your Moose Tracks Ice Cream can save time on special occasions. Start by making the ice cream base one day in advance and allowing it to chill overnight. Store your prepared fudge separately and mix in when you’re ready to churn. If space permits, consider preparing multiple flavors in advance, making your entertaining effortless and delightful. Fresh elements like a sprinkle of sea salt or a light drizzle of syrup can be added just before serving to ensure optimal freshness and flavor contrast.

Scaling Instructions

If you want to halve the ice cream recipe, simply divide the ingredient quantities by two and maintain the same preparation method. To double or triple the recipe, you may need a larger ice cream maker or multiple batches because most machines have a specific capacity. Adjusting timing may be necessary for longer freezing periods, and ensure you have suitable storage containers to accommodate larger volumes.

Nutritional Deep Dive

A macro breakdown of your Moose Tracks Ice Cream will reveal its balance of carbohydrates, fats, and proteins, with a higher emphasis on sugars due to the added fudge and peanut butter cups. Micronutrient analysis can show that while there’s a good amount of energy per serving, it’s essential to appreciate the uniqueness of each ingredient’s contributions, such as calcium from dairy and protein from peanut butter. Additionally, this indulgent dessert can serve as a mood booster, creating incredibly gratifying moments through its rich flavors. Portion analysis is also vital; smaller servings can make this treat fitting for a balanced diet while effectively managing weight.

Dietary Adaptations

Gluten-free adaptation can effortlessly be achieved by ensuring all ingredients, like cookie crumbles or candies, are free from gluten. Dairy-free substitutes using almond milk or coconut cream allow for a vegan version without sacrificing creaminess. For those on low-carb or keto diets, sugar substitutes can be utilized in the base mixture, though texture may vary. Consider paleo-friendly alternatives using natural sweeteners and nut-based ingredients, or low-FODMAP options for special dietary needs. Each adaptation can transform this recipe into a fit for various lifestyles.

Troubleshooting Guide

If you encounter texture issues, possibly due to improper churning, consider adjusting the speed and duration of the churning process. Should flavors lack balance, a small pinch of salt can enhance sweetness and round out the overall profile. For temperature problems, ensure your freezer is adequately cold before storing your ice cream for optimal freezing. If using alternative ingredients results in challenges, experiment with proportions or brands to find the best fit. Timing concerns can be tackled by trailing behind with attention to the freezing stage’s duration and allowing ample time for setting.

Recipe Success Stories

Community feedback about homemade Moose Tracks Ice Cream often highlights the satisfaction of creating this nostalgic flavor from scratch. Many readers share their adaptations, such as incorporating seasonal fruits or local candies, offering a personal twist that continues the evolution of the recipe. Photography tips from our followers have inspired stunning presentations, where vibrant colors and textures shine through, encouraging engagement and showcasing their culinary creativity. Success stories showcase the joy of making memorable treats for loved ones, proving that ice cream-making is as much about joy as it is about flavor.

Frequently Asked Questions

Can I make Moose Tracks Ice Cream without an ice cream maker?

Yes! If you don’t have an ice cream maker, you can pour the mixture into a shallow dish and freeze it. Every 30-60 minutes, stir it vigorously with a fork to break up ice crystals until it reaches the desired consistency.

How long can I store homemade ice cream?

Homemade Moose Tracks Ice Cream can typically last for 2-3 weeks in the freezer if stored properly in an airtight container. However, it’s best enjoyed within the first week for optimal freshness.

Can I use different types of chocolate?

Absolutely! Feel free to experiment with dark chocolate, white chocolate, or even milk chocolate. Each type will provide a unique flavor profile and change the overall taste of the ice cream.

Is there a way to make this recipe healthier?

Yes, you can use low-fat dairy or plant-based alternatives and substitute sugar with a natural sweetener like honey or maple syrup. Adjusting the amount of fudge or candy pieces can also help reduce overall sugar content.

How can I make sure my ice cream is creamy?

To achieve a creamy texture, ensure your base is well-chilled before churning, and avoid overchurning to prevent it from becoming too airy. Adding a small amount of alcohol, like vodka, can also help maintain creaminess when frozen.

Can I add other mix-ins?

Definitely! Variations can include crushed cookies, nuts, or different candy pieces. Just be sure to mix them in during the last few minutes of churning so they maintain their texture.

Should I let the ice cream sit before scooping?

Yes, it’s best to let the ice cream sit at room temperature for about 5 minutes before scooping. This will soften the ice cream slightly, making for easier serving.

What if my ice cream is too hard after freezing?

If your ice cream is too hard, let it sit at room temperature for about 10-15 minutes to soften slightly. You can also use a knife to gently stir it before serving.

Can I use low-sugar ingredients?

Of course! There are many low-sugar and sugar-free products available, such as low-calorie chocolate syrup and sugar-free peanut butter cups, that can help you make a lower-sugar version of this ice cream.

Can I use natural peanut butter?

Yes, natural peanut butter can be used! Just keep in mind that it may slightly alter the texture, but it can add a deliciously rich flavor without additives or sugars.

Additional Resources

If you enjoyed making Homemade Moose Tracks Ice Cream, check out our other delectable frozen treats, like Strawberry Sorbet or Mint Chocolate Chip Ice Cream. For those interested in improving their ice cream-making skills, we offer guides on mastering the creaming method and choosing the best equipment for your kitchen. Additionally, take a look at seasonal variations of ice creams, like Pumpkin Spice, to broaden your culinary horizons.

Join the Conversation

Share your adventures in making Homemade Moose Tracks Ice Cream on social media using our unique hashtag. Whether you want to boast about your successes, show off stunning photos, or ask for advice, we are excited to connect with you. Engage with our community by sharing your variations, creative presentations, or simply reviewing the recipe. Your insights help inspire others to appreciate and embrace the joy of ice cream-making!

The Recipe

Homemade Moose Tracks Ice Cream

Serves: 6 servings

Prep Time: 30 mins

Cook Time: 0 mins

Total Time: 4 hours

Kitchen Equipment Needed

  • Ice cream maker
  • Mixing bowl
  • Spatula
  • Airtight storage container

Ingredients

  • 2 cups heavy cream
  • 1 cup whole milk
  • 3/4 cup granulated sugar
  • 1 teaspoon pure vanilla extract
  • 1/2 cup chocolate fudge sauce
  • 1 cup chopped peanut butter cups

Directions

  1. In a mixing bowl, whisk together heavy cream, whole milk, sugar, and vanilla extract until the sugar is dissolved.
  2. Pour the mixture into your ice cream maker and churn according to the manufacturer’s instructions until it reaches a soft-serve consistency.
  3. In a separate bowl, combine the fudge sauce and half of the chopped peanut butter cups.
  4. During the last few minutes of churning, fold in the fudge mixture and remaining peanut butter cups to distribute evenly.
  5. Transfer the churned ice cream to an airtight container, spreading evenly and smoothing the top.
  6. Freeze for at least 4 hours or until firm before serving.

Recipe Notes

  • For a richer flavor, you may use half-and-half instead of whole milk.
  • Feel free to substitute any chocolate or candy mix-ins you prefer.
  • Keep ice cream stored in an airtight container to prevent freezer burn.

Irresistible Garlic Parmesan Bacon Cheeseburger Bombs Recipe You’ll Love

Garlic Parmesan Bacon Cheeseburger Bombs: A Flavor Explosion in Every Bite

⚖️
Difficulty
Easy

⏲️
Prep Time
30 mins

🕒
Cook Time
20 mins

⏱️
Total Time
50 mins

🍽️
Servings
12 Bombs

Garlic Parmesan Bacon Cheeseburger Bombs are the ultimate comfort food that combines the savory richness of cheeseburgers with the addictive flavor of garlic and parmesan, all wrapped in a delightful dough. Each bite delivers a burst of flavor, making them perfect for game day, family dinners, or just a satisfying snack. The combination of crispy bacon, juicy beef, and melty cheese creates a taste profile that is simply irresistible. Imagine the aroma filling your kitchen as these things bake to golden perfection — it’s a culinary experience worth savoring!

This easy-to-follow recipe is great for novice cooks and seasoned chefs alike. The preparation involves simple steps that turn basic ingredients into a mouthwatering dish that everyone will love. Plus, the versatility of this recipe means you can customize each bomb with your favorite toppings or additional ingredients. You’ll be amazed by how quickly they disappear, leaving everyone asking for seconds!

Quick Recipe Highlights

  • Flavor Profile: The combination of garlic, parmesan cheese, and crispy bacon makes each bomb bursting with flavor, while the seasoned ground beef adds richness that can’t be beat.
  • Texture: Expect a delightful contrast between the flaky bread outer layer and the savory, juicy filling inside that keeps you going for more.
  • Aroma: The aromatic blend of baked garlic and sizzling bacon creates an intoxicating smell that will make your mouth water.
  • Visual Appeal: Golden brown bomb shells filled with melting cheese and garnished with green onions create a visually stunning and appetizing dish.
  • Skill Level Needed: This dish is easy to prepare and perfect for cooks of all levels, requiring only basic cooking skills.
  • Special Equipment: Just basic kitchen tools are needed, such as a baking sheet, mixing bowls, and measuring cups.

Recipe Overview

  • Difficulty Level: This recipe is considered easy due to its straightforward preparation and minimal cooking techniques required, making it accessible even for beginner cooks.
  • Category: These Garlic Parmesan Bacon Cheeseburger Bombs fit perfectly as an appetizer or snack, and can also work as a main dish paired with a side salad.
  • Cuisine: This dish draws inspiration from American comfort food and takes familiar flavors to the next level with a creative twist.
  • Cost: The approximate cost for making these garlic parmesan bacon cheeseburger bombs is budget-friendly, usually ranging between $15-$20, depending on ingredient choices.
  • Season: These bombs can be enjoyed year-round but are especially popular during gatherings, tailgates, and parties.
  • Occasion: Perfect for celebrations, casual game days, or cozy family evenings, they are always a hit at gatherings.

Why You’ll Love This Recipe

Garlic Parmesan Bacon Cheeseburger Bombs offer an irresistible taste and texture that will leave your taste buds dancing. The buttery, flaky dough complements the savory filling excellently, creating a dish that appeals to everyone. Whether you’re a fan of cheeseburgers or simply enjoy garlic and bacon, this recipe delivers all those flavors in every bite.

Not only are these bites delicious, but they also come together quickly. With some basic prep and minimal hands-on cooking time, you can whip up a delicious platter in less than an hour. This is especially convenient for those nights when you crave something comforting but don’t want to spend all evening in the kitchen.

In addition to the flavor, these bombs offer nutritional benefits. While they are certainly a treat, they can be enjoyed in moderation without compromising your dietary goals. With protein-rich ingredients like beef and bacon blended with fresh flavor notes from parsley and garlic, they strike a balance that is satisfying without being overly indulgent.

When it comes to social gatherings, this recipe shines. Its shareable nature makes it an excellent choice for parties — just set out a plate of these golden bombs, and watch as they quickly disappear. They’re perfect for casual finger food, allowing everyone to enjoy the flavors without the formalities of a sit-down meal.

Moreover, Garlic Parmesan Bacon Cheeseburger Bombs are cost-effective. Many of the ingredients are pantry staples, making it easy to throw this dish together without a trip to the store. With slight variations in ingredients based on what you have, these bombs can be as accessible as they are delicious.

Historical Background and Cultural Significance

Garlic Parmesan Bacon Cheeseburger Bombs are a modern twist on classic American comfort food. The combination of cheeseburgers and garlic bread is not entirely new but makes for a deliciously satisfying snack that symbolizes American culinary creativity. This dish exemplifies the way home cooks take traditional recipes and give them a fun twist, appealing to both contemporary tastes and nostalgic memories of cooked meals shared with family and friends.

Bacon as an ingredient has reached iconic status in American cuisine, often hailed for its smoky flavor and richness. It is not just a food item; it’s part of a cultural phenomenon that evokes feelings of comfort and indulgence. The addition of parmesan and garlic enhances that beloved profile, creating a fusion that appeals to a wide range of palettes.

Originally, stuffed pastries and bombs can be traced back to various cultures, where dough is wrapped around various fillings, providing a convenient and hearty meal option. In recent years, these concepts have evolved and taken on new forms, reflecting changes in culinary trends and preferences.

Over time, the classic cheeseburger has also seen many variations, from gourmet interpretations in restaurants to beloved backyard summer barbecues. The Garlic Parmesan Bacon Cheeseburger Bombs symbolize the playful spirit of home cooking, combining familiar flavors into an easy-to-savor format that suits modern lifestyles.

Ingredient Deep Dive

  • Bacon: Not only does bacon provide a deliciously smoky flavor, but it is also high in protein and certain vitamins. When selecting bacon, look for varieties with higher meat content over fillers. Store it in the refrigerator and once opened, consume within a week or freeze for longer storage. For a healthier version, turkey bacon can be used as a substitute.
  • Ground Beef: A staple in many households, ground beef offers a budget-friendly protein source, rich in B vitamins and essential nutrients. Opt for lean cuts to reduce fat content without sacrificing flavor. When storing, keep it in an airtight container in the fridge and use within two days or freeze for later use. Ground turkey or plant-based meat alternatives can serve as excellent substitutes.
  • Garlic: A beloved ingredient across culinary traditions, garlic is celebrated for its health benefits, including anti-inflammatory properties. Fresh garlic possesses a strong flavor; when choosing, opt for firm cloves with no sprouts. Store them in a cool, dark place to extend their shelf life. Garlic powder can also be used for convenience, but may not provide the same punch of flavor.
  • Parmesan Cheese: This nutty cheese offers great depth of flavor and enhances dishes with its savory notes. When selecting parmesan, look for aged varieties with rich flavors. Grate fresh cheese for the best results. Store it shredded in the fridge, using it within a week or so for peak freshness. Nutritional yeast can be a suitable substitute in vegan diets.
  • Dough: The choice of dough can significantly affect the final dish. Use store-bought crescent roll dough for ease, or make your own for freshness. Check for freshness dates, and store dough in the fridge until ready to use. If gluten-free is needed, explore various alternative dough options available.

Common Mistakes to Avoid

  • Incorrect dough handling: Overworking the dough can lead to tough bombs, while underworking may result in weak structure. Handle gently and avoid excess kneading.
  • Not pre-cooking the bacon: It’s important to partially cook the bacon before adding it to the filling to ensure it crisps up without remaining raw inside the bombs.
  • Poorly measuring ingredients: Accurate measurements ensure that the flavors balance well. Use a scale or measuring cups for precise amounts.
  • Overstuffing the bombs: While it’s tempting to add more filling, overstuffing can prevent proper sealing and lead to messy results. Stick to recommended amounts.
  • Ignoring oven temperature: Make sure to preheat the oven properly and check the temperature for consistent baking results.
  • Insufficient baking time: Keep an eye on the bombs to ensure they bake until golden brown. Undercooked bombs won’t have that delicious crispy exterior.
  • Skipping the seasoning: Garlic and cheese enhance the flavor profile, so don’t skip salt and pepper. Season to taste for maximum flavor.
  • Failing to let them cool: Letting the bombs cool slightly before serving helps maintain their shape and makes for easier eating.

Essential Techniques

  • Mixing Ingredients: Properly mixing ensures even distribution of flavors. Mix ingredients until just combined to avoid overworking the meat, which can lead to a dense filling. Use your hands or a spoon to blend, but do not overmix.
  • Wrapping Technique: Gently wrapping the dough around the filling is crucial for keeping them intact during baking. Make sure to seal edges well to avoid leaks. Pinch firmly but gently for a secure wrapping.
  • Baking: Baking at the correct temperature yields golden, flaky results. Keep an eye on them for color changes, which can indicate doneness. Rotate the baking sheet halfway for even cooking.
  • Seasoning: Taste your filling as you prepare it to adjust salt and pepper levels. A well-seasoned filling makes all the difference in flavor.
  • Presentation: Offer an appealing presentation by arranging the bombs on a platter and garnishing with fresh herbs. Visual appeal elevates the experience.
  • Cleaning Up: Cleaning your kitchen as you go prevents a daunting post-cooking mess. Have containers for waste and wash tools as you finish with them.

Pro Tips for Perfect Garlic Parmesan Bacon Cheeseburger Bombs

  • For an extra cheesy delight, consider adding a cube of mozzarella in the center along with the ground beef mixture.
  • Experiment with different fillings like barbecue sauce or jalapeños for a spicy kick — versatility is key!
  • Use parchment paper on baking sheets for easy cleanup and to prevent bombs from sticking.
  • Brush the tops with melted butter before baking for a richer flavor and higher gloss finish.
  • For a healthier alternative, opt for ground turkey or chicken instead of beef to cut calories while keeping flavor.
  • Give your bombs a sprinkle of fresh herbs or green onions after baking for added color and freshness.
  • Chill the prepared bombs for 15-20 minutes before baking; this helps them maintain shape during the cooking process.
  • Don’t forget to allow the cooked bombs to rest for a few minutes before serving to enhance flavors and make for easier handling.

Variations and Adaptations

  • Regional Variations: Try Southern-inspired versions by incorporating cooked collard greens or pimento cheese into the filling.
  • Seasonal Adaptations: In autumn, mix in sautéed mushrooms or sweet potatoes for a seasonal flavor boost.
  • Dietary Modifications: For gluten-free bombs, use almond flour dough or pre-made gluten-free crescent rolls.
  • Flavor Variations: Experiment with different cheeses, like pepper jack or gouda, to introduce new taste profiles to the bombs.
  • Texture Modifications: Add crushed potato chips to the beef mixture for a satisfying crunch contrast.
  • Presentation Alternatives: Serve with a homemade dipping sauce, like marinara or ranch, for an additional layer of flavor.

Serving and Presentation Guide

  • To plate Garlic Parmesan Bacon Cheeseburger Bombs, arrange them on a large serving platter for an inviting appearance.
  • Garnish with chopped fresh parsley or chives to add a pop of color and flavor contrast.
  • Offer dipping sauces, such as ketchup or ranch, alongside the bombs to enhance the overall experience.
  • Serve them warm, as the flavors are best at a slightly elevated temperature, and pairs beautifully with chilled beverages.
  • Control portions by providing small plates where guests can take their desired servings without overindulging right away.

Wine and Beverage Pairing

  • For wine pairings, consider a light red such as Pinot Noir, which complements the savory notes without overwhelming the palette.
  • Alternative non-alcoholic beverages like sparkling water with a hint of lemon can refresh the palate between bites.
  • If you prefer coffee, serve a dark roast — the bold flavors can enhance the savory experience of the bombs.
  • Make sure to serve all beverages at appropriate temperatures to retain flavors; chilled options work best with hot foods.

Storage and Shelf Life

  • For storage, keep leftovers in an airtight container in the refrigerator; they can last for up to 3-4 days without losing quality.
  • Enjoy the best flavor while the bombs are fresh, but they can also be frozen for up to 2 months for a convenient meal later.
  • When reheating, do so in the oven at a low temperature to preserve texture and avoid sogginess; microwaving may lead to chewy results.
  • Check for signs of spoilage such as off odors or discoloration before consuming leftovers to ensure food safety.

Make Ahead Strategies

  • Consider fully preparing the filling in advance, storing it separately and assembling the bombs just before baking.
  • Chill the assembled bombs in the refrigerator for 20-30 minutes to set them before baking, which can help prevent them from spreading.
  • Assess the impact of refrigeration on the quality of the bombs; baking them shortly after assembly yields the best results.
  • Add any fresh herbs or garnishes right before serving to maintain their vibrant appearance and enhance freshness.

Scaling Instructions

  • To halve the recipe, simply divide ingredients by half and maintain similar cooking times for smaller batches for best results.
  • For doubling or tripling, keep an eye on the baking time, as larger portions may require extra minutes in the oven.
  • Use larger baking sheets or multiple sheets when scaling up, ensuring that bomb placement allows for even baking and airflow.
  • Consider pre-cooked bacon for larger batches; it saves time and offers consistent flavor across each serving.

Nutritional Deep Dive

  • The macro breakdown of Garlic Parmesan Bacon Cheeseburger Bombs highlights their protein content from beef and bacon while being balanced with fats from cheese.
  • Key micronutrients include B vitamins from beef and vitamin A from cheese, benefiting overall health and energy levels.
  • When enjoyed as part of a balanced diet, the nutrients in these Bombs can fit into many dietary frameworks without compromising flavor.
  • Portion analysis shows that enjoying just one or two bombs aligns well with numerous dietary plans, helping to maintain a healthy lifestyle.

Dietary Adaptations

  • For gluten-free adaptations, substitute the dough with gluten-free alternatives to ensure inclusivity for those with gluten sensitivities.
  • For a dairy-free option, use cashew cheese or nutritional yeast to mimic cheese flavors without dairy.
  • Vegan substitutions can be made by using plant-based ground beef and omitting bacon or using smoked mushrooms for a similar flavor profile.
  • Low-carb eaters can create crustless bombs using zucchini or eggplant instead of traditional dough.

Troubleshooting Guide

  • If bombs are too dry, check the beef’s fat content and consider adding sautéed onions or moistening ingredients like Worcestershire sauce.
  • From a flavor imbalance perspective, taste the filling before wrapping and adjust seasoning as needed.
  • If bombs spread too much during baking, try chilling them in the fridge before popping them in the oven to maintain shape.
  • For ingredient substitutions, research alternatives well to avoid unwanted flavor or texture deviations.

Recipe Success Stories

  • Many home cooks report that these Garlic Parmesan Bacon Cheeseburger Bombs have become a go-to for parties and family gatherings.
  • Adaptation stories often include variations made by readers using alternative ingredients, leading to delightful new flavors that excite palates.
  • Photography tips taught by participants suggest capturing the golden crusts with garnishes for mouthwatering food photography.

Frequently Asked Questions

Can I freeze these bombs before baking?

Yes, you can assemble and freeze the bombs before baking. Wrap each bomb individually in plastic and store in a freezer bag for up to two months. Bake from frozen for a few extra minutes.

What dipping sauces pair well with these bombs?

tag.pretty; Popular choices include marinara sauce, ranch dressing, or a spicy barbecue sauce for an extra kick. Create a sauce bar for variety.

Can I make these bombs with turkey instead of beef?

Absolutely! Ground turkey is a great alternative that can make the dish leaner while still providing delicious flavor. Just be sure to season well!

How do I know when my bombs are done baking?

Look for a golden-brown color on the outside. You can also check the internal temperature; it should reach at least 165°F for safety.

Are leftovers okay to reheat?

Yes! Reheat leftovers in the oven at 350°F for about 10 minutes to regain their crispness. Microwave reheating can make them chewy.

Can I add vegetables to the filling?

Yes, diced bell peppers, onions, or jalapeños can be added to the beef mixture. Just sauté them first to release moisture and enhance flavor!

What if I can’t find crescent roll dough?

You can use puff pastry, pizza dough, or even make homemade dough using flour, yeast, and water. Each will provide a unique texture.

Can I make smaller bites instead of full bombs?

Yes! Simply use less filling and adjust the baking time accordingly to create bite-sized versions that are perfect for appetizers.

Is it necessary to pre-cook the bacon?

Pre-cooking the bacon helps render excess fat and ensures that it crisps up properly once baked, enhancing the final texture and flavor.

What can I serve with these bombs?

Salads, baked beans, or even coleslaw complement these bombs well, providing a refreshing contrast to the rich flavors.

Additional Resources

  • Explore related recipes for bacon-wrapped snacks, stuffed dough delicacies, and savory pastry options to expand your culinary repertoire.
  • Technique guides on pastry making can elevate your skills in crafting dough from scratch, leading to fresher results.
  • Ingredient information on savory cheeses can enhance your understanding of flavor pairings and selections that suit your taste.
  • Learn about essential kitchen tools that simplify the cooking process, making it more enjoyable and efficient.
  • Seasonal variations can highlight fresh, in-season ingredients that elevate your recipe based on availability.

Join the Conversation

Share your cooking experiences on social media, tagging your photos and stories with us to inspire others. Readers are encouraged to leave feedback and share modifications that worked well for them. Engaging with our community not only helps improve recipes but also connects you with fellow food enthusiasts who share similar interests!

The Recipe

Garlic Parmesan Bacon Cheeseburger Bombs

Serves: 12 Bombs

Prep Time: 30 mins

Cook Time: 20 mins

Total Time: 50 mins

Kitchen Equipment Needed

  • Baking sheet
  • Mixing bowls
  • Measuring cups and spoons
  • Cooking utensils
  • Oven mitts

Ingredients

  • 1 lb ground beef
  • 6-8 slices of bacon, cooked and chopped
  • 1 cup shredded parmesan cheese
  • 2-3 cloves garlic, minced
  • 1 roll of crescent roll dough
  • 1 tsp salt
  • 1 tsp pepper
  • Chopped parsley for garnish (optional)

Directions

  1. Preheat the oven to 375°F (190°C).
  2. In a mixing bowl, combine ground beef, chopped bacon, parmesan cheese, minced garlic, salt, and pepper.
  3. Roll out crescent dough and cut into squares approximately 4×4 inches.
  4. Place a spoonful of the filling in the center of each square, then fold the dough over and pinch to seal.
  5. Arrange the stuffed bombs on a baking sheet lined with parchment paper.
  6. Bake for 20 minutes or until golden brown.
  7. Let cool slightly before serving and garnish with fresh herbs if desired.

Recipe Notes

  • Feel free to customize the filling with your favorite ingredients, such as different cheeses or vegetables.
  • For extra crispiness, brush the tops with melted butter before baking.
  • Leftovers can be stored in an airtight container for up to four days or frozen for later use.

Cajun Lobster, Crab, and Salmon: A Seafood Delight Recipe

Cajun Lobster, Crab, and Salmon: A Southern Seafood Delight

⚖️
Difficulty
Medium

⏲️
Prep Time
30 mins

🕒
Cook Time
20 mins

⏱️
Total Time
50 mins

🍽️
Servings
4

Bringing a taste of the South to your kitchen, this Cajun Lobster, Crab, and Salmon recipe is an explosion of ocean flavors and spices that promises to tantalize your taste buds. The blend of fresh seafood is complemented by robust Cajun spices, creating a delightful harmony that will remind you of warm, inviting gatherings along the Gulf Coast. With rich, succulent salmon and sweet crab meat perfectly paired with tender lobster, each bite serves as a reminder of the vibrant, culinary heritage of Louisiana.

The aromatic notes of garlic, onion, and zesty lemon fill the air as you prepare this dish, creating a feast not just for the palate but for the senses. Imagine the enticing sizzle of seafood on the stovetop, imbuing your kitchen with an irresistible fragrance. The colorful presentation—deep reds and vibrant yellows—would elevate any dinner table, making it perfect for both casual dining and special occasions.

Quick Recipe Highlights

  • Flavor Profile: This dish boasts a bold flavor from the Cajun spices, combined with the natural sweetness of the seafood.
  • Texture: Enjoy a delightful combination of flaky salmon, tender crab meat, and juicy lobster that melds beautifully.
  • Aroma: The garlic and Cajun seasoning create an aromatic base that enhances the freshness of the seafood.
  • Visual Appeal: The plate is a feast for the eyes, showcasing vibrant reds, yellows, and a sprinkle of green herbs.
  • Skill Level Needed: Intermediate cooking skills are recommended for mastering seafood preparation and seasoning techniques.
  • Special Equipment: A good quality skillet and seafood utensils will elevate your cooking experience.

Recipe Overview

  • Difficulty Level: This medium difficulty recipe requires attention to detail, particularly when it comes to seasoning and timing.
  • Category: Perfect as a main course for dinner parties or festive gatherings, this recipe fits well into a seafood dinner category.
  • Cuisine: Drawing inspiration from Cajun cooking traditions, this recipe showcases the fusion of spices and seafood renowned in Southern cuisine.
  • Cost: Ingredients may range from moderate to high, depending on the seafood quality, but the flavors make it worth every penny.
  • Season: Best made during late spring and summer when fresh seafood is plentiful and flavorful.
  • Occasion: Ideal for gatherings, celebrations, or impressing dinner guests with an exceptional seafood dish.

Why You’ll Love This Recipe

The Cajun Lobster, Crab, and Salmon dish captivates with its enticing taste and texture. The bold Cajun seasoning adds a kick that pairs perfectly with the delicate seafood flavors. Each bite reveals juicy chunks of crab, rich salmon, and tender lobster, all harmonizing to create a mouthwatering experience. The mixture of spices elevates the dish, making it not just a meal, but a culinary adventure that transports you straight to the Southern shores.

In terms of convenience, this recipe is straightforward with tasks that can be completed in a reasonable time frame. The blend of preparation time and cook time ensures that you can produce a gourmet dish without spending all day in the kitchen. Simple chopping, seasoning, and cooking processes make this an accessible option for home cooks looking to shine.

Nutritionally, this dish offers a host of benefits, including omega-3 fatty acids from the salmon, high-quality protein from the crab and lobster, and healthy fats from cooking oils. It’s a dish that not only satisfies taste buds but also promotes a balanced diet, rich in nutrients essential for maintaining good health.

When it comes to entertaining, this recipe shines. Its elegant presentation combined with robust flavors makes it a conversation starter and a definite crowd-pleaser at any gathering. Serve it alongside a crisp white wine, and watch your guests rave about your cooking.

Lastly, considering the overall cost, while it may seem high at first, the rewarding experience of enjoying fresh seafood with loved ones makes it a worthwhile investment. Plus, with careful selection of ingredients, you can manage expenses while still creating a stunning dish.

Historical Background and Cultural Significance

The origins of Cajun cuisine can be traced back to the French-speaking Acadians who settled in Louisiana in the 18th century. These culinary traditions evolved over time, influenced by the Native American, African, and Spanish populations in the region. As fresh seafood was abundant in coastal areas, recipes like this Cajun Lobster, Crab, and Salmon emerged to highlight local ingredients and the Creole-inspired flavors that characterize Southern cooking.

Culturally, Cajun cuisine holds a prominent place in Louisiana’s heritage, reflecting its complex history and diverse influences. The vibrant flavors and communal aspects of Cajun dining emphasize family, friendship, and culture, making dishes like this one central to local celebrations and gatherings. The rich traditions surrounding food preparation and sharing are a vital part of the Cajun lifestyle.

Over the years, the recipe has evolved, incorporating modern techniques and flavors while respecting traditional roots. This evolution reflects the dynamic nature of Cajun cooking, allowing it to remain relevant and appealing to contemporary palates, all while keeping the essence of its heritage alive.

Regional variations also play a role in how seafood is prepared. While the basic ingredients may be constant, the spice levels and cooking methods vary from family to family and event to event. This ability to adapt while maintaining core flavors is a hallmark of fine Cajun cooking.

Ingredient Deep Dive

Lobster is both a delicacy and a cultural symbol of coastal culinary traditions. With its sweet, firm meat, lobster provides an exquisite texture and flavor that enhances this dish. Rich in protein and low in fat, it’s perfect for health-conscious meals. When selecting lobster, opt for fresh, sustainably sourced varieties, and ensure they are stored properly in a cold environment to maintain quality. If fresh lobster is unavailable, consider high-quality frozen options.

Crab, particularly blue crab, is a staple in many Cajun recipes. Its tender, sweet meat pairs beautifully with bold spices, making it a favorite in seafood dishes. Not only is crab high in protein, but it’s also a good source of essential minerals. When buying crab, look for fresh, lively crabs, and store them in a cool, damp place. If fresh crab is out of reach, canned or frozen varieties can work in a pinch, though they may lack some flavors.

Salmon is celebrated for its rich, fatty flavors and health benefits, including omega-3 fatty acids that support heart health. Choosing wild-caught salmon can enhance flavor and ensure a more sustainable source. When selecting salmon, opt for bright, firm fillets with minimal fishy odor. Proper storage is crucial to maintaining freshness; keep salmon in the coldest part of your refrigerator and consume it within a few days of purchase.

Common Mistakes to Avoid

  • Overcooking the seafood: Seafood cooks quickly. Ensure you monitor cooking times closely to avoid tough textures.
  • Ignoring seasoning: Cajun dishes thrive on bold flavors, so be generous but balanced with spices.
  • Skimping on fresh ingredients: Fresh seafood significantly enhances the dish’s overall quality, so choose wisely.
  • Not letting the seafood rest: Allow seafood to sit after cooking for a few minutes to preserve juiciness.
  • Using improper cooking temperatures: Cooking seafood at too high or low a temperature could lead to poor results; aim for medium heat for a perfect sear.
  • Overcrowding the pan: Cooking in batches ensures even cooking and avoids steaming the seafood.
  • Neglecting to deglaze: Use wine or broth to deglaze the pan, incorporating all the delicious bits into your sauce.
  • Mixing too many flavors: While bold flavors are key in Cajun cooking, excessive variations can muddle the dish instead of enhancing it.

Essential Techniques

One essential technique for mastering this dish is sautéing seafood. Sautéing involves cooking seafood quickly over medium-high heat with oil, creating a beautifully seared exterior while retaining moisture inside. To master this technique, ensure your pan is hot before adding seafood, allowing for instant caramelization. Watch for visual cues, such as golden edges and a firm texture, indicating doneness.

Another important technique is deglazing, which helps integrate the fond (the browned bits left in the pan) into the final sauce. Once the seafood is cooked, add a splash of wine or broth to the hot pan, scrapping the bottom with a wooden spoon to lift the flavors. This step enhances your dish’s complexity, ensuring that every bite is bursting with flavor.

Pro Tips for Perfect Cajun Lobster, Crab, and Salmon

1. Always use fresh ingredients for the best flavors. Check local markets regularly for the freshest seafood options.
2. Prepare your spices in advance. A well-thought-out spice mix elevates your seafood and streamlines cooking.
3. Allow your seafood to come to room temperature before cooking for even cooking results.
4. Experiment with homemade Cajun seasoning blends to customize flavors to your preference.
5. Avoid stirring your seafood too frequently while cooking; allow it to sear for that delicious crust.
6. Serve with a side of crusty bread to soak up the flavorful sauce, giving another layer to the dining experience.
7. Incorporate seasonal vegetables for additional freshness and nutritional value on your plate.
8. Consider adding a splash of cream to the sauce for a rich finish, complementing the seafood wonderfully.

Variations and Adaptations

This Cajun dish can be adapted regionally by incorporating local seafood favorites. For instance, substituting halibut for salmon offers a different texture while maintaining a rich flavor profile. Seasonal adaptations can include adding fresh summer vegetables, such as corn or bell peppers, bringing a bright color contrast and added sweetness to the meal.

Dietary modifications are also possible for those with specific dietary restrictions. For gluten-free options, ensure that any prepared sauces or seasonings are certified gluten-free. For a lower-carb adaptation, you could serve the seafood over a bed of cauliflower rice instead of traditional rice.

Flavor variations could involve the addition of tropical fruits like mango or pineapple for a sweet-tangy twist, while texture modifications might include adding a crunchy topping like panko breadcrumbs mixed with Cajun seasoning before broiling.

Lastly, alternative presentation ideas can include serving in individual ramekins or as part of a seafood tower, showcasing the vibrant colors and making the dish even more visually appealing.

Serving and Presentation Guide

Plating your Cajun Lobster, Crab, and Salmon beautifully elevates the dish. Start with a clean, warm plate and layer your ingredients for maximum visual appeal. Arrange the seafood attractively, ensuring the vibrant colors are showcased, and drizzle any sauce artistically around the seafood.

Garnishing with freshly chopped herbs, such as parsley or green onions, adds pop and freshness while some lemon zest creates a bright aroma. Traditional accompaniments, like a side of garlic bread or a crisp salad, enhance the meal’s atmosphere, inviting sharing and enjoyment.

Consider serving at slightly warm temperatures to maintain the optimal flavor and texture of the seafood. For portion control, adjust servings based on your menu, ensuring that each guest has a satisfying amount without overwhelming the plate.

Wine and Beverage Pairing

For this Cajun seafood dish, Sauvignon Blanc or a light Chardonnay complements the flavors beautifully. The crisp, clean taste of Sauvignon Blanc matches the seasoning and cuts through the richness of the seafood. If you prefer reds, a light Pinot Noir can also harmonize well without overpowering the dish.

For non-alcoholic alternatives, consider pairing with a sparkling water infused with citrus fruits, which can refresh the palate. A brewed iced tea with lemon also provides a soothing contrast to the spiced flavors of the dish.

If you’re serving coffee or tea afterwards, opt for herbal blends or light coffees that maintain a refreshing finish to the meal, allowing the delicious memory of this dish to linger.

Storage and Shelf Life

To store leftovers safely, place the Cajun Lobster, Crab, and Salmon in airtight containers within two hours of cooking. This method preserves flavor and quality, typically allowing refrigerated storage for up to three days. Ensure your fridge temperature stays below 40°F (4°C) to inhibit bacterial growth.

If you need to store for a longer duration, freezing is an option, but be aware that texture may change upon reheating. Wrap individual portions in plastic wrap and foil before placing in an airtight container to prevent freezer burn.

When reheating, do so gently in the oven or microwave, keeping the seafood moist by adding a splash of broth or water. Avoid reheating more than once, as repeated heating can further degrade the texture and flavor.

Make Ahead Strategies

For those planning to serve this delightful dish, consider prepping some elements in advance. You can chop vegetables and mix spices, storing them in airtight containers until ready to cook, which saves time on the day of serving.

If making the dish for an event, you can cook the seafood a day prior and simply reheat gently, being cautious not to overcook. However, assembling the final dish just before serving creates a fresher presentation.

Consider preparing accompanying sides, such as salads or bread, in advance and complementing later with the ready seafood. When serving, adding components like crispy fried elements at the last minute will ensure a delightful contrast in texture while enjoying the fresh seafood.

Scaling Instructions

Scaling this recipe is straightforward. To halve the recipe, reduce all ingredient amounts by 50% while keeping the cooking method the same. For doubling or tripling, ensure your cooking equipment can accommodate the increase in volume without overcrowding.

Adjust timing accordingly; larger batches may require a few extra minutes to cook thoroughly. Use an instant-read thermometer for more precise cooking, ensuring all seafood reaches a safe internal temperature.

For storage, make sure to utilize larger containers or multiple smaller ones to preserve the quality of the seafood when scaling up for larger gatherings, ensuring freshness for all your guests.

Nutritional Deep Dive

A nutritional breakdown of the Cajun Lobster, Crab, and Salmon reveals a protein-rich meal that provides essential nutrients. Salmon alone contains healthy fats that support heart health, while crab provides additional protein and minerals like zinc.

Macros generally balance well in this dish, contributing to a satisfying meal while maintaining a thoughtful approach to dietary needs. Each serving typically offers a substantial protein content with fewer carbs, ideal for those monitoring their intake.

Micronutrient analysis shows a good mix of vitamins A, B, and D, alongside iron and potassium from the seafood and added vegetables. Encouraging a wholesome seafood diet can contribute to various health benefits, from improved cognitive function to heart health, reinforcing the importance of enjoying dishes like this regularly.

Dietary Adaptations

For gluten-free versions of this dish, ensure that any sauces or seasonings used are certified gluten-free. Substituting regular flour for gluten-free alternatives can also maintain the dish’s integrity without compromising flavor.

For dairy-free options, keep the recipe as is, since it naturally excludes dairy. Those following a vegan diet might appreciate a vegetable-based version, replacing seafood with hearty vegetables and flavored tofu or tempeh, all seasoned with the same Cajun flair.

The dish can be modified for low-carb or keto diets by minimizing the use of starch-heavy side dishes, instead focusing on fresh salads or sautéed greens to emphasize flavors without increasing carbohydrate intake.

Adapting this recipe further for paleo or low-FODMAP diets can include small tweaks in seasoning and side options, allowing for a healthier version that maintains the dish’s vibrant essence.

Troubleshooting Guide

For texture issues, overcooked seafood can lead to a rubbery finish. To avoid this, monitor cooking times and temperatures closely, ensuring seafood is ideally flakey but not dry.

In flavor balance, if the dish is overly spicy, consider adding dairy (cream or sour cream) to mellow the heat, or incorporate a sprinkle of sugar to balance flavors more effectively.

Temperature challenges can arise if cooking equipment is inconsistent; using a thermometer can help achieve the perfect doneness consistently.

If ingredient substitutions are necessary, ensure replacements mimic the intended flavors or textures when changing seafood.

Timing concerns during the cooking process can be mitigated by prepping all ingredients beforehand, allowing for a smoother cooking experience.

Recipe Success Stories

Community feedback on the Cajun Lobster, Crab, and Salmon recipe often leads to enthusiastic praise for its bold flavors and presentation. Many readers share their success in adapting the dish with seasonal variations, showcasing the versatility of the recipe.

Adaptation stories show how various families have made the dish their own through cultural influences, integrating family traditions and memories into cookouts and celebrations, creating lasting bonds over meals.

Photography tips often highlight the vibrant colors of the seafood and spices, encouraging readers to share their culinary masterpieces on social media and engage with a larger community that celebrates seafood lovers.

Frequently Asked Questions

Can I use frozen seafood for this recipe? Yes, frozen seafood can be used, but it’s essential to thaw it properly before cooking for the best texture and taste.

Is this dish suitable for meal prep? Absolutely, the Cajun Lobster, Crab, and Salmon dish can be cooked ahead of time and stored in the refrigerator for up to three days.

How can I increase the spice level? You can adjust the spice level by adding more cayenne pepper or hot sauce during cooking to suit your palate.

What sides pair well with this dish? Classic sides include garlic bread, a fresh salad, or seasoned rice to complement the bold flavors of the seafood.

Can I make a vegetarian version? While this recipe is focused on seafood, you could substitute with hearty vegetables and tofu to retain the Cajun flavor profile.

What’s the best way to reheat leftovers? Gently reheat in the oven with a splash of broth to maintain moisture, avoiding microwave reheating to prevent rubbery textures.

Can I use other types of fish in this recipe? Yes, feel free to experiment with other fish types, like tilapia or cod, to find a balance of flavors that you enjoy.

Is this recipe gluten-free? The recipe is inherently gluten-free as long as all added seasoning and sauces are checked for gluten content.

What is the average cost for this dish? Costs can vary based on seafood prices; averaging approximately $40-$60 depending on freshness and quality.

How long should I cook lobster in this recipe? Depending on size, lobster tails typically need around 6-8 minutes to cook thoroughly, ensuring they remain tender, not overcooked.

Additional Resources

For more delicious recipes showcasing seafood, consider exploring our collection of Cajun dishes or classic Southern cooking favorites. Technique guides on sautéing seafood and making homemade Cajun seasoning blends are also available to enhance your culinary skills.

Ingredient information sections can help you navigate through purchasing sustainable seafood options, while equipment recommendations can ensure you have the best tools for your kitchen endeavors.

Seasonal variations further extend your recipe repertoire, allowing creative freedom as you explore flavors and ingredients that naturally change throughout the year.

Join the Conversation

We encourage you to share your culinary journeys on social media using our hashtag, showcasing your delicious dinner table creations. Engaging with our community can inspire others and create a vibrant dialogue around Cajun cooking.

Consider sharing photography tips that highlight your styled dishes, and don’t hesitate to leave reviews on recipe adaptations that worked well for you.

Join fellow seafood enthusiasts in exploring variations and unique interpretations, fostering a community that celebrates the love of cooking and sharing exceptional meals with loved ones.

The Recipe

Cajun Lobster, Crab, and Salmon

Serves: 4

Prep Time: 30 mins

Cook Time: 20 mins

Total Time: 50 mins

Kitchen Equipment Needed

  • Large skillet
  • Cutting board
  • Chef’s knife
  • Measuring cups and spoons
  • Wooden spoon or spatula

Ingredients

  • 1 lb lobster tails, thawed and cut in half
  • 1 lb crab meat, picked over for shells
  • 1 lb salmon fillet, cut into chunks
  • 2 tbsp cajun seasoning
  • 3 tbsp olive oil
  • 4 garlic cloves, minced
  • 1 medium onion, diced
  • 1 lemon, juiced
  • Salt and pepper, to taste
  • Fresh parsley, for garnish

Directions

  1. Heat olive oil in a large skillet over medium-high heat.
  2. Add diced onions and sauté until translucent, about 3-4 minutes.
  3. Stir in minced garlic and cook for an additional minute.
  4. Add lobster tails and sauté for 5 minutes, until they turn opaque.
  5. Sprinkle in the Cajun seasoning, then add crab meat and salmon chunks. Cook for 6-8 minutes, stirring gently.
  6. Drizzle with lemon juice and season with salt and pepper to taste.
  7. Remove from heat and garnish with parsley before serving.

Recipe Notes

  • Adjust the amount of Cajun seasoning according to your taste preference.
  • Serve immediately with garlic bread or over rice for a complete meal.
  • Feel free to replace any seafood with other preferred types for personal twists.