Delicious Carrot Cake Cheesecake Cupcakes Perfect for Any Occasion

Luscious Carrot Cake Cheesecake Cupcakes: Indulge in a Flavorful Delight

⚖️
Difficulty
Medium

⏲️
Prep Time
20 mins

🕒
Cook Time
25 mins

⏱️
Total Time
45 mins

🍽️
Servings
12 cupcakes

Are you ready to take your dessert game to the next level with these Luscious Carrot Cake Cheesecake Cupcakes? This delightful recipe combines the wonderful flavors of traditional carrot cake with the creamy richness of cheesecake, encapsulated in a beautifully baked cupcake. Each bite is a perfect balance of sweetness and spice, evoking feelings of warmth and comfort. Whether you’re baking for a special occasion or just because, these cupcakes are guaranteed to impress your family and friends.

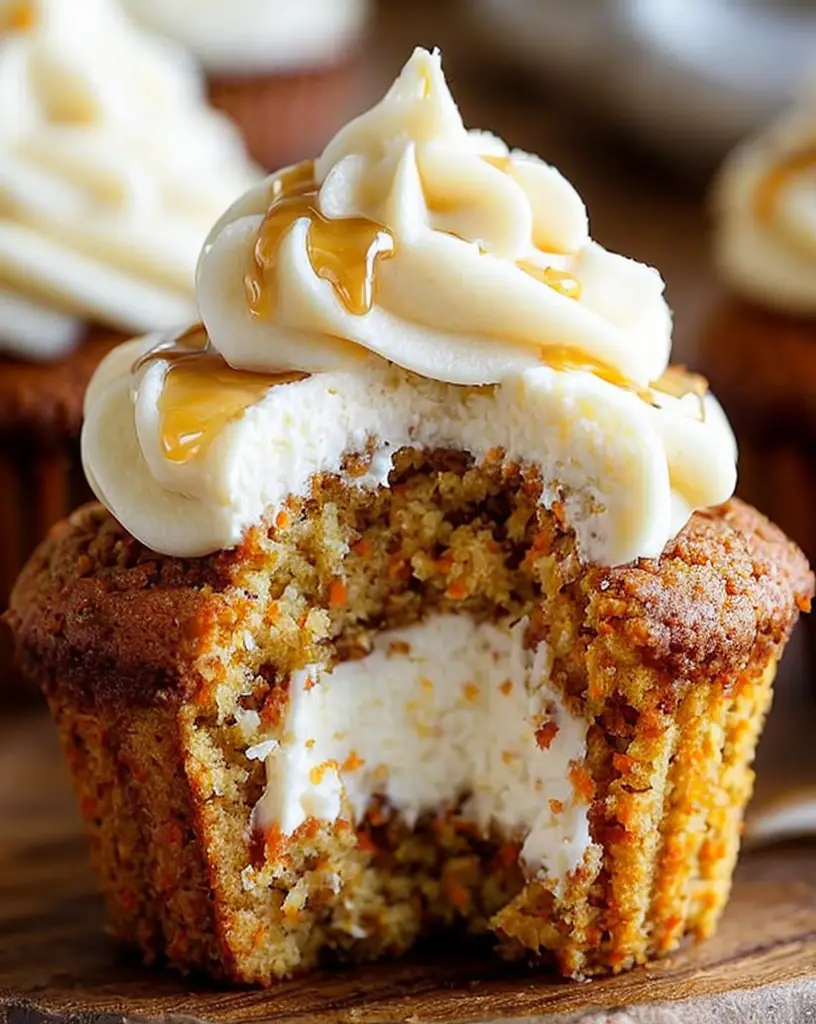
Imagine the sweet aroma of freshly grated carrots mingling with hints of cinnamon and vanilla as these cupcakes bake in the oven. Topped with a luscious cream cheese frosting, they not only look stunning but also taste heavenly. This is more than just a dessert; it’s an experience that will leave everyone wanting more. The combination of textures—from the fluffy cake to the smooth cheesecake filling—makes every mouthful a treat.

Quick Recipe Highlights

  • Flavor Profile: These cupcakes are bursting with sweet carrots, warm spices, and a creamy cheesecake center.
  • Texture: Expect a moist and fluffy texture from the carrot cake, paired with the smoothness of the cheesecake.
  • Aroma: The baking process releases a delightful mix of cinnamon, nutmeg, and fresh carrots.
  • Visual Appeal: Each cupcake showcases a beautiful swirl of cream cheese frosting, topped with shredded carrots and nuts.
  • Skill Level Needed: This medium-level recipe requires basic baking skills and some patience.
  • Special Equipment: You’ll need a cupcake pan and muffin liners, plus a mixer for the cheesecake filling.

Recipe Overview

  • Difficulty Level: The process of creating these cupcakes is more involved than a standard recipe, but it’s accessible for intermediate bakers. With careful attention to detail, you can produce bakery-quality desserts.
  • Category: Perfect for dessert, snack time, or even a celebratory treat, these cupcakes fit well in numerous meal categories.
  • Cuisine: Rooted in traditional American baking, these cupcakes draw inspiration from classic carrot cake recipes that have delighted taste buds for generations.
  • Cost: Depending on ingredient availability, these cupcakes can be made on a budget, generally totaling about $15 for a dozen.
  • Season: While delicious all year round, they’re especially perfect during spring and autumn when carrots are fresh and in season.
  • Occasion: Ideal for birthdays, holidays, or simply as an afternoon snack, these cupcakes elevate any gathering.

Why You’ll Love This Recipe

The taste and texture appeal of these Luscious Carrot Cake Cheesecake Cupcakes is undeniable. The spices in the carrot cake harmoniously complement the tanginess of the cream cheese filling, creating layers of flavor that dance on your palate. The use of freshly grated carrots not only contributes to the sweetness but also adds moisture, ensuring each bite is soft and enjoyable.

Convenience and preparation benefits make this recipe a favorite. Unlike traditional layered cakes, these cupcakes donate a perfect portion control solution while still retaining that special touch of homemade love. You can easily prepare the batter and filling in advance, then bake right before serving for maximum freshness.

Nutritionally, carrots provide a good dose of vitamins and minerals, making these cupcakes a slightly healthier indulgence compared to other desserts. The addition of spices like cinnamon and nutmeg not only enhances flavor but also offers antioxidant benefits.

Social and entertaining value is another reason to adore these cupcakes. They’re a fantastic conversation starter, bringing friends together over their delightful taste while looking appealing on any dessert table. Plus, their individual servings make them easy to share among guests.

Cost-effectiveness and accessibility of ingredients ensure that anyone can whip up these Luscious Carrot Cake Cheesecake Cupcakes. The recipe calls for pantry staples, and fresh carrots are available in most grocery stores, making it a budget-friendly option for anyone looking to impress.

Historical Background and Cultural Significance

The origin story of carrot cake can be traced back to medieval times when carrots were used as a sweetener during wartime when sugar was scarce. Over time, the use of carrots in desserts evolved, leading to the creation of the beloved carrot cake recipes we have today.

Culturally, carrot cake has become a staple in American kitchens, especially in the South. It’s often served at celebrations and holidays, symbolizing togetherness and joy. The combination of spices and cream cheese frosting has made it a popular choice among dessert lovers.

The evolution of this recipe is fascinating. What started as a simple cake has transformed into myriad variations, including cakes, cookies, and, more recently, cupcakes. Each iteration adds a unique twist to the classic flavor profile.

Regional variations exist as well, with different areas putting their spin on ingredients. For instance, some bakers add pineapple or coconut, enhancing the moisture and tropical flavors of carrot cake, further showcasing its adaptable nature.

Ingredient Deep Dive

Carrots are the star ingredient in this recipe, often lauded for both their sweetness and nutritional benefits. Historically, carrots have been cultivated since ancient times for culinary and medicinal purposes. Rich in vitamins A and K, they’re fantastic for eye health and overall wellness.

When selecting carrots, look for firm, smooth skin without blemishes. For storage, keep them in the fridge to prolong freshness, and they can be grated in advance for convenience. If you’re out of carrots, zucchini can be an excellent substitute, as it also provides moisture and a mild flavor.

Next in line is the cream cheese used for the frosting. This essential ingredient brings a rich, tangy flavor and smooth consistency that pairs perfectly with the sweetness of the carrot cake. Cream cheese has its origins in the early 19th century and has since become a staple in desserts across cultures.

When selecting cream cheese, opt for full-fat versions for the richest flavor and texture. It should be stored in the refrigerator and brought to room temperature before frosting for the best consistency. If you’re looking for alternatives, mascarpone or ricotta can work in a pinch, though they will change the flavor profile.

Common Mistakes to Avoid

  • Not measuring ingredients accurately can lead to undesirable textures. Always use a kitchen scale for the best results.
  • Overmixing the batter is a common mistake that can cause dense cupcakes. Mix until just combined for light and fluffy results.
  • Using cold eggs and cream cheese can affect the smoothness of your batter. Ensure all ingredients are at room temperature.
  • Neglecting to grease the cupcake liners properly could result in cupcakes sticking. Use non-stick spray for extra assurance.
  • Underbaking or overbaking cupcakes affects the final outcome. Use a toothpick to check for doneness; it should come out clean when inserted.
  • Forgetting to shred the carrots finely can lead to uneven texture. Use a fine grater for the best distribution.
  • Being too generous with the frosting can overwhelm the cupcakes. Apply a thin, even layer for a balanced flavor.
  • Skipping the refrigeration step for cream cheese frosting can make it difficult to work with. Chill for 30 minutes to achieve the perfect spreadability.
  • Not allowing the cupcakes to cool before frosting can result in melted frosting. Ensure they are fully cool for the best results.
  • Ignoring the importance of flavor balance can lead to overly sweet cupcakes. Taste and adjust spices accordingly.

Essential Techniques

Mixing the batter correctly is essential for creating light cupcakes. Use the creaming method for the butter and sugar to incorporate air, and combine dry ingredients separately to avoid clumping. Common pitfalls include overmixing, which can lead to dense cupcakes; aim for just combined.

Properly cooling the cupcakes before frosting is critical. Allow them to sit in the pan for 5 minutes before transferring to a wire rack. This ensures they’re set properly and avoids melting your cream cheese frosting when applied. Visual cues for success include a lightly golden top and a firm touch.

Pro Tips for Perfect Luscious Carrot Cake Cheesecake Cupcakes

1. Always use fresh spices for maximum flavor impact; swap out old cinnamon and nutmeg for fresh ground alternatives.

2. To enhance the carrot flavor, add a splash of orange or lemon zest to your batter.

3. Consider adding crushed pineapple for moisture and a delightful flavor twist.

4. Experiment with different nut toppings, such as pecans or walnuts, for added crunch and taste.

5. For decorating, use a piping bag for a professional finish, and top with edible flowers for a pop of color.

6. If you love a surprise, add mini chocolate chips to the cupcake batter for a delightful contrast to the carrot.

7. Store leftover cupcakes in an airtight container to retain freshness.

8. Share your baking achievements on social media to inspire others!

Variations and Adaptations

Regional variations of carrot cake showcase local flavors; for instance, adding coconut or raisins is popular in Caribbean-inspired recipes. Seasonal adaptations might involve swapping fall spices with brighter citrus notes in the spring, creating a lighter taste profile.

For dietary modifications, consider using gluten-free flour blends for those with gluten sensitivities. Vegan adaptations can be achieved by substituting eggs with flaxseed meal and using dairy-free cream cheese. Additionally, for flavor variations, introduce spices like ginger or allspice to add depth.

Serving and Presentation Guide

Plating techniques can elevate your cupcake presentation. Consider tiered stands for a striking display, utilizing varying heights and colors to draw attention. Simple garnishing ideas include sprinkling chopped hazelnuts or a drizzle of caramel sauce.

Traditional accompaniments like a scoop of vanilla ice cream create a delightful contrast to the carrot cake. Modern serving suggestions include pairing with a herbal tea or spiced chai for an indulgent afternoon treat.

Temperature considerations matter! Serve these cupcakes slightly chilled to showcase the creamy frosting. Portion control is easier with standard cupcake liners, but avoid too generous servings to let guests enjoy a variety of desserts.

Wine and Beverage Pairing

Wine pairings with these Luscious Carrot Cake Cheesecake Cupcakes can be delightful; consider a light Riesling or Moscato, which pair beautifully with the sweetness of the carrot cake and cream cheese frosting. For those who prefer non-alcoholic alternatives, a ginger lemonade works wonderfully to balance the flavors.

If you enjoy coffee or tea with dessert, a strong cup of Earl Grey highlights the spices of the cupcake, creating a comforting combination. Serve at optimal warmth, allowing the flavors to shine through.

Storage and Shelf Life

Proper storage methods ensure the longevity of your cupcakes. Keep them in an airtight container in the refrigerator for up to a week. This helps the cream cheese frosting maintain its texture while preserving the moisture of the cupcakes.

Temperature requirements for storage include cooler environments to prevent spoilage. Suitable containers include glass or plastic with tight-sealing lids, ensuring freshness. Signs of spoilage might include an unpleasant odor or a dry texture, signaling it’s time to discard them.

If you want to enjoy them later, freezing is an option. Wrap individual cupcakes in plastic wrap and aluminum foil, then store them in a freezer-safe bag for up to three months.

Make Ahead Strategies

Prep timeline is key; you can make the batter and cheesecake filling in advance, storing them separately in the refrigerator. This allows for easy assembly when you’re ready to bake. Quality impact assessment shows that making them a day later improves flavor as they set.

Assembly tips include baking the cupcakes and frosting just before serving for optimal freshness. If you want to add fresh elements, consider garnishing with herbs or citrus zest right before serving to keep colors vibrant.

Scaling Instructions

When halving the recipe, adjust each ingredient proportionately to maintain flavor balance. For doubling or tripling, prepare for longer baking times, and consider using multiple cupcake pans to streamline the process.

Equipment adjustments may be needed for larger batches, ensuring your kitchen tools can handle increased quantity. Timing modifications are crucial for cooking; check for doneness regularly when scaling up.

Nutritional Deep Dive

The macro breakdown of these Luscious Carrot Cake Cheesecake Cupcakes includes carbohydrates from flour and sugar and protein from eggs and cream cheese. Understanding these macros helps in balancing indulgence within a meal plan.

Micronutrient analysis reveals the benefits of carrots, which are rich in vitamin A, promoting good vision and skin health while providing fiber. Dietary considerations are important for maintaining a balanced diet; enjoy these cupcakes as an occasional treat rather than a daily indulgence.

Portion analysis indicates that moderation is key for weight management; planning to enjoy just one cupcake can allow you to satisfy sweet cravings without going overboard.

Dietary Adaptations

For a gluten-free version, replace flour with a gluten-free blend. Use certified gluten-free oats to maintain the integrity of the cake while ensuring it’s suitable for everyone.

For a dairy-free option, substitute cream cheese with cashew cheese or a dairy-free alternative. If you are looking for a vegan version, use plant-based buttermilk and egg replacements such as flax meal.

Troubleshooting Guide

Texture issues such as dry cupcakes can result from overbaking or too much flour. Ensure accurate measurements and check for doneness earlier than the suggested time.

For flavor balance, if your cupcakes taste too sweet, consider reducing sugar in the frosting, as the cake itself will also contribute sweetness. Additionally, bring the balance of spices to the forefront to avoid cloying flavors.

Recipe Success Stories

Community feedback has shown great enthusiasm for these cupcakes, with many praising the delightful blend of flavors. Readers have shared successful adaptations, such as incorporating unique spices and additional fruits, creating their own signature version.

Photography tips include capturing the vibrant colors of the carrot and the creamy frosting, highlighting their appeal on social media. Recipe variations have encouraged a lively discussion amongst bakers, expanding the community around this delightful treat.

Frequently Asked Questions

Can I freeze these cupcakes?

Yes! You can freeze the cupcakes for up to three months. Wrap them individually to maintain freshness.

What can I substitute for cream cheese?

If you’re looking for a substitute, mascarpone or ricotta cheese can be used, but they will alter the flavor slightly.

Is this recipe suitable for kids?

Absolutely! These cupcakes are a hit with kids due to their tasty nature and fun presentation.

Can I add nuts to the batter?

Yes, adding chopped walnuts or pecans provides additional crunch and flavor. Just be sure to chop them finely.

What spices are traditionally used in carrot cake?

The most common spices are cinnamon, nutmeg, and ginger, which complement the sweetness of the carrots perfectly.

How do I know when my cupcakes are done?

Check for doneness by inserting a toothpick in the center; it should come out clean or with a few moist crumbs attached.

Can I make mini versions of these cupcakes?

Yes! Just reduce the baking time and watch closely as they will bake faster.

What goes well as a garnish on these cupcakes?

Shredded carrots, edible flowers, or a sprinkle of crushed nuts make beautiful garnishes!

How do I store leftover cupcakes?

Keep them in an airtight container in the fridge to maintain freshness for about a week.

What is the best way to serve these cupcakes?

Serve them chilled or at room temperature, adorned with a dollop of frosting for presentation.

Additional Resources

Explore related recipes, including classic carrot cake, and cream cheese frosting to enhance your baking repertoire. Technique guides on making perfect cupcakes or cream cheese frosting offer deeper understanding and skills.

Ingredient information about the benefits of using fresh spices and quality carrots will empower your future baking adventures. For equipment recommendations, look for quality cupcake pans and mixers that stand the test of time. Seasonal variations can inspire new twists on this classic recipe throughout the year.

Join the Conversation

Share your baking creations on social media using the recipe hashtag! Join our community and engage with fellow bakers. Offer feedback and photography tips to inspire others and encourage recipe reviews to enhance our baking community.

The Recipe

Luscious Carrot Cake Cheesecake Cupcakes

Serves: 12 cupcakes

Prep Time: 20 mins

Cook Time: 25 mins

Total Time: 45 mins

Kitchen Equipment Needed

  • Cupcake pan
  • Mixing bowls
  • Hand mixer or stand mixer
  • Measuring cups and spoons
  • Piping bag (for frosting)

Ingredients

  • 1 1/2 cups all-purpose flour
  • 1 teaspoon baking soda
  • 1 teaspoon baking powder
  • 1 teaspoon cinnamon
  • 1/2 teaspoon nutmeg
  • 1/4 teaspoon salt
  • 1/2 cup granulated sugar
  • 1/2 cup brown sugar
  • 1/2 cup vegetable oil
  • 3 large eggs
  • 1 teaspoon vanilla extract
  • 1 1/2 cups grated carrots
  • 8 oz cream cheese, softened
  • 1/2 cup powdered sugar
  • Additional frosting ingredients as desired

Directions

  1. Preheat your oven to 350°F (175°C) and line a cupcake pan with liners.
  2. In a bowl, mix flour, baking soda, baking powder, cinnamon, nutmeg, and salt.
  3. In another bowl, whisk the sugars, oil, eggs, and vanilla until smooth.
  4. Gradually add the dry ingredients to the wet ingredients, mixing just until combined.
  5. Fold in the grated carrots gently.
  6. Fill the cupcake liners about 3/4 full with cupcake batter.
  7. In a separate bowl, combine softened cream cheese and powdered sugar until smooth for the cheesecake filling.
  8. Place a dollop of cream cheese filling onto each cupcake batter before baking.
  9. Bake in preheated oven for 20-25 minutes, checking with a toothpick for doneness.
  10. Remove from oven and let cool in the pan for 5 minutes before transferring to a wire rack.
  11. Once cooled, frost with cream cheese frosting and serve.

Recipe Notes

  • Feel free to add nuts or raisins to the batter for added flavor and crunch.
  • Use leftover frosting as a dip for fruit or cookies!
  • Experiment with different spices if you want to tweak the flavor profile.

Indulge in Easy Chocolate Pecan Caramel Truffles Recipe

Chocolate Pecan Caramel Truffles – A Decadent Easy Dessert Recipe!

⚖️
Difficulty
Easy

⏲️
Prep Time
15 mins

🕒
Cook Time
5 mins

⏱️
Total Time
20 mins

🍽️
Servings
12 truffles

Indulge in the rich, luxurious flavors of Chocolate Pecan Caramel Truffles! This easy dessert recipe is perfect for chocolate lovers and anyone looking to impress their guests with a sweet treat. These truffles combine the nutty crunch of pecans, the creamy sweetness of caramel, and the intense flavor of dark chocolate, making them a truly decadent experience. Whether it’s a family gathering, a dinner party, or a cozy night in, these chocolate truffles bring a touch of elegance to any occasion.

What makes these Chocolate Pecan Caramel Truffles so special is not only their delightful flavor profile but also their ease of preparation. With just a few ingredients and minimal time, you can create a dessert that rivals those found in the finest bakeries. The combination of sweet and salty, along with the melt-in-your-mouth texture, ensures that one truffle will never be enough!

Quick Recipe Highlights

  • Flavor Profile: The chocolate offers a rich, bittersweet taste that contrasts beautifully with the buttery caramel and the warm nuttiness of the pecans.
  • Texture: Each truffle boasts a creamy interior enveloped in a smooth chocolate shell, providing a satisfying crunch from the pecans.
  • Aroma: The delightful aroma of melted chocolate and toasty pecans fills the air, creating an irresistible invitation to indulge.
  • Visual Appeal: These truffles have a glossy chocolate finish and a beautiful pecan topping, making them an eye-catching dessert.
  • Skill Level Needed: Perfect for beginners, this recipe requires no specialized skills, just a bit of patience while the chocolate sets.
  • Special Equipment: All you need is a microwave-safe bowl, mixing utensils, and a chocolate mold or tray for shaping the truffles.

Recipe Overview

  • Difficulty Level: This recipe is categorized as easy, making it approachable for novice bakers and busy cooks alike.
  • Category: These truffles make an excellent dessert or sweet snack, ideal for satisfying a sweet tooth at any time of the day.
  • Cuisine: Although seemingly gourmet, this recipe draws from classic dessert-making traditions, focusing on the luxurious combination of chocolate and nuts.
  • Cost: With ingredients mainly found in the pantry, making these truffles is budget-friendly, costing around $10 to prepare.
  • Season: Chocolate Pecan Caramel Truffles are perfect for all seasons, but they shine during the holidays when shared among loved ones.
  • Occasion: These truffles are great for celebrations, dinner parties, or as a thoughtful homemade gift for friends and family.

Why You’ll Love This Recipe

These Chocolate Pecan Caramel Truffles combine the classic flavors of chocolate and caramel with the delightful crunch of pecans, making them an unforgettable treat. The rich chocolate coating provides a smooth finish that perfectly contrasts with the gooey caramel center, while the pecans add a nutty depth that elevates each bite. Each truffle is a small piece of heaven that promises to satisfy your sweet cravings.

The ease of preparation is another benefit of this recipe. In just 20 minutes, you can whip up a batch of these decadent truffles with minimal fuss. This makes them an excellent choice for spontaneous gatherings or when you want to treat yourself without spending hours in the kitchen. The straightforward process ensures you won’t find yourself overwhelmed, allowing you to focus on the joy of indulging in your creation.

From a nutritional standpoint, using high-quality chocolate and nuts provides essential nutrients such as antioxidants and healthy fats. You can feel good about indulging in these truffles, knowing they offer some nutritional benefits. They are a delightful way to treat yourself while still incorporating some wholesome ingredients into your dessert.

These truffles also shine in a social setting. They can be beautifully arranged on a platter, making them an irresistible centerpiece for any dessert table. Their elegant presentation is sure to impress your guests, leading to compliments and requests for the recipe. Sharing these truffles will create memorable moments with friends and family.

Finally, the cost-effectiveness of this recipe cannot be overlooked. With just a handful of ingredients, you can make dozens of delightful truffles that would typically cost a fortune at a specialty shop. This means you can indulge more often or even surprise a loved one with a homemade gift that carries the extra thought and love.

Historical Background and Cultural Significance

The origin of chocolate truffles dates back to the late 19th century in France, where they were created by pastry chefs who wanted to combine chocolate with rich fillings. The traditional truffle shape, resembling the prized fungi found in the ground, inspired their name. Over the years, chocolate truffles evolved from simple chocolate ganache to incorporate various flavors, textures, and decorations.

Chocolate has always held a significant place in culinary history, initially consumed as a bitter beverage by ancient Mesoamerican cultures. With the arrival of European influence, especially in Belgium and France, chocolate underwent transformation into the sweet delicacies we know today. The combination of caramel and nuts captures traditional flavors while adding a touch of modern indulgence.

Regional variations of truffles have emerged around the world, showcasing local ingredients and flavors. In Italy, for instance, one might find an addition of espresso or citrus zest, creating a unique twist on the classic. Each region puts its spin on the truffle, making it a versatile dessert enjoyed globally.

In many cultures, desserts play a crucial role in celebrations and gatherings. Chocolate Pecan Caramel Truffles encapsulate the spirit of sharing and indulgence, making them a perfect addition to holidays like Christmas, Valentine’s Day, or even birthdays. They allow for personal expression, creativity, and the joy of gifting handmade treats to loved ones.

Ingredient Deep Dive

Dark Chocolate
Dark chocolate is the heart of our truffles, offering a deep, complex flavor. It is rich in antioxidants, particularly flavonoids, which have been linked to various health benefits, including improved heart health. When selecting dark chocolate, look for a cocoa content of at least 70% for a rich flavor. For storage, keep it in a cool, dry place, as chocolate is sensitive to temperature and humidity. If you’re looking for substitutions, milk chocolate or white chocolate can also be used, but the flavor profile will change.

Pecans
Pecans add a delightful crunch and earthy flavor to the truffles. They are also packed with essential nutrients, including healthy fats, protein, and fiber. When choosing pecans, opt for fresh nuts that are firm and have a pleasant aroma. To store them, keep them in an airtight container to maintain freshness. If you’re in need of substitutions, walnuts or almonds can be used, although they will impart a different flavor.

Caramel
Caramel provides a luscious, gooey center that contrasts beautifully with the chocolate coating. Traditionally, caramel is made by heating sugar until it melts and turns golden brown, producing a rich flavor. It’s essential to watch the caramel closely to prevent burning. For convenience, store-bought caramel can be used as a time-saver. Store caramel in a cool environment if made fresh, and consider options like chocolate caramel for a deeper flavor.

Common Mistakes to Avoid

  • Not tempering the chocolate properly: If chocolate is not tempered, it won’t have a glossy finish and could develop a white bloom.
  • Using low-quality chocolate: The flavor of your truffles is directly tied to the quality of the chocolate, so always opt for high-quality brands.
  • Overheating the caramel: Monitor the caramel closely while cooking to prevent it from burning, leading to a bitter taste.
  • Skipping the cooling time: Allowing the truffles to cool fully before handling ensures they set properly and maintain their shape.
  • Pecans not chopped evenly: Ensure the pecans are evenly chopped to maintain consistency in texture throughout the truffles.
  • Not coating the truffles properly: Ensure each truffle is fully coated in chocolate to keep the caramel from leaking.
  • Skipping refrigeration: Allowing the truffles to cool in the fridge helps them set properly for easier handling.
  • Not tasting as you go: Keep tasting the components as you assemble your truffles to achieve the desired flavor balance.

Essential Techniques

Tempering Chocolate
Tempering chocolate is essential to achieve a smooth, glossy finish on your truffles. It involves melting the chocolate to a specific temperature and cooling it down while continually stirring. This process aligns the cocoa butter crystals, creating a better snap and a beautiful shine. To master this, use a thermometer to monitor temperatures closely, as failure can result in thick or dull-looking chocolate. Look for a smooth, shiny appearance as a visual cue for success.

Molding Truffles
Molding truffles is the technique used to give them their round shape. After preparing your filling, use a small cookie scoop or your hands to shape the mixture into balls. Ensure you work quickly, as the heat from your hands can melt the chocolate. The ideal truffle should be firm and well-formed, avoiding any cracks or uneven surfaces. To master this technique, practice will help improve your speed and efficiency, yielding consistently shaped truffles.

Pro Tips for Perfect Chocolate Pecan Caramel Truffles

1. Use room temperature ingredients: Ensure your ingredients like cream or butter are at room temperature for easier mixing and better texture.
2. Chill the filling before shaping: After making the caramel, let it cool in the refrigerator for easier handling and to prevent melting when shaping.
3. Utilize a double boiler for melting chocolate: This gentle heating method prevents scorching and ensures a smooth chocolate consistency.
4. Be generous with coatings: For a thicker chocolate shell, don’t be afraid to dip the truffles twice in chocolate for added richness.
5. Experiment with flavors: Try adding a dash of sea salt on top of the truffles for a delightful sweet-salty combination.
6. Allow the truffles to set at room temperature: This will enhance the flavors as they reach their best taste and texture before serving.
7. Decorate with cocoa powder or crushed nuts: Add visual appeal by rolling the finished truffles in cocoa powder or chopped nuts for extra texture.
8. Keep them chilled until serving: This will help maintain their shape and prevent chocolate from melting during warmer weather.

Variations and Adaptations

Chocolate Pecan Caramel Truffles can be adapted to suit various preferences. For those looking to explore flavors, consider adding orange zest or espresso powder to the caramel for a unique twist. Seasonal adaptations could include incorporating peppermint extract during the winter holidays, creating a festive peppermint bark-like version of these truffles.

When catering to dietary needs, you can easily make these truffles dairy-free by utilizing coconut cream and dairy-free chocolate. For a gluten-free version, ensure all ingredients are certified gluten-free, particularly when using mixed nuts. Don’t hesitate to alter the type of nuts as well, with almonds or hazelnuts offering a different taste experience.

For a delightful presentation, consider shaping the truffles into different forms or sizes. You might create bite-sized versions for parties or larger truffles for a more decadent treat. The choices are endless when it comes to customizing these little bites of bliss!

Serving and Presentation Guide

Presentation plays a key role in enhancing the enjoyment of your truffles. To plate your Chocolate Pecan Caramel Truffles, consider using decorative paper cups or a beautiful serving tray. Arranging the truffles in a circular pattern can create a stunning visual centerpiece for any dessert table.

For garnishing, a sprinkle of coarse sea salt atop each truffle elevates their appearance and adds a flavor contrast that people love. Consider drizzling melted chocolate over the top of the finished truffles for an extra touch of elegance.

These truffles can be served fresh from the fridge for a cool and indulgent taste, or at room temperature for a softer texture. Portion control can also be guided by using smaller molds, making them the perfect pick-me-up for snacks without overindulging.

Wine and Beverage Pairing

For wine pairings, a rich red like a Cabernet Sauvignon complements the sweetness of the caramel beautifully. The deep fruit flavors of the wine enhance the chocolate without overpowering it. For a non-alcoholic alternative, consider serving a rich coffee or espresso, which balances the sweetness and heightens the flavors of the truffles.

Herbal teas, especially those with chocolate notes or spices, work well as a lighter pairing. Always serve your chosen beverage at the recommended temperatures to ensure optimal flavor when enjoyed alongside your truffles.

Storage and Shelf Life

To keep your Chocolate Pecan Caramel Truffles fresh, store them in an airtight container at room temperature for up to one week, away from direct sunlight. If you need to store them longer, refrigeration can extend their shelf life to about two weeks.

If freezing, ensure each truffle is individually wrapped or placed in a single layer in a freezer-safe container to avoid sticking. They will last up to three months in the freezer. To enjoy, simply take them out and let them thaw in the refrigerator before serving for the best texture.

Make Ahead Strategies

For those looking to prepare truffles in advance, make the caramel filling a day or two ahead of time. Store it in the fridge and let it come to room temperature before using. This allows the flavors to develop even further, enhancing the end result.

You can also shape the truffles and store them at any point before coating them in chocolate. This way, you can have ready-to-dip truffles on hand whenever you’re ready to finish them.

Consider preparing the truffles for gifting by placing them in decorative boxes or jars. Make-ahead strategies not only save time but also ensure you have delightful treats ready for any occasion.

Scaling Instructions

Scaling your Chocolate Pecan Caramel Truffles recipe is straightforward! If you’re looking to make a smaller batch, simply halve the ingredient measurements, and enjoy a few less decadent individual treats.

To make a larger batch, it’s easy to double or even triple the ingredients without concern for the recipe’s integrity. Just ensure you have adequate mold space or room on your baking sheet to avoid overcrowding when shaping.

Timing adjustments may be necessary only in terms of cooling and setting times. Larger batches may require extra refrigeration time to ensure they set properly. Sizeable portions can also impact storage considerations, as you might need more substantial containers to store your delicious creations.

Nutritional Deep Dive

Examining the nutritional aspects of your Chocolate Pecan Caramel Truffles reveals some interesting insights. Each truffle is relatively high in healthy fats from the pecans, providing essential nutrients like vitamin E and magnesium. Moderation is key, as the sugar content from caramel can be considerable, making these truffles more of an occasional treat.

When considering portion sizes, one or two truffles can be an entirely reasonable indulgence, especially when paired with a nutritious beverage, such as green tea. If you are mindful of sugar intake, consider balancing your diet on the day you plan to enjoy these sweet bites.

Additionally, if you seek to reduce calories, consider making smaller truffles, allowing you to savor the same flavors without all the calories that come with larger portions. From a weight management perspective, enjoying a small treat like this can satisfy cravings without leading to overindulgence.

Dietary Adaptations

For those adhering to gluten-free diets, ensuring your chocolate and other ingredients are labeled gluten-free guarantees enjoyment without worry. You can also explore dairy-free options by substituting regular cream with coconut cream or almond milk, achieving a similar texture without the dairy.

Those pursuing vegan diets can easily replace dark chocolate with dairy-free varieties, and ensure caramel is made with coconut cream and plant-based alternatives for a fully vegan-friendly treat.

Low-carb or keto dieters can utilize dark chocolate with a minimal sugar content and substitute sugar in the caramel for a suitable alternative. This flexibility facilitates creating delicious desserts for diverse dietary preferences without skimping on taste.

Troubleshooting Guide

For texture issues, if your chocolate coating appears dull or soft, ensure you’ve tempered your chocolate well; reheating may be necessary. If truffles turn out too crumbly, adjust your caramel to add more moisture to the mixture.

If flavor balance feels off, a slight sprinkle of sea salt can enhance sweetness without overwhelming flavors. For any temperature problems, check your environment; keeping the kitchen cool can help when working with chocolate.

Equipment challenges may arise if you lack specific tools. A makeshift double boiler can be created by using pots filled with water and bowls on top to melt chocolate safely. Lastly, if time concerns arise, opt for chilled cooling, allowing set time to expedite your truffle-making process.

Recipe Success Stories

The response to these Chocolate Pecan Caramel Truffles has been overwhelmingly positive, with countless readers expressing their delight and surprise at how easily they create such a luxurious treat. Community feedback emphasizes the excellent balance of flavors, noting the truffles’ quality far exceeds expectations for homemade desserts.

Some readers have made successful variations, incorporating spices like cinnamon or almond extracts, which added an exciting dimension to their truffles. Several have shared their ingenious adaptations, such as using leftover truffles for creating delightful desserts, like ice cream toppings or as a filling for pastries.

Photography tips from our community reveal that presenting the truffles on rustic wooden boards or slate tiles enhances their homey feel, making for the perfect Instagram post. By sharing stories and feedback, a close-knit community of bakers has emerged, each exploring their unique takes on this voracious treat!

Frequently Asked Questions

Q1: Can I make these truffles ahead of time? Yes, you can prepare the caramel and shape the truffles ahead of time. Store them in the fridge and coat them in chocolate right before serving to maintain freshness.

Q2: What can I substitute for pecans? If you’re allergic or simply don’t have pecans, walnuts, or almonds can serve as great alternatives, though the flavor will differ slightly.

Q3: How should I store the truffles? Keep them in an airtight container at room temperature for up to a week, or refrigerate them for about two weeks. They can also be frozen for three months!

Q4: Can I use milk chocolate instead of dark chocolate? Yes, but keep in mind that it will change the flavor profile. Milk chocolate is sweeter and less rich than dark chocolate.

Q5: What is the best way to melt chocolate? A double boiler is ideal for melting chocolate gently without scorching it. Microwave in short bursts, stirring regularly if you’re using that method.

Q6: How do I ensure my truffles have a nice sheen? Properly tempering your chocolate will help achieve that glossy finish on your truffles.

Q7: Can I add flavored extracts to the recipe? Absolutely! A few drops of vanilla, almond, or espresso extract can elevate the flavor of your truffles beautifully.

Q8: Are these truffles gluten-free? Yes, by using gluten-free chocolate and ensuring your other ingredients are labeled gluten-free, you can safely enjoy these truffles without gluten.

Q9: What is the ideal temperature for serving? Truffles are best served at room temperature for a softer texture, but can also be stored in the fridge for a firmer bite.

Q10: How can I decorate my truffles? Consider rolling them in cocoa powder, chopped nuts, or a drizzle of melted chocolate for an attractive finishing touch.

Q11: How long do they take to set? Allow them to set in the refrigerator for about 30 minutes after coating them with chocolate.

Q12: Can I use any caramel for this recipe? Yes! You can use homemade caramel or store-bought caramel, just make sure it has a good consistency for filling the truffles.

Additional Resources

If you enjoyed these Chocolate Pecan Caramel Truffles, you might want to explore other recipes that highlight chocolate’s versatility. Check out our recipes for Classic Chocolate Cake, Chocolate Mousse, or even Chocolate-Dipped Strawberries for delightful chocolate-inspired ideas.

For those keen on enhancing their baking skills, look for technique guides on tempering chocolate, molding sweets, or making homemade caramel from scratch. Such fundamental skills will boost your confidence in the kitchen and expand your dessert offerings.

Consider exploring equipment recommendations for your baking endeavors. Investing in quality mixing bowls, chocolate molds, or proper measuring tools will greatly aid in crafting delicious dishes in the future.

Finally, seasonal variations in sweets can inspire you throughout the year, from pumpkin-spiced truffles in the fall to cherry-infused chocolates in summer—innovate and celebrate with each celebration.

Join the Conversation

We invite you to share your experience with making Chocolate Pecan Caramel Truffles! Use the hashtag #ChocolatePecanTruffles on social media to showcase your creations and inspire others. Photograph your truffles beautifully and share tips or variations you’ve tried to engage community members and create dialogue around this delicious dessert.

Leave a comment below with your thoughts on this recipe, any successful adaptations you’ve created, or simply to share your experience. Your voice matters, and your contribution helps establish a rich community of bakers eager to try new things and support one another.

Join us in this culinary journey, and let’s celebrate the love for baking and sharing delightful treats together!

The Recipe

Chocolate Pecan Caramel Truffles

Serves: 12 truffles

Prep Time: 15 mins

Cook Time: 5 mins

Total Time: 20 mins

Kitchen Equipment Needed

  • Microwave-safe bowl or double boiler
  • Mixing spatula
  • Cookie scoop or melon baller
  • Airtight container for storage
  • Chocolate mold or baking sheet

Ingredients

  • 1 cup dark chocolate chips (70% cocoa or higher)
  • ½ cup pecans, finely chopped
  • ½ cup caramel sauce (store-bought or homemade)
  • Additional pecans for garnish

Directions

  1. Prepare a baking sheet by lining it with parchment paper.
  2. Melt the dark chocolate in a microwave-safe bowl or double boiler, stirring until smooth and glossy.
  3. Using a cookie scoop, portion out the caramel into small mounds and place them on the prepared baking sheet. Chill in the refrigerator for about 15 minutes.
  4. Once the caramel is firm, take chocolate out of the fridge and dip each caramel mound into the melted chocolate, fully coating it.
  5. Return the chocolate-covered truffles back to the baking sheet, and sprinkle additional chopped pecans on top for decoration.
  6. Let the truffles set in the refrigerator until firm, about 30 minutes, before serving.

Recipe Notes

  • For a gourmet touch, consider adding a sprinkle of sea salt on top of each truffle before they set.
  • Store any leftover truffles in an airtight container at room temperature for up to a week or in the refrigerator for up to two weeks.
  • Feel free to experiment with different types of nuts or chocolate to create your unique version of these truffles.

Easy French Onion Soup Recipe You Can’t Afford to Lose

Easy French Onion Soup – A Comforting Classic

⚖️
Difficulty
Easy

⏲️
Prep Time
15 mins

🕒
Cook Time
40 mins

⏱️
Total Time
55 mins

🍽️
Servings
4

French Onion Soup is more than just a meal; it’s a warm embrace on a chilly evening. This classic French dish boasts a rich, deep flavor profile, where perfectly caramelized onions blend beautifully with a comforting broth. With each spoonful, you’ll savor the gooey, melted cheese that floats atop toasted bread, creating a delightful contrast to the smooth soup beneath. It’s a dish that not only satisfies your hunger but also enchants your senses, capturing the essence of home-cooked comfort.

In this Easy French Onion Soup recipe, the simplicity and accessibility of ingredients make it an ideal dish for novice cooks and seasoned chefs alike. By utilizing everyday pantry staples, anyone can create a bowl of soul-soothing goodness that’s ready to impress family and friends. The process of caramelizing onions fills your kitchen with an irresistible aroma, making it almost impossible to resist sneaking a taste before the soup is even served!

Quick Recipe Highlights

  • Flavor Profile: The combination of sweet caramelized onions and savory beef broth creates a warm and inviting flavor.
  • Texture: The soup features a silky liquid contrasted by crunchy croutons topped with melted cheese, providing a delightful textural experience.
  • Aroma: As the onions cook down, their sweetness fills the kitchen, offering an alluring scent that beckons you to the table.
  • Visual Appeal: Topped with golden, bubbly cheese and accompanied by crusty bread, it presents beautifully in any bowl.
  • Skill Level Needed: This recipe is straightforward, requiring basic chopping and sautéing skills.
  • Special Equipment: A heavy-bottomed pot or Dutch oven is essential for achieving the perfect caramelization of the onions.

Recipe Overview

  • Difficulty Level: This Easy French Onion Soup is classified as easy, making it perfect for beginning cooks wanting to try their hand at a traditional recipe.
  • Category: Ideal for lunch or dinner, it can be served as a starter or main dish, pairing well with various sides.
  • Cuisine: French Onion Soup hails from rustic French cuisine, showcasing the simple yet rich flavors of the region.
  • Cost: With a modest ingredient list, this soup is budget-friendly, costing approximately $10 for four servings.
  • Season: This recipe shines in the colder months, providing warmth and comfort as winter approaches.
  • Occasion: Whether for a cozy family dinner, a gathering with friends, or a comforting weeknight meal, this soup fits any occasion.

Why You’ll Love This Recipe

French Onion Soup tantalizes the taste buds with its harmonious flavors. The sweetness of the caramelized onions mingles with a hearty broth, creating a soothing experience that leaves you wanting more. Paired with cheesy croutons, each bite offers a delightful contrast, making it a comforting bowl of happiness that warms you from the inside out.

Another reason to love this recipe is its convenience. With minimal prep time and simple cooking steps, you can whip up a pot of this delicious soup that’s sure to impress. The whole process allows you time to unwind while the flavors deepen, making it an excellent choice for busy evenings or leisurely weekends.

From a nutritional standpoint, French Onion Soup offers a comforting yet simple meal. Onions, a main ingredient, are packed with vitamins and antioxidants, providing health benefits while satisfying your cravings. Additionally, when made with low-sodium broth, this dish can be a smart choice for those watching their sodium intake.

Serving this soup is a wonderfully social experience. Whether you’re sharing it with family on a cozy night in or showcasing it at a dinner party, it invites conversation and compliments. The communal aspect of dipping bread and enjoying together creates a connection that elevates the dining experience.

Lastly, Easy French Onion Soup is cost-effective. It uses basic ingredients readily found in your pantry, allowing you to serve a gourmet dish without breaking the bank. This makes it not only delicious but accessible for everyone looking to enjoy a taste of comfort.

Historical Background and Cultural Significance

French Onion Soup has its roots in Ancient Roman times when onions were plentiful and served in various dishes. However, the modern version we enjoy today is thought to have originated in the 18th century, becoming popular in Parisian bistros as a peasant meal due to its affordability and simple ingredients.

Over the years, the French Onion Soup evolved, gaining recognition in gourmet cuisine. Its popularity surged in the 1960s when chefs began to incorporate it into fine dining menus, elevating its status from a humble dish to a culinary classic. It is now a staple in French restaurants worldwide.

The soup holds significant cultural importance in France, representing resourcefulness. Soldiers and workers favored it for its ability to nourish and fortify them during long, demanding days. Today, it reflects the warmth and hospitality of French culture, often served in homes during gatherings.

Regional variations of French Onion Soup also exist, with some adding white wine or herbs for additional depth of flavor. Each variation tells a story of local preferences and traditions, showcasing the dish’s adaptability while remaining true to its origins.

Ingredient Deep Dive

Onions are the star of French Onion Soup, providing the dish’s signature sweetness and depth. These allium vegetables have been grown for thousands of years and are known for their rich flavor and health benefits, including anti-inflammatory properties and high vitamin C content. When selecting onions for this soup, opt for yellow onions, as they caramelize beautifully and contribute to that desired golden color. Store onions in a cool, dark place, and they can last several weeks. If you don’t have yellow onions, shallots or even red onions can serve as alternatives, though they will alter the soup’s final taste.

Beef broth is essential, forming the foundation of the soup’s flavor. Its robust, savory profile enhances the overall taste, making it rich and fulfilling. You can use store-bought low-sodium beef broth for convenience or make your own for a fresher taste. When selecting broth, look for varieties that are free of preservatives. If you prefer a lighter option, vegetable broth can also be used, though the flavor will be milder.

Cheese adds the finishing touch to this dish, typically Gruyère, which melts beautifully and brings a nutty flavor. This Swiss cheese is known for its excellent melting qualities, producing that perfect cheesy layer on top of the soup. When choosing cheese, ensure it’s fresh for the best flavor. Alternatives like mozzarella or provolone can be used, but these cheeses will yield different tastes. For a lower-fat option, reduced-fat cheeses can suffice, although they may not melt as well.

Common Mistakes to Avoid

  • Not caramelizing the onions long enough: One of the keys to a great French Onion Soup is perfectly caramelized onions, which require time and patience to develop their deep, sweet flavor.
  • Using the wrong type of onions: Using white onions instead of yellow can result in a soup that lacks the necessary depth of flavor, as yellow onions yield the best sweetness when cooked.
  • Over-salting the broth: It’s important to taste your broth as you go. Store-bought broths can vary in sodium content, and you may need less than you expect.
  • Cooking at high heat: Cooking onions at too high a temperature can burn them instead of caramelizing and will create an unpleasant bitterness in the soup.
  • Neglecting the cheese: Adding cheese too early can lead to a tough, rubbery texture; it should be melted on top just before serving.
  • Not using enough liquid: This can lead to a soup that is too thick; you want a balance of broth to onions for the best flavor.
  • Failing to taste along the way: Regularly tasting your soup allows you to adjust flavors as needed, ensuring a perfectly balanced final dish.
  • Not layering flavors: Adding a splash of white wine deglazes the pot and enhances the flavor; skipping this step can result in a less complex soup.
  • Using stale bread for croutons: Fresh bread creates a better texture and flavor profile, crucial for the soup’s garnish.
  • Ignoring the garnishing: A sprinkle of fresh herbs or cracked black pepper before serving can elevate your soup’s presentation and flavor.

Essential Techniques

Caramelization is a technique crucial for developing the deep, sweet flavor of the onions. To master this, cook them slowly over medium to low heat, stirring regularly and scraping the pot’s bottom to release the fond. Watch for a golden-brown color and sweet aroma to indicate readiness. Common pitfalls include rushing the process or cooking at too high a heat, leading to burnt onions instead of caramelized goodness.

Deglazing the pot enhances flavor by dissolving browned bits stuck to the bottom after cooking the onions. To do this, add a splash of white wine, scraping the bottom with a wooden spoon. This releases additional flavors that create a richly layered soup. Ensure the wine is dry; sweet varieties can alter the soup’s taste.

Pro Tips for Perfect Easy French Onion Soup

1. Use a mix of onions for added complexity—yellow and sweet onions can yield different yet complementary flavors.
2. Experiment with different types of broth, such as mushroom or chicken, for unique flavor profiles.
3. For an extra layer of flavor, toss in a few sprigs of thyme while the onions cook for an herbal touch.
4. Consider using a slow cooker; it deepens the flavor while freeing you up for other preparations.
5. Always taste as you season; this allows you to find the right balance of flavors that suits your palate.
6. Toast the bread until golden before placing it on the soup, ensuring that it holds up without becoming soggy too quickly.
7. For added richness, incorporate a small amount of sherry or cognac during cooking for a gourmet flair.
8. Always broil the completed soup for a few minutes to achieve that perfect bubbly cheese crust—watch it closely to prevent burning.

Variations and Adaptations

French Onion Soup can be adapted to fit every palate. For a regional variation, try adding a splash of port wine for a slightly sweeter and more robust flavor that pairs beautifully with the caramelized onions. Seasonal adaptations might include incorporating roasted butternut squash during autumn for a sweet and hearty twist, or adding fresh herbs in the summer for brightness.

For dietary modifications, create a vegan version by using vegetable broth and omitting cheese or substituting it with a dairy-free alternative. For gluten-free eaters, ensure the bread used as a topping meets their dietary needs.

For a flavorful texture variation, consider blending the soup partially to provide a creamier texture, leaving some onion chunks intact for that classic flavor. Presentation can be enhanced with fresh herb garnishes or a drizzle of truffle oil for an elegant touch.

Serving and Presentation Guide

When plating Easy French Onion Soup, opt for individual oven-safe bowls for a traditional presentation. Ladle the soup, ensuring each bowl gets a generous helping of onions and broth. Toast bread slices and place them directly on the soup, allowing them to soak slightly before sprinkling a generous amount of cheese on top.

Use fresh herbs like thyme or parsley to garnish for a pop of color and flavor. Traditional accompaniments include a crisp green salad or a light sandwich, providing a refreshing balance to the rich flavors of the soup.

Maintain serving temperature by using preheated bowls to serve piping hot soup, and encourage portion control by ladling smaller portions, ensuring everyone has room for seconds.

Wine and Beverage Pairing

When it comes to pairing wine with Easy French Onion Soup, look for a light-bodied red wine such as Pinot Noir or a rich white like Chardonnay. These wines harmonize beautifully with the soup’s savory flavors without overpowering them.

For non-alcoholic alternatives, consider sparkling water with a twist of lemon for a refreshing contrast. Pairing with herbal teas can enhance the aromatic profile; a lightly spiced chai or a classic Earl Grey would work splendidly.

When serving, ensure that the wine or beverage temperature aligns with the dish—serving red wines slightly chilled can elevate the dining experience.

Storage and Shelf Life

To store Easy French Onion Soup, allow it to cool and then transfer it to an airtight container, where it can last in the refrigerator for up to four days. If you plan to keep it longer, consider freezing it, where it can last up to three months; just ensure that it is completely cooled first to prevent ice crystals from forming.

For reheating, gently warm the soup on the stove over low heat, stirring occasionally. If frozen, allow it to thaw in the refrigerator overnight before reheating.

For the best quality, avoid reheating the soup more than once, as this can affect its flavor and texture. If you notice off smells or signs of spoilage, such as discoloration, it’s best to discard it.

Make Ahead Strategies

To save time, consider preparing the onions ahead of time. Caramelize them in advance, store them in the refrigerator, and sauté them quickly with broth when ready to serve. This pre-preparation focuses on developing the rich flavors without the long cooking time.

You can also pre-assemble all ingredients—chop onions, measure out broth, and prepare soups in advance. Store elements separately until you’re ready to heat and serve.

Reheating tips involve slowly warming your soup to maintain the cheese’s luscious texture. For added freshness, add a sprinkle of fresh herbs just before serving.

Scaling Instructions

If you need to halve the recipe, make sure to adjust cooking times accordingly—less soup may cook faster than the original. For larger gatherings, doubling or tripling is simple; just ensure you have a sufficiently large pot to accommodate the increased volume.

When scaling up, consider timing adjustments to allow for additional caramelization of the onions. Always taste and adjust seasonings throughout the cooking process; larger quantities may require different seasoning levels.

For leftover scaling, ensure that containers used for storage can accommodate the increased volume. Being mindful of the freezing process is crucial; portions should be layered correctly in airtight containers to maximize shelf life.

Nutritional Deep Dive

With Easy French Onion Soup, you gain a comforting meal but one that is balanced in nutrients as well. This soup is rich in carbohydrates and provides a hearty dose of dietary fiber from onions.

In terms of micronutrients, onions are high in vitamin C, potassium, and several antioxidant compounds, which support immune function and overall health.

When considering portion sizes, one serving gives a balanced intake of fats from cheese, carbs from bread, and proteins from broth—making it a well-rounded dish for any meal. By selecting low-sodium broth and reducing cheese portions, it’s easier to adapt to individual dietary goals or preferences.

Dietary Adaptations

For those seeking gluten-free adaptations, use gluten-free bread without compromising flavor. Dairy-free options can replace traditional cheese with nut-based or vegan alternatives, achieving a similar creamy texture without animal products.

For vegan variations, focus on vegetable broth and experiment with plant-based cheeses, or skip the cheese altogether for a lighter option.

Low-carb dieters might want to skip the bread and pair the soup with a side of sautéed greens. Those following a keto or paleo diet can substitute high-fiber bread alternatives, ensuring a fulfilling meal without the carbs.

Each adaptation emphasizes the versatility of this beloved dish while catering to various dietary needs.

Troubleshooting Guide

If your soup has a bitterness from burnt onions, reduce the heat and make sure to stir regularly during the caramelization process. If the flavor lacks richness, consider adding a splash of sherry or a bit more broth for depth.

For a too-thin consistency, simmer uncovered until it reduces to your desired thickness. Conversely, if it’s too thick, thin it out with additional broth.

If you find the cheese separating or clumping during melting, ensure this happens at low heat—using pre-grated cheese can also lead to undesirable melting habits.

Timing issues when caramelizing onions can happen; if it appears too rushed, lower the heat and add time back into the cooking schedule to avoid compromising flavor.

Recipe Success Stories

Many readers report their successes with Easy French Onion Soup, often mentioning how impressive it is for dinner parties. The combination of its simplicity and show-stopping flavor allows for varied applications—from everyday dining to festive gatherings.

Various adaptations have emerged from the community, with individuals sharing their tweaks, like adding chili flakes for a spicy kick or incorporating different broths for enhanced flavor.

Photographers from our community have shared stunning images of their completed soups, highlighting creative bread toppings and herb garnishes that elevate the dish.

Several readers express gratitude for how approachable this recipe is, making French cuisine feel accessible without sacrificing quality or flavor.

Frequently Asked Questions

Q: Can I use onion soup mix instead of fresh onions?
A: While onion soup mix can add flavor, it lacks the depth and richness of freshly caramelized onions. For the best results, use fresh onions for true culinary enjoyment.

Q: Is it possible to make this soup in advance?
A: Absolutely! You can caramelize the onions beforehand and freeze the soup in portions to enjoy later. Just reheat and add the cheese just before serving.

Q: How can I make this vegetarian?
A: Simply substitute the beef broth with vegetable broth and skip the cheese or opt for a plant-based cheese to create a vegetarian alternative.

Q: What’s the best way to store leftovers?
A: Store leftovers in an airtight container in the refrigerator for up to four days. You can also freeze it for up to three months.

Q: Can I use other types of cheese?
A: Yes! Gruyère is traditional, but you can experiment with Swiss, mozzarella, or provolone. Just ensure it melts well for that satisfying topping.

Q: How can I get my cheese to melt perfectly?
A: Broiling the soup with cheese on top for a few minutes achieves that bubbly, golden crust. Keep an eye on it to avoid burning!

Q: Is it possible to make this soup gluten-free?
A: Certainly! Use gluten-free bread for the topping and ensure your broth is also gluten-free.

Q: What if I accidentally burned my onions?
A: If onions get burnt, start again with new onions, as burnt onions will impart a bitter flavor to the soup.

Q: Can I add other vegetables for more nutrition?
A: Yes! Feel free to add chopped carrots or celery when cooking the onions for extra nutrition and flavor.

Q: Is there a low-carb version of this soup?
A: A low-carb variant can be achieved by skipping the bread and focusing on the rich broth and onions, or using cheese crisps as a topping instead.

Additional Resources

If you’re looking to dive deeper into culinary explorations, check out related recipes like Tomato Basil Soup for another classic comfort dish. For technique guides, explore articles on knife skills for the best onion preparation or cheese melting techniques.

Ingredient information on onions can also enhance your understanding, while equipment recommendations for Dutch ovens will ensure that you have the right tools on hand for this recipe. Seasonal variations can further inspire your cooking, especially when adapting this recipe to showcase the freshest ingredients as the seasons change.

Join the Conversation

We invite you to share your experiences with Easy French Onion Soup! Post your adaptations on social media and tag us, or leave a comment with your feedback and suggestions.

Consider sharing photos of your beautifully plated soup, offering tips that can aid fellow cooks in their journey. Engage and connect by discussing your favorite variations or serving suggestions with our community—your insights may inspire others!

Thank you for being a part of our cooking community, and we look forward to seeing how you bring this comforting dish to life!

The Recipe

Easy French Onion Soup

Serves: 4

Prep Time: 15 mins

Cook Time: 40 mins

Total Time: 55 mins

Kitchen Equipment Needed

  • Heavy-bottomed pot or Dutch oven
  • Wooden spatula
  • Measuring cups and spoons
  • Oven-safe bowls for serving

Ingredients

  • 4 large yellow onions, thinly sliced
  • 2 tablespoons of unsalted butter
  • 1 tablespoon olive oil
  • 1 teaspoon sugar (optional, for caramelization)
  • 4 cups beef broth (or vegetable broth for vegetarian version)
  • ½ cup dry white wine
  • Salt and pepper to taste
  • 4 slices of crusty bread
  • 1 cup shredded Gruyère cheese

Directions

  1. In a heavy-bottomed pot, heat the olive oil and butter over medium heat. Add the sliced onions and a pinch of salt.
  2. Cook the onions, stirring frequently, for about 20-30 minutes until they become golden brown and caramelized. If desired, sprinkle the sugar to enhance caramelization.
  3. Add the white wine, scraping up any brown bits from the bottom of the pot, and simmer for an additional 5 minutes.
  4. Pour in the broth, bring to a simmer, and season with salt and pepper to taste. Let it simmer for another 10-15 minutes to meld the flavors.
  5. Preheat your broiler. Ladle the soup into oven-safe bowls, top each with a slice of bread and a generous amount of Gruyère cheese.
  6. Broil the bowls until cheese is bubbly and golden brown, about 2-3 minutes. Keep an eye on them to prevent burning.
  7. Serve hot with a sprinkle of fresh herbs if desired.

Recipe Notes

  • For a deeper flavor, use homemade beef stock.
  • Feel free to experiment with different types of cheese for unique flavor profiles.
  • This soup can be made in a slow cooker; simply caramelize the onions and transfer them with other ingredients to the slow cooker for convenience.

Delicious Pumpkin BBQ Jalapeño Meatballs for Fall Gatherings

Pumpkin BBQ Jalapeño Meatballs: A Fall Flavor Delight

⚖️
Difficulty
Easy

⏲️
Prep Time
15 mins

🕒
Cook Time
25 mins

⏱️
Total Time
40 mins

🍽️
Servings
4 servings

If you’re in the mood for a dish that encapsulates the spirit of fall, look no further than these mouthwatering Pumpkin BBQ Jalapeño Meatballs. Combining the rich, earthy flavors of pumpkin with the smokiness of BBQ and a kick of heat from jalapeños, this recipe creates a perfectly balanced medley of taste that is sure to become a seasonal favorite. The moist, tender meatballs are not only delicious but also loaded with nutrients, making them a smart choice for any meal.

Imagine biting into a meatball that bursts with flavor, the subtle sweetness of pumpkin playing beautifully against the spiciness of fresh jalapeños and the savory notes from the BBQ sauce. Whether served as an appetizer at your next gathering or as a hearty main dish, these meatballs will impress and satisfy. The vibrant colors and enticing aromas will certainly elevate your dining experience, making every bite a joy to savor.

Quick Recipe Highlights

  • Flavor Profile: The combination of pumpkin and BBQ creates a rich, tangy flavor with a hint of sweetness.
  • Texture: Expect tender, juicy meatballs that are both succulent and satisfying.
  • Aroma: The aromatic notes of BBQ sauce mixed with fresh jalapeños and pumpkin will fill your kitchen with a comforting scent.
  • Visual Appeal: These meatballs are beautifully colored, showcasing warm yellows and rich browns that are perfect for fall.
  • Skill Level Needed: This easy recipe requires minimal cooking skills, making it accessible for home cooks of any level.
  • Special Equipment: A mixing bowl and baking sheet are all you need to whip up this delightful dish.

Recipe Overview

  • Difficulty Level: This recipe is considered easy, consisting of simple preparation and cooking steps that even beginner cooks can master.
  • Category: These meatballs fit great as both an appetizer and a main course, making them versatile for different meal occasions.
  • Cuisine: Blending traditional BBQ flavors with seasonal ingredients, this dish has a distinct American twist that celebrates autumn.
  • Cost: The estimated cost is relatively low, as many ingredients are commonly found in most kitchens or easily accessible.
  • Season: Fall is the best season to enjoy these meatballs due to the seasonal availability of pumpkins and the warm flavors they bring.
  • Occasion: Perfect for fall parties, family gatherings, or cozy dinners at home, these meatballs add a festive touch to any occasion.

Why You’ll Love This Recipe

The taste and texture of Pumpkin BBQ Jalapeño Meatballs are truly divine. The combination of ground meat and pumpkin creates a savory umami profile, complemented beautifully by the smokiness of BBQ sauce. The heat from jalapeños adds an exciting kick, creating an irresistible flavor explosion that keeps you coming back for more. Each bite is juicy, tender, and bursting with seasonal flavors, making this dish extraordinarily comforting.

Convenience is another reason to love this recipe. With just 15 minutes of prep time, you can have these meatballs ready to cook and subsequently delight your guests or family with a homemade dish. The straightforward ingredients are quick to assemble and the cooking time is brief, meaning you can enjoy delicious meatballs without spending the entire evening in the kitchen.

Health-wise, this dish packs a powerful nutritional punch. Pumpkins are high in vitamins A and C, fiber, and potassium, making them an excellent addition to your diet, especially for the fall season. By incorporating pumpkin, these meatballs not only have enhanced flavor but also contribute beneficial nutrients that support overall health.

When it comes to social gatherings, these meatballs shine. They are perfect for sharing and will surely be a conversation starter. Their delicious flavor profile makes them a crowd-pleaser, while their unique twist on traditional BBQ meatballs brings something new to the table, setting the mood for a festive gathering.

Cost-effectiveness is also a major advantage. The ingredients used are affordable and can typically be found in your pantry or local grocery store. This means you can serve a hearty and impressive meal without breaking the bank, allowing for less stress when planning your next dinner party or family meal.

Historical Background and Cultural Significance

The origins of meatballs can be traced back centuries, with various cultures developing their own interpretations based on regional ingredients. The idea of combining pumpkin with meat is particularly significant in American cuisine, reflecting the agricultural abundance of fall harvests. Pumpkins have been a staple in many cultures for their nutritional value and versatility, often celebrated during harvest festivals.

This dish can also be seen as a celebration of culinary fusion, bridging traditional BBQ culture with seasonal flavors. The evolution of meatballs highlights the adaptability of this classic dish, where herbs, spices, and additional elements like pumpkin are integrated to create new, innovative recipes that resonate with modern palates.

Furthermore, pumpkins in American history symbolize bounty and harvest, frequently associated with autumn festivities. Recipes like Pumpkin BBQ Jalapeño Meatballs reflect this cultural significance, serving as a tribute to seasonal cooking and the joy of sharing food during gatherings.

Regional variations exist around the world, with countless adaptations of meatballs reflecting local tastes and ingredients. The pumpkin-infused version showcases how versatile meatballs can be while embracing the uniqueness of fall-inspired flavors.

Ingredient Deep Dive

Pumpkin serves as the star of this recipe, contributing both flavor and nutrition. Originating in North America, pumpkins are rich in vitamins and antioxidants, making them a favored ingredient during the fall. When selecting pumpkin, you want to choose one that feels heavy for its size, indicating a juicy interior. Storage in a cool, dark place ensures longevity, and if fresh pumpkins are unavailable, canned pumpkin is an excellent substitute for this recipe.

Ground meat, whether beef, turkey, or chicken, forms the base of the meatballs. Each type of meat brings its own unique flavor and texture. Turkeys are lower in fat, while beef provides a richer taste. When purchasing ground meat, look for higher fat content for juicier meatballs. Proper storage involves refrigeration for short-term keeps and freezing for longer preservation.

Common Mistakes to Avoid

  • Overmixing the meat mixture can lead to tough meatballs. Mix just until combined for best results.
  • Using too little or too much pumpkin can affect the texture and flavor. Stick to the recommended quantity.
  • Not preheating the oven can cause uneven cooking. Always preheat for a consistent result.
  • Skipping the chilling step before baking can lead to meatballs falling apart. Chill for at least 30 minutes.
  • Choosing overly ripe or damaged jalapeños may overpower the dish. Pick firm, fresh peppers for balanced flavor.
  • Neglecting to season adequately can result in bland meatballs. Taste your mixture and adjust as needed.
  • Overcrowding the baking sheet can inhibit browning. Give your meatballs space during cooking.
  • Skipping the resting time after cooking may lead to a messy presentation. Let them rest briefly before serving.

Essential Techniques

Properly mixing your meatball mixture is crucial for achieving a tender result. This involves gently combining the ingredients without overworking the meat. Use your hands to mix until just combined, and consider chilling the mixture to reduce stickiness. Avoid visual cues of a dry mixture; it should be moist yet hold together when formed into balls.

Baking the meatballs at the right temperature is essential for achieving a golden-brown exterior. Preheat at 400°F (200°C) for even cooking and to develop a crispy outer layer. Look for meatballs that are browned all around and a meat thermometer reading of 160°F (71°C) for safety and perfection.

Pro Tips for Perfect Pumpkin BBQ Jalapeño Meatballs

1. Experiment with different types of ground meat to find your preferred flavor profile.

2. Consider adding herbs like parsley or cilantro to enhance the flavor.

3. For a fun twist, add cheese to the meat mixture for extra richness.

4. Test one meatball before baking the entire batch to ensure seasoning is perfect.

5. Serve the meatballs with a drizzle of additional BBQ sauce for extra flavor.

6. Introduce other vegetables into the mixture, like finely grated zucchini, for added moisture.

7. Using fresh jalapeños offers a more vibrant flavor than pickled ones.

8. Don’t skip resting time after cooking; it helps retain the juices and enhances flavor.

Variations and Adaptations

You can customize your Pumpkin BBQ Jalapeño Meatballs by integrating regional flavors. Consider infusing spices such as cumin or coriander for a Southwestern twist. For a seasonal adaptation, substitute pumpkin with sweet potato or butternut squash, which offer similar texture and sweetness when cooked.

Dietary modifications are also possible. To make gluten-free meatballs, simply use gluten-free breadcrumbs. Those on low-carb diets can skip breadcrumbs altogether, using almond flour for binding instead.

Flavor variations can be introduced by experimenting with different barbecue sauces, ranging from sweet to smoky flavors. Alternatively, for a zestier profile, consider adding lime zest and juice to the mixture.

For those who prefer a firmer texture, add additional oats or breadcrumbs to absorb more moisture. Explore garnishing with fresh herbs, such as cilantro or chives, to brighten the presentation and flavor.

Serving and Presentation Guide

Plating the meatballs can elevate your dish. Serve them on a rustic wooden board or a white platter to showcase their vibrant colors. Consider garnishing with chopped green onions or parsley for added freshness and color. Pair with toothpicks for easy serving if using as an appetizer, allowing guests to enjoy them while mingling.

Traditional accompaniments may include a side of mixed greens or a pumpkin-based dipping sauce that echoes the flavors in the meatballs. For modern presentations, drizzle homemade herb-infused oil around the plate or serve alongside artisanal bread for guests to create their flavor combinations.

Temperature considerations are crucial; serve your meatballs warm for the best taste experience. If making in advance, allow them to cool before refrigerating, then reheat gently before serving.

Portion control is essential, especially for parties. Aim for 2-3 meatballs per serving for appetizers and 4-5 for heartier meals.

Wine and Beverage Pairing

When it comes to wine, a medium-bodied red such as Merlot pairs wonderfully with the smoky BBQ flavors. If you prefer white wine, opt for a Chardonnay that has its own subtleties to complement the meatballs. Non-alcoholic alternatives could include sparkling cider or an autumn-spiced iced tea, providing refreshing options that enhance the meal.

For coffee lovers, a dark roast coffee offers a rich depth that beautifully contrasts the sweetness of the pumpkin, making it a perfect after-dinner drink. Always consider serving beverages at the right temperature; wines should be chilled, while coffee should be served steaming hot.

Storage and Shelf Life

Store your leftover Pumpkin BBQ Jalapeño Meatballs in an airtight container in the refrigerator for up to 3 days. Freezing is also an option; place cool meatballs in freezer-safe bags, removing as much air as possible, and they can last for up to 2 months. Always label your containers and bags with dates for easy tracking.

Signs of spoilage may include off smells or changes in texture. Reheating should be done in the oven or microwave until the meatballs are heated through and steaming, ensuring they are safe to eat. For best results, thaw frozen meatballs overnight in the fridge before reheating.

Make Ahead Strategies

To save time, consider making your meatball mixture a day in advance. Store it in the refrigerator, tightly covered, until you are ready to bake. This not only helps the flavors to meld but also simplifies your cooking on the day of serving.

You can also cook the meatballs ahead, letting them cool and then refrigerating for later. Reheat in the oven before serving to ensure they maintain a pleasing texture, avoiding the microwave if possible as it can make them soggy.

Adding fresh elements, such as a sprinkle of fresh herbs or a dollop of BBQ sauce just before serving, can elevate the dish further, creating an appealing presentation while enhancing flavor.

Scaling Instructions

When scaling the recipe, halving the ingredients is straightforward: simply divide by two and adjust your baking dish accordingly. For doubling or tripling, ensure your baking sheets can accommodate all meatballs without overcrowding for even baking.

Equipment adjustments may be necessary for larger batches, which might involve using multiple baking sheets or larger bowls for mixing. Timing modifications may also be required; monitor cooking times closely as larger batches typically require slightly longer baking times.

Store any leftover meatballs in appropriately sized containers to prevent spoilage and ensure that they remain delicious for future meals.

Nutritional Deep Dive

An average serving of Pumpkin BBQ Jalapeño Meatballs offers a balanced nutrient profile. You can expect a good mix of macronutrients, predominantly protein from the meat, healthy fats if applicable, and carbs primarily from the pumpkin. These components work together to provide energy and essential nutrients.

Micronutrient analysis reveals that pumpkin is particularly rich in vitamin A, which contributes to overall health, while the protein from the meat aids in muscle maintenance and repair. Monitoring servings can help manage portion sizes effectively, especially for those keeping an eye on caloric intake.

Weight management tips include being conscious of ingredients, opting for lean meats, and balancing the meal with plenty of vegetables for added fiber and nutrients.

Dietary Adaptations

If you’re looking to make these meatballs gluten-free, substitute regular breadcrumbs with gluten-free options, which will work just as well in maintaining texture and taste without compromising quality.

Dairy-free eaters can enjoy these meatballs without issue, as the original recipe contains no dairy products. For those following a vegan diet, replacing the meat with plant-based ground meat alternatives and using flaxseed meal as a binder would provide an excellent substitute.

Low-carb dieters can alter the recipe by skipping breadcrumbs entirely or substituting them with crushed pork rinds or almond flour. Keto adherents will benefit from the healthy fats in pumpkin and nutritious meat, creating delicious, compliant meals.

Troubleshooting Guide

If you experience texture issues where your meatballs are too mushy, consider adding breadcrumbs or oats for added structure. It’s essential to ensure the mixture isn’t overly wet before forming.

For flavor balance problems, taste the mixture before cooking, and adjust with more seasoning as needed. Too much spice from jalapeños can be mellowed out with a touch of honey or sugar in the sauce.

Temperature problems can arise if the meatballs cook unevenly or take too long. Ensure your oven is preheated evenly, and consider investing in an oven thermometer for accurate readings.

Recipe Success Stories

Readers love these meatballs for their exciting flavor combinations, often sharing feedback about how their guests raved about the dish during parties. Many users have successfully adjusted the heat level by experimenting with different types of peppers.

Success stories often highlight how easy the recipe is to adapt, with individuals sharing their personal twists that reflect their regional preferences and dietary needs. The flexibility of this recipe allows it to shine in multiple contexts.

Photography tips from readers suggest taking pictures after garnishing with fresh herbs, which brings out the colors and textures of the meatballs, appealing significantly in social media posts.

Frequently Asked Questions

Can I use canned pumpkin instead of fresh? Absolutely! Canned pumpkin puree is an excellent substitute and offers a delightful flavor without the hassle of preparing fresh pumpkin.

How spicy are these meatballs? The heat level depends on the jalapeños used, but you can adjust the amount to your taste. Removing the seeds and membranes from the peppers decreases the heat significantly.

Can I freeze the meatballs? Yes! Cooked meatballs freeze well. Just let them cool, place them in an airtight container, and freeze for up to 2 months. Reheat before serving.

What’s the best way to reheat these meatballs? Reheating in the oven is best to maintain texture. Warm them at 350°F (175°C) until heated through.

Can I use different kinds of meat? Yes! This recipe is versatile, allowing you to use beef, turkey, chicken, or even plant-based alternatives.

How long do leftovers last? Leftover meatballs can be stored in the refrigerator for up to 3 days. Ensure they are in an airtight container.

Is there a non-spicy version of this recipe? You can simply omit the jalapeños for a milder flavor. The other ingredients will still provide plenty of deliciousness!

Can I bake these meatballs instead of frying? Yes, baking is the recommended cooking method for this recipe, allowing for a healthier option without sacrificing flavor.

Are these meatballs gluten-free? They can be made gluten-free by using gluten-free breadcrumbs instead. Just check the product labels to ensure they fit dietary needs.

How can I make these meatballs ahead of time? Prepare the mixture and shape the meatballs a day in advance. Store them covered in the refrigerator until you’re ready to bake.

Additional Resources

For more delicious fall dishes, check out recipes like Maple Glazed Brussels Sprouts or Sweet Potato Casserole. Additionally, explore technique guides on how to make perfect homemade BBQ sauce that complements these meatballs.

If you’re interested in improving your meatball-making skills, consider reading up on ground meat selections and cooking methods to elevate future dishes. Seasonal variations such as apple or squash-based recipes can also inspire your fall cooking repertoire.

Join the Conversation

We’d love to hear your thoughts on this recipe! Share your experiences, tips, and photos of your Pumpkin BBQ Jalapeño Meatballs on social media, tagging us to join the community. Whether you made any alterations or enjoyed the classic recipe, your feedback is valuable to fellow cooks looking to enjoy new flavors.

Don’t forget to leave a review and rate this recipe below. Your insights help others in the community discover this delightful dish and inspire them to recreate your personalized version!

The Recipe

Pumpkin BBQ Jalapeño Meatballs

Serves: 4

Prep Time: 15 mins

Cook Time: 25 mins

Total Time: 40 mins

Kitchen Equipment Needed

  • Baking sheet
  • Mixing bowl
  • Measuring cups and spoons
  • Spatula or wooden spoon
  • Meat thermometer

Ingredients

  • 1 lb ground turkey (or your choice of meat)
  • 1 cup pumpkin puree
  • 1 egg
  • 1/2 cup breadcrumbs
  • 1/4 cup finely chopped jalapeños
  • 1/4 cup BBQ sauce
  • 1 tsp garlic powder
  • 1 tsp onion powder
  • Salt and pepper to taste

Directions

  1. Preheat your oven to 400°F (200°C).
  2. In a large mixing bowl, combine ground turkey, pumpkin puree, egg, breadcrumbs, chopped jalapeños, BBQ sauce, garlic powder, onion powder, salt, and pepper.
  3. Mix gently until well combined, ensuring not to overmix.
  4. Form the mixture into meatballs, about 1-1.5 inches in diameter.
  5. Place meatballs on a baking sheet lined with parchment paper.
  6. Bake for 20-25 minutes or until the meatballs are browned and cooked through (internal temperature should read 160°F).
  7. Serve warm with additional BBQ sauce and garnish as desired.

Recipe Notes

  • For a spicier kick, leave the seeds in the jalapeños.
  • This recipe can be easily doubled or tripled for larger gatherings.
  • Leftover meatballs can be stored in the fridge for up to 3 days or frozen for up to 2 months.

Praline Upside-Down Pumpkin Cake: An Easy Must-Try Dessert

Praline Upside-Down Pumpkin Cake – A Deliciously Easy Dessert Recipe

⚖️
Difficulty
Easy

⏲️
Prep Time
20 mins

🕒
Cook Time
30 mins

⏱️
Total Time
50 mins

🍽️
Servings
8 servings

Looking for an easy dessert that celebrates the flavors of fall? Our Praline Upside-Down Pumpkin Cake is the perfect choice! Featuring a delectable blend of pumpkin, warm spices, and a rich praline topping, this cake is not only simple to prepare but also offers an alluring aroma that fills your kitchen. The unique upside-down presentation adds a delightful twist, making it a standout centerpiece for your gatherings. Perfectly moist with a hint of sweet pecan crunch, this cake is sure to impress your family and friends.

This Praline Upside-Down Pumpkin Cake evokes memories of cozy autumn evenings and festive celebrations. The pumpkin and spice combination resonates with seasonal flavors, while the sweet, caramelized features of the praline topping introduce an irresistible texture contrast. Savory and sweet in one mouthful, it’s an easy dessert that showcases the best aspects of the season. Whether served warm with a scoop of vanilla ice cream or on its own, this cake will have everyone asking for the recipe!

Quick Recipe Highlights

  • Flavor Profile: This cake boasts a warm blend of pumpkin and spices, combined with the crunch of praline for a delectable flavor experience.
  • Texture: The moist cake contrasts beautifully with the crunchy praline topping, creating a delightful multi-dimensional mouthfeel.
  • Aroma: Your kitchen will be filled with inviting aromas of cinnamon, nutmeg, and caramelized sugar.
  • Visual Appeal: The vibrant orange of pumpkin coupled with the golden brown praline creates a visually stunning dessert.
  • Skill Level Needed: This recipe is perfect for bakers of all skill levels, making it accessible for novice and experienced bakers alike.
  • Special Equipment: You’ll need a 9-inch round cake pan and an oven for baking.

Recipe Overview

  • Difficulty Level: The Praline Upside-Down Pumpkin Cake is categorized as easy, making it an excellent choice for beginner bakers. With straightforward steps, it requires minimal baking skills while still delivering impressive results.
  • Category: This dessert fits wonderfully into the sweet treat category, specifically as a cake or dessert for fall festivities.
  • Cuisine: Drawing inspiration from traditional American baking, this cake showcases seasonal ingredients, making it a staple during Thanksgiving and autumn celebrations.
  • Cost: The ingredients are budget-friendly, with common pantry staples leading to an overall affordable dessert.
  • Season: Best enjoyed in the fall, this cake leverages pumpkin’s high season and the cozy spices associated with the cooler months.
  • Occasion: This cake is perfect for family gatherings, potlucks, or any autumn event where you want to impress guests without complicating your baking duties.

Why You’ll Love This Recipe

The remarkable taste and texture appeal of our Praline Upside-Down Pumpkin Cake makes it a deserving centerpiece for any dessert table. The combination of moist pumpkin bread with the crunchy praline topping offers a satisfying contrast that leaves a lasting impression on the palate. Each slice reveals a beautifully caramelized top layer that enhances the flavors, making every bite a delicious experience.

This dessert caters to those who appreciate convenience in their preparations. With quick prep and straightforward steps, it comes together easily, allowing you to spend more time enjoying your event rather than being stuck in the kitchen. Plus, the easy clean-up means you won’t have to dread the aftermath of your baking adventure.

From a health perspective, the use of pumpkin introduces beneficial nutrients such as vitamin A and fiber, promoting overall health while indulging your sweet tooth. The nuts in the praline provide heart-healthy fats, adding a nice twist that delivers both nutrition and taste, ensuring that you can enjoy a dessert that is not just about indulgence.

Beyond the deliciousness, this Praline Upside-Down Pumpkin Cake serves as an excellent option for entertaining guests. It is warm and inviting, perfect for sharing with loved ones. The unique presentation makes it a conversation starter, and preparing it can become a fun, communal activity for family and friends to join in on.

Cost-effectiveness is another reason to love this recipe. Utilizing basic ingredients that are easy to find means you won’t have to scour expensive specialty stores. The result is a delightful dessert that looks and tastes gourmet while being kind to your wallet.

Historical Background and Cultural Significance

The origins of pumpkin cake trace back to early American settlers who utilized pumpkins as a staple food. Over the years, this simple ingredient evolved into various delightful desserts, leading us to the modern interpretations we see today. The praline topping is a nod to Southern culinary traditions, merging two distinct cultural influences beautifully.

In American culture, pumpkin-flavored treats, particularly during the fall season, represent celebration and gratitude. Pumpkin has become synonymous with Thanksgiving, making desserts like this Praline Upside-Down Pumpkin Cake a cherished part of family traditions and holiday dinners.

Over the decades, pumpkin desserts have evolved alongside changing tastes and preferences. The addition of nuts and spices reflects a regional adaptation, bringing additional textures and flavors while honoring simpler, foundational recipes of our ancestors.

Variations exist across the United States, with some areas incorporating fruits or other spices. Yet, the fundamental flavors remain consistent, proving this cake’s adaptability while maintaining its core essence throughout various regions.

Ingredient Deep Dive

Pumpkin has a rich history of use in American and global cuisines due to its versatility and nutrition. It is packed with vitamins such as A and C, as well as fiber, making it a healthful addition to desserts. When selecting pumpkin, opt for pure pumpkin puree or freshly roasted pumpkin, ensuring a rich flavor.

Storage recommendations include sealing pumpkin puree in an airtight container, where it can last up to a week in the fridge or several months in the freezer. If you encounter canned pumpkin, always check for 100% pure varieties without additives for the best results. Substitutions can include butternut squash for a similarly sweet base in your cake.

Pecans, as a central ingredient in the praline topping, hold cultural significance in Southern cooking and are celebrated for their distinct flavor and texture. Rich in healthy fats, fiber, and protein, pecans offer a crunchy contrast to the moist cake. When selecting pecans, look for whole, unbroken pieces to ensure the highest quality.

Storage is best in a cool, dry place within an airtight container to maintain freshness. Pecans can be used in various recipes, and alternatives such as walnuts can work as a substitute for those with allergies or preferences.

Common Mistakes to Avoid

  • Using canned pumpkin pie filling instead of pure pumpkin can lead to overly sweet results and spices that don’t align with the intended flavor profile.
  • Not measuring your flour properly can result in a dense cake; make sure to spoon and level it for accuracy.
  • Overmixing the batter will create a tough cake instead of the light and fluffy texture desired. Mix just until combined.
  • Skipping the praline topping can make the dessert less appealing; don’t overlook the sweet and crunchy finishing touch.
  • Baking the cake too long may dry it out; always check for doneness with a toothpick in the center.
  • Letting the cake cool too long in the pan can lead to sticking; invert it onto a plate while it’s still slightly warm.
  • Not pre-heating the oven can affect the rise of the cake; ensure your oven is at the right temperature before baking.
  • Using cold ingredients may result in uneven baking; allow eggs and other ingredients to reach room temperature before mixing.
  • Ignoring flavor balance. Taste the batter before baking to adjust sweetness or spices according to personal preference.
  • Not following the recipe’s order of operations might complicate the mixing process, leading to poor results.

Essential Techniques

Perfectly measuring ingredients is crucial for successful baking. Using a kitchen scale or proper measuring cups ensures accuracy for light and fluffy results. Be mindful of leveling ingredients appropriately to maintain balance in your cake.

Mixing techniques also play a key role. Incorporating dry ingredients separately from wet can prevent clumping and allow for better blending. Be cautious not to overmix once combined, as this will lead to gluten development and a tougher texture.

Pro Tips for Perfect Praline Upside-Down Pumpkin Cake

1. Toast the pecans beforehand to deepen their flavor and enhance the praline topping’s overall taste.

2. Incorporate a splash of vanilla extract into the batter to enhance the cake’s overall flavor complexity.

3. Experiment with different spices such as cloves or allspice for a unique twist on the traditional pumpkin flavor.

4. Serve the cake warm or at room temperature for the best flavor experience.

5. Consider adding chocolate chips into the batter for an extra layer of sweetness!

6. For a festive touch, drizzle caramel sauce on top for an extravagant presentation.

7. Keep a close eye on the cake as it bakes, and test doneness with a toothpick to avoid overbaking.

8. If making in advance, the flavors will deepen and blend when allowed to sit overnight.

Variations and Adaptations

Regional variations of pumpkin cake include the addition of local fruits, nuts, or spices, allowing for varied flavor profiles and satisfaction. You could try swapping pumpkin for applesauce in certain recipes for a different base texture while still retaining moisture.

Seasonal adaptations may include incorporating cranberries or pears to introduce a delightful tartness that balances the pumpkin’s sweetness. Using pumpkin spice blends available in stores can also ease the spicing process!

Dairy-free adaptations can be made by substituting the buttermilk with almond or soy milk and using coconut oil instead of butter, allowing those with dietary restrictions to enjoy this delicious cake.

For those looking to reduce sugars, consider using natural sweeteners like maple syrup or honey as substitutes, adapting the sweetness to personal preference.

Serving and Presentation Guide

When plating this stunning cake, consider using a white or neutral plate to highlight its colorful presentation. Gently releasing the cake from its pan while still warm will allow you to top it with fresh whipped cream or a dusting of powdered sugar for aesthetic appeal.

Garnish with additional toasted pecans or seasonal fruits, such as slices of fresh apple or pear, to create a vibrant contrast against the pumpkin-colored cake. Offering a scoop of vanilla ice cream alongside can enhance the dessert, balancing flavors wonderfully.

Wine and Beverage Pairing

When pairing wine with your Praline Upside-Down Pumpkin Cake, consider serving it with a sweet Riesling or a light-bodied Pinot Noir for an excellent complement to the cake’s spiced notes.

For non-alcoholic options, warm apple cider or a spiced chai latte are fantastic choices, echoing the flavors present in the dessert while providing comforting warmth for autumn gatherings.

Storage and Shelf Life

To store your Praline Upside-Down Pumpkin Cake, first, let it cool completely, then cover it tightly with plastic wrap or place it in an airtight container. This allows for fresh flavors and prevents drying.

The cake can be kept at room temperature for up to three days or can be refrigerated for a week. If freezing, wrap securely and place in a freezer-safe container for up to three months.

Make Ahead Strategies

For those busy seasons, you can prepare the cake batter ahead of time and keep it in the fridge. Bake it fresh the day of your event for the best taste!

Alternatively, bake the cake a day prior and allow flavors to meld overnight. Just ensure you store it properly to maintain moisture and flavor integrity before serving.

Scaling Instructions

If you need to halve the recipe, do so carefully, ensuring that each ingredient is adjusted accordingly. This works well if you are trying to create a smaller dessert for a more intimate gathering.

For doubling or tripling, make sure to use a larger baking pan or create multiple batches in separate pans and adjust the baking time accordingly. Keep an eye on the cake as it bakes and test for doneness!

Nutritional Deep Dive

Analyzing the macros for the Praline Upside-Down Pumpkin Cake reveals a dessert rich in flavor but also packed with nutritional benefits from the pumpkin and pecans. Pumpkin provides essential vitamins like A and C, while the nuts contribute healthy fats.

For those managing their diet, be aware of the sugar content, and consider adjusting it based on personal preferences or dietary needs. Understanding the serving size can also aid in portion control, ensuring that enjoyment is balanced with overall nutrition.

Dietary Adaptations

For gluten-free adaptations, using a gluten-free flour blend works well for substitutions, allowing those sensitive to gluten to savor the cake without worry.

Dairy-free options include using plant-based milk substitutes and oils, allowing for broader accessibility across dietary preferences.

For a vegan version, utilize flax eggs or chia seeds as replacements for traditional eggs, and employ plant-based buttermilk to maintain texture in the cake.

For those on low-carb or keto diets, consider using sugar substitutes and almond flour instead of traditional flour to create a healthier version.

Troubleshooting Guide

If your cake turns out too dense, assess your measuring techniques; be sure to mix only until combined without overmixing. If the flavor seems too bland, consider adjusting spices or adding a pinch of salt to enhance taste profiles.

In case of temperature issues, use an oven thermometer to ensure your cooking temperature is accurate. Uneven baking can be a result of improper placement in the oven.

Ingredient substitutions can lead to varying results; if you’re unsure about an alternative, start with small batches to test for desired outcomes before committing to larger quantities.

Recipe Success Stories

Members of our baking community have shared rave reviews, often noting how this recipe has become their go-to dessert for seasonal gatherings. The cake has been adapted successfully by incorporating additional spices and flavors, tailoring it to different cultural backgrounds while maintaining its core appeal.

Many highlight how simple it is to prepare yet impressive in taste, with first-time bakers often expressing delight in achieving an “Instagram-worthy” cake that tastes as good as it looks.

Frequently Asked Questions

Can I use fresh pumpkin instead of canned? Absolutely! Fresh pumpkin can provide deeper flavors; just ensure it is cooked and pureed for best results.

How do I know when the cake is done? Insert a toothpick in the center. If it comes out clean or with a few crumbs, your cake is ready.

Can I make this cake ahead of time? Yes, the flavors develop beautifully overnight. You can bake it a day prior to serving.

What can I serve with this cake? A scoop of vanilla ice cream or a dollop of whipped cream pairs beautifully with the flavors

Is it possible to freeze the cake? Yes, you can store the cake in an airtight container in the freezer for up to three months.

Can I make a smaller batch? You can easily halve the recipe to suit a smaller gathering.

What type of pan should I use? A 9-inch round cake pan works best; ensure it’s greased properly to avoid sticking.

Can I substitute other nuts for the praline topping? Yes, walnuts or almonds can provide a delicious variation in flavor and texture.

Is it gluten-free friendly? By using gluten-free flour, this cake can be easily adapted for those with gluten sensitivities.

What if I want a spicier flavor? Feel free to enhance the spices in the recipe; increasing cinnamon and adding some ginger can offer a robust flavor.

Additional Resources

If you love this Praline Upside-Down Pumpkin Cake, you might also enjoy our collection of other seasonal recipes, including spiced apple pie and cozy pecan pie. Exploring ingredient information can further enhance your baking skills, delving into techniques and recommendations that elevate your dessert game.

Don’t forget to explore our equipment recommendations for baking essentials; proper tools make a significant difference in your kitchen creations. Check out seasonal variations, ensuring you can bring a festive touch to your gatherings.

Join the Conversation

We’d love to connect with you on social media! Share your photographic successes, reviews, and any adaptations you make to this recipe. Engaging with our community and swapping tips can inspire new variations and foster creativity in your cooking.

Your feedback is invaluable; it helps us to continue providing delightful recipes for everyone to enjoy. Join us in the culinary chat by sharing your experiences and tips, and don’t hesitate to let us know how your Praline Upside-Down Pumpkin Cake turns out!

The Recipe

Praline Upside-Down Pumpkin Cake

Serves: 8 servings

Prep Time: 20 mins

Cook Time: 30 mins

Total Time: 50 mins

Kitchen Equipment Needed

  • 9-inch round cake pan
  • Mixing bowls
  • Measuring cups and spoons
  • Spatula
  • Whisk

Ingredients

  • 1 cup pumpkin puree
  • 1 cup granulated sugar
  • 1/2 cup packed brown sugar
  • 1/2 cup vegetable oil
  • 2 large eggs
  • 1 1/2 cups all-purpose flour
  • 1 teaspoon baking powder
  • 1 teaspoon baking soda
  • 1 teaspoon ground cinnamon
  • 1/2 teaspoon ground nutmeg
  • 1/2 teaspoon salt
  • 1 cup pecans (for praline topping)
  • 1/2 cup unsalted butter (for praline topping)
  • 1 cup brown sugar (for praline topping)

Directions

  1. Preheat your oven to 350°F (175°C) and grease the cake pan.
  2. In a large bowl, combine pumpkin puree, granulated sugar, brown sugar, vegetable oil, and eggs. Mix well.
  3. In another bowl, whisk together the flour, baking powder, baking soda, cinnamon, nutmeg, and salt.
  4. Gradually add the dry ingredients to the wet ingredients, mixing until just combined.
  5. In a small saucepan, melt butter over low heat. Stir in brown sugar and pecans to create the praline topping.
  6. Spread the praline topping in the bottom of the prepared cake pan.
  7. Pour the batter over the praline mixture in the pan, spreading it evenly.
  8. Bake for 30-35 minutes or until a toothpick inserted comes out clean.
  9. Let the cake cool for about 10 minutes before inverting onto a serving plate.
  10. Serve warm, optionally topped with whipped cream or ice cream.

Recipe Notes

  • For a richer flavor, consider adding chocolate chips or experimenting with different spices.
  • Ensure you do not overbake the cake to maintain its moist texture.