Delicious Homemade Cinnamon Donut Bread for an Easy Sweet Breakfast

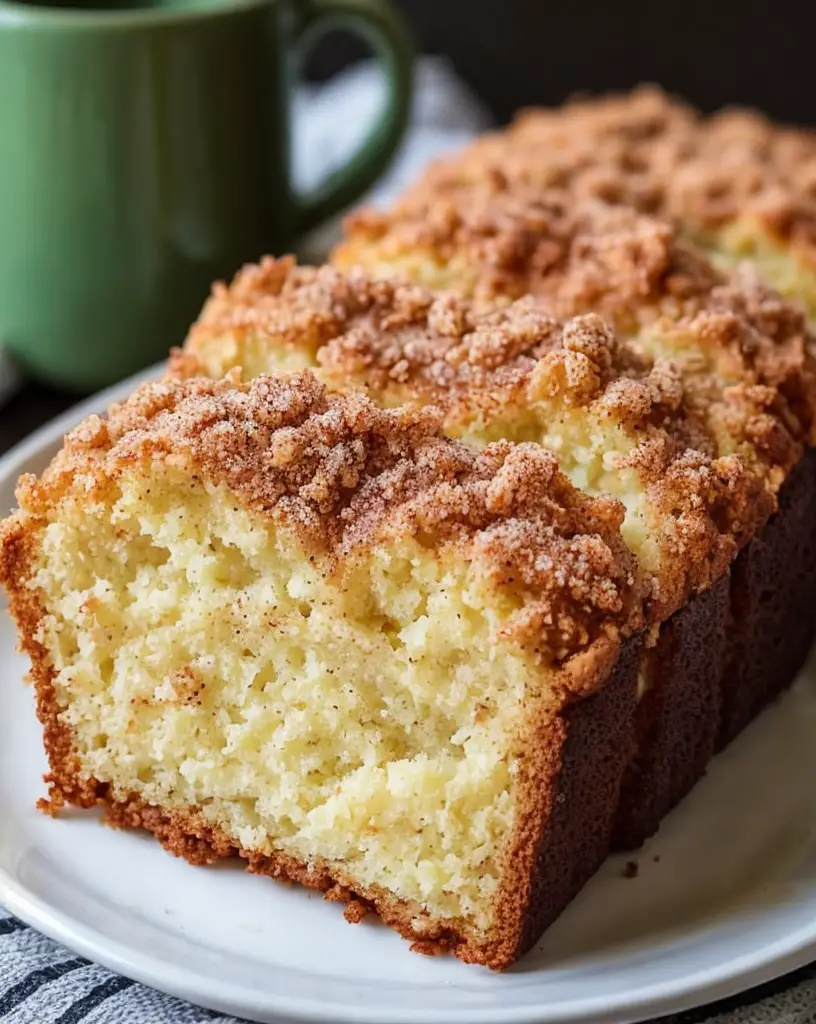
Homemade Cinnamon Donut Bread Recipe | Easy Sweet Breakfast

⚖️
Difficulty
Easy

⏲️
Prep Time
10 mins

🕒
Cook Time
30 mins

⏱️
Total Time
40 mins

🍽️
Servings
8 servings

Indulge in the delightful sweetness of our Homemade Cinnamon Donut Bread, a perfect treat to brighten your breakfast table. This easy sweet breakfast recipe combines the classic flavors of cinnamon donuts into a luscious bread, making it an unbeatable morning companion. Whether you’re enjoying it with your morning coffee or serving it as a special treat for guests, each slice offers a cozy hug of warmth and nostalgia. The irresistible cinnamon sugar topping adds a sweet crunch, perfectly balanced with the soft, fluffy texture of the bread.

The beauty of this Cinnamon Donut Bread lies not only in its taste but also in its simplicity. Perfect for weekend brunches or a sweet pick-me-up on weekday mornings, this recipe showcases the charm of homemade goodness with minimal effort. Imagine pulling a warm loaf from the oven, its sweet aroma wafting through your kitchen, as you slice through its golden crust. Each bite is a reminder of childhood breakfasts filled with joy and comfort, making it a recipe you’ll return to time and again.

Quick Recipe Highlights

  • Flavor Profile: Sweet and spiced with notes of cinnamon and sugar, reminiscent of classic donuts.
  • Texture: Soft and fluffy with a crumb that melts in your mouth, complemented by a crispy, sugary topping.
  • Aroma: Warm, inviting scents of baked cinnamon and sugar will fill your kitchen.
  • Visual Appeal: Gorgeous golden brown crust topped with glistening cinnamon sugar makes for a stunning presentation.
  • Skill Level Needed: This recipe is beginner-friendly, ideal for those who may not have extensive baking experience.
  • Special Equipment: All you need is a mixing bowl, loaf pan, and basic baking tools.

Recipe Overview

  • Difficulty Level: With straightforward steps and easily manageable ingredients, this recipe is great for beginners and seasoned bakers alike.
  • Category: This Homemade Cinnamon Donut Bread fits perfectly into breakfast, brunch, or even a sweet snack category.
  • Cuisine: Rooted in American baking traditions, it draws on classic donut flavors and transforms them into a loaf.
  • Cost: The ingredients are affordable and commonly found in most kitchens, making it a budget-friendly option.
  • Season: Perfect for any season, this bread can be a delightful centerpiece for holiday gatherings or cozy winter mornings.
  • Occasion: Ideal for birthday brunches, casual get-togethers, or simply enjoying a slice during a quiet coffee break.

Why You’ll Love This Recipe

This Homemade Cinnamon Donut Bread combines the perfect balance of sweet and spice, delivering a flavor that is comforting and nostalgic. Each slice is bursting with cinnamon goodness that warms the soul. The texture is incredibly soft, yet the crunchy topping provides a satisfying contrast, making it impossible to eat just one piece. Not only does it taste fantastic, but it also fills your home with an irresistible aroma while it bakes, creating an inviting atmosphere for family and friends.

The convenience of this recipe can’t be beaten. It requires minimal prep time and can be baked in just one bowl, simplifying the process and making cleanup a breeze. You can easily whip this up in the morning or prep it the night before, allowing you to enjoy a freshly baked loaf any day of the week. Furthermore, the ease of slicing means you can serve portions effortlessly, making it perfect for gatherings or lazy Sunday breakfasts.

Nutritionally, this bread boasts simple ingredients that provide comfort without excessive guilt. You can incorporate whole grain flour for added fiber or reduce sugar for a healthier twist while maintaining its delectable taste. It’s a delightful balance of indulgence and nourishment, ensuring you won’t feel weighed down after enjoying a slice.

This recipe shines during social occasions; it’s an ideal centerpiece for brunch tables and potlucks. Your guests will be enthralled with its delightful flavors and textures, making it a memorable treat. The sweet cinnamon hint captures the essence of a friendly gathering, fostering connections and conversations around the breakfast table.

Finally, Homemade Cinnamon Donut Bread is incredibly cost-effective. With basic pantry staples and minimal ingredients, you can create an impressive dish for a fraction of the price of store-bought options. Its accessibility encourages everyone to embrace their inner baker—bringing the amazing flavors of traditional donuts into the comfort of their homes.

Historical Background and Cultural Significance

The origin of cinnamon bread can be traced back to the rich baking traditions of Europe, where sweet breads were often enhanced with spices such as cinnamon, nutmeg, and cloves. With time, various regional interpretations emerged, blending local traditions into delightful baked goods. This bread pays homage to those age-old recipes while creating something uniquely comforting.

Cinnamon itself holds a special place in culinary history; once considered a luxury item, it was worth its weight in gold. Its warmth and flavor have long been celebrated and are closely tied to festive and familial gatherings. The emergence of donut-inspired treats, such as this bread, showcases how cultural influences and culinary traditions meld to create something exquisite.

As seasons passed, this recipe evolved, becoming more mainstream. The twist of turning classic donut flavors into a bread format allows for versatility; whether enjoyed fresh from the oven or toasted and slathered with butter, the options are endless. This evolution caters to present-day preferences for convenience and flavor.

Regional variations also exist, with some incorporating chocolate chips or toasted nuts to enhance flavor profiles. The adaptability of this recipe symbolizes how exchanging culinary ideas can lead to delicious innovations while retaining the essence of cherished traditions.

Ingredient Deep Dive

Cinnamon, a key ingredient in our Homemade Cinnamon Donut Bread, has a rich history that dates back thousands of years, revered for both its flavor and medicinal properties. This fragrant spice is derived from the bark of cinnamon trees, commonly used in many cultures for its ability to enhance both sweet and savory dishes. When it comes to nutritional benefits, cinnamon is known for its antioxidant properties and potential to help regulate blood sugar levels.

Selecting fresh, high-quality cinnamon is vital for the best flavor; look for sticks with a strong aroma and a brittle texture. Ground cinnamon should be stored in a cool, dark place to maintain its potency, and if desired, can be substituted with nutmeg for a different flavor profile.

Flour serves as the backbone of this recipe. All-purpose flour brings a light texture to the bread, making it fluffy and tender. Whole wheat or even gluten-free flour can be utilized for those looking for healthier options. Store flour in a sealed container in a cool, dry area, and make sure to check expiration dates for freshness.

Sugar provides sweetness to the bread, elevating the overall flavor. Granulated sugar is commonly used, but you can easily swap in brown sugar for a deeper, molasses-like taste. Be sure to keep an eye on the amount used, as it also affects texture; adjusting it can yield delightful variations, like adding maple syrup for a unique twist.

Eggs not only enhance flavor but also contribute to the bread’s structural integrity. They provide moisture, richness, and act as a binding agent, ensuring high-quality texture. Consider using flaxseed meal for a vegan alternative, or yogurt for a protein-packed option that complements the recipe beautifully.

Lastly, milk adds moisture. Any dairy or non-dairy milk can be used here—almond milk and oat milk are great substitutes. Always check dietary preferences when choosing your milk to accommodate all guests.

Common Mistakes to Avoid

  • Using stale ingredients. Always check the freshness of your baking powder and cinnamon to ensure the best flavor.
  • Overmixing the batter, which can create a dense bread instead of a light and fluffy loaf.
  • Baking at the wrong temperature can lead to uneven cooking. Use an oven thermometer to confirm accuracy.
  • Not measuring ingredients accurately; using weights or specific measuring cups can greatly improve results.
  • Skipping the resting time after mixing; allowing the batter to sit helps create a better texture.
  • Not greasing the loaf pan sufficiently, leading to stuck bread. Always use parchment paper as an additional measure.
  • Ignoring oven placement; ensure that the bread is centered in the oven for even baking.
  • Not letting the bread cool properly before slicing; this helps set the texture and flavor.
  • Storing the bread improperly can lead to quick spoilage. Use an airtight container or wrap tightly.
  • Using too much cinnamon sugar mixture can overpower the bread; balance is key.

Essential Techniques

One important technique in this recipe is proper mixing. It’s essential to combine ingredients until just incorporated to ensure the bread remains tender and airy. Overmixing leads to gluten development, resulting in a denser loaf. Visual cues for success include a slightly lumpy batter that does not have dry flour pockets.

Another essential technique is precise baking. Always preheat the oven until it reaches the specified temperature before adding your bread. This ensures even cooking and optimal rise. A toothpick inserted into the center should come out clean when the bread is done.

Incorporating the cinnamon sugar topping can also be a pivotal moment. For even coverage, sprinkle it generously while the bread is still warm to allow for optimal adhesion. Remember, balance is key; too much can overshadow the lovely flavor of the bread itself.

Finally, cooling the bread is vital. Allow your loaf to cool in the pan for a short time before transferring it to a wire rack. Cooling helps maintain moisture and prevents sogginess, ensuring each slice is beautifully fluffy.

Pro Tips for Perfect Homemade Cinnamon Donut Bread

1. Use fresh spices whenever possible to achieve the most vibrant flavor in your bread.
2. Experiment with adding a layer of cream cheese frosting for an extra decadent treat.
3. Allow the bread to rest for at least 10 minutes before slicing for the best texture.
4. For a warm bread experience, reheat slices in the microwave for a few seconds before serving.
5. Consider toasting slices of the bread lightly before serving to enhance flavor complexity.
6. Create a healthier version by substituting some flour for oats, adding a nutty flavor profile.
7. Try enhancing the recipe with nuts or chocolate chips for a delightful twist.
8. Always store leftover bread tightly wrapped to prolong freshness.

Variations and Adaptations

This enticing Homemade Cinnamon Donut Bread can be tailored to suit a variety of preferences. To cater to different taste buds, consider adding nuts such as pecans or walnuts for added crunch and flavor. Seasonal adaptations like pumpkin or apple puree work wonderfully, adding moisture and complementing the cinnamon notes beautifully.

Vegan modifications can easily be made by replacing eggs with flax eggs and using almond or oat milk. For those seeking gluten-free options, swapping in a gluten-free flour blend can yield a delicious loaf that everyone can enjoy.

Flavor variations are also a fantastic way to experiment. Consider using brown sugar instead of granulated sugar for richer flavor, or infuse the batter with citrus zest for a refreshing twist. Adding vanilla extract elevates the overall aroma and sweetness as well.

Individuals focused on dietary modifications may experiment with sugar alternatives, ensuring that everyone can enjoy this bread without guilt.

Finally, think about presentation alternatives. Serve slices warm with a drizzle of honey or maple syrup or pair it with cream cheese spread for an indulgent treat.

Serving and Presentation Guide

When it comes to presenting your Homemade Cinnamon Donut Bread, the key is simplicity and allure. Warm, freshly baked slices should be elegantly arranged on a rustic wooden board or cake stand, inviting guests to partake. A light dusting of powdered sugar over the top can add a visually stunning touch.

For garnishing, fresh fruit such as strawberries or blueberries sprinkled around the edges can enhance visual appeal and introduce a fresh flavor contrast. Elegant serving suggestions could include a side of whipped cream or flavored butter to complement the rich sweetness of the bread.

Temperature considerations are essential for maintaining the best flavor, so serve your bread slightly warm. This not only enhances the aroma but allows for a soft, melt-in-your-mouth experience.

Portion control can be handled by pre-slicing the loaf; this encourages guests to take their desired portions while also showcasing the beautiful interior of the bread, filled with delightful cinnamon goodness.

Wine and Beverage Pairing

When it comes to the perfect beverage pairing with your Homemade Cinnamon Donut Bread, consider options that highlight its sweetness and spices. A light, fruity white wine such as a Riesling or Moscato can accentuate its flavors beautifully. Both wines offer subtle sweetness that complements the cinnamon without overwhelming it.

For non-alcoholic alternatives, a hot cup of freshly brewed coffee or spiced chai latte can enhance the cozy feel of breakfast. The richness of the coffee pairs seamlessly with the sweetness of the bread, creating a comforting morning experience.

Herbal teas, like chamomile or peppermint, also work well; they provide a cooling effect on the palate after indulging in the bread’s sweetness.

Temperature matters with your beverages too; serving them warm will enhance the overall dining experience. A frothy cappuccino or latte can provide a lovely accompaniment, mirroring the bread’s delightful texture.

Storage and Shelf Life

Storing your Homemade Cinnamon Donut Bread properly is crucial for maintaining freshness and taste. Allow the bread to cool to room temperature completely before wrapping it tightly in plastic wrap or aluminum foil to preserve moisture. Alternatively, you can store it in an airtight container.

It’s best to keep the bread in a cool, dry place for short-term storage. If you’d like to extend its shelf life, consider freezing portions. To freeze, slice the bread, wrap each slice individually, and then place them in a freezer bag for easy access.

Always label your storage bags with the date; when stored properly, this bread can last up to three months in the freezer. When ready to enjoy, simply thaw at room temperature or pop slices into the microwave for a few seconds to warm.

Signs of spoilage include a sour smell or discoloration; if you notice these changes, it’s time to discard it. Reheating instructions suggest to microwave briefly or warm in an oven at low heat to refresh its flavor and texture.

Make Ahead Strategies

To streamline your breakfast routine, consider making your Homemade Cinnamon Donut Bread ahead of time. You can prepare the batter the night before and store it in the refrigerator—simply give it a gentle stir before baking in the morning. This allows for a delightful fresh-baked experience without the morning rush.

Another strategy is to bake the bread in advance. Once cooled, wrap it tightly and store it in the fridge for up to five days. You can slice and toast pieces as needed; this method ensures you have fresh bread ready to go any day of the week while maintaining great flavor.

Evaluate the quality impacts when preparing components ahead; while the bread may lose some moisture over two to three days, a warm slice can easily revive its delightful texture.

If you plan to create variations, consider adding the toppings just before serving to preserve freshness. This simple planning lets you enjoy delicious homemade bread whenever the craving strikes.

Scaling Instructions

If you’re looking to adjust the quantity of your Homemade Cinnamon Donut Bread, halving or doubling the recipe is an easy task. For smaller quantities, simply use half of each ingredient, ensuring the ratios remain consistent and accurate.

When doubling or tripling the recipe, consider using a larger mixing bowl to accommodate the increased volume. Keep in mind that baking times may vary; check for doneness a few minutes earlier to ensure the exterior doesn’t over-bake while the interior remains perfectly tender.

Equipment adjustments should also be made. If you are scaling up significantly, you might need multiple loaf pans or a larger-capacity mixer depending on your kitchen equipment.

For timing modifications, watch for visual cues such as color and texture rather than solely relying on time. Bread made in larger batches may require slightly longer to bake thoroughly, so testing with a toothpick is advisable.

Lastly, ensure you have adequate storage solutions for any leftovers; scaled recipes produce more bread, so having extra containers on hand is a smart strategy.

Nutritional Deep Dive

With each slice of Homemade Cinnamon Donut Bread, you can indulge without excessive guilt. This bread provides moderate macronutrients, featuring carbohydrates primarily from the flour. It’s vital to balance carbohydrates with protein and healthy fats during breakfast for sustained energy.

A micronutrient analysis reveals that cinnamon adds a unique antioxidant profile, while eggs contribute essential amino acids and some vitamins. Adjusting the recipe for whole grain options can boost fiber intake, aiding in digestion and promoting a feeling of fullness.

Consider dietary considerations; while this bread serves as a delightful treat, monitoring portion sizes is essential to managing caloric intake. If you’re mindful of sugar consumption, experiment with using alternatives to achieve a satisfying result.

Weight management benefits can be achieved by embracing moderation; enjoy a slice of this delightful bread as part of a balanced breakfast when paired with protein-rich foods like yogurt or eggs.

When tracking calories, keep in mind that the ingredients you choose could significantly influence the final nutritional content, making this recipe adaptable to various lifestyle preferences.

Dietary Adaptations

This Homemade Cinnamon Donut Bread recipe is highly adaptable to accommodate various dietary needs. For those needing gluten-free options, simply swap out regular flour for a gluten-free blend. Ensure you check for cross-contamination if you are highly sensitive to gluten.

Dairy-free diets can embrace this recipe by employing substitutes like almond or coconut milk, allowing for a delicious result. Flax eggs serve as an excellent vegan alternative for binding, ensuring the bread maintains its delicious quality.

If you’re following low-carb or keto diets, consider using almond or coconut flour instead of regular flour. You may also wish to reduce sugar significantly or utilize sugar alternatives to maintain flavor while achieving dietary goals.

Paleo enthusiasts can still enjoy this delicious bread by using honey or maple syrup as a natural sweetener, along with coconut flour. Ensure the ingredients stay true to the paleo principles for an authentic experience.

Other specific diets, such as low-FODMAP, can adapt this recipe similarly by ensuring any additional ingredients used are compliant, allowing many individuals to enjoy this sweet breakfast treat.

Troubleshooting Guide

Texture issues can arise if the bread is under- or overbaked; if it’s too wet, continue baking in 5-minute increments until a toothpick comes out clean. If it becomes dense or tough, it may have been overmixed.

Flavor balance can be adjusted by incorporating additional spices like nutmeg or cardamom for a richer taste. Sweetness can be modified by varying the sugar used, with natural alternatives offering a new flavor dimension.

Temperature problems usually stem from an inaccurate oven; keep an oven thermometer handy to confirm that the baking temperature is correct for even results.

Equipment challenges are common when experimenting; if your loaf pan is too large or small, this can cause impacts on baking time and texture. Consider investing in quality bakeware for consistent results.

Ingredient substitutions can alter the final product outcome; sticking close to the original ingredient list will yield the intended flavors. When trying different ingredients, test small batches first.

Timing concerns must also be handled accurately; ensure to keep a close eye on the bread for the perfect timing or risk undercooking or overbaking during the process.

Recipe Success Stories

Our readers have shared fantastic feedback, emphasizing the versatility and delightful nature of this Homemade Cinnamon Donut Bread. Many have adapted the recipe by incorporating their twists, from adding chocolate chips to different spices, leading to delightful variations that have become crowd favorites.

Success stories often highlight how easy it is to bake and share this bread during family gatherings or brunch events, captivating guests with its lovely aroma and warmth. Testimonials mention how it’s become a staple in their homes, enjoyed both fresh and toasted.

Readers have also reported impressive outcomes when experimenting with the recipe in different sized pans; success with mini loaves has been a popular adaptation to gift or share.

Photography submissions from our community show stunning presentations, inspiring others to get creative with their plating methods. Such engagement emphasizes how this recipe fosters community connections through shared experiences in the kitchen.

Moreover, the simplicity of the recipe has encouraged many novice bakers to take their first baking steps, making for wonderful stories of triumph and newfound confidence.

Frequently Asked Questions

Can I make this bread gluten-free?

Absolutely! You can use a gluten-free flour blend to make this recipe celiac-friendly. Just ensure your baking powder is also gluten-free. You may notice a slight change in texture, but it will still be delicious!

How do I store leftover cinnamon bread?

Store your leftover Homemade Cinnamon Donut Bread in an airtight container at room temperature for up to 3-4 days. For longer storage, you can freeze it for up to 3 months. Just make sure to slice it before freezing for easy access!

Can I add nuts or chocolate chips to the batter?

Yes! Adding nuts or chocolate chips is a great way to customize the flavor. Consider folding in 1/2 cup of your favorite nuts or chocolate chips before pouring the batter into the loaf pan for added texture and taste.

What should I do if my bread is too dense?

If your bread turns out dense, it could be overmixed or cooked for too long. Ensure you mix just until the ingredients are combined and check for doneness a few minutes before the recommended baking time.

Can I make this recipe vegan?

Yes! Replace the eggs with flaxseed meal (1 tablespoon per egg) and use plant-based milk to create a delightful vegan version of this bread. It will still be just as delicious!

How can I adjust the sweetness of the bread?

If you prefer a less sweet bread, reduce the amount of sugar in the recipe. You can also substitute sugar with natural alternatives like honey or maple syrup while ensuring the consistency remains intact.

Can I make mini loaves with this recipe?

Yes! This batter is perfect for mini loaf pans. Adjust the baking time to approximately 20-25 minutes, checking closely for doneness with a toothpick.

What can I serve with this bread?

This cinnamon bread pairs well with coffee, tea, or milk. You could also serve it with whipped cream or a dollop of yogurt for a delightful breakfast treat.

Can I freeze the dough before baking?

Yes! You can freeze the dough after mixing it. Just let it thaw overnight in the refrigerator before baking. This preparation method makes it easy to enjoy fresh-baked bread anytime.

How long does this bread take to bake?

Your Homemade Cinnamon Donut Bread typically takes about 30 minutes to bake. Make sure to check for doneness using a toothpick inserted into the center, which should come out clean.

Additional Resources

Be sure to explore other related recipes that complement your Homemade Cinnamon Donut Bread, such as fluffy pancakes or fruit-filled muffins to elevate your breakfast spread. Additionally, dive into technique guides on baking basics to sharpen your skills in the kitchen.

Learn more about various ingredients like the nutritional benefits of cinnamon and explore its cultural significance throughout culinary history. Discover kitchen equipment recommendations that may enhance your baking experience, such as quality bakeware or measuring tools.

Finally, for seasonal variations, keep an eye out for festive adaptations of this bread, incorporating seasonal spices and ingredients to make your gatherings even more special.

Join the Conversation

We’d love to hear your thoughts on our Homemade Cinnamon Donut Bread! Share your experiences on social media, and don’t forget to tag us in your stunning photos for a chance to be featured. If you’ve made any modifications or tried new flavor variations, please share those tips with our community.

Read through the recipe reviews to connect with fellow bakers and gain inspiration from their variations, anecdotes, and ideas. Engage in collaborative dialogue around this beloved recipe—perhaps it could inspire your next baking adventure!

Your wonderful success stories and feedback not only encourage us but help fellow baking enthusiasts discover this delightful recipe. Together, let’s build a community filled with creativity and passion for baking delicious treats!

The Recipe

Homemade Cinnamon Donut Bread

Serves: 8 servings

Prep Time: 10 mins

Cook Time: 30 mins

Total Time: 40 mins

Kitchen Equipment Needed

  • Mixing bowl
  • Loaf pan
  • Whisk
  • Measuring cups
  • Measuring spoons
  • Spatula

Ingredients

  • 2 cups all-purpose flour
  • 1 cup granulated sugar
  • 2 teaspoons baking powder
  • 1 teaspoon ground cinnamon
  • 1/2 teaspoon salt
  • 1/2 cup unsalted butter, melted
  • 2 large eggs
  • 1 cup milk
  • 1 teaspoon vanilla extract
  • 1/4 cup sugar, for topping
  • 2 tablespoons ground cinnamon, for topping

Directions

  1. Preheat your oven to 350°F (175°C) and grease your loaf pan.
  2. In a mixing bowl, combine flour, sugar, baking powder, cinnamon, and salt.
  3. In another bowl, whisk together melted butter, eggs, milk, and vanilla extract.
  4. Pour the wet ingredients into the dry ingredients and mix until just combined.
  5. Pour the batter into the greased loaf pan, smoothing the top with a spatula.
  6. In a small bowl, mix the topping sugar and cinnamon together, then sprinkle evenly over the batter.
  7. Bake for 30-35 minutes or until a toothpick comes out clean when inserted in the center.
  8. Let the bread cool in the pan for 10 minutes, then transfer to a wire rack to cool completely.

Recipe Notes

  • You can substitute half the flour with whole wheat for a healthier option.
  • Feel free to experiment with adding nuts or chocolate chips into the batter.
  • This bread is best enjoyed fresh but can be stored sealed for a few days or frozen for later.
  • For a festive twist, incorporate pumpkin puree instead of some liquid for a seasonal treat.

Luscious Lemon Blueberry Cheesecake: A Delightful Dessert Recipe

Luscious Lemon Blueberry Cheesecake: A Delightful Dessert Experience

⚖️
Difficulty
Intermediate

⏲️
Prep Time
30 mins

🕒
Cook Time
60 mins

⏱️
Total Time
90 mins

🍽️
Servings
8 slices

Indulging in a slice of luscious lemon blueberry cheesecake is like taking a bite of sunshine on a plate! This decadent dessert combines the creamy richness of cheesecake with the bright, refreshing flavors of lemon and sweet, juicy blueberries, creating a symphony of taste that dances on the palate. As the smooth, creamy filling meets the zesty zing of lemon, it evokes memories of sunny days and joyous celebrations, making it the perfect treat for any occasion.

The contrast between the velvety cheesecake and the vibrant burst of blueberry flavor makes this dessert not only delicious but visually stunning. The golden crust, often crafted from graham crackers, serves as a delightful base that complements the citrus notes perfectly. With each mouthful, the richness is balanced by the tartness of the lemon, creating a harmonious blend that will leave you craving more.

Quick Recipe Highlights

  • Flavor Profile: Expect a delightful balance of tart lemon and sweet blueberries in every bite.
  • Texture: The cheesecake is rich and creamy, while the blueberries add a juicy burst.
  • Aroma: The refreshing scent of lemons combined with the sweetness of fresh berries makes this dessert irresistible.
  • Visual Appeal: The vibrant yellow and deep blue colors create a captivating dessert that is as beautiful as it is delicious.
  • Skill Level Needed: This intermediate-level recipe presents an exciting challenge, perfect for home bakers looking to impress.
  • Special Equipment: A springform pan is essential for easy removal of the cheesecake and achieving that perfect presentation.

Recipe Overview

  • Difficulty Level: This luscious lemon blueberry cheesecake requires intermediate baking skills, making it an excellent choice for those who have some experience with dessert preparations.
  • Category: As a dessert, this cheesecake is versatile, fitting perfectly into categories like celebrations, gatherings, or even a sweet end to a family dinner.
  • Cuisine: This recipe draws influences from classic American desserts, blending traditional cheesecake techniques with fruity flavors that highlight seasonal produce.
  • Cost: Ingredients can vary but plan for a budget-friendly total that accommodates fresh fruits and quality cream cheese.
  • Season: While delightful year-round, spring and summer are especially perfect for this cheesecake, taking advantage of in-season blueberries.
  • Occasion: Whether it’s a birthday, a summer picnic, or simply a sweet treat after dinner, this cheesecake fits or elevates various occasions.

Why You’ll Love This Recipe

Indulging in a slice of luscious lemon blueberry cheesecake is an experience that tantalizes both the taste buds and the senses. The delicate balance between creamy cheesecake and bursts of fresh blueberries lends itself to both summer soirées and cozy winter evenings. Each bite comes with varying degrees of sweetness and tanginess that linger on your palate, leaving you wanting more.

Convenience is another reason to adore this dessert. With straightforward preparations that grant even novice bakers the chance to shine, this recipe is easily executed. The wait while it chills in the fridge builds anticipation, allowing flavors to meld together beautifully. Additionally, it can be made a day ahead, providing a stress-free dessert option for parties or family gatherings.

From a nutritional standpoint, this cheesecake incorporates the health benefits of blueberries, which are rich in antioxidants and vitamins. When paired with homemade lemon zest, its health benefits increase, making each slice a guilt-free indulgence. It’s also a versatile dessert that can accommodate various dietary preferences making it accessible to many.

This dish often becomes the star of social gatherings, sparking joy and conversations among friends and family. Sharing a slice can bring people together, and swapping stories over a slice can add a personal touch to gatherings. Moreover, showcasing your baking skills with this impressive cheesecake can make you the go-to dessert maker for future events.

Finally, the cost-effectiveness of this recipe cannot be overlooked. With simple, yet impactful ingredients, you can create an unforgettable dessert that doesn’t break the bank. Investing in quality ingredients will enhance the dish, but overall, it remains a budget-friendly option perfect for everyday enjoyment.

Historical Background and Cultural Significance

The origins of cheesecake can be traced back to ancient Greece, where it was a popular dessert among athletes and during religious ceremonies. This delightful treat was often made from simple ingredients like cheese, honey, and flour; however, as culinary practices evolved, so did the cheesecake itself. The introduction of cream cheese in the early 20th century revolutionized the traditional recipe we enjoy today.

In American cuisine, the cheesecake took on its own cultural significance, becoming a classic representation of celebration and indulgence. The addition of fruits, especially blueberries, reflects the abundance of local produce found throughout the United States. This cheesecake recipe showcases the strong ties between food and tradition, often served at family gatherings, holidays, and special occasions.

The evolution of the cheesecake has led to numerous variations around the world, each adapting to local tastes and available ingredients. For instance, in Italy, ricotta cheese is often used, introducing a different flavor and texture profile, while adaptations in other countries feature unique flavors such as chocolate or matcha.

Regional variations often highlight seasonal fruits, like the luscious blueberries found in this recipe. As blueberry picking in summer has become a beloved tradition in certain regions, many families have crafted their own versions of blueberry cheesecake, showcasing family creativity while celebrating local culture.

Ingredient Deep Dive

Blueberries

Blueberries hold a prominent place in American culture as a symbol of summer and harvest. Rich in vitamins C and K, they provide numerous health benefits, including boosting immunity and promoting heart health. When selecting blueberries, look for ones that are plump, firm, and have a deep blue hue. For storage, keep them in a breathable container in the refrigerator and wash them only before consumption to maintain freshness.

In recipes, blueberries can often be substituted with other berries like raspberries or blackberries, although each berry will impart its unique flavor. For freezing, wash and dry the berries thoroughly, then spread them out on a baking sheet before transferring to a freezer-friendly container.

Lemon

Lemon, with its vivid flavor and aroma, is an essential ingredient in this cheesecake, providing a refreshing contrast to the rich creaminess. Lemons have a storied history, originating from Southeast Asia and now widely cultivated in temperate climates. They are packed with vitamin C, aiding digestion and enhancing skin health.

When selecting lemons, choose ones that are firm, heavy for their size, and have a vibrant yellow peel. For storage, keep them in the fridge to prolong freshness. Zesting and juicing fresh lemons yield the best flavor; however, bottled lemon juice can be used in a pinch, though it comes at the cost of aromatic profile.

Common Mistakes to Avoid

  • Overmixing the batter: This can introduce unnecessary air pockets, leading to cracks in your cheesecake; mix just until combined.
  • Not letting the ingredients come to room temperature: Cold ingredients can impact the texture and creamy consistency; always allow them to warm up before mixing.
  • Using a pan that isn’t leakproof: A water bath is essential for cheesecakes; ensure your pan is sealed well to avoid water seeping in.
  • Skipping the chilling time: Patience is key! Rushing this step can lead to a soft filling that doesn’t hold its shape.
  • Baking at too high a temperature: This may result in a cracked surface; try low-temperature baking for a smoother finish.
  • Not allowing it to cool gradually: Cracking can occur if you move the cheesecake from hot to cold too quickly; cool it in the oven with the door ajar for a bit.
  • Incorrectly measuring ingredients: Baking is precise; always use a scale or measuring cups for accuracy.
  • Serving it too soon: The flavors deepen as it sits; letting it chill overnight will enhance its taste significantly.
  • Neglecting to line the pan: Make sure to line your pan with parchment to prevent sticking and ensure easy removal.
  • Ignoring flavor adjustments: Tastes vary; adjust sugar and lemon to suit your palate for optimal enjoyment.

Essential Techniques

One vital technique in creating a luscious lemon blueberry cheesecake is the water bath method. This technique helps control temperature during baking, preventing cracks on the surface. To master this, wrap your springform pan tightly with aluminum foil, ensuring it’s leak-proof before placing it in a larger pan filled with water. Aim for a warm water bath to help the cheesecake bake evenly.

Another essential technique is proper mixing of the batter. Over-mixing can cause air bubbles that lead to cracks, while under-mixing can leave lumps. Strive for a smooth, creamy consistency by mixing until just combined. Incorporating ingredients gradually—beginning with cream cheese and adding sugar, followed by eggs and finally the zest—will help maintain that ideal texture.

Pro Tips for Perfect Luscious Lemon Blueberry Cheesecake

One key tip is to chill the cheesecake as long as possible, ideally overnight, to allow flavors to meld beautifully. A longer chill enhances the overall taste and gives it the firm consistency you desire while slicing.

Next, using fresh blueberries elevates the dish’s taste. Frozen blueberries can be used, but ensure they are thawed and drained beforehand to avoid excess moisture in the recipe.

Consider adding a blueberry compote on top before serving for an extra burst of flavor and a stunning presentation. Making a quick compote with sugar and water on the stove will enhance the cheesecake and offer an exquisite finish.

Don’t forget to pre-bake the crust; this prevents it from becoming soggy once the filling is added. A quick 10-minute bake creates a delicious, crunchy base that complements the soft cheesecake.

If you’re aiming for a swirl effect, portion the blueberry mixture into the batter and use a skewer to create beautiful patterns before baking. This not only looks stunning but also adds delightful flavor throughout.

Finally, insulate your cake in the refrigerator after baking for at least two hours before slicing. This will help maintain the shape and achieve cleaner cuts!

Variations and Adaptations

Exploring variations can make your cheesecake unique. Consider regional variations—using fresh peaches or cherries in place of blueberries celebrates summer’s bounty. You could also employ different citrus like oranges or limes for a unique twist on the flavor profile.

Seasonal adaptations highlight the best of what each season offers. In fall, spice it up with warm flavors such as cinnamon or nutmeg for a cozy vibe, transitioning the cheesecake into a seasonal favorite. Conversely, top your cheesecake with winter fruits like pomegranate or cranberries for a festive touch.

For dietary modifications, making a gluten-free crust by using almond flour or crushed gluten-free cookies can accommodate many preferences. Vegan adaptations can be achieved with cashew cream mixed with coconut milk to replicate the cheesecake texture while remaining plant-based.

Lastly, consider adding a chocolate layer or a chocolate swirl to give a completely different flavor and visual texture. Incorporating white or dark chocolate can create a rich and indulgent take on this classic dessert.

Serving and Presentation Guide

When it comes to serving your luscious lemon blueberry cheesecake, consider classic plating techniques such as a simple slice placed on a dessert plate with a light dusting of powdered sugar or a drizzle of blueberry compote for visual appeal. The pop of color from the blueberries adds a compelling contrast to the creamy yellow filling.

For garnishing, adding a sprig of fresh mint can elevate the dish’s presentation while enhancing the flavor as well. Pair the cheesecake with a dollop of whipped cream or scoop of vanilla ice cream for an added creamy experience that guests will love.

Traditional accompaniments can include a selection of seasonal fruits arranged aesthetically on the side, providing both garnish and complementary flavors. Modern serving suggestions may include individual mini cheesecakes for trendy, single-serving options that are perfect for parties or events.

Temperature is crucial when serving cheesecake; ensure it’s at refrigerator temperature rather than room temperature for the best texture and flavor balance. Mastering portion control can ensure every slice maintains the integrity of the visual presentation without losing the cake’s beautiful structure.

Wine and Beverage Pairing

Wine pairing can elevate your cheesecake experience. A light dessert wine, like Moscato or a sweet Riesling, complements the tanginess of the cheesecake beautifully, enhancing its delicate flavors and adding a delightful contrast.

If you prefer non-alcoholic options, consider pairing your cheesecake with a sparkling lemonade or iced tea infused with fresh mint or lemon zest, providing refreshment and balancing the cheesecake’s richness.

For those who enjoy coffee, a smooth cappuccino or latte pairs exceptionally well, as the hint of bitterness contrasts delightfully against the sweet cheesecake. Consider serving these beverages at a slightly warmer temperature to enhance the flavor experience.

Ultimately, serving suggestions can be tailored to your personal preferences and the occasion, ensuring that your lemon blueberry cheesecake is enjoyed to the fullest.

Storage and Shelf Life

Store any leftover cheesecake by covering it tightly with plastic wrap in the refrigerator, where it will last for up to five days. For optimal freshness, prefer placing it in an airtight container, as this protects it from moisture and absorbs outside odors.

The best temperature for storing your cheesecake is consistent, cool refrigeration at about 35°F to 40°F. When it comes to signs of spoilage, observe the crust; if it becomes overly soggy, or if the filling shows any signs of mold, it’s best to discard it.

If you plan to freeze your cheesecake, use an airtight container, tightly wrapped in plastic followed by aluminum foil to prevent freezer burn. A well-wrapped cheesecake can maintain its quality for about 2 to 3 months. To thaw, transfer it to the fridge overnight before serving. Reheating is not required but serving it chilled is recommended for the best taste.

Make Ahead Strategies

Creating a luscious lemon blueberry cheesecake ahead of time is a wonderful strategy for busy bakers. You can prepare the crust a day in advance, allowing it to cool completely before adding the cheesecake filling. This not only saves time but allows for a firm, integrated crust.

One smart make-ahead strategy is to assemble and bake the cheesecake a day or two prior to serving. Once cooled, refrigerate it to allow the flavors to intensify and meld together beautifully. This leads to a more flavorful dessert as it sits.

For those who want to enhance freshness, prepare a blueberry compote topping a few hours before serving. This allows for the flavors to combine without losing the freshness of the blueberries when serving.

Finally, consider dividing toppings or sauces into small containers that can be stored properly and easily added just before serving. These strategies ensure quality and save time during gathering preparations, allowing you to enjoy more time with your guests.

Scaling Instructions

Scaling this luscious lemon blueberry cheesecake recipe can easily be done based on your needs. To halve the recipe, simply divide all ingredients by two, ensuring that the baking time is adjusted accordingly, typically requiring a bit less due to the reduced volume.

For larger gatherings, doubling or tripling the ingredients is feasible. Use a larger springform pan or divide into two pans if necessary. Be aware that baking times may need to be increased slightly, so monitoring your cheesecake as it bakes is crucial.

Adjust equipment sizes accordingly; for example, if using multiple pans, the total baking time may need to be altered, especially for a larger batch. Always check for doneness by inserting a toothpick or skewer into the center.

Finally, remember to consider storage accordingly when scaling up; larger batches mean larger containers, and the potential for leftovers increases, especially when scaling up for parties or special occasions.

Nutritional Deep Dive

In examining the nutritional profile of our luscious lemon blueberry cheesecake, focus on macronutrients including carbohydrates, proteins, and fats. Each slice typically offers a balanced composition of these macronutrients, with cream cheese contributing to protein content while blueberries add natural sugars and fiber.

Micronutrient analysis reveals that blueberries provide essential vitamins C and K, while lemons enhance the dish with vitamin C and beneficial flavonoids. The crust may add calories primarily from fats and carbohydrates, making moderation key in serving sizes.

Health benefits abound with this treat; beyond essential vitamins, the antioxidants present in blueberries can support heart health and improve overall wellness. Additionally, incorporating lighter cream cheese or yogurt can reduce calories, catering to various dietary preferences.

For those mindful of dietary considerations, be aware of portion sizes when indulging in dessert, especially during events where rich foods abound. Moderating serving sizes influences weight management and contributes to a balanced diet.

Dietary Adaptations

This luscious lemon blueberry cheesecake can be modified to accommodate various dietary needs. For a gluten-free version, use gluten-free graham cracker crumbs or almond flour for the crust. This ensures that those on gluten-alternative diets can still enjoy its delicious flavor.

For a dairy-free alternative, consider using cashew cream mixed with coconut milk or almond milk; you can replace cream cheese with tofu or dairy-free cream cheese. This method keeps the delightful texture of a cheesecake intact while remaining suitable for vegans.

Low-carb adaptations can be achieved with sugar substitutes, such as erythritol or stevia, along with a nut-based crust instead of graham crackers. This maintains the satisfying essence of the recipe without excessive carbs.

Keto-friendly variations follow similar principles, replacing traditional ingredients with low-carb counterparts, allowing for an indulgent dessert without the carbohydrate load.

Lastly, for a Paleo-friendly cheesecake, use almond meal for the crust, honey or maple syrup for sweetness, and ensure all ingredients align with Paleo guidelines, maintaining health while enjoying this delicious confection.

Troubleshooting Guide

If you encounter texture issues with your cheesecake, ensure consistent mixing. If it’s too dense, the eggs may have been added too quickly; instead, incorporate them gradually to achieve the desired texture.

Flavor balance can be tricky; to counteract excessive tartness, increase sugar incrementally when adjusting. Always taste as you go to maintain the flavor harmony intended in the dish.

Temperature problems can arise during baking; a too-high temperature may cause cracking. Lowering the oven temperature slightly can help combat this while still cooking the cheesecake evenly.

For equipment challenges, such as using the wrong type of pan, always ensure to use a springform pan for easy removal or a removable base if available. Replace any shady equipment for future bakes to prevent frustration.

Ingredient substitutions can lead to unexpected results; follow the prescribed recommendations closely to maintain the cheesecake’s ideal characteristics and flavors, ensuring that appropriate substitutes are chosen for each ingredient.

If timing concerns arise, be flexible and patient. Cheesecake often requires longer chilling times and baking, and rushing this can change the entire outcome—thorough checks with toothpicks are always wise for doneness.

Recipe Success Stories

Community feedback for the luscious lemon blueberry cheesecake has been overwhelmingly positive. Many have shared how its vibrant flavors and creamy texture captivated their guests at gatherings, often requesting the recipe for their own special events. The combination of lemon and blueberry is often praised for its refreshing qualities, eliciting joyful reactions.

Variations introduced by readers have led to exciting new flavors, such as lemon raspberry or even a hint of lavender, showcasing personal touches that adaptively evolve this classic recipe. People love to share their modifications, illustrating community engagement and the recipe’s versatility.

There have been several success stories where bakers used this cheesecake as a centerpiece for significant celebrations, highlighting milestones like weddings, anniversaries, or memorable birthday parties. This success encourages others to attempt their own versions, fostering excitement and creativity.

Reader suggestions for presentation have also inspired bakers to elevate their desserts visually, as simple garnishes elevate the dining experience. Many incorporate fresh mint or unique dessert sauces, turning every cheesecake into a stunning highlight on the table.

Photography tips shared among the community have gathered attention, enabling amateur bakers to capture gorgeous images that showcase their efforts. This goes hand-in-hand with engaging recipe discussions which further enhances the cooking community spirit!

Frequently Asked Questions

Can I make this cheesecake in advance?

Absolutely! This cheesecake tastes even better after sitting in the refrigerator overnight. Baking it a day or two in advance allows the flavors to meld beautifully, making it an excellent choice for busy schedules.

How do I store leftovers?

Store any leftover cheesecake in the refrigerator, covered with plastic wrap or in an airtight container. It will last up to five days but is best enjoyed fresh.

Can I freeze the cheesecake?

Yes, you can freeze this cheesecake! Wrap it tightly in plastic wrap and aluminum foil to prevent freezer burn. It will maintain quality for about 2-3 months when frozen. Thaw in the refrigerator overnight before serving.

Why did my cheesecake crack?

Cracking can occur from several factors, such as high baking temperature or rapid temperature changes. To prevent this, bake at a lower temperature and allow it to cool gradually in the oven.

What can I substitute for cream cheese?

If you need alternatives, consider using mascarpone, ricotta, or vegan cream cheese substitutes for a different texture and flavor base. Each will impart a unique quality to the cheesecake.

Can I use frozen berries?

Yes, frozen blueberries can work, but ensure to thaw and drain them well before adding to the batter to prevent excess moisture which could alter the cheesecake’s texture.

How do I know when my cheesecake is done?

The cheesecake is done when the edges are set, and the center still has a slight jiggle. It will firm up as it cools in the refrigerator.

Can I use a different crust?

Certainly! You can experiment with various crust options, such as almond flour or graham cracker blends, and even use cookie crumbs for a unique flavor twist!

What if I don’t have a springform pan?

If a springform pan isn’t available, try using a regular round cake pan lined with parchment paper for easier removal. Be careful while inverting to retain shape.

How can I enhance the flavor?

Add toppings like lemon zest, fruit compote, or flavored extracts during mixing to elevate the cheesecake’s flavor to your taste!

Additional Resources

For those eager to explore more desserts, check out related recipes like classic New York cheesecake, blueberry tart, or lemon bars. These desserts showcase similar flavors and can inspire creativity in your baking.

Technique guides can help improve your skills. Consider reading about baking fundamentals, cheesecake tips, or fruit handling guides to hone your expertise and enhance your culinary creations.

Ingredient information is key; learn more about selecting fresh fruits, choosing quality dairy, and understanding sweeteners. This knowledge enhances your overall experience while cooking and baking.

When investing in kitchen equipment, discover must-have tools for baking cheesecakes, such as high-quality springform pans, mixers, and food processors that streamline your preparation process.

Taking seasonal variations into account ensures your recipes reflect quality produce, so be sure to check out seasonal desserts that utilize local and fresh ingredients throughout the year.

Join the Conversation

Engaging with others through social media can amplify the joy of baking. Share your luscious lemon blueberry cheesecake experiences or connect through online platforms, showcasing hard-earned masterpieces and inviting feedback.

Photography plays a significant role in food blogging—capture your delightful desserts and share them with the community. Great photos inspire others and can captivate audiences with your culinary skills.

Recipe reviews are an integral part of the cooking experience. After trying this luscious cheesecake, share your thoughts and modifications, allowing readers to learn from your insights and experiences.

Community engagement helps strengthen bonds; share tips, tricks, or even swap recipes with fellow baking enthusiasts. Together, you can explore flavors, techniques, and variations that steep in tradition while promoting culinary creativity.

Lastly, users are encouraged to post variations they have tried, fostering a sense of cooperation in trying something new and celebrating the home-baking journey together!

The Recipe

Luscious Lemon Blueberry Cheesecake

Serves: 8 slices

Prep Time: 30 mins

Cook Time: 60 mins

Total Time: 90 mins

Kitchen Equipment Needed

  • Springform pan
  • Mixing bowls
  • Electric mixer
  • Rubber spatula
  • Measuring cups and spoons
  • Large roasting pan for water bath

Ingredients

  • 1 ¾ cups graham cracker crumbs
  • ½ cup unsalted butter, melted
  • 1 cup cream cheese, softened
  • 1 cup sour cream
  • ¾ cup granulated sugar
  • 3 large eggs
  • 1 tablespoon lemon zest
  • ½ cup fresh blueberries
  • 2 tablespoons lemon juice

Directions

  1. Preheat the oven to 325°F (160°C).
  2. In a mixing bowl, combine graham cracker crumbs and melted butter until well blended. Press into the bottom of the springform pan firmly.
  3. In another bowl, mix cream cheese and sugar until smooth. Add sour cream, eggs, lemon zest, and lemon juice; blend until creamy.
  4. Fold in fresh blueberries gently.
  5. Pour the cheesecake mixture over the crust in the springform pan. Smooth the surface.
  6. Place the springform pan into a large roasting pan. Fill the roasting pan with hot water, halfway up the sides of the springform.
  7. Bake for 60 minutes or until the center is set but still has a slight jiggle.
  8. Turn off the oven and let the cheesecake cool with the door ajar for about an hour.
  9. Transfer to the refrigerator and chill for at least 4 hours, preferably overnight before serving.

Recipe Notes

  • For best results, use fresh blueberries.
  • Adjust sweetness by modifying sugar according to your taste.
  • This cheesecake can be made a day ahead for optimal flavor.

Delicious Homemade Lemon Poppy Seed Pudding Cake Recipe

Homemade Lemon Poppy Seed Pudding Cake: A Delightful Citrus Treat

⚖️
Difficulty
Medium

⏲️
Prep Time
20 mins

🕒
Cook Time
40 mins

⏱️
Total Time
1 hour

🍽️
Servings
8

Indulging in a piece of Homemade Lemon Poppy Seed Pudding Cake is akin to taking a joyful bite of sunshine. This delightful dessert is characterized by its bright, zesty lemon flavor combined with the delightful crunch of poppy seeds. The creamy pudding-like texture makes it an exceptional treat that offers not just taste but also comfort. Each forkful brings forth a delightful balance of sweetness and tanginess, creating an experience that dances on your taste buds. This cake is perfect for a family gathering, afternoon tea, or simply enjoying a quiet moment in your kitchen.

What sets this cake apart is its unique combination of textures. The moist, pudding-like center contrasts beautifully with the soft, light sponge surrounding it. The lemon zest infuses the cake with a refreshing fragrance, making it hard to resist. It’s not just visually appealing; the poppy seeds add speckles that elevate its visual charm. This Homemade Lemon Poppy Seed Pudding Cake is sure to be the star of any dessert table, bringing smiles and satisfaction to all who partake.

Quick Recipe Highlights

  • Flavor Profile: This cake showcases a harmonious blend of tart lemon and sweet vanilla undertones, rounded out by nutty poppy seed crunch.
  • Texture: Expect a luscious pudding interior juxtaposed with a light and fluffy sponge that feels heavenly on the palate.
  • Aroma: The refreshing citrus notes of lemon intertwine with comforting sweetness, enveloping your kitchen in a delightful fragrance.
  • Visual Appeal: The pale yellow color, sprinkled with dark poppy seeds, creates an eye-catching dessert that invites you to indulge.
  • Skill Level Needed: This recipe is approachable for beginners while allowing more experienced bakers to play with its foundational elements.
  • Special Equipment: A mixing bowl, whisk, and baking dish are essential, along with a hand mixer for a smooth batter.

Recipe Overview

  • Difficulty Level: This Homemade Lemon Poppy Seed Pudding Cake is marked as medium difficulty. It requires careful measuring and mixing, but is straightforward enough for anyone willing to give it a try.
  • Category: This is a delightful dessert that fits perfectly into a variety of meal categories, from light summer dinners to festive celebrations.
  • Cuisine: Originating from classic baking traditions, this cake incorporates elements popular in both American and European culinary practices, marrying familiarity with creativity.
  • Cost: The recipe is budget-friendly, requiring common pantry ingredients, making it accessible for everyday baking.
  • Season: Lemon desserts are especially appreciated in warmer months but can be a lovely contrast during wintertime as well.
  • Occasion: This cake is ideal for all sorts of occasions, from birthdays and holidays to casual get-togethers or barbecue parties.

Why You’ll Love This Recipe

The incredible balance of flavors in this Homemade Lemon Poppy Seed Pudding Cake makes it a must-try dessert. The bright lemon provides a refreshing zing that enlivens the senses, and the sweet, custardy pudding layer offers comfort like no other dessert. When combined, these elements create a perfect harmony that encourages multiple servings.

Moreover, its preparation is a breeze. With simple steps and readily available ingredients, even novice bakers will feel accomplished. The minimal effort required to create this delightful cake allows bakers to spend more time enjoying their creations rather than laboring in the kitchen.

In terms of nutritional advantages, this cake allows you to indulge in a treat that scores high on flavor without excessive guilt. Lemons are rich in vitamin C, which helps boost your immune system, and poppy seeds add a nutritious crunch filled with essential minerals.

This cake is not just a dessert; it is a conversation starter at gatherings. Its charm and delightful taste will inspire friends and family to share their experiences and perhaps encourage them to try their own versions at home.

Finally, when it comes to cost-effectiveness, the ingredients are simple and often on hand. This recipe maximizes value while delivering an impressive, celebratory dessert that’s perfect for any occasion.

Historical Background and Cultural Significance

The evolution of the pudding cake can be traced back to early American cooking, where simplicity was prized. The original concepts of combining custard with flour gave rise to the beloved pudding cake we cherish today. Each culture has added its twist, but lemon flavors became especially popular in the United States in the late 19th century.

Lemon desserts, in general, have a rich history, often used in celebrations and feasts. They symbolize warmth and hospitality, inviting guests to relax and enjoy the offerings. Celebrations centering around spring and summer typically include fresh fruits, making lemon desserts a seasonal staple.

This recipe for Homemade Lemon Poppy Seed Pudding Cake showcases cultural influences that span centuries. It embodies not only a delightful flavor profile but also a nostalgic connection to simpler times when desserts were prepared with love and care.

Regional variations exist, especially in the use of citrus fruits. In parts of the South, for instance, you’ll find variations using grapefruits or oranges, showcasing regional agriculture. Similarly, adding local herbs for flavoring can personalize the recipe to reflect local tastes and traditions.

Ingredient Deep Dive

The first key ingredient is lemon, which carries significant cultural importance as a symbol of freshness and vibrancy. Lemons are commonly associated with warmth, joy, and hospitality. Rich in vitamin C, they provide various health benefits, including supporting your immune system and improving skin health. When selecting lemons, look for ones that are firm and vibrant, storing them at room temperature for up to a week or refrigerating for longer freshness. You can also substitute with other citrus fruits for a unique twist.

Next, we have poppy seeds, often celebrated for their nutty flavor and crunch. Historically, these seeds have been used in diverse cuisines around the world, adding depth and texture to dishes. Nutritionally, they are rich in healthy fats, fiber, and essential minerals. When using poppy seeds, opt for fresh ones as their flavor diminishes over time. Store them in a cool, dark place to maintain freshness, and remember that they can be replaced with chia seeds in a pinch.

Flour is the backbone of this recipe, providing structure and stability to your cake. While all-purpose flour works well, alternatives like almond flour or gluten-free blends can also be considered for different dietary needs. It’s crucial to sift flour before measuring to avoid lumps and ensure accurate measurement.

Sugar plays a vital role in balancing the flavors of your pudding cake. Besides sweetness, it contributes to the cake’s texture by creating a tender crumb. Granulated sugar is the most common form used, but brown sugar can also enhance the flavors. Keep in mind the storage options for sugar; it should be kept in an airtight container to prevent clumping.

Last but not least, eggs bring richness and structure to the cake. They help bind ingredients together and create a custard-like texture. Fresh eggs are always best, providing enhanced flavor. For those with dietary restrictions, consider using flax eggs or a commercial egg replacement mix.

Common Mistakes to Avoid

  • Overmixing the batter can lead to a dense cake, so mix only until ingredients are combined.
  • Not properly measuring ingredients may alter the cake’s texture; use a kitchen scale for precision.
  • Using old or stale baking powder can affect rising; always check the expiration date.
  • Opening the oven door too early can cause the cake to collapse; wait until cooking time is nearly complete before checking.
  • Skipping the zest can diminish the lemon flavor; always include freshly grated zest for optimal taste.
  • Not letting the cake cool properly can lead to a soggy bottom; cool in the pan before transferring to a wire rack.
  • Ignoring storage recommendations can alter the cake’s texture; always refrigerate leftover pudding cake.
  • Using substitute ingredients without adjusting the quantities can ruin the balance; follow substitutions carefully.
  • Not tasting the batter can miss out on flavor enhancement; a small taste can guide your adjustments.
  • Forgetting to line the baking dish can cause the cake to stick, leading to frustrating presentation issues.

Essential Techniques

Mixing techniques are vital for a successful pudding cake. It’s important to incorporate ingredients slowly and thoroughly without overworking the batter. This ensures lightness in the finished product. Use a folding technique to gently combine wet and dry ingredients, preserving the air bubbles for a fluffy texture. Look out for a smooth batter without lumps.

Baking requires careful attention to temperature and time. Preheating your oven is crucial to ensure the cake rises properly. Always bake in the center of the oven to promote even cooking and avoid hot spots. Keep an eye on the color and use a toothpick to check for doneness. A clean toothpick means it’s ready to come out.

Cooling is equally important in allowing your cake to set properly. Letting it sit in the pan for a short period before transferring helps avoid breaking apart. Once cooled to room temperature, move to the refrigerator for maximum flavor infusion and a firmer texture. This step can be vital for achieving perfect slicing on serving day.

Pro Tips for Perfect Homemade Lemon Poppy Seed Pudding Cake

– Use the freshest lemons you can find; they will provide the best flavor and aroma throughout the cake.
– Consider using room temperature eggs and butter to create a smooth mixture that emulsifies well.
– If you want a deeper lemon flavor, try adding a bit of lemon extract along with the juice and zest.
– Do not rush the mixing phase; this is crucial for an airy and fluffy cake texture.
– Once baked, give the cake enough time to cool before cutting, which will help keep it intact.
– Decorate with whipped cream and additional lemon zest for a beautiful presentation.
– Serve your cake chilled for a refreshing treat, especially on warm days.
– Experiment with different citrus fruits and flavors for variety in your dessert repertoire.

Variations and Adaptations

One popular variation of this cake is to incorporate different types of citrus, such as orange or grapefruit, to suit seasonal tastes or preferences. This slight twist on the original recipe can add new dimensions while still honoring the traditional lemon flavor.

In terms of dietary modifications, consider making it gluten-free by substituting regular flour with almond flour or a gluten-free blend. This alteration will not only cater to those with dietary restrictions but also lend a nutty flavor that pairs beautifully with lemon.

For an added flavor boost, try infusing your cake with spices, such as cardamom or ginger. These spices complement the citrus perfectly, adding warmth to the overall experience.

If you’re looking for a more decadent presentation, consider turning it into a layered dessert by serving the pudding cake with layers of lemon curd and whipped cream. This change adds depth and a gourmet feel to your dessert.

Another delightful variation is to serve warm pudding cake with a scoop of vanilla ice cream or a dollop of crème fraîche, providing a contrast in temperature and texture that elevates the experience further.

Serving and Presentation Guide

For an impressive presentation, consider plating your Homemade Lemon Poppy Seed Pudding Cake on a beautiful cake stand or decorative platter. Use a serrated knife to cut the cake into even squares, ensuring smooth edges for a polished look.

Garnish with fresh berries like raspberries or blueberries to add a pop of color that complements the cake’s pale hue. A sprinkle of powdered sugar or zest over the top can enhance both the visual appeal and flavor.

For an extra touch, serve with a side of lemon curd or a light lemon glaze drizzled atop the pieces. This will draw out even more lemon flavor while providing visual contrast.

Temperature is vital when serving. Present the cake chilled, allowing flavors to meld beautifully. If you prefer warmth, ensure it’s slightly heated before serving, as the pudding element can create a comforting warm dessert.

Portion control can be important, especially if serving at a gathering. Consider using small plates and offering smaller slices, allowing guests to sample multiple desserts without feeling overwhelmed.

Wine and Beverage Pairing

When it comes to wine pairings, a light-bodied white wine such as a Sauvignon Blanc complements the bright lemon flavors beautifully. The acidity in the wine balances the sweetness of the cake and enhances overall richness.

For non-alcoholic options, a refreshing iced tea with a hint of lemon works wonderfully. You can also serve flavored sodas or lemonade for an extra citrus kick, perfect alongside this dessert.

If you’re considering coffee or tea pairings, a lightly brewed tea, like chamomile or green tea, can boost the flavor experience without overshadowing the cake. For coffee lovers, opt for a smooth roast with hints of citrus overtones to tie in with the dessert’s profile.

Temperature should be kept in mind; serve white wines chilled and coffees at a comfortable drinking temperature to enhance the overall experience.

For serving suggestions, create a delightful dessert table with various beverages and complementing flavors, allowing guests to mix and match to find their perfect pairing.

Storage and Shelf Life

To store your Homemade Lemon Poppy Seed Pudding Cake, it’s best to keep it in an airtight container in the refrigerator. Proper sealing will maintain its moisture and prevent drying. The cake can last for up to 3 days in the fridge, but the flavors may deepen as it chills.

If you want to store it for a longer duration, freezing is an option. Wrap slices individually in plastic wrap and then place them in a freezer-safe container. The cake can be kept frozen for up to 2 months.

Signs of spoilage include unexpected odors or a change in texture. Always give it a quick inspection before serving, especially if it’s been refrigerated for an extended period.

For reheating, consider the microwave or the oven. If using the microwave, warm it up in short intervals to avoid overheating. If opting for the oven, low heat will bring it back to life without affecting its texture.

When defrosting, place the wrapped pieces in the refrigerator overnight or at room temperature for a couple of hours before serving. The cake will remain moist and flavorful, bringing back its delightful essence.

Make Ahead Strategies

For the best Homemade Lemon Poppy Seed Pudding Cake experience, you can prepare it a day ahead. The flavors marry beautifully when allowed to sit in the refrigerator overnight, enhancing its taste.

Preparation can be broken into stages. You can mix the batter and prepare the dish a few hours in advance, then simply bake it when you’re ready. This helps streamline mealtime while still enjoying freshly baked dessert.

Quality is crucial—avoid overbaking, as it may lose moisture. The perfect balance is to bake just until fully set and lightly golden on top.

For assembly tips, if using additional garnishes or accompaniments, keep those components separate until serving. This will help retain freshness and visual appeal.

When reheating individual slices, use the microwave, but cover it to keep moisture, or warm in the oven briefly to maintain texture without drying it out.

Scaling Instructions

If you’re thinking about scaling your Homemade Lemon Poppy Seed Pudding Cake, halving the recipe can work well. Simply divide all ingredients by two, using smaller baking dishes if necessary.

Doubling or tripling the recipe is also feasible, especially if serving a crowd. Just ensure you have sufficient mixing space and adjust cooking times as needed. It may require longer baking time for larger recipes, so watch closely.

In terms of equipment adjustments, when scaling up, make sure to use larger mixing bowls and baking pans. Additionally, keep an eye on oven space to prevent overcrowding when increasing quantities.

Timing modifications are important; larger cakes may need longer to bake, so use toothpick tests to determine doneness accurately as you scale.

For storage considerations, consider consolidating your baked goods into airtight containers if freezing multiple portions to save space while keeping them fresh.

Nutritional Deep Dive

Examining the macro components, Homemade Lemon Poppy Seed Pudding Cake usually consists of carbohydrates from flour and sugar, along with some protein from eggs. A typical serving offers a satisfying treat, and when enjoyed in moderation, can fit within balanced diets.

On the micronutrient side, this dessert provides vitamin C thanks to lemons, along with small amounts of calcium and iron from poppy seeds. These nutrients contribute to overall well-being, supporting various bodily functions.

In terms of health benefits, using fresh ingredients enhances not just flavors but nutritional profiles. Limiting added sugars through careful measurements can also help maintain a healthier dessert.

When considering dietary considerations, being mindful of portion sizes can help maintain balance without overindulgence. Sharing desserts can make rich recipes more manageable while allowing everyone to partake.

Lastly, incorporating this dessert into a weight management plan can be achieved with mindful eating practices. Enjoying treats like this in moderation ensures a pleasurable experience without feelings of deprivation.

Dietary Adaptations

For a gluten-free version of Homemade Lemon Poppy Seed Pudding Cake, substitute all-purpose flour with a certified gluten-free blend. This way, you can maintain the cake’s integrity while accommodating dietary needs.

If you need a dairy-free alternative, simply utilize non-dairy milk alternatives such as almond or oat milk and replace butter with coconut oil or a vegan butter substitute. Adjustments will ensure everyone at your table can enjoy this delightful cake.

For a vegan adaptation, replace eggs with flax eggs (1 tablespoon of ground flaxseed mixed with 2.5 tablespoons of water per egg), and use a plant-based yogurt instead of traditional dairy. These substitutions don’t compromise the cake’s flavor or texture.

If you are following low-carb or keto diets, consider using almond flour and a sugar substitute that suits your dietary restrictions. Low-carb versions are becoming increasingly popular and can be enjoyed guilt-free.

For those on paleo diets, swap in honey or maple syrup as your sweetener while using coconut flour to align with paleo standards, achieving a cake close to its original form without processed ingredients.

Troubleshooting Guide

Texture issues often arise if the batter is overmixed or undermixed; engage in careful folding for a light and fluffy cake. If the cake is too dense, consider incorporating a bit more air through careful mixing techniques.

Flavor balance can be a common concern; always taste your batter before baking and adjust sweetness or acidity if necessary for the perfect blend of lemony delight.

Temperature problems are easily rectified by ensuring your oven is accurately calibrated; using an oven thermometer can help troubleshoot discrepancies that may affect baking times.

Equipment challenges can occur if proper tools are not utilized; invest in quality mixing bowls and baking pans to make your experience smoother.

Ingredient substitutions can be tricky; always research alternatives to maintain flavor profiles, ensuring the balance of wet and dry ingredients stays intact.

Timing concerns during baking can lead to an overly dry cake; set a timer and check for doneness a few minutes early to ensure the perfect texture.

Recipe Success Stories

Community feedback has been overwhelmingly positive, with many readers praising the effortless preparation and the lovely lemon flavor. Variations and adaptations shared by readers have added unique twists that enhance the original recipe.

One reader delighted in using different citrus fruits, sharing that a grapefruit version became a family favorite. Another suggested pairing it with homemade whipped cream, which brought about rave reviews from guests.

Adaptation stories often revolve around making this recipe gluten-free or vegan, highlighting how these changes do not diminish the dessert’s overall taste. Readers have expressed joy in sharing their creations across family gatherings.

Photography tips from users contribute further to the success stories, with many sharing their mouthwatering snapshots of the finished product, inspiring others to try their hand at this delightful cake.

Overall, the community engagement around this recipe reflects its popularity, reinforcing the idea that Homemade Lemon Poppy Seed Pudding Cake is a celebration-worthy dessert.

Frequently Asked Questions

Q: Can I make this cake ahead of time?

A: Absolutely! This cake can be prepared a day in advance, allowing the flavors to meld beautifully in the refrigerator.

Q: How should I store leftover cake?

A: Keep it in an airtight container in the refrigerator for up to 3 days, or freeze it for longer storage.

Q: Can I use other citrus fruits?

A: Yes, feel free to experiment with oranges, limes, or even grapefruits for different flavor profiles.

Q: Is this cake suitable for a gluten-free diet?

A: Yes, by using gluten-free flour alternatives, you can make this a safe treat for those with gluten sensitivities.

Q: How do I know when the cake is done baking?

A: A toothpick inserted into the center should come out clean, and the top will appear lightly golden.

Q: Can I freeze this cake?

A: Yes, individual slices can be wrapped in plastic and stored in a freezer-safe container for up to 2 months.

Q: Can I add frosting on top?

A: While it’s not traditional, a light lemon glaze or whipped cream can enhance the flavors further.

Q: How can I make this a low-carb version?

A: Use almond flour and sugar substitutes suited for low-carb diets to create a delightful, guilt-free dessert.

Q: What can I serve with this cake?

A: It’s fantastic served with whipped cream, fresh berries, or even a scoop of vanilla ice cream for an added treat.

Q: Is this recipe easy for beginners?

A: Yes! With straightforward steps, even novice bakers can create this delicious lemony dessert with success.

Additional Resources

If you’re interested in more recipes featuring citrus, check out our other delightful treats such as Lemon Bars, Orange Almond Cake, and Citrus Tart. These recipes harness the amazing flavors of fruit while providing variations on classic desserts.

For those looking to elevate their techniques, explore our guides on cake decorating, basic baking skills, and whipping up homemade frostings that can enhance any treat you create.

Need ingredient information? Understand how to select fresh produce, measure accurately, and shop smart for quality products to ensure the best results in your baking adventures.

In search of the right equipment? Discover recommendations for mixing bowls, baking pans, and small kitchen appliances that can help streamline your baking process.

Lastly, keep an eye out for seasonal variations that transform your favorite recipes into holiday-centric offerings, adapting your baking for festive occasions year-round!

Join the Conversation

We invite you to share your Baking experiences on social media. Tag us with your creations and share the delicious outcomes of your Homemade Lemon Poppy Seed Pudding Cake!

Photography tips can help inspire others to try their hand at this recipe. Share your best shots to showcase the beautiful results that can come from your kitchen.

Recipe reviews from the community are welcome as well. Let others know how you and your family enjoyed the cake, as sharing experiences fosters connections around food.

Engagement is key, and we love hearing about your unique adaptations and variations. Sharing what worked for you can inspire fellow bakers to try something new with this delightful recipe!

Your feedback not only helps improve future recipes but creates a community of culinary enthusiasts eager to explore the joys of homemade baking together.

The Recipe

Homemade Lemon Poppy Seed Pudding Cake

Serves: 8

Prep Time: 20 mins

Cook Time: 40 mins

Total Time: 1 hour

Kitchen Equipment Needed

  • Mixing bowl
  • Whisk or hand mixer
  • Baking dish (9×9 inch)
  • Measuring cups and spoons
  • Oven mitts

Ingredients

  • 1 cup all-purpose flour
  • 1 cup sugar
  • 1/2 cup unsalted butter, softened
  • 2 eggs
  • 1/2 cup milk
  • 1/4 cup lemon juice
  • 1 tablespoon lemon zest
  • 1 tablespoon poppy seeds
  • 1 teaspoon baking powder
  • 1/2 teaspoon salt

Directions

  1. Preheat the oven to 350°F (175°C) and grease your baking dish.
  2. In a mixing bowl, cream the butter and sugar until light and fluffy.
  3. Add eggs one at a time, mixing well after each addition.
  4. Stir in milk, lemon juice, zest, and poppy seeds until combined.
  5. In another bowl, whisk together flour, baking powder, and salt. Gradually add to the wet mixture.
  6. Pour the batter into the prepared baking dish and bake for about 40 minutes.
  7. Check doneness with a toothpick; it should come out clean.
  8. Let it cool before serving, optionally top with whipped cream or a light lemon glaze.

Recipe Notes

  • Ensure you measure flour accurately for best results.
  • Can substitute fresh lemons with bottled lemon juice if necessary.
  • Adding a pinch of almond extract can enhance flavor without overpowering lemon.

Indulge in Easy Caramel Pecan Turtle Bars Delight

Easy Caramel Pecan Turtle Bars: Your New Favorite Dessert

⚖️
Difficulty
Easy

⏲️
Prep Time
15 mins

🕒
Cook Time
30 mins

⏱️
Total Time
45 mins

🍽️
Servings
12 bars

If you’re searching for an indulgent dessert that combines the rich flavors of caramel and pecans with the delight of chocolate, look no further than these Easy Caramel Pecan Turtle Bars. These luscious bars create a perfect balance of sweet and salty, thanks to the buttery shortbread crust, gooey caramel layer, and crunchy pecans. Each bite melts in your mouth, while the luscious chocolate topping ties everything together in a decadent treat that is hard to resist.

What makes these turtle bars even more appealing is how simple they are to make. With just a handful of ingredients and minimal effort, you can whip up these bars for family gatherings, potlucks, or even a cozy night in. They offer just the right amount of sweetness, complemented by the nuttiness of the pecans, creating a delightful experience for your taste buds.

Quick Recipe Highlights

  • Flavor Profile: These bars feature a delicious combination of buttery, sweet caramel, nutty pecans, and rich chocolate.
  • Texture: The shortbread crust provides a firm base, while the gooey caramel layer and crunchy pecans add delightful contrasts.
  • Aroma: The warm, inviting aroma of baking caramel and chocolate fills your kitchen, enticing everyone nearby.
  • Visual Appeal: The bars boast a stunning appearance with a glossy chocolate topping and studded pecans, making them a feast for the eyes.
  • Skill Level Needed: This recipe is beginner-friendly, making it perfect for cooks of all skill levels.
  • Special Equipment: You’ll need a baking pan and a saucepan to create these scrumptious bars.

Recipe Overview

  • Difficulty Level: Easy, ideal for novice bakers and seasoned pros alike, making it enjoyable for anyone to try.
  • Category: Dessert, perfect for satisfying your sweet tooth or as a companion to coffee.
  • Cuisine: This recipe draws inspiration from classic American desserts, particularly the famous turtle chocolate candies.
  • Cost: Approximately $10 to make, making it an affordable treat for gatherings or personal enjoyment.
  • Season: Perfect for all year round but especially delightful during festive seasons and holidays.
  • Occasion: Ideal for parties, game nights, holidays, or anytime you crave a sweet treat.

Why You’ll Love This Recipe

When you take a bite of these Easy Caramel Pecan Turtle Bars, the first thing you notice is the incredible taste and texture appeal. The buttery shortbread crust provides a satisfying crunch, while the gooey caramel contrasted with the crunchy pecans creates a mouthwatering combination that you’ll crave time and again. Whether enjoyed with a cup of coffee, tea, or dessert wine, these bars make the perfect indulgence.

Convenience is another advantage of this recipe. With a prep time of just 15 minutes and only four main ingredients, these bars are incredibly easy to whip up. Perfect for last-minute gatherings, you can prepare them quickly and bake them in under an hour. You’ll impress friends and family without spending all day in the kitchen.

On top of all that, there’s an added layer of nutritional advantages. Pecans are not just a delicious addition; they’re also packed with healthy fats and protein. This dessert offers a balance of energy-boosting ingredients, perfect for satisfying your sweet cravings while still providing nutrition.

When it comes to entertaining, these bars are a crowd-pleaser. They’re easy to cut into portions, making them functional for serving at parties. Guests will love the charm of homemade treats, and you’ll gain rave reviews for your delicious baking skills.

Lastly, this recipe proves to be cost-effective and accessible. You can make a large batch for around $10, which is a great value compared to purchasing similar gourmet bars. With just a few ingredients and an easy preparation process, you’re guaranteed a dessert that is as economical as it is delightful.

Historical Background and Cultural Significance

The origin of turtle desserts has deep roots in American culinary traditions, believed to have been inspired by the classic turtles candies made with chocolate, caramel, and nuts. The melding of these flavors has evolved over the years into various forms of tortes, bars, and confections, becoming a beloved dessert across the country.

Culturally, turtle sweets represent indulgence and celebration, often being served during festive occasions and family gatherings. They evoke feelings of nostalgia, as many childhood memories are made sharing these rich treats.

The evolution of the turtle bar can be traced back to home bakers experimenting with their own variations of the much-loved turtle candy. This adaptation into bar form offers convenience and a greater capacity for flavor combination, leading to a dessert that appeals to modern palettes.

Regional variations of turtle bars exist, with many families adding their own twist to the recipe by incorporating different nuts, flavorings, or toppings. From adding chocolate chips to varying the nut types, this dessert continues to reflect individual preferences and cultural influences.

Ingredient Deep Dive

Pecans: Pecans hold cultural significance in Southern cooking, often associated with warmth and comfort. Rich in antioxidants, they promote heart health and are an excellent source of healthy fats. When selecting pecans, choose fresh, whole nuts to ensure the best flavor, and store them in an airtight container in a cool place. You can substitute walnuts if preferred, but keep in mind that the flavor will differ slightly.

Caramel: Caramel sauce has a rich history dating back to ancient times, with roots in both European and American desserts. While primarily made from sugar, butter, and cream, caramel is not just tasty; it provides a delicious chewy texture that complements other ingredients in desserts like these turtle bars. When making caramel, watch for changes in color to avoid burning the sugar. However, ready-made caramel can be used for convenience.

Common Mistakes to Avoid

  • Not measuring ingredients accurately, which can alter the consistency of your bars.
  • Overbaking, which can lead to a dry texture; keep an eye on the bars as they bake.
  • Using stale nuts, which can result in an unpleasant flavor; always use fresh pecans.
  • Skipping the chilling step after baking; this is crucial for the bars to set properly.
  • Not allowing the caramel to cool before spreading, leading to a gooey mess.
  • Failing to line the baking pan; this makes it harder to remove the bars cleanly after baking.
  • Using a dull knife for cutting the bars; this can create uneven edges and breaks.
  • Not allowing the bars to cool completely before serving; they may fall apart when cut.

Essential Techniques

Preparing the Shortbread Crust: This is the foundation of your bars. Use cold butter for a flaky texture and avoid overmixing the dough to keep it tender. Press the mixture evenly into the pan for uniform baking. Look for a light golden color as an indicator of doneness.

Making the Caramel: Ensuring the sugar dissolves completely is critical; keep stirring to avoid burning. Use a food thermometer to monitor temperature; a golden amber color indicates readiness. Cool the caramel slightly before pouring it over the crust to ensure it doesn’t melt the base.

Pro Tips for Perfect Easy Caramel Pecan Turtle Bars

1. Use high-quality chocolate for the topping; it enhances the overall flavor immensely.
2. Allow the bars to chill properly in the fridge to ensure they set up perfectly.
3. Experiment with different nuts for unique flavor profiles.
4. Drizzle extra caramel sauce on top for added richness.
5. For a more intense chocolate flavor, add cocoa powder to the shortbread crust.
6. Use a sharp knife dipped in warm water to make cutting easier and cleaner.
7. Store remaining bars in the refrigerator for an extended shelf life.
8. Feel free to double the recipe for larger gatherings; these bars disappear quickly!

Variations and Adaptations

Consider making a chocolate turtle version by incorporating cocoa into the shortbread crust. If you’re looking to switch up the nuts, almonds or cashews can provide a tasty alternative. For seasonal adaptations, try adding a hint of pumpkin spice during the fall to create a festive flavor. If you’re aiming for healthier options, replace standard sugar with a sugar substitute to reduce calories, or use dark chocolate instead of milk chocolate for a richer taste.

Serving and Presentation Guide

For a visually appealing presentation, cut the bars into uniform squares and arrange them on a decorative plate. Garnish with a sprinkle of sea salt or chocolate shavings for an extra touch. Consider serving them with a scoop of vanilla ice cream or a dollop of whipped cream for a decadent touch. Always serve at room temperature for the best flavor and texture. Ensure proper portion control by cutting bars into small bites for guests to enjoy with ease.

Wine and Beverage Pairing

Pair these delicious turtle bars with a rich dessert wine, such as a late-harvest Riesling, which complements the sweetness of the caramel and chocolate. For a non-alcoholic alternative, a warm cup of chai latte enhances the flavors beautifully. If you’re a coffee lover, opt for a bold espresso to contrast the sweetness of the bars. Don’t forget to serve chilled or slightly warmed for optimal flavor experience!

Storage and Shelf Life

To store your Easy Caramel Pecan Turtle Bars, keep them in an airtight container for up to a week at room temperature. If you need longer storage, place them in the refrigerator, where they can last for up to two weeks. Signs of spoilage include off smells or a change in texture. For reheating, warm them in the microwave for a few seconds to restore their gooey goodness. You can also freeze the bars for up to three months, making sure to wrap them well to avoid freezer burn.

Make Ahead Strategies

These turtle bars can be made ahead of time, making them perfect for prepping for parties. You can prepare the crust and caramel the day before, storing them separately until it’s time to assemble. If you’re short on time, consider allowing the bars to set in the refrigerator overnight for enhanced flavor. Always taste for freshness before serving, and consider adding any fresh toppings just before serving for the best texture and presentation.

Scaling Instructions

If you need to halve the recipe, simply divide all ingredients in half. For doubling or tripling, ensure your mixing bowls and baking pans are large enough to accommodate the increased volume. Keep an eye on cooking time, as larger batches may require a few more minutes to bake through. Always store extra bars properly to maintain their freshness. Adjust your toppings accordingly, as more chocolate or nuts may be needed for larger batches.

Nutritional Deep Dive

Each serving of these Easy Caramel Pecan Turtle Bars contains essential macros, including carbohydrates from the crust and healthy fats from the pecans. The bars provide a mixture of vitamins and minerals, allowing you to enjoy a sweet treat that offers some nutritional benefits. For those managing their diet, it’s essential to consider portion sizes, particularly since these bars are calorie-dense, helping you maintain a balanced diet while indulging.

Dietary Adaptations

For a gluten-free option, use almond flour or a gluten-free baking mix in place of traditional flour. If you’re looking for a dairy-free alternative, try substituting coconut milk for cream in the caramel, and use dairy-free chocolate for the topping. For a vegan modification, employ flax eggs in the base crust and opt for plant-based butter. This versatility ensures everyone can enjoy a slice of these delightful bars regardless of dietary preferences.

Troubleshooting Guide

If your bars are too crumbly, it may be due to overmixing the crust or not incorporating enough moisture. To enhance flavor balance, consider adjusting the salt in the recipe; a pinch more can elevate the sweetness. For temperature issues, ensure your oven is preheated correctly before baking. If there are challenges with ingredient substitutions, always check equivalent measurement conversions for accurate results. Lastly, timing can be crucial, so set timers for each step to avoid over or under-cooking.

Recipe Success Stories

Community feedback on this recipe has been overwhelmingly positive, with readers sharing variations they’ve made, such as adding different nuts or adjusting the sweetness levels. Many bakers express elation at how easily these bars come together, even declaring them their new favorite go-to dessert. Photos shared by readers showcase beautiful presentations, showcasing their creativity and success in the kitchen.

Frequently Asked Questions

Can I use unsalted butter instead of salted? Yes, using unsalted butter will work; simply add a pinch of salt to support flavor balance if desired.

How long do these bars stay fresh? If stored correctly, they can last for up to a week at room temperature or two weeks in the refrigerator.

Can I substitute other nuts for pecans? Absolutely! You can use walnuts or even almonds for a different flavor.

What’s the best way to cut these bars? For cleaner cuts, use a sharp knife warmed under hot water to make slicing easier.

Are these bars freezer-friendly? Yes, they can be frozen for up to three months when wrapped properly.

What should I do if my caramel is too hard? If your caramel sets too hard, you can warm it gently in the microwave to soften it before spreading.

Can I add chocolate chips to the bars? Adding chocolate chips is a great idea! Just sprinkle them on before baking.

What’s the best way to serve these turtle bars? They are best served slightly warm or at room temperature, perhaps with a scoop of ice cream on the side.

Is there a way to make these bars less sweet? You can reduce the amount of sugar in the crust and caramel to decrease the overall sweetness.

Do I need to chill the bars before serving? Chilling the bars will help them set better and make for easier cutting, but they can also be served immediately.

Additional Resources

For more delightful desserts, check out related recipes like No-Bake Chocolate Mint Bars and Classic Brownies. You can find guides on essential baking techniques and ingredient information to enhance your baking skills. Our equipment recommendations will also assist in selecting the right tools for your kitchen needs. Experiment with seasonal variations to keep your dessert offerings exciting throughout the year.

Join the Conversation

We invite you to share your own creations and tweaks to this Easy Caramel Pecan Turtle Bars recipe! Connect with us on social media to showcase your photography talents and provide feedback. Your recipe reviews and shared experiences help build our kitchen community and inspire new bakers to try out these delicious treats. Don’t hesitate to explore variations you’ve made, and let us know how they turned out!

The Recipe

Easy Caramel Pecan Turtle Bars

Serves: 12 bars

Prep Time: 15 mins

Cook Time: 30 mins

Total Time: 45 mins

Kitchen Equipment Needed

  • 9×13-inch baking pan
  • Medium saucepan
  • Mixing bowl
  • Whisk
  • Sharp knife

Ingredients

  • 1 cup unsalted butter, softened
  • 1 cup granulated sugar
  • 2 cups all-purpose flour
  • 1 cup chopped pecans
  • 1 cup caramel sauce
  • 1 cup chocolate chips

Directions

  1. Preheat your oven to 350°F (175°C). Grease the baking pan.
  2. In a mixing bowl, cream together the softened butter and granulated sugar until light and fluffy.
  3. Gradually add flour and mix until combined. Stir in chopped pecans.
  4. Press the mixture into the bottom of the prepared baking pan to form an even layer.
  5. Bake for 15 minutes or until lightly golden.
  6. Remove from the oven and pour the caramel sauce evenly over the crust.
  7. Sprinkle chocolate chips over the caramel layer and return to the oven.
  8. Bake for an additional 15 minutes or until melted and bubbly.
  9. Let cool completely before cutting into squares.

Recipe Notes

  • For a richer flavor, consider using dark chocolate chips instead of milk chocolate.
  • You can use store-bought caramel or make your own for a more homemade taste.
  • Try adding a sprinkle of sea salt on top for an extra flavor boost.

Indulge in Easy Peanut Butter Truffles: A Homemade Delight

Peanut Butter Truffles Recipe: Easy Homemade Treats

⚖️
Difficulty
Easy

⏲️
Prep Time
15 mins

🕒
Cook Time
10 mins

⏱️
Total Time
25 mins

🍽️
Servings
12 truffles

Peanut Butter Truffles are the ultimate indulgence for nut butter lovers. Imagine biting into a smooth, creamy peanut butter center encased in rich chocolate – it’s a heavenly combination that leaves you wanting more. These easy homemade treats are not only delightful for your taste buds, but they also bring a sense of warmth and nostalgia, reminiscent of childhood favorites. With minimal preparation and cooking time, you can whip up a batch of these delicious truffles and impress friends and family alike.

What’s remarkable about this Peanut Butter Truffles Recipe is its simplicity. You don’t have to be a skilled chocolatier to create these morsels of joy. The ingredients come together effortlessly, resulting in a sweet treat that’s perfect for any occasion. Whether you’re looking for a quick snack, a party treat, or a thoughtful homemade gift, this recipe checks all the boxes. The delightful aroma of melting chocolate and nutty peanut butter fills your kitchen, making the experience even more enticing.

Quick Recipe Highlights

  • Flavor Profile: A delightful blend of sweet and salty with rich chocolate and creamy peanut butter.
  • Texture: Smooth and velvety filling enveloped in a slightly crispy chocolate shell.
  • Aroma: A comforting and inviting scent of roasted peanuts and sweet chocolate.
  • Visual Appeal: Glossy chocolate coating with a hint of nutty filling peeking through.
  • Skill Level Needed: Perfect for beginners, no special skills required.
  • Special Equipment: Simple mixing bowls, measuring cups, and a baking sheet.

Recipe Overview

  • Difficulty Level: This Peanut Butter Truffles Recipe is categorized as easy, making it accessible to all home cooks.
  • Category: This recipe falls under snacks and desserts, a perfect treat for any sweet tooth.
  • Cuisine: While it has American influences, peanut butter is a beloved ingredient across various culinary traditions.
  • Cost: The ingredients are quite affordable, making this an economical treat to create.
  • Season: Ideal for any season; however, they shine during the holidays as a festive gift option.
  • Occasion: These truffles are fabulous for celebrations, parties, or as a delightful surprise for friends.

Why You’ll Love This Recipe

These Peanut Butter Truffles offer an irresistible taste and texture that excites both kids and adults. The creamy peanut butter works harmoniously with the chocolate, delivering a balanced sweetness that satisfies cravings. The truffles melt in your mouth, creating a delightful experience with every bite. Each truffle is a small explosion of flavor that wraps you in its deliciousness, making it hard to stop at just one.

The convenience of this recipe is a major plus. With only a handful of ingredients and simple steps, you can have a batch ready in about 25 minutes. This ease of preparation allows everyone, even busy parents and novice cooks, to indulge in homemade treats without spending hours in the kitchen. You can simply mix, roll, and chill, making them a go-to choice for last-minute dessert needs or sudden cravings.

From a nutritional standpoint, peanut butter provides a great source of protein, healthy fats, and essential vitamins. When made at home, you can control the quality of ingredients, opting for organic peanut butter or dark chocolate for added health benefits. This appeal makes these truffles not just an indulgent treat, but also a snack that you don’t have to feel guilty about enjoying.

Socially, Peanut Butter Truffles can be a conversation starter at gatherings. Sharing these delicious bites with friends and family creates an opportunity to bond over their delightful taste. They can also be an inviting centerpiece at parties or festive events, encouraging guests to dig in and enjoy the delectable offerings.

Cost-effectiveness is yet another reason to love this recipe. The affordability of basic ingredients such as peanut butter, chocolate, and sugar means you can make multiple batches without breaking the bank. Moreover, they can be packaged beautifully for gifts, making them a thoughtful and personal present that shows you care, yet is easy on your wallet.

Historical Background and Cultural Significance

Peanut butter itself has a rich history that dates back to ancient cultures, but its popularity surged in the United States in the late 19th century. The incorporation of peanut butter into sweets like truffles showcases the versatility of this ingredient, turning it into a beloved treat. Peanut butter truffles encapsulate American dessert innovation, capturing the spirit of comfort food in a bite-sized form.

Culturally, these truffles reflect the incorporation of everyday ingredients into indulgent treats. The use of accessible ingredients like peanut butter resonates with families looking to create satisfying desserts without excessive costs or complicated processes. As food culture continues to evolve, recipes like peanut butter truffles remind us of the nostalgia embedded in our culinary history.

While the concept of peanut butter desserts has remained steady, the evolution of this recipe showcases flexibility. Variations can cater to dietary preferences or twists on taste, such as the inclusion of flavored extracts or the use of different chocolate types. This adaptability emphasizes how traditional recipes can morph into contemporary favorites while maintaining their charm.

Regionally, peanut butter truffles can vary slightly, with some areas incorporating local flavors or ingredients unique to them. Whether it’s a spicy twist with cinnamon or adding local nuts for crunch, these delightful treats capture the essence of regional tastes while staying grounded in their peanut butter roots.

Ingredient Deep Dive

Peanut Butter:
Peanut butter has significant cultural importance in the U.S., often seen as a staple in many households. Its history traces back to indigenous cultures that utilized peanuts as a vital crop. Nutritionally, peanut butter is a fantastic source of protein and healthy fats, which contribute to muscle repair and energy. When selecting peanut butter, opt for natural varieties that avoid added sugars and hydrogenated oils. In terms of storage, keep it in a cool, dark place, and remember that refrigerating can prolong freshness. If you need a substitute, almond or cashew butter works beautifully, though the flavor will vary.

Chocolate:
Chocolate, in its many forms, has captivated cultures worldwide for centuries. It’s not just a sweet treat; it’s intertwined with numerous traditions and celebrations. Within this truffle recipe, chocolate adds a rich, sweet layer that complements the peanut butter impeccably. Look for high-quality chocolate with at least 70% cocoa for optimal benefits. Store chocolate in a cool environment, away from direct sunlight, as heat can alter its texture and flavor. If you need alternatives, consider using dark chocolate, white chocolate, or even a dairy-free option for a vegan choice.

Common Mistakes to Avoid

  • Using old or stale ingredients can ruin the flavor; always check expiration dates.
  • Not measuring peanut butter accurately may cause texture issues – make sure to level your measuring cup.
  • Skipping the chilling step leads to a gooey texture instead of firm truffles; don’t rush this part!
  • Melting chocolate too quickly can lead to a burnt taste – always use a low heat setting.
  • Overmixing the truffle mixture can result in a grainy texture; mix until just combined.
  • Using too much or too little chocolate coating can alter the balance of flavors; a thin layer works best.
  • Not allowing the truffles to set properly may cause them to fall apart when you try to serve them.
  • Storing improperly, such as leaving them in a warm place, can spoil the texture and flavor; keep them cool.
  • Not cleaning your hands or utensils properly can introduce cross-contamination, affecting flavor.
  • Assuming all peanut butters are created equal; check for added ingredients that can change taste.

Essential Techniques

Mixing the Ingredients:
Getting the right consistency for your truffle mixture is crucial. Start by blending peanut butter and sugar first until smooth, then gradually add melted chocolate. Avoid overmixing as this can make it grainy; just mix until combined. The right texture ensures your truffles are soft yet firm.

Chilling the Truffles:
Chilling is a key step in ensuring your truffles hold their shape. After forming them, place them in the refrigerator for about 30 minutes. This allows the chocolate coating to set evenly, resulting in the perfect bite. Look for a firm feel but ensure they aren’t rock-hard, indicating they’re ready to be coated.

Pro Tips for Perfect Peanut Butter Truffles

1. Use room-temperature peanut butter for smoother mixing and better texture.
2. Don’t rush the chocolate melting process; low and slow yields the best results.
3. Experiment with different chocolate types for unique flavor combinations – think white or dark chocolate.
4. Chill your hands before rolling the truffles to prevent melting the mixture.
5. Add a dash of salt to elevate the flavors between sweet and savory.
6. For decorations, consider rolling your truffles in crushed nuts or coconut flakes.
7. Make use of parchment paper on your baking sheet for easy cleanup.
8. Store truffles in the refrigerator to maintain freshness and flavor integrity.

Variations and Adaptations

If you’re in the mood for a twist, consider adding spices like cinnamon or cayenne pepper for added warmth. For a seasonal flair, incorporate pumpkin spice during fall. Dietary modifications can make this recipe suitable for various lifestyles; simply replace the powdered sugar with a sugar alternative for a keto-friendly option. Chopped dried fruits can add a lovely chewiness, while using pretzels introduces a salty crunch that contrasts well with sweetness.

Presentation can be playful as well; consider serving these truffles in decorative cupcake liners. A drizzle of melted chocolate on top can enhance their appearance, making them perfect for parties or gatherings. With each variation, these truffles keep the beloved peanut butter flavor at the forefront while inviting creativity.

Serving and Presentation Guide

When presenting your Peanut Butter Truffles, consider using minimalist plating techniques. A simple white plate allows the truffles’ rich colors to shine. You could also create a delightful display by stacking truffles or arranging them in a circle. Garnishing with chopped nuts or a dusting of cocoa powder adds a festive touch.

Accompany your truffles with a side of fresh fruit, like strawberries or raspberries for freshness. Serve them slightly chilled, allowing the flavors to meld beautifully, while ensuring they maintain that melt-in-your-mouth quality. For portion control, consider using small serving spoons or trays for easier sharing at gatherings.

Wine and Beverage Pairing

For a delightful pairing with these Peanut Butter Truffles, consider a full-bodied red wine, such as a Cabernet Sauvignon, which highlights the richness of the chocolate. Alternatively, a sweet dessert wine can echo the sweetness of the truffles beautifully.

If you prefer non-alcoholic options, a creamy almond milk or chai latte creates a comforting balance. For a refreshing contrast, serve with brewed iced tea, the subtle tannins complementing the truffle flavors. Remember to serve at the appropriate temperatures to enhance the overall experience.

Storage and Shelf Life

To store your Peanut Butter Truffles effectively, place them in an airtight container lined with parchment paper to prevent sticking. Keep them in the refrigerator, where they can last for up to two weeks. For longer shelf life, consider freezing them; they can be kept for up to three months.

Be cautious of temperature changes, as this can affect the texture and taste. When reheating, avoid using the microwave as this can change their delightful consistency. Instead, allow frozen truffles to thaw in the refrigerator before consuming.

Make Ahead Strategies

You can easily prepare these truffles ahead of time. The peanut butter mixture can be rolled into balls and stored in the refrigerator for a day before coating them in chocolate. This allows for even better flavor melding.

For storage between steps, keep the rolled truffles tightly packed in the fridge. Consider making a larger batch and freezing half for unexpected guests. When serving them after making ahead, allow them some time to reach room temperature; this enhances the flavor profile as the chocolate softens slightly.

Scaling Instructions

To halve the Peanut Butter Truffles Recipe, simply divide all ingredients by two and follow the same mixing and chilling instructions. If you want to double or triple the recipe, ensure you have a larger mixing bowl to accommodate the increased volume.

Adjust cooking times slightly if you’re using a different type of chocolate; however, the core technique remains unchanged. When scaling up, also consider using multiple baking sheets for the chilling process to maximize efficiency.

Nutritional Deep Dive

Peanut Butter Truffles provide a good source of energy, owing to their macro breakdown of carbohydrates, protein, and fats. Each truffle delivers a satisfying quality that can be balanced within a healthy diet. The presence of healthy fats from peanut butter facilitates long-lasting fullness and satiety.

Micronutrient analysis reveals that peanut butter is rich in Vitamin E, magnesium, and phosphorus, which contribute to overall health. Depending on the chocolate type used, antioxidants can also be a beneficial addition. For portion management, being mindful of serving sizes is key, as the caloric density is higher.

Weight management tips for enjoying these treats include focusing on moderation – savor each bite, and consider lower-calorie options without compromising taste.

Dietary Adaptations

To cater to various dietary needs, switch out traditional peanut butter for almond or sunflower butter for a nut-free approach. Using dairy-free chocolate satisfies vegan requirements without losing the flavor essence.

For a gluten-free version, ensure that all ingredients are certified gluten-free, especially the powdered sugar or any potential additives. Those on low-carb diets can utilize sugar substitutes without sacrificing the truffle experience.

For the keto lifestyle, focusing on dark chocolate and low-carb sweeteners creates a delightful experience while keeping calories in check. Each adaptation emphasizes the versatility of this Peanut Butter Truffles Recipe, allowing it to shine in numerous culinary landscapes.

Troubleshooting Guide

If your texture is off, it may result from overly hot chocolate or too much peanut butter; remember to introduce ingredients slowly and balance appropriately. If flavors seem unbalanced, consider adding a hint of salt or sweetness based on your preference to rein in any overly strong flavors.

Temperature issues can arise if you’re working in a warm kitchen, leading to a soft mixture; chill your mixture briefly before rolling if necessary. For equipment challenges, ensure all kitchen tools are dry and clean; moisture can lead to unwanted consistency changes.

If you struggle with ingredient substitutions leading to unsuccessful outcomes, start with small test batches to find what works best for your palate. Timing concerns play a significant role as well; ensure proper cooling and chilling times are observed for the best results.

Recipe Success Stories

Countless home cooks have enjoyed making Peanut Butter Truffles, often sharing their modifications and successes. From personal stories of baking with children to hosting peanut butter-themed parties, these truffles bring creativity to the forefront of dessert making.

Community feedback frequently highlights the versatility of the recipe, with many readers experimenting with flavor combinations, showcasing their truffles on social media. The heartwarming tales often center around family gatherings where these treats became a crowd favorite, encouraging sharing and celebration.

Photography tips often accompany success stories, assisting others in capturing the visual charm of these truffles. Clever plating and strategic lighting help showcase their appeal, sparking inspiration among fellow bakers to give it a try.

Frequently Asked Questions

How long can I store these truffles? Peanut Butter Truffles can be stored in an airtight container in the refrigerator for up to two weeks. If frozen, they can last up to three months. Always ensure they are in proper storage to maintain peak flavor and texture.

Can I use crunchy peanut butter instead of creamy? Absolutely! Crunchy peanut butter will add a delightful texture and extra crunch to your truffles, giving them a unique twist.

What type of chocolate is best for these truffles? Dark chocolate with at least 70% cocoa is recommended for a rich, balanced flavor, though you can experiment with milk, semi-sweet, or vegan chocolate as well.

Can I make these truffles vegan? Yes, by using dairy-free chocolate and ensuring all other ingredients, like powdered sugar, are vegan-friendly, you can create a delicious vegan version of these truffles.

Do I need to temper the chocolate? No, tempering isn’t necessary for this recipe. Simply melt your chocolate and coat your truffles for a delicious finish.

How can I get my truffles to be uniform in size? Using a small cookie scoop can help ensure that all your truffles are roughly the same size for even cooking and presentation.

Can I add other ingredients to the truffle mixture? Yes! Feel free to experiment with additions such as vanilla extract, protein powder, or a hint of cayenne for an extra kick.

How can I decorate my truffles? Consider rolling them in crushed nuts, shredded coconut, or drizzling with additional melted chocolate for an attractive presentation.

Are these truffles gluten-free? Yes, provided you check that all ingredients, especially powdered sugar, are gluten-free, making them a perfect treat for those with gluten intolerance.

Can I customize the flavors of this recipe? Yes, you can include flavorings such as mint or orange extract to alter the taste of your truffles, making them your own.

Additional Resources

If you love this Peanut Butter Truffles Recipe, explore more related recipes on our blog! Discover techniques for making chocolate firmer or alternative dessert ideas that leverage peanut butter.

Check out ingredient information for various types of peanut butter, including how to make your own. Explore equipment recommendations suited for dessert making to enhance your culinary experience. Seasonal variations can also inspire creativity, allowing you to enjoy these truffles year-round.

Join the Conversation

We’d love to hear your thoughts on this Peanut Butter Truffles Recipe! Share pictures of your homemade treats on social media or leave a comment with your feedback and any variations you tried. Your reviews help our community grow and inspire others to explore their culinary creativity.

Engage with us for photography tips and join our newsletter for more exciting recipes, tips, and culinary adventures. Let’s create a delicious dialogue that encourages everyone in their journey to homemade goodness!

The Recipe

Peanut Butter Truffles

Serves: 12 truffles

Prep Time: 15 mins

Cook Time: 10 mins

Total Time: 25 mins

Kitchen Equipment Needed

  • Mixing bowl
  • Measuring cups
  • Spatula
  • Baking sheet
  • Parchment paper

Ingredients

  • 1 cup creamy peanut butter
  • 1/2 cup powdered sugar
  • 1 cup dark chocolate chips
  • 1 tablespoon coconut oil (optional)

Directions

  1. In a mixing bowl, combine creamy peanut butter and powdered sugar until smooth.
  2. Form the mixture into small balls and place them onto a parchment-lined baking sheet.
  3. Chill the peanut butter balls in the refrigerator for about 15-30 minutes.
  4. In a separate bowl, melt the dark chocolate chips and coconut oil in the microwave at 30-second intervals, stirring until fully melted.
  5. Dip each chilled peanut butter ball into the melted chocolate, ensuring it is fully coated.
  6. Return the coated truffles to the baking sheet and chill until the chocolate hardens.

Recipe Notes

  • For added flavor, consider mixing in vanilla extract or a pinch of salt.
  • These truffles can be stored in an airtight container in the fridge for up to two weeks.
  • Experiment with different types of chocolate or toppings for unique variations.