Delicious Lemon Raspberry Cheesecake Recipe You Must Try Today!

Mouthwatering Lemon Raspberry Cheesecake Recipe: A Delightful Dessert for Any Occasion

⚖️
Difficulty
Intermediate

⏲️
Prep Time
20 mins

🕒
Cook Time
60 mins

⏱️
Total Time
80 mins

🍽️
Servings
8 servings

Indulge in the luscious flavors of our Mouthwatering Lemon Raspberry Cheesecake Recipe, a delightful dessert that embodies the perfect balance of tartness and sweetness. This cheesecake combines the zesty brightness of fresh lemons with the juicy burst of raspberries, resulting in an unforgettable flavor experience. The creamy cheesecake layer rests upon a buttery graham cracker crust that adds a delightful crunch to each bite, making it the ultimate way to satisfy your sweet cravings.

Unlike traditional cheesecakes, this recipe features a light and refreshing twist, making it an ideal addition to any gathering or special occasion. Whether it’s a summer cookout or a holiday feast, this Lemon Raspberry Cheesecake is sure to impress your family and friends. The vibrant colors and inviting aroma will have everyone reaching for another slice!

Quick Recipe Highlights

  • Flavor Profile: The interplay of tangy lemon and sweet raspberry creates a captivating and refreshing taste that dances on the palate.
  • Texture: Creamy and velvety cheesecake contrasts beautifully with a crumbly crust and juicy fruit topping, offering a delightful mouthfeel.
  • Aroma: The fresh scent of zesty lemons combined with the sweet fragrance of ripe raspberries fills the kitchen, enticing all who enter.
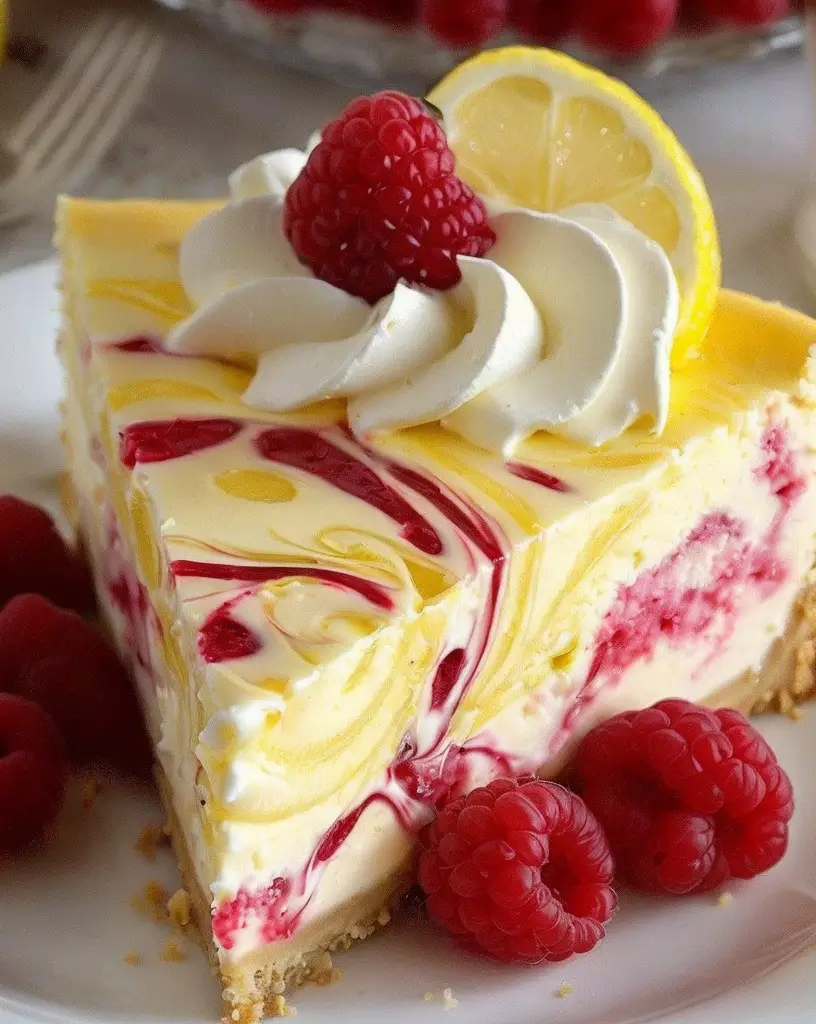
  • Visual Appeal: This cheesecake boasts a stunning presentation with its sunny yellow filling, vibrant raspberry topping, and a golden-brown crust.
  • Skill Level Needed: Requires basic cheesecake-making skills but is manageable for those ready to tackle a tasty challenge.
  • Special Equipment: A springform pan is essential for achieving the perfect shape and easy release of this cheesecake.

Recipe Overview

  • Difficulty Level: This cheesecake is classified as intermediate due to the multiple steps involved, including preparing the crust, filling, and topping, but is well worth the effort.
  • Category: A fantastic dessert option, the Lemon Raspberry Cheesecake fits beautifully into any sweet course of a meal.
  • Cuisine: Rooted in classic American dessert traditions but infused with vibrant seasonal flavors for a modern twist.
  • Cost: Budget-friendly ingredients paired with a high-impact result make this cheesecake an economical choice for gatherings.
  • Season: Perfect for warm-weather months when fresh raspberries and lemons are in season, brightening up any dessert table.
  • Occasion: Excellent for celebrations, birthdays, or a refreshing end to a family meal.

Why You’ll Love This Recipe

This Lemon Raspberry Cheesecake offers an incredible combination of taste and texture that can elevate any occasion. The creamy, decadent cheesecake melts in your mouth, while the refreshing, tart lemon and sweet raspberry make for an irresistible pairing. Each bite is a delightful contrast that keeps your taste buds intrigued, inviting you back for more.

Furthermore, the convenience of making this cheesecake makes it a go-to recipe. With the ability to prepare it ahead of time and serve it chilled, hosting friends and family becomes less stressful. The added garnish of fresh raspberries or a dusting of powdered sugar can enhance its appearance without requiring extra effort in the kitchen, leaving you more time to enjoy your guests.

In terms of nutrition, this cheesecake can be a more balanced dessert option when fresh fruits like raspberries are included. Raspberries are packed with antioxidants, vitamins, and fiber, offering a guilt-free way to indulge your sweet tooth. This lighter dessert could fit into a moderate lifestyle while still satisfying your cravings.

This dessert not only serves as a beautiful centerpiece for any occasion but also functions as a conversation starter. Guests are likely to rave about your baking skills and the delightful flavors they’ve just experienced. Sharing this dessert fosters community and gratitude, enhancing every gathering.

Lastly, the cost-effectiveness of this Lemon Raspberry Cheesecake should not be overlooked. It uses affordable ingredients that yield a stunning dessert, making it an accessible option for anyone looking to delight their guests without breaking the bank.

Historical Background and Cultural Significance

Cheesecake has a rich and fascinating history that dates back to ancient Greece, where it was served to athletes during the first Olympic Games. This early version laid the groundwork for various adaptations worldwide. Over centuries, cheesecake has evolved into a beloved dessert found in numerous cultures, each bringing unique ingredients and flavors.

In America, cheesecake gained popularity in the 19th century, primarily due to the availability of cream cheese. The incorporation of flavors such as lemon and berries showcases the country’s love for fruit-inspired desserts, which reflects a seasonal and local approach to cooking. The vibrant use of fruit in cheesecakes aligns with the American culinary tradition of celebrating fresh seasonal ingredients.

The evolution of this particular recipe speaks to contemporary dessert trends. Modern bakers often incorporate lighter, fresher elements into traditional recipes, appealing to health-conscious consumers. The use of lemon and raspberry adds not only flavor but also color, creating a visually stunning dessert that satisfies today’s aesthetic and palate preferences.

Regional variations of cheesecake abound, with each culture offering its twist. From the New York-style cheesecake’s dense creaminess to the lighter, fluffier versions found in Europe, these variations prove that cheesecake is versatile and adaptable to diverse tastes and occasions.

Ingredient Deep Dive

  • Raspberries: These vibrant berries are not only delicious but also packed with antioxidants and vitamins. When selecting raspberries, look for plump, unblemished fruit with a deep red color. Store them in the refrigerator and consume them within a few days for optimal freshness. If fresh raspberries aren’t available, frozen versions work well, though adjust the recipe to reduce moisture.
  • Lemon: Fresh lemons are essential for creating that zesty flavor profile in this cheesecake. They are an excellent source of Vitamin C and help enhance the overall taste of the dessert. To select lemons, choose those that are firm and heavy for their size. Store them in a cool, dry place or in the refrigerator to extend shelf life. For substitutes, lemon juice can be used, though fresh zest adds more depth of flavor.
  • Cream Cheese: The base of any cheesecake, cream cheese adds richness and creaminess. It’s crucial for achieving the desired texture and flavor. When purchasing cream cheese, opt for reputable brands that offer a smooth consistency. Allow it to reach room temperature for easier mixing. Alternatives like Neufchâtel cheese can be used for a lighter option, but the flavor profile will differ slightly.
  • Graham Crackers: These are commonly used for creating the cheesecake crust due to their balance of sweetness and crunch. When choosing graham crackers, look for those free from preservatives. Keep them stored in an airtight container to maintain their crispness. If gluten-free alternatives are needed, crushed nuts or gluten-free cookies can serve as substitutes for the crust.
  • Sugar: A critical ingredient for balancing the tartness of lemons and the freshness of raspberries, granulated sugar enhances flavors and textures. Always opt for pure sugar without additives. For those looking for healthier alternatives, coconut sugar or agave syrup can be used, but adjustments might be necessary to achieve the desired sweetness.
  • Butter: Unsalted butter is typically called for in this recipe to add richness to the crust. Look for high-quality butter that provides a smooth texture when melted. Store butter in the refrigerator and use it within the expiration date. Margarine or coconut oil can be considered for those seeking dairy-free options, but texture and flavor may vary.

Common Mistakes to Avoid

  • Overmixing: Be careful not to overmix the cheesecake batter, as it can lead to a dense texture. Mix until just combined to keep it light and airy.
  • Skipping the chilling step: Allowing the cheesecake to chill properly is crucial for setting the filling. Skipping this step can result in a runny cheesecake.
  • Not letting ingredients come to room temperature: Using cold cream cheese can lead to lumps in the batter. Always let your cream cheese and eggs come to room temperature before mixing.
  • Testing doneness incorrectly: Cheesecake should be firm but slightly jiggly in the center when removing it from the oven. Overbaking will cause cracks and dry texture.
  • Using the wrong pan: For the best results, always use a springform pan for cheesecakes, ensuring easy removal and presentation.
  • Not preparing the crust adequately: Make sure to press the crust mixture firmly into the pan’s bottom to avoid it crumbling when slicing.
  • Overloading on toppings: While it’s tempting to add too many toppings, a few fresh raspberries and a drizzle of sauce usually suffice for the best flavor balance.
  • Ignoring storage guidelines: Cheesecakes should be stored in the refrigerator to maintain freshness. Leaving them at room temperature can promote bacterial growth.
  • Neglecting to line the pan: For easier removal, lining the bottom of the pan with parchment paper can help prevent sticking.
  • Not letting it cool gradually: After baking, the cheesecake should gradually cool in the oven with the door slightly ajar to prevent cracks.

Essential Techniques

  • Baking in a water bath: This technique helps create a moist environment, preventing cracks. Place the springform pan in a larger pan filled with water while baking, ensuring the water level is halfway up the sides of the cheesecake pan. Mastering this technique is essential for a perfect finished product.
  • Preventing cracks: To avoid cracks, refrain from overbeating the eggs and always ensure your ingredients are at room temperature before mixing. Burping the oven, or allowing steam to escape, helps control temperature fluctuations which lead to cracks.
  • Proper cooling: It is crucial to let the cheesecake cool slowly in the oven after baking. This gradual change in temperature allows the cheesecake to set properly while minimizing the risk of cracks. Let it rest with the door ajar for about an hour, and then refrigerate it for several hours before serving.
  • Mixing cheesecake batter: To ensure a smooth, lump-free batter, combine room temperature cream cheese with sugar until smooth before adding eggs. Avoid mixing too vigorously, as overmixing will incorporate excess air, leading to a dense texture.
  • Pro Tips for Perfect Mouthwatering Lemon Raspberry Cheesecake

  • Use fresh ingredients for the best flavor; ripe raspberries and freshly squeezed lemons will elevate your cheesecake.
  • Chill your ingredients beforehand to help control mixing and prevent lumps in your batter.
  • Double-check your oven temperature—invest in an oven thermometer to ensure accuracy for perfect baking conditions.
  • Consider adding a layer of raspberry puree on top of your cheesecake for an extra burst of flavor.
  • For a no-bake version, switch to a similar filling using whipped cream and gelatin for a lighter dessert.
  • Always allow the cheesecake to reach room temperature before serving for the best texture.
  • Refrigerate leftover cheesecake tightly wrapped to maintain its freshness for up to a week.
  • Add a touch of whipped cream or dollop of yogurt on top before serving to enhance the creaminess.
  • Variations and Adaptations

    To elevate this Lemon Raspberry Cheesecake, consider incorporating seasonal variations such as using strawberries or blackberries instead of raspberries. Each berry brings a unique flavor profile that can refresh the recipe throughout the year. Additionally, for a chocolate twist, swirl in melted dark chocolate with your batter before baking for a rich, decadent dessert.

    For dietary adaptations, you can create a gluten-free cheesecake by substituting the graham crackers with gluten-free options, such as almond flour or crushed gluten-free cookies. This adaptation allows those with gluten sensitivities to enjoy the same delightful dessert.

    You might also explore flavor modifications by adding a hint of vanilla extract or almond extract to the batter, enhancing the overall complexity of the cheesecake’s taste. If you’re looking for a lighter option, consider reducing the amount of sugar and substituting with a natural sweetener, maintaining the cake’s integrity without compromising flavor.

    For a unique presentation, serve the cheesecake as individual mini cheesecakes in jars or cups. This modern approach offers an engaging dining experience and allows for creative garnishing and customized servings for guests.

    Serving and Presentation Guide

    Presenting your Lemon Raspberry Cheesecake beautifully elevates its appeal. Consider using a serrated knife to achieve perfectly smooth slices. Garnish each slice with a fresh raspberry and a small sprig of mint for a refreshing touch.

    For visual impact, build a colorful berry coulis with fresh raspberries and a bit of sugar to drizzle over individual plates. This not only adds color but complements the tangy flavors of the cheesecake. Additionally, serving the cheesecake on a rustic wooden board can introduce a touch of charm while enhancing the dessert’s presentation.

    Temperature considerations are crucial; serve the cheesecake chilled but not ice-cold to allow the creamy texture to shine. Portion control can be achieved using a cake slicer or cheese wire to maintain uniformity in each slice, making it aesthetically pleasing on your dessert table.

    Finally, consider offering a side of whipped cream or lemon curd on the side for those who enjoy a richer accompaniment, allowing guests to customize their experience with additional flavor.

    Wine and Beverage Pairing

    When it comes to pairing wine with Lemon Raspberry Cheesecake, opt for a light dessert wine such as a Moscato or a sparkling wine. The citrus notes in these wines complement the cheesecake’s flavors beautifully, offering a refreshing balance to the sweetness.

    For non-alcoholic alternatives, consider serving iced herbal tea or refreshing lemonade. The herbal notes will highlight the lemon in the cheesecake, while lemonade is a classic complement that enhances the dessert experience.

    If you prefer coffee or tea, a light, floral tea such as chamomile can harmonize well with the delicate flavors of this dessert. Cold brew coffee also pairs nicely, providing a slight bitterness to balance the sweet, creamy cheesecake.

    Always remember to serve these beverages chilled or at the appropriate temperature for maximum enjoyment and flavor complexity.

    Storage and Shelf Life

    Proper storage of your Lemon Raspberry Cheesecake is essential to maintain its freshness and flavor. Store the cheesecake in an airtight container in the refrigerator, where it can last for up to one week. Ensure that it is tightly wrapped, as cheesecakes can absorb odors from other foods in the fridge.

    If you have parts of the cake left over, consider freezing individual slices. Wrap each slice closely in plastic wrap and place them in a freezer-safe container. This way, the cheesecake can last up to two months. When ready to serve, simply thaw in the refrigerator overnight or at room temperature for a few hours before indulging.

    Be mindful of spoilage signs; if you notice a change in texture, an off smell, or discoloration, it’s best to err on the side of caution and discard any remaining cheesecake. Reheating is unnecessary as cheesecakes are best enjoyed chilled, allowing the creaminess and flavors to shine through.

    Make Ahead Strategies

    To streamline your dessert preparation, consider making the Lemon Raspberry Cheesecake a day in advance. This allows the flavors to meld and develop fully, leading to a more delicious final product. Prepare the cheesecake according to the recipe and let it cool in its pan before transferring it to the refrigerator to chill overnight.

    If you’re planning to add a raspberry topping or sauce, consider making it ahead as well. Fresh raspberry puree can easily be prepared and refrigerated until serving, allowing for a quick assembly just before your event or dinner.

    For this no-bake cheesecake method, prepare the crust and filling only, storing each component separately in the refrigerator. Then, when ready to serve, assemble the cheesecake quickly for freshness.

    Make sure to adhere to recommended storage guidelines, including wrapping the cheesecake tightly. Waiting to garnish with fresh fruit or whipped cream until right before serving can enhance presentation and flavor.

    Scaling Instructions

    Scaling your Lemon Raspberry Cheesecake recipe is straightforward, whether halving or doubling. When halving, simply use a smaller springform pan and adjust baking time accordingly, checking for doneness earlier.

    If you’re doubling the recipe for a larger gathering, ensure you use a larger springform pan and possibly multiple pans to maintain even cooking. Remember, each oven varies, so monitor the baking time closely to ensure proper setting without overcooking.

    When scaling, consider ingredient adjustments, especially if using a different style of cheese. The ratios still hold true, but measuring accurately is essential for maintaining flavor balance.

    Lastly, keep in mind portioning; reflective of the larger size, ensure each slice remains consistent for impressive presentation while serving.

    Nutritional Deep Dive

    This Lemon Raspberry Cheesecake, while been a delightful dessert option, also carries nutritional benefits. The primary macronutrients of cheese include a mix of protein from cream cheese and healthy fats. When enjoying a slice, one can appreciate not only the flavor but also the higher nutritional profile from the berries.

    Raspberries provide essential vitamins and minerals, such as Vitamin C, manganese, and dietary fiber. These fruits also contribute antioxidants, supporting overall health. The rich presence of fats from cream cheese contributes to satiety, making it a satisfying dessert option.

    When considering portion sizes, mindful consumption allows you to relish this dessert without feeling guilty while enabling it to fit within a balanced diet. Adjusting ingredients can further improve nutritional health without compromising flavor, aligning with dietary preferences.

    Considering cutting down sugar content or replacing it with natural sweeteners can prevent a significant spike in blood sugar levels while enjoying this delightful treat.

    Dietary Adaptations

    Whether you are catering to specific dietary preferences or health needs, adapting the Mouthwatering Lemon Raspberry Cheesecake can be easily executed. For a gluten-free option, swapping graham crackers for a gluten-free cookie alternative or a nut-based crust can create a delicious and adaptable base.

    For those avoiding dairy, coconut cream provides a suitable alternative to cream cheese, yielding a similarly rich and creamy texture. Utilize dairy-free yogurt or a tofu-based alternative blended with flavors to achieve satisfying creaminess without dairy.

    Vegan adaptations are possible by substituting eggs with flaxseed or chia seeds mixed with water, allowing for binding in the cheesecake filling. For extra sweetness without traditional sugars, maple or agave syrup can serve as natural sweeteners.

    Low-carb and keto dieters can swap sugar for erythritol or stevia in the crust and filling to align with their nutritional values while still enjoying a decadent dessert experience.

    These variations not only expand the recipe’s appeal but make it accessible to different dietary restrictions and lifestyle choices, all while keeping the delightful essence of the cheesecake.

    Troubleshooting Guide

    Common issues in cheesecake making include texture problems, such as a grainy consistency. This is often resolved by ensuring that the cream cheese is at room temperature before mixing to achieve a smooth, creamy batter.

    Overbaking can leave the dessert dry or cracked on top. Baking it just until it is set with a slight jiggle in the center is crucial for retaining the desired texture. Using a water bath can further help in providing even baking conditions, preventing such mishaps.

    Flavor balancing can be an area of concern, particularly if the taste leans too heavily on tartness. Adjusting sugar levels subtly to your preference without overly overshadowing the lemon flavors can help strike the right balance.

    For those using alternative ingredients, timing may need to be monitored closely as different brands or types may alter cooking durations. Always perform a toothpick test to ensure the internal structure is appropriate before cooling.

    In addressing ingredient substitutions, be mindful that some changes may result in less-than-ideal outcomes. Maintain an awareness of how substitutions will affect consistency, flavor, and texture, ensuring the little nuances of the original recipe are preserved.

    Recipe Success Stories

    The community surrounding the Mouthwatering Lemon Raspberry Cheesecake recipe has thrived, with countless adaptations and personal stories shared. Many bakers celebrate their happy encounters with this delightful dessert, praising its simplicity and delightful flavor.

    Readers have highlighted their variations, experimenting successfully with different fruits or flavor combinations, showcasing versatility while narrating their “cheesecake journey.”

    Photography enthusiasts share their beautiful captures of the cheesecake, spreading enthusiasm for the recipe both visually and through testimony about their baking victories. This aspect encourages engagement as budding bakers gain confidence through visuals and community support.

    Moreover, success forums frequently discuss tips discovered during attempts, enhancing the recipe’s legacy by sharing discoveries that shift traditional approaches into innovative avenues of flavor.

    Interactive engagement through recipe reviews fosters a sense of belonging, with bakers offering helpful critiques and feedback, motivating improvements and inspiration for others.

    Frequently Asked Questions

    Can I make Lemon Raspberry Cheesecake ahead of time?

    Yes! This cheesecake can be made a day in advance, allowing it to chill overnight which enhances the flavors and stabilizes the filling.

    How do I know when my cheesecake is done?

    The cheesecake should be set around the edges but still slightly jiggly in the center when you take it out of the oven. It will continue to firm up as it cools.

    What can I use instead of raspberries?

    You can substitute blueberries, strawberries, or blackberries in this cheesecake, adjusting sweetness as needed to match the new fruit’s flavor profile.

    How do I prevent my cheesecake from cracking?

    To reduce the risk of cracks, avoid overmixing your batter and let the cheesecake cool slowly in the oven after baking. Additionally, using a water bath can help maintain even baking temperatures.

    Can I freeze Lemon Raspberry Cheesecake?

    Yes! Wrap individual slices tightly in plastic wrap and store them in a freezer-safe container. Thaw them in the refrigerator before serving for best texture.

    Is there a dairy-free version available?

    Absolutely! You can use coconut cream or cashew cream as a replacement for cream cheese, ensuring a creamy consistency without dairy.

    How do I serve this cheesecake?

    Serve chilled, garnished with fresh raspberries or a drizzle of raspberry puree for added flavor and visual appeal. Consider a dollop of whipped cream as well!

    What should I do if my cheesecake is too sweet?

    If your cheesecake turns out too sweet, a citrus garnish like lemon zest can cut through the sweetness and add a refreshing contrast. Alternatively, serve it with a tangy yogurt or curd.

    What’s the best way to store leftovers?

    Store leftover cheesecake in an airtight container in the refrigerator for up to a week, or freeze individual slices for longer storage.

    Can I customize the crust?

    Definitely! You can use crushed cookies, oats, or nut-based crusts as a substitute for the traditional graham cracker crust to alter texture and flavor.

    Is it possible to make this cheesecake vegan?

    Yes, by substituting eggs with flaxseeds or chia seeds, and using plant-based cream cheese, you can create a delicious vegan version of this cheesecake.

    Additional Resources

    For further exploration, consider trying out related recipes such as No-Bake Strawberry Cheesecake or Classic New York Cheesecake for more delicious variations. You can also refer to technique guides for mastering cheesecake, providing knowledge on baking principles that ensure success.

    If you’re interested in ingredient benefits, look into comprehensive nutritional information regarding fruits like raspberries or lemons. Understanding these elements can deepen the appreciation of your creations.

    For those looking to expand their baking repertoire, equipment recommendations such as high-quality springform pans or mixing tools can enhance your cheesecake-making experience.

    Lastly, keeping an eye on seasonal variations allows you to prepare desserts that not only suit the time of year but also celebrate seasonal flavors, bringing freshness to your meal planning and entertaining.

    Join the Conversation

    We invite you to be part of our vibrant community! Share your own photos, variations, or adaptations of the Lemon Raspberry Cheesecake on social media using our hashtag. Connect with fellow bakers, share tips, and exchange stories about your successes and challenges with this delightful recipe.

    We encourage you to leave reviews and feedback on this cheesecake, as your insights can inspire others in their baking journey. Recipe reviews also foster engagement, providing a platform for our community to connect, ask questions, and recommend their own modifications for this beloved dessert.

    May your baking adventures continue to be fruitful, and let’s celebrate the joy of baking together!

    The Recipe

    Mouthwatering Lemon Raspberry Cheesecake

    Serves: 8 servings

    Prep Time: 20 mins

    Cook Time: 60 mins

    Total Time: 80 mins

    Kitchen Equipment Needed

    • Springform pan
    • Mixing bowls
    • Electric mixer
    • Rubber spatula
    • Measuring cups and spoons
    • Food processor (for crust)

    Ingredients

    • 1 ½ cups graham cracker crumbs
    • ½ cup unsalted butter, melted
    • 2 cups cream cheese, softened
    • 1 cup granulated sugar
    • 3 large eggs
    • 1 cup sour cream
    • ⅓ cup fresh lemon juice
    • Zest of 2 lemons
    • 1 cup fresh raspberries

    Directions

    1. Preheat your oven to 325°F (160°C).
    2. In a food processor, blend graham cracker crumbs with melted butter until combined, then press into the bottom of the springform pan.
    3. Bake the crust for about 10 minutes or until lightly golden, then remove from the oven and let it cool.
    4. In a large mixing bowl, beat the cream cheese until smooth. Gradually add sugar, mixing well.
    5. Add the eggs one at a time, beating well after each addition. Stir in sour cream, lemon juice, and lemon zest until smooth.
    6. Fold in fresh raspberries gently into the batter.
    7. Pour the cheesecake batter over the cooled crust and spread evenly.
    8. Bake for 60 minutes or until the center is just set. Allow it to cool in the oven with the door ajar for an hour.
    9. Refrigerate for at least 4 hours, preferably overnight, before serving.
    10. Garnish with additional raspberries and lemon slices before serving.

    Recipe Notes

    • You can substitute frozen raspberries if fresh aren’t available, but thaw and drain them first.
    • Adjust sugar levels based on personal preference and the tartness of your chosen fruit.
    • For a swirl effect, reserve some raspberry puree and gently swirl it into the batter before baking.
    • Best served chilled; add toppings just before serving to maintain freshness.

    Delicious and Easy Crockpot Chili Recipe for Cozy Evenings

    Crockpot Chili Recipe: A Comforting Bowl of Flavor

    ⚖️
    Difficulty
    Easy

    ⏲️
    Prep Time
    15 mins

    🕒
    Cook Time
    6 hours

    ⏱️
    Total Time
    6 hours 15 mins

    🍽️
    Servings
    8 servings

    Crockpot chili is more than just a meal; it’s a nourishing embrace on a chilly day. This easy recipe combines hearty ingredients, simmered to perfection, allowing flavors to meld beautifully over time. The slow-cooked meat mingles with kidney beans and tomatoes, creating a rich, savory experience that warms the soul. It’s an ideal dish for both weeknight dinners and weekend gatherings, offering comfort and satisfaction with every spoonful.

    This Crockpot chili recipe not only excels in taste but also prioritizes convenience. Simply toss in your ingredients, set the timer, and walk away! The aroma will fill your home, beckoning friends and family to the dinner table. Plus, it’s versatile and easily adaptable—perfect for customizing to your dietary needs or preferences.

    Quick Recipe Highlights

    • Flavor Profile: This chili boasts a savory blend of spices, complemented by the subtle sweetness of bell peppers and the richness of ground beef.
    • Texture: Expect a delightful contrast between the tender meat, creamy beans, and slightly crunchy fresh toppings.
    • Aroma: The fragrant mix of spices, garlic, and simmering ingredients will awaken your senses and create a welcoming environment.
    • Visual Appeal: The vibrant red tomatoes and green peppers create a colorful dish, enhanced further by bright garnishes like cilantro or cheese.
    • Skill Level Needed: Ideal for all skill levels, this recipe is straightforward and requires no advanced cooking techniques.
    • Special Equipment: A crockpot or slow cooker is essential for this recipe, making it ultra-convenient.

    Recipe Overview

    • Difficulty Level: This crockpot chili recipe is rated easy, making it an excellent choice for beginners or busy individuals looking for a hassle-free meal.
    • Category: Perfect for the main course, this chili can also serve as a filling side dish for larger gatherings.
    • Cuisine: With roots in Tex-Mex cuisine, chili has adapted various flavors and techniques across different regions of the United States.
    • Cost: This budget-friendly recipe allows you to feed a crowd without breaking the bank, with many canned and staple ingredients.
    • Season: Chili is a perfect choice for fall and winter months, offering warmth and comfort during colder weather.
    • Occasion: Ideal for family dinners, game days, or as a batch meal prep option for the week ahead.

    Why You’ll Love This Recipe

    This delicious Crockpot chili is packed with unique flavors and textures that will have your taste buds dancing. The warmth of the spices and the heartiness of the meat provide a comforting experience, while the beans add a rich creaminess that adopts the flavors around them. The option to customize your toppings ensures every bowl can be tailored to personal preferences.

    Convenience is a huge benefit of this Crockpot chili recipe. Meal prepping becomes effortless—prepare the ingredients the night before, pop them into the crockpot in the morning, and return home to a delightful meal that has been cooking all day. This not only saves you time but enhances the flavors as they meld together thoroughly through slow cooking.

    From a nutritional perspective, this chili is packed with protein, fiber, and essential vitamins from vegetables like tomatoes and peppers. It is a dish you can feel good about serving to your family, ensuring they are nourished while enjoying an incredibly satisfying meal.

    Chili is inherently a social dish, ideal for gatherings and sharing with loved ones. Serve it during a game night or family celebration, and watch as everyone appreciates the hearty goodness in each bowl. There’s something inherently communal about sharing a pot of chili, making meal time feel special.

    Lastly, the budget-friendly nature of this recipe makes it accessible to everyone. With a few simple ingredients, you can create a filling meal, making it easier to enjoy delicious food without overspending.

    Historical Background and Cultural Significance

    The origin of chili is steeped in rich traditions and diverse regional influences, primarily hailing from the American Southwest. Although there are many theories surrounding its beginnings, chili as we know it today is believed to have been inspired by the communal cooking practices of early settlers, blending European and indigenous flavors.

    Culturally, chili holds a significant place in American cuisine. It has become a symbol of comfort food and is showcased at various festivals and competitions, celebrating its hearty qualities. Additionally, chili is a staple dish in many households, often passed down through generations, reflecting family traditions and unique variations.

    Over the years, chili recipes have evolved, incorporating regional ingredients and preferences, giving rise to numerous variations including vegetarian and spicy options. This evolution reflects the adaptability of the dish to various tastes and dietary needs.

    Regional variations have emerged, with each reflecting local culture. Texas chili, which traditionally doesn’t contain beans, contrasts with the more inclusive recipes found in the Midwest that embrace both beans and meat. These differences highlight cultural identity and preference, making each bowl of chili a unique representation of its origins.

    Ingredient Deep Dive

    The main ingredient in any chili is usually ground beef, which offers heartiness and protein. Historically, beef was a staple for many families in the Southwest due to its availability and richness. Nutritionally, it provides essential amino acids and iron, making it a powerful addition to your diet. When selecting ground beef, look for lean cuts to reduce excess fat, and ensure proper storage in the refrigerator or freezer to maintain freshness.

    Beans are another crucial component of chili, often representing affordability and nutrition. They broaden the dish’s texture and offer fiber as well as protein. Varieties like kidney and black beans are popular, and their versatility allows for easy substitutions. When choosing beans, opt for canned options if you’re short on time; they’re ready to use! If using dried beans, be sure to soak them beforehand for optimal texture.

    Tomatoes form the base flavor profile of most chili recipes. They lend a natural sweetness and acidity, balancing the spices effectively. Both canned crushed tomatoes and tomato paste can enhance depth of flavor. When selecting tomatoes, go for high-quality brands to ensure richness in your chili. Store open cans in the refrigerator for a short period or freeze leftovers for later use.

    Spices play a vital role in flavoring chili, with common choices including chili powder, cumin, and paprika. These spices contribute unique flavors that enhance the overall dish. Opt for freshly ground spices for a more potent taste, and remember to store them in a cool, dark place to maintain their flavor integrity.

    Others ingredients may include bell peppers and onions, adding freshness and complexity to the dish. Their crispness contrasts beautifully with the chili’s warmth. When selecting vegetables, choose firm and brightly colored options. Store them appropriately in the fridge to keep them fresh for longer.

    Common Mistakes to Avoid

    • Not browning the meat: Skipping this step can lead to bland flavors. Browning the meat before adding it to the crockpot adds depth and richness.
    • Under-seasoning: Since flavors develop during slow cooking, it’s important to season adequately at the beginning, adjusting at the end.
    • Using low-quality ingredients: Poor-quality meat or beans can affect the overall flavor and texture of the chili dramatically.
    • Rushing the cooking process: Giving the chili ample time to cook allows flavors to mature and ingredients to become tender.
    • Overloading with beans: While beans are a nutritious addition, too many can overpower the dish. Find a balanced ratio for a harmonious flavor.
    • Ignoring the freshness of spices: Spices can lose their potency over time; ensure freshness for optimal flavor impact.
    • Not allowing for flavor development: Taste-testing halfway through and adjusting spices and seasonings at the end can enhance the final product.
    • Using excess liquid: A chunky chili is preferable; aim to keep the liquid level consistent to prevent a soupy texture.
    • Overcooked vegetables: Some vegetables may break down into mush after long cooking periods. Add softer ones later in the cooking process.

    Essential Techniques

    Browning the meat is an essential technique when making chili. It not only locks in flavor but enhances the overall richness of the dish. To master this step, ensure your pan is properly heated and avoid overcrowding, which can prevent a good sear. Visual cues include a golden crust developing on the meat, indicating it’s ready for the crockpot.

    Layering flavors is another key technique that involves adding ingredients in stages to build a complex profile. Start with aromatics like onions and garlic before layering in spices to bloom their flavors. Monitoring taste as you go allows for adjustments that enhance the overall dish.

    Preparation and chopping techniques are crucial for an even cook. Aim for uniform cuts of vegetables to ensure they cook at similar rates. Practicing proper knife skills will improve your efficiency and presentation.

    Finally, adjusting consistency is important. If your chili becomes too thick during cooking, you can thin it out with extra broth or water. Conversely, if it’s too watery, allowing it to cook down further will help condense the flavors without losing quality.

    Pro Tips for Perfect Crockpot Chili

    – Always brown your meat before adding it to the crockpot for improved flavor.
    – Don’t skimp on spices; they are the stars of your chili. Adjust according to your taste preference.
    – Experiment with different beans to change the texture and nutrition profile; try black beans for a bit of contrast.
    – Use fresh ingredients for maximized flavors and nutrition.
    – Consider incorporating a secret ingredient, such as dark chocolate or coffee, to enhance the chili’s depth.
    – Customize the heat level by adjusting the amount of chili powder or by adding fresh or dried peppers.
    – Allow the chili to sit after cooking; this resting time helps meld and balance flavors.
    – Always taste before serving; final adjustments in seasoning can make a huge difference in flavor.

    Variations and Adaptations

    Regional variations of chili can add unique twists to this classic dish. Texas chili, for instance, is known for its lack of beans and typically focuses on meat and spices. Conversely, Cincinnati-style chili includes a hint of sweetness and is often served over spaghetti instead of rice.

    Seasonal adaptations can also enhance the dish. In the fall, try incorporating seasonal vegetables like pumpkin or butternut squash for added depth and flavor. During summer, add fresh corn for a sweeter crunch that contrasts beautifully with the spicy elements of the chili.

    Dietary modifications make this recipe suitable for various health needs. For vegan options, replace the meat with lentils or mushrooms and adjust for flavors, focusing on the spices to keep it rich. Low-carb enthusiasts can use cauliflower rice to maintain bulk without the carbs.

    Flavor variations can be achieved by experimenting with different spice blends or incorporating ingredients like smoked paprika or lime juice for a bright twist. Select alternative proteins, such as turkey or chicken, for a lighter take on the traditional recipe.

    Presentation alternatives, such as serving your chili in bread bowls or using tortilla chips as a vessel, can delight guests and spark conversation. Simple garnishes, like fresh cilantro or avocado, elevate both flavor and aesthetics.

    Serving and Presentation Guide

    Plating is an essential part of serving chili; presentation matters. Use shallow bowls to show off the vibrant colors of your chili. A sprinkle of cheese or a dollop of sour cream on top adds visual appeal and texture.

    Garnishing with fresh cilantro, diced red onions, or jalapeños can enhance both the aroma and the taste, while also making the dish more visually striking. Complement the hearty chili with traditional accompaniments like cornbread or tortilla chips for textural contrast.

    For modern serving suggestions, consider creative dishes like a chili bar where guests can customize their toppings. Offering options like diced avocado, cheese, and hot sauces allows everyone to tailor their experience.

    Temperature considerations are important; chili can be enjoyed fresh from the slow cooker or reheated. If serving at a gathering, consider keeping it warm in a slow cooker on the buffet table for easy access.

    Finally, portion control is crucial—especially when serving at events. Pre-portion your servings to avoid waste and ensure each guest receives an enjoyable number of flavors.

    Wine and Beverage Pairing

    When pairing wine with chili, consider robust red wines like Zinfandel or Malbec, which complement the hearty flavors without overpowering them. An alcohol-free option would be a rich grape juice or a dark soda like root beer for sweetness and nostalgia.

    For those who prefer a lighter touch, a crisp lager can help cleanse the palate between bites, ensuring the chili’s rich spices don’t overwhelm the taste buds.

    Temperature is essential when serving wine and beverages. Chill white wines sufficiently to enhance their crispness, while serving reds at room temperature will allow their aromas and flavors to shine through.

    Additionally, coffee can complement the richness of chili beautifully. Try serving a dark roast coffee as an after-dinner drink to echo the depths of flavor found in the dish.

    Storage and Shelf Life

    For storing leftover chili, allow it to cool completely before transferring it to an airtight container. Proper refrigeration is key—store it in the fridge for up to 3-4 days to ensure freshness.

    Signs of spoilage include off smells, discoloration, or unusual textures. Always use your best judgment when determining the freshness of your food.

    For longer storage, chili can also be frozen. Store it in freezer-safe containers or zip-top bags, ensuring you leave space for expansion. It can last up to 3 months in the freezer without losing much quality.

    When reheating, ensure the chili reaches an internal temperature of at least 165°F to guarantee safe consumption. Gently simmer on the stove or use the microwave; stir frequently for even heating.

    Make Ahead Strategies

    Preparation for crockpot chili can be streamlined. Consider chopping vegetables a day ahead and storing them in the refrigerator, making the final assembly in the morning quick and easy.

    Between steps, storing partially prepared ingredients in the fridge can maintain freshness. For instance, you can brown the meat and sauté the aromatics the night before, then simply combine everything for cooking in the morning.

    Quality impact should be assessed carefully; some ingredients, like beans, tend to absorb flavors better if allowed to sit in the spices overnight before cooking.

    While assembling the chili, ensure you layer flavors correctly—adding spices early helps them bloom in the hot liquid—a step that effectively maximizes taste.

    Fresh elements can be added post-cooking, like sliced green onions or freshly chopped herbs, to brighten the dish when you’re ready to serve.

    Scaling Instructions

    Scaling recipes, particularly for large gatherings, requires careful attention. Halving the chili recipe is straightforward: simply divide each ingredient accordingly and maintain the cooking time.

    Doubling or tripling the recipe may require a larger crockpot; ensure you have enough space, and consider using two pots to avoid overcrowding. Monitor cooking times, as larger volumes may take longer to cook through evenly.

    Adjustments to timing are essential, particularly if using a stovetop method instead of a slow cooker. Cook times may need to be increased for bulk recipes to ensure all ingredients are tender.

    For storage considerations, plan to freeze portions if preparing larger amounts, ensuring you have containers suitable for freezing without risk of breaking.

    Nutritional Deep Dive

    The macro breakdown of this crockpot chili is impressive. Each serving provides a healthy dose of protein from the meat, paired with fiber-rich beans. An analysis of portion sizes helps maintain a balanced diet while still indulging in the comforting flavors of chili.

    On the micronutrient front, chili is rich in vitamins and minerals. Beans and vegetables contribute potassium and folate, while tomatoes offer a good source of vitamin C—essential for immune support.

    Health benefits of chili include high fiber content, which supports digestive health. Additionally, spices like cumin and chili pepper may boost metabolism and improve heart health.

    Dietary considerations should be taken into account, especially for those monitoring sodium intake or those selecting leaner meat options to reduce overall fat content. The beauty of this recipe lies in its flexibility to cater to various dietary needs while remaining flavorful.

    Portion analysis is crucial for those managing calorie intake. Consider serving sizes carefully—utilizing smaller bowls can make meals feel hearty while controlling portions effectively.

    Dietary Adaptations

    For those needing gluten-free options, ensure your broth and other ingredients are certified gluten-free. Many brands offer suitable choices to substitute in chili.

    Dairy-free adaptations can easily be made by substituting sour cream and cheese with cashew cream or coconut yogurt for similar creaminess without dairy.

    Vegans can replace the ground beef with lentils or textured vegetable protein for a meaty texture, while still providing ample protein and fiber.

    Low-carb diets can benefit from using cauliflower instead of beans or rice, creating a light but filling dish that maintains flavor without added carbs.

    Keto enthusiasts can adopt more fatty cuts of meat, such as ground pork or beef, and adjust bean quantities accordingly to found balance from carbs.

    Other specific diets, like low-FODMAP, can require precaution. Swap out high-FODMAP ingredients like certain beans with alternatives like carrots to maintain flavor while supporting digestive wellness.

    Troubleshooting Guide

    Texture issues can arise if beans disintegrate during cooking. If this happens, ensure you’re not overcooking; add beans later in the cooking process for better preservation.

    Flavor balance is key; if your chili turns out too spicy, you can counter the heat with a pinch of sugar or honey, which can help round out the flavors while tempering the spiciness.

    Temperature problems might occur if your chili is too cold after cooking. Gently reheat it on the stove, making sure to stir frequently to avoid any scorching on the bottom.

    Equipment challenges can surface with crockpots that cook unevenly. Adjust placement within your kitchen to ensure optimal performance, checking food doneness regularly.

    Ingredient substitution can present challenges; if you swap out the meat for a non-beef variant, the cooking time may vary, requiring close observation for ideal doneness.

    Timing concerns are common; if your chili hasn’t cooked through as expected, increase the cooking time, ensuring you have enough liquid to prevent drying out during the later hours.

    Recipe Success Stories

    Community feedback often highlights the warm, welcoming nature of this dish. Many families create beautiful memories around the table, sharing bowls of chili and storytelling.

    Variation successes often stem from readers customizing ingredients based on their preferences. One reader shared a success with a turkey chili that leaned into freshness and seasonal vegetables.

    Adaptation stories speak to the creativity of cooks who transform this recipe to fit their culinary traditions—integrating local spices or cooking techniques to make a unique family version of chili.

    Readers love sharing photography of their finished products, and many engage in recipe reviews, often highlighting how this easy-to-make dish became a household staple.

    Many have found the recipe refreshing, noting how simple substitutions created hearty meals without sacrificing beloved flavors, further proving versatility.

    Frequently Asked Questions

    Can I leave my chili in the crockpot overnight?

    Leaving chili in the crockpot overnight isn’t recommended for food safety. If you need to prepare ahead, cook it earlier in the day and refrigerate it for later consumption.

    How do I prevent my chili from being too watery?

    If your chili turns out watery, use less broth or allow the chili to simmer uncovered for a while to heat and evaporate excess liquid. Avoid adding too many canned ingredients, which can release additional moisture.

    Can I use different types of beans in my chili?

    Absolutely! Mixing varieties of beans can add nutrition and texture to your chili. Consider using black beans, pinto beans, or even chickpeas for a unique twist.

    What should I serve with my chili?

    Chili pairs well with a variety of accompaniments, including cornbread, tortilla chips, or a simple salad. Consider offering a toppings bar with cheese, sour cream, and fresh herbs to enhance each bowl.

    Is this chili recipe good for meal prep?

    Yes! This chili recipe stores well in the refrigerator or freezer, making it perfect for meal prep. Prepare a large batch and portion it into containers for easy reheating throughout the week.

    Can I make this chili vegetarian?

    Yes! To make vegetarian chili, use lentils or a mix of different beans instead of meat. Adding extra vegetables will enhance flavor and texture.

    What are some good toppings for chili?

    Excellent toppings for chili include cheese, sour cream, diced onions, jalapeños, avocado, and fresh cilantro. These toppings enhance the flavors while adding texture to the dish.

    How spicy is this chili recipe?

    The spice level can easily be adjusted. Start with the base recipe and taste as you go, adding chili powder or fresh peppers based on your desired heat level.

    How do I store leftover chili?

    Once cooled, transfer leftover chili to airtight containers and refrigerate for up to four days. For longer storage, freeze portions for up to three months.

    Can I cook chili on the stovetop instead of the crockpot?

    Yes! While the crockpot enhances flavors over time, chili can be made on the stovetop by simmering all ingredients together for about 1-2 hours, stirring occasionally for even cooking.

    Additional Resources

    For those eager to explore further into the world of chili, there are numerous related recipes to discover. From vegetarian options to different regional styles, the possibilities are endless. Technique guides on slow-cooking, flavor layering and spice balancing are also valuable for enhancing your culinary skills.

    Ingredient resources offer deep dives into the nutritional benefits and storage of key chili ingredients, ensuring that your meals are both healthy and tasty. Equipment recommendations can guide you toward the best tools for creating the perfect dish.

    Consider seasonal variations that bring freshness to the table, particularly incorporating seasonal vegetables or fruits to adapt the chili recipe throughout the year.

    Join the Conversation

    Engagement with the community enhances the cooking experience. Sharing your chili successes on social media can inspire others and spark conversation. Don’t hesitate to upload your photos, share your tweaks, or highlight your favorite pairings.

    Recipe reviews contribute significantly to the community, helping others discover variations that may suit their tastes. Engaging through feedback not only fosters connections but also encourages experimentation.

    Your individual recipe variations can add to a collective wealth of knowledge, presenting unique adaptations cultivated from family traditions, seasonal inspirations, and personal preferences.

    Feel free to start conversations by asking for advice or sharing your own tips within cooking forums and social media platforms to further encourage communal exchanges around this comforting bowl of chili.

    The Recipe

    Crockpot Chili

    Serves: 8 servings

    Prep Time: 15 mins

    Cook Time: 6 hours

    Total Time: 6 hours 15 mins

    Kitchen Equipment Needed

    • Crockpot
    • Skillet (for browning meat)
    • Chopping board
    • Knife
    • Measuring cups and spoons

    Ingredients

    • 2 lbs ground beef (or meat of choice)
    • 1 can (15 oz) kidney beans, drained and rinsed
    • 1 can (15 oz) black beans, drained and rinsed
    • 2 cans (14.5 oz) diced tomatoes with green chilies
    • 1 medium onion, chopped
    • 1 bell pepper, chopped
    • 3 cloves garlic, minced
    • 3 tablespoons chili powder
    • 1 tablespoon cumin
    • Salt and pepper, to taste
    • 1 cup beef broth (or vegetable broth)
    • Optional toppings: shredded cheese, sour cream, fresh cilantro

    Directions

    1. In a skillet over medium heat, brown the ground beef until fully cooked. Drain excess grease and transfer to a crockpot.
    2. Add the chopped onions, bell peppers, garlic, kidney beans, black beans, diced tomatoes, and beef broth to the crockpot.
    3. Season with chili powder, cumin, salt, and pepper. Stir well to combine all ingredients.
    4. Cover and cook on low for 6 hours or on high for 3 hours, stirring once or twice if possible.
    5. Adjust seasonings to taste before serving. Enjoy with desired toppings.

    Recipe Notes

    • This chili can be customized further by adding your favorite vegetables or spices based on preference.
    • For a more flavorful chili, consider letting it cool and refrigerating overnight; the flavors will deepen significantly.
    • Feel free to substitute ground turkey or chicken instead of beef for a leaner option.

    Indulge in Velvety White Chocolate Raspberry Cheesecake Balls Today

    Velvety White Chocolate Raspberry Cheesecake Balls: A Decadent Delight

    ⚖️
    Difficulty
    Easy

    ⏲️
    Prep Time
    30 mins

    🕒
    Cook Time
    10 mins

    ⏱️
    Total Time
    40 mins

    🍽️
    Servings
    24 balls

    Indulge your sweet tooth with these luscious Velvety White Chocolate Raspberry Cheesecake Balls. These delightful treats combine velvety white chocolate with tangy raspberries, creating a perfect balance of flavors that’s sure to please any crowd. Whether you’re entertaining guests or simply treating yourself, these cheesecake balls serve as the perfect bite-sized dessert option.

    The creamy, rich interior melts in your mouth, while the burst of fresh raspberry provides a refreshing contrast. Coated in a smooth white chocolate shell, these balls not only taste divine but look incredibly appetizing too! They’re perfect for any occasion, from festive gatherings to casual get-togethers, making them a versatile addition to your dessert repertoire.

    Quick Recipe Highlights

    • Flavor Profile: The soothing sweetness of white chocolate complements the tartness of raspberries, resulting in a harmonious blend of flavors.
    • Texture: The smooth and creamy cheesecake filling contrasts beautifully with the crunchy white chocolate coating.
    • Aroma: A delightful blend of creamy chocolate and fresh raspberries fills your kitchen, making it irresistible.
    • Visual Appeal: The pristine white coating with bright raspberry flecks creates an eye-catching presentation that will impress guests.
    • Skill Level Needed: The recipe is easy to follow, even for novice bakers, making it accessible for everyone.
    • Special Equipment: You’ll need a microwave for melting chocolate and a mixing bowl to combine ingredients.

    Recipe Overview

    • Difficulty Level: This recipe is classified as easy, making it perfect for beginners and seasoned bakers alike. The straightforward steps ensure success with each batch.
    • Category: These cheesecake balls are ideal for dessert, snack, or even a festive party platter, appealing to all sugar lovers.
    • Cuisine: While infused with modern twists, this dessert pays homage to classic cheesecakes, merging American culinary traditions with a sweet, indulgent flair.
    • Cost: Expect a modest cost for ingredients, making this a budget-friendly dessert perfect for home cooking.
    • Season: Enjoy these delightful bites year-round, but they’re especially refreshing in spring and summer when raspberries are at their peak.
    • Occasion: Perfect for birthdays, holidays, or any special occasion where you want to impress guests with something unique and delicious.

    Why You’ll Love This Recipe

    The taste and texture of these Velvety White Chocolate Raspberry Cheesecake Balls are simply irresistible. The rich creaminess of the cheesecake makes each bite a delightful treat. The tang of raspberry adds a refreshing layer, balancing the sweetness of the white chocolate, ensuring your palate is tantalized with every bite. The smoothness of the cheesecake pairs beautifully with the slight crunch of the chocolate coating, providing a satisfying contrast that’ll have you reaching for more.

    Not only are these cheesecake balls delicious, but they are also incredibly convenient to prepare. With a relatively short time commitment, you can whip up a delightful batch for any occasion. The step-by-step instructions are straightforward, making it easy even for novice bakers to create stunning desserts that will impress friends and family.

    Nutritionally, while these treats are indeed indulgent, they also provide some benefits from the raspberries, which are high in antioxidants and vitamins. Enjoy this dessert knowing that you are incorporating a bit of healthy fruit into your sweet experience.

    Socially, these cheesecake balls are perfect for sharing. Bringing a plate of these to a gathering will surely elevate the celebration and spark conversation among guests. Their cute size makes them easy to enjoy in casual settings, allowing for mingling while savoring a sweet bite.

    Cost-effectiveness plays a significant role here as well. The ingredients are easy to find and relatively inexpensive, making it feasible to prepare large batches without breaking the bank. This recipe is a win-win, offering luxury without the hefty price tag.

    Historical Background and Cultural Significance

    The origins of cheesecake can be traced back to ancient times, with references found in Greek literature. The concept of blending cream cheese or ricotta with sweeteners dates back centuries, evolving through cultures such as the Romans and beyond. White chocolate, a modern addition to dessert-making, offers a sweeter alternative that’s become a favorite in contemporary baking.

    Culturally, cheesecakes symbolize indulgence and celebration. In various cultures worldwide, cheesecakes represent special occasions, ranging from weddings to birthdays. The unique flavor combinations, like raspberry and white chocolate, reflect regional creativity and the beautiful marriage of sweet and tart.

    As recipes have evolved, cheesecake has seen endless adaptations, giving way to beautiful new versions that keep the spirit of the original alive while incorporating new flavors and techniques. From no-bake to baked variations, the gold standard of cheesecake continues to inspire bakers.

    Regional variations abound, with each culture bringing their own twist to the classic cheesecake. This particular recipe draws upon both traditional elements and modern innovations, making it a beloved treat in homes worldwide.

    Ingredient Deep Dive

    White Chocolate

    White chocolate, despite its name, is not technically chocolate because it lacks cocoa solids. It is sweet, creamy, and offers a smooth texture that melts in your mouth. Always look for high-quality white chocolate that contains cocoa butter for the best results. Store it in a cool, dry environment, and consider alternatives like yogurt or cream cheese in different recipes for added richness.

    Raspberries

    Raspberries are not just delicious; they’re also packed with vitamins and dietary fiber, promoting overall health. Fresh raspberries should be bright and firm, while frozen ones offer convenience while maintaining flavor. Ensure you wash them gently and use them promptly for the best taste in desserts like this Cheesecake Balls recipe.

    Common Mistakes to Avoid

    • Not chilling the mixture long enough: Ensuring the mixture is well-chilled is vital to achieving the perfect texture for rolling.
    • Overheating the chocolate: Melting white chocolate at too high a temperature can cause it to seize up, making it unusable.
    • Using stale ingredients: Always check the freshness of your ingredients, especially raspberries, to avoid off-flavors.
    • Skipping the refrigeration step: Allowing the cheesecake balls to set in the fridge helps them maintain their shape.
    • Inconsistent size: Make sure all balls are uniform in size for even cooking and better presentation.
    • Too much filling: Avoid overfilling the chocolate coating to prevent breaks.
    • Not tempering the chocolate: Ensuring your chocolate is tempered properly enhances the look and palate of the final product.
    • Not tasting as you go: Always taste your mixtures to ensure the flavors are balanced before assembling the cheesecake balls.

    Essential Techniques

    Melting Chocolate

    Melting chocolate properly is crucial for achieving a smooth coating. Use a microwave in short bursts or a double boiler to ensure even melting. Avoid letting vapor mix with the chocolate, as moisture can cause it to seize. Aim for a smooth, fluid consistency for easy dipping.

    Chilling the Mixture

    Chilling your cheesecake mixture helps it firm up, making it easier to roll into balls. It’s vital to plan for this step in your timing so that the texture is just right. Proper chilling also enhances the flavors as they meld together, creating a more cohesive taste profile.

    Pro Tips for Perfect Velvety White Chocolate Raspberry Cheesecake Balls

    1. Always use high-quality white chocolate for the best flavor and appearance in your cheesecake balls.
    2. Consider using fresh mint for garnish to add a fresh aroma that complements the white chocolate and raspberry.
    3. Experiment with different fruits like strawberries or blueberries for a unique twist on this classic recipe.
    4. Allow your cheesecake mix to chill adequately; the texture will improve drastically.
    5. Dip your hands in cold water when rolling the cheesecake balls to prevent sticking and ensure a smooth surface.
    6. If using frozen raspberries, let them sit in a bowl for a bit to come to room temperature before incorporating them into the mix.
    7. Use a lollipop stick to serve these dessert balls for an elegant presentation.
    8. Always taste your cheesecake filling and adjust the sweetness as per your preference before forming the balls.

    Variations and Adaptations

    For a regional twist, consider adding spices like cinnamon or nutmeg to the cheesecake filling for a bit of warmth. Seasonal adaptations can also include swapping out raspberries for pumpkin puree in the fall to create a festive treat. Dietary modifications can be made by using dairy-free cream cheese and chocolate for a vegan version, or by substituting almond flour for a gluten-free option. For a different flavor profile, experiment with flavored extracts such as almond or mint. Textural modifications may also be achieved by rolling the balls in crushed graham crackers for additional crunch, and for presentation, consider using colored chocolate melts.

    Serving and Presentation Guide

    When serving your Velvety White Chocolate Raspberry Cheesecake Balls, plating is essential. Arrange them on a beautiful platter, perhaps alongside fresh raspberries and mint for a pop of color. Garnish with a dusting of powdered sugar or drizzle some chocolate sauce over them for an appealing look. It’s best to serve them chilled, as this enhances their texture and flavor. Making sure each portion is controlled will help guests enjoy just the right amount, leaving them satisfied without overwhelming the palate.

    Wine and Beverage Pairing

    A light and refreshing white wine, such as a Moscato or Riesling, pairs beautifully with the sweetness of the cheesecake balls, complementing the raspberry flavor. For non-alcoholic alternatives, a sparkling raspberry lemonade or a refreshing iced tea enhances the overall experience. If serving after dinner, consider a smooth cup of coffee or herbal tea to balance out the sweetness while providing a warm finish to the meal.

    Storage and Shelf Life

    Store the Velvety White Chocolate Raspberry Cheesecake Balls in an airtight container in the refrigerator for up to one week. Ideally, keep them in a single layer to prevent sticking. For longer storage, you can freeze them in a freezer-safe container, where they will last up to three months. When you’re ready to enjoy, thaw them in the refrigerator overnight for best results. Always look for signs of spoilage such as unusual odors or mold before consuming.

    Make Ahead Strategies

    You can prepare the filling up to a week in advance and store it in the fridge. Roll the filling into balls only a few hours before serving to maintain the fresh taste and texture. If you need to save time on the day of an event, consider coating the cheesecake balls in chocolate ahead of time and refrigerating them until you’re ready for serving. Remember, adding fresh garnishes like mint adds a pop of freshness right before serving.

    Scaling Instructions

    If you want to halve the recipe, simply divide each ingredient in half, and you’ll still achieve the same taste and texture. On the other hand, multiplying the ingredients by three is manageable; just be sure to have ample space for mixing and rolling your cheesecake balls. If doubling or tripling, pay close attention to the melting and chilling times, as portions will require a little more time. Additionally, ensure you have larger mixing bowls and trays for storing the balls.

    Nutritional Deep Dive

    Each serving of Velvety White Chocolate Raspberry Cheesecake Balls provides a delightful treat rich in calories due to white chocolate and cream cheese. However, they also offer nutritional benefits from fresh raspberries, including antioxidants and vitamins that aid in immune support. When analyzing macros, consider serving size, as it impacts overall caloric intake. A well-balanced approach ensures you enjoy indulgence while keeping health considerations in check.

    Dietary Adaptations

    For gluten-free adaptions, be sure to use certified gluten-free alternatives for any cookies or crusts. A dairy-free version can be achieved with coconut cream and dairy-free chocolate. For those following a vegan diet, opting for plant-based cream cheese provides a similar texture and flavor without animal products. Low-carb enthusiasts can adapt the recipe with sugar substitutes and a nut-based crust to maintain a keto-friendly treat.

    Troubleshooting Guide

    If your cheesecake balls turn out overly soft, check chilling times – they may need longer in the fridge. For flavor imbalance, always taste the mixture and adjust the sweetness of the filling before assembling. If your chocolate coating is thick, try adding a small amount of coconut oil when melting to achieve a smoother consistency. Should you encounter a grainy texture in the cheesecake, ensure that you’re using room-temperature cream cheese for better fusion.

    Recipe Success Stories

    Home bakers have raved about the ease and joy of making these Velvety White Chocolate Raspberry Cheesecake Balls. Many have shared stories of adapting the recipe, such as switching up the fruits or incorporating unique flavor extracts. Photography tips are also a favorite amongst bakers to showcase their culinary creations on social media, engaging others and gathering positive feedback.

    Frequently Asked Questions

    Can I freeze these cheesecake balls?

    Yes, they freeze wonderfully! Store them in an airtight container for up to three months, and thaw in the refrigerator when you’re ready to enjoy.

    What can I substitute for white chocolate?

    If you prefer, you can use milk chocolate or dark chocolate depending on your taste. Just be mindful that this will alter the flavor profile slightly.

    How long can I keep these in the fridge?

    You can store them in the refrigerator for up to a week. Just make sure they’re kept in an airtight container to maintain freshness.

    Are there any alternatives to raspberries?

    Absolutely! You can experiment with strawberries, blueberries, or even cherries for a different taste experience.

    Can I make these vegan?

    Yes! Substitute the cream cheese with a plant-based alternative and use dairy-free chocolate for coating.

    Do I have to chill the mixture before rolling?

    Chilling is important to ensure the cheesecake mixture holds its shape when rolled into balls. Aim for at least an hour in the fridge.

    How do I know when

    Easy Chocolate Chip Banana Bread Recipe for Delicious Baking

    Easy Chocolate Chip Banana Bread: A Delightful Twist on a Classic

    ⚖️
    Difficulty
    Easy

    ⏲️
    Prep Time
    15 mins

    🕒
    Cook Time
    50 mins

    ⏱️
    Total Time
    65 mins

    🍽️
    Servings
    10 slices

    There’s nothing quite like the comforting aroma of freshly baked banana bread wafting through your kitchen, especially when enriched with luscious chocolate chips. Our Easy Chocolate Chip Banana Bread recipe transforms overripe bananas into a moist, tender loaf that pairs perfectly with a cup of coffee or tea. This dish is not only simple to make but also a delightful way to use those bananas that have seen better days. Each bite offers a heavenly combination of sweetness and chocolate, leaving you wanting more.

    Whether you’re a seasoned baker or trying your hand at baking for the first time, this easy recipe ensures a scrumptious outcome with minimal effort. The flavors meld beautifully, creating a rich, satisfying treat that can brighten up any day. So, preheat your oven and get ready to indulge in a slice of heaven with our Easy Chocolate Chip Banana Bread!

    Quick Recipe Highlights

    • Flavor Profile: Sweet, dense banana flavor complemented by rich chocolate.
    • Texture: Moist and soft with a slightly gooey bite from the chocolate chips.
    • Aroma: A warm, inviting aroma of baked bananas and melting chocolate fills the air.
    • Visual Appeal: Golden-brown crust with scattered chocolate chips and a fluffy interior.
    • Skill Level Needed: No special skills required; great for beginners.
    • Special Equipment: Just a mixing bowl, loaf pan, and measuring cups.

    Recipe Overview

    • Difficulty Level: This Easy Chocolate Chip Banana Bread is rated as easy, making it a perfect choice for beginner bakers. The straightforward steps help chefs of all experience levels achieve delicious results.
    • Category: Suitable for breakfast, snacks, and desserts, this banana bread can be enjoyed at any time of the day.
    • Cuisine: This recipe draws from classic American cuisine tradition, where banana bread has become a beloved staple in many households.
    • Cost: With simple, everyday ingredients, this banana bread is made at a low cost, making it accessible for all budgets.
    • Season: Ideal for year-round baking, particularly when bananas are in season and ripening quickly.
    • Occasion: Perfect for casual gatherings, brunches, or even as a sweet treat to pack for lunch.

    Why You’ll Love This Recipe

    The taste and texture of this Easy Chocolate Chip Banana Bread are truly amazing. The natural sweetness from the ripe bananas pairs perfectly with the decadent chocolate chips, creating a heavenly treat that satisfies sweet cravings. With each slice, you’ll experience a soft, moist texture that leaves a delightful melt-in-your-mouth sensation.

    Convenience is another reason you will fall in love with this recipe. With just a few simple ingredients and minimal preparation time, you can whip up this flavorful banana bread in no time. It’s a great recipe for beginner bakers who want to experience the magic of home baking without feeling overwhelmed.

    If you’re health-conscious, you’ll be pleased to know that bananas are packed with nutrients, including potassium, vitamin C, and fiber. This recipe also offers the opportunity to use whole grain flours for added nutrients and a hearty feel, making it a guilt-free indulgence that can fit into a balanced diet.

    Social and entertaining value is another highlight of our Easy Chocolate Chip Banana Bread. It’s a great addition to any gathering or get-together, perfect for sharing with family and friends. Serve it warm with a dollop of butter, or eat it plain—either way, it acts as a conversation starter and a crowd-pleaser.

    Lastly, the cost-effectiveness and accessibility of this banana bread recipe make it even more appealing. With minimal investment in ingredients, you can create a delicious homemade treat that is sure to impress. Plus, it helps reduce food waste by utilizing ripe bananas that would otherwise be discarded.

    Historical Background and Cultural Significance

    The origin of banana bread dates back to the Great Depression when resourceful cooks sought ways to use up overripe bananas during hard times. Bakers began to experiment with various bread recipes, integrating bananas to add moisture and sweetness, leading to what we now know as banana bread. It quickly gained popularity across American kitchens due to its feasibility and delightful taste.

    Cultural importance lies significantly within many American households where banana bread became a symbol of comfort cooking. It often signifies home, family gatherings, and shared moments, making it more than just a dessert; it’s a nostalgic experience for many.

    Over time, banana bread recipes have evolved to include various adaptations and ingredient substitutions. The classic version often included simple pantry staples, but modern takes have seen the addition of nuts, spices, and even different types of flours to cater to diverse taste preferences and dietary needs.

    Regional variations have also emerged, from adding cocoa for chocolate lovers to spicing it up with cinnamon or nutmeg for a warmer flavor profile. Today, banana bread encompasses many twists and adaptations reflective of individual taste and creativity.

    Ingredient Deep Dive

    Ripe Bananas

    Bananas are not only delicious but also have cultural significance around the world, serving as a staple fruit in tropical regions. Nutritionally, they are an excellent source of potassium, vitamin C, and dietary fiber. When selecting bananas for this recipe, look for those with plenty of brown spots as they indicate ripeness and sweetness.

    To store bananas, keep them at room temperature until fully ripened. If you have leftover ripe bananas, consider freezing them for later use in smoothies or other baking projects. If necessary, you can substitute with applesauce or pureed pumpkin for similar moisture in your bread.

    Chocolate Chips

    Chocolate chips add delightful flavor and richness to banana bread, enhancing its indulgence. They come in various types, including semi-sweet, dark, and milk chocolate, allowing for versatility in flavor. When selecting chocolate chips, choose high-quality brands for the best taste.

    To store chocolate chips, keep them in a cool, dry place or in the refrigerator for extended freshness. If you’re looking for healthier options, consider using dark chocolate or unsweetened cocoa nibs as a substitute that packs a nutritional punch.

    Common Mistakes to Avoid

    • Using under-ripe bananas: This results in less flavor and sweetness. Always choose overripe bananas for the best banana bread.
    • Overmixing the batter: This can lead to dense and tough bread. Stir until just combined for a light texture.
    • Not measuring ingredients accurately: Inaccurate measurements can change the texture and flavor outcomes. Use measuring cups and spoons for precision.
    • Baking at incorrect temperatures: Always preheat your oven and ensure it’s set correctly. An oven thermometer can help avoid discrepancies.
    • Skipping the parchment paper or greasing the pan: This can cause the bread to stick and break apart during removal. Use parchment paper or sufficient grease to make extraction easy.
    • Not letting it cool before slicing: Cutting too soon can result in a mushy loaf. Allow the banana bread to cool for at least 15 minutes in the pan.
    • Storing improperly: Failure to store it correctly can lead to dryness or spoilage. Store in an airtight container for freshness.
    • Using the wrong baking pan size: Each pan size affects baking time and outcome; adapt baking times accordingly if using a different size.
    • Forgetting to check for doneness: Overbaking can lead to dryness. Use a toothpick to test the center before removing it from the oven.
    • Using low-quality ingredients: The flavor depends significantly on the quality of your bananas and chocolate. Always pick fresh, high-quality components for best results.

    Essential Techniques

    Mixing the batter properly is crucial. It’s important to combine your dry and wet ingredients gently to avoid overdeveloping gluten, which can result in a dense loaf. Use a spatula or wooden spoon to fold until just mixed; leaving some lumps is okay.

    Measuring accurately is another essential technique. Baking is a precise science, and measuring ingredients correctly can drastically affect the outcome. Use dry measuring cups for flour and wet measuring cups for liquids; this ensures consistency and predictability in your baking.

    Pro Tips for Perfect Easy Chocolate Chip Banana Bread

    1. Always use overripe bananas for maximum sweetness and moisture.

    2. Experiment with add-ins like nuts or dried fruits for added texture and flavor.

    3. Adjust the level of chocolate chips to suit your taste—more chips for a sweeter bread!

    4. Use whole wheat flour for a healthier twist while maintaining its delicious taste.

    5. Don’t skip the cooling time in the pan; it helps enhance the flavors as it sets.

    6. For extra moistness, consider adding a tablespoon of yogurt or sour cream into the batter.

    7. Test for doneness using a toothpick; it should come out clean when the bread is perfectly baked.

    8. Store leftovers properly in an airtight container to keep your bread fresh for days.

    Variations and Adaptations

    For regional variations, consider adding spices such as nutmeg or cinnamon to give your banana bread a warm depth of flavor. Seasonal adaptations can include using pumpkin puree during autumn or incorporating fresh blueberries when in season for a fruity twist.

    If you have specific dietary needs, consider dietary modifications like using almond flour for a gluten-free option or substituting with flax eggs for a vegan version. For flavor variations, try adding peanut butter to the batter for a nutty taste or experiment with various types of chocolate chips, like white chocolate or butterscotch.

    Regarding texture modifications, walnuts or pecans can provide a satisfying crunch that contrasts beautifully with the soft bread. Alternatively, adding rolled oats can create a hearty feel.

    For presentation alternatives, slice and serve individual pieces topped with a dusting of powdered sugar or a drizzle of melted chocolate to enhance its visual appeal.

    Serving and Presentation Guide

    For plating techniques, slice the banana bread into uniform pieces to ensure even serving sizes. Consider serving on a rustic wooden board garnished with fresh bananas or a scoop of ice cream for an enticing contrast.

    Garnishing ideas could include a sprinkle of chocolate shavings or a dollop of whipped cream on each slice to elevate its presence. Traditional accompaniments include a side of butter or molasses for spreading, while modern serving suggestions may include a scoop of vanilla ice cream.

    Temperature considerations are crucial; banana bread can be enjoyed warm or at room temperature. If serving cold, consider warming individual slices slightly in the microwave for about 10-15 seconds for an inviting taste.

    For portion control tips, aim for slices around one inch thick. This allows guests to enjoy a delectable piece without overindulging.

    Wine and Beverage Pairing

    For wine pairings, consider a light dessert wine like Moscato or an off-dry Riesling, which beautifully complements the sweetness of the banana bread. If you’re looking for non-alcoholic alternatives, fresh-brewed chai tea or mocha coffee creates a harmonious flavor combination.

    For coffee and tea pairings, go for a strong espresso or a robust black tea to balance the sweetness of the bread. Keep temperature considerations in mind; ensure that beverages are served hot to enhance the overall experience.

    Storage and Shelf Life

    To store your Easy Chocolate Chip Banana Bread, wrap it in plastic wrap or place it in an airtight container to maintain freshness. Ideal storage conditions should be at room temperature for up to 3 days or in the refrigerator for up to a week.

    Signs of spoilage can include a sour smell or visible mold. If you notice either, discard the bread immediately. For reheating instructions, warm slices in the microwave for around 10 seconds or in the toaster oven for a crispy edge.

    If you want to freeze banana bread, slice it first and wrap each piece tightly in plastic wrap, then place it in a freezer bag. Properly stored, it can last for up to 3 months. To defrost, simply leave it in the refrigerator overnight or warm individual slices in the microwave.

    Make Ahead Strategies

    For a prep timeline, you can mash bananas and mix your dry ingredients the night before. Combine the wet ingredients the next morning for quick assembly. Storage between steps is key; store mashed bananas in the refrigerator to keep them fresh until ready to mix.

    Quality impact assessments suggest that certain flavors develop beautifully overnight. If you can make your batter the day before, you might notice an enhanced banana flavor in your quick bread.

    For assembly tips, combine your prepared wet and dry ingredients quickly to prevent the batter from becoming overly mixed. Always remember to fold, rather than stir.

    When reheating guidelines are concerned, always check your bread’s texture; it should be moist and well heated but not dried out.

    If you want to add fresh elements, consider adding a spread of flavored cream cheese after reheating for an exciting twist.

    Scaling Instructions

    Halving the recipe is simpler than it sounds. Just use a smaller loaf pan, and remember that baking time may decrease, so keep an eye on it around the 30-minute mark.

    Doubling or tripling the recipe can be done for larger gatherings. Ensure you have a large enough mixing bowl, and if you plan on increasing the volume, make a note to monitor bake times as they may vary with larger batches.

    Equipment adjustments may include using multiple pans to accommodate batches if making larger quantities. Timing modifications should always consider that larger or fuller pans may take slightly longer than expected to bake.

    For storage considerations when scaling, ensure that you have ample storage space to accommodate the excess banana bread, whether in the fridge or freezer.

    Nutritional Deep Dive

    Your Easy Chocolate Chip Banana Bread is not only delicious but offers an interesting macro breakdown, primarily consisting of carbohydrates from the bananas and flour with healthy fats from the chocolate. Each slice primarily provides energy through naturally occurring sugars.

    The micronutrient analysis shows that bananas contribute potassium levels, while the chocolate chips add a small amount of magnesium and iron. Plus, integrating whole wheat flour can bring in added fiber and beneficial nutrients.

    If you’re health-conscious or on a specific diet, remember the health benefits bananas provide for digestion and heart health due to their fiber and antioxidant levels. The addition of nuts or seeds can further enhance nutrient density.

    Dietary considerations play a key role in managing your wellness. With this recipe, you can modify ingredients based on your dietary needs, making it a versatile choice whether you enjoy it as is or tweak it to fit your lifestyle goals.

    When tackling portion analysis, keep in mind that a slice should be moderate in size to keep sugar levels in balance while providing satisfaction from natural sweetness. Weight management tips focus on mindful eating, enjoying each slice slowly to appreciate the flavors fully.

    Dietary Adaptations

    For a gluten-free version of this Easy Chocolate Chip Banana Bread, substitute regular flour with a gluten-free all-purpose blend. Make sure it contains binding agents for better texture.

    To create a dairy-free adaptation, replace butter with coconut oil or a dairy-free spread. For a vegan option, use flax or chia seeds mixed with water as an egg substitute, plus dairy-free chocolate chips.

    If you’re watching carbs, try using almond flour or coconut flour in place of standard flour. You could also modify sugar levels or substitute with natural sweeteners like stevia or erythritol for a low-carb alternative.

    For followers of the keto diet, ensure to balance your ingredients accordingly by opting for nut butters and maintaining the use of acceptable sweeteners.

    Paleo adaptations can include using ripe bananas, almond or coconut flour, and avoiding sugar altogether while opting for raw honey or maple syrup in minimal quantities.

    If you’re following a low-FODMAP diet, ensure to measure your bananas carefully and consider limiting the number of chocolate chips added to your banana bread.

    Troubleshooting Guide

    If you’re facing texture issues, it’s likely due to overmixing; strive for a gentle fold when incorporating dry ingredients to prevent dense bread. If your bread is too dry, ensure your bananas are sufficiently ripe, and consider adding extra moisture with yogurt or applesauce.

    For flavor balance problems, you can enhance sweetness by adding a dash of vanilla extract or adjusting sugar levels. If your banana bread tastes bland, consider spices like cinnamon to elevate its flavor profile.

    If you’re encountering temperature problems, it can lead to uneven baking or burnt edges. Make sure your oven is correctly calibrated, and consider rotating the pan halfway through baking.

    Equipment challenges such as not having the right loaf pan can be resolved by using similar sizes; just adjust baking times as necessary. If using a glass pan, baking times may need to be reduced.

    If ingredient substitutions have left you unsatisfied, ensure you choose quality alternatives to match flavors, especially with chocolate chips or sugars. Always follow ingredient quality and freshness.

    Timing concerns can arise as well; if you notice your batter isn’t rising, check your baking powder’s expiration date and adjust timings based on your bowls and pan sizes.

    Recipe Success Stories

    Community feedback on this Easy Chocolate Chip Banana Bread reveals enthusiastic responses, encouraging bakers of all skill levels to share their successes online. Many have marveled at the simplicity and incredible flavor.

    Variation successes highlight how adaptable this recipe can be, with many bakers experimenting successfully with different add-ins like nuts, coconut, or spices, showing the bread’s versatility.

    Reader suggestions often include tips on perfecting their version of the recipe by sharing what worked best for their taste preferences. Many love incorporating seasonal fruits such as peaches or strawberries alongside the bananas.

    Photography tips often arise, with community members encouraging each other to highlight their finished product beautifully. They often suggest natural lighting and clean backgrounds to showcase their baking skills.

    Frequently Asked Questions

    Can I use frozen bananas for this recipe?

    Yes, frozen bananas work great for banana bread! Just thaw them before use, and they’ll mash easily, adding fantastic moisture to your bread.

    How do I know when my banana bread is done?

    Check if a toothpick inserted into the center comes out clean. If it has a few crumbs but isn’t wet, it’s done!

    Can I make mini loaves with this recipe?

    Absolutely! Just adjust the baking time down to 20-25 minutes for mini loaves.

    What should I do if my banana bread sinks in the middle?

    This typically happens due to underbaking or excessive moisture. Make sure you bake until a toothpick pulls out clean next time.

    How can I store leftover banana bread for freshness?

    Wrap it tightly in plastic wrap or store it in an airtight container. It can also be frozen for longer storage.

    Can I add nuts to this recipe?

    Definitely! Chopped walnuts or pecans add wonderful texture and flavor. Just fold them into the batter gently.

    Is it possible to make this banana bread without sugar?

    You can substitute sugar with natural sweeteners like honey or maple syrup, but do check the liquid amount accordingly.

    Does the banana bread get better with time?

    Yes! Many people find that the flavors deepen after a day in the fridge, making it even tastier!

    Can I make it with whole wheat flour?

    Certainly! Whole wheat flour not only adds nutrition but also gives the bread a delicious nuttier flavor.

    What can I serve with banana bread?

    Banana bread pairs well with butter, cream cheese, or even delicious spreads like Nutella for an indulgent treat!

    Additional Resources

    For those looking to explore more, consider related recipes such as pumpkin bread, zucchini bread, or even a classic loaf cake. Technique guides can enhance your baking skills, particularly with measuring, mixing, and baking tips specific to quick breads.

    Learn ingredient information to discover the benefits of using various flours or add-ins. Equipment recommendations like high-quality loaf pans and baking sheets can improve your baking experience, ensuring every loaf is a success.

    Don’t forget to check out seasonal variations! Incorporate festive flavors during holidays to keep your baking exciting and fresh.

    Join the Conversation

    We’d love to hear your thoughts on this Easy Chocolate Chip Banana Bread! Share your photos, variations, and reviews on social media. Create a sense of community among fellow bakers by connecting with others who love to create and enjoy baked goods.

    Photography tips can help you capture the perfect moment when your banana bread comes out of the oven. Be sure to use natural light to highlight the rich colors and textures of your delicious creation.

    Take the time to review this recipe, share your personal experiences, and inspire others by showcasing your unique adaptations. Baking is best enjoyed together, so let’s keep the conversation going!

    The Recipe

    Easy Chocolate Chip Banana Bread

    Serves: 10 slices

    Prep Time: 15 mins

    Cook Time: 50 mins

    Total Time: 65 mins

    Kitchen Equipment Needed

    • Mixing bowl
    • Loaf pan
    • Measuring cups and spoons
    • Spatula
    • Fork for mashing bananas

    Ingredients

    • 3 ripe bananas
    • 1/3 cup melted butter
    • 1 teaspoon baking soda
    • Pinch of salt
    • 3/4 cup sugar
    • 1 large egg
    • 1 teaspoon vanilla extract
    • 1 1/2 cups all-purpose flour
    • 1 cup semi-sweet chocolate chips

    Directions

    1. Preheat the oven to 350°F (175°C) and grease your loaf pan.
    2. In a mixing bowl, mash the ripe bananas with a fork until smooth.
    3. Stir in the melted butter.
    4. Mix in baking soda and salt, then add sugar, egg, and vanilla extract.
    5. Gradually mix in the flour until just combined.
    6. Fold in the chocolate chips gently.
    7. Pour the batter into the prepared loaf pan and smooth the top.
    8. Bake for 50 minutes, or until a toothpick comes out clean.
    9. Allow cooling in the pan for 15 minutes before transferring to a wire rack.

    Recipe Notes

    • For extra flavor, consider adding a dash of cinnamon or nutmeg.
    • You can substitute the sugar with honey or maple syrup if desired.
    • This recipe can be made with gluten-free flour blends as well.

    Deliciously Soft and Chewy Cinnamon Chocolate Chip Cookies Recipe

    Soft and Chewy Cinnamon Chocolate Chip Cookies: A Delightful Treat

    ⚖️
    Difficulty
    Easy

    ⏲️
    Prep Time
    15 mins

    🕒
    Cook Time
    10 mins

    ⏱️
    Total Time
    25 mins

    🍽️
    Servings
    24 cookies

    Soft and Chewy Cinnamon Chocolate Chip Cookies are the perfect blend of warmth and sweetness, enveloping you in a cocoon of comfort with each bite. The inviting aroma of cinnamon wafting through your kitchen as they bake will have everyone flocking to the oven, eager to enjoy this delightful treat. These cookies boast an irresistible soft and chewy texture, making them the ultimate indulgence for any chocolate lover. Whether enjoyed with a glass of milk or as a standalone snack, they are sure to satisfy your sweet tooth.

    In addition to their delightful flavor, these cookies carry a sense of nostalgia and warmth that brings together friends and family. As you gather around the cookie jar, each crunch followed by a delightful chocolate melt creates a perfect moment of joy. The combination of cinnamon and chocolate chips offers a cozy twist on the traditional chocolate chip cookie, elevating your dessert experience and inviting you to indulge in a little slice of happiness.

    Quick Recipe Highlights

    • Flavor Profile: Rich chocolate combined with the warm and slightly spicy flavor of cinnamon creates a comforting taste sensation.
    • Texture: Each cookie delivers a deliciously soft and chewy experience, with a slight crispness at the edges.
    • Aroma: The warm scent of cinnamon and melted chocolate fills the air, creating an inviting atmosphere.
    • Visual Appeal: Golden brown edges with vibrant chocolate chips make each cookie visually appealing.
    • Skill Level Needed: This easy cookie recipe is ideal for bakers of any skill level.
    • Special Equipment: A mixing bowl, baking sheet, and an oven are all you need to whip up these cookies.

    Recipe Overview

    • Difficulty Level: The ease of this recipe makes it accessible for beginner bakers. Even kids can help with mixing and decorating.
    • Category: Perfect for desserts or snacks, these cookies are a classic addition to any meal.
    • Cuisine: While chocolate chip cookies are a beloved American staple, the addition of cinnamon offers a fun twist that draws inspiration from various desserts.
    • Cost: Preparing these cookies is budget-friendly, with common pantry staples making up most of the ingredients.
    • Season: Enjoy these cookies any time of the year, but they are especially comforting during the colder months.
    • Occasion: These cookies are perfect for birthdays, family gatherings, or simply as a treat to enjoy on a cozy afternoon.

    Why You’ll Love This Recipe

    With a rich and satisfying taste, the Soft and Chewy Cinnamon Chocolate Chip Cookies are sure to please anyone who tries them. The combination of sweet and warm flavors ensures that every bite is not just a treat but a delightful experience. The chewiness provides a unique texture, making them different from regular cookies, and the few added ingredients elevate the standard cookie to a comforting dessert that’s suitable for any occasion.

    The convenience of this recipe makes it a winner in the kitchen. It requires minimal prep time, and you can whip it up in under thirty minutes. Not only are you left with delicious cookies, but you also enjoy the baking experience. The aroma filling your kitchen while these cookies bake is an olfactory delight that brings warmth and joy to every home.

    Nutritionally, while cookies are a treat, you can feel good knowing that they include traditional ingredients that are widely used and understood. The inclusion of cinnamon even adds some health benefits, such as antioxidant properties. Sharing these cookies with loved ones can create opportunities for bonding and fun experiences.

    There’s something special about enjoying freshly baked cookies with friends or family. These cookies can spark conversations, share laughter, and create memorable moments. Their nostalgic appeal also allows everyone to reminisce about their favorite dessert experiences from childhood, making gatherings more lively.

    Cost-effectiveness plays a significant role in the recipe’s appeal. Most ingredients are pantry staples, making it easy to whip them up whenever the craving strikes. It’s a smart choice, especially for families looking to indulge while staying within a budget.

    Historical Background and Cultural Significance

    The origin of the chocolate chip cookie dates back to the 1930s when Ruth Wakefield introduced them at her Toll House Inn in Massachusetts. This unique recipe quickly gained popularity and became a staple in American dessert culture. The delectable combination of sweet chocolate and soft dough sparked a cookie revolution, influencing countless variations across the globe.

    Cinnamon has a long history in cooking, often symbolizing warmth and hospitality. Its integration into the chocolate chip cookie alters the traditional recipe, introducing an aromatic spice that aligns with various cultural celebrations, especially during the fall and winter months. This comfort food has evolved, but its cultural resonance remains strong as families continue to enjoy these delightful treats during festive gatherings.

    As time progressed, cookie recipes began to evolve. Today, we see a variety of adaptations that incorporate different flavors and textures. Soft and chewy variations have emerged, often with added ingredients such as nuts, dried fruits, and seasonal spices to create new experiences. Chocolate chip cookies, with their hybrid versions, remain a fixture in both homes and bakeries alike.

    Regional variations also play a role in how chocolate chip cookies are perceived and consumed. Certain areas may add distinct touches, such as extra spices or different types of chocolate, enhancing uniqueness and appeal. Regardless of the variation, the comforting elements of these cookies remain a constant presence in many households.

    Ingredient Deep Dive

    1. All-Purpose Flour
    All-purpose flour is a crucial ingredient in most baking recipes, as it provides the structure and base for cookies. Its versatility allows it to be used in various baked goods, making it a staple in many kitchens. Look for unbleached flour to avoid unnecessary chemical processing, which retains more nutrients.

    Nutritionally, all-purpose flour is a source of carbohydrates and provides some protein. It’s essential to store flour in a cool, dry place and ensure it’s sealed properly to extend its shelf life. If you need a gluten-free option, almond flour or coconut flour can be suitable substitutes, though adjustments may be necessary in the recipe.

    2. Brown Sugar
    Brown sugar is essential for achieving that rich flavor and chewy texture in cookies. Its molasses content not only lends sweetness but also depth to the cookies, ensuring they are wonderfully moist. When selecting brown sugar, stick with light or dark depending on your flavor preference; dark brown sugar will yield a richer taste.

    Brown sugar also brings nutritional benefits, such as minor amounts of minerals like calcium and potassium. Store it in an airtight container to prevent hardening and keep it fresh. If you don’t have brown sugar on hand, you can mix granulated sugar with molasses to replicate its flavor profile.

    Common Mistakes to Avoid

    • Overmixing the dough: Overmixing can lead to tough cookies. Mix just until combined for a soft texture.
    • Using cold ingredients: Cold butter or eggs can affect the dough’s consistency. Ensure all ingredients are at room temperature for best results.
    • Not chilling the dough: Skipping the chill time can cause cookies to spread too much during baking, leading to flat cookies.
    • Incorrect oven temperature: An uncalibrated oven can result in burnt edges or undercooked centers. Use an oven thermometer for accurate measurements.
    • Using expired ingredients: Expired baking soda or baking powder can impact the cookies’ rise and texture. Check expiration dates regularly.
    • Skipping ingredient measuring: Accurate measurements are key in baking, so resist the urge to eyeball ingredients.
    • Not rotating the baking sheet: Failing to rotate the sheet halfway through baking can lead to unevenly baked cookies.
    • Overbaking: Keep a close eye on baking time; pull the cookies out when they are slightly underbaked for the chewy texture.

    Essential Techniques

    Baking cookies requires specific techniques to achieve the desired result. **Measuring Ingredients Accurately** is crucial, as incorrect measurements can lead to poor texture and taste. Always use dry measuring cups for flour and sugar, leveling them off for precision. A kitchen scale can also provide accurate measurements in grams, making it easier to ensure consistent results.

    **Creaming Butter and Sugar** is a significant step in creating a light and fluffy cookie. When butter and sugar are creamed together, they incorporate air into the dough, leading to a better rise during baking. Aim for a light, pale yellow color, indicating that enough air has been whipped in. Avoid overmixing at this stage to prevent the dough from becoming dense.

    Pro Tips for Perfect Soft and Chewy Cinnamon Chocolate Chip Cookies

    1. Use room temperature butter: This helps in achieving the best texture. Cold butter won’t incorporate well with sugar.
    2. Chill the dough: Letting the dough rest in the fridge for at least 30 minutes helps the flavors meld and prevents excess spreading.
    3. Use a cookie scoop: This ensures uniform cookies that bake evenly. A scoop will also help to control portion sizes.
    4. Don’t be afraid to experiment: Try adding nuts or different types of chocolate chips for a unique twist on the classic recipe.
    5. Bake in batches: If possible, bake one tray at a time for even baking results. The lower the temperature of the oven due to opening, the longer it takes to bake.
    6. Consider parchment paper: Using parchment paper makes for easy cleanup and prevents sticking.
    7. Adjust baking time based on size: Larger cookies may need a bit more time, so keep an eye on them while they bake.
    8. Use a combination of sugars: Mixing granulated and brown sugars will enhance the flavor and texture of your cookies.

    Variations and Adaptations

    Cookies can be adapted to suit different preferences and dietary needs. For a **regional variation**, consider adding pumpkin pie spice for a fall flavor twist, marrying perfectly with the cinnamon. During the holiday season, incorporating nutmeg or even a hint of ginger can bring seasonal cheer.

    **Seasonal adaptations** can also involve using chocolate chips that reflect the season, such as white chocolate, dark chocolate with orange zest in winter, or pastel colors for springtime events. For those with special dietary needs, you can create **gluten-free versions** using almond or oat flour, maintaining the soft and chewy texture everyone loves.

    Moreover, if looking to cater to vegan audiences, replacing eggs with a flaxseed meal and non-dairy butter creates an equally delightful treat. For an exciting flavor twist, try **spicy or savory variations** by adding chili flakes or even jalapeños for a unique kick, demonstrating the infinite possibilities with each batch.

    Serving and Presentation Guide

    Serving your Soft and Chewy Cinnamon Chocolate Chip Cookies can be elevated with a few simple techniques. **Plating techniques** include stacking the cookies in a casual yet appealing manner on a decorative plate or a delightful cookie jar that encourages people to take one. **Garnishing ideas** can include sprinkling a bit of sea salt on top or drizzling with a simple glaze that complements the cookie’s flavors.

    Pairing them with traditional accompaniments, like a glass of cold milk or a cup of hot tea, enhances the experience. For a modern touch, consider using colorful parchment paper to wrap individual cookies for gift-giving, adding a personal touch that guests appreciate.

    When considering temperature, warm cookies right from the oven create the best experience, but a few minutes on a cooling rack allows for better handling without the risk of breaking. Lastly, understand proper portion control to prevent overwhelming guests, ensuring there are enough cookies for everyone to enjoy.

    Wine and Beverage Pairing

    Pairing beverages with cookies enhances the tasting experience immensely. A **sweet dessert wine** such as a late harvest Riesling complements the sweet and spicy notes found in the cookies beautifully. If you prefer a **non-alcoholic alternative**, a rich hot chocolate or a spiced apple cider can bring out the flavors of cinnamon and chocolate.

    If you’re a coffee lover, **cold brew coffee**, with its smoother profile, pairs wonderfully with the cookies. Both beverages provide refreshing contrasts that balance the sweetness, ensuring a more rounded experience. **Temperature considerations** are essential; serving warm cookies alongside a cold beverage or a hot drink creates a delightful blend of sensations when enjoying your cookies.

    Storage and Shelf Life

    Storing your Soft and Chewy Cinnamon Chocolate Chip Cookies correctly ensures they remain fresh and delicious. After baking, allow the cookies to cool completely before transferring them into an airtight container. Keep them at room temperature to maintain their soft texture, as refrigeration can cause them to dry out.

    **Signs of spoilage** include a hard or stale texture, distinct off-smells, or discoloration. You can also freeze cookies to extend their shelf life; simply wrap them individually in plastic wrap and place them in a freezer-safe bag. This helps them retain moisture, allowing you to enjoy a freshly baked cookie whenever you desire. For reheat, place them in a low oven for a few minutes to revive the soft and chewy texture.

    Make Ahead Strategies

    Planning ahead when baking cookies can save you time and ensure delightful treats are always on hand. You can **prep the dough in advance**, shaping it into balls and storing them in the freezer. When you’re ready to bake, simply add an extra minute or two to the bake time for chilled dough.

    **Quality impact assessment** is imperative; cookies created from fresh dough yield the best results. If you have leftover baked cookies, consider storing them in a decorative jar or container to maintain freshness while adding charm to your kitchen.

    For **fresh element additions**, reheating cookies slightly before serving can help regain that freshly baked warmth. Take this approach to serve cookies during gatherings, ensuring everyone enjoys a soft cookie that feels just out of the oven.

    Scaling Instructions

    If you want to share these delightful cookies with a large crowd, scaling the recipe is simple. **Halving the recipe** is straightforward; just cut each ingredient amount in half while following standard baking practices.

    For **doubling or tripling**, make sure you have enough mixing space. A larger bowl is essential to accommodate additional dough while still allowing for proper mixing. Additionally, consider adjusting baking times based on the amount of dough on each tray; more cookies might require a longer baking period.

    **Storage considerations** become crucial when scaling; ensure you have enough containers to hold the cookies you plan to make. Smaller batches can lead to fresher cookies, so balance your needs and portion sizes accordingly to avoid waste.

    Nutritional Deep Dive

    When enjoying Soft and Chewy Cinnamon Chocolate Chip Cookies, understanding their nutritional profile is beneficial. Each cookie contains carbohydrates primarily from sugars and flour, providing quick energy.

    In terms of **macro breakdown**, focusing on portioning can help manage calorie intake, especially since cookies are higher in sugar and fat. However, adding whole ingredients like oats or nuts can improve nutritional value, offering fiber and healthy fats.

    A **micronutrient analysis** reveals that cookies can contribute small amounts of calcium and iron through the brown sugar and enriched flour. Balancing cookie intake with more nutrient-dense meals ensures a well-rounded diet, making treats a joyful yet mindful experience for every baker.

    Dietary Adaptations

    For those with dietary restrictions, adaptations of the Soft and Chewy Cinnamon Chocolate Chip Cookies can accommodate various needs. **Gluten-free** variations can be achieved using certified gluten-free flour alternatives, allowing those with celiac disease to indulge.

    **Dairy-free** options are easily accessible by using plant-based butter or coconut oil, ensuring that everyone can enjoy these delightful treats. For a **vegan** adaptation, eggs can be substituted with flaxseed meal or applesauce, resulting in equally delicious cookies that everyone can enjoy guilt-free.

    Those following a **low-carb** or **keto** diet can experiment by using almond flour and sugar substitutes like erythritol or monk fruit, keeping the cookie’s flavor while lowering carbohydrates significantly. Adapting recipes not only allows for flexibility but fosters creativity and inclusiveness.

    Troubleshooting Guide

    When baking, it’s essential to address common challenges that may arise. **Texture issues** can often occur; if cookies come out too tough, they may have been overmixed or overbaked. Always check your baking time and ensure you aren’t whisking too vigorously during the mixing process.

    For **flavor balance**, if cookies taste bland, consider adding a pinch of salt or extra cinnamon to enhance flavors. **Temperature problems** can pave the way for various challenges; if cookies spread too much, check that your butter isn’t melted.

    **Equipment challenges** like inconsistent oven temperatures can lead to uneven baking. Using an oven thermometer can help mitigate this issue for perfect results.

    If you’ve made a substitution, be aware that certain adjustments may impact the outcome. Keep a watchful eye during the first batch, giving you insights into necessary timing modifications for future cookies.

    Recipe Success Stories

    Community feedback reveals that these Soft and Chewy Cinnamon Chocolate Chip Cookies resonate with many. Recipes evolve through reader suggestions offering exciting variations that include incorporating butterscotch chips or a hint of espresso powder for depth.

    Many have enjoyed adapting the original recipe for **holiday baking**, resulting in unique sprinkles for festive occasions. Sharing photographs of their baking success highlights the joy and creativity found in cookie-making, motivating others to try their hands at baking.

    Adaptation stories tell of experimenting with ingredients, leading to delightful surprises or unexpected failures that transformed into new recipes. The vibrant community of bakers encourages open exchanges of tips and experiences, ensuring that everyone finds success in their endeavors.

    Frequently Asked Questions

    Q1: Can I use whole wheat flour instead of all-purpose flour?
    A: Yes, whole wheat flour can be used, but it may change the cookie’s texture, making them denser. You might also consider using a mix of all-purpose and whole wheat for balance.

    Q2: How can I keep my cookies soft after baking?
    A: To maintain their softness, ensure they are stored in an airtight container at room temperature, and consider adding a slice of bread to the container to help retain moisture.

    Q3: Can I freeze the cookie dough?
    A: Absolutely! You can freeze the dough before baking. Just scoop the cookie portions onto a baking sheet, freeze them individually, then store in a freezer bag.

    Q4: How long do baked cookies stay fresh?
    A: Baked cookies can last for about a week at room temperature when stored properly in an airtight container. Freezing extends their life significantly.

    Q5: What’s the best way to reheat cookies?
    A: The best method is to microwave them for about 10-15 seconds or bake them briefly at a low temperature (about 300°F) to regain their freshness.

    Q6: What can I do if my dough is too sticky?
    A: If your dough is too sticky, you can add a little extra flour gradually until it reaches a more manageable consistency. Be careful not to add too much to avoid dry cookies.

    Q7: Can I use other types of chocolate?
    A: Yes! Feel free to mix in dark chocolate, white chocolate, or even a combination, depending on your preference for a delightful twist.

    Q8: How do I know when they are done baking?
    A: The cookies are typically done when the edges are set and slightly golden, but the centers may still look a tad underbaked. They will continue to firm up as they cool.

    Q9: How can I make these cookies gluten-free?
    A: You can substitute all-purpose flour with a gluten-free flour blend. Ensure the blend contains xanthan gum or add it separately for better texture.

    Q10: Can these cookies be made with less sugar?
    A: You can reduce the sugar slightly, but keep in mind that sugar not only adds sweetness but also affects texture and moisture. A moderate reduction may work fine.

    Additional Resources

    For those eager to expand their baking repertoire, consider checking out related recipes that incorporate similar flavors or themes. Look for guides on cookie decorating techniques to elevate your presentation, and read up on ingredient information to understand the science behind your favorite treats.

    Kitchen tools recommendations, such as quality baking sheets and silicone mats, can also aid you in producing the best results. Seasonal variations can inspire you to create new memories, especially during the holiday season when cookies shine the brightest.

    Join the Conversation

    Don’t forget to share your baking experiences on social media! Engaging with a vibrant community of food lovers encourages recipe exploration and the sharing of tips and tricks. Delicious photographs of your completed Soft and Chewy Cinnamon Chocolate Chip Cookies can inspire others seeking delightful treats for their gatherings.

    Your reviews and suggestions help refine this beloved cookie recipe, ensuring future batches are even better. The community thrives on shared experiences, reminding us that baking is not just about the end product but the joy of creation and connection it brings.

    The Recipe

    Soft and Chewy Cinnamon Chocolate Chip Cookies

    Serves: 24 cookies

    Prep Time: 15 mins

    Cook Time: 10 mins

    Total Time: 25 mins

    Kitchen Equipment Needed

    • Mixing bowl
    • Baking sheets
    • Cookie scoop
    • Measuring cups and spoons
    • Silicone spatula

    Ingredients

    • 2 ¼ cups all-purpose flour
    • 1 tsp baking soda
    • 1 tsp cinnamon
    • ½ tsp salt
    • 1 cup (2 sticks) unsalted butter, room temperature
    • ¾ cup granulated sugar
    • ¾ cup packed brown sugar
    • 2 large eggs
    • 1 tsp vanilla extract
    • 2 cups semi-sweet chocolate chips

    Directions

    1. Preheat your oven to 350°F (175°C).
    2. In a bowl, whisk together flour, baking soda, cinnamon, and salt; set aside.
    3. In a large mixer bowl, beat the butter and sugars together until light and fluffy.
    4. Add eggs one at a time, mixing well after each addition, then stir in the vanilla.
    5. Gradually blend dry mixture into wet ingredients until just combined.
    6. Fold in chocolate chips with a spatula until evenly distributed.
    7. Drop dough by rounded tablespoon onto ungreased baking sheets.
    8. Bake for 9-11 minutes or until edges are golden; centers may look soft.
    9. Remove from oven and cool on baking sheets for 5 minutes before transferring to wire racks.

    Recipe Notes

    • For chewier cookies, slightly underbake them; they’ll firm up as they cool.
    • Add half a cup of chopped nuts for extra crunch.
    • Store in an airtight container for up to one week or freeze for longer storage.