Tiramisu Cupcakes: A Decadent Twist on a Classic Italian Dessert
Tiramisu Cupcakes: A Fusion of Italian Tradition and Modern Desserts
Introduction
Tiramisu cupcakes combine the essence of the classic Italian dessert with the fun and portability of cupcakes. Perfect for parties, gatherings, or a sweet treat for yourself, this dessert captures the layers of coffee-soaked goodness and mascarpone richness in a bite-sized delight.
1. Can I use store-bought frosting?
Mascarpone frosting is recommended for authenticity but store-bought can work in a pinch.
2. How do I store these cupcakes?
Store in an airtight container in the fridge for up to three days.
3. Can I make them alcohol-free?
Absolutely! Use vanilla extract or extra coffee instead of liqueurs.
Conclusion
Tiramisu cupcakes are the perfect fusion of tradition and modern creativity. With their rich flavor and customizable options, they’re sure to be a hit at any event. Pair them with other Italian-inspired desserts and let the flavors shine! Let me know if you’d like further refinements or ideas!
Delicious Hillbilly Pie: A Comforting Poor Man’s Delight
Hillbilly Pie (Poor Man’s Pie): A Comforting Classic
⚖️
Difficulty
Easy
⏲️
Prep Time
15 mins
🕒
Cook Time
40 mins
⏱️
Total Time
55 mins
🍽️
Servings
8 servings
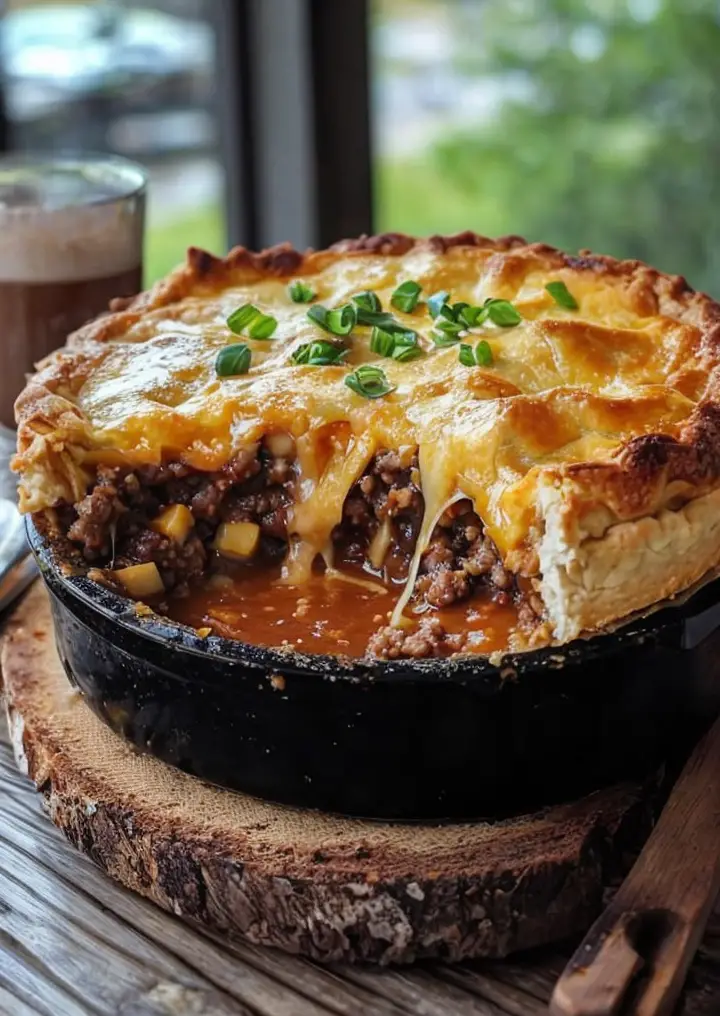
Hillbilly Pie, affectionately known as Poor Man’s Pie, is a delightful and budget-friendly dessert that’s rich in flavor and history. This dish comes from a time when resourcefulness was essential, utilizing ingredients that were readily available to create a satisfying pie. The sweet custard filling is enveloped in a buttery crust, creating a delectable contrast that is sure to please any palate. It’s a perfect option for family gatherings or cozy nights at home, evoking a sense of nostalgia and warmth.
When you take a bite of Hillbilly Pie, you will experience the lusciousness of the creamy filling paired with the golden-brown crust. The heavenly aroma wafts through your kitchen while baking, filling the air with the comforting scents of vanilla and baked goodness. As it cools, the anticipation builds for the delightful moment when you slice into this pie, revealing its custardy goodness and making every gathering just a little bit sweeter.
Quick Recipe Highlights
Flavor Profile: Hillbilly Pie offers a delightful blend of sweet vanilla and creamy rich textures, making each bite a treat.
Texture: The pie features a crispy, flaky crust that contrasts beautifully with the smooth and velvety filling.
Aroma: As the pie bakes, expect a warm aroma of vanilla and caramelized sugar, beckoning everyone to the kitchen.
Visual Appeal: The golden-brown crust and creamy filling make this pie not only delicious but visually tempting as well.
Skill Level Needed: This recipe is beginner-friendly, making it perfect for those new to pie-making.
Special Equipment: A pie dish and a whisk are essential tools for preparing this classic dessert.
Recipe Overview
Difficulty Level: This Hillbilly Pie recipe is easy and accessible, with straightforward steps that anyone can follow.
Category: Serve this pie as a dessert or as a sweet treat during celebrations and family gatherings.
Cuisine: Rooted in American culinary tradition, Hillbilly Pie reflects the ingenuity of Southern cooking.
Cost: The ingredients required are economical, typically under $10, making it budget-friendly for any occasion.
Season: Hillbilly Pie is perfect for any season, but especially delightful during the fall when comfort foods are in demand.
Occasion: This pie is ideal for holidays, family reunions, or simply as a sweet surprise for a loved one.
Why You’ll Love This Recipe
Hillbilly Pie is a taste of heaven in every slice. The contrast of the rich, creamy filling against the light, flaky crust creates a mouthwatering experience worth savoring. Each bite embodies the essence of comfort food, pairing perfectly with a scoop of ice cream or a dollop of whipped cream.
In terms of convenience, this recipe requires minimal ingredients and effort, making it a go-to for busy weeknights or last-minute gatherings. It’s the perfect dessert to whip up with kids, allowing them to join in the fun of baking and creating something delicious from scratch.
Nutritionally, while not the lightest dessert, Hillbilly Pie boasts an energy and comfort level that can appeal on chilly evenings. With its use of simple, wholesome ingredients, it’s a dessert you can feel good about sharing with loved ones.
Socially, this pie brings people together around the table, sparking conversations and creating memories over its delightful taste. It’s the kind of dish that not only fills bellies but also warms hearts, making gatherings all the more special.
Lastly, its cost-effectiveness is a notable aspect. Utilizing pantry staples and inexpensive ingredients means you can serve this pie without breaking the bank. It’s a comforting dessert that doesn’t compromise on flavor or experience.
Historical Background and Cultural Significance
Hillbilly Pie, often referred to as Poor Man’s Pie, has its origins rooted in the American South, where resourcefulness was key. This pie uses basic ingredients that were accessible to the everyday family, symbolizing ingenuity and simplicity in cooking during tough times.
Culturally, this pie reflects a time when families needed to stretch their resources. By turning modest ingredients into a satisfying dessert, Hillbilly Pie embodies the spirit of frugality while still celebrating sweetness in life.
Throughout the years, this recipe has evolved. While the basic components have remained constant, modern variations now include additional flavors, such as chocolate or seasonal fruits, showcasing the adaptability of this traditional dish.
Regional variations offer exciting twists to the original recipe, including the addition of local flavors or the use of alternative crusts. These adaptations demonstrate how a simple pie can be transformed to reflect the uniqueness of different culinary traditions across the country.
Ingredient Deep Dive
– **Sugar**: A basic pantry staple, sugar is a key ingredient in Hillbilly Pie. It not only sweetens the dish, but its caramelization during baking adds depth and flavor. Choose granulated sugar for the best results.
– **Milk**: Essential for the creamy filling, milk brings a smooth texture to the pie. For a richer flavor, consider whole milk or even cream as a substitute. Store milk in a cool environment and be sure to check expiration dates.
– **Eggs**: Eggs provide structure and binding to the filling. They help achieve a fluffy texture. When selecting eggs, look for fresh and organic sources to enhance both flavor and quality in your baking.
– **Vanilla Extract**: This ingredient lends a warm, aromatic flavor to the pie. Pure vanilla extract is preferred over artificial versions for the best flavor profile. Store in a cool, dark place for longevity.
Common Mistakes to Avoid
Using stale eggs can affect the texture and overall outcome of your pie. Always check the freshness by placing them in water: fresh eggs sink, while older ones float.
Overmixing the filling can lead to a tough texture. Mix just until combined for the best results.
Not preheating your oven can result in uneven baking. Always allow your oven to reach the desired temperature before placing the pie inside.
Skipping the cooling time can cause the filling to be too runny. Allow it to cool before slicing to achieve a set texture.
Choosing the wrong type of milk could alter the creaminess of your filling; use whole milk for richness.
Using unsalted butter instead of salted butter can change the flavor profile; choose based on your preference.
Not properly measuring ingredients, especially flour, can result in a dense crust; always use the spoon-and-level method.
Baking the pie for too long can lead to burning; monitor closely, especially towards the end of the cook time.
Neglecting to blind bake the crust may result in a soggy bottom; consider pre-baking when necessary.
Using a dull knife to slice can result in a messy cut. A sharp chef’s knife is ideal for clean slices.
Essential Techniques
– **Blind Baking**: Blind baking the crust is crucial for preventing sogginess. Roll out your dough, place it in the pie dish, and bake it with weights for the first few minutes. This technique ensures a golden and crispy base.
– **Whisking**: Properly whisking the filling is essential for achieving the right consistency. Incorporate air into the mixture by whisking vigorously until pale and slightly thickened. This step helps create a light and fluffy filling.
– **Cooling**: Allowing the pie to cool gradually helps the custard set properly. Place it on a wire rack after baking and let it sit for at least an hour before serving for the perfect texture.
Pro Tips for Perfect Hillbilly Pie
– Choose fresh, quality ingredients for the best flavor and texture.
– Allow the pie to cool completely; this settling time is essential for a creamy custard.
– For an extra touch, consider sprinkling nutmeg or cinnamon on top before baking to enhance the aroma.
– Use leftover pie crust scraps to create decorative shapes for the top crust; it adds visual interest.
– If you’re short on time, store-bought pie crust can be a great substitute.
– Serve with a scoop of vanilla ice cream or whipped cream for an indulgent dessert experience.
– Experiment with flavored extracts or liqueurs, like almond or hazelnut, for a unique twist.
– Always taste the filling before baking; adjust sweetness as needed.
Variations and Adaptations
– **Regional Variations**: In some areas, you may find recipes that incorporate seasonal fruits such as peaches or apples to complement the base custard, providing a fresh take on the classic Hillbilly Pie.
– **Seasonal Adaptations**: During fall, consider adding pumpkin spice to the filling, transforming it into a festive autumn dessert that will be a hit at gatherings.
– **Dietary Modifications**: For a gluten-free version, use a gluten-free pie crust or a crust made from ground nuts and date paste, catering to those with dietary restrictions.
– **Flavor Variations**: For chocolate lovers, add cocoa powder to the filling for a decadent chocolate custard pie. Alternatively, infusing the filling with citrus zest can brighten the flavor.
– **Texture Modifications**: For an extra creamy texture, mix sour cream into the filling, creating a rich and tangy profile that contrasts beautifully with the sweetness.
– **Presentation Alternatives**: Instead of a traditional pie, consider individual tart pans for personal servings or layering the filling in small mason jars for a charming dessert presentation.
Serving and Presentation Guide
– When plating Hillbilly Pie, use a pie server for neat slices and serve it warm for a comforting dessert experience.
– Garnish with fresh fruit, like berries or a sprig of mint, to add a splash of color and freshness to the dish.
– Traditional accompaniments such as whipped cream or a scoop of vanilla ice cream complement the creamy texture and rich flavor.
– For modern serving suggestions, consider drizzling with chocolate sauce or caramel to elevate the presentation.
– Maintain an optimal serving temperature by keeping the pie covered until it’s ready to be served, preventing it from drying out.
– Control portions by serving smaller slices and encourage guests to return for seconds; this method promotes sharing and interaction.
Wine and Beverage Pairing
– Hillbilly Pie pairs well with sweet dessert wines, such as Riesling or Moscato, offering a delightful contrast to the rich filling.
– For non-alcoholic options, serve with homemade lemonade or iced tea for a refreshing touch alongside the sweet pie.
– Should you prefer coffee or tea, a light roast coffee enhances the pie’s sweet notes, while a cup of Earl Grey tea complements the custard’s creaminess.
– Ensure that any beverage paired is served at the right temperature, allowing the drink to balance the pie’s richness rather than overpower it.
– Offering guests a selection of beverages provides variety and encourages conversation around taste experiences.
Storage and Shelf Life
– Proper storage is crucial for maintaining the freshness of Hillbilly Pie. Keep uneaten pie pieces in an airtight container in the refrigerator for up to 3-4 days.
– Store the pie at a consistent temperature, ideally around 40°F to avoid spoilage, ensuring it remains safe to eat.
– Glass or ceramic containers work well for storing the pie, as they hold temperature well and prevent odors from transferring.
– Signs of spoilage include off odors or a change in texture; when in doubt, discard any questionable pieces.
– To reheat, simply pop a slice in the microwave for about 30 seconds, or rewarm in a preheated oven at 350°F for a few minutes.
– Hillbilly Pie can be frozen; wrap slices tightly in plastic wrap and store them in a freezer-safe container for up to 2 months.
Make Ahead Strategies
– To save time, prepare the pie crust a day in advance and store it in the refrigerator to allow the flavors to meld.
– After baking, assemble the pie a couple of hours before serving, ensuring it has time to cool and set properly for optimal texture and taste.
– Assess the impact on quality: certain ingredients, like fresh fruits, should be added just before serving to maintain their vibrant texture.
– For assembly tips, quickly whisk the filling before pouring it into the crust to ensure an even distribution and avoid clumping.
– When reheating, allow time for the pie to return to room temperature before serving to enhance flavor and texture.
– Keep extra toppings, like whipped cream, prepared and ready to serve for an easy finish right before serving.
Scaling Instructions
– Halving the recipe for a smaller gathering is simple; just reduce each ingredient by half for the perfect-sized dessert.
– When doubling or tripling the recipe, ensure you have a large enough pie dish or divide the filling between several smaller dishes.
– Be conscious of equipment adjustments; a larger pie dish may require longer baking times to ensure thorough cooking.
– Monitor timing closely, especially when scaling up, as larger quarts may need additional time in the oven.
– Consider storing any extras in individual portions, allowing for easy serving and reducing waste.
Nutritional Deep Dive
– Hillbilly Pie will generally contain a good balance of carbohydrates and fats, making it a higher-calorie dessert, suitable for a satisfying sweet finish.
– Pay attention to micronutrient content: eggs and milk contribute proteins and essential vitamins, enhancing the nutritional profile compared to more simplistic desserts.
– For those mindful of dietary considerations, maintain portion control; consider serving a small slice alongside fruit to create a more balanced dessert plate.
– Evaluate health benefits: while indulging in sweet treats, homemade versions often have less sugar than store-bought options, allowing for greater customization.
– Emphasize moderation, enjoying a slice during special occasions, promoting a healthier relationship with dessert.
Dietary Adaptations
– For gluten-free options, swap conventional flour for a gluten-free alternative like almond flour or gluten-free all-purpose flour to maintain the pie’s structure.
– For a dairy-free variation, substitute traditional milk and butter with almond milk and coconut oil, ensuring the filling remains rich and flavorful.
– Vegan adaptations can be achieved with plant-based egg substitutes, like flaxseed meal, ensuring that everyone can enjoy this delightful pie.
– Low-carb or keto modifications may entail using almond flour for the crust and sugar substitutes like erythritol to create a lower-carb dessert without sacrificing taste.
– For paleo followers, utilize almond flour for the crust and honey or maple syrup as a natural sweetener, adhering to paleo guidelines.
Troubleshooting Guide
– If the crust is soggy, ensure you’ve blind-baked properly. If needed, further bake it at a higher temperature to allow excess moisture to evaporate.
– Should the filling come out too runny, this usually indicates undercooking. Check your oven temperature; often, it runs cooler than stated.
– If the pie is overbaked, the filling may curdle. Use a kitchen thermometer to keep track of the internal temperature, ensuring it stays around 170°F for a custard pie.
– Having issues with the crust shrinking during baking? Use pie weights during blind baking and pre-chill the crust to help minimize this problem.
– If substitutions were made that altered flavor, balance with additional flavoring—like citrus or vanilla—as needed, to elevate the pie back to deliciousness.
– For ingredient challenges, like missing something, consider adapting what you have. Many custard-style pies can remain delicious with varied ingredients.
Recipe Success Stories
– Community feedback often highlights that the simplicity of this pie is a major draw, making it accessible for bakers of all skill levels.
– Many variations successfully transform the original pie, showcasing personal creativity in the kitchen and inspiring other bakers to try their hand at adaptations.
– Readers have shared their twists, such as a chocolate version or a fruit-filled take, adding their own unique flair to the Hillbilly Pie tradition.
– Successful adaptations can generate excitement, leading to new family favorites—great evidence of how such recipes pass from generation to generation.
Frequently Asked Questions
What is Hillbilly Pie?
Hillbilly Pie, also known as Poor Man’s Pie, is a classic American dessert that features a creamy, custard-like filling baked in a flaky pie crust. It’s known for its simplicity and comforting flavors, making it a staple in many households.
Can I use other types of milk?
Yes! While whole milk is traditionally used, you can substitute with almond milk or coconut milk for a dairy-free version. However, note that this might slightly alter the flavor and creaminess of the pie.
How do I prevent a soggy crust?
Blind baking your crust is essential to prevent sogginess. Make sure to weigh your crust down with pie weights or dried beans to ensure it cooks evenly before adding the filling.
Can I make this pie ahead of time?
Yes! You can prepare Hillbilly Pie ahead of time. It can be left in the refrigerator for up to 3-4 days. Just allow it to cool completely before storing it in an airtight container.
What should I serve with Hillbilly Pie?
This delightful pie pairs well with vanilla ice cream, whipped cream, or even fresh berries for a burst of flavor!
How long can I freeze Hillbilly Pie?
You can freeze Hillbilly Pie for up to 2 months. Be sure to wrap it tightly in plastic wrap and aluminum foil to prevent freezer burn.
What is the best way to reheat this pie?
The best way to reheat Hillbilly Pie is in the oven at 350°F for about 10-15 minutes until warmed through. You can also microwave individual slices for about 30 seconds.
Can I add fruits to the filling?
Absolutely! Consider adding fresh or cooked fruits like peaches or apples to the custard filling before baking for added flavor and nutrition.
How do I know when the pie is done?
Your Hillbilly Pie is done when the filling is set and jiggles slightly in the center. A toothpick inserted into the filling should come out clean.
What can I do with leftover pie?
Leftover pie can be stored in an airtight container in the refrigerator and enjoyed for days. You can also freeze it for later enjoyment!
Additional Resources
– For those interested in exploring more with pie making, check out related recipes like Classic Apple Pie or Chocolate Cream Pie that feature similar techniques and flavors.
– If you’re interested in mastering pie-making techniques, be sure to look at guides on how to make perfect pie crusts or tips for crafting custards.
– Understanding ingredients can deepen your appreciation for baking. Explore in-depth resources about sugar types, flours, and dairy products.
– Equipment recommendations are key for successful baking; consider investing in quality measuring cups, pie dishes, and baking tools for best results.
– Seasonal variations can elevate your dessert game; adapt this pie for different holidays by exploring flavors and garnishes that align with the themed celebrations.
Join the Conversation
– We invite you to share your experience making Hillbilly Pie by posting photos of your creations on social media, using the hashtag #HillbillyPie.
– Engaging with the community not only encourages others to try the recipe but also establishes a sense of camaraderie among fellow food lovers.
– Your photography tips could inspire others in their culinary journey. Share tricks for capturing delicious-looking pie slices or presenting them beautifully.
– We’d love to hear your variations! Did you add a special ingredient? Share your surprises and adaptations so others can benefit from your creativity.
– Join our recipe review section, where you can leave comments and suggestions that enhance the baking experience for all.
The Recipe
Hillbilly Pie
Serves: 8 servings
Prep Time: 15 mins
Cook Time: 40 mins
Total Time: 55 mins
Kitchen Equipment Needed
9-inch pie dish
Mixing bowls
Whisk
Baking weights (optional)
Ingredients
1 pie crust (homemade or store-bought)
1 cup granulated sugar
2 cups milk
3 large eggs
2 teaspoons vanilla extract
1/4 cup melted butter
1/4 teaspoon salt
Directions
Preheat your oven to 350°F (175°C).
Prepare your pie crust in a 9-inch pie dish, blind baking as necessary according to your recipe.
In a mixing bowl, whisk together the sugar, milk, eggs, vanilla, melted butter, and salt until well combined.
Pour the filling into the prepared crust and bake for 35-40 minutes until the center is set and jiggles slightly.
Remove from the oven and allow the pie to cool on a wire rack for at least an hour before serving.
Recipe Notes
This pie can be served warm or chilled, depending on personal preference.
Feel free to experiment with using different extracts or adding spices for a bespoke flavor.
Leftovers can be refrigerated for up to 3 days or frozen for up to 2 months.
Deliciously Easy Crockpot Ravioli Lasagna for Stress-Free Dinners
Crockpot Ravioli Lasagna: A Cozy Italian Delight
⚖️
Difficulty
Easy
⏲️
Prep Time
15 mins
🕒
Cook Time
4 hours
⏱️
Total Time
4 hours 15 mins
🍽️
Servings
6 servings
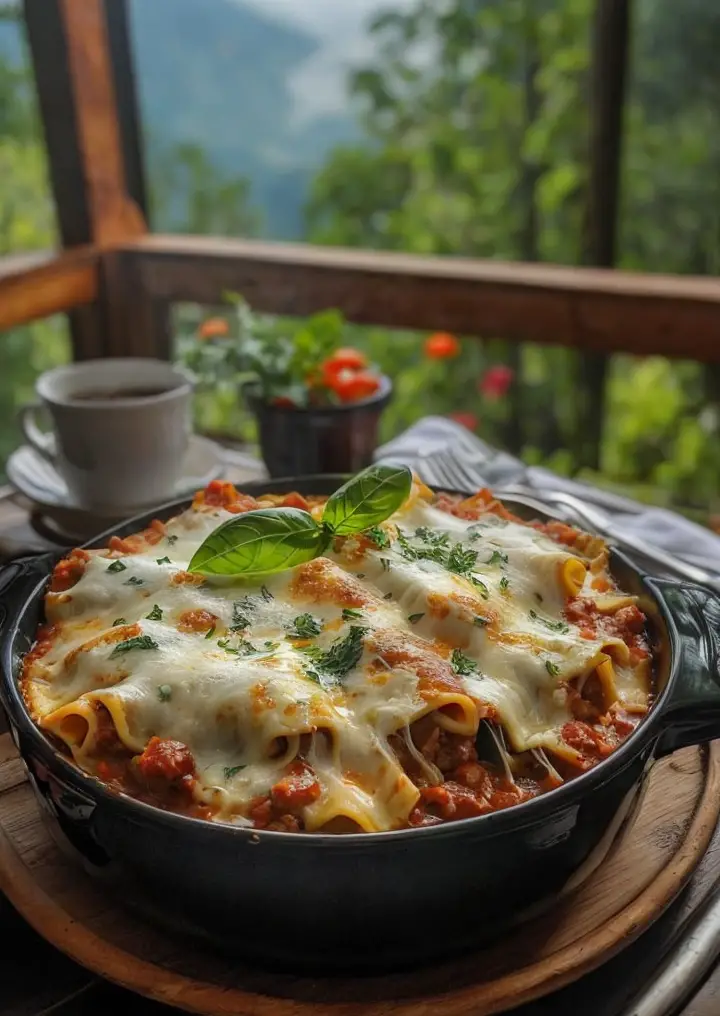
Indulge in the comforting embrace of a classic Italian dish with this Crockpot Ravioli Lasagna. It’s a hearty meal that combines the rich flavors of marinara sauce, creamy ricotta cheese, and tender ravioli, all cooked to perfection in a slow cooker. Each bite is a delightful explosion of flavors that will make you feel like you’re dining in a cozy trattoria in Italy. Perfect for busy weeknights, this lasagna requires minimal effort and still delivers maximum satisfaction.
What makes this dish even more appealing is its simplicity. Layered with convenience, it allows you to enjoy a homemade meal without spending hours in the kitchen. Just throw in the ingredients and let the slow cooker do the magic. As it simmers, your home will be filled with an enticing aroma that will have everyone asking for dinner to be served a little earlier. The combination of cheese with savory sauce and tender pasta provides a delightful experience that warms both the body and soul.
Quick Recipe Highlights
Flavor Profile: This dish features a delicious mix of savory marinara, creamy ricotta, and the mild taste of ravioli, making it a crowd-pleaser.
Texture: The gooey melted cheese pairs perfectly with the tender ravioli and thick sauce, providing a delightful mouthfeel.
Aroma: The combination of garlic, basil, and tomatoes creates a fragrant symphony that fills your kitchen.
Visual Appeal: With its layers of vibrant red tomato sauce and creamy cheese, this lasagna is as pleasing to the eyes as it is to the palate.
Skill Level Needed: This is an easy recipe that anyone can master with minimal cooking experience.
Special Equipment: A standard crockpot is all you need to whip up this amazing dish.
Recipe Overview
Difficulty Level: Easy to prepare, this Crockpot Ravioli Lasagna is ideal for families or individuals who wish to enjoy a delicious homemade meal without complexity.
Category: This meal is great for lunch or dinner, ideal for weeknight meals or casual weekend gatherings.
Cuisine: This dish draws inspiration from traditional Italian cuisine, which often features layers of pasta and cheese.
Cost: It is budget-friendly, with a total cost of under $20 for a filling dish that serves multiple people.
Season: Great all year round but especially comforting during colder months.
Occasion: Perfect for family dinners, potlucks, or informal gatherings with friends.
Why You’ll Love This Recipe
Crockpot Ravioli Lasagna is a delightful blend of taste and texture that satisfies all palates. The melted mozzarella creates a savory crust on top, while the layers of ravioli deliver a chewy complement to the sauce. As the flavors meld together during the cooking process, you experience a depth of taste that is unmatched. Every spoonful brings a warm sense of nostalgia, reminiscent of family gatherings and festive holidays.
The preparation of this meal is incredibly convenient, saving both time and effort. Simply layering the ingredients and setting the crockpot means you can set it and forget it. Whether you’re bustling through a busy week or just want to spend a stress-free evening, this recipe allows for effortless meal planning. You can even prepare your ingredients the night before, making it even more hassle-free.
Nutrition is another significant advantage of this Crockpot Ravioli Lasagna. Filled with protein-rich cheese and nutritious vegetables, it’s a well-rounded meal. You can easily enhance its health benefits by selecting whole-wheat ravioli or adding extra vegetables. The comfort of a cozy lasagna balanced with nutritional value makes this dish an excellent choice for health-conscious eaters.
Socially, this dish shines as it’s easy to share and serve. Planning a gathering? Just double the recipe, and you’ll have enough to feed a crowd. The simple, warming flavors encourage conversation and contribute to a relaxed, friendly atmosphere. It makes moving from the kitchen to the dining table seamless and enjoyable, allowing guests to serve themselves entirely.
Cost-effectiveness is yet another reason to love this recipe. With affordable ingredients that yield numerous servings, it’s perfect for families or for anyone seeking to maintain a budget. This lasagna is not just a meal; it’s an investment in both your time and finances, providing tremendous value.
Historical Background and Cultural Significance
Italian cuisine has a rich history that dates back centuries, with layered pasta dishes being a staple since the Middle Ages. Lasagna evolved from these early creations, becoming synonymous with family meals and gatherings. It represents comfort and loving preparation for many cultures, especially in Italy where it’s believed that the earliest forms were made with sheets of pasta layered with meat and sauce.
The cultural importance of lasagna within Italian families cannot be overstated. It is often reserved for special occasions such as holidays and major celebrations. Families pass down recipes through generations, creating a beautiful tradition of recipes shared around the dinner table while creating memories that last a lifetime.
Over time, lasagna recipes have evolved, integrating local ingredients and personal tastes. The convenience of frozen ravioli has brought about newer versions, like this crockpot variation, which offers the same heartfelt essence without traditional preparation hassle. As the cooking methods changed, families found new ways to enjoy classic flavors, continuing the legacy of comfort food.
Regional variations can be seen throughout Italy, where each area adds its local flavors and ingredients. In some regions, a béchamel sauce layers between the pasta, while in others, substitutions like mushrooms or spinach are added for variation. This flexibility highlights the dish’s cultural importance across different Italian territories.
Ingredient Deep Dive
– Ravioli: Traditionally made from egg pasta, ravioli can be filled with various ingredients including cheeses, meat, or vegetables. These little pockets of flavor provide both convenience and satisfaction in cooking.
– Marinara Sauce: Originating from Naples, marinara is a simple tomato-based sauce flavored with garlic, herbs, and olive oil. It serves as a base for many Italian dishes, and provides a bright, tangy kick to the lasagna.
– Ricotta Cheese: A staple in Italian desserts and savory dishes, ricotta is soft and creamy. Its mild flavor creates a beautiful balance in layered dishes, and it’s packed with protein and calcium, making it a nutritious choice.
– Mozzarella Cheese: Known for its excellent meltability, mozzarella brings a delicious stretchy texture to lasagna. It’s an essential cheese for Italian cuisine, greatly enhancing the overall taste.
Common Mistakes to Avoid
Overfilling the crockpot can lead to uneven cooking and may prevent proper heat circulation. Always leave some space at the top.
Using uncooked ravioli can result in a tough texture. Make sure to use pre-cooked or frozen ravioli to achieve desired softness.
Not layering ingredients correctly can affect the final texture and flavor. Be sure to follow layering instructions for the best results.
Rushing the cook time can lead to undercooked ingredients, especially if you’re tempted to open the lid frequently.
Skipping seasoning can lead to bland flavors. Always taste your sauce before layering it in your dish.
Failing to add enough sauce can dry out our dish. Ensure enough liquid is present to keep everything moist during cooking.
Using low-quality ingredients will yield lower results. Choose good quality cheeses and fresh ingredients for the best flavor.
Not letting the lasagna rest after cooking can lead to a messy serving. Allow it to sit for a few minutes before slicing.
Not adjusting for slow cooker size can be problematic. Each slow cooker may have slight differences in cook times and temperatures, so monitor accordingly.
Assessing doneness through external appearance alone can be misleading. Using a thermometer can provide a more accurate gauge of readiness.
Essential Techniques
To create a perfect Crockpot Ravioli Lasagna, layering is key. Proper layering allows each ingredient to contribute to the overall harmony of flavors. Start with sauce at the base, followed by ravioli, ricotta, and mozzarella. Repeat this pattern until you reach the top. This ensures even distribution of sauce and minimizes the likelihood of burning.
Another essential technique is seasoning. Adequately seasoning your marinara sauce can elevate the entire dish. Use fresh herbs like basil and oregano, along with salt and pepper. Taste your sauce as you go, adjusting the balance until it meets your personal flavor preference.
Pro Tips for Perfect Crockpot Ravioli Lasagna
Use frozen cheese ravioli for convenience; it defrosts and cooks perfectly in the slow cooker.
Opt for a quality marinara to elevate flavor—don’t just settle for any jarred sauce.
Incorporate vegetables like spinach or zucchini for enhanced nutrition and flavor; they meld beautifully with the sauce and cheese.
For a little kick, add red pepper flakes to the sauce or mix directly into the layers.
Allow your lasagna to rest for at least 15 minutes after cooking, providing a better slice and maintaining structural integrity.
Keep some extra cheese to sprinkle on top before cooking for an appealing golden-brown crust.
Experiment with different cheese blends, like provolone or gouda, to create unique flavor profiles.
Monitor the cooking time; if you notice it’s too watery, remove the lid for the last 30 minutes to allow some moisture to evaporate.
Variations and Adaptations
You can adapt this recipe to include different regional variations by swapping out the ravioli fillings. Try mushroom-stuffed ravioli for an earthy flavor, or butternut squash for a touch of sweetness. Alternatively, for an exciting twist, experiment with a pesto sauce layer.
Seasonal adaptations could involve using summer vegetables like zucchini or roasted peppers, which can be layered in for added nutrition and flavor. In colder months, consider adding roasted butternut squash for a comforting winter variation.
For those with dietary restrictions, simple substitutions can be made. A gluten-free ravioli can easily replace traditional pasta, and almond or soy ricotta can make the dish dairy-free.
Flavor variations include adding fresh herbs or spices, such as basil or Italian seasoning, to enhance the overall taste. Harissa or chili flakes can be added for a spicy kick.
Texture modifications can be achieved by adding breadcrumbs on top of the cheese layer, providing a satisfying crunch. For a creamier texture, mix in cream cheese or sour cream into the ricotta mixture.
Presentation alternatives could include serving the lasagna in individual ramekins, which not only looks appealing but also enhances portion control at gatherings.
Serving and Presentation Guide
Plating your Crockpot Ravioli Lasagna can be both fun and artful. Serve it directly from the crockpot for a rustic feel, but for a more polished presentation, consider transferring slices to a serving dish. Use a sharp knife to cut clean lines; a spatula can help lift pieces without disturbing the layers.
Garnish with fresh herbs such as basil or parsley for a pop of color and freshness. Sprinkling freshly grated parmesan will add elegance and a delicious finishing touch.
Traditional accompaniments like garlic bread or a simple green salad pair beautifully with lasagna, enhancing the meal experience.
Modern serving suggestions might include offering a side of roasted vegetables, boosting the nutritional profile while still keeping with the comforting theme of the meal.
Remember temperature considerations: lasagna should be served warm but allow it to sit for a bit after cooking to maintain structural integrity when being served.
Portion control tips involve cutting into smaller sections for ease of serving, especially if you have a crowd. This ensures everyone gets a taste while allowing for easy second servings.
Wine and Beverage Pairing
Pair your Crockpot Ravioli Lasagna with a bold red wine like Chianti, which complements the tomato sauce beautifully. A medium-bodied Merlot also works well, providing a smooth balance to the rich flavors.
For non-alcoholic options, sparkling water with a splash of lemon or a fresh iced tea would refresh the palate nicely.
If you enjoy coffee or tea, consider a light herbal tea or a cappuccino served after your meal, which can aid digestion and enhance the comforting ambiance.
Temperature considerations for wine involve serving red wine slightly below room temperature to bring out its best flavors. Ensure that non-alcoholic drinks are chilled for optimal enjoyment.
Serving suggestions can include decanting the wine to allow it to breathe, enriching the tasting experience.
Storage and Shelf Life
For proper storage, keep any leftover Crockpot Ravioli Lasagna in airtight containers in the refrigerator. It will typically stay fresh for up to 3-4 days.
Temperature requirements dictate that you should allow the dish to cool completely before refrigerating, to avoid condensation that can affect quality.
For optimal organization, consider glass containers which allow you to see the food inside and plan meals accordingly.
Signs of spoilage include an off smell, mold, or a change in color; when in doubt, throw it out for safety.
Reheating instructions suggest using the microwave or an oven to gently warm up single servings, while a larger portion can be reheated in the oven covered with foil to prevent drying out.
If freezing is necessary, ensure the lasagna is thoroughly cooled. Wrap it in plastic wrap followed by aluminum foil for best preservation, and it can last up to three months frozen.
Make Ahead Strategies
For those busy days, you can prepare the ingredients in advance. Chop vegetables and prepare the sauce a day or even a week before, which will reduce overall meal prep time.
Storage between steps can include storing layers in separate containers in the fridge; simply assemble when ready to cook.
Quality should not be affected, but keeping ingredients separate can ensure fresher flavors, especially for herbs and vegetables.
When assembling, prepare the layers up to the night before and refrigerate. Just make sure to give an extra hour on the cooking time, as it will be starting cold.
During reheating, be mindful to check for doneness since ingredients may retain cold spots if not evenly layered.
Fresh elements like basil or a sprinkle of parmesan should be added just before serving to maintain their texture and flavor.
Scaling Instructions
If you need to halve the recipe, adjust the ingredient quantities accordingly, ensuring that each layer is proportional. Be mindful of the cook time as well; it may decrease.
Doubling or tripling the recipe is straightforward, but ensure that your slow cooker has ample capacity. If needed, divide the ingredients between two crockpots.
Equipment adjustments may include considering a larger slow cooker or cooking for a longer duration if you add a significant volume of ingredients.
Timing modifications may be necessary; monitor the dish closely as larger amounts can impact cooking speed.
When scaling up, additional storage considerations are essential; ensure ample containers are available for leftovers after serving.
Nutritional Deep Dive
This dish offers a macro breakdown that provides a balanced intake of carbohydrates from the ravioli, protein from the cheese, and healthy fats. It’s essential for maintaining energy levels throughout the day.
A micronutrient analysis reveals the benefits of vitamin A from the tomatoes and calcium from the cheese, contributing to bone health.
Health benefits include fiber from the potential vegetable additions, which enhances digestive health.
Dietary considerations should include portion sizes, as larger servings may lead to unintended calorie intake.
A good practice is to measure servings, enabling effective control over diet management while enjoying decadent comfort food.
Weight management tips highlight the importance of moderating portion sizes while incorporating this lasagna into a balanced diet that includes various food groups.
Dietary Adaptations
For gluten-free variations, consider using gluten-free ravioli or substituting with polenta layers for a similar structure.
Dairy-free options may involve substituting ricotta and mozzarella with plant-based alternatives such as cashew cheese or almond-based products.
For vegans, incorporating tofu or lentils as a ricotta substitute allows for maintaining protein levels while creating a satisfying texture.
Individuals on a low-carb diet can substitute traditional pasta with zucchini noodles, or use a cauliflower-based base to still enjoy the flavors without the extra carbs.
Keto followers can benefit from the high-fat, low-carb alternatives, simply by adjusting the ingredients to align with their dietary restrictions.
Paleo enthusiasts can replace grains with vegetable or meat layers, ensuring a filling meal without sacrificing dietary goals.
Low-FODMAP modifications may include excluding certain vegetables that could cause flare-ups. Choose safe options like carrots and bell peppers for your layers.
Troubleshooting Guide
If you encounter texture issues, consider checking the moisture levels. If it appears too wet, leave the lid off during the last hour of cooking to allow evaporation.
Flavor balance may need adjusting if the dish tastes bland. Always taste your sauce before layering and add salt, herbs, or spices as needed.
Temperature problems can arise if the crockpot temperature is too low; check settings and ensure it’s functioning properly.
Equipment challenges might involve crockpot size; if the recipe appears too big, consider cooking in batches or splitting it into two portions.
Ingredient substitutions can affect the outcome. Make sure to balance flavors by adjusting seasonings when replacing main ingredients.
If timing concerns arise, monitor the dish closely towards the end; extended cooking can lead to overly soft ravioli or burnt layers.
Recipe Success Stories
Community feedback on this Crockpot Ravioli Lasagna has been overwhelmingly positive, with many praising its simplicity and flavor. Families have shared how this dish has become a staple for their gatherings, often modifying the original recipe to include their favorite ingredients.
Variation successes highlight creativity with the dish. Readers have reported using different types of cheese or introducing unique ingredients like spicy sausage, which adds a fun twist to a traditional meal.
Adaptation stories often focus on busy parents who love the ease of preparing this on chaotic evenings. The appealing flavor has made it a win-win in homes across diverse backgrounds.
Photography tips from community members suggest showcasing layers to emphasize the melting cheese and vibrant colors. This makes the lasagna look as enticing as it tastes, drawing everyone in.
Each shared experience exemplifies this dish’s versatility, allowing families and friends to come together for joyous meals while sharing cherished moments.
Frequently Asked Questions
Can I use fresh ravioli instead of frozen?
While fresh ravioli can be used, ensure they are sufficiently cooked, as they typically require less time compared to frozen varieties. You may need to reduce the cook time slightly to avoid overcooking them.
Can I make this dish ahead of time?
Absolutely! You can prepare all the ingredients in advance and layer them in the slow cooker when ready to cook. Just remember to refrigerate any prepped ingredients overnight.
How can I alter this recipe for a vegetarian diet?
Simply replace the meat-stuffed ravioli with vegetable versions, or add layers of sautéed vegetables like spinach, mushrooms, or bell peppers for added nutrition without meat.
Can I freeze leftovers?
Yes! Allow the lasagna to cool completely before wrapping it tightly for freezing. It can be stored for up to three months. Just thaw in the fridge before reheating.
How do I prevent the ravioli from becoming mushy?
To prevent mushy ravioli, ensure you use cooked or frozen ravioli and consider reducing the amount of sauce slightly to prevent excess moisture during cooking.
What is the best way to reheat leftover lasagna?
The best way is to reheat individual portions in the oven covered with foil. This prevents drying and ensures even reheating. Microwaving can work, but may not preserve the texture as well.
What is the ideal temperature to serve lasagna?
Lasagna is best served warm, around 160-165°F. Let it rest for at least 15 minutes after cooking to set before slicing.
Can this recipe be doubled?
Yes! If doubling, use a larger crockpot or two separate ones. You may need to adjust cooking times slightly based on your units’ size and brand.
Can I add more cheese to the recipe?
Absolutely! Feel free to adjust cheese quantities to your preference. Just ensure that more moisture isn’t added inadvertently, which can alter the consistency.
How do I add more flavor to the marinara?
You can enhance marinara by adding diced onions, garlic, or herbs like basil and oregano during cooking; this enriches the overall flavor of the dish.
Is it necessary to layer the ingredients in a specific order?
Layering starting with sauce at the bottom is beneficial to ensure the ravioli doesn’t stick to the pot. Following the layering pattern helps achieve even cooking and flavor distribution.
Additional Resources
Explore additional related recipes such as classic Meat Lasagna or Spinach and Ricotta Cannelloni for more Italian-inspired meals.
Technique guides for slow cooking can help enhance your culinary skill-set, especially if you’re new to this convenient cooking method.
Ingredient information is available for those wanting to delve deeper into nutritional values or culinary history behind classic Italian ingredients.
Equipment recommendations, such as the best crockpot models, can provide insight into choosing the right tools for your cooking adventures.
Seasonal variations can inspire unique adaptations using ingredients that cycle through availability, creating excitement throughout the year in your cooking.
Join the Conversation
Share your cooking adventures on social media by tagging us! Include tips, variations, or your favorite drink pairing to inspire others in the community.
Photography tips can enhance your food photography game—highlight the layers, the colors, or even your plating style to showcase your dish.
Engage with community feedback about your experiences making the Crockpot Ravioli Lasagna, and keep the dialogue going regarding ingredient modifications you’ve tried or love.
Reader reviews play an important role; let us know how yours turned out, or any cooking tips you would like to share based on your experience.
Sharing recipe variations enriches our community! Don’t hesitate to discuss how you’ve adapted the dish to suit your tastes.
The Recipe
Crockpot Ravioli Lasagna
Serves: 6 servings
Prep Time: 15 mins
Cook Time: 4 hours
Total Time: 4 hours 15 mins
Kitchen Equipment Needed
Crockpot
Measuring cups and spoons
Cutting board
Knife
Spatula
Ingredients
1 package (24 oz) frozen cheese ravioli
2 cups marinara sauce
1 cup ricotta cheese
1 cup shredded mozzarella cheese
1/2 cup grated Parmesan cheese
1 egg
1 teaspoon Italian seasoning
Salt and pepper to taste
Fresh basil for garnish (optional)
Directions
In a bowl, mix ricotta cheese, egg, Italian seasoning, salt, and pepper until combined.
Spread a layer of marinara sauce on the bottom of the crockpot.
Layer 1/3 of the frozen ravioli on top of the sauce.
Add 1/2 of the ricotta mixture, then sprinkle 1/3 of the mozzarella cheese on top.
Repeat layers: sauce, ravioli, ricotta mix, and mozzarella cheese until all ingredients are used, finishing with a layer of sauce and mozzarella on top.
Cover and cook on low for 4 hours or until the ravioli are cooked through and the cheese is bubbly.
Let rest for 10-15 minutes before slicing, and garnish with fresh basil if desired.
Recipe Notes
This recipe can be doubled or modified according to your preferences.
Use your favorite marinara sauce for best taste.
Feel free to add vegetables between layers for extra nutrition.
Leftovers will save well in the refrigerator for 3-4 days.
Decadent Red Velvet Oreo Cheesecake with Creamy Vanilla Swirls Recipe
Decadent Red Velvet Oreo Cheesecake with Creamy Vanilla Swirls: A Heavenly Indulgence
⚖️
Difficulty
Medium
⏲️
Prep Time
30 mins
🕒
Cook Time
50 mins
⏱️
Total Time
80 mins
🍽️
Servings
10 servings
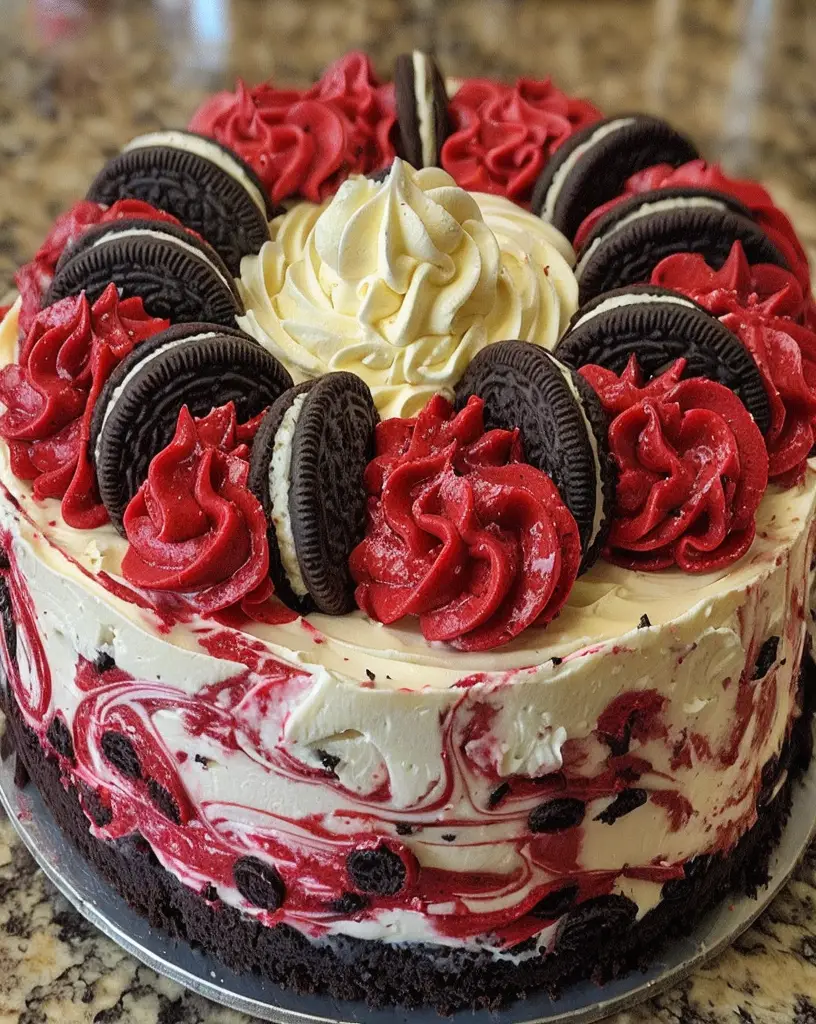
Indulge in the rich, velvety flavors of our Decadent Red Velvet Oreo Cheesecake, perfectly swirled with creamy vanilla goodness. This luxurious dessert harmoniously combines the classic notes of red velvet cake with a luscious Oreo crust, creating an irresistible treat that is sure to impress both family and friends. Each bite offers a delightful experience, marrying the tanginess of cream cheese with the subtle sweetness of red velvet, all while the Oreo crust adds a satisfying crunch.
Not only is this cheesecake a feast for the taste buds, but its striking appearance also makes it a stunning centerpiece for any occasion. The vibrant red color, adorned with fluffy vanilla swirls, is enough to prompt awe from your guests. Whether you serve it at a birthday party, a holiday gathering, or as a surprise dessert for a loved one, this red velvet Oreo cheesecake will leave everyone asking for seconds. Plus, the combination of flavors creates an exquisite balance that will have you planning your next baking session before you even finish your slice!
Quick Recipe Highlights
Flavor Profile: A delicious clash of tangy cream cheese and sweet red velvet, highlighted by rich Oreo cookie flavor.
Texture: A creamy, velvety consistency from the cheesecake base pairs beautifully with the crunch of the Oreo crust.
Aroma: The comforting aroma of baked cake accompanied by sweet vanilla notes wafts through your kitchen as this cheesecake bakes.
Visual Appeal: Striking red swirls dancing atop a stark white cheesecake provide a stunning presentation for any dessert table.
Skill Level Needed: Intermediate skill level is preferred; this recipe requires attention to detail and techniques like swirling and layering.
Special Equipment: A springform pan is key for achieving that perfect cheesecake structure, along with an electric mixer for a smooth batter.
Recipe Overview
Difficulty Level: This Decadent Red Velvet Oreo Cheesecake is marked as medium difficulty due to the need for precise measurements and baking techniques, but it is manageable for anyone with basic baking skills.
Category: This dessert falls under the category of sweet treats, particularly as a cheesecake, and is perfect for special occasions.
Cuisine: The recipe draws inspiration from American dessert traditions, marrying classic red velvet cake with the popular flavor of Oreos.
Cost: The approximate cost to prepare this cheesecake is moderate, considering premium ingredients like fresh cream cheese and quality cocoa powder.
Season: This cheesecake is an excellent choice for celebrations year-round but is especially popular during holidays like Valentine’s Day and Christmas.
Occasion: Ideal for birthday parties, holiday gatherings, or as a special dessert for a romantic dinner, it fits a variety of celebratory events.
Why You’ll Love This Recipe
This Decadent Red Velvet Oreo Cheesecake is more than just a visual delight; it’s a treat that tantalizes the taste buds with its incredible blend of flavors and textures. Each mouthful offers a creamy sensation balanced by crusty cookie layers, making it a comforting indulgence that pairs perfectly with fresh whipped cream or a drizzle of chocolate sauce. The red velvet brings a nostalgic warmth, reminiscent of family celebrations and special moments, while the Oreo adds a familiar twist that adults and children alike adore.
Convenience is another great benefit of this recipe. While it does require a bit of time, the preparation is straightforward, making it a fitting choice for both novice and experienced bakers. The cheesecake can be made in advance, allowing you to focus on other preparations for your event without the stress of last-minute baking. It also holds up beautifully in the fridge, ensuring flavors deepen after resting overnight.
In terms of nutritional advantages, the ingredients for this cheesecake provide a balance of rich flavors while still incorporating some traditional favorites. Cream cheese offers protein and calcium, while the red velvet cake base keeps it lighter than most chocolate cheesecakes. The use of Oreos, while indulgent, is balanced with the cheesecake’s freshness.
Social gatherings become even more enjoyable with this charming dessert on the table. Whether you’re celebrating a milestone or just hosting a casual get-together, serving this cheesecake sparks conversations and encourages sharing lovely experiences, complemented by laughter and joy around the dining table. Your friends and family will relish each bite and remember the special moments tied to it.
Finally, considering its accessibility and reasonably priced ingredients, this recipe proves cost-effective yet lavishly delightful. Most of the ingredients can be found at your local grocery store, and since this cheesecake serves multiple people, you can please a crowd without breaking the bank.
Historical Background and Cultural Significance
The origins of red velvet cake can be traced back to the early 20th century in the United States, particularly in the southern states, where it became a popular dessert at gatherings and holidays. This cake gained its name from its alluring red hue, especially emphasized by the use of cocoa powder and buttermilk, which caused a chemical reaction that produced its signature color. Over time, red velvet became an American classic, often associated with love and celebration.
In American culture, the dessert has evolved significantly over the years. The addition of cream cheese frosting elevated the flavor profile and made it a staple at weddings and special occasions. The dessert’s iconic appeal leads to vibrant interactions among friends and family, reinforcing bonds through shared experiences. Pairing it with Oreos introduces a modern twist, showing how traditional cuisines can adapt and transform in contemporary baking.
As cheesecake popularity rose in the late 20th century, combining the two beloved desserts seemed like a natural evolution. Bakeries across the country began to feature red velvet cheesecakes, each adopting unique interpretations, which spurred a wave of creativity in culinary approaches. This recipe, with its rich flavor combinations and stunning presentation, captures the spirit of both desserts, making it a beloved treat for many.
Regional variations of red velvet cheesecake have emerged, with some areas opting to introduce additional ingredients like nuts or chocolate chips for texture. Yet, the core idea remains the same: a scrumptious celebration of flavor and color that resonates with festive gatherings and joyous moments.
Ingredient Deep Dive
Red Velvet Cake Base: The red velvet cake base has a rich history tied to American baking traditions. Initially, it was made using cocoa powder and buttermilk that reacted with vinegar to produce its characteristic red hue. This cake not only symbolizes love and warmth but is also a festive staple in many households. Nutritionally, this base provides carbohydrates and a slight boost of iron. When selecting ingredients, opt for high-quality cocoa and fresh buttermilk for the best outcome. Store it in a cool, dark place to maintain its freshness, and if you need a substitute, regular milk or even a vanilla-flavored yogurt can work well.
Oreo Cookies: Oreos have been a beloved treat since their introduction in the early 20th century. Their sandwich-style design – consisting of two chocolate cookies with a sweet filling – makes them a versatile addition to many desserts. Nutritionally, Oreos provide a quick source of energy but should be consumed in moderation. When selecting Oreos, check for freshness and avoid those with broken packaging. If unavailable, other chocolate sandwich cookies can serve as alternatives, and they can be stored in an airtight container to retain their crunchiness.
Cream Cheese: Cream cheese is the star of the cheesecake world, with its smooth and creamy texture. This ingredient spans back to the 19th century and has since become iconic in American desserts. Nutritionally, it provides protein and calcium, but it can be high in fat, so moderation is key. When selecting cream cheese, choose full-fat for the richness required in baking. For storage, keep it in the refrigerator, and if you’re looking to reduce fat, low-fat cream cheese options are available.
Common Mistakes to Avoid
Overmixing the batter: This can lead to a dense cheesecake. Mix just until ingredients are combined to retain that creamy texture.
Using cold ingredients: Cold cream cheese can create lumps. Allow your cream cheese and eggs to sit out until they are at room temperature before mixing.
Skipping the water bath: Not using a water bath while baking can result in cracks. A water bath helps evenly distribute heat and prevents excessive drying.
Not chilling the cheesecake adequately: Failing to chill the cheesecake for at least four hours can result in a soft texture. For optimal results, let it sit overnight.
Baking too long: Overbaking can dry out your cheesecake. It should still jiggle slightly in the center when removed from the oven.
Not allowing it to cool: Removing hot cheesecake directly from the oven can cause cracks. Allow it to cool gradually before refrigerating.
Using expired ingredients: Always check the expiry dates on cream cheese and other perishables to avoid off-flavors.
Using a damaged springform pan: Ensure your springform pan is in good condition to prevent leakage which can ruin the cheesecake texture.
Not prepping the crust correctly: Make sure to properly crush and measure Oreos for even distribution and binding properties.
Forgetting to run a knife along the edge: This step helps release the cheesecake from the pan, preventing it from sticking.
Essential Techniques
Making a Water Bath: Using a water bath is important as it helps regulate the temperature surrounding the cheesecake, resulting in a creamy texture and preventing cracks. To master this technique, wrap the bottom of your springform pan with aluminum foil, and place it inside a larger baking dish filled with hot water halfway up the sides. Be cautious of leaks, and avoid boiling water, which could result in a sudden temperature shock.
Swirling Cream Cheese: Creating beautiful swirls in your cheesecake adds visual appeal. To achieve this effect, take a toothpick or skewer and gently mix in the cream cheese mixture to create marbled patterns. Avoid excessive swirling, which can mix the colors too much. Visual cues to success include distinct patterns and defined areas of red and cream that enhance presentation.
Pro Tips for Perfect Decadent Red Velvet Oreo Cheesecake
1. For a smoother finish, make sure to sift your cocoa powder before mixing to avoid lumps.
2. Use a stand mixer to achieve a perfectly blended cheesecake batter without overmixing.
3. Refrigerate your ingredients beforehand for easier mixing and a more cohesive batter.
Heavenly Banana Caramel Cake Recipe for Irresistible Dessert Cravings
Heavenly Banana Caramel Cake Recipe: Indulgence in Every Bite
⚖️
Difficulty
Medium
⏲️
Prep Time
20 mins
🕒
Cook Time
35 mins
⏱️
Total Time
55 mins
🍽️
Servings
8 servings
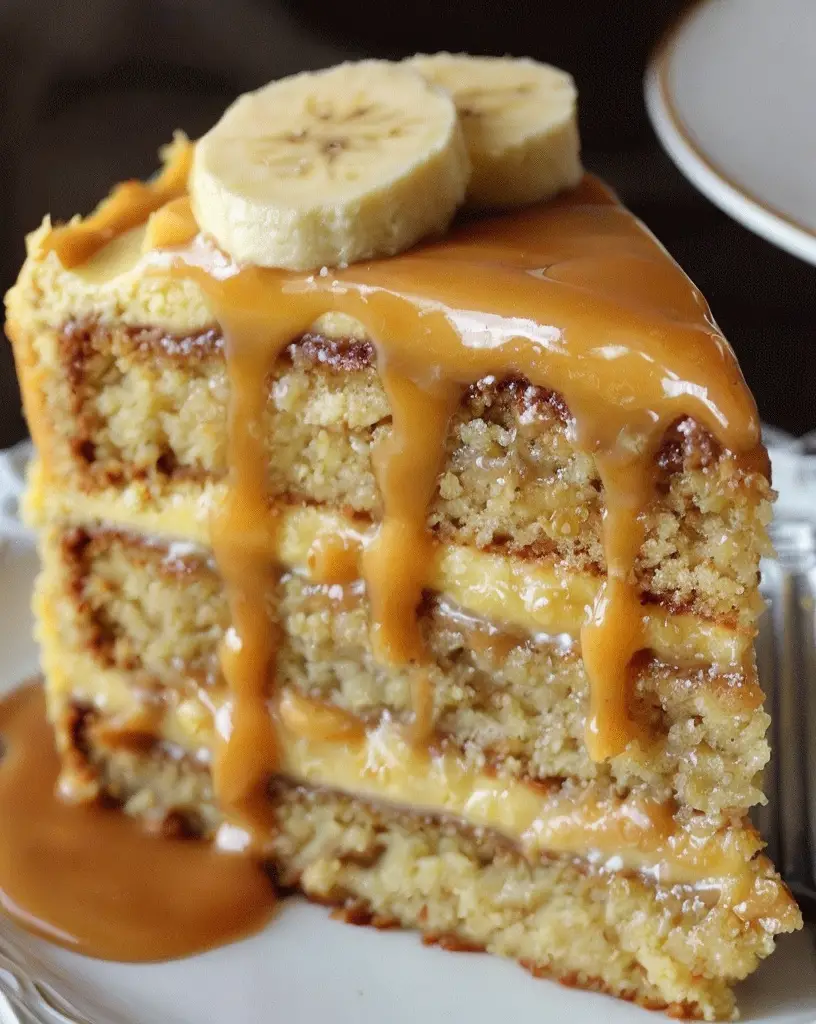
The Heavenly Banana Caramel Cake is a delightful indulgence that embraces the sweetness of ripe bananas and the rich depth of caramel, creating a dessert that speaks to both the heart and the palate. This cake is perfect for any occasion, whether it’s a family gathering, a birthday celebration, or just to brighten up your day. Each bite offers a luscious blend of flavors, making it not just a dessert but a memorable experience.
Imagine the warm, moist texture of the cake melting in your mouth, contrasted with a smooth layer of caramel draping over the top, crowned with banana slices for the finishing touch. With every forkful, you’ll find the flavors harmonizing beautifully, making the Heavenly Banana Caramel Cake a true showstopper on any dessert table. The warm aroma of baking bananas mixed with caramel fills your kitchen, inviting guests to indulge in this sweet treat.
Quick Recipe Highlights
Flavor Profile: This cake features the sweet, comforting flavor of banana alongside the rich, buttery taste of caramel, creating a delightful contrast and balance.
Texture: Enjoy the moist, fluffy texture of the cake paired with a smooth, glossy caramel glaze that adds richness and depth.
Aroma: The luscious aroma of bananas mingled with the scent of caramel creates a warm and inviting atmosphere as it bakes.
Visual Appeal: The soft golden hue of the cake and the glossy caramel drizzle make it visually stunning, fashioned for any celebratory gathering.
Skill Level Needed: This recipe is great for intermediate bakers, requiring some basic skills but mostly straightforward steps to follow.
Special Equipment: You’ll need standard baking tools, including mixing bowls, measuring cups, a cake pan, and a mixer.
Recipe Overview
Difficulty Level: This Heavenly Banana Caramel Cake is categorized as medium difficulty, making it suitable for those who are comfortable in the kitchen but not overly experienced.
Category: This cake falls into the dessert category, perfect for satisfying your sweet tooth after a meal or as a special treat for guests.
Cuisine: Drawing inspiration from classic American desserts, this cake harmonizes traditional flavors with a twist of creativity through its caramel addition.
Cost: The recipe is budget-friendly, utilizing simple ingredients that are typically inexpensive and easily found in most grocery stores.
Season: While delicious year-round, this cake shines in late summer and autumn when bananas are plentiful and desserts are often desired during holidays.
Occasion: Great for birthdays, potlucks, or any festive occasion, this cake is sure to please both children and adults alike.
Why You’ll Love This Recipe
The Heavenly Banana Caramel Cake brings together taste and texture in a way that is simply irresistible. The banana offers natural sweetness that beautifully complements the rich, velvety caramel. Each slice boasts a texture that is fluffy yet moist, making it a delight for the taste buds. The contrast builds excitement with every bite, ensuring no one can have just one piece.
Convenience plays a huge role in this recipe’s charm. With straightforward ingredients and a simple method that requires minimal prep time, you can whip up this gorgeous cake without breaking a sweat. Once assembled, the cake bakes while you enjoy your time with friends and family, making it the ideal dessert for gatherings.
Beyond amazing flavors, this cake incorporates nutritional benefits from bananas, including potassium and vitamin C, which contribute to overall health. While indulgent, the use of whole fruit adds a comforting element that makes you feel good about your dessert choice.
Sharing this cake with friends or at gatherings invites social interaction that is filled with praise and compliments. It creates an atmosphere of joy, as everyone will want to share their fondness for this unique dessert. It’s perfect for sparking conversations around the dining table.
Additionally, this recipe is cost-effective. The primary ingredients are staples that are usually on hand or can be easily purchased without overspending, making it accessible for everyone. This timeless dessert won’t strain your budget, ensuring that you can treat yourself and others without guilt.
Historical Background and Cultural Significance
The origin of the banana cake dates back to the early 20th century when mashed bananas were first introduced into the batter. This innovative technique turned a simple, everyday fruit into a delightful culinary component that changed the dessert landscape. The evolution of banana desserts, particularly cakes, reflects a focus on utilizing ingredients that might otherwise go to waste.
Culturally, banana cake has taken root in many American households, often becoming a staple for family gatherings and celebrations. The use of caramel as a topping elevates the classic recipe, creating a richer dessert that resonates with many people seeking comfort food.
Over the years, this recipe has seen numerous adaptations, with different fruits and flavors added in different cultures. Each region has developed its unique variations, ranging from chocolate banana combinations to nutty add-ins, showcasing the versatility of this beloved cake.
Regional variations are abundant, with some cultures using other fruits alongside bananas or layers of cream cheese frosting instead of caramel. This highlights how an ingredient as simple as a banana can be a canvas for creative exploration within baking traditions.
Ingredient Deep Dive
Bananas: Bananas have deep cultural significance in many tropical regions where they are a staple fruit, representing abundance. Nutritionally, they are an excellent source of potassium, precision carbohydrates, and dietary fiber. When selecting bananas, look for ones just starting to go brown for optimal sweetness. Store unripe bananas at room temperature and transfer ripe bananas to the refrigerator to prolong freshness. In this recipe, they can be substituted with applesauce for a lower-calorie option or other ripe fruits if you’re feeling adventurous.
Caramel: Caramel has a rich history that dates back to the 17th century when it was first created in Spain. Caramel adds a luxurious touch to desserts due to its sweet and slightly bitter flavor, balancing the overall profile. Look for high-quality caramel sauce that isn’t overly processed. It’s best stored in an airtight container in the refrigerator. If you’d like to substitute caramel, you can use chocolate ganache or fruit preserves for a different flavor combination.
Common Mistakes to Avoid
Using underripe bananas: Underripe bananas won’t provide the same flavor and sweetness required for the cake, so choose well-ripened fruit.
Overmixing the batter: Mixing too much can result in a dense cake; stir until just combined for a light texture.
Not measuring ingredients correctly: For baking, precision is key; use weight measurements where possible for best results.
Skipping the cooling step: Allow the cake to cool completely before icing to prevent the caramel from melting off and make it easier to work with.
Cooking too long: Overbaking can dry out the cake; check for doneness a few minutes before the cook time is up.
Using low-quality caramel: Low-quality ingredients can affect flavor; use homemade or premium store-bought caramel for the best taste.
Insufficient greasing of the pan: Properly grease your pan to avoid sticking, which can compromise the cake’s presentation.
Ignoring ingredient temperature: Using cold eggs or butter can affect the cake’s texture; let these ingredients come to room temperature before starting.
Underestimating cooling time: If the cake isn’t cool enough before icing, it can lead to melting caramel; patience pays off.
Not following the recipe: Baking requires accuracy; deviations can lead to unexpected results, so be sure to follow the recipe closely.
Essential Techniques
Mixing Batter: Mixing the batter correctly is crucial to achieving a light and fluffy cake. Use a folding technique when adding dry ingredients to wet to maintain air pockets that help the cake rise. Visual cues for success include a smooth batter without lumps.
Preparing Caramel: Making your own caramel can be daunting but is rewarding. Cook sugar slowly over medium heat to avoid burning, and stir constantly until golden brown. The caramel is ready when it has a deep amber color and a fragrant aroma.
Pro Tips for Perfect Heavenly Banana Caramel Cake
Always use ripe bananas for the best sweetness; they should be speckled with brown spots.
Consider making your own caramel sauce for a more authentic taste; it’s easier than you might think.
Be mindful of your oven temperature; using an oven thermometer can help maintain consistent baking conditions.
To add more flavor, consider mixing in spices like cinnamon or nutmeg to the batter.
When serving the cake, warm it slightly in the microwave for a cozy dessert experience.
Use a serrated knife for cutting the cake to ensure clean and even slices.
Enhance presentation by garnishing with fresh banana slices or a dusting of powdered sugar.
Adapt the recipe by using whole wheat flour for a healthier option that also adds a nutty flavor.
Variations and Adaptations
Regional variations of banana caramel cake can include additional flavors, such as the addition of chocolate chips or nuts for a textural contrast that amplifies the dessert.
Seasonal adaptations might involve leveraging other fruits as a topping during their peak season to elevate the flavor and visual appeal of the cake.
Those with dietary restrictions might explore vegan and gluten-free alternatives using non-dairy milks and flours to still enjoy the cake without compromising their health goals.
Experimenting with flavor variations could include adding a splash of rum or bourbon to intensify the caramel flavor, making it an adult-oriented dessert.
Texture modifications could come from substituting butter with applesauce to create a lighter cake without sacrificing moisture.
Presentation alternatives might entail stacking the cake and serving it in layers for a tiered effect, perfect for special occasions or parties.
Serving and Presentation Guide
Plating techniques can enhance the aesthetic appeal significantly; consider slicing the cake at an angle to showcase its beautiful layers and drizzle a bit of caramel sauce around the plate.
Modern serving suggestions may include pairing the cake with a scoop of vanilla ice cream or a dollop of whipped cream for a delightful contrast in texture.
Temperature considerations are vital; serve the cake at room temperature for optimal flavor, or warm it slightly for a more indulgent dessert experience.
Portion control can be managed by pre-slicing the cake into uniform pieces to keep servings uniform, making it easier for guests to enjoy without excessive waste.
Wine and Beverage Pairing
For wine pairings, a sweet dessert wine, such as a late harvest Riesling or Moscato, complements the cake’s sweetness and fruity elements beautifully.
If you’re looking for non-alcoholic alternatives, consider pairing the cake with chai tea or an iced herbal tea to match the comforting flavors of banana and caramel.
Coffee lovers might enjoy a bold cup of coffee with this dessert, as the rich flavor of coffee balances the sweet notes of the cake, making it a satisfying treat.
Storage and Shelf Life
Store leftover cake in an airtight container at room temperature for up to three days for optimal freshness. For longer storage, refrigerate, but be aware that this can alter the cake’s texture slightly.
The signs of spoilage include off-odors or visible mold; always check before consuming leftovers. Proper storage is key to enjoying this delicious treat for days to come.
If you want to freeze the cake, slice it first and wrap individual portions in plastic wrap, then in aluminum foil, and freeze for up to three months.
Make Ahead Strategies
Prep timeline is key; you can bake the cake a day in advance and keep it covered in the fridge. This also enhances the flavors as they meld together overnight.
During storage between steps, cool fully before icing; this prevents melting and helps the cake maintain its shape and presentation.
Assess quality impact against the fresh-baked version. Generally, cakes last well; however, fresh cream toppings should be applied just before serving.
Scaling Instructions
To halve the recipe, maintain the proportions of cooking times and methods, as small adjustments might not substantially affect the quality of the cake.
When doubling or tripling, ensure you have a larger mixing bowl and sufficient baking dishes; monitor bake times as they may need adjusting depending on oven capacity.
Timing modifications are essential; larger batter volumes may require longer baking times, check for doneness with a toothpick during the last few minutes of baking.
Nutritional Deep Dive
The macro breakdown of this cake provides a satisfying balance of carbohydrates, some protein from eggs and dairy, and fats primarily from butter. It’s rich but can be enjoyed in moderation.
Nutritional analysis shows that bananas contribute significant potassium, fiber, and vitamins, making this treat more enjoyable as a source of energy and nutrients compared to other desserts.
Dietary Adaptations
For a gluten-free option, substitute wheat flour with almond or coconut flour for a different twist.
Dairy-free adaptations could see the use of plant-based milks and oils, ensuring that the decadent taste remains while catering to lactose intolerant eaters.
Providing a vegan adaptation is easy through the use of flax seed meal or chia seeds as replacements for eggs while still maintaining moisture and richness.
Troubleshooting Guide
If your cake is too dense, you may have overmixed; use gentle folding techniques for the batter to maintain its airy texture.
Flavor balance can be tweaked by adjusting sugar levels, especially if the bananas were particularly sweet; feel free to experiment next time.
Equipment challenges such as incorrect baking dish size can affect rise; always follow recommended pan sizes for best results.
Recipe Success Stories
Many readers rave about the cake’s moist texture and inviting flavors, often sharing photos of their successful bakes on social media.
Adaptation stories demonstrate how this cake can be modified for various festivities, such as holiday gatherings or birthday parties, and still leave a lasting impression.
Frequently Asked Questions
Can I freeze the cake? Yes, slice it and wrap it properly before freezing. It keeps well for about three months.
Can I make this cake ahead of time? Absolutely! You can bake it a day in advance; it will taste even better the next day.
Can I substitute brown sugar for granulated sugar? Yes, brown sugar adds more moisture and richness, enhancing the caramel flavor.
What should I serve with this cake? Consider pairing it with vanilla ice cream or whipped cream for a delicious contrast.
Can I use other fruits? Yes, feel free to experiment with ripe peaches or berries, but ensure they have similar moisture content.
What’s the best way to store leftovers? Store in an airtight container at room temperature, or in the refrigerator for longer freshness.
How can I ensure the cake doesn’t stick to the pan? Properly greasing and flouring the pan will help prevent sticking.
Can I use this recipe to make cupcakes? Yes, the batter can be baked in cupcake liners, just adjust the cooking time accordingly.
What can I do if my caramel is too thick? Warm it gently on the stove with a splash of cream or milk for easier drizzle.
Can I make a layered cake with this recipe? Definitely! Just double the recipe and layer it with additional caramel and banana slices between the layers.
Additional Resources
For more delightful recipes, check out our collection of desserts that celebrate the best of seasonal fruit, or explore guides on mastering baking techniques, from cake making to frosting perfection.
Need equipment recommendations? We offer reviews on everything from stand mixers to cake pans to help you choose the best tools for your baking adventures.
Join the Conversation
We love hearing your thoughts! Share your pictures, modifications, and reviews of the Heavenly Banana Caramel Cake on social media to inspire others.
Engage with fellow bakers in the comments section, swap tips, and explore variations to make this cake uniquely yours.
The Recipe
Heavenly Banana Caramel Cake
Serves: 8 servings
Prep Time: 20 mins
Cook Time: 35 mins
Total Time: 55 mins
Kitchen Equipment Needed
Mixing bowls
Measuring cups
Mixer or whisk
8-inch round cake pan
Spatula
Ingredients
3 ripe bananas, mashed
1 cup granulated sugar
1/2 cup unsalted butter, softened
2 large eggs
1 1/2 cups all-purpose flour
1 tsp baking soda
1/2 tsp salt
1 cup caramel sauce (store-bought or homemade)
Directions
Preheat the oven to 350°F (175°C) and grease the cake pan.
In a large bowl, cream together the butter and sugar until fluffy.
Add eggs one at a time, beating well after each addition. Stir in the mashed bananas.
In a separate bowl, combine the flour, baking soda, and salt. Gradually add to the banana mixture.
Pour the batter into the prepared pan and smooth the top.
Bake for 30-35 minutes or until a toothpick inserted comes out clean.
Let the cake cool in the pan for about 10 minutes, then transfer to a wire rack to cool completely.
Once cooled, drizzle with caramel sauce and top with banana slices as desired.
Recipe Notes
Use overripe bananas for optimal sweetness.
If making ahead of time, store in an airtight container for freshness.