Delicious Hearty Chicken and Mushroom Alfredo Recipe to Savor

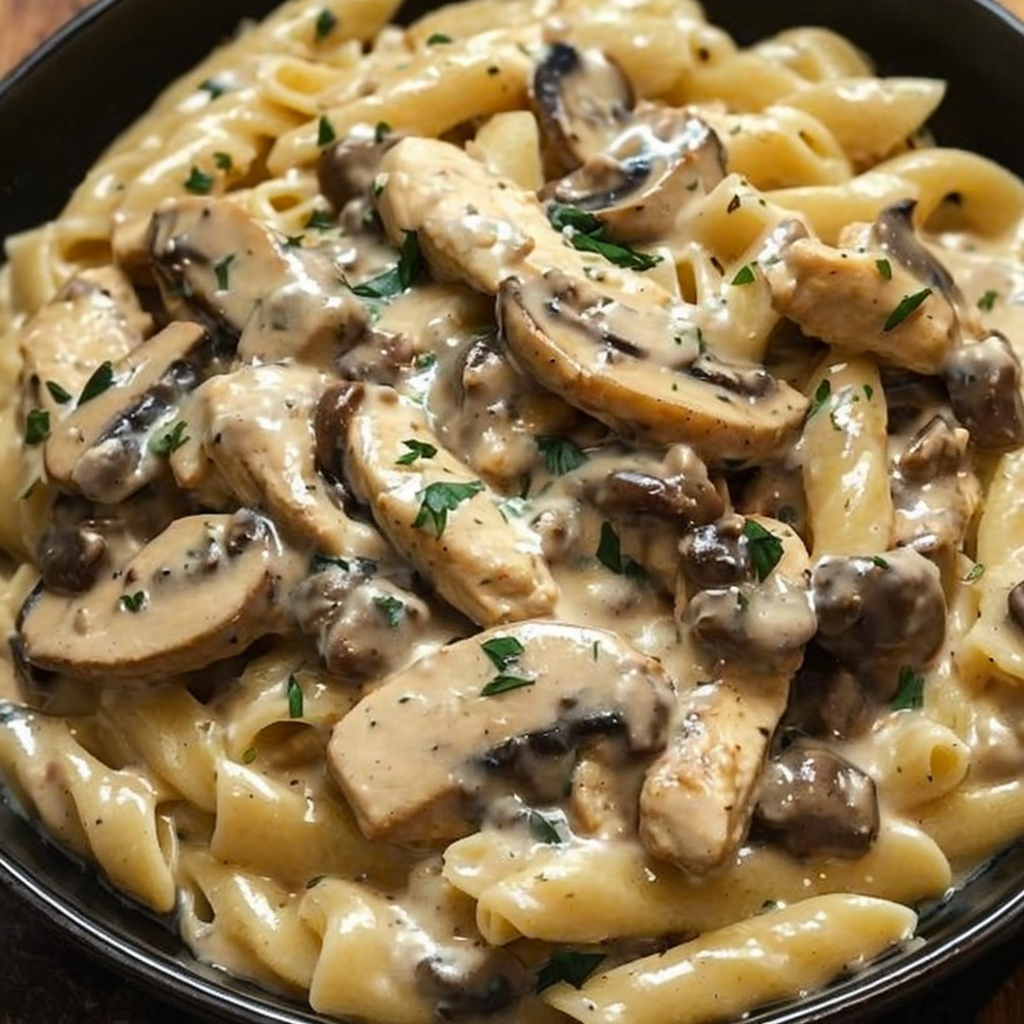
Hearty Chicken and Mushroom Alfredo: The Creamy Comfort Dish You’ll Love

⚖️
Difficulty
Moderate

⏲️
Prep Time
15 mins

🕒
Cook Time
30 mins

⏱️
Total Time
45 mins

🍽️
Servings
4 servings

The Hearty Chicken and Mushroom Alfredo recipe is a comforting blend of savory chicken and earthy mushrooms enveloped in a rich and creamy Alfredo sauce. This dish brings together tender chicken breast, mushrooms, and fettuccine pasta, topped with freshly grated Parmesan cheese to create a harmonious balance of flavors. The elegance of the creamy sauce, combined with the umami notes from the mushrooms, transforms a simple weeknight dinner into something truly special.

Every bite of this dish offers a sensory experience: the sweetness of sautéed garlic, the luscious cream, and the gentle saltiness of cheese bind the ingredients together. It is not just a meal but an invitation to savor moments gathered around the table with family and friends. Whether for a casual dinner or a special occasion, this Hearty Chicken and Mushroom Alfredo promises to delight everyone’s palate.

Quick Recipe Highlights

  • Flavor Profile: The dish presents a delightful blend of creamy textures and savory flavors, highlighted by the deep, rich notes of sautéed mushrooms.
  • Texture: The fettuccine offers a smooth mouthfeel, perfectly complementing the tender chicken and the creamy sauce.
  • Aroma: The fragrance of the garlic and freshly cooked mushrooms wafts through the kitchen, tantalizing anyone nearby.
  • Visual Appeal: The creamy Alfredo sauce coats the pasta beautifully, garnished with a sprinkle of freshly chopped parsley for a pop of color.
  • Skill Level Needed: While this recipe requires some basic cooking skills, it is achievable for home cooks looking to elevate their culinary game.
  • Special Equipment: Basic kitchen tools such as a sauté pan, pot, and measuring cups will suffice for this delightful meal.

Recipe Overview

  • Difficulty Level: This recipe is moderate in difficulty, requiring attention to detail during cooking to ensure the pasta is perfectly coated and the sauce reaches the ideal creamy consistency.
  • Category: Enjoy this dish as a main course, perfect for lunch, dinner, or a hearty meal after a long day.
  • Cuisine: Italian cuisine inspires this Hearty Chicken and Mushroom Alfredo, emphasizing creamy sauces and delightful pasta pairings.
  • Cost: With an approximate total cost of about $15, this dish provides a great flavor-to-cost ratio for family dinners.
  • Season: This creamy pasta dish shines throughout the year, especially during the colder months when comforting flavors are desired.
  • Occasion: Ideal for dinner parties, family gatherings, or cozy nights in, it is versatile enough to suit any occasion.

Why You’ll Love This Recipe

This Hearty Chicken and Mushroom Alfredo shines with an irresistible combination of taste and texture. The creamy Alfredo sauce forms a velvety coating around the perfectly cooked fettuccine, while the tender chicken pieces and earthy mushrooms create a satisfying mouthfeel. As the chicken and mushrooms cook, they release juices that infuse the sauce, enhancing its flavor and creating a unified dish.

Convenience is another compelling reason to embrace this recipe. With a straightforward preparation and cooking process totaling around 45 minutes, dinner can be on the table with minimal effort. The ingredients are commonly found in most pantries, making this recipe not only accessible but appealing to whip up after a busy day.

From a nutritional standpoint, this dish balances carbohydrates from the pasta, protein from the chicken, and essential vitamins and minerals from the mushrooms. This makes it a wholesome option for those seeking a filling yet satisfying meal that offers energy and nourishment.

Socially, this chicken and mushroom Alfredo is perfect for sharing. Gather your loved ones around the table and watch as they savor every bite of this creamy delight, inviting conversations and laughter while indulging in warming flavors.

Moreover, its cost-effectiveness makes it a dish that won’t break the bank. With affordable ingredients combined to create a hearty meal, it is a fantastic choice for families or anyone seeking nourishment without compromising quality or taste.

Historical Background and Cultural Significance

The origins of Alfredo sauce date back to the early 20th century in Rome, Italy. Fine dining establishments popularized the dish due to its rich, creamy texture that delighted diners at the time. As Italian immigrants spread across countries, the Alfredo preparation gained popularity, particularly in the United States, where it became a staple in American Italian cuisine.

Culturally, the dish represents a fusion of creamy sauces and pasta that are hallmark features of Italian cooking. The Hearty Chicken and Mushroom Alfredo brings together a delightful ensemble of ingredients, often reminding people of family gatherings, celebrations, and comforting meals enjoyed during difficult days.

The evolution of the Alfredo recipe has seen various adaptations over the years. The traditional Alfredo, made with just butter and cheese, has expanded to include cream, chicken, and other proteins. The addition of mushrooms not only enhances the dish’s flavor but adds nutritional value and a more complex texture that elevates the classic recipe.

Regionally, variations of Alfredo can be found throughout Italy, often using local ingredients that highlight regional flavors. As families began to put their creative spin on the dish, the Hearty Chicken and Mushroom Alfredo showcases how food can adapt and evolve while maintaining its comforting essence.

Ingredient Deep Dive

Chicken
Chicken is the star of the dish, providing a hearty source of protein. Historically, chicken has been an integral part of Italian cuisine, frequently featured in pasta dishes. For optimal flavor, fresh, high-quality chicken breast is recommended. When selecting, look for a firm texture with no discoloration. Store in the refrigerator up to two days or freeze for longer shelf life. If chicken isn’t available, turkey makes a great substitute.

Mushrooms
Mushrooms add an earthy flavor, essential in enriching the dish’s taste profile. Known for their nutritional benefits, especially in terms of vitamins and antioxidants, mushrooms have a fascinating history in Mediterranean diets. When selecting, look for firm, plump specimens, and avoid any with wet spots. Store mushrooms in a paper bag in the refrigerator. They can easily be swapped with other varieties like cremini or shiitake if needed.

Fettuccine
Fettuccine is the traditional pasta choice for this dish, providing a broad surface area for sauce adherence. Originating from Italy, this pasta variety has gained popularity across the globe. Opt for dried or fresh fettuccine based on availability. Store pasta in a cool, dry place, and it has a long shelf life. If fettuccine isn’t desired, other pasta shapes like penne or rigatoni can be used for delightful adaptations.

Common Mistakes to Avoid

  • Using the wrong pasta: Always choose pasta that can hold the sauce, like fettuccine. Short pasta could work, but the texture and flavor profile will differ.
  • Overcooking the chicken: Cook chicken just until it’s no longer pink to keep it juicy. Overcooking makes it dry and less flavorful.
  • Not seasoning adequately: Flavor develops through salt. Ensure you season each layer in the cooking process, from the chicken to the sauce.
  • Rushing the sauce: Make sure to let your sauce simmer; this enhances the flavors and allows the ingredients to meld beautifully.
  • Not using freshly grated cheese: Pre-packaged cheese often contains fillers and doesn’t melt as nicely. Freshly grated cheese ensures creaminess.
  • Skipping the sauté step for mushrooms: Sautéing enhances mushrooms’ flavor and eliminates excess moisture, which could dilute your sauce.
  • Adding cold dairy to hot pans: Always incorporate dairy gradually into hot sauces to avoid curdling.
  • Not tasting as you go: The best dishes are adjusted along the way. Regular tasting helps achieve the perfect balance of flavors.
  • Using low-quality ingredients: This dish relies heavily on its components; high-quality chicken and cheese can elevate the meal dramatically.
  • Inadequate sauce-to-pasta ratio: Ensure a generous amount of sauce coats your pasta for the best experience. Adjust based on personal preferences.

Essential Techniques

Sautéing Chicken
Sautéing is crucial in developing a flavorful base for your dish. This technique involves cooking chicken over medium-high heat until golden brown. To master it, preheat your pan and avoid overcrowding, which can lead to steaming instead of browning. Look for a golden hue on the chicken before flipping to achieve that crispy texture.

Making Alfredo Sauce
Creating a creamy Alfredo sauce requires attentive simmering. After melting butter and adding cream, keep the mixture at a low simmer to prevent sticking or burning. Stir continuously to prevent clumping. The final product should be smooth, glossy, and thick enough to coat the back of a spoon.

Pro Tips for Perfect Hearty Chicken and Mushroom Alfredo

– Always use room temperature chicken for even cooking. This prevents the outer layers from cooking too quickly while the center remains undercooked.
– Use a combination of seasoned salt and fresh herbs during cooking to elevate the dish. Fresh parsley adds a bright note to the final product.
– Choose high-fat content cream for the sauce; this creates a richer and creamier texture.
– Don’t forget to reserve some pasta water to adjust the sauce’s consistency if it becomes too thick.
– Allow the sauce to rest for a few minutes off the heat; this will help thicken the mixture further.
– Garnish with toasted pine nuts or fresh herbs for an added crunch and visual appeal.
– Turn down the heat before adding cheese to avoid clumping. Stir slowly to ensure it integrates seamlessly.
– Serve immediately, as the pasta can absorb the sauce if left too long before serving.

Variations and Adaptations

The Hearty Chicken and Mushroom Alfredo can easily accommodate various regional variations. Adding sun-dried tomatoes or spinach can introduce vibrant colors and flavors, while Italian sausage can offer a spicy twist. For seasonal adaptations, consider roasted butternut squash in the fall for added sweetness and creaminess.

Dietary modifications also elevate this dish for various needs; for a gluten-free version, opt for rice or quinoa pasta. For those looking for lighter fare, replacing chicken with grilled vegetables can provide a satisfying, plant-based meal. Switching the heavy cream for a low-fat alternative can keep flavors intact while reducing calories.

Flavor variations are limitless. Consider infusing herbs like thyme or oregano into your sauce for an aromatic experience. Feel free to play with textures as well; adding crispy pancetta or breadcrumbs offers an enticing crunch that contrasts the creaminess of the dish.

Serving and Presentation Guide

For an elegant serving technique, twirl the fettuccine onto plates for a restaurant-style appearance. Drizzle additional sauce over each portion for a luscious finish, and sprinkle fresh parsley for color. Classic accompaniments can include garlic bread and a simple side salad to balance the meal. Serve everything hot, as the comforting warmth of the dish heightens the experience. Adjusting portion sizes can help cater to guests with varying appetites.

Incorporating elements such as small bowls of grated cheese on the side adds a personal touch to the dining experience and invites guests to customize their plates.

Wine and Beverage Pairing

When choosing a wine to pair with Hearty Chicken and Mushroom Alfredo, a Chardonnay stands out for its buttery texture and hints of fruit that complement the creaminess of the dish. Alternatively, a Pinot Grigio provides a crisp contrast that refreshes the palate. For non-alcoholic options, sparkling water infused with lemon can cleanse the palate, while iced tea offers a refreshing accompaniment.

If enjoying coffee with dessert afterwards, consider a light roast that offers floral notes alongside the following courses for a well-rounded end to the meal.

Storage and Shelf Life

To maintain freshness, store leftover Hearty Chicken and Mushroom Alfredo in an airtight container in the refrigerator. It can typically last 3-4 days, but always check for spoilage signs before consuming. If the texture becomes too thick upon reheating, add a splash of milk or cream to achieve the desired consistency.

For longer storage, this dish can be frozen for up to two months. It’s best to freeze without the pasta for optimal texture. When reheating, thaw in the refrigerator overnight and warm gently in a pan over low heat.

Make Ahead Strategies

This hearty dish can be prepped ahead to save time on busy nights. Cook the chicken, mushrooms, and sauce in advance, then store them separately in the refrigerator. The day you plan to serve, simply boil fresh pasta and combine everything over low heat for a quick assembly.

Quality can remain high with proper storage. However, adding fresh elements—like herbs—immediately before serving ensures that the dish retains its vibrancy and flavor richness.

Scaling Instructions

Adjusting the Hearty Chicken and Mushroom Alfredo recipe is simple. If you need to serve fewer people, halving the ingredients works seamlessly. Conversely, if needing to accommodate a larger group, doubling or tripling the recipe is straightforward; just make sure your cooking vessel can handle the increased volume.

Timing can vary with larger quantities as well. Allow extra time to ensure that everything cooks evenly. Store leftovers with care, and remember that additional servings might require a slightly longer reheating period.

Nutritional Deep Dive

Analyzing the nutritional aspects of Hearty Chicken and Mushroom Alfredo reveals its balanced macro composition. Each serving contains a rich source of protein from chicken, carbohydrates from pasta, and healthy fats from the cream. It’s an excellent choice for those seeking a hearty meal without compromising on nutrition.

Micronutrient analysis highlights essential vitamins and minerals provided by mushrooms and fresh herbs, offering health benefits that support immune functions and overall health. This dish can cater to various dietary considerations, ensuring it remains suitable for many lifestyles.

Portion control is also significant in this recipe, enabling diners to enjoy the delicious flavors while keeping an eye on their caloric intake. With adjustments to the recipe, such as reducing cream or pasta, it can also effectively fit into weight management strategies.

Dietary Adaptations

To make Hearty Chicken and Mushroom Alfredo suitable for different dietary needs, there are several adaptations available. For a gluten-free option, substituting traditional fettuccine with gluten-free pasta maintains the essence while accommodating dietary restrictions. For those who prefer a dairy-free version, using coconut milk or cashew cream can recreate the creamy texture without the dairy.

Vegan adaptations are easy as well by omitting chicken and replacing it with sautéed vegetables. Nutritional yeast can be incorporated for a cheesy flavor, while gluten-free pasta ensures the dish remains harmonious for all diners.

Explore low-carb options by using spiralized zucchini or cauliflower rice. For those pursuing a keto or paleo lifestyle, these swaps provide the same satisfying flavors and textures without excess carbs.

Troubleshooting Guide

If experiencing texture issues, such as the sauce being too thick or clumpy, this often results from cooking at too high a heat or incorporating dairy too quickly. To resolve this, return the sauce to low heat, stir in additional liquid slowly, and whisk until smooth.

Flavor balance can be adjusted by incorporating more seasoning gradually. Tasting throughout the cooking process will prevent over-salting and allow for precise adjustments. If the dish turns out bland, consider adding a squeeze of lemon juice for brightness.

Temperature problems often arise if the chicken isn’t cooked evenly or pastas become mushy. Ensuring even cooking by cutting chicken pieces uniformly can alleviate this problem. Pay close attention to boiling times for pasta to maintain texture.

Equipment challenges, such as working with non-stick pans, can affect cooking success. Investing in good quality cookware will prevent sticking and promote even cooking.

Recipe Success Stories

Many home cooks have shared their success stories utilizing this Hearty Chicken and Mushroom Alfredo recipe. From families coming together at dinner to individuals mastering their cooking skills, the positive feedback emphasizes the dish’s versatility. Adaptations by readers have led to unique variations, like adding seasonal vegetables.

Notably, readers found joy in the stunning visual presentation as they experimented with various garnishes. Suggestions like adding herbs or using personalized serving platters highlight how even simple dishes can be transformed into showstoppers for gatherings.

Photography tips also stemmed from those documenting their culinary journey. Lessons on capturing the essence of a well-plated meal have enriched the recipe’s community experience, inspiring more cooks to share their artistry.

Frequently Asked Questions

Q1: Can I use frozen chicken for this recipe?

A1: While it’s best to use fresh chicken for an optimal texture and flavor experience, you can use frozen chicken if necessary. Just ensure it’s fully thawed and cooked thoroughly to avoid any health risks.

Q2: What can I replace the mushrooms with?

A2: If you’re not a fan of mushrooms, consider adding spinach, asparagus, or bell peppers to the dish. Each provides unique flavors while maintaining the creamy essence of the Alfredo sauce.

Q3: Is it necessary to use heavy cream?

A3: While heavy cream gives the richest texture, you can substitute it with half-and-half or a dairy-free cream alternative. The sauce will be less rich but still delicious.

Q4: How do I store leftovers?

A4: Store leftovers in an airtight container in the refrigerator for up to 4 days. To reheat, use low heat, adding a splash of milk if the sauce is too thick.

Q5: Can I make this dish ahead of time?

A5: Yes! You can prepare the chicken, mushrooms, and Alfredo sauce a day ahead. Just cook the pasta fresh when you’re ready to serve for the best texture.

Q6: Is this recipe kid-friendly?

A6: Absolutely! The creamy sauce and tender chicken are appealing to kids. You can adjust flavors and spices to cater to their preferences.

Q7: What cheese is best for this Alfredo?

A7: Freshly grated Parmesan cheese is traditional for Alfredo sauce, but you can mix in a bit of Pecorino Romano for added depth and saltiness.

Q8: Can I freeze the Alfredo sauce?

A8: Yes! You can freeze Alfredo sauce for up to 2 months. Thaw and reheat gently on the stove, stirring frequently to avoid separation.

Q9: Is there a vegetarian option for this recipe?

A9: Yes! Replace the chicken with vegetables like zucchini, bell peppers, or eggplant, and use vegetable broth instead of chicken stock.

Q10: What is the best way to reheat leftovers?

A10: To reheat leftover Alfredo, use low heat in a pan, adding a splash of cream or milk to maintain creaminess. Stir frequently.

Additional Resources

If you’re interested in expanding your cooking repertoire, consider trying related recipes like Shrimp Scampi or Spinach and Ricotta Stuffed Shells. These recipes showcase similar flavors and cooking techniques. Additionally, explore technique guides focusing on mastering sauces, including variations of Alfredo.

For ingredient-specific information such as how to select quality chicken or the benefits of mushrooms, armed with knowledge will enhance your kitchen experience. Finally, consider investing in essential kitchen equipment like non-stick pans or high-quality knives to elevate your cooking.

Join the Conversation

We invite you to share your Hearty Chicken and Mushroom Alfredo experiences with us! Take stunning photos of your creations and share them on social media. Your unique variations and adaptations inspire others to experiment in the kitchen, fostering a community of culinary enthusiasts.

Engage in recipe reviews and let us know what worked and what could be improved, as your feedback is invaluable. Together, we can create a collection of wonderful stories surrounding this beloved dish, making it a shared experience for all.

The Recipe

Hearty Chicken and Mushroom Alfredo

Serves: 4 servings

Prep Time: 15 mins

Cook Time: 30 mins

Total Time: 45 mins

Kitchen Equipment Needed

  • Large pot for pasta
  • Sauté pan
  • Measuring cups and spoons
  • Wooden spoon or spatula
  • Grater for cheese
  • Colander for draining pasta

Ingredients

  • 2 chicken breasts, diced
  • 8 oz. fettuccine pasta
  • 8 oz. fresh mushrooms, sliced
  • 4 tbsp. butter
  • 2 cups heavy cream
  • 1 cup freshly grated Parmesan cheese
  • 2 cloves garlic, minced
  • Salt and pepper to taste
  • Fresh parsley for garnish

Directions

  1. In a large pot, boil salted water and cook the fettuccine according to package instructions. Drain and set aside.
  2. In a sauté pan, melt butter over medium heat. Add garlic and sauté for 1 minute until fragrant.
  3. Add diced chicken to the pan and cook until golden brown and cooked through, about 5-7 minutes. Season with salt and pepper.
  4. Stir in the sliced mushrooms and cook for another 5 minutes, until they are tender.
  5. Pour in the heavy cream and bring to a simmer. Let it cook for 5-7 minutes until slightly thickened.
  6. Add grated Parmesan cheese to the sauce and stir until melted and creamy.
  7. Toss in the cooked fettuccine and mix until well coated with the sauce.
  8. Garnish with fresh parsley before serving.

Recipe Notes

  • You can replace the chicken with shrimp or keep it entirely vegetarian by using just mushrooms and adding more vegetables.
  • For a lighter version, substitute heavy cream with half-and-half or a dairy-free cream alternative.
  • Feel free to experiment with different types of mushrooms to customize flavor profiles.

Deliciously Cheesy Bread Recipe: A Must-Try for Cheese Lovers

Cheesy Bread: A Delightful and Melty Experience

⚖️
Difficulty
Easy

⏲️
Prep Time
10 mins

🕒
Cook Time
20 mins

⏱️
Total Time
30 mins

🍽️
Servings
4

Cheesy Bread is the epitome of comfort food, featuring a warm, golden crust that encases an irresistible layer of gooey cheese. This dish is perfect for sharing or enjoying alone while cozying up with a good book or a movie. The moment you take a bite, the melty cheese stretches deliciously, and the aroma of baked bread fills the air, inviting everyone to gather around.

The combination of simple ingredients transforms into something extraordinary with Cheesy Bread. Whether served as an appetizer at a family gathering or a delicious side to your favorite pasta, this delightful bread never fails to impress. The rich, buttery flavor combined with the savory cheese creates a symphony of taste that’s hard to resist.

Quick Recipe Highlights

  • Flavor Profile: Cheesy Bread features a harmonious blend of savory cheese and buttery bread, creating a mouthwatering treat.
  • Texture: The outside is crispy and golden, while the inside remains soft and gooey with melted cheese.
  • Aroma: The scent of warm, freshly baked bread mixed with dairy delights invites you to take a bite.
  • Visual Appeal: With its golden crust and bubbling cheese oozing out, this bread is as pleasing to the eyes as it is to the palate.
  • Skill Level Needed: This easy recipe requires basic cooking skills and is perfect for novice bakers.
  • Special Equipment: A baking sheet and parchment paper are essential for achieving that perfect crust.

Recipe Overview

  • Difficulty Level: This easy recipe is accessible even for kitchen beginners, with straightforward steps and quick prep time.
  • Category: Ideal as an appetizer, side dish, or even a snack, Cheesy Bread is versatile for any meal.
  • Cuisine: Rooted in various culinary traditions, this dish is influenced by Italian focaccia and the beloved cheesy garlic bread styles.
  • Cost: The ingredients are budget-friendly, making it an economical recipe that delivers big on flavor.
  • Season: This recipe shines year-round, especially in fall and winter when comfort food is most sought after.
  • Occasion: Cheesy Bread is a hit for casual gatherings, game day parties, or simply enjoying with family.

Why You’ll Love This Recipe

With its enchanting taste and satisfying texture, Cheesy Bread holds a special place in the hearts of many. It brings together a delightful mix of simple yet rich flavors that appeal to both young and old alike. The ooey-gooey cheese melds perfectly with the warm bread, harmonizing comfort with indulgence. The ease of preparation allows anyone to create this culinary masterpiece without breaking a sweat.

Convenience plays a major role in why this recipe is so cherished. A quick prep time of just ten minutes followed by only twenty minutes in the oven means that fresh, savory Cheesy Bread can be on your table in half an hour. Perfect for unexpected guests or a last-minute meal addition, this is a dish that can adapt to any culinary emergency.

Additionally, Cheesy Bread packs a delightful nutritional punch despite its treat quality. The combination of bread and cheese provides energy, calcium, and protein, making it both satisfying and fulfilling. Just be mindful of portion sizes, ensuring a balance in your overall diet.

Cheesy Bread has an amazing social and entertaining aspect. Imagine sharing this warm, cheesy delight with friends and family during gatherings or cozy evenings at home. It serves as a fantastic conversation starter and complements a wide range of dishes, creating memorable dining experiences.

Finally, its cost-effectiveness makes Cheesy Bread an attractive option for those who want to enjoy delicious food without straining their budget. With just a few affordable ingredients, you can whip up a batch that will definitely leave a lasting impression.

Historical Background and Cultural Significance

The origin of Cheesy Bread can be traced back to various European culinary traditions, particularly in Italy, where bread-making and cheese have folklore roots. The pairing of crusty bread with cheese was a practical solution for farmers and workers who needed sustenance while toiling in the fields. Today, this simple yet fulfilling recipe has evolved into a cherished comfort food in many households.

Beyond its deliciousness, Cheesy Bread holds a cultural significance that reflects community and togetherness. Historically, it was often made in homes as a way to use leftover ingredients, representing a frugality that resonates with people worldwide. This adaptability has allowed it to evolve into countless variations across different regions, each with its own unique twist.

As recipes and cooking techniques have spread across borders, the journey of Cheesy Bread has transformed it. From traditional Italian focaccia to American-style cheesy garlic bread, the beloved flavors remain constant while incorporating regional variations that honor each culture’s influence.

Today, Cheesy Bread remains a staple across the globe, embraced in different forms and styles. It represents comfort and nurturance, and its presence is a guarantee of warmth and community in any meal setting.

Ingredient Deep Dive

– **Bread**: The foundation of Cheesy Bread, various bread types can be used, including baguette, ciabatta, or traditional Italian. Each brings a unique texture that will affect the final product. Always choose fresh bread whenever possible, and store it in a cool, dry place to prolong freshness. If you’re looking to substitute, sourdough offers a tangy alternative that enhances flavor.

– **Cheese**: Cheese choices are paramount in this dish, as they dictate the flavor and texture. Mozzarella is a classic choice due to its meltability, while cheddar adds a sharper profile. Be sure to buy quality cheese; freshly grated options melt better than pre-shredded ones. To store, keep cheese wrapped in parchment paper in the fridge. If you want to reduce calories, consider using part-skim cheese.

Common Mistakes to Avoid

  • Using stale bread: Always opt for fresh bread to avoid a chewy texture. Stale bread won’t rise or crunch properly.
  • Overcooking: Keep an eye on the baking time; overcooked Cheesy Bread can become tough. Aim for a golden, bubbly top.
  • Insufficient cheese: Don’t skimp on cheese; it’s the star. Ensure an even coating to guarantee melty goodness.
  • Incorrect oven temperature: Always preheat your oven; starting cold can lead to uneven cooking.
  • Ignoring the resting time: Allow your bread to sit for a few minutes after baking. This will enhance the flavors as it cools slightly.
  • Skipping seasoning: A pinch of salt enhances flavor significantly. Don’t leave out garlic powder or herbs if preferred.
  • Inadequate kneading: Properly knead your dough for the right texture; overdoing it can make bread tough.
  • Not slicing properly: Cut the bread while warm, but avoid cutting too soon. This prevents the cheese from leaking out too much.

Essential Techniques

Understanding the art of kneading is crucial. Kneading helps develop gluten, giving the bread structure and elasticity. To master this technique, use a pushing and folding motion, ensuring an even dough. Common pitfalls include overworking the dough, which can yield tough results. Ideal kneading takes about five to eight minutes.

Baking is another essential technique. Preheat your oven to the right temperature for optimal rising and browning. Maintaining even heat allows the cheese to melt beautifully and the bread to achieve a crisp crust. Look for visual cues like bubbling cheese and a golden crust to know the bread is ready.

Pro Tips for Perfect Cheesy Bread

1. Choose high-quality, fresh ingredients for the best flavor.
2. Experiment with different cheeses for unique taste profiles.
3. Add herbs and spices to the butter mixture for extra flavor.
4. Let the bread cool slightly before serving for better slicing.
5. Serve with marinara sauce for a delicious dipping option.
6. Brush the top with garlic butter before baking for an extra kick.
7. If topping with vegetables, ensure they are pre-cooked to avoid excess moisture.
8. For an additional layer of taste, try sprinkling grated Parmesan cheese on top before baking.

Variations and Adaptations

Cheesy Bread can easily adapt to regional flavors. Try using different types of cheeses, such as feta for Mediterranean flair or pepper jack for a spicy kick. Seasonal adaptations are also fun; in autumn, incorporate pumpkin puree into your dough for a festive twist.

For dietary modifications, switch to gluten-free bread without sacrificing flavor. Vegan options are also attainable with plant-based cheese alternatives while maintaining a similar texture. Explore flavor variations by mixing in herbs, roasted garlic, or sun-dried tomatoes into your cheese blend.

Texture modifications can elevate this dish as well. For instance, topping the Cheesy Bread with crispy bacon bits or caramelized onions can provide a delightful crunch. There’s also the option to serve it with a fresh herb salad to cut through the richness.

Serving and Presentation Guide

The serving of Cheesy Bread is as essential as its preparation. For an attractive presentation, place the bread on a rustic wooden board or a vibrant plate to contrast the golden color. Garnishing with freshly chopped parsley or a sprinkle of Italian seasoning adds a pop of color.

Accompany this dish with traditional forms such as marinara sauce, which heightens flavors. Modern serving suggestions include pairing with a fresh salad or a chutney, adding a twist to the classic.

Temperature considerations are key; serve Cheesy Bread warm alongside a hot dip to maintain its meltiness. For portion control, slice into manageable pieces, encouraging diners to savor and enjoy.

Wine and Beverage Pairing

For a delightful wine pairing, consider a medium-bodied white wine, such as Chardonnay or Sauvignon Blanc. Their crispness complements the flavors of the Cheesy Bread perfectly. If you’re a red wine fan, a light Pinot Noir can also harmonize well.

Non-alcoholic drink options include sparkling water with a lemon wedge or a refreshing iced tea. Both will cleanse the palate and enhance the bread’s taste. If you enjoy coffee or tea, a mildly flavored herbal tea works as a lovely counterpart without overpowering the dish.

Storage and Shelf Life

To store, wrap leftover Cheesy Bread tightly in aluminum foil or place it in an airtight container to prolong freshness. Keep it in the refrigerator, where it can last 3-5 days.

For signs of spoilage, watch out for an unusual odor or any visible mold. When it comes to reheating, an oven or toaster oven is preferred for restoring that crispy crust; aim for a low temperature to warm through without drying out.

Consider freezing this bread for up to three months. Wrap tightly in plastic wrap followed by foil, ensuring no air pockets remain. To thaw, leave overnight in the fridge before warming up for a delightful treat.

Make Ahead Strategies

To make Cheesy Bread ahead of time, prepare the dough and store it in the refrigerator for up to 24 hours before baking. Allow it to rest at room temperature for about 30 minutes before baking to ensure an even rise.

Another strategy is to assemble the bread and freeze it before baking. Bake directly from frozen, just adding an extra few minutes to the baking time to ensure doneness. This method keeps the flavors intact while offering convenience.

Quality may diminish if stored too long; check the texture and flavor before serving. Fresh herbs can be added before serving to give a bright finish.

Scaling Instructions

Scaling Cheesy Bread is straightforward. If you’re halving the recipe, maintain the same cooking time, but monitor your bread closely for doneness.

Doubling or tripling the recipe may require you to bake in batches depending on the oven size. Be sure to adjust your baking sheet size as needed. As you scale up, consider spacing out the pieces adequately for even cooking.

Storage considerations also change; more leftovers may require extra attention to prevent spoilage. Properly wrap and label frozen batches to keep track of freshness.

Nutritional Deep Dive

Cheesy Bread is a comforting indulgence with moderate caloric value, making it suitable for occasional meals. The macros typically provide a satisfying balance of carbohydrates and proteins, mainly derived from the bread and cheese.

Micronutrient analysis indicates that bread often supplies B vitamins, while cheese can provide calcium and vitamin A, contributing positively to bone health and immunity. However, always consider portion sizes, as heavy cheese can lead to calorie surpluses.

Dietary considerations are important—those watching their carbohydrate intake should be mindful of serving sizes, especially if served as a side with carb-rich dishes. By enjoying Cheesy Bread in moderation, it can fit into various meal plans.

Dietary Adaptations

For gluten-free options, substitute the traditional bread with a gluten-free variant readily available in stores. This adaptation ensures that everyone can enjoy this warm and cheesy treat without worry.

Dairy-free eaters can opt for plant-based cheese, making it possible to still achieve the gooey texture. Similarly, for those tracking carbs, low-carb bread alternatives are conveniently available.

Vegan adaptations can easily be achieved with plant-based butter and cheese, offering a similar mouthfeel without the animal products. Always check labels to ensure that substitutes are completely dairy-free.

Low-FODMAP versions can be made by using lactose-free cheese and gluten-free bread, addressing digestive considerations while still delivering great taste.

Troubleshooting Guide

For texture issues, if your Cheesy Bread comes out too doughy, ensure you’re not overloading it with cheese or moisture-rich ingredients. Let the bread cool slightly to allow the structure to set before slicing.

If you encounter flavor balance problems, add salt gradually during preparation to enhance overall taste and bring out the flavors in your cheese.

Temperature problems may arise if the bread isn’t cooking evenly. Be sure your oven is preheated, and rotate the baking sheet halfway for even cooking.

Should you face equipment challenges like browning too quickly, consider covering the bread with foil to prevent over-browning while the inside cooks thoroughly.

For ingredient substitutions, always account for the moisture content of alternatives and adjust accordingly to avoid heavy, dense loaves.

Timing concerns can occur with inexperienced bakers. Always set a timer but use visual cues, like a golden crust and bubbling cheese, as your indicators of doneness.

Recipe Success Stories

Community feedback often highlights Cheesy Bread as a favorite at gatherings. Readers share how this recipe livened up their parties and received rave reviews, inspiring many to try their hands at making it.

Numerous success stories focus on personal adaptations, from unique cheese blends to fun ingredient additions like jalapeños or caramelized onions. Photographers enjoy capturing the bubbling cheese coming out of the oven, showcasing this delicious dish.

Readers have suggested pairing Cheesy Bread with their favorite dips, introducing a new dimension to its traditional serving style. It encourages experimenting and discovering personal favorites among the community.

The easy nature of the recipe encourages beginner cooks to elevate their skills, receiving praise for their first successful bread-baking ventures, thus inspiring others to join in the excitement.

Frequently Asked Questions

Can I use gluten-free bread? Absolutely! Gluten-free bread works well and offers the same delicious experience, ensuring everyone can enjoy this cheesy delight.

What kind of cheese is best for this recipe? For maximum meltiness, mozzarella is a top choice, but don’t hesitate to experiment with cheddar or a mix of your favorites!

Can I freeze Cheesy Bread? Yes, you can freeze it! Just wrap it tightly in foil and it will be great for up to three months.

How do I know when Cheesy Bread is done? Look for a golden crust and bubbling cheese. If unsure, you can insert a toothpick in the center to check if it comes out clean.

What can I serve with Cheesy Bread? It’s fantastic on its own but pairs wonderfully with marinara sauce, garlic butter, or even a fresh salad!

Can I make this recipe without garlic? Yes, simply omit the garlic powder for a simpler version that’s still delectable!

Do I have to use fresh herbs? While fresh herbs enhance flavor, you can substitute with dried herbs to achieve a similar taste.

Is there a vegan option for Cheesy Bread? Yes! You can use plant-based cheese alternatives and dairy-free butter for a delicious vegan version.

How long does it take to bake Cheesy Bread? Approximately 20 minutes at 375°F is ideal for this bread to achieve that perfect golden brown.

Can I add extra toppings like bacon or vegetables? Certainly! Just make sure they’re pre-cooked to avoid added moisture that can affect the bread’s texture.

Additional Resources

Explore related recipes that capture the essence of comfort food, from Garlic Bread to Cheesy Pull-Apart Bread. Dive deeper into technique guides that teach essential baking methods, ensuring your bread turns out perfectly every time.

Ingredient information is critical for finding the best types to use in dishes like Cheesy Bread. For those interested in equipment recommendations, discover the essentials that will simplify your baking adventures and improve your results.

Be sure to check out seasonal variations that celebrate flavors and ingredients at their peak, ensuring you have the freshest Cheesy Bread experience all year round.

Join the Conversation

We encourage our readers to share their cooking experiences on social media, showcasing their photos, variations, and feedback on the recipe. Engaging with us and others creates a wonderful community where everyone can learn and grow as cooks.

Photography tips can help capture the beauty of your Cheesy Bread; natural light works wonders! Additionally, recipe reviews allow you to share your successes and challenges, helping us refine our content.

We invite you to experiment with Cheesy Bread, substitute ingredients, and come up with unique creative ideas. The kitchen is a place of creativity, and we love hearing how you make each recipe your own!

The Recipe

Cheesy Bread

Serves: 4

Prep Time: 10 mins

Cook Time: 20 mins

Total Time: 30 mins

Kitchen Equipment Needed

  • Baking sheet
  • Parchment paper
  • Mixing bowl
  • Spatula
  • Oven mitts

Ingredients

  • 1 loaf of bread (your choice)
  • 1 cup of shredded mozzarella cheese
  • 1/4 cup of grated Parmesan cheese
  • 1/2 cup of unsalted butter, melted
  • 2 teaspoons of garlic powder
  • 1 tablespoon of chopped fresh parsley (optional)
  • Salt and pepper to taste

Directions

  1. Preheat the oven to 375°F (190°C) and line a baking sheet with parchment paper.
  2. Slice the loaf of bread in half lengthwise and place it on the baking sheet.
  3. In a bowl, mix the melted butter with garlic powder, parsley, salt, and pepper.
  4. Brush the butter mixture generously over each half of the bread.
  5. Sprinkle the mozzarella and Parmesan cheese evenly over the bread.
  6. Bake in the preheated oven for about 15-20 minutes or until the cheese is bubbly and golden.
  7. Remove from the oven, let cool slightly, then slice and serve warm.

Recipe Notes

  • Feel free to add your favorite toppings such as olives, jalapeños, or cooked vegetables.
  • If you want a cheesier experience, increase the cheese quantity.
  • For better flavor, allow the bread to cool slightly before slicing.
  • Leftovers can be stored in the fridge for up to 3 days or frozen for later use.

Tuna Stuffed Cucumber Bites with Hard Boiled Egg Delight

Tuna Stuffed Cucumber Bites: A Refreshing Snack for Any Occasion

⚖️
Difficulty
Easy

⏲️
Prep Time
15 mins

🕒
Cook Time
10 mins

⏱️
Total Time
25 mins

🍽️
Servings
4

Tuna stuffed cucumber bites are a light and refreshing appetizer that perfectly balances savory and crunchy textures. Each bite showcases the delightful combination of creamy tuna salad nestled within crisp cucumber slices, topped with slices of hard-boiled egg for added protein and flavor. This recipe is not just visually appealing but also a fantastic way to incorporate more vegetables into your diet, making it an ideal choice for lunches, picnics, or light snacks.

The bright colors of the cucumbers and eggs come together, making these snacks a feast for the eyes and the palate. With the fresh taste of the cucumbers paired with the richness of the tuna, you’ll find it hard to resist going back for more. Whether you’re hosting a gathering or simply indulging in a healthy treat, these tuna stuffed cucumber bites are sure to impress.

Quick Recipe Highlights

  • Flavor Profile: The tuna salad is seasoned to perfection with zesty lemon and fresh herbs, while the cucumber adds a refreshing crunch that contrasts beautifully.
  • Texture: Crispy cucumber paired with the creamy tuna and smooth egg create various textures in every bite.
  • Aroma: Freshness from the herbs combined with the umami scent of tuna makes this dish incredibly inviting.
  • Visual Appeal: The vibrant green cucumber and the bright yellow of the egg yolks create a colorful platter suitable for any occasion.
  • Skill Level Needed: This recipe is easy and perfect for beginner cooks who want to impress their guests.
  • Special Equipment: A sharp knife and a mixing bowl are the only tools you need to prepare this dish.

Recipe Overview

  • Difficulty Level: This recipe is straightforward, making it perfect for novice cooks. The steps are simple, and there are no complicated techniques involved.
  • Category: Ideal for appetizers or snack foods, these cucumber bites are perfect for gatherings, picnics, and even lunchboxes.
  • Cuisine: This recipe takes inspiration from Mediterranean cuisine, known for its emphasis on fresh vegetables and seafood.
  • Cost: The ingredients are affordable, with costs averaging around $10 to serve four people.
  • Season: Cucumber is available year-round, but this recipe shines during warm weather when fresh vegetables are most appealing.
  • Occasion: These bites are excellent for parties, BBQs, and casual family gatherings.

Why You’ll Love This Recipe

The taste and texture of tuna stuffed cucumber bites are an enjoyable experience that combines the creaminess of the tuna with the crispness of the cucumbers. The hint of lemon and herbs enhances the overall flavor, making each bite burst with freshness. You’ll appreciate the contrast of temperature as the cool cucumbers provide a refreshing base for the rich filling.

This recipe is not only easy to prepare but also requires minimal cooking time, allowing you to whip up a batch in less than 30 minutes. It’s perfect for those busy weekdays or last-minute gatherings. Simply mix your ingredients, assemble, and you’re ready to serve!

In terms of nutrition, this dish packs a punch. Tuna is a great source of lean protein, while cucumbers are low in calories but packed with vitamins and minerals. The hard-boiled eggs add another layer of protein, making this app a satisfying and nutritious snack option.

Tuna stuffed cucumber bites also shine when it comes to social settings. They are easy to handle, making them a fantastic finger food for parties. Their bright colors and elegant presentation make them aesthetically pleasing, sure to attract rave reviews from guests.

Financially, this recipe is budget-friendly. With a few inexpensive ingredients, you can make a delicious snack that feels indulgent without breaking the bank. It’s accessible for anyone looking to prepare a tasty meal at home.

Historical Background and Cultural Significance

Tuna as a food source has a long history, particularly in cultures surrounding the Mediterranean and Pacific regions. The use of tuna in recipes dates back centuries, where it was often preserved using various methods, allowing it to be stored for long periods. Tuna salads have become a staple in many households due to their versatility and rich flavor.

Cucumber, on the other hand, has been cultivated for over 3,000 years, with its origins tracing back to South Asia. In many cultures, cucumber serves as a refreshing treatment for ailments, making it a beloved ingredient across the globe. Combining tuna and cucumber not only showcases their unique flavors but also highlights their historical importance in various cuisines.

As recipes evolve, so do cultural interpretations. The tuna salad concept has seen countless variations that adapt to different local tastes. Adding cucumbers provides a modern twist to traditional tuna recipes, bringing an innovative edge to classic dishes while still preserving their essence.

In various countries, tuna salad varies greatly in flavor profiles and presentation, but the concept remains popular around the globe. This recipe for tuna stuffed cucumber bites exemplifies how traditional elements can be transformed into something new, bridging old culinary practices with contemporary dining experiences.

Ingredient Deep Dive

Tuna: Tuna is not only a protein powerhouse but also rich in omega-3 fatty acids which promote heart health. When selecting canned tuna, look for options packed in water for a lighter flavor. It’s essential to check the label for sustainability certifications to ensure you are choosing environmentally-friendly seafood. Store opened tuna in an airtight container, and it should be consumed within a few days for the best quality. Alternatives include chicken or chickpeas for non-seafood lovers.

Cucumbers: Fresh cucumbers are hydrating and low in calories, making them a popular choice for healthy eating. They also provide dietary fiber and essential vitamins. When shopping, opt for firm cucumbers without blemishes or softness. Store them in the refrigerator to maintain crispness, and they’re best used within a week. If cucumbers aren’t available, consider using bell peppers or zucchini for a different twist.

Hard-Boiled Eggs: Hard-boiled eggs add creaminess and protein, enhancing the overall nutrition of the dish. For perfect hard-boiled eggs, start them in cold water and bring them to a boil, then cover and let sit off the heat for 10-12 minutes. Always cool them in ice water to make peeling easier. If you want to skip eggs, avocado could provide a creamy texture while keeping the recipe light and healthy.

Common Mistakes to Avoid

  • Using overcooked tuna: Overcooking can dry out the tuna, leaving it less palatable. Just mix until combined to maintain moisture.
  • Choosing soft cucumbers: Ensure your cucumbers are firm and fresh for the best texture. Soft cucumbers will lead to soggy bites.
  • Not chilling the filling: Allowing your tuna filling to cool slightly can enhance the flavors and make it easier to handle.
  • Skipping seasoning: Failing to season your tuna salad can lead to bland bites. Taste and adjust seasonings to your liking.
  • Overloading the cucumbers: Moderation is key; stuffing too much filling can cause them to become messy and difficult to eat.
  • Using low-quality tuna: Invest in good quality canned tuna to elevate the flavor and nutritional benefits of your dish.
  • Not storing properly: For best freshness, store remaining cucumber bites in an airtight container in the refrigerator and consume them within a day.
  • Ignoring garnish options: A sprinkle of herbs on top can enhance presentation as well as add fresh flavor!
  • Not pairing with the right flavors: Enhancing these bites with complementary flavors such as lemon or spices can take them to another level.

Essential Techniques

Mixing Tuna Salad: Achieving the right creamy texture is essential. Use a fork to break up the tuna while gently folding in other ingredients to avoid becoming mushy. Taste and adjust seasonings before proceeding to ensure a balanced flavor profile.

Cutting Hydrates: To get the perfect cucumber slices, use a sharp knife for clean cuts. Slice evenly to maintain consistency in thickness, ensuring every bite has the same delightful crunch.

Hard-Boiling Eggs: Mastering the perfect hard-boiled egg involves timing and technique. Always start with cold water and add salt to prevent cracking. Tap the egg gently after boiling to check for doneness; the shell should be easy to peel if cooked correctly.

Pro Tips for Perfect Tuna Stuffed Cucumber Bites

1. Choose the freshest cucumbers you can find for maximum crunch and flavor. Look for bright green color without soft spots or blemishes.
2. Mix the tuna salad in advance and refrigerate it to allow flavors to meld, making a more delicious filling.
3. Use a piping bag to fill the cucumber slices neatly for a polished look at gatherings.
4. Experiment with different herbs like dill or cilantro to refresh the classic flavor profile of tuna salad.
5. Consider adding a splash of hot sauce or diced jalapeños for an exciting spicy kick in the filling.
6. For an extra crunch, mix in some finely chopped celery or bell pepper to the tuna salad mixture.
7. Create colorful variations by alternating the cucumbers with different vegetables, such as colorful bell peppers.
8. Serve these bites on a platter with a light dip, like tzatziki or sour cream, for an extra layer of flavor.

Variations and Adaptations

Tuna stuffed cucumber bites can be modified in various exciting ways. For a regional twist, use Mediterranean flavors by incorporating feta cheese and olives into your tuna salad. For a seasonal adaptation, consider adding fresh herbs and other veggies available at your local farmers’ market.

Dietary modifications can include using chickpeas instead of tuna for a vegan option that still offers a protein punch. To experiment with flavor variations, try different spices or sauces within the filling, such as curry powder or aioli, to create unique bites.

Texture modifications can also transform the experience; instead of slicing cucumbers, try utilizing bell peppers that resemble cups, creating an even more authentic stuffed experience. Presentation alternatives can include using small skewers or toothpicks for serving miniature versions at parties, ensuring every guest can indulge conveniently.

Serving and Presentation Guide

When it comes to plating tuna stuffed cucumber bites, keeping them visually appealing is key. Arrange them neatly on a colorful platter with garnishes like fresh herbs or edible flowers for a sophisticated touch. Drizzle a light balsamic glaze around them for added flavor and visual contrast.

For garnishing ideas, consider a sprinkle of paprika on top of the tuna salad for an additional pop of color. Serve alongside a tangy dip, such as tzatziki, to elevate the dining experience while providing your guests with an interactive option.

Temperature is another important aspect. Ensure the cucumbers are chilled before preparing; this enhances the refreshing qualities of the bites. For portion control, keep each cucumber bite uniform for consistent serving sizes that are easy to handle during gatherings.

Wine and Beverage Pairing

Pairing wine with tuna stuffed cucumber bites calls for something light and crisp. A Sauvignon Blanc works wonderfully, with its refreshing acidity complementing the flavors of the dish. Alternatively, a dry sparkling wine adds celebratory flair and cleanses the palate beautifully.

For non-alcoholic alternatives, club soda with a splash of fresh citrus can enhance the fresh profile of the dish. If you prefer a warm beverage, consider herbal teas like chamomile or mint that can amplify the refreshing elements of the cucumber.

Always consider serving suggestions such as chilling wines before serving to maintain their refreshing quality, particularly when enjoying these bites on a warm day.

Storage and Shelf Life

To keep your tuna stuffed cucumber bites fresh, store them in an airtight container in the refrigerator. It’s ideal to consume them within 24 hours for the best taste and quality. If you have leftover tuna filling, it can last up to three days in the fridge if kept sealed.

For those considering freezing, it’s best to not freeze the cucumbers since they lose their crispness. However, the tuna salad can be frozen for later use—just ensure it’s placed in airtight containers to avoid freezer burns.

When reheating any stored filling, gently warm it in the microwave, ensuring not to overheat, which can change the texture. Fresh cucumbers should be re-sliced at the time of serving to maintain their crunchiness.

Make Ahead Strategies

To streamline your preparation, make the tuna salad a day in advance. This allows the flavors to combine and intensify, creating a more flavorful bite. Store the salad in an airtight container and refrigerate until you’re ready to assemble.

If you want to take it one step further, prep your cucumbers by slicing them in advance, keeping them submerged in cold water to maintain freshness. Just dry them thoroughly before filling them with the tuna mix.

Quality impacts everything, so remember to add fresh elements like herbs just before serving. This ensures they’re vibrant and full of flavor, enhancing the overall appeal of your presentation.

Scaling Instructions

When tailoring this recipe to a larger crowd, doubling or tripling ingredients is straightforward. Simply maintain the same ratios and remember to have ample space for preparing all the cucumber bites.

For smaller gatherings, you can easily halve the recipe. Be mindful of adjusting the prep and chill times to allow for optimal flavor and freshness of your ingredients.

If you’re using different kitchen equipment, like a larger food processor for mixing tuna, ensure timing remains consistent, especially when it comes to combining and chilling the ingredients.

Make sure to store any leftovers appropriately; they can be enjoyed later, but it’s best to prepare cucumbers just before serving.

Nutritional Deep Dive

In every serving of tuna stuffed cucumber bites, you’re looking at a nice balance of macronutrients. With lean protein from the tuna and eggs, along with dietary fiber from the cucumbers, this snack promotes satiety without excessive calories.

Micronutrient analysis shows that cucumbers offer hydration and vitamins, while tuna provides vital minerals like selenium and vitamin D. Together, these ingredients support overall health and well-being.

For weight management, these bites are perfect since they are low in calories yet high in protein, assisting with maintaining energy. Portion control is also simple with these bite-sized snacks, allowing for mindful eating.

Nutrition-conscious cooks can feel confident knowing this recipe supports a healthy lifestyle while indulging in flavors that everyone will love.

Dietary Adaptations

For those observing gluten-free diets, this recipe naturally fits the bill without any modifications. Additionally, it can easily be adapted for dairy-free eaters by avoiding creamy dressings or cheese in the filling.

Vegan enthusiasts can replace tuna with mashed chickpeas or tofu and skip the eggs entirely, creating a plant-based version of this tasty treat. For those on a low-carb or keto diet, simply eliminate any bread-based sides and focus on enhancing protein and healthy fats within the filling.

This recipe also lends itself well to paleo and low-FODMAP adaptations. Using the correct, compliant ingredients will ensure everyone can enjoy delicious, guilt-free snacks tailored to their specific dietary needs.

Troubleshooting Guide

If your tuna salad ends up too dry, consider adding a spoonful of mayo or Greek yogurt to achieve the desired creaminess. Always taste your filling as you go, adjusting flavors to your preference.

For texture issues, if your cucumbers seem too watery, be sure to dry them thoroughly after washing. Soggy cucumbers can lead to an unappealing bite, diminishing the overall experience.

Should issues arise with flavor balance, adding a squeeze of lemon can help brighten the dish while adding salt can amplify the flavors.

If equipment challenges arise, ensure knife skills are practiced for slicing cucumbers. It can also be beneficial to have a sturdy cutting board to prevent instability while you work.

Timing concerns can manifest in preparing too much ahead of time. Remember, assembly should occur just before serving for the freshest and crunchiest bites possible.

Recipe Success Stories

Community feedback has praised these tuna stuffed cucumber bites as a go-to recipe for light appetizers at family gatherings. Many readers have noted how easy it is to adapt the recipe to personal taste, whether through varying spices or substituting ingredients based on dietary preferences.

Success stories often involve variations, with readers sharing their favorite adaptations, such as the addition of curry powder for a delightful new flavor direction. Some have even suggested using pickled cucumbers for a tangy twist, enhancing the original concept.

Photography tips from fellow cooks highlight the importance of plating these bites aesthetically to capture the attention of guests. Bright colors and neat arrangements have resulted in appetizing photographs that inspire others to recreate the dish.

Reader suggestions about pairings and variations further emphasize the versatility of this simple recipe, solidifying its place as a cherished contribution to many kitchens.

Frequently Asked Questions

1. Can I use fresh tuna instead of canned? Yes, but make sure to cook the fresh tuna properly before using it in the salad to ensure safety and flavor.
2. How do I store leftovers? Store any leftover bites in an airtight container in the fridge and consume within 24 hours for the best quality.
3. Can I prepare these bites in advance? Yes, the tuna mixture can be made a day ahead, but assemble the bites just before serving for the freshest experience.
4. What are some alternative toppings? You can add fresh herbs, slices of radish, or even a drizzle of chili sauce for an extra kick.
5. Are there any gluten ingredients? No, this recipe contains no gluten, making it suitable for gluten-free diets.
6. What kind of tuna should I buy? Opt for high-quality, sustainably sourced canned tuna packed in water or olive oil for the best flavor.
7. Can I freeze the filling? Yes, the tuna filling can be frozen, but do not freeze sliced cucumbers as they will lose their crunch.
8. What’s the best way to cut cucumbers for stuffing? Use a sharp knife and slice evenly to maintain a consistent bite-size serving.
9. Can I add other vegetables to the filling? Absolutely! Chopped celery or bell peppers can add extra crunch to the tuna salad’s texture.
10. Is this recipe kid-friendly? Definitely! The flavors are mild and enjoyable for children, making it a great way to sneak in healthy veggies.

Additional Resources

For those eager to expand their culinary repertoire, consider exploring related recipes for fresh summer salads, or finger food appetizers. Technique guides on hard-boiling eggs or choosing the best cucumbers can enhance your confidence in the kitchen.

Ingredient information about tuna varieties and their sourcing can help you make informed decisions during shopping trips. Equipment recommendations, such as proper cutting boards and sharp knives, can also elevate your cooking experience.

Seasonal variations of this recipe can include ingredients like avocados or tomatoes for different flavor profiles, depending on what’s predominant in local markets.

Join the Conversation

We invite you to share your experiences with these tuna stuffed cucumber bites! Whether it’s feedback, unique adaptations, or questions, we want to engage with fellow food lovers.

Don’t forget to follow us on social media, where you can share your photos and how you enjoy this delightful recipe. By sharing your culinary creations, you contribute to a vibrant community that celebrates healthy, delicious eating.

Your insights help inspire others, so feel free to pace your own cooking tips or personal variations to the recipe. Let’s connect through our mutual love for cooking and create conversations around food that brings us together.

The Recipe

Tuna Stuffed Cucumber Bites

Serves: 4

Prep Time: 15 mins

Cook Time: 10 mins

Total Time: 25 mins

Kitchen Equipment Needed

  • Mixing bowl
  • Knife
  • Cutting board
  • Piping bag (optional)

Ingredients

  • 1 can of tuna (12 oz), drained
  • 1/4 cup mayonnaise
  • 1 tablespoon Dijon mustard
  • 2 tablespoons chopped red onion
  • 2 tablespoons chopped celery
  • 1 tablespoon chopped fresh dill or parsley
  • Salt and pepper to taste
  • 2 medium cucumbers
  • 2 hard-boiled eggs, sliced

Directions

  1. In a mixing bowl, combine drained tuna, mayonnaise, mustard, onion, celery, and herbs. Mix until well combined. Season with salt and pepper to taste.
  2. Slice cucumbers into 1-inch thick rounds, then cut a small hollow space in each slice to hold the filling.
  3. Using a piping bag or spoon, fill each cucumber slice with the tuna mixture.
  4. Top each bite with a slice of hard-boiled egg.
  5. Arrange on a serving platter and chill until ready to serve.

Recipe Notes

  • For different flavors, try adding spices like paprika or curry powder to the tuna mixture.
  • These bites are best served fresh but can be refrigerated for 24 hours before serving.

Delicious and Easy Noodle Recipe for Quick Weeknight Meals

Delicious Noodle Recipe: Easy, Quick, and Flavorful

⚖️
Difficulty
Easy

⏲️
Prep Time
15 mins

🕒
Cook Time
20 mins

⏱️
Total Time
35 mins

🍽️
Servings
4

Noodles are the ultimate comfort food, and this delicious noodle recipe is as easy as it is satisfying. With a delightful blend of fresh ingredients and rich flavors, you’ll savor every bite. Whether you’re looking for a quick weeknight dinner or a dish to impress guests, this noodle recipe fits the bill perfectly. The fragrant stir-fry combined with perfectly cooked noodles creates a symphony of tastes and textures that will leave your taste buds dancing.

Imagine the aroma of garlic and ginger wafting through your kitchen as you cook. The vibrant colors of the vegetables provide a feast for the eyes, while the tender noodles serve as the perfect canvas to absorb all the savory goodness. Each mouthful bursts with flavor, making it ideal for busy families or anyone who enjoys a home-cooked meal without the fuss.

Quick Recipe Highlights

  • Flavor Profile: This noodle recipe features a savory sauce with hints of soy sauce and sesame, balanced by the freshness of vegetables.
  • Texture: The noodles are perfectly al dente, offering a delightful chew, while the veggies add a crunchy contrast.
  • Aroma: A fragrant mix of garlic, ginger, and soy sauce creates an inviting aroma that will lure everyone into the kitchen.
  • Visual Appeal: The dish is a colorful medley of ingredients, with bright greens, yellows, and reds that enhance its presentation.
  • Skill Level Needed: This recipe is beginner-friendly and requires basic cooking skills.
  • Special Equipment: A large skillet or wok is needed for stir-frying the ingredients effectively.

Recipe Overview

  • Difficulty Level: This easy noodle recipe is perfect for novice cooks and busy individuals, requiring minimal ingredients and time.
  • Category: Ideal for lunch or dinner, this noodle dish can be served as a main course or as a side.
  • Cuisine: Rooted in Asian cuisine, this dish captures the vibrant flavors and cooking techniques commonly practiced in many Asian households.
  • Cost: With economical ingredients, this dish provides delicious value, making it a budget-friendly option for families.
  • Season: Enjoy this noodle recipe year-round, but it’s especially refreshing during the summer months when paired with crunchy vegetables.
  • Occasion: Perfect for weeknight dinners, potlucks, or gatherings, this versatile dish caters to both casual and festive occasions.

Why You’ll Love This Recipe

Savoring this noodle recipe means indulging in a delightful blend of taste and texture. The harmony of flavors is immensely satisfying, with each ingredient balancing the others perfectly. The umami-rich sauce enhances the fresh vegetables and tender noodles, creating a dish that is truly unforgettable.

Convenience is key with this recipe. You can whip up this delicious meal in just 35 minutes, making it an ideal solution for hectic weekdays. The simplicity of preparation allows for fewer dishes and quick cleanup, giving you more time to relax and enjoy your meal.

Nutritionally, this noodle recipe shines with a variety of vegetables packed with vitamins and minerals. Whole grains in the noodles offer fiber and slow-releasing energy, making it a wholesome choice for everyone in the family. Enjoying this dish not only satisfies your cravings but also contributes positively to your diet.

Socially, this noodle dish is a crowd-pleaser. It’s perfect for family gatherings, and its vibrant colors make it an enticing centerpiece on any table. Whether served at a holiday feast or a casual dinner party, it encourages sharing and enjoyment amongst friends and family.

Lastly, the cost-effectiveness of this recipe makes it all the more appealing. With easily accessible ingredients, you can create a homemade meal that rivals takeout without breaking the bank. It’s delicious, nutritious, and affordable—what’s not to love?

Historical Background and Cultural Significance

The origin of noodles dates back thousands of years, believed to have originated in China before spreading to other parts of Asia. The earliest evidence of noodles was found in archaeological sites, signifying their long-standing role in Asian cuisine. Different cultures have their unique variations, but the fundamental concept remains the same: a source of sustenance.

Culturally, noodles are celebrated in various Asian festivities and are often associated with longevity and good fortune. They are commonly served at birthdays and New Year celebrations, symbolizing a long life ahead. This significance offers an added layer of meaning to enjoying a bowl of noodles.

Over the years, the preparation of noodle dishes has evolved, with countless adaptations being made to fit modern culinary preferences. This evolution showcases the dish’s versatility, allowing for various flavors and styles, from spicy to sweet and savory.

Regionally, each area has its distinct variations of noodles. From Italian pasta to Japanese ramen or Chinese chow mein, each variant emphasizes local ingredients and flavor profiles, showcasing the cultural diversity found within noodle recipes.

Ingredient Deep Dive

The key ingredient, noodles, have a rich cultural history, serving as a staple food in many Asian countries. Noodles are typically made from wheat, rice, or buckwheat, offering diverse nutritional benefits. Each type contributes varying amounts of protein and fiber, making them a valuable addition to any diet.

When selecting noodles, aim for brands that use high-quality grains, as freshness greatly impacts taste and texture. Stored properly in a cool, dry place, noodles can maintain their quality for months, allowing for easy meal planning.

Vegetables, another essential part of this noodle recipe, provide vibrant colors and essential nutrients. Fresh vegetables like bell peppers, broccoli, and carrots not only add fiber but also important vitamins and minerals.

In terms of selection, always go for bright, crisp vegetables without blemishes for the best flavor. Keep them in the refrigerator, wrapped in a damp paper towel, to maintain freshness. If necessary, substitutions can be made with frozen vegetables, ensuring you still enjoy the essential nutrition without compromising taste.

Sauces, typically soy or teriyaki, add depth and flavor to noodle dishes. Familiarize yourself with brands that utilize real ingredients without excessive additives. Store sauces in a cool place, and check expiration dates regularly to ensure optimal flavor.

Common Mistakes to Avoid

  • Overcooking the noodles: Rushing the cooking process can lead to mushy noodles. Always follow the package instructions for perfect texture.
  • Skipping the rinse: Rinsing noodles after boiling helps remove excess starch and prevents them from clumping together.
  • Not using enough oil: Using inadequate oil in the pan can cause sticking. A light drizzle helps avoid this issue.
  • Adding cold ingredients: Ensure ingredients like chicken or shrimp are at room temperature before cooking to maintain temperature consistency.
  • Not prepping ingredients ahead of time: Having all ingredients ready before cooking speeds up the process and prevents overcooking.
  • Overcrowding the pan: This can lead to uneven cooking. Stir-fry in batches if needed to ensure everything is cooked perfectly.
  • Using stale ingredients: Fresh vegetables and sauces make a significant difference in flavor; always choose fresh ingredients.
  • Ignoring seasoning: A pinch of salt or pepper at various cooking stages elevates the overall taste of the dish.
  • Rushing the stir-frying process: Take your time to allow flavors to meld; fast stir-frying can lead to undercooked ingredients.
  • Neglecting flavor balancing: Taste and adjust by adding more soy sauce, spice, or sweetness to reach the desired flavor profile.

Essential Techniques

Stir-frying is a key technique for this noodle recipe. It’s important as it helps retain the nutrients in vegetables while producing a smoky flavor. To master stir-frying, work with a hot skillet and ensure ingredients are added in order of cooking times, starting with proteins, followed by denser vegetables, and finishing with leafy greens.

Another essential technique is the timing of noodle cooking. It’s crucial to time the noodles’ doneness to align perfectly with the stir-fry. Check the noodles periodically for texture, remembering that they will continue to cook slightly once drained.

Understanding how to prepare sauces is also vital. Balancing soy sauce with acid (like vinegar) and sweetness (like sugar or honey) enhances flavor complexity. Taste your sauce during preparation to find the right blend for your palate.

Pro Tips for Perfect Noodle Recipe

Use high-quality noodles for the best taste and texture; avoid over-the-counter options with harsh preservatives.
Prep all vegetables and proteins beforehand to ensure a smooth cooking process, reducing chances of overcooking.
Experiment with different sauces like hoisin or oyster sauce for unique flavor variations, adding a personal touch.
Don’t skimp on the oil when stir-frying; it prevents sticking and enhances flavor.
Garnish with fresh herbs or sesame seeds for an added burst of flavor and textural contrast.
Allow cooked noodles to cool slightly before serving; this prevents further cooking and retains their ideal texture.
Taste as you cook, adjusting seasonings or sauce amounts to suit your preference for seasoning balance.
Use a wide skillet or wok to give more surface area for even cooking.

Variations and Adaptations

Explore regional variations by incorporating local spices or vegetables unique to your area, such as bok choy in Asian cuisine or zucchini for a Mediterranean twist. Seasonal adaptations are also encouraged; use summer vegetables like zucchini and bell peppers, or winter root vegetables for hearty meals.

Dietary modifications can make this noodle recipe suitable for various diets. Substitute traditional noodles with quinoa or spiralized vegetables for gluten-free or low-carb options. Flavor variations can include different sauces or spices for those seeking a kick or a specific taste profile.

Texture modifications allow for creativity through additional crunchy toppings like crushed peanuts or crispy onions. Finally, different presentation alternatives, such as bowls or platters, can elevate the dining experience and make the dish more visually appealing.

Serving and Presentation Guide

Presentation is key to any meal. When serving your noodle dish, consider plating individual portions in deep bowls, which allow for generous servings and saucy goodness. Garnishing with sliced green onions or sesame seeds adds a pop of color.

Accompanying side dishes can enhance the meal; consider serving with spring rolls or a light cucumber salad. Ensure the peppers and greens remain vibrant by adding them last and tossing them through the hot noodles briefly before serving.

Temperature is vital; serve noodles hot for the best flavor, but allow them to rest shortly after cooking for flavors to meld. Portion control is also essential; serving sizes should be generous but reasonable to avoid overwhelming guests.

Wine and Beverage Pairing

For pairing with this delectable noodle recipe, consider a light white wine such as a Sauvignon Blanc or a Gewürztraminer, which complements the fresh flavors. If you prefer red wine, a light Pinot Noir could provide an interesting contrast without overpowering the meal.

For non-alcoholic alternatives, refresh with iced green tea or sparkling water with a splash of citrus, enhancing the dish’s freshness. Coffee or tea can be delightful after the meal, with options like matcha or a light herbal tea soothing the palate.

When serving, make sure the beverages are chilled, providing a crisp, refreshing contrast to the warm noodles. This enhances the overall dining experience, keeping it light yet satisfying.

Storage and Shelf Life

For storing this noodle dish, allow it to cool at room temperature before transferring it to an airtight container. Proper storage can extend the dish’s shelf life to about 3-4 days in the refrigerator.

Temperature requirements are crucial; ensure it remains chilled to prevent spoilage. When reheating, use a microwave or stovetop with a splash of water to rehydrate the noodles without compromising texture.

If you plan to freeze the dish, remember to omit any fresh garnishes before storage. Properly stored, the dish can last up to 2 months in the freezer, maintaining flavor and texture. Before serving, fully thaw in the fridge and reheat.

Make Ahead Strategies

To streamline preparation, consider pre-cooking and storing noodles, which can be refrigerated with a drizzle of oil to prevent sticking. Assembling the remaining ingredients can further expedite the cooking process on the day of serving.

Quality will remain intact when planning and prepping ingredients; however, add fresh elements, such as herbs or toppings, just before serving for the best results. A timeline can be established for when to start cooking, ensuring every component is ready at once.

When reheating, use low to medium heat to avoid overcooking, stirring frequently. Fresh elements, like lemon zest or fresh cilantro, can be added post-reheating, revitalizing flavors and enhancing the dish’s taste.

Scaling Instructions

Scaling this noodle recipe is simple, whether you’re halving or doubling the ingredients. For halving, ensure you accurately measure all components to maintain flavor balance and consistency.

If you’re making extra to serve a larger group, remember to use a larger skillet or pot to accommodate everything, allowing for even cooking. Adjust cooking times slightly, as larger quantities may take longer to reach the desired texture.

Timing modifications are critical; ensure additional ingredients are added gradually and monitored closely to prevent overcooking. Additionally, make sure you have appropriate storage options lined up for leftovers.

Nutritional Deep Dive

On the macro level, this noodle recipe provides a balanced combination of carbohydrates, proteins, and fats. Whole grain noodles deliver fiber, while added vegetables contribute essential vitamins and minerals for overall health.

Micronutrient analysis reveals a treasure trove of nutrients; colorful vegetables such as bell peppers and broccoli offer vitamins A, C, and K, vital for immune function and bone health. Balance is key, as this recipe supports a range of dietary needs.

Health benefits of the ingredients boost energy levels, improve digestion, and contribute to overall wellness, making it suitable for everyday meals. Enjoying moderate portions promotes sustained energy without overwhelming calorie intake, assisting weight management.

Evaluating portion sizes also ensures you derive maximum nutritional benefit, hence be mindful of serving suggestions. This noodle dish stands out as both nourishing and satisfying, making it a staple for balanced eating.

Dietary Adaptations

For gluten-free options, consider using rice noodles or made-from-scratch gluten-free alternatives. These substitutions allow those with dietary restrictions to indulge without discomfort while maintaining delicious taste.

Dairy-free options can easily be achieved by omitting cream or cheese. Consider utilizing plant-based sauces and fresh vegetables to enhance flavors without compromising dietary needs.

Vegan adaptations can be made easily by substituting meat proteins with tofu or chickpeas, adding an excellent source of protein while still keeping the dish hearty.

Low-carb alternatives encourage spiralizing vegetables like zucchini in place of traditional noodles, offering a lighter take while maintaining a satisfying meal.

For those on ketogenic diets, ensure the sauce is also low in sugars, perhaps by making a homemade version to suit the macros.

Paleo enthusiasts can use fresh, whole ingredients and steer clear of processed items found in traditional recipes, ensuring meals remain within dietary guidelines.

Low-FODMAP adaptations focus on avoiding garlic and onions, substituting them with green onions or herbs for flavor without digestive stress.

Troubleshooting Guide

If the noodles end up too chewy, revisit your cooking time, as they should be al dente. Overcooking can make them rubbery, so closely follow package instructions for timing.

For a flavor imbalance, taste and adjust by adding soy sauce gradually and check for sweetness, ensuring all elements are harmonized.

Temperature issues can arise if the skillet isn’t hot enough; preheating ensures a good stir-fry that maintains the ingredients’ quality and freshness.

If you encounter sticking noodles, ensure adequate oil is used, and try tossing immediately after boiling with a light drizzle of sesame oil.

Ingredient substitutions might lead to unexpected results; always opt for similar textures that provide analogous flavors to avoid dullness.

Timing concerns often happen with meal prep—using a timer can help manage cooking durations for each ingredient, ensuring everything melds together beautifully.

Recipe Success Stories

Community feedback often highlights how versatile this noodle recipe is, showcasing its adaptability to personal tastes. Many readers share their successful modifications, such as adding seasonal vegetables or experimenting with spicy sauces, all while maintaining the core of the original recipe.

Readers’ suggestions frequently inspire others to try new approaches and flavor combinations that enhance the dish. Sharing pictures on social media has created a lively community around this noodle recipe, encouraging even more creativity.

Photography tips suggest focusing on vibrant colors and textures when posting about this recipe. Capturing each stage of preparation, from raw ingredients to plated perfection, can inspire others to recreate it.

Adaptation stories from various cultural backgrounds demonstrate the universal appeal of noodles. Each variant brings something unique, making the shared experience all the richer through culinary diversity.

Frequently Asked Questions

How long can I store leftovers in the refrigerator?

Leftovers can be stored in an airtight container for 3-4 days. Make sure they cool completely before refrigerating to preserve freshness.

Can I freeze this noodle recipe?

Yes, you can freeze the noodle dish for up to 2 months. However, avoid freezing fresh garnishes; add them after reheating.

What are the best noodles to use for this recipe?

For best results, use fresh or whole grain noodles. Rice noodles also work well for a gluten-free option, providing a different flavor profile.

How can I customize the vegetables?

Feel free to customize the vegetables according to your preferences. Seasonal and local produce works best for freshness and flavor.

Can I make this recipe vegan?

Absolutely! Substitute meat with tofu or chickpeas and use vegan sauces to maintain the dish’s heartiness while making it plant-based.

What if my sauce is too salty?

If the sauce is too salty, consider adding a touch of sugar or a splash of vinegar to balance out the flavors.

How do I make the dish spicy?

You can increase heat by adding chili paste, red pepper flakes, or fresh chopped chili peppers to the stir-fry.

What’s the best way to serve this dish?

This noodle recipe is best served hot. Consider garnishing with fresh herbs or sesame seeds to enhance flavor and presentation.

Can I use dry noodles instead of fresh?

Yes, dry noodles can be used; just ensure to adjust the cooking time per the package instructions for the perfect texture.

What are some good side dishes to serve?

Consider serving light appetizers, like spring rolls or fresh salads, that complement the noodle dish without overwhelming flavors.

Additional Resources

Explore related recipes that feature noodles, such as Pad Thai or Spaghetti Aglio e Olio, to enrich your cooking repertoire. If you’re interested in learning more about noodle-making techniques, numerous online resources and cookbooks provide a wealth of information on homemade pasta.

Ingredient information is readily available; consider checking out local markets for fresh produce and artisanal noodles to enhance your cooking experience.

Weather-related resources can guide your herb and vegetable selection based on seasonal availability, ensuring you always have fresh produce at your fingertips.

Equipment recommendations can help you choose the right tools for your kitchen; investing in a quality wok can make a significant difference when stir-frying.

Join the Conversation

Social media sharing can elevate your cooking experience. Encourage friends and family to join in by sharing your own photographs and recipe variations online. Engaging with others through comments and tips can foster a supportive cooking community.

Photography tips include capturing the dish at different stages of preparation, which can enhance your presentation while providing inspiration to others. Encourage recipe reviews and story-sharing to create a lively discussion about the noodle recipe.

Inviting new ideas and variations from readers can enhance the dish and make it even more enjoyable for everyone. This collaborative spirit can inspire new adaptations and diverse flavors while solidifying a sense of community around this beloved noodle dish.

The Recipe

Delicious Noodle Recipe

Serves: 4

Prep Time: 15 mins

Cook Time: 20 mins

Total Time: 35 mins

Kitchen Equipment Needed

  • Large skillet or wok
  • Chopping board
  • Knife
  • Spatula
  • Airtight containers for storage

Ingredients

  • 200g noodles of your choice
  • 1 bell pepper, sliced
  • 1 cup broccoli florets
  • 1 carrot, julienned
  • 2 tablespoons soy sauce
  • 1 tablespoon sesame oil
  • 2 cloves garlic, minced
  • 1 teaspoon ginger, grated
  • Salt and pepper to taste
  • Sesame seeds for garnish

Directions

  1. Prepare noodles according to the package instructions, then drain and set aside.
  2. In a large skillet or wok, heat sesame oil over medium-high heat. Add garlic and ginger, sautéing for 1-2 minutes until fragrant.
  3. Add bell pepper, broccoli, and carrot. Stir-fry for 5-7 minutes, ensuring vegetables remain vibrant and crisp.
  4. Toss in the cooked noodles and pour soy sauce over the mixture. Gently toss everything together for 2-3 minutes, allowing the noodles to absorb flavors.
  5. Season with salt and pepper to taste. Serve immediately, garnished with sesame seeds.

Recipe Notes

  • Feel free to add proteins like chicken, shrimp, or tofu for a heartier meal.
  • Adjust vegetable quantities based on preference or availability.
  • This noodle recipe can be easily doubled or halved as needed.
  • For added spice, include chili paste or red pepper flakes during the cooking process.

Delicious Keto LCHF Almond Cookies: Easy Low-Carb Recipe

KETO LCHF Almond Cookies: A Deliciously Low-Carb Treat

⚖️
Difficulty
Easy

⏲️
Prep Time
10 mins

🕒
Cook Time
15 mins

⏱️
Total Time
25 mins

🍽️
Servings
24 cookies

Indulge in the delightful world of KETO LCHF Almond Cookies, a perfect balance of taste and health for anyone on a low-carb diet. These cookies are not just a treat; they’re a testament to what can be created without the excess sugars and carbs that often plague traditional baking. Biting into a cookie brings an explosion of nutty flavor paired with the rich sweetness of almond extract, making for a heavenly experience with every nibble. The flavor is beautifully complemented by a subtle crunch that satisfies both the palate and the soul.

Whether you’re navigating a KETO lifestyle or simply want a healthier snack option, these cookies fit the bill flawlessly. Their crumbly yet moist texture strikes a perfect balance, leaving you feeling satisfied without the sugar crash. Plus, they’re incredibly easy to prepare with minimal ingredients, making them an ideal choice for both novice bakers and seasoned chefs looking for a quick, low-carb dessert. Dive into this delicious recipe that not only pleases your taste buds but also falls in line with your dietary goals.

Quick Recipe Highlights

  • Flavor Profile: Nutty, sweet, and pleasantly fragrant, these cookies provide a satisfying treat without the carbs.
  • Texture: Crispy on the outside with a tender bite, these cookies melt in your mouth while also providing a satisfying crunch.
  • Aroma: The delightful scent of toasted almonds mingles with the warmth of vanilla, creating an inviting kitchen atmosphere.
  • Visual Appeal: Golden-brown and perfectly round, these cookies are as beautiful as they are delicious. Topped with flaked almonds, they offer an appealing rustic charm.
  • Skill Level Needed: Suitable for all levels, making it perfect for a family baking project or a quick solo endeavor.
  • Special Equipment: All you need is a mixing bowl, baking sheet, and parchment paper—no fancy gadgets required!

Recipe Overview

  • Difficulty Level: These KETO LCHF Almond Cookies are categorized as easy due to their straightforward steps requiring minimal preparation and baking experience.
  • Category: These cookies serve as a delightful dessert, snack, or even a quick breakfast option for those seeking low-carb alternatives.
  • Cuisine: Rooted in low-carb dietary traditions, this recipe showcases the versatility of almond flour in creating satisfying, guilt-free desserts.
  • Cost: With almonds and basic pantry items as the main ingredients, this cookie recipe is budget-friendly and wallet-conscious.
  • Season: Perfect for any season, but especially delightful with a warm cup of tea or coffee during the colder months.
  • Occasion: Ideal for gatherings, holiday parties, or simply as a tasty treat for yourself or your family.

Why You’ll Love This Recipe

The taste and texture of KETO LCHF Almond Cookies are simply irresistible. The natural nuttiness of almonds brings a depth of flavor that enhances every bite, while the sweetness from low-carb sweeteners means you can enjoy them guilt-free. Each cookie has a light crunch that gives way to a soft center, perfectly satisfying to both cookie lovers and health enthusiasts.

Preparing these cookies is incredibly convenient. With just a handful of ingredients and minimal prep time, you can whip up a batch quickly. They are perfect for meal prep, allowing you to have a healthy snack readily available. Their simple mix-and-bake process makes them a go-to treat for any busy day.

Not only do these cookies satisfy your cravings, but they also offer nutritional advantages. Packed with healthy fats and protein from almonds, they fit seamlessly into low-carb and ketogenic diets. Almonds are also rich in Vitamin E, magnesium, and fiber, promoting overall health and wellness while catering to your sweet cravings.

They also hold great social and entertaining value. Whether serving friends or family, you’ll be the star of the gathering by offering a delicious cookie that everyone can enjoy. They pair wonderfully with coffee or tea, elevating your hosting game with minimal effort.

Cost-effectiveness is a significant factor with these cookies. With easily accessible ingredients that are typically available in bulk, you can make numerous batches without breaking the bank. The incredible satisfaction and taste you get from these KETO LCHF Almond Cookies far exceed the cost involved.

Historical Background and Cultural Significance

The origin of almond cookies can be traced back to ancient times in various cultures, highlighting almonds’ historical significance as a staple nut in many cuisines. As the popularity of low-carb diets surged, particularly among health enthusiasts and those looking to manage their weight, recipes like KETO LCHF Almond Cookies began to emerge, bridging traditional flavors with modern dietary needs.

Almonds have long been linked to health benefits across cultures. Historically significant for their nutrient density, almonds have been associated with longevity and vitality. This cultural importance has paved the way for their modern usage in baking, particularly in cookie recipes that aim to be healthier and more beneficial, such as these low-carb cookies.

Over time, recipes for almond cookies have evolved, especially in response to increased dietary knowledge and preferences. Traditional recipes, often laden with sugar and wheat flour, have transformed into healthier alternatives that maintain the spirit of the original while aligning with contemporary dietary trends, such as KETO and LCHF.

Regional variations can also be found, with many cultures incorporating local flavors and ingredients. The versatility of almond flour allows for creativity in recipe formulation, resulting in diverse cookie styles that still honor the nut’s distinct flavor.

Ingredient Deep Dive

Almond Flour: Almond flour is a crucial ingredient in KETO LCHF Almond Cookies, providing a gluten-free alternative to traditional flour. Rich in nutrients, almond flour is celebrated for its low carbohydrate content and high protein levels, making it a popular choice among those following low-carb and ketogenic diets. When selecting almond flour, look for finely ground options to ensure a tender texture in your cookies. Proper storage in an airtight container in a cool, dark place will ensure freshness for longer periods.

Sweetener: The choice of sweetener can significantly alter the flavor profile of your almond cookies. Many opt for erythritol or stevia, both of which are popular in low-carb baking. These sweeteners provide the sweetness we crave without the glycemic impact of sugar. When substituting, it’s essential to understand each one’s sweetness level compared to sugar to maintain the desired flavor in your cookies. Store any leftover sweetener in a cool, dry place to preserve its integrity.

Common Mistakes to Avoid

  • Overmixing the dough can lead to tough cookies. Mix just until combined for a tender texture.
  • Using improperly measured almond flour can affect the consistency. Always spoon and level your flour for accuracy.
  • Not allowing cookies to cool on the baking sheet can result in them falling apart. Let them set for a few minutes before transferring to a wire rack.
  • Using too much sweetener can overpower the delicate almond flavor. Adjust according to taste preference.
  • Skipping the parchment paper might result in sticking. Always line your baking sheet for easy removal.
  • Not preheating the oven can lead to uneven baking. Ensure your oven is hot before placing the cookies inside.
  • Overbaking can make the cookies dry. Keep an eye on them, as they continue to cook slightly once out of the oven.
  • Using cold ingredients can hinder proper mixing. Ensure eggs and butter are at room temperature for a smooth mixture.
  • Not cooling the cookies properly can lead to a soggy bottom. Allow adequate time for cooling to retain texture.
  • Storing cookies improperly may affect freshness. Keep them in an airtight container for optimal shelf life.

Essential Techniques

Mastering the art of mixing is crucial in baking cookies. Proper mixing technique ensures that the ingredients are well-combined without overworking the dough. Aim for a smooth consistency without any lumps—this prevents the cookies from becoming tough. A good visual cue is the dough holding together without crumbling.

Another essential skill is understanding oven temperatures. Each oven can behave differently, and calibration is key to perfect baking. An accurate oven thermometer can prevent baked goods from undercooking or overcooking, ensuring that your KETO LCHF Almond Cookies emerge perfectly golden every time.

Pro Tips for Perfect KETO LCHF Almond Cookies

1. Always measure your almond flour accurately using a spoon and leveling method for consistent results.

2. Freeze dough for later use. Roll into logs, wrap tightly, and store in the freezer for a quick cookie treat.

3. Experiment with different extracts like coconut or lemon to create unique flavors while keeping the base low-carb.

4. Use a cookie scoop for uniform shaping to ensure even baking across all cookies.

5. Add in sugar-free chocolate chips for a fun twist on the original recipe.

6. For a chewy texture, don’t overbake; pull them out while they are still slightly soft in the center.

7. Dust with powdered sweetener just before serving for an elegant presentation.

8. Make mini cookies to serve at parties—everyone loves bite-sized treats!

Variations and Adaptations

Experimenting with KETO LCHF Almond Cookies can yield delightful transformations. For instance, you can add spices like cinnamon or nutmeg to infuse them with seasonal flavors. Dark chocolate chips can be incorporated for chocolate lovers, providing richness with a hint of sweetness—all while keeping the carbs in check.

For those who enjoy fruity flavors, consider folding in dried unsweetened cranberries or blueberries. These additions complement the almond flavor beautifully while adding a pop of color and a nutritional boost.

Texture modifications can also enhance your cookies; try incorporating ground flaxseed for added fiber or chopped nuts for added crunch. Adjusting these elements can transform each batch into something uniquely your own.

If gluten-free modifications are needed, be sure to substitute any other necessary ingredients. Almond flour often pairs excellently with coconut flour for various experiments, allowing for delightful flavor combinations.

Serving and Presentation Guide

When it comes to serving KETO LCHF Almond Cookies, presentation is key. Opt for a beautiful cake stand or a rustic wooden platter to showcase your cookies. Dust the tops with a light sprinkling of powdered erythritol for a visually appealing touch that enhances their elegance.

Garnishing with whole almonds or drizzling melted sugar-free chocolate on top can bring an extra flair to your display. Consider serving them alongside a small card explaining that they are KETO-friendly; this can spark conversation and interest with guests.

For a modern serving suggestion, pair the cookies with a rich, dark cup of coffee or a refreshing herbal tea, enhancing the experience. Remember that these cookies maintain best texture when served at room temperature; keep that in mind during your serving process.

Wine and Beverage Pairing

Pairing KETO LCHF Almond Cookies with a lightly oaked Chardonnay can beautifully balance the nutty flavors, bringing out the sweetness of the cookies. The creaminess of the wine complements the rich texture while its acidity cuts through the sweetness perfectly.

If you prefer non-alcoholic options, a sparkling water infused with lemon or rosemary can refreshingly contrast with the almond flavors, making it an excellent pairing for a spring gathering.

For coffee lovers, a robust espresso creates a delightful contrast, enhancing the sweetness of the cookies overall. Enjoy experimenting with different beverages to find your perfect match.

Storage and Shelf Life

Properly storing your KETO LCHF Almond Cookies will maintain their freshness. Store them in an airtight container at room temperature for up to one week. If you wish to prolong their shelf life, consider freezing them; they can last up to three months in a freezer-safe bag or container.

To freeze, ensure the cookies are completely cooled, then layer them between wax paper in a container to prevent sticking. When ready to enjoy, allow them to thaw on the counter, and they will retain their delightful texture.

Check for signs of spoilage, such as off smells or changes in texture, especially if stored for extended periods. Reheating in the oven briefly can also help restore their original texture if they feel soft after thawing.

Make Ahead Strategies

Making KETO LCHF Almond Cookies ahead of time is a great strategy for busy weeks. You can prepare the dough and refrigerate it for up to three days before baking. This allows flavors to meld together beautifully while saving time on the actual baking day.

If making these cookies for an event, consider baking them the day before. This allows them to set properly and ensures fresh cookies on the day of the occasion. Just remember to store them in an airtight container to preserve their delightful texture and taste.

Additionally, you can pre-chop any nuts or prepare your ingredients ahead of time, streamlining the process even further. Taking these steps can inspire you to bake low-carb cookies more often without sacrificing time or quality.

Scaling Instructions

If you need to halve or double the KETO LCHF Almond Cookies recipe, adjustments are straightforward. Simply divide or multiply each ingredient accordingly, keeping ratios consistent. For example, if doubling, be mindful that the bake time may slightly vary, so keep a close eye on the cookies.

Equipment may also need adjusting as larger batches may require multiple baking sheets. If you’re doubling the since, wider space may prevent them from sticking together during baking.

Always consider storage requirements when scaling up a recipe; ensure enough space to contain your freshly baked cookies without compromising their quality.

Nutritional Deep Dive

Each KETO LCHF Almond Cookie is a powerhouse of nutrients. On a macro-level, they provide healthy fats from almonds, essential proteins, and fiber, making them satisfying and less likely to lead to hunger soon after consumption. This cookie provides a smart choice for a nutrient-dense snack.

Micronutritionally, almonds are a fantastic source of Vitamin E, magnesium, and antioxidants, contributing to heart health and overall well-being. Additionally, they are low in carbohydrates, making them a preferred choice for those adhering to low-carb and ketogenic diets.

Consider portion analysis when enjoying these cookies as even low-carb treats can add up if consumed in excess. Maintaining mindful eating practices can help with weight management while indulging in delicious KETO LCHF Almond Cookies.

Dietary Adaptations

These KETO LCHF Almond Cookies can easily accommodate various dietary needs. For those following a gluten-free diet, almond flour makes this cookie an effortless choice without compromising flavor or texture.

Dairy-free adaptations can also be achieved by substituting any butter with coconut oil or a dairy-free margarine. This keeps the cookies equally moist and delicious while catering to different dietary restrictions.

For vegan variations, replace eggs with flaxseed meal or chia seeds combined with water to replicate binding effects without animal products.

Low-carb, KETO, paleo, and even low-FODMAP diets can find a place within this cookie recipe, as it naturally leans towards clean, wholesome ingredients that celebrate nutrient density.

Troubleshooting Guide

If you encounter texture issues, such as being too crumbly or difficult to shape, ensure your almond flour is of high quality and properly measured. Adjusting the fat content slightly can help achieve the desired dough consistency.

Flavor balance can also present a challenge. If your cookies taste too bland, consider adding a pinch of salt or altering your sweetener to achieve a more flavorful profile.

Temperature problems often arise, leading to undercooked or overcooked cookies. Investing in an oven thermometer can ensure accurate readings, providing perfectly baked treats every time.

Common equipment challenges arise with cookie sheets that may warp during baking. Investing in high-quality, heavy pans can mitigate these issues, ensuring your cookies bake evenly and beautifully.

Recipe Success Stories

The KETO community consistently shares success stories featuring these almond cookies, with praise surrounding their nutty flavor and delightful crunch. Many readers have adapted the recipe to include various nut butters, resulting in personalized flavors that still maintain the original’s essence while accommodating personal preferences.

Share your baking experiences with the community to inspire others to indulge in these delicious treats. No two experiences should be the same!

Readers have suggested adding vanilla or experimenting with different nut flours for diverse culinary adventures. These suggestions not only highlight the adaptability of almond cookies but also foster creativity in the kitchen.

Frequently Asked Questions

Can I use different nut flours? Yes, experimenting with other nut flours such as hazelnut or coconut flour can add unique flavors, but adjustments in measurements may be required due to different absorbency levels.

How many carbs are in each cookie? The carb count largely depends on the sweetener used, but on average, each cookie contains about 1-2 grams of net carbs, making them a low-carb treat!

Can I substitute the sweetener? Absolutely! Just be cautious with sweetness levels, as each sweetener varies in potency. Taste as you go for the best results.

What if I run out of almond flour? You might be able to use sunflower seed flour or a blend of coconut flour and other nut flours, but be prepared for changes in texture and flavor.

How do I make these cookies chocolate-flavored? Simply incorporate unsweetened cocoa powder into the dough along with the almond flour, adjusting sweetness as needed.

Can I make these cookies vegan? Yes! Substitute eggs with flaxseed meal mixed with water or chia seeds to replicate binding effects without using animal products.

How should I store leftover cookies? Store in an airtight container at room temperature for up to a week, or freeze for longer storage. Thaw on the counter when ready to enjoy.

Why did my cookies spread too much? This can happen if the oven temperature is not hot enough or if the dough was too soft. Ensure your dough is firm before baking and that the oven is properly preheated.

Can I add other ingredients like nuts or chocolate chips? Yes! Feel free to mix in sugar-free chocolate chips, chopped nuts, or even dried fruits to add variety to your cookies.

How long do they take to bake? Baking typically takes about 12-15 minutes depending on the oven and desired crunchiness, so keep an eye on them towards the end!

Additional Resources

Explore related recipes that enhance your low-carb lifestyle, from decadent desserts to savory snacks. Understanding foundational baking techniques will also elevate your cooking skills, allowing you to create various delightful treats. Ingredient-specific guides provide details on the health benefits and culinary uses of almond flour, ensuring you’re knowledgeable about what you bake with.

Additionally, don’t forget to check out equipment recommendations that enhance your baking experiences, from quality mixing bowls to optimal baking sheets. Seasonal variations in flavors can also bring excitement to your cookie-making endeavors.

Join the Conversation

Share your baking creations on social media, tagging friends or family who might find pleasure in trying out KETO LCHF Almond Cookies. Photography tips can help you capture the delightful beauty of your baked goods, making every post share-worthy. Engaging with fellow bakers and sharing experiences encourages a sense of community and inspires more baking adventures!

Let your creativity shine through in variations, and gather feedback from friends and family to enhance future batches. Your voice matters in the baking community and can inspire others to experiment with such delicious low-carb options.

The Recipe

KETO LCHF Almond Cookies

Serves: 24 cookies

Prep Time: 10 mins

Cook Time: 15 mins

Total Time: 25 mins

Kitchen Equipment Needed

  • Mixing bowl
  • Baking sheet
  • Parchment paper
  • Cookie scoop
  • Wire rack

Ingredients

  • 2 cups almond flour
  • 1/2 cup erythritol or sweetener of choice
  • 1/4 cup butter, softened
  • 1 large egg
  • 1 teaspoon almond extract
  • 1/2 teaspoon baking powder
  • Pinch of salt

Directions

  1. Preheat your oven to 350°F (175°C) and line a baking sheet with parchment paper.
  2. In a mixing bowl, cream together the softened butter and sweetener until smooth.
  3. Add the egg, almond extract, and mix until well combined.
  4. Gradually incorporate almond flour, baking powder, and salt until a dough forms.
  5. Using a cookie scoop, drop rounded tablespoons of dough onto the prepared baking sheet.
  6. Bake for 12-15 minutes or until the edges are golden brown.
  7. Remove from oven and allow to cool on the baking sheet for a few minutes before transferring to a wire rack.

Recipe Notes

  • For a chocolate variation, substitute half the almond flour with unsweetened cocoa powder.
  • Add chopped nuts or sugar-free chocolate chips for extra texture and flavor.
  • Store in an airtight container at room temperature for up to a week or freeze for longer storage.