Copycat Pizza Hut Breadsticks: Easy Recipe for Perfect Homemade Breadsticks

homemade Pizza Hut breadsticks, easy breadstick recipe, garlic Parmesan breadsticks, fluffy breadsticks recipe, Pizza Hut breadstick copycat, homemade breadsticks recipe

Copycat Pizza Hut Breadsticks Recipe: Perfect Homemade Snack

Introduction

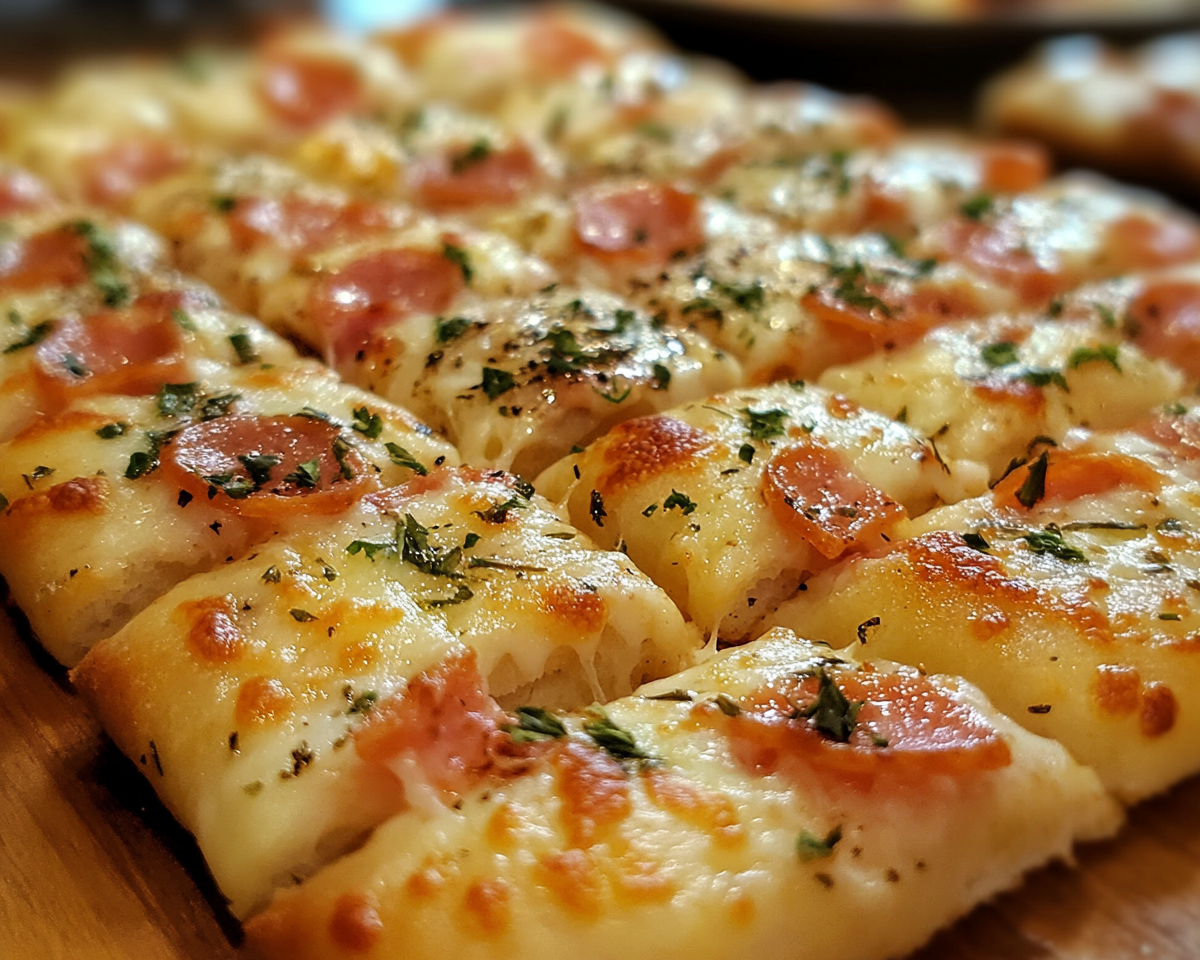
The Pizza Hut breadsticks are an iconic favorite among pizza lovers, known for their fluffy texture and perfectly seasoned buttery topping. This homemade copycat recipe brings the flavors of Pizza Hut straight to your kitchen, allowing you to recreate this classic appetizer at home.

For another pizza-inspired recipe, try Homemade Chicago-Style Deep Dish Pizza.


Why Make Copycat Breadsticks?

Homemade breadsticks offer unmatched freshness, the ability to customize seasoning, and the joy of creating a restaurant-quality snack at home. Perfect for serving alongside pasta, pizza, or soups, these breadsticks are a versatile addition to any meal.

Learn more about creating dough from scratch with Secrets to Perfect Pizza Dough.


Ingredients for Copycat Pizza Hut Breadsticks

For the Dough

  • All-purpose flour
  • Yeast
  • Sugar
  • Salt
  • Olive oil
  • Warm water

For the Topping

  • Butter
  • Garlic powder
  • Parmesan cheese
  • Italian seasoning

For more bread-based ideas, explore Easy Garlic Knots Recipe.


Step-by-Step Recipe

  1. Prepare the Dough
    • Activate yeast by mixing with sugar and warm water until frothy.
    • Combine with flour, olive oil, and salt; knead until smooth and elastic.
  2. Shape and Rest the Dough
    • Roll out the dough into a rectangular shape.
    • Cut into even strips and let them rise on a prepared baking sheet.
  3. Bake the Breadsticks
    • Bake at 400°F until golden brown.
    • Immediately brush with melted butter and sprinkle with the seasoning mix.

Tips for Success

  • Use warm water (around 110°F) to activate the yeast effectively.
  • Resting the dough is essential for fluffy breadsticks.
  • For even baking, rotate the pan halfway through cooking.

Creative Variations

  • Cheesy Breadsticks: Sprinkle shredded mozzarella before baking.
  • Spicy Breadsticks: Add chili flakes to the seasoning mix.
  • Whole Wheat Breadsticks: Replace all-purpose flour with whole wheat flour for a healthier twist.

Serving and Storing

Serving Suggestions

  • Pair with marinara or ranch dipping sauce.
  • Serve as an appetizer or a side dish with pizza or pasta.

Storage Tips

  • Store in an airtight container for up to 2 days.
  • Reheat in an oven or air fryer for a crisp texture.

FAQs

  1. Can I freeze the dough?
    Yes, portion the dough into strips and freeze on a baking sheet before transferring to a freezer-safe bag.
  2. What’s the secret to fluffy breadsticks?
    Proper kneading and allowing enough time for the dough to rise are key.
  3. Can I make the dough without a stand mixer?
    Yes, you can knead the dough by hand for about 8–10 minutes.

Internal Linking Opportunities

  1. Link to Homemade Marinara Sauce with anchor text: Pair your breadsticks with this rich homemade marinara sauce.
  2. Link to Cheesy Bread Recipe with anchor text: Discover another cheesy delight with this recipe.
  3. Link to Crescent Roll Pizza with anchor text: Explore a fun twist on traditional pizza with crescent roll dough.

External Links and Recommended Anchor Text

  1. How to Proof Yeast for Perfect Dough
    Anchor Text: Learn the essentials of proofing yeast for flawless dough.
  2. Perfect Pizza Dough Techniques
    Anchor Text: Master the art of making the perfect pizza dough.
  3. Best Dipping Sauces
    Anchor Text: Discover creative dipping sauce ideas for your breadsticks.

Conclusion

Recreating Pizza Hut’s breadsticks at home is easier than you think and delivers delicious results. Perfectly fluffy and seasoned to perfection, they’re a crowd-pleaser for any occasion. Try pairing them with Homemade Chicago-Style Deep Dish Pizza for a complete Pizza Hut-inspired meal.

Strawberry Cream Cheese Icebox Cake: A Perfect No-Bake Dessert

no-bake strawberry cake, strawberry icebox dessert, cream cheese layered cake, summer dessert recipes, strawberry cream dessert, easy icebox cake

Strawberry Cream Cheese Icebox Cake: A Delightful No-Bake Dessert

Introduction

The Strawberry Cream Cheese Icebox Cake is a perfect no-bake dessert for warm weather or any time you crave a creamy, fruity treat. Layered with graham crackers, fresh strawberries, and a rich cream cheese mixture, this dessert is as visually appealing as it is delicious. Its simplicity and versatility make it a go-to recipe for parties, family gatherings, or just a casual indulgence.

For more summer dessert ideas, explore No-Bake Banana Pudding Cheesecake.


Why Choose Icebox Cakes?

Icebox cakes are quick, easy, and require no baking. They rely on the magic of refrigeration to soften layers and meld flavors together into a luscious, sliceable dessert. Whether you’re short on time or avoiding turning on the oven, an icebox cake is a foolproof choice.

Learn more about no-bake dessert techniques with Tips for No-Bake Desserts.


Ingredients for Strawberry Cream Cheese Icebox Cake

Core Ingredients

  • Graham crackers or shortbread cookies
  • Fresh strawberries, sliced
  • Cream cheese, softened
  • Heavy whipping cream
  • Confectioners’ sugar
  • Vanilla extract

Optional Additions

  • Lemon zest for a tangy flavor boost
  • Strawberry jam for a sweet layer
  • Chocolate chips or shavings for added decadence

For a fruity twist, try Strawberry Freezer Pie.


Step-by-Step Recipe

  1. Prepare the Cream Cheese Mixture
    • Whip cream cheese, confectioners’ sugar, and vanilla until smooth.
    • Fold in whipped cream for a light, fluffy texture.
  2. Layer the Cake
    • Start with a base layer of graham crackers.
    • Spread cream cheese mixture evenly.
    • Add a layer of sliced strawberries.
    • Repeat layers until the dish is filled, ending with a layer of cream.
  3. Chill and Serve
    • Cover and refrigerate overnight to allow flavors to meld.
    • Garnish with fresh strawberries or chocolate shavings before serving.

Tips for Success

  • Use room-temperature cream cheese for a smooth filling.
  • Chill the dessert for at least 6–8 hours, but overnight is best for full flavor.
  • Slice strawberries evenly for consistent layers.

Creative Variations

1. Berry Medley Icebox Cake

Mix in blueberries and raspberries for a multi-berry delight.

2. Chocolate-Strawberry Icebox Cake

Incorporate a layer of melted chocolate or cocoa powder into the cream cheese mixture.

3. Gluten-Free Option

Substitute graham crackers with gluten-free cookies for a celiac-friendly dessert.


Serving and Storing

Serving Suggestions

  • Serve chilled with a drizzle of strawberry syrup.
  • Pair with iced tea or lemonade for a refreshing combination.

Storage Tips

  • Store in the refrigerator for up to 3 days.
  • Freeze individual slices for a longer shelf life; thaw in the refrigerator before serving.

FAQs

  1. Can I use frozen strawberries?
    Yes, but thaw and drain them thoroughly to prevent excess moisture.
  2. How do I prevent soggy layers?
    Ensure the strawberries are dry and avoid overloading each layer with cream.
  3. What’s a good substitute for cream cheese?
    Mascarpone cheese can be used for a slightly richer flavor.

Internal Linking Opportunities

  1. Link to Easy No-Bake Banana Split Cheesecake with anchor text: Try another easy no-bake dessert with our banana split cheesecake recipe.
  2. Link to Berry Lemon Poke Cake with anchor text: Discover how to create a tangy berry lemon poke cake.
  3. Link to Lemon Icebox Pie with anchor text: Explore another refreshing no-bake option with our lemon icebox pie recipe.

External Links and Recommended Anchor Text

  1. How to Choose Fresh Strawberries
    Anchor Text: Learn how to select the best strawberries for your dessert.
  2. Cream Cheese Dessert Recipes
    Anchor Text: Explore more ways to use cream cheese in desserts.
  3. Tips for No-Bake Desserts
    Anchor Text: Master the art of no-bake desserts with these tips.

Conclusion

The Strawberry Cream Cheese Icebox Cake is a crowd-pleasing dessert that’s easy to make and even easier to love. With its creamy texture, fresh strawberries, and simple preparation, it’s perfect for any occasion. Pair it with other no-bake desserts like Strawberry Freezer Pie to complete your dessert table.

Valentine’s Day Royal Icing Cookies Recipe: Sweet Treats for Your Loved Ones

Valentine cookies recipe, royal icing for Valentine cookies, heart-shaped cookies, decorated Valentine’s cookies, sugar cookies with royal icing

Valentine’s Day Royal Icing Cookies Recipe: A Sweet Way to Celebrate

Introduction

Valentine’s Day is a time to express love, and what better way than with beautifully decorated royal icing cookies? These cookies are the perfect combination of delicious and artistic, making them ideal for gifting, sharing, or enjoying yourself.

For other creative cookie ideas, explore Pistachio Shortbread Cookies.


Why Choose Royal Icing for Valentine’s Day Cookies?

Royal icing is a baker’s secret weapon for creating intricate, colorful designs. Its versatility allows for everything from smooth floods to detailed piping, ensuring your cookies look professional.

Learn about icing techniques from Mastering Royal Icing.


Ingredients for Valentine’s Day Royal Icing Cookies

Cookie Base

  • All-purpose flour, sugar, unsalted butter
  • Baking powder, eggs, vanilla extract

Royal Icing

  • Confectioners’ sugar
  • Meringue powder
  • Water
  • Gel-based food coloring

For more cookie inspiration, check out Cinnamon Roll Cookies with Cream Cheese Drizzle.


Step-by-Step Recipe

  1. Prepare the Cookie Dough:
    • Cream butter and sugar.
    • Incorporate eggs and vanilla, followed by dry ingredients.
  2. Cut and Bake:
    • Roll dough evenly, cut into hearts, and bake until golden.
  3. Prepare Royal Icing:
    • Mix meringue powder, confectioners’ sugar, and water until stiff peaks form.
  4. Decorate:
    • Outline cookies, flood with icing, and add details.

Tips for Success

  • Chill dough before cutting to prevent spreading.
  • Use gel food coloring to achieve vibrant designs without thinning the icing.
  • Test royal icing consistency: stiff for outlines, thinner for flooding.

Creative Decorating Ideas

  • Personalized Cookies: Add names or initials.
  • Layered Designs: Use wet-on-wet techniques for marbled effects.
  • Textured Patterns: Use stencils or brushes for unique designs.

Explore decorating tips with Royal Icing Consistency Guide.


Serving and Storing

Serving Suggestions

  • Package cookies in decorative bags for gifting.
  • Pair with tea or coffee for a cozy Valentine’s treat.

Storage Tips

  • Store cookies in an airtight container for up to a week.
  • Freeze undecorated cookies for future use.

FAQs

  1. How do I fix runny royal icing?
    Add more confectioners’ sugar to thicken the icing.
  2. Can I make royal icing without meringue powder?
    Yes, you can substitute egg whites, but adjust consistency accordingly.
  3. What’s the best way to prevent icing bleeding?
    Use gel-based food coloring and let each layer dry fully before adding details.

Internal Linking Opportunities

  1. Link to Cinnamon Roll Cake with Cream Cheese Glaze with anchor text: Discover another Valentine’s Day dessert option.
  2. Link to Homemade Chocolate Bark Recipe with anchor text: Pair cookies with homemade chocolate bark for a decadent gift.
  3. Link to Easy Apple Hand Pies with anchor text: Explore easy-to-make desserts for special occasions.

External Links and Recommended Anchor Text

  1. How to Make Royal Icing
    Anchor Text: Learn how to create the perfect royal icing.
  2. Cookie Decorating Ideas
    Anchor Text: Find creative ideas for decorating Valentine’s cookies.
  3. Royal Icing Consistency Tips
    Anchor Text: Master royal icing consistency for flawless designs.

Conclusion

Valentine’s Day royal icing cookies are not only delicious but also an opportunity to express creativity and love. With the right tools, techniques, and a bit of patience, you can create beautiful cookies that will impress anyone. For more sweet recipes, visit Homemade Sugar Cookies.

Homemade Peppermint Patties: Easy and Delicious Minty Treats

DIY peppermint patties, chocolate mint candy, easy peppermint treats, homemade mint patties, festive peppermint sweets, peppermint chocolate dessert

Homemade Peppermint Patties: A Sweet and Minty Delight

Introduction

Homemade peppermint patties are a delightful combination of creamy peppermint filling and smooth chocolate coating, making them a favorite treat for holidays, parties, or gifting. Unlike store-bought versions, homemade patties allow you to control the sweetness, flavor, and quality of ingredients.

To explore more candy-making ideas, check out Easy Chocolate Truffles.


Why Make Peppermint Patties at Home?

Creating peppermint patties from scratch is simple, rewarding, and healthier. You avoid unnecessary additives and can customize flavors with extracts or decorations. Homemade candies are also a thoughtful and personal gift for loved ones.

Learn more about using high-quality chocolate for homemade candy from Guide to Choosing Quality Chocolate.


Ingredients for Homemade Peppermint Patties

Core Ingredients

  • Confectioners’ sugar
  • Butter or shortening
  • Peppermint extract
  • Semi-sweet chocolate

Optional Additions

  • Food coloring for festive touches
  • Coconut oil for smoother chocolate coating
  • Sprinkles or edible glitter for decoration

Pair this with Chocolate Magic Shell for Yogurt Cups to create a unique dessert twist.


Step-by-Step Recipe for Homemade Peppermint Patties

  1. Prepare the Filling: Mix confectioners’ sugar, butter, and peppermint extract until a dough forms. Adjust the peppermint extract to taste.
  2. Shape the Patties: Roll the dough and cut into rounds. Chill to firm.
  3. Coat with Chocolate: Melt chocolate and dip the patties, ensuring full coverage. Let the chocolate set on a parchment-lined tray.

Tips for Perfect Peppermint Patties

  • Ensure the filling is chilled before coating to prevent melting.
  • Use tempered chocolate for a glossy, professional finish.
  • Avoid overloading the chocolate by tapping off excess after dipping.

Creative Variations

1. White Chocolate Peppermint Patties

Substitute white chocolate for a creamy, sweet variation.

2. Vegan Peppermint Patties

Use plant-based butter and dairy-free chocolate.

3. Festive-Themed Patties

Add green or red food coloring for a holiday theme or sprinkle crushed candy canes on top.


Serving and Storing Peppermint Patties

Serving Suggestions

  • Serve chilled for a refreshing dessert.
  • Wrap individually for party favors or gifts.
  • Add as a garnish for cakes or hot chocolate.

Storage Tips

  • Store in an airtight container for up to a week at room temperature.
  • Refrigerate or freeze for longer shelf life, separating layers with parchment paper.

FAQs

  1. Can I make peppermint patties gluten-free?
    Yes, the recipe is naturally gluten-free as long as the chocolate is certified gluten-free.
  2. How can I prevent chocolate from cracking?
    Ensure the patties are not too cold when dipping to avoid sudden temperature changes.
  3. What’s the best way to add color to the filling?
    Use gel food coloring for a vibrant hue without altering the filling’s texture.

Internal Linking Opportunities

  1. Link to Holiday Fudge Recipe with anchor text: Try another festive treat with our holiday fudge recipe.
  2. Link to No-Bake Peanut Butter Oatmeal Cookies with anchor text: Explore an easy no-bake cookie recipe.
  3. Link to Homemade Chocolate Bark with anchor text: Discover how to make customizable chocolate bark.

External Links and Recommended Anchor Text

  1. How to Temper Chocolate
    Anchor Text: Master the art of tempering chocolate for a perfect finish.
  2. Peppermint Health Benefits
    Anchor Text: Explore the benefits of peppermint in your diet.
  3. Choosing the Best Baking Tools
    Anchor Text: Find the best tools for your baking needs.

Conclusion

Making homemade peppermint patties is a fun and rewarding activity that allows you to enjoy a classic treat with a personal touch. Whether for holidays or everyday indulgence, this recipe offers endless possibilities for customization and creativity. For more sweet inspirations, visit Easy Chocolate Truffles.

Air Fryer Peanut Butter Cookies: Quick, Delicious, and Easy

peanut butter cookies air fryer recipe, quick air fryer cookies, easy peanut butter cookies, air fryer cookie recipes, crispy air fryer cookies

Air Fryer Peanut Butter Cookies: A Sweet, Easy Treat

Introduction

Air fryer peanut butter cookies are a perfect blend of convenience and deliciousness. The air fryer brings a new twist to traditional baking, providing crispy edges and chewy centers without preheating an oven. Whether you’re an experienced baker or trying this for the first time, this recipe will guide you to cookie perfection.

For a quick treat, try No-Bake Peanut Butter Oatmeal Cookies.


What Makes Air Fryer Baking Unique?

Air fryers cook by circulating hot air, creating evenly cooked peanut butter cookies in less time than traditional methods. This makes them energy-efficient, quick, and perfect for small batches.

For tips on baking in an air fryer, check out How to Use an Air Fryer for Baking.


Ingredients for Peanut Butter Cookies

Core Ingredients

  • Creamy or chunky peanut butter
  • Granulated sugar
  • Eggs
  • Baking soda

Optional Additions

  • Chocolate chips or sprinkles for added sweetness
  • Vanilla extract for depth of flavor
  • Pinch of salt to enhance peanut butter’s natural taste

Pair these cookies with other air fryer delights like Crispy Air Fryer Onion Rings.


Step-by-Step Recipe for Air Fryer Peanut Butter Cookies

  1. Prepare the Dough: Combine peanut butter, sugar, and egg in a mixing bowl. Stir until smooth.
  2. Shape the Cookies: Scoop small portions, roll into balls, and press with a fork for the classic crisscross pattern.
  3. Preheat the Air Fryer: Set the air fryer to 350°F for optimal baking.
  4. Bake in Batches: Place cookies on parchment paper, ensuring they don’t touch. Bake for 6–8 minutes.

Tips for Success

  • Use natural peanut butter for a rich flavor.
  • Cool cookies on a wire rack to prevent overcooking.
  • Avoid overcrowding the air fryer basket for even baking.

Variations

1. Chocolate Peanut Butter Cookies

Add cocoa powder for a decadent twist.

2. Vegan Option

Use flaxseed meal mixed with water as an egg substitute.

3. Low-Sugar Cookies

Replace granulated sugar with a natural sweetener like stevia.


FAQs

  1. Can I use crunchy peanut butter? Yes, it adds texture to the cookies.
  2. Do I need parchment paper? Yes, it prevents cookies from sticking to the air fryer basket.
  3. How do I store these cookies? Keep them in an airtight container for up to a week.

Internal Linking Opportunities

  1. Link to Peanut Butter Fudge with anchor text: Explore a creamy and indulgent peanut butter fudge recipe.
  2. Link to Reese’s Pieces Cookie Bars with anchor text: Try another peanut butter-based dessert with Reese’s Pieces.
  3. Link to Air Fryer Brownies with anchor text: Discover how to make brownies in an air fryer.

External Links and Recommended Anchor Text

  1. How to Use an Air Fryer for Baking
    Anchor Text: Master baking techniques with your air fryer.
  2. Peanut Butter Nutrition Facts
    Anchor Text: Learn about the health benefits of peanut butter.
  3. Best Air Fryer Models
    Anchor Text: Find the perfect air fryer for your kitchen.

Conclusion

These air fryer peanut butter cookies are a game-changer for quick, delicious treats. With simple ingredients and minimal effort, they are sure to become a household favorite. Pair them with other air fryer recipes for a sweet and savory spread. For more inspiration, try No-Bake Peanut Butter Oatmeal Cookies.