Fried Strawberry Cheesecake Sandwiches: A Decadent Dessert Treat
Fried Strawberry Cheesecake Sandwiches: A Delectable Dessert Twist
Fried Strawberry Cheesecake Sandwiches are a rich and indulgent dessert that combines the crispy exterior of fried treats with a luscious cheesecake and strawberry filling. This recipe is perfect for satisfying your sweet tooth or impressing guests at parties and gatherings.
For another fried dessert favorite, explore Crispy Fried Cheesecake Bites, which offers a bite-sized version of this delightful treat.
What Are Fried Strawberry Cheesecake Sandwiches?
These sandwiches are made by filling slices of bread with a creamy cheesecake mixture and sweet strawberries, coating them in a crispy breading, and frying until golden brown. The result is a delightful blend of textures and flavors.
For a similar indulgence, consider trying Deep-Fried Oreos, which delivers a classic carnival-style dessert at home.
Ingredients for Fried Strawberry Cheesecake Sandwiches
For the Filling
Cream cheese, softened.
Powdered sugar.
Strawberry jam or fresh strawberries.
Vanilla extract for flavor.
For the Sandwich
Slices of white or brioche bread.
Egg and milk mixture for coating.
Breadcrumbs or crushed graham crackers for a crispy finish.
For Frying
Neutral oil like canola or vegetable oil.
Optional: powdered sugar for dusting or chocolate syrup for drizzling.
Step-by-Step Recipe
1. Preparing the Filling
Mix softened cream cheese with powdered sugar and vanilla extract until smooth.
Stir in strawberry jam or chopped fresh strawberries.
2. Assembling the Sandwiches
Spread the filling evenly on a slice of bread.
Top with another slice of bread and gently press to seal.
3. Coating the Sandwiches
Dip the sandwich in the egg and milk mixture.
Coat evenly with breadcrumbs or crushed graham crackers.
4. Frying
Heat oil in a skillet over medium heat.
Fry the sandwiches until golden brown on both sides, about 2-3 minutes per side.
5. Serving
Slice the sandwiches diagonally.
Dust with powdered sugar and serve warm with a side of strawberry sauce or whipped cream.
Variations of Fried Strawberry Cheesecake Sandwiches
Chocolate Strawberry Sandwich: Add a layer of Nutella for extra richness.
Berry Medley Version: Combine strawberries with raspberries or blueberries.
Gluten-Free Option: Use gluten-free bread and breadcrumbs.
Air-Fried Version: Prepare in an air fryer for a healthier take.
Vegan-Friendly: Substitute cream cheese with a dairy-free alternative and use plant-based milk for coating.
FAQs About Fried Strawberry Cheesecake Sandwiches
Can I make these sandwiches ahead of time?
Yes, assemble and refrigerate them for up to a day before frying.
What type of oil is best for frying?
Neutral oils like canola or vegetable oil work well.
Can I use frozen strawberries?
Yes, thaw and drain them before mixing into the filling.
How do I prevent the filling from leaking?
Ensure the bread edges are pressed firmly, and consider freezing sandwiches for 10 minutes before frying.
Tips for the Perfect Fried Strawberry Cheesecake Sandwiches
Use day-old bread for better structural integrity.
Chill the sandwiches briefly before frying to keep the filling intact.
Fry on medium heat for even cooking without burning.
Fried Strawberry Cheesecake Sandwiches are a delightful way to elevate your dessert game. With a crispy crust, creamy cheesecake filling, and a burst of strawberry sweetness, these sandwiches are sure to become a favorite indulgence. Ready to try more creative desserts? Visit ExoRecipes for endless inspiration!
Savory French Onion Short Rib Soup with Gruyère Toast Recipe
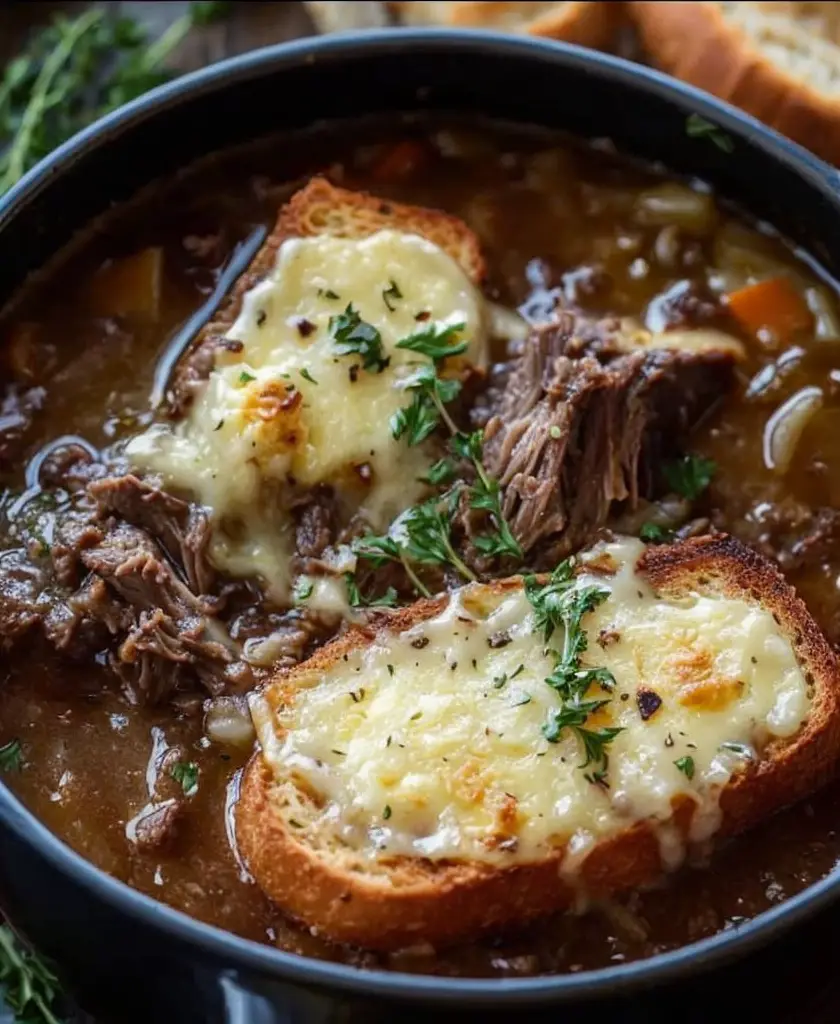
French Onion Short Rib Soup with Gruyère Toast: A Comforting Culinary Delight
⚖️
Difficulty
Intermediate
⏲️
Prep Time
20 mins
🕒
Cook Time
120 mins
⏱️
Total Time
140 mins
🍽️
Servings
4
French Onion Short Rib Soup with Gruyère Toast is more than a recipe; it’s an experience of flavors and warmth that transcends the ordinary. The rich, savory broth paired with tender, melt-in-your-mouth short ribs creates a comforting bowl that feels like a hug on a chilly day. As the Gruyère cheese melts into a gooey layer atop toasted bread, every spoonful becomes a delightful fusion of flavors and textures.
Indulging in this decadent soup allows you to appreciate the art of slow cooking. The time invested transforms simple ingredients into a sophisticated dish, as the caramelization of onions lends a natural sweetness that balances the hearty beef. Every bite is punctuated by the luxurious toppings that elevate the dish further, promising an unforgettable culinary experience.
Quick Recipe Highlights
Flavor Profile: The interplay of savory beef, sweet caramelized onions, and nutty Gruyère creates an irresistibly rich and satisfying taste.
Texture: Expect a delightful contrast with the silky smooth broth and tender meat, complemented by crispy toast.
Aroma: The fragrant notes of caramelized onions and herbs fill your kitchen, creating an inviting atmosphere.
Visual Appeal: Golden-brown Gruyère beautifully contrasts the dark broth, making for an enticing presentation.
Skill Level Needed: While the process requires some advanced techniques, the steps are straightforward, making it approachable for home cooks.
Special Equipment: A heavy-bottomed pot or Dutch oven is essential for even heat distribution during cooking.
Recipe Overview
Difficulty Level: This recipe is ideal for intermediate cooks willing to invest time for an exceptional result. It teaches valuable skills like slow roasting and caramelization.
Category: Perfect as a main course, this soup works elegantly for both casual family dinners and formal gatherings.
Cuisine: Rooted in French culinary traditions, this dish showcases the flavors and techniques typical of French comfort food.
Cost: The recipe calls for affordable cuts of beef and basic ingredients, making it economically friendly for home cooks.
Season: Best enjoyed in the colder months, this soup serves as a warming dish for winter culinary gatherings.
Occasion: Celebrate cozy evenings, holiday gatherings, or impress dinner guests with this comforting yet elegant soup.
Why You’ll Love This Recipe
The taste and texture of this French Onion Short Rib Soup make it a standout dish. The combination of the tender short ribs and the sweet, caramelized onions enveloped in a rich broth creates a deep, warming flavor profile that evokes feelings of nostalgia and comfort. The addition of crusty bread topped with gooey Gruyère cheese adds a layer of indulgence that is hard to resist.
In terms of convenience, this soup lends itself well to meal prep. Slower cooking techniques allow flavors to meld together beautifully, meaning you can make it ahead of time and simply reheat before serving. It’s an excellent option for busy schedules, as it can be made a day or two in advance, enhancing its already rich flavors.
Nutritionally, short ribs provide a good source of protein and essential vitamins, while the onions contribute beneficial antioxidants. This combination makes the soup not just filling, but also a nourishing option for a family meal.
Socially, serving this delicious soup can become a highlight of any gathering. It encourages sharing and conversation, as diners can assemble their bowls with toast and cheese to their liking. Pair it with a nice wine, and you have an impressive dinner ready to impress your guests.
Lastly, this recipe is cost-effective. With minimal but quality ingredients required, it transforms affordable staples into an exquisite meal, offering value without compromising on taste.
Historical Background and Cultural Significance
French Onion Soup dates back to Roman times, evolving through the centuries into the comforting dish we cherish today. Traditionally, it is said to have originated from the ability to make use of leftover ingredients, highlighting the culinary ingenuity of earlier cultures. Through the ages, this dish became a staple in French bistros, celebrated for its simplicity and hearty flavor.
Culturally, this dish holds a significant place in French cuisine. It showcases fundamental French cooking techniques, such as caramelization and slow simmering, which are the cornerstones of creating flavorful and nurturing dishes. Every bowl of French Onion Short Rib Soup tells a story of craftsmanship, patience, and a deep appreciation for good food.
As culinary trends have fluctuated, the classic recipe has adapted. The integration of short ribs reflects a modern twist, reflecting contemporary tastes that favor richer, meatier soups. This adaptation allows the dish to flourish within different dining contexts, making it a beloved option on both restaurants and home tables.
Regional variations further enrich its legacy, with local specialties such as adding different cheeses, herbs, or even a splash of wine. Each variation adds its unique flair, demonstrating the flexibility and timeless appeal of this classic soup.
Ingredient Deep Dive
Each ingredient in this hearty French Onion Short Rib Soup plays a vital role in balancing flavors and textures.
**Short Ribs**: Known for their rich taste, short ribs benefit from slow cooking, allowing the tough fibers to break down into tender, juicy meat. They offer significant amounts of iron and protein, making them both flavorful and nutritious. When selecting short ribs, choose cuts with good marbling to ensure tenderness. Store them in the fridge for up to three days, or freeze for longer preservation.
**Onions**: The star of this soup, onions bring a foundational sweetness that perfectly balances the savory notes of the beef. Rich in antioxidants, they provide numerous health benefits, including anti-inflammatory properties. When selecting onions, look for firm bulbs without soft or dark spots. For storage, keep them in a cool, dark place to maintain freshness.
**Gruyère Cheese**: This Swiss cheese melts beautifully, adding a nutty flavor and creamy texture to enhance the soup. In addition to its taste, Gruyère is a good source of protein and calcium. When selecting, opt for aged varieties for a stronger taste. To store, wrap in parchment paper followed by a plastic wrapper to keep it from drying out.
Common Mistakes to Avoid
Skipping the caramelization: Rushing the process will lead to a lack of depth in flavor. Take the time to let the onions become golden and sweet.
Using low-quality short ribs: Quality meat is essential for flavor; avoid cheap cuts that can ruin the dish.
Not seasoning properly: Tasting as you go is key to balancing flavors; under-seasoning can lead to a bland end product.
Overcooking the short ribs: While they need time to become tender, too much cooking can dry them out; keep a check on them.
Using pre-grated cheese: Opt for block cheese for better melting quality and taste; pre-grated varieties often contain additives.
Ignoring the broth quality: Homemade broth significantly improves flavor; store-bought can be too salty or bland.
Insufficient simmering time: Allowing the soup to simmer helps the flavors meld; don’t rush this step.
Serving without proper garnish: Presentation matters; a sprinkle of fresh herbs or spices elevates the dish visually and taste-wise.
Essential Techniques
Caramelization is a crucial technique for enhancing the flavor of the onions. Properly caramelizing involves cooking them slowly over medium-low heat, allowing the natural sugars to develop a rich golden color. To master this, stir occasionally and be patient; it may take 30-40 minutes. Watch for a deep, golden color, signaling readiness.
Braising the short ribs is another key technique. This process involves searing the meat before simmering it in liquid. It helps to develop complex flavors and tenderness. Aim for a high heat during the searing phase, then reduce to low heat while braising. The ribs are done when they are tender and easily pull apart with a fork.
Pro Tips for Perfect French Onion Short Rib Soup
1. Invest time in caramelizing the onions; the deeper the color, the better the flavor you’ll achieve.
2. Opt for high-quality, well-marbled short ribs for maximum tenderness and richness.
3. Infuse the broth with herbs such as thyme and bay leaves for added depth.
4. Use a mixture of beef stock and chicken stock for a balanced flavor profile.
5. Garnish with fresh chives or parsley for a pop of color and freshness.
6. If available, add a splash of dry sherry to the broth for an extra layer of flavor.
7. Toast the bread ahead of time for the cheese to melt beautifully.
8. Wait a minute for the cheese toast to cool slightly before serving; it enhances flavor and texture.
Variations and Adaptations
For a regional variation, consider incorporating local cheeses or herbs that reflect your area’s culinary influences. Seasonal adaptations might include adding root vegetables like carrots or parsnips for sweetness during colder months.
For dietary modifications, you can substitute the beef with plant-based short ribs or tempeh for a vegan-friendly version, keeping all other ingredients intact for flavor. For those watching carbs, replace bread with roasted cauliflower or zucchini for a healthier option.
Flavor variations could include adding a splash of balsamic vinegar for tang, while texture modifications might incorporate crispy shallots or toasted nuts for a delightful crunch. Finally, adapting presentation by serving in individual crocks can add an elegant touch to your dinner table.
Serving and Presentation Guide
Plating this soup perfectly enhances your dining experience. Ladle the soup into warm bowls, ensuring a balance between broth, meat, and onions. Place a generous slice of toasted bread on top, then sprinkle with cheese and broil until bubbly.
For garnishing, consider fresh herbs like thyme or parsley. These not only add a splash of color but also amplify the fresh aroma. Serve with a side salad or roasted vegetables that complement the richness of the soup.
Temperature is crucial—serve the soup piping hot to keep each component enjoyable. Portion carefully; aim for a hearty serving without overwhelming your guests, leaving room for additional sides or dessert.
Wine and Beverage Pairing
Pairing your French Onion Short Rib Soup with a full-bodied red wine such as Cabernet Sauvignon or a fruity Merlot enhances the rich flavors. The bold notes cut through the hearty broth, creating a harmonious balance.
For a non-alcoholic alternative, consider a sparkling apple cider that adds a refreshing contrast to the savory attributes of the soup.
If you prefer a warm beverage, a rich chai or spiced tea offers a perfect contrast with hints of warmth and sweetness that complement the dish.
Serving these beverages at optimal temperatures is key—ensure red wine is slightly chilled, while sparkling cider should be served cold.
Storage and Shelf Life
To store your French Onion Short Rib Soup, let it cool completely before transferring to airtight containers. It can last up to three days in the refrigerator and will intensify in flavor.
For long-term storage, consider freezing portions; the soup can be stored in freezer-safe containers for up to three months. When reheating, do so slowly on the stovetop or in a microwave, ensuring it’s heated through without boiling.
Signs of spoilage include an off odor or unusual texture; if in doubt, discard the soup. Avoid refreezing once thawed, as it can compromise texture and flavor.
Make Ahead Strategies
To streamline your cooking process, consider preparing the soup a day in advance. Cook fully and store in the refrigerator overnight, allowing flavors to deepen. When ready to serve, reheat slowly, adding fresh Gruyère toast just before serving.
You can also prep ingredients ahead of time—chop onions and season short ribs in advance, storing them in the fridge until ready to cook. This saves time on the day of serving, making the entire process less daunting.
For quality impact, always taste before serving, adjusting seasonings as flavors can mellow when stored. Fresh herbs can be added just before serving to maintain their vibrant color and flavor.
Scaling Instructions
If you need to adjust portion sizes, halving the recipe is simple and maintains flavors well. For larger gatherings, doubling or tripling the recipe is recommended, but be sure to use a larger pot for even cooking.
Adjust cooking times accordingly; larger quantities may require longer simmering or browning times for even flavor distribution.
Consider using a meat thermometer to ensure the short ribs are cooked to perfection, regardless of portion size. Be mindful of space in your refrigerator or freezer if scaling for later consumption, ensuring you have enough storage solutions available.
Nutritional Deep Dive
This French Onion Short Rib Soup delivers a balanced macro profile. Each serving provides ample protein from the short ribs while delivering healthy fats, particularly when using quality cuts.
Micronutrient benefits include iron and zinc, essential for immune support and energy production, while onions contribute antioxidants which are beneficial for heart health.
For portion analysis, a serving provides a comforting dish without overwhelming caloric content, making it suitable for a balanced diet when portioned correctly.
Weight management advocates can enjoy this dish with awareness of portion sizes, as it offers a satisfying meal that keeps hunger at bay.
Dietary Adaptations
For gluten-free adjustments, swap traditional bread with gluten-free alternatives like rice cakes or gluten-free artisan bread.
If following a dairy-free protocol, consider using cashew or nutritional yeast for a hint of creaminess without the cheese.
Vegan options can be embraced by using plant-based short ribs and almond milk for creaminess, maintaining the integrity of the flavors.
For those following low-carb or keto diets, replace traditional bread with thin slices of grilled eggplant or zucchini, creating a delicious base for the melty cheese topping.
Paleo enthusiasts can enjoy this soup as well, simply omitting any dairy and starches to keep it aligned with their dietary guidelines.
Troubleshooting Guide
If you encounter texture issues in the soup, consider returning to low heat. If the broth feels too thin, simmer longer to reduce it down, intensifying the flavor.
For flavor balance concerns, add a pinch of salt or a splash of vinegar to elevate the savory notes, augmenting the overall taste.
Should you face temperature problems, ensure an even heat distribution by using a heavy-bottomed pot, preventing hotspots.
If you need to substitute ingredients, understand that some flavors can be tempered by alternative options—do trial runs before serving to gauge that the taste remains consistent.
Timing concerns can arise if the cooking process feels rushed; patience is key to developing rich flavors, especially during caramelization and braising stages.
Recipe Success Stories
Community feedback around this French Onion Short Rib Soup has been overwhelmingly positive, with many readers sharing adaptations they’ve successfully tried at home. Stories of experimentation with local cheeses or stock infusions have inspired new variations, proving that the dish is flexible and forgiving.
Readers have also reported excellent results when following the cooking guidance, particularly in achieving the perfect onion caramelization and short rib tenderness. These tips foster confidence and encourage kitchen enthusiasts to take on this dish.
Photography tips abound, with many adventurous cooks sharing their beautiful presentations on social media, highlighting the golden crusts and rich, deep colors of the soup. The comforting nature of this recipe prompts heartwarming connections and renewed culinary enthusiasm.
Frequently Asked Questions
Can I prepare this soup in advance? Yes! The soup can be made a day ahead and reheated for even richer flavors.
What wines pair best with this dish? Full-bodied reds like Cabernet Sauvignon or Merlot complement the richness of the soup beautifully.
Can I use other meats aside from short ribs? Absolutely! You can substitute beef chuck or even pork for a different flavor experience.
How should I store leftovers? Store the soup in an airtight container in the refrigerator for up to three days, or freeze for up to three months.
What should I serve with the soup? Traditional accompaniments include a side salad or crusty artisan bread to balance the richness of the soup.
Is it possible to make this sauce healthier? You can use leaner cuts of meat or reduce the amount of cheese used for a lighter version.
Can I customize toppings for the soup? Yes! You can explore various cheeses or add a splash of balsamic vinegar for extra flavor.
Is this soup kid-friendly? Yes, the comforting flavors and textures should appeal to many children, especially with toasted cheese on top.
What type of pot is best for making this soup? A heavy-bottomed pot or Dutch oven works best to evenly distribute heat and prevent scorching.
Can I make this soup vegetarian? A vegetarian version can be made using plant-based broth, mushrooms, and beans or lentils for protein.
Additional Resources
Explore additional related recipes on our blog, including different takes on classic French dishes. We offer technique guides for caramelization and slow cooking that are useful for gaining confidence in the kitchen.
Ingredient information sheds light on selecting high-quality meats and cheese, alongside seasonal variations to incorporate fresh produce throughout the year.
We also recommend essential kitchen equipment suited for creating these gourmet-style dishes at home, encouraging culinary creativity and exploration.
Join the Conversation
We invite you to share your experience with this French Onion Short Rib Soup on social media, tagging us in your successful endeavors. Share your photography tips and ideas to create visually stunning presentations that will inspire others in our community.
Engaging with our community through comments and recipe reviews not only builds connections but also fosters a learning environment, encouraging others to try their hand at creating this delightful dish.
We encourage you to experiment with variations and share your unique twists on this classic recipe, enriching our culinary community.
The Recipe
French Onion Short Rib Soup with Gruyère Toast
Serves: 4
Prep Time: 20 mins
Cook Time: 120 mins
Total Time: 140 mins
Kitchen Equipment Needed
Heavy-bottomed pot or Dutch oven
Wooden spoon or spatula
Oven-safe bowl for broiling
Knife and cutting board
Ingredients
2 lbs short ribs
4 medium onions, thinly sliced
6 cups beef broth
1 cup dry white wine
2 tbsp olive oil
1 tbsp fresh thyme
2 bay leaves
Salt and pepper to taste
8 slices of crusty bread
2 cups Gruyère cheese, grated
Directions
Season the short ribs with salt and pepper. In a heavy pot, heat olive oil over medium-high heat and sear the short ribs on all sides until browned. Remove and set aside.
In the same pot, add the sliced onions and sauté until they begin to caramelize, around 30-40 minutes. Stir occasionally to prevent burning.
Once the onions are caramelized, add the wine, scraping the bottom of the pot to release any flavorful bits. Cook for about 5 minutes until reduced.
Add the broth, thyme, bay leaves, and seared short ribs back into the pot. Bring to a simmer and cover. Cook on low heat for about 1.5 hours until the meat is tender.
Remove the short ribs and shred the meat, discarding the bones. Return the shredded meat to the pot.
Preheat the oven to broil. Lay the toasted bread on an oven-safe dish, top each slice with a generous amount of Gruyère. Broil until the cheese is melted and bubbly.
Serve the soup hot with the cheesy toast on top or alongside the bowls for dipping.
Recipe Notes
For extra flavor, consider adding a splash of balsamic vinegar at the end.
This recipe can be easily doubled for larger gatherings.
Leftovers store well and can intensify in flavor over time.
Delicious Pistachio Cream Cake Recipe for Any Occasion
Pistachio Cream Cake: A Decadent Delight for Any Occasion
⚖️
Difficulty
Moderate
⏲️
Prep Time
20 mins
🕒
Cook Time
30 mins
⏱️
Total Time
50 mins
🍽️
Servings
8 servings
Pistachio Cream Cake is the perfect blend of nostalgia and sophistication. Its origins trace back to classic baking traditions but have evolved into a favorite for both special occasions and everyday enjoyment. The stunning green hue of the pistachio cream and the delicate layers of moist cake invite you to indulge in a dessert experience that is as rich in flavor as it is in beauty. The balance of the nutty pistachio flavor, smooth creaminess, and a hint of sweetness creates a symphony that dances on your palate, making each bite a delight.
As you cut into the cake, the layers reveal themselves, each one promising a unique taste that complements the others perfectly. The soft sponge cake acts as the ideal canvas for the vibrant pistachio cream, while the topping of crushed pistachios adds a delightful crunch that enhances the overall texture. Whether served at a birthday party, an afternoon tea, or simply as a treat for yourself, the Pistachio Cream Cake is bound to impress your guests and leave them wanting more.
Quick Recipe Highlights
Flavor Profile: A luscious blend of nutty pistachio and creamy frosting enhances every bite of this cake. The sweetness is perfectly balanced, ensuring that it is a treat for all palates.
Texture: The cake layers are soft and fluffy, while the pistachio cream adds a velvety richness. Crunchy pistachios on top provide a satisfying contrast.
Aroma: The inviting aroma of freshly ground pistachios mingles with the sweet vanilla scent of the cake, creating a mouthwatering anticipation.
Visual Appeal: This cake boasts a striking green cream topping, adorned with crushed pistachios, making it a stunning centerpiece for any occasion.
Skill Level Needed: While moderately challenging, this recipe is manageable with basic baking skills and offers great rewards for your efforts.
Special Equipment: A stand mixer is recommended for optimal cream whipping, and cake pans are essential for the perfect cake layers.
Recipe Overview
Difficulty Level: This Pistachio Cream Cake requires some baking finesse, making it an ideal adventure for intermediate bakers. If you’ve mastered basic cakes, you’re ready to tackle this delightful recipe.
Category: This dessert fits perfectly into the cake category, specifically as a celebration cake or an elegant dessert for special events.
Cuisine: Drawn from Middle Eastern influences, pistachios play a significant role in various culinary traditions, adding both flavor and cultural significance to desserts.
Cost: The ingredients are relatively affordable, especially if you purchase pistachios in bulk. Expect a reasonable cost that reflects the quality of the dish.
Season: This cake is delightful all year round, but it’s especially popular during spring and summer when fresh flavors are most appreciated.
Occasion: Suitable for birthdays, anniversaries, or just a sweet treat, this cake is sure to elevate any gathering.
Why You’ll Love This Recipe
The Pistachio Cream Cake is not only delicious but also tempting in its rich characteristics. The nutty flavor of the pistachio combines beautifully with the creamy frosting, creating a cake that feels both luxurious and comforting. The sweetness is balanced perfectly, ensuring the experience is not overwhelmingly sweet, making it enjoyable for everyone, including those with meticulous palates.
Preparing this cake is straightforward and rewarding. The steps are clear, and while the cake may take a bit of time to prepare, the process is enjoyable. This is an excellent recipe for those wanting to impress friends and family without the need for complex techniques or ingredients. Once baked, the cake can easily be stored, allowing you to prepare it ahead of time for your events.
Nutrition is an essential aspect of every meal, and with the inclusion of pistachios, this cake boasts several health benefits. Pistachios are rich in antioxidants, vitamins, and healthy fats, making them a smart addition to your dessert repertoire. This cake allows you to indulge while sneaking in a bit of nutritional goodness, making it a guilt-free pleasure.
This cake is not just about eating; it’s about sharing. The Pistachio Cream Cake is sure to be a conversation starter at gatherings, making it a fantastic centerpiece for entertaining. Its stunning appearance combined with delightful taste will have your guests complimenting your culinary skills all night long.
Cost-effectiveness is another plus. This delicious cake requires only a few affordable ingredients, primarily focusing on pantry staples and pistachios. This dessert offers fabulous flavor and presentation, making it an excellent value for gatherings or personal enjoyment.
Historical Background and Cultural Significance
The origins of the Pistachio Cream Cake can be traced back to traditional Middle Eastern desserts, where pistachios have been a staple ingredient for centuries. These nuts, known for their vibrant color and unique flavor, elevate many dishes, particularly in sweets that celebrate cultural gatherings and festivities. Over time, the use of pistachios expanded globally, culminating in various adaptations of cakes and desserts, including this beloved recipe.
Culturally, pistachios hold a significant place in various regions and are often associated with wealth and prosperity due to their richness and the labor involved in harvesting them. They symbolize celebration, making their presence in desserts like this cake meaningful for both personal events and festive feasts.
As culinary practices evolved, the Pistachio Cream Cake became more accessible, allowing home bakers to incorporate this delectable flavor into everyday and special occasion desserts. The versatility of the ingredient has resulted in numerous adaptations, with variations emerging based on regional and modern tastes.
Today, this cake continues to evolve, with creative twists and versions appearing worldwide. From modern patisserie showcases to home kitchens, the Pistachio Cream Cake invites experimentation while retaining its classic charm rooted in rich cultural history.
Ingredient Deep Dive
Pistachios are not only delicious but also come packed with a variety of health benefits. They’re an excellent source of healthy fats, protein, fiber, and essential vitamins like B6 and E. When selecting pistachios, look for those that are vibrant green and air-tight packaged to ensure maximum freshness. To maintain their flavor and texture, store them in an airtight container in a cool, dry place.
For those with nut allergies, substitutes such as almond or sunflower seed flour can provide a similar consistency, while retaining some of the original flavor profile. These alternatives might alter the cake’s flavor slightly but can still result in a tasty dessert.
In addition to the pistachios, the other ingredients also play crucial roles. Flour is the backbone of the cake, giving it structure while sugar adds sweetness and moisture. Eggs act as a binding agent, ensuring that the cake rises and remains light and fluffy.
Lastly, a quality butter or margarine can enhance the cake’s richness and contribute to a satisfying mouthfeel. Remember to always use fresh ingredients for the best results, especially when it comes to the flavor of your cake.
Common Mistakes to Avoid
Not rotating the cake in the oven: Many bakers forget to rotate the cake to ensure even baking. This can result in uneven texture or uneven browning.
Using stale pistachios: Ensure your pistachios are fresh and have not passed their expiration date. Stale nuts can compromise the flavor of the cake significantly.
Overmixing the batter: It’s essential to mix the ingredients just until combined; overmixing can lead to a dense texture.
Skipping the parchment paper: Not lining the cake pans can lead to cakes sticking, making them difficult to remove.
Incorrect oven temperature: An oven that isn’t at the correct temperature can lead to undercooked or overcooked cakes, so always preheat your oven.
Ignoring cooling time: Allowing the cake to cool completely in the pan can create moisture and result in a soggy bottom.
Improper measuring of ingredients: Accurate measurements are crucial. Use a scale for precise baking, especially with flour and sugar.
Not allowing the butter to soften: Using cold butter can impact the mixing process. Always allow butter to come to room temperature before mixing.
Using low-quality ingredients: High-quality butter, flour, and fresh pistachios make a noticeable difference in the final taste of the cake.
Overbaking the cake: Keep a close eye on your cake as it bakes. A toothpick should come out clean but moist, rather than dry and crumbly.
Essential Techniques
Mixing your ingredients thoroughly is key to a well-integrated batter. Start by creaming the butter and sugar together until light and fluffy. This process introduces air into the mixture, providing a light texture. Avoid overmixing once you add the dry ingredients, as it can lead to a dense cake.
Baking the cake correctly is crucial for achieving the perfect rise and structure. Ensure that your oven is preheated to the right temperature, and avoid opening the door while the cake is baking, as this can disrupt the cooking process. Check for doneness by inserting a toothpick in the center; it should come out clean for a perfectly baked cake.
Frosting the cake requires a steady hand and patience. Start with a crumb coat, which helps to lock in any crumbs and provides a smooth base for your final layer of frosting. Use an offset spatula for even application, smoothing the frosting around the sides and over the top for a finish that looks professional.
Pro Tips for Perfect Pistachio Cream Cake
1. Invest in high-quality natural pistachio cream for the best flavor. Avoid artificial flavors that can overwhelm the cake’s beautiful essence.
2. Chill your mixing bowl and beaters before whipping cream for the frosting; cold equipment helps achieve better volume and stiffness.
3. If your cake layers are domed, level them by trimming the tops with a serrated knife for even stacking; this ensures a beautiful final presentation.
4. Garnish your cake with fresh pistachios and a dusting of powdered sugar for an elegant touch that enhances the visual appeal.
5. Experiment with adding a hint of almond extract to the batter for an additional depth of flavor that complements the pistachios beautifully.
6. Place the cake in the refrigerator for 30 minutes before cutting to ensure cleaner slices, preventing the layers from shifting.
7. Utilize a cake stand when serving; it improves presentation and allows guests to see the beautiful layers of the Pistachio Cream Cake.
8. For those who love dessert pairings, consider serving this cake with a scoop of vanilla ice cream or a dollop of whipped cream for an indulgent treat.
Variations and Adaptations
When considering regional variations, the use of different nuts can be exciting. For instance, mixing walnuts or hazelnuts with pistachios can create a flavor profile that reflects local tastes while still keeping the original essence intact. Also, consider adding a layer of raspberry or berry compote to introduce a refreshing tartness alongside the rich pistachio flavor.
Seasonal adaptations could include using citrus zest, such as lemon or orange, for a fresh and zesty twist, making it perfect for spring and summer gatherings. The vibrant flavors brighten up the cake, enhancing its versatility based on the season.
Gluten-free and vegan adaptations can be accomplished effectively. Almond flour can replace traditional flour in a gluten-free version, while a flaxseed egg or a commercial egg replacer can be used for a vegan rendition. These modifications ensure inclusivity for various dietary needs without compromising flavor.
Textural modifications could involve adding a layer of cream cheese frosting to the cake for a balance of flavors or drizzling chocolate ganache over the top for decadence. Each of these variations can transform the cake for different occasions or preferences.
Considering presentation alternatives, serving in individual portions or mini-cakes can make for an impressive display at events. Cupcakes crafted from this recipe allow serving convenience while dazzling guests with their presentation.
Serving and Presentation Guide
When serving your Pistachio Cream Cake, consider using a serrated knife for the cleanest cuts. Present it on a beautiful cake stand to elevate its appearance, making it the centerpiece of your table. Garnishing with extra crushed pistachios or edible flowers can add vibrant color and texture, creating a feast for the eyes as well as the palate.
Slicing the cake into equal portions will not only satisfy your guests but will also ensure that everyone enjoys the same delectable bites. Accompanying each slice with a dollop of whipped cream or a scoop of vanilla ice cream can enhance the overall experience, marrying the rich creaminess with soothing coolness.
For ideal temperature serving, allow the cake to sit at room temperature for about 20 minutes prior to cutting. This readiness ensures that the texture is inviting and that the pistachio cream slightly softens for optimal spreadability and flavor release.
Consider pairing with fresh tea or coffee to complement the cake’s flavors beautifully. Hot beverages can create a comforting experience, encouraging more intimate moments of sharing and entertaining.
Wine and Beverage Pairing
When it comes to wine pairing, a sweet dessert wine such as Sauternes or Moscato can enhance the cake’s nutty flavors, creating a delightful harmony between the drink and dessert. Both wines complement the sweetness of the pistachio cream and present a balanced finish that enhances the indulgence of the cake.
For non-alcoholic alternatives, opt for iced herbal teas featuring hints of mint or chamomile. These light beverages won’t overshadow the cake’s flavors while providing refreshment alongside the dessert.
Additionally, pairing with a nice cup of quality coffee can contrast beautifully with the sweetness of the cake. The rich, bold flavors of espresso or Americano can provide a pleasant counterpoint to the rich softness of the Pistachio Cream Cake, enhancing your overall dining experience.
Always serve the beverages at appropriate temperatures to respect the flavors of both the cake and the drinks. Cold beverages can enhance the flavors during warmer months while warm drinks can increase the comfort level during colder seasons.
Storage and Shelf Life
To keep your Pistachio Cream Cake fresh and delicious, it’s essential to store it properly. An airtight container is necessary to maintain the moisture of the cake while preventing it from absorbing any unwanted odors from your refrigerator. Ideally, refrigerate the cake if it’s topped with cream or frosting to maintain freshness for about 3-4 days.
If you must store it at room temperature, only do so for slices without frosting, to prevent its deterioration. Ensure that the cake is covered with plastic wrap or placed in a container that’s sealed. The shelf life for unfrosted cake layers is around 2-3 days.
Signs of spoilage include off-smells, changes in texture or significant dryness. If your cake has molded or developed an unappetizing appearance, it’s best to discard it. For a longer duration, consider freezing pieces of the cake, which can preserve flavors and textures for several months.
For reheating, gently warm slices in the microwave, using a low setting to retain moisture. Alternatively, for a firmer texture, allow the frozen slices to thaw in the refrigerator overnight before enjoying your cake again.
Make Ahead Strategies
Planning to serve Pistachio Cream Cake without the last-minute rush? Pre-baking the cake layers a day in advance can save you time. Allow the layers to cool completely, then wrap them tightly in plastic wrap before storing in the refrigerator. This process enhances flavor and moisture absorption, resulting in a more delicious cake during serving.
When you’re ready to frost the cake, prepare the pistachio cream in advance too. Store it in an airtight container for a day or up to 48 hours, maintaining its freshness and making the final assembly a breeze.
Assembling the cake closer to serving time keeps the presentation stunning. However, consider chilling the completed cake for at least an hour before serving, which can help set the frosting and make cutting cleaner.
Incorporate fresh elements like berries or mint leaves just before serving to add that last moment of freshness, enhancing the visual appeal of your beautifully layered cake. These final touches elevate the dessert experience and cater to guests’ anticipations.
Scaling Instructions
Scaling the Pistachio Cream Cake recipe can be simple and rewarding. If you want to halve the recipe, reduce all the ingredients by half while adjusting baking times accordingly; a smaller cake will typically take less time to bake.
Should you wish to double or triple the recipe for a larger gathering, ensure you have adequately sized pans to accommodate the increased volume. Be aware that baking times may need to be adjusted, particularly as extra batter may require longer cooking; always keep an eye on the cakes, checking for doneness with a toothpick.
For larger batches, be prepared to use a heavier-duty mixer since the additional batter may exceed the capacity of standard mixers. Always consider the space in the oven; you may need to bake in batches to ensure even cooking.
When it comes to storage, remember to scale the storage containers as well; larger cake pans will allow for more air exposure than smaller, tightly packed ones, impacting freshness. Plan accordingly to preserve the integrity of your flavors.
Nutritional Deep Dive
Understanding the macro breakdown of your Pistachio Cream Cake can help inform baking decisions. Each slice typically contains a balanced ratio of carbohydrates, fats, and proteins mainly due to the components of flour, butter, and pistachios. This cake packs an added protein punch thanks to pistachios, enhancing its nutrient value over traditional cakes.
In terms of micronutrients, the inclusion of pistachios contributes vitamins B6 and E, magnesium, and potassium. These nutrients play essential roles in supporting heart health, metabolism, and overall well-being, evidencing the benefits of indulging in this dessert.
Health benefits extend beyond feel-good factors since including nuts in your diet has been shown to help lower cholesterol levels and provide healthy energy sources. However, enjoy in moderation; despite its benefits, cake remains a treat and should be part of a balanced diet.
When considering portion sizes, it’s beneficial for weight management to cut smaller slices, allowing you to enjoy the delicate flavors without overindulgence. Pairing each slice with fruits or low-calorie desserts allows for a satisfying meal without excessive calorie consumption.
Dietary Adaptations
For gluten-free adaptations, consider using almond flour or gluten-free all-purpose flour as substitutes, ensuring a similar baking experience while retaining the integrity of the cake. Adjust the liquid content accordingly for the best texture comparison.
For those following dairy-free diets, plant-based butter and coconut or nut-based creams can be used as alternatives, providing richness without compromising on taste or texture. These substitutions encourage inclusivity, allowing more people to enjoy this tasty treat.
Transforming this into a vegan cake is simple too. Use flax or chia seeds as egg replacements and opt for non-dairy milk options. Ensure that any added flavors or toppings are also plant-based to maintain the integrity of the vegan diet.
For a lower-carb option, you can replace regular sugar with erythritol or other sugar substitutes to reduce the overall carbohydrate count; however, consider that this may alter the sweetness and texture slightly.
Paleo enthusiasts can effectively modify the recipe by using coconut flour and natural sweeteners such as honey or maple syrup. This variety explores new ingredients while preserving the delicious essence of the Pistachio Cream Cake.
Troubleshooting Guide
Texture issues often arise due to overmixing, leading to a gummy result. Avoid this by mixing until just combined. If underbaked, add a few minutes to the baking time in your next batch, checking doneness with a toothpick for future efforts.
For flavor balance, if a batch leans too sweet, try incorporating a pinch of salt into the cream and batter the next time to enhance overall flavor. If the pistachio taste is lacking, consider increasing the amount slightly or adding pistachio extract for a more pronounced flavor.
Temperature problems can occur if the oven is not properly preheated. Make sure to calibrate your oven for accurate readings on temperature settings; a digital thermometer can assist with this.
If you encounter equipment challenges, ensure that your mixing bowl and tools are properly cleaned and free of any residual materials that might contaminate flavors. Incorporating brands that you trust can also impact overall baking results.
When making substitutions, ensure you’re making changes that fit the overall baking environment; not all no-sugar or gluten-free products behave the same as conventional ingredients, which may require adjustments in method or proportions.
Timing concerns can affect the cake’s integrity. If you’re delayed in frosting, consider refrigerating the layers to allow the cake to firm up slightly and make the process smoother.
Recipe Success Stories
Community feedback about the Pistachio Cream Cake has emphasized how it impressively couples moistness with rich flavors that are often sought in celebratory dishes. Many home bakers have shared their success with the recipe, noting how it received rave reviews at family gatherings and parties.
Readers often mention their joy at adapting the recipe by experimenting with different flavors and fillings, leading to unique renditions of the cake. An infused layer with raspberry jam has been a favored suggestion, providing a refreshing contrast to the rich pistachio cream.
Photography tips frequently include focusing on the beautiful green colors and textures layered within the cake; natural lighting captures the vibrance of the pistachios perfectly. Showcasing the cake’s layers in cross-section adds intrigue, tempting viewers to try for themselves.
Furthermore, many share that their variations of the recipe, including mini versions for parties, have been met with enthusiasm. The excitement around personal touches allows creativity while adhering to the essence of this delicious cake.
Social media has also played a role in propagating this cake’s popularity, with influencers incorporating it into their dessert compilations, leading to a wider audience for this delectable treat.
Frequently Asked Questions
1. Can I make this cake in advance? Absolutely! You can bake the cake layers one day ahead and store them wrapped in plastic wrap in the refrigerator. Frosting can also be prepared in advance for easier assembly.
2. How should I store leftover cake? Store any leftover cake in an airtight container in the refrigerator, where it can last for about 3-4 days. If you want to keep it longer, consider freezing the slices.
3. Can I use different nuts? Yes! While pistachios are traditional, feel free to experiment with other nuts such as almonds or cashews; each will provide a unique flavor profile.
4. What can I do if my cake sinks? If your cake sinks, it may be due to underbaking or too much leavening agent. Always check for doneness with a toothpick in the center to avoid this issue in the future.
5. Can I use a different type of frosting? Definitely! Cream cheese frosting or ganache could be delightful substitutes if you wish to change things up while still enjoying the nutty cake experience.
6. Is this cake suitable for freezing? Yes, this cake freezes well. Just wrap it tightly to prevent freezer burn and enjoy it within 2-3 months for the best quality.
7. What is the best way to serve this cake? Chilling the cake for 20 minutes before serving helps clean cutting. Consider garnishing with crushed pistachios or fresh berries for a stunning look.
8. What type of flour should I use? All-purpose flour works best for this cake, providing the right structure and texture. For gluten-free options, consider a gluten-free all-purpose blend.
9. Can I adjust the sweetness level? Absolutely! Feel free to reduce the amount of sugar slightly to suit your taste, or experiment with alternative sweeteners if you prefer.
10. How do I know when the cake is done? The cake is done when a toothpick inserted into the center comes out clean or with just a few moist crumbs attached. Avoid overbaking to keep it tender.
Additional Resources
For those looking to pair their cake with other complementary recipes, an assortment of nut-based desserts can enhance the dining experience. Check out related recipes like pistachio baklava or almond cookies to round out a nut-loving dessert table.
Helpful technique guides on cake decoration and frosting techniques can also aid in achieving a professional finish. Invest time in expanding your cake-decorating skills to enhance not just this recipe but many more in your culinary journey.
Understanding the ingredients better can also improve your baking practices. Exploring the nutritional benefits of nuts or the importance of leavening agents can give you insights into baking science, leading to more successful outcomes.
If you’re looking for equipment recommendations, high-quality baking pans, mixers, and kitchen gadgets can transform your baking experience, making it smoother and more enjoyable. Invest wisely in tools that can handle the demands of your baking adventures.
Seasonal variations can change the flavors of your desserts dramatically. Explore how shifting the ingredients with the seasons can elevate your cooking, presenting another dimension to cakes and desserts you create.
Join the Conversation
We invite our readers to share their experiences with the Pistachio Cream Cake! Post your photos on social media and tag us; we love seeing how you personalize the recipe. Share feedback, tips, and successful tweaks that make it uniquely yours, as community engagement makes baking even more rewarding.
Engage in recipe reviews to help each other refine techniques or ingredients. Your insights and suggestions can assist fellow bakers in overcoming obstacles and improving outcomes.
Why not start a discussion about dessert pairings? Share what helps you serve this cake best, exploring traditions and variations. From simple afternoon tea to grand celebrations, your experiences can inspire others to bring this delightful cake to their tables too.
If you’re knowledgeable about photography, share your tips on capturing desserts beautifully. Join the conversation and help fellow bakers capture their culinary masterpieces, encouraging a sense of community and collaboration.
Don’t hesitate to suggest variations of your own! Whether it’s a twist on flavor or a different presentation style, your creativity can benefit others looking for ways to reinvent this classic cake.
The Recipe
Pistachio Cream Cake
Serves: 8 servings
Prep Time: 20 mins
Cook Time: 30 mins
Total Time: 50 mins
Kitchen Equipment Needed
Two 9-inch round cake pans
Stand mixer or hand mixer
Mixing bowls
Whisk
Offset spatula
Cooling rack
Measuring cups and spoons
Food processor (for pistachios)
Ingredients
1 cup unsalted butter, softened
2 cups all-purpose flour
1.5 cups granulated sugar
4 large eggs
1 tsp vanilla extract
1 tsp baking powder
1/4 tsp salt
1 cup unsalted pistachios, finely ground
1.5 cups heavy whipping cream
1/2 cup powdered sugar
Additional crushed pistachios for garnish
Directions
Preheat the oven to 350°F (175°C). Grease and line two 9-inch round cake pans with parchment paper.
In a large mixing bowl, cream together the softened butter and granulated sugar until light and fluffy.
Beat in the eggs one at a time, mixing well after each addition. Stir in the vanilla extract.
In another bowl, whisk together the flour, baking powder, ground pistachios, and salt.
Gradually add the dry ingredient mixture to the wet ingredients, mixing until just combined.
Divide the batter evenly between the prepared cake pans. Bake for 25-30 minutes or until a toothpick inserted in the center comes out clean.
Remove from the oven and let cool in the pans for 10 minutes before transferring to a cooling rack to cool completely.
Meanwhile, whip the heavy cream with powdered sugar until stiff peaks form.
Once the cake layers have cooled, spread a thick layer of whipped cream between them and top with remaining cream.
Decorate with crushed pistachios and refrigerate until ready to serve.
Recipe Notes
For a richer flavor, you can also add a tablespoon of almond extract.
The cake can be made a day ahead; just store it in the refrigerator.
Consider using different nuts for a unique flavor profile while keeping the foundation of the recipe intact.
Be sure to allow the cake to cool completely before frosting to prevent melting.
Delicious Spicy Coconut Curry Lentil Soup Recipe for Health Enthusiasts
Spicy Coconut Curry Lentil Soup: A Flavorful Journey
⚖️
Difficulty
Easy
⏲️
Prep Time
15 mins
🕒
Cook Time
30 mins
⏱️
Total Time
45 mins
🍽️
Servings
4
Welcome to the world of delightful flavors with our Spicy Coconut Curry Lentil Soup! This vibrant dish brings a perfect balance of sweetness, spice, and earthy goodness straight to your bowl. Packed with wholesome lentils, rich coconut milk, and aromatic spices, this soup not only warms the soul but also serves as a nourishing meal any time of the year. Whether you’re curled up on a cold evening or hosting a cozy dinner party, this recipe is bound to impress with ease and sophistication.
The creamy texture of the coconut milk harmonizes beautifully with tender lentils, creating a satisfying soup that’s both hearty and comforting. A touch of heat from the spices ignites your senses, making each spoonful an exciting experience. This soup is easily adaptable, so feel free to play with the spices or add in seasonal veggies for an extra layer of flavor!
Quick Recipe Highlights
Flavor Profile: This Spicy Coconut Curry Lentil Soup features a delightful blend of sweet coconut, spicy curry, and earthy lentils, delivering a rich and comforting taste.
Texture: The creamy coconut base combined with tender lentils creates a luscious and satisfying mouthfeel that’s both warming and filling.
Aroma: A fragrant mix of coconut, ginger, and spices wafts through your kitchen, promising a delicious meal that tantalizes your senses.
Visual Appeal: This soup is as pretty as it is tasty, boasting a vibrant orange-red hue from the curry and pops of green from fresh herbs.
Skill Level Needed: With its straightforward steps and easy-to-find ingredients, this recipe is perfect for beginners and experienced cooks alike.
Special Equipment: You’ll need a large pot and a blender for achieving that creamy texture, along with basic kitchen tools.
Recipe Overview
Difficulty Level: This soup is rated easy due to its simple steps and quick preparation, making it accessible for anyone looking to whip up a hearty meal.
Category: This dish fits perfectly in the soup category and makes for a nourishing lunch or dinner option.
Cuisine: Drawing influences from Thai and Indian cuisines, this soup offers a unique combination of ingredients that showcases the best of both worlds.
Cost: Using common ingredients, this recipe is budget-friendly, with costs peeking around $10 for approximately four servings.
Season: Enjoy this soup year-round, but it shines particularly well during fall and winter months when warm comforting meals are most desirable.
Occasion: Ideal for casual weeknight dinners or as a starter at a cozy gathering, this soup is versatile for any occasion.
Why You’ll Love This Recipe
This Spicy Coconut Curry Lentil Soup tantalizes taste buds with its unique combination of flavors and textures. The earthy lentils provide a strong base, complemented by the sweetness of the coconut milk and the warmth of the spices. With every spoonful, you experience a symphony of tastes that make this dish memorable.
One of the standout features of this soup is its convenience. Preparation takes only 15 minutes, and with a cook time of 30 minutes, you can quickly have a satisfying meal ready. It’s the perfect solution for busy weeknights when you crave comfort without the hassle of complicated cooking methods.
Nutritionally, this soup is packed with benefits. Lentils are rich in protein and fiber, making this dish filling while also supporting digestive health. Additionally, the coconut milk provides healthy fats that contribute to satiety and energy.
Sharing food is one of the most rewarding experiences, and this soup offers an excellent dish for entertaining. It can easily be scaled up for larger gatherings, allowing you to connect with friends and family over a delightful meal.
Affordably made with accessible ingredients, this recipe doesn’t break the bank. A small investment yields a hearty meal, proving that comfort food doesn’t have to be costly.
Historical Background and Cultural Significance
Originating from Southeast Asia, lentil soups have been beloved for centuries, as they provide a hearty and nutritious meal. The use of coconut in cooking reflects the tropical climate of the region, where coconut trees thrive, and various recipes have evolved over time to include this versatile ingredient.
Coconut curry is particularly significant in both Thai and Indian cuisines, showcasing the multicultural influences that have shaped this dish. The blending of spices is a testament to the trading routes that opened doors to new flavors and techniques, creating dishes that celebrate cultural diversity.
Over the years, recipes similar to this soup have transformed to cater to local tastes and ingredient availability. For instance, the addition of lentils is a nod to regions where legumes are a staple, enhancing the dish’s nutritional value and accessibility.
Regional variations can be found throughout Asia, with each area adding its twist. From spicy heat to milder flavors, different cultures have embraced this soup, making it a beloved comfort food worldwide.
Ingredient Deep Dive
Lentils: A staple ingredient in many cultures, lentils are rich in protein, fiber, and essential nutrients. They are often used in traditional soups for their health benefits and ability to absorb flavors, making them an excellent addition to this recipe. When selecting lentils, choose dried ones that are firm and free of debris. Proper storage in a cool, dry place will maintain their quality.
Coconut Milk: This creamy liquid, derived from pressed coconut flesh, adds richness to dishes and serves as a dairy alternative in many recipes. It’s high in healthy fats, particularly medium-chain triglycerides, which can be beneficial for energy. Look for canned coconut milk for a thicker texture, and store any leftovers in the fridge for up to a week.
Common Mistakes to Avoid
Overcooking the lentils can lead to mushy soup, so keep an eye on them as they simmer.
Not seasoning adequately may result in bland flavors; be generous with spices.
Using canned coconut milk that’s too watery will not provide the creamy texture you want.
Skipping on aromatics like onions and garlic can diminish the overall flavor.
Not tasting as you go can prevent achieving that perfect balance of spice and sweetness.
Failing to blend the soup adequately can leave it grainy instead of smooth.
Using old or stale spices can dull the flavors; fresher spices give better zest.
Setting the heat too high can lead to scorching; keep it medium to maintain controlled cooking.
Essential Techniques
Simmering: Essential for developing flavors and cooking lentils, simmering allows the ingredients to meld together. Keep the heat moderate to prevent rapid boiling.
Blending: For a creamy texture, blending soups is crucial. Use an immersion blender for convenience, ensuring smooth, even consistency without lumps.
Pro Tips for Perfect Spicy Coconut Curry Lentil Soup
1. Always taste the soup before serving, adjusting spices to suit personal preferences.
2. For extra creaminess, consider adding a swirl of coconut cream on top before serving.
3. Enhance the flavor by toasting spices briefly in the pot before adding liquids.
4. Add vegetables such as carrots or spinach for additional nutrients and taste.
5. Use fresh herbs like cilantro or basil to brighten the dish just before serving.
6. Reheating tends to intensify flavors; it often tastes better the next day!
7. Serve with a sprinkle of chili flakes for those who enjoy extra heat.
8. Pair with crusty bread or rice to soak up the delicious broth.
Variations and Adaptations
Regional variations of this soup can introduce unique flavors. For example, try adding Thai basil for an aromatic twist or feature other legumes like chickpeas for a different texture.
Seasonal adaptations may include using butternut squash or sweet potatoes for added sweetness in the fall or fresh spring vegetables like peas or zucchini in warmer months.
Dietary modifications can make this soup suitable for vegan diets simply by ensuring no animal-based ingredients are included. For gluten-free needs, this recipe naturally fits without modifications.
Adjusting flavors can include using different types of curry paste or powders to provide various spice levels, while texture modifications, such as an additional blend or leaving some lentils whole, can create a diverse eating experience.
For presentation alternatives, serve the soup in charming bowls topped with fresh herbs, garnished with a lime wedge for an inviting touch.
Serving and Presentation Guide
For plating, use a large bowl to highlight the soup’s vibrant colors; it draws the eye and adds to the dining experience.
Garnish with chopped cilantro or sesame seeds for flavor and visual appeal. Pair with a wedge of lime on the side for a fresh burst when served.
Consider traditional accompaniments such as crusty bread or rice to complement the soup and offer a hearty meal.
Careful attention to temperature is crucial; serve the soup piping hot, ensuring that it remains enjoyable throughout your meal.
When considering portion size, each serving should be generous yet manageable, allowing guests to savor every delectable spoonful.
Wine and Beverage Pairing
For wine pairings, look for a fruity Sauvignon Blanc or a light-bodied Riesling which complement the soup’s spices beautifully.
If you prefer non-alcoholic options, consider a refreshing ginger or mint-infused lemonade that can enhance the meal’s vibrant flavors.
Tea, particularly a chai or spiced tea, can pair wonderfully, echoing the aromatic notes of the soup.
Always consider the right serving temperature to maximize the tasting experience.
Storage and Shelf Life
When storing, allow the soup to cool fully before transferring it to an airtight container. This method preserves flavors and prevents spoilage.
Keep in the refrigerator for up to three days; for longer storage, consider freezing portions in freezer-safe containers.
Signs of spoilage include off smells or unusual color changes. Ensure to reheat thoroughly before consuming leftovers.
If freezing, do so in portions that facilitate easy reheating, maintaining optimal quality upon defrosting.
Make Ahead Strategies
Prep ingredients like chopping vegetables or measuring spices the night before, streamlining the cooking process. Store prepped ingredients in the fridge.
Consider preparing the soup in advance to allow flavors to develop. You can store it in the fridge for a day before serving.
While reheating, add fresh herbs to elevate the dish, keeping it vibrant and exciting each time.
Scaling Instructions
If you need to halve the recipe, adjust the ingredient measurements accordingly while maintaining the same cooking time.
Doubling or tripling the recipe requires a larger pot and may necessitate additional time to bring to a simmer.
When scaling, remember to taste and adjust seasoning as larger quantities can dilute flavors.
Properly store any leftovers according to the previous storage guidelines for optimal freshness.
Nutritional Deep Dive
This soup offers macro nutrients essential for a balanced diet. Lentils provide considerable protein and fiber, critical for energy and digestion.
Furthermore, the coconut milk presents healthy fats that play a role in optimal energy levels, making the soup not just delightful but also nutritionally balanced.
Consideration of micronutrients reveals that this dish is rich in vitamins and minerals, including iron and magnesium, ensuring it contributes positively to your overall health.
This recipe can fit into many dietary considerations, encouragement for mindful consumption.
Dietary Adaptations
For gluten-free diets, this soup doesn’t require modifications and remains safe and nourishing.
It is naturally dairy-free, appealing to those following vegan or plant-based lifestyles, as well as low-carb diets, with minor adjustments in portioning.
By relating to specific dietary needs, this recipe supports a wide range of preferences, easing the process of meal planning for diverse households.
Troubleshooting Guide
If the soup turns out too thick, add more vegetable broth or coconut milk until the desired consistency is achieved.
To balance flavors that lean too spicy, introduce more coconut milk or sugar to temper heat.
If using dried lentils results in uneven cooking, ensure you are using fresh, high-quality canned or dried products for best results.
Monitoring cooking times closely can prevent overcooked lentils that lose their texture and bite.
Recipe Success Stories
Many readers have shared feedback on how this soup became a family favorite, often making a regular appearance at their dinner tables. The comments indicate that some have added unique ingredients, such as diced sweet potatoes or kale, which create variations they enjoy.
Photography tips from community members highlight the vibrant colors and creamy textures, encouraging everyone to capture their finished dishes to share.
Frequently Asked Questions
Can I make this recipe in advance?
Yes! This soup can be made ahead and stored in the refrigerator for up to three days. It often tastes even better the next day once the flavors have melded together.
What can I use instead of coconut milk?
If you prefer not to use coconut milk, other non-dairy alternatives, such as almond milk or oat milk, can work, though they will change the flavor and texture slightly.
Can I freeze this soup?
Absolutely! This soup freezes well. Allow it to cool completely, then store in airtight containers for up to three months. Remember to thaw in the fridge before reheating.
Is this soup spicy?
The soup has a spicy flavor, but you control the heat. Adjust the curry paste amount to suit your preference, and it’s simple to keep it mild.
What should I serve with this soup?
This soup pairs wonderfully with crusty bread, rice, or a simple salad. Consider adding a side of fresh lime wedges for brightness.
Can I add vegetables to this recipe?
Certainly! You can add seasonal vegetables like spinach, carrots, or peas. Just ensure they have a similar cooking time as the lentils.
Is there a way to enhance the flavor?
Yes! Toasting the spices before adding the broth and lentils can enhance their flavors significantly, adding depth to the soup.
How do I store leftovers?
Once cooled, transfer leftovers to airtight containers and keep in the refrigerator for up to three days, or freeze for later use.
Can this be made in a slow cooker?
Yes, you can cook this recipe in a slow cooker if you prefer. Just add all the ingredients and set on low for 6-8 hours or high for 3-4 hours until the lentils are tender.
What kind of lentils work best for this soup?
Brown or red lentils are ideal for this recipe as they hold their shape but cook thoroughly, bringing the best texture to the soup.
Additional Resources
Explore related recipes like our robust Thai Vegetable Curry or our comforting Chickpea Stew, each designed to warm your heart and nourish your body.
For technique guides, consider reading about how to properly toast your spices or methods for cooking lentils to perfection!
Sourcing information on fresh and dried herbs can enhance your cooking and support flavorful dishes throughout the year.
If you’re looking for equipment recommendations, a good quality immersion blender is perfect for achieving that creamy consistency in soups.
As seasons change, don’t forget to experiment with ingredient variations that can enhance this recipe, showcasing the best flavors of each time of year!
Join the Conversation
Feel free to engage with our community on social media! Share your creations of Spicy Coconut Curry Lentil Soup, and don’t forget to tag us for a chance to be featured on our page.
Photography enthusiasts can join our monthly contests to showcase their culinary snapshots and connect with fellow food lovers.
We encourage you to leave your reviews and suggestions, allowing you to become part of our recipe journey while inspiring others with your unique adaptations!
The Recipe
Spicy Coconut Curry Lentil Soup
Serves: 4
Prep Time: 15 mins
Cook Time: 30 mins
Total Time: 45 mins
Kitchen Equipment Needed
Large pot
Blender or immersion blender
Cutting board
Knife
Measuring cups and spoons
Ingredients
1 cup dried lentils (red or brown)
1 tablespoon coconut oil
1 onion, diced
2 cloves garlic, minced
1 tablespoon ginger, grated
2 tablespoons curry powder
1 can (14 oz) coconut milk
4 cups vegetable broth
Salt and pepper to taste
Fresh cilantro for garnish
Directions
In a large pot, heat coconut oil over medium heat. Add onion and sauté until translucent.
Stir in garlic and ginger; cook for an additional minute until fragrant.
Add curry powder and cook for 1-2 minutes, allowing the spices to toast.
Stir in lentils, coconut milk, and vegetable broth. Bring to a boil, then reduce heat and simmer for about 30 minutes until lentils are tender.
Use an immersion blender to blend the soup until creamy. You can also use a traditional blender in batches.
Season with salt and pepper to taste, and garnish with fresh cilantro before serving.
Recipe Notes
Feel free to customize the soup by adding your favorite vegetables.
Adjust the spice level by increasing or decreasing the curry powder.
Store leftovers in the fridge for up to 3 days or freeze for longer storage.
Crispy Chicken With Creamy Pasta: A Delicious Dinner Delight
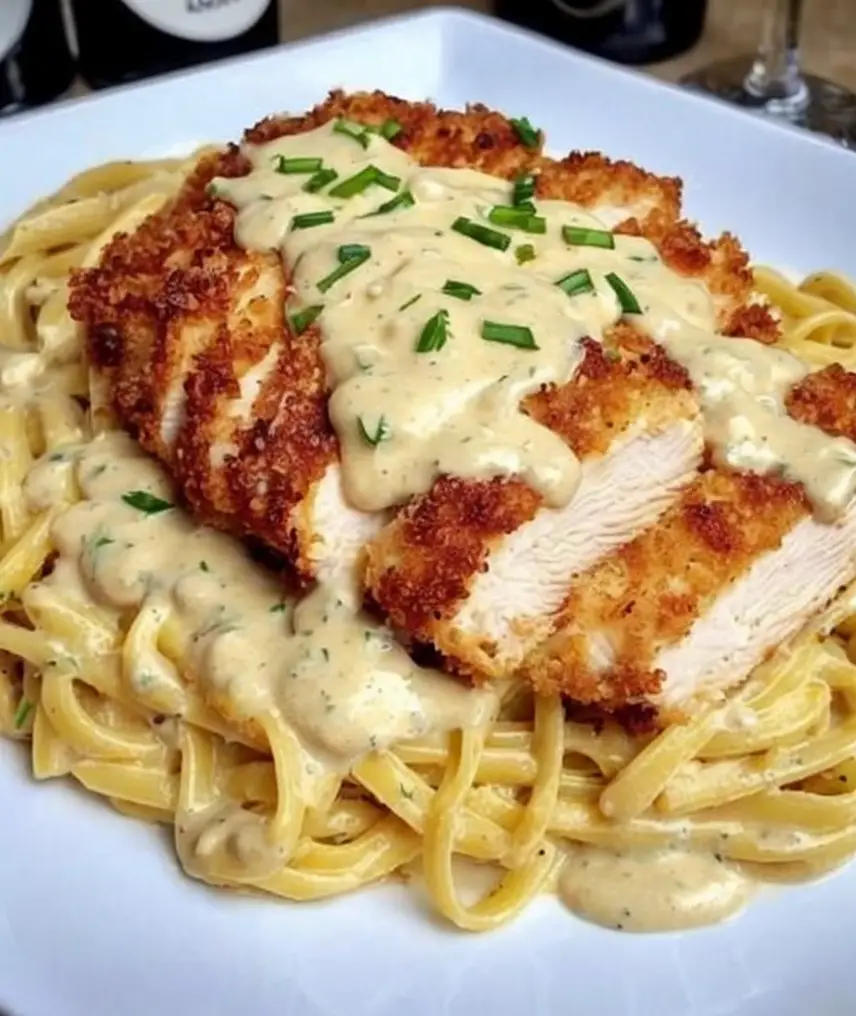
Crispy Chicken With Creamy Pasta: A Deliciously Satisfying Meal
⚖️
Difficulty
Moderate
⏲️
Prep Time
15 mins
🕒
Cook Time
30 mins
⏱️
Total Time
45 mins
🍽️
Servings
4
Welcome to a culinary adventure with our Crispy Chicken with Creamy Pasta! This scrumptious dish perfectly balances the crunchy texture of pan-fried chicken with the rich, smooth embrace of a creamy pasta sauce. Combining vibrant ingredients like garlic, fresh herbs, and a blend of spices, every forkful is an explosion of flavor that will have your taste buds dancing. Whether it’s a weeknight family dinner or a weekend gathering with friends, this meal is sure to impress with its satisfying combination of tastes and textures.
The beauty of this recipe lies not only in its taste but also in its simplicity. With just a handful of ingredients and straightforward cooking techniques, you can create a restaurant-quality dish right in your own kitchen. Imagine the tantalizing aroma filling your space as the chicken sizzles and the sauce simmers—it’s comfort food at its best, and it comes together in under an hour!
Quick Recipe Highlights
Flavor Profile: The Crispy Chicken brings a savory flavor, complemented beautifully by the rich and creamy pasta sauce that has hints of garlic and fresh herbs.
Texture: The contrast between the crispy, golden chicken and the velvety smooth pasta creates an irresistible mouthfeel that everyone will love.
Aroma: Expect enticing notes of garlic, butter, and herbs wafting through your kitchen as you prepare this delightful dish.
Visual Appeal: The dish boasts vibrant colors—golden brown chicken served atop a plate of creamy pasta sprinkled with fresh parsley for the perfect presentation.
Skill Level Needed: Moderately simple, ideal for home cooks looking to expand their skills while still being approachable for beginners.
Special Equipment: A large skillet and a pot for boiling pasta are essential tools for this recipe.
Recipe Overview
Difficulty Level: This dish falls into the moderate category as it balances frying and sauce-making techniques, offering a great opportunity for cooks to practice their skills.
Category: This Crispy Chicken with Creamy Pasta fits perfectly into the main course category, making it the star of your meal.
Cuisine: Drawing inspiration from classic Italian cooking, this recipe embraces hearty ingredients and simple preparations, resulting in a satisfying dish.
Cost: An approachable dish cost-wise, utilizing affordable proteins and pantry staples, it’s budget-friendly yet luxurious.
Season: Although delicious year-round, this dish is particularly comforting in fall and winter when hearty meals are more appealing.
Occasion: Perfect for family dinners, casual get-togethers, or even date nights where you want to impress your guests.
Why You’ll Love This Recipe
The combination of crispy chicken and creamy pasta creates a flavor sensation that is deeply satisfying. The chicken’s crunch contrasts beautifully with the luscious, rich pasta, making for a unique dining experience. Each bite melds together the savory and creamy elements, providing a comforting embrace for your palate. Pair this with your favorite vegetables or a light salad, and you have a well-rounded meal that makes every occasion special.
Convenience is another appealing aspect of this recipe. With a total cooking time of just 45 minutes, you can whip up a delicious homemade meal without spending hours in the kitchen. The steps are straightforward and perfect for midweek family dinners or prepping for casual get-togethers with friends. Plus, the ingredients are easy to find and won’t break the bank.
This dish is not just tasty but also provides nutritional benefits. Chicken offers a hearty source of protein, while the creamy sauce can be enriched with vegetables for added nutrients. Utilizing whole grain pasta can also bring fiber into the dish, making it a filling and balanced meal that can keep you energized throughout the day.
It’s a fantastic dish to share at gatherings and celebrations. The crisp chicken and creamy pasta not only look impressive but also taste incredible. Everyone loves a comforting meal, and this recipe is no exception. You can effortlessly double or triple the ingredients to serve larger groups, making it a go-to option for hosting.
Finally, there’s the cost-effectiveness of this meal. Utilizing everyday ingredients that you may already have in your pantry means this can become a weekly staple without losing flair. With the satisfaction of a home-cooked meal made from scratch, this recipe retains a restaurant-quality experience while being easy on the wallet.
Historical Background and Cultural Significance
The origins of creamy pasta dishes can be traced back to various Italian regions where the melding of ingredients reflected local availability, tradition, and culture. Historically, creamy sauces became popular due to their ability to elevate simple meals through richness and flavor, providing sustenance for communal gatherings.
In Italian culture, chicken is often celebrated for its versatility, making it a mainstay in a plethora of traditional dishes. This recipe marries these components together beautifully, incorporating elements from various regions that all aim for a harmonious balance of flavors.
Over time, recipes for crispy chicken and creamy pasta have evolved, blending influences from various cuisines—creating fusion dishes that adapt to contemporary taste preferences. The heart of this recipe remains rooted in the Italian tradition of comfort food, with its embrace of wholesome ingredients and hearty preparation methods.
Regional variations offer exciting twists on this classic dish. From the addition of sun-dried tomatoes in the south to a sprinkle of fresh basil and seasonal vegetables from maritime areas, each region contributes its unique signature, making every plate a celebration of Italian culinary flair.
Ingredient Deep Dive
Chicken: Chicken has been a staple protein across many cultures due to its widespread availability and affordability. Not only does it provide a rich source of protein, but it also contains essential vitamins and minerals. When selecting chicken, look for fresh, plump pieces without discoloration and ensure proper storage to maintain quality.
In terms of nutritional benefits, chicken is low in fat and rich in nutrients like B vitamins and selenium. Store it in the refrigerator for up to two days or freeze it for longer periods. Alternatives include turkey or tofu for vegetarian options.
Pasta: Pasta is a cultural icon of Italian cuisine, and its history dates back centuries. With countless varieties available, it serves as a versatile base for many sauces and toppings. Whole grain pasta offers added fiber and nutrition compared to traditional white pasta, making it a healthier choice.
Selecting the right pasta can enhance your dish; look for ones with a rough texture to better hold sauces. Boiled pasta should be stored in airtight containers in the fridge if not used immediately. Substitute with gluten-free options to accommodate dietary preferences.
Common Mistakes to Avoid
Overcooking the chicken—this can lead to dry and tough meat. Cook until it reaches an internal temperature of 165°F.
Not seasoning the pasta water—this step is essential for flavor. Always salt your water generously before cooking.
Using heavy cream instead of lighter alternatives—opt for half and half or milk to achieve the same creamy texture without the heaviness.
Rushing the sauce preparation—take time to let flavors meld for a richer taste before serving.
Skipping the resting period for chicken—allowing it to rest helps retain moisture within the meat.
Not utilizing fresh herbs—while dried herbs can work in a pinch, fresh will elevate your dish significantly.
Overcrowding the skillet—cooking in batches ensures even cooking and crispiness across your chicken pieces.
Forgetting to taste as you cook—tasting allows you to adjust seasoning and balance flavors before serving.
Neglecting the use of a lid during cooking—covering can trap moisture and help cook the chicken through more evenly.
Using cold ingredients—bring dairy products to room temperature for better incorporation into your sauce.
Essential Techniques
Pan-Frying Chicken: A key technique for achieving a crispy outer layer. To master this, ensure your oil is hot enough before adding the chicken. Look for a sizzle when the meat hits the pan. Avoid moving the chicken too much as it cooks to allow the crust to form properly.
Making a Creamy Sauce: The base of a rich sauce typically requires a roux or a reduction. Start by cooking aromatics like garlic and shallots, then gradually add your cream or broth. Stir constantly to avoid burning while achieving a smooth and creamy consistency.
Pro Tips for Perfect Crispy Chicken With Creamy Pasta
1. Use a meat thermometer to ensure the chicken is cooked perfectly without being dry.
2. Allow chicken to rest after cooking to preserve its juiciness.
3. For added crunch, double dip the chicken in flour and breadcrumbs.
4. Experiment with different herbs and spices in your sauce to personalize flavors.
5. Add a splash of lemon juice to the sauce for a refreshing zing.
6. Top the dish with grated Parmesan before serving for an authentic Italian touch.
7. Serve immediately for the best presentation, as the texture can soften over time.
8. Pair with a crisp green salad for a complete dining experience.
Variations and Adaptations
Regional variations can add exciting twists to your dish. For instance, incorporating sun-dried tomatoes or green peas can complement the dish beautifully. Seasonal adaptations allow the incorporation of fresh vegetables during spring or summer, providing a lightness to your meal.
Dietary modifications include using gluten-free pasta or tofu for the chicken to cater to consistent dietary needs. Flavor variations, like adding red pepper flakes for heat or using different cheeses, can elevate the taste profile significantly.
Texture modifications can also be achieved by varying your cooking methods; roasting the chicken for a different flavor or adding nuts for crunch can make each experience unique.
Presentation alternatives may include platting in a rustic serving dish or garnishing with vibrant herbs for visual appeal. These adjustments make the recipe adaptable for any season or occasion.
Serving and Presentation Guide
When plating, arrange the creamy pasta first, then place the crispy chicken atop or to the side for contrast. Garnish with fresh herbs or Parmesan cheese to elevate the dish. Expect to accompany your meal with a refreshing salad or crusty bread for balance.
Temperature is key—serve the dish hot to enjoy the textures at their finest. For portion control, consider using pre-measured servings or small plates for guests. This approach fosters sharing and encourages everyone to enjoy a variety of flavors.
Wine and Beverage Pairing
Bright white wines, such as Pinot Grigio or Sauvignon Blanc, complement the creamy elements beautifully. Alternatively, a light-bodied red like Pinot Noir can balance the dish’s richness.
For non-alcoholic options, consider sparkling water with a twist of lemon or herbal iced tea for refreshing contrast. If applicable, a robust coffee can also play well with the cream elements in the dish.
Storage and Shelf Life
For optimal freshness, store leftover pasta and chicken separately in airtight containers. Refrigerating items within two hours of cooking ensures quality retention.
Leftover chicken can last up to three days in the fridge, and pasta typically retains freshness for up to five days. Signs of spoilage include off smells or discoloration. Reheat carefully in the oven or microwave, ensuring even warmth without drying out the chicken. Freezing leftovers is also an option; seal tightly to avoid freezer burn and use within three months.
Make Ahead Strategies
Preparation can begin ahead of time by seasoning the chicken and preparing the sauce with fresh ingredients while allowing flavors to develop. Store chicken in the fridge up to a day prior and make the sauce in advance to save time when cooking.
Ensure that cooked pasta is kept in cold water to maintain its texture until ready to combine with the sauce. When reheating, add a splash of cream to help revive the sauce’s consistency and flavor.
Scaling Instructions
For smaller gatherings, you can easily halve the recipe without losing flavor or quality. Alternatively, doubling or tripling works well for larger events—just ensure you have adequate cooking equipment.
Timing may need to be adjusted based on quantity; cook in batches to maintain that crispness and even cooking for chicken. Be mindful of portion control, as larger servings can sometimes overwhelm the palate.
Nutritional Deep Dive
This dish offers balance with high protein levels from chicken, essential for muscle health, while cream provides calcium and energy. The inclusion of pasta adds carbohydrates necessary for active lifestyles.
Moreover, the use of herbs not only elevates flavor but enhances micronutrient intake. Consider variations to monitor caloric and nutritional benefits, especially for weight management in portion sizes.
Dietary Adaptations
This recipe is versatile, enabling modifications for various dietary restrictions, such as gluten-free pasta for those with sensitivities or allergies. To accommodate lactose intolerance, you can replace cream with coconut milk.
For those following vegan diets, substitute chicken with plant-based proteins and utilize cashew cream for a rich sauce alternative. The possibilities are endless, ensuring everyone can enjoy this delicious dish.
Troubleshooting Guide
For texture issues, ensure the chicken is at room temperature before cooking to avoid rubberiness. For flavor balance, taste during cooking and add salt, pepper, or citrus juice as necessary to round out the dish.
If the sauce turns out too thick, slowly add broth or water for a smoother consistency. If the pasta is overcooked, quickly drain and refresh with cold water to halt the cooking process.
Recipe Success Stories
Home cooks have raved about the impressive nature of this dish, with its ability to wow dinner guests without extensive culinary skills. Followers of the recipe have shared their unique variations, from spicing up the sauce to incorporating seasonal vegetables, which have become personal favorites.
As members of the community explore their adaptations, photography tips shared among users highlight the dish’s vibrant colors, encouraging others to showcase their cooking successes proudly.
Frequently Asked Questions
Can I use frozen chicken instead of fresh? Yes, just ensure to fully thaw before pan-frying for even cooking.
What can I substitute for cream? You can use cashew cream or any plant-based milk mixed with a bit of cornstarch for a creamy texture.
How can I add more vegetables to this dish? Incorporate steamed or sautéed broccoli or spinach into the pasta for added nutrition.
Is this recipe suitable for meal prep? Absolutely! The components can be made ahead and stored separately for easy reheating during the week.
Can I make this dish dairy-free? Yes, simply substitute dairy ingredients with non-dairy alternatives for the cream and cheese.
How do I prevent the chicken from becoming dry? Make sure to monitor the cooking time and let the chicken rest after cooking to retain moisture.
Is there a gluten-free pasta option? Yes, many stores offer gluten-free pasta that works perfectly in this recipe.
Can I bake the chicken instead of frying it? Sure! Baking is a healthier alternative and can achieve similar results if seasoned well.
What’s the best way to reheat leftovers? Gently heat in the oven or microwave, adding a splash of cream to maintain the sauce’s creamy consistency.
How do I know when the chicken is done cooking? Use a meat thermometer; the internal temperature should be at least 165°F.
Additional Resources
For those looking to further expand your culinary repertoire, consider exploring related recipes such as Chicken Alfredo or Creamy Spinach Pasta dishes. Technique guides for sautéing, frying, or sauce preparation can enhance your skills in the kitchen.
Ingredient information is vital, too—learning about the best types of chicken or pasta for different dishes can elevate your cooking. Also, equipment recommendations, such as high-quality frying pans or pasta pots, can contribute significantly to your cooking experience.
Join the Conversation
Share your successes on social media, showcasing your unique spins on the Crispy Chicken with Creamy Pasta. Engaging with community feedback and photography tips helps you and others refine their techniques and recipes.
Encourage recipe reviews to create a dialogue about variations and new ideas for this beloved dish. Fostering a sense of community allows the recipe to grow and adapt, ensuring it remains a family favorite for generations to come.
The Recipe
Crispy Chicken With Creamy Pasta
Serves: 4
Prep Time: 15 mins
Cook Time: 30 mins
Total Time: 45 mins
Kitchen Equipment Needed
Large skillet
Pot for boiling pasta
Meat thermometer
Wooden spoon or spatula
Airtight storage containers
Ingredients
4 chicken breasts, boneless and skinless
2 cups pasta (your choice)
1 cup heavy cream
2 tablespoons olive oil
2 cloves garlic, minced
1/2 cup grated Parmesan cheese
Salt and pepper to taste
Fresh parsley for garnish
Directions
Cook pasta according to package instructions; drain and set aside.
Season chicken breasts with salt and pepper. Heat olive oil in a skillet over medium heat.
Pan-fry the chicken for about 6-7 minutes per side until golden brown and cooked through.
Remove chicken and let it rest; in the same skillet, add garlic and sauté until fragrant.
Add heavy cream, bring to a simmer, then stir in Parmesan cheese until melted and combined.
Toss the drained pasta in the sauce and heat through.
Slice rested chicken and serve over the creamy pasta; garnish with fresh parsley.
Recipe Notes
For added flavor, marinate chicken in herbs for extra time before cooking.
Feel free to swap chicken for shrimp or vegetables for a different protein option.
Use low-fat dairy options for a lighter take.
This dish can be made in advance; store components separately to ensure freshness.