Elevate Dinner with Gourmet Lamb Chops and Lobster Mashed Potatoes

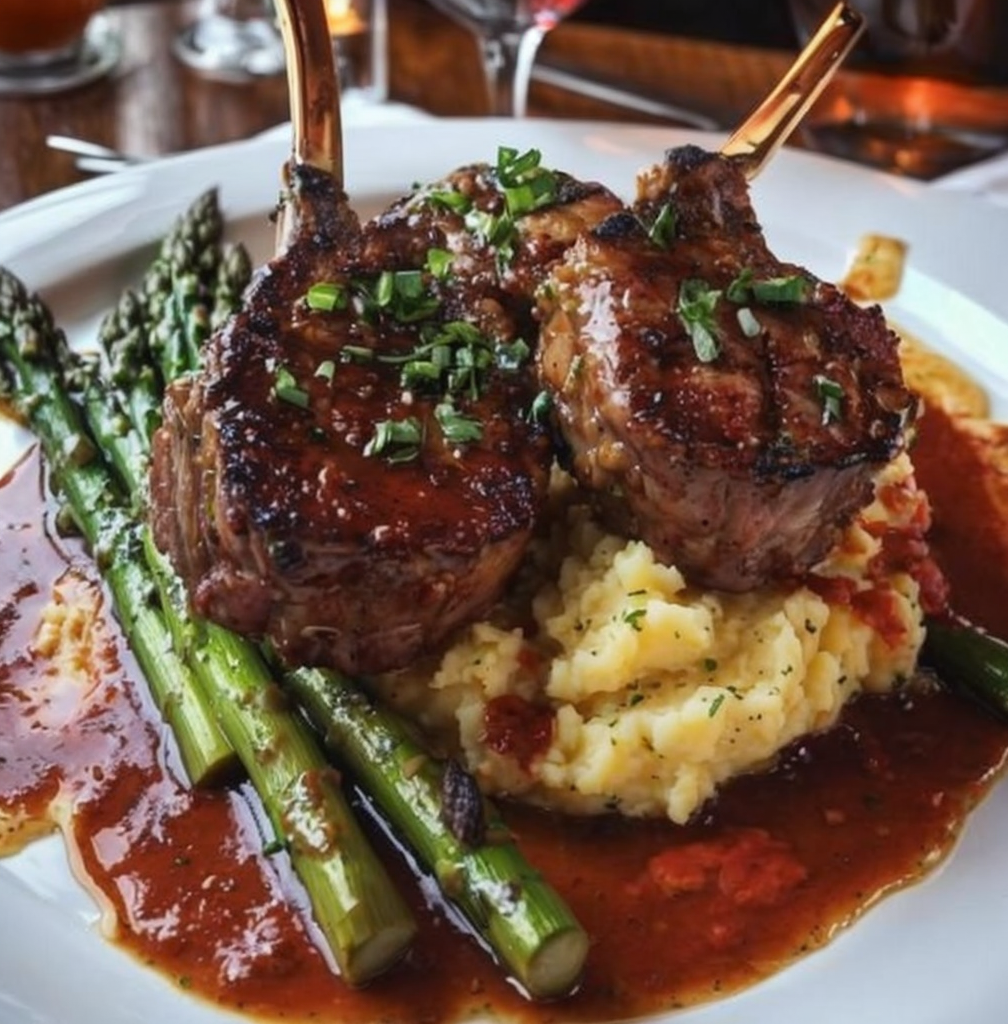
Gourmet Lamb Chops with Lobster Mashed Potatoes and Asparagus: A Decadent Delight

⚖️
Difficulty
Intermediate

⏲️
Prep Time
30 mins

🕒
Cook Time
45 mins

⏱️
Total Time
75 mins

🍽️
Servings
4

Indulge in a truly luxurious dining experience with our gourmet lamb chops accompanied by creamy lobster mashed potatoes and crisp, tender asparagus. This dish promises an explosion of flavors that will tantalize your palate, making it an ideal choice for a special occasion or intimate dinner. Each succulent lamb chop is seasoned to perfection, while the buttery lobster mashed potatoes offer a unique twist, blending rich, savory notes that elevate the classic mashed potatoes into something extraordinary. The asparagus not only adds a vibrant green color to the plate but also brings a satisfying crunch that contrasts beautifully with the other components.

The combination of tender lamb, rich lobster, and fresh asparagus provides an elegant harmony of tastes and textures. Picture the juicy, perfectly cooked lamb chops paired with silky, luscious lobster potatoes and the snap of freshly sautéed asparagus. This gourmet dish not only impresses your guests but also fills your home with an inviting aroma that signals a culinary adventure. Whether you’re celebrating a milestone or simply want to treat yourself, gourmet lamb chops with lobster mashed potatoes will certainly leave everyone craving more.

Quick Recipe Highlights

  • Flavor Profile: Experience the delightful blend of savory lamb, buttery lobster, and the earthiness of asparagus for a well-rounded taste.
  • Texture: Savor the contrasts between the tender, juicy lamb, the smooth, rich mashed potatoes, and the crisp asparagus.
  • Aroma: The heavenly scent of grilled lamb mingled with the luxurious smell of lobster will enhance your cooking experience.
  • Visual Appeal: A stunning presentation with vibrant greens, deep browns, and creamy whites creates an inviting dinner plate.
  • Skill Level Needed: A moderate skill level is required, making this a rewarding recipe for home cooks ready to impress.
  • Special Equipment: You’ll need a grill or cast-iron skillet, a large pot for boiling, and a food processor for mashed potatoes.

Recipe Overview

  • Difficulty Level: This gourmet dish falls into the intermediate category, requiring some familiarity with cooking techniques and timing.
  • Category: This recipe is perfect for main courses during dinner parties, celebrations, or holiday meals.
  • Cuisine: The preparation brings together influences from Mediterranean and fine dining traditions, creating a fusion of flavors.
  • Cost: The cost can vary based on the quality and source of the lamb and lobster, but expect a higher price due to premium ingredients.
  • Season: Best enjoyed in spring or fall, when asparagus is in season and the weather is ideal for grilling.
  • Occasion: Perfect for anniversaries, date nights, or holiday gatherings, showcasing your culinary skills.

Why You’ll Love This Recipe

This dish stands out for its remarkable taste and texture appeal. The juicy, seasoned lamb chops boast rich, meaty flavors, while the addition of lobster in the mashed potatoes creates an upscale twist that excites the palate. The crunchiness of asparagus adds a fresh contrast, ensuring each bite is varied and satisfying.

Convenience is another highlight of this recipe. While the techniques may seem complex, the steps are laid out clearly, making it achievable even for those with moderate cooking experience. You can prepare many elements ahead of time, allowing you to enjoy your guests’ company without a last-minute kitchen scramble.

Nutritionally, lamb is a great source of protein, and the inclusion of asparagus provides essential vitamins and minerals. The lobster mashed potatoes contribute healthy fats and can even support heart health, making this dish not just indulgent but also nourishing.

As a centerpiece at any gathering, these gourmet lamb chops elevate the dining experience. They foster conversations around the table with vibrant flavors and stunning presentations that guests will be thrilled to share and enjoy.

Lastly, the cost-effectiveness of this recipe is surprising given its gourmet standing. With thoughtful ingredient selection and sustainable sourcing, you can create a luxurious meal without breaking the bank. Lamb and lobster may be considered splurges, but when appropriately prepared, they deliver meaningful satisfaction and value.

Historical Background and Cultural Significance

The origin of lamb as a culinary staple can be traced back to ancient civilizations, where it was regarded not only for its flavor but also for its nutritional value. Cultures around the Mediterranean have embraced lamb in various traditions, from festive meals to everyday family gatherings, cementing its place in the culinary history.

In contrast, lobster has been revered in coastal regions for centuries, once considered food for the poor until its popularity surged among the elite. The union of both in a singular dish represents a rich tapestry of cultural significance, showcasing the marrying of humble origins and sophisticated dining experiences.

This recipe has evolved as culinary landscapes expanded, incorporating modern cooking techniques and influences from global cuisines. Many chefs today experiment with luxurious ingredients, elevating classic comfort foods to gourmet status, making exquisite dishes accessible to a wider audience.

Regional variations exist, often influenced by local seasonality and ingredient availability. This adaptability ensures that each preparation of gourmet lamb chops with lobster mashed potatoes can reflect its originating locale, enhancing its cultural significance across borders.

Ingredient Deep Dive

Lamb Chops: Historically, lamb has symbolized innocence and springtime, often featured in seasonal festivals. Nutritionally, it’s rich in protein, B vitamins, and iron. When selecting lamb, look for cuts with a good amount of marbling for tenderness. Store lamb chops in the refrigerator for a maximum of three days or freeze for long term, ensuring they remain airtight to maintain freshness. Substitutions can include pork or beef, but the flavor profile will change significantly.

Lobster: Lobster’s journey from a common catch to a luxury seafood item reflects its transition through economic status. Lobster is high in protein and omega-3 fatty acids while being low in calories. When purchasing lobster, opt for fresh or frozen alternatives that smell clean and oceanic. Store cooked lobster in a refrigerator and consume within two days. For a budget-friendly substitute, consider shrimp or crab paired with a touch of smoked paprika to mimic flavors.

Asparagus: Known for its nutritious properties, asparagus has been cultivated since ancient times, valued for its delicate flavor and health benefits, such as high fiber content. Select fresh asparagus spears that are bright green and firm. Store them upright in water or wrapped in a damp paper towel in the refrigerator. Alternatives for asparagus can include green beans or broccoli, which can provide a similar texture.

Common Mistakes to Avoid

  • Overcooking the lamb can dry it out; aim for a medium-rare finish for optimal tenderness.
  • Ignoring seasoning; be generous with salt and pepper to enhance the flavors of the dish.
  • Boiling potatoes too long can lead to waterlogged potatoes; check for doneness early.
  • Neglecting to rest the meat after cooking can prevent juices from redistributing, resulting in dryness.
  • Not using fresh lobster when possible; frozen can work, but always opt for the freshest ingredients when available.
  • Crowding the pan while cooking lamb will lead to steaming instead of searing; cook in batches if necessary.
  • Improperly preparing asparagus can yield a rubbery texture; blanching before sautéing helps retain crispness.
  • Skipping the garnish; a sprinkle of fresh herbs can elevate the dish visually and enhance flavor.
  • Not tasting as you go can lead to imbalanced flavors that may require adjustments toward the end.
  • Failing to serve at the right temperature can diminish the dining experience; ensure everything is served hot.

Essential Techniques

Grilling Lamb Chops: Proper grilling will result in beautifully charred and juicy outcomes. Preheat your grill or skillet to high, oil the grates lightly, and avoid flipping too often. Look for a nice crust to form before turning the chops. Common pitfalls include not allowing the meat to reach room temperature before cooking, which can impact cooking time.

Making Lobster Mashed Potatoes: Boil potatoes until tender but not mushy. Introduce lobster towards the end, ensuring gentle mashing to avoid overworking the starches. The key visual cue for success is a creamy consistency without lumps, contrasted by the vibrant pink of the lobster. Avoid adding too much liquid, as this can dilute flavor.

Pro Tips for Perfect Gourmet Lamb Chops with Lobster Mashed Potatoes

1. Always allow lamb chops to come to room temperature before cooking to ensure even cooking throughout.

2. Use a probe thermometer to check the internal temperature; target 135°F for medium-rare.

3. Rest the chops for at least 5 minutes after grilling to let juices redistribute.

4. For richer mashed potatoes, use a blend of cream and butter for a velvety texture.

5. Season your water when boiling potatoes to infuse flavors into them from the outset.

6. Don’t hesitate to add a splash of white wine to your lobster for an additional layer of flavor.

7. Serve the dish on warm plates to maintain temperature longer during dining.

8. Pair with a flavorful sauce, like a balsamic reduction, to enhance the dish’s richness.

Variations and Adaptations

For a regional variation, try using different lamb cuts such as rack or leg, which can offer unique flavor profiles. Seasonal adaptations could include replacing asparagus with seasonal veggies like peas or courgettes in the spring for freshness. Dietary modifications such as using cauliflower potatoes for a lower-carb option can keep the dish accessible for various diets. Flavor variations can include adding herbs like rosemary and thyme to elevate sophistication. For texture modifications, try adding crispy shallots on top for crunch. Asparagus can be substituted with other seasonal greens like green beans for variety. Presenting this dish family-style can enhance the communal dining experience.

Serving and Presentation Guide

When plating, consider arranging the lamb chops in a fan shape for aesthetic appeal. Create a base of lobster mashed potatoes and top with asparagus for a striking color contrast. Drizzling sauces artfully can add a modern touch. Garnish with microgreens or fresh herbs to elevate visual appeal. Serve each plate with a thoughtful balance of components to highlight the flavors. Ensure all elements are warm, and consider warm bread on the side for completeness. Proper portion control can enhance the dining experience without overwhelming the guest.

Wine and Beverage Pairing

For wine pairings, opt for a full-bodied red such as Cabernet Sauvignon or a Syrah, which complements the rich flavors of lamb beautifully. For those preferring white wine, a buttery Chardonnay pairs well with the lobster. Non-alcoholic alternatives could include sparkling water infused with lemon or a light herbal tea. When considering coffee pairings, an espresso can offer a bold contrast post-meal. Serve wines at appropriate temperatures—reds slightly cooler than room temperature, and whites chilled.

Storage and Shelf Life

To store leftovers, allow the dish to cool completely before transferring to airtight containers. Refrigerate for up to 3 days; ensure lamb is reheated thoroughly to maintain safety. For freezing, wrap each element separately, ensuring moisture is minimized. When reheating, do so gently in the oven to preserve moisture and texture, ideally using a covered dish. Signs of spoilage to watch for include off-smells or changes in color or texture.

Make Ahead Strategies

Prep the lobster mashed potatoes a day in advance and simply reheat before serving. Lamb chops can be marinated ahead to enhance flavors. Asparagus can be prepped and stored in the fridge, ready to be sautéed fresh just before serving. Create a timeline to manage your cooking session efficiently, ensuring everything comes together seamlessly. Assemble the components shortly before dinner to retain freshness, and consider adding herbs right before plating for an aromatic finish.

Scaling Instructions

To halve the recipe, use 2 lamb chops per serving, and adjust the potato and asparagus quantities accordingly. For larger gatherings, doubling or tripling the recipe is straightforward; ensure your equipment can accommodate larger food quantities. Timing may vary slightly due to increased cooking volume, so monitor closely. Take care when storing increased volumes; ensure containers are appropriately sized to maintain quality.

Nutritional Deep Dive

The macro breakdown showcases high protein content from both lamb and lobster, essential for muscle maintenance and repair. The dish also provides healthy fats from butter and lobster, essential for brain health. In terms of micronutrients, lamb supplies zinc and iron, while asparagus offers vitamins A, C, and K. Dietary considerations for this dish include protein-rich options for active individuals, but portion control may be necessary for weight management pursuits.

Dietary Adaptations

For a gluten-free adaptation, all ingredients listed are naturally gluten-free, ensuring everyone can enjoy the dish without concerns. For a dairy-free option, substitute butter with olive oil in the mashed potatoes. Making the dish vegan could entail using plant-based substitutes like jackfruit for lamb and almond milk in mashed potatoes. For a low-carb approach, swapping potatoes for cauliflower is effective. Those following a keto or paleo diet can maintain protein intake while reducing carbohydrates.

Troubleshooting Guide

If the lamb ends up tough, it is likely overcooked; aim for a shorter cooking time next time. A flavor imbalance can be quickly fixed by adjusting seasoning throughout cooking. For temperature problems, ensure your grill is preheated adequately to avoid uneven cooking. If you lack specific ingredients, timely substitutions can maintain recipe integrity—check online for quick suggestions. Lastly, if timing is off, prepare a few steps ahead, allowing flexibility in the kitchen.

Recipe Success Stories

Community feedback highlights how this dish has transformed everyday dining into memorable experiences. Readers have successfully adjusted the recipe for various dietary needs, inspiring adaptations across the board. Many have shared their own twist on the lamb seasoning, exploring global spice innovations. Success in photography captures the dish beautifully, encouraging others to recreate it at home and share their culinary journeys.

Frequently Asked Questions

Can I use frozen lobster for this recipe?

Yes, frozen lobster can be used, but thaw it properly before cooking to achieve optimal texture and flavor.

What should I serve with this dish?

This gourmet dish pairs well with light salads or crusty bread, enhancing the overall dining experience.

Can I substitute the lamb with another type of meat?

Absolutely! Pork or beef can make excellent substitutes, though they will alter the overall taste significantly.

How can I ensure my lamb chops are tender?

Use a meat thermometer to achieve the perfect doneness; resting after grilling is key to tender results.

Is this recipe suitable for meal prep?

Yes, but it’s best to store components separately and combine them fresh for the best texture.

How should I store leftovers?

Store leftovers in airtight containers in the fridge for up to 3 days. You can freeze for longer storage as well.

Can I prepare the lobster mashed potatoes in advance?

Yes, prepare them a day ahead; reheat gently before serving, adding a little cream to revive the texture.

What herbs work best with this dish?

Fresh rosemary and thyme complement lamb wonderfully, while dill pairs nicely with lobster.

Can this dish be made in a slow cooker?

While lamb chops can be cooked in a slow cooker, this method may not yield the same grilled or sautéed flavor.

What type of grill should I use?

A gas or charcoal grill works well; both provide excellent motivation for achieving beautiful sear marks and flavor.

Additional Resources

For related recipes, check out our collection of gourmet meat dishes that showcase similar techniques. Explore our technique guides for mastering grilling lamb and crafting the perfect mashed potatoes. Delve into ingredient information to uncover more about the health benefits of lamb and lobster. Our equipment recommendations highlight key kitchen tools that can make cooking a breeze. Seasonal variations also provide insights on how to employ fresh, seasonal produce in this dish.

Join the Conversation

Share your cooking experience on social media using #GourmetLambChops and showcase your culinary success. Engage with our community by sharing your photography tips for food styling. We welcome your recipe reviews and encourage you to comment about your variations on this dish, contributing to a vibrant cooking community.

The Recipe

Gourmet Lamb Chops with Lobster Mashed Potatoes and Asparagus

Serves: 4

Prep Time: 30 mins

Cook Time: 45 mins

Total Time: 75 mins

Kitchen Equipment Needed

  • Grill or cast-iron skillet
  • Large pot for boiling
  • Food processor for mashed potatoes
  • Thermometer for meat
  • Non-stick saute pan for asparagus
  • Measuring cups and spoons
  • Cutting board and sharp knife

Ingredients

  • 4 lamb chops
  • 2 cups mashed potatoes
  • 1 cup cooked lobster meat, chopped
  • 1 bunch asparagus, trimmed
  • 2 tbsp olive oil
  • 4 tbsp unsalted butter
  • Salt and pepper to taste
  • Fresh herbs for garnishing (optional)

Directions

  1. Start by marinating the lamb chops in olive oil, salt, and pepper for at least 30 minutes.
  2. Simultaneously, boil potatoes until fork-tender, then drain and mash with butter and lobster meat.
  3. Heat a grill or skillet over medium-high heat and cook the lamb chops for 4-5 minutes on each side for medium-rare.
  4. In a hot non-stick pan, sauté the asparagus until tender-crisp, about 5 minutes.
  5. Plate the lobster mashed potatoes, top with lamb chops, and arrange asparagus on the side.
  6. Finish with fresh herbs and serve immediately.

Recipe Notes

  • For a milder flavor, soak lamb chops in yogurt with spices overnight.
  • Can substitute lobster with crab or shrimp for a different seafood experience.
  • Adjust the quantity of asparagus based on seasonal availability and preference.

Master the Art of Tres Leches Cake: A Delicious Recipe

Tres Leches Cake: A Heavenly Dessert You’ll Adore

⚖️
Difficulty
Medium

⏲️
Prep Time
30 mins

🕒
Cook Time
25 mins

⏱️
Total Time
55 mins

🍽️
Servings
10-12

Tres Leches Cake, or “Three Milk Cake,” is a beloved dessert that hails from Latin America, particularly Mexico. This luscious cake is soaked in a delightful mixture of three types of milk—evaporated milk, sweetened condensed milk, and whole milk—creating a moist and rich dessert that is hard to resist. The cake’s light texture, combined with the creamy milk mixture, makes it a delicious treat that melts in your mouth. As you take your first bite, the sweetness of the milks mingles with a hint of vanilla, transporting you to a world of culinary bliss.

This cake is not only delicious but also visually stunning. Traditionally topped with fluffy whipped cream and a sprinkle of cinnamon or fresh fruits, Tres Leches Cake makes an ideal centerpiece for any gathering. Whether you’re celebrating a birthday, hosting a potluck, or simply indulging your sweet tooth, this cake is sure to impress your family and friends. With a preparation time of just 30 minutes and a cook time of under 30 minutes, you can whip up this irresistible dessert in no time.

Quick Recipe Highlights

  • Flavor Profile: The blend of three milks creates a unique flavor that balances sweetness and creaminess, making each bite decadent.
  • Texture: A soft, tender cake base soaked in creamy milk creates a spongy, melt-in-your-mouth texture.
  • Aroma: The inviting aroma of vanilla and freshly whipped cream adds to the overall experience, enticing guests even before the first slice is served.
  • Visual Appeal: The cake is elegantly layered and topped with whipped cream, garnished with fresh fruit or cocoa, making it a treat for the eyes.
  • Skill Level Needed: This is a medium-difficulty dessert, requiring basic baking skills and attention to detail during the soaking process.
  • Special Equipment: You’ll need basic baking equipment such as a mixing bowl, a baking dish, measuring cups, and an electric mixer for the best results.

Recipe Overview

  • Difficulty Level: Medium—the technique involved in soaking the cake properly and preparing the frosting requires some practice but is achievable.
  • Category: Dessert—this cake is ideal for sweet treats after meals, fitting perfectly in the dessert category.
  • Cuisine: Latin American—its roots are predominantly Mexican, showcasing the region’s culinary finesse through rich flavors.
  • Cost: The ingredients are relatively inexpensive, making it a budget-friendly dessert option.
  • Season: Perfect for any season, but particularly delightful during festive occasions and family gatherings.
  • Occasion: Birthdays, weddings, and holidays are ideal opportunities to showcase this stunning cake.

Why You’ll Love This Recipe

Taste and texture come together beautifully in Tres Leches Cake, offering a delightful treat that satisfies your sweet cravings without being overwhelmingly rich. The cake absorbs the three types of milk, ensuring that every bite is infused with flavor. Not only does it boast an impressive moisture level, but it also has a lovely spongy texture that contrasts beautifully with the creamy frosting.

The convenience of this recipe is another significant advantage. The straightforward steps require minimal effort, making it a perfect dessert for novice bakers or anyone looking for a quick yet impressive treat. Additionally, the ingredients are usually pantry staples, allowing you to whip it up any time you have a craving.

Nutritionally, while Tres Leches Cake is indulgent, the use of milk and eggs provides a good source of protein, calcium, and essential nutrients. When moderated as part of a balanced diet, it can still be enjoyed healthily.

This dessert holds great social value, often served at celebrations and gatherings, making it a fantastic option for entertaining guests. It’s sure to be a hit, prompting compliments and requests for the recipe.

Finally, the cake’s affordability ensures that it is accessible to everyone. Its delightful presentation and delicious taste allow it to rival any gourmet dessert without breaking the bank.

Historical Background and Cultural Significance

The origin of Tres Leches Cake is somewhat ambiguous, with various countries in Latin America claiming to have invented it. However, it’s believed that this cake’s history dates back to the early 20th century, becoming popular in Mexico during the 1930s. Its rise to fame can be attributed to the addition of sweetened condensed milk, making it a rich dessert option appealing to those with a sweet tooth.

Culturally, Tres Leches Cake holds a special place in the hearts of many Latin Americans. It is often served at birthday parties, weddings, and festivals, symbolizing joy and celebration. The cake’s presence at significant life events reflects its role in nurturing community bonds and shared cultures among families and friends.

Over the years, the recipe has evolved. While the traditional version remains popular, creative adaptations have also emerged, incorporating different flavors or toppings to customize the cake. Such variations showcase regional preferences while keeping the essence of the Tres Leches intact.

Regional variations also highlight the cake’s versatility. For example, in some areas, bakers add a hint of coconut or chocolate, showcasing the creativity of different cultures while maintaining the original cake’s integrity.

Ingredient Deep Dive

Main ingredients used in Tres Leches Cake include flour, eggs, sugar, butter, and the star trio of milks: evaporated milk, sweetened condensed milk, and heavy cream.

Flour is essential in giving the cake its structure. When choosing flour, all-purpose flour works best. Make sure to store flour in a cool, dry place to prevent clumping or spoilage. You can substitute other flours, like cake flour, but avoid using gluten-free options as they may not yield the spongy texture desired.

Eggs contribute richness and moisture, while providing valuable proteins. Always opt for fresh eggs, as they not only improve flavor but also impact the cake’s texture. When not using, store eggs in the refrigerator for extended shelf life.

The three milks elevate the cake’s flavor profile significantly. Evaporated milk provides creaminess without excessive sweetness, while sweetened condensed milk is incredibly rich. Heavy cream is crucial for the cake’s decadent soak, adding an irresistible wetness. It’s best to use full-fat versions of these products to achieve optimal taste and texture.

Common Mistakes to Avoid

  • Not letting the cake cool completely before soaking. This can cause the cake to fall apart or become too mushy.
  • Forgetting to poke holes in the cake before adding the milk mixture, which helps the cake absorb the liquid properly.
  • Using low-fat or non-fat milk options, which won’t provide the same richness as full-fat alternatives.
  • Being too impatient during the soaking process; letting the cake absorb the milk mixture overnight offers the best results.
  • Over-whipping the cream, which can lead to a grainy texture instead of a smooth frosting.
  • Using a pan that is too small, causing the cake to rise too much and spill over.
  • Not sifting dry ingredients before mixing, which can result in a dense cake.
  • Skipping the flavor enhancements, such as vanilla or cinnamon, which elevate the overall taste experience.
  • Neglecting to serve the cake chilled; allowing it to rest in the refrigerator enhances its overall flavor.
  • Not considering garnishes—a sprinkle of cocoa powder or fresh fruit can enrich the cake’s presentation and taste.

Essential Techniques

A key technique when making Tres Leches Cake is the soaking process. This step is vital because it ensures the cake absorbs the three types of milk uniformly. Master it by thoroughly poking holes throughout the cooled cake with a skewer or fork, allowing the liquid to permeate without weighing down the cake. Common pitfalls to avoid include rushing the process or skimping on the soaking time, which can result in a less moist cake.

Another crucial technique is whipping the cream for the frosting. This adds a light and airy contrast to the dense and creamy soaked cake. To master this, aim for soft peaks before gently folding in any additional flavors like powdered sugar or vanilla. Watch out for over-whipping, which can lead to a grainy consistency. Visual cues include the cream becoming thick while still easily spreading over the cake.

Pro Tips for Perfect Tres Leches Cake

One of the best tips for perfect Tres Leches Cake is to allow the cake to soak overnight; this dramatically improves the moisture and flavor penetration. Additionally, consider baking the cake in a glass dish to easily monitor the soaking process.

Additionally, infusing your milk mixture with flavors such as vanilla bean or a hint of rum will add depth to the cake that takes it to the next level. Always use room temperature ingredients when mixing, as this helps achieve a better batter consistency.

Utilizing a serrated knife to cut the cake will yield cleaner slices, making for an elegant presentation. Don’t forget to chill the cake before serving; it tastes best when cold, refreshing, and inviting on a warm day.

Lastly, garnishing the cake with fresh berries or a sprinkle of cinnamon creates not only a beautiful presentation but also elevates the flavor, enticing your guests even before their first bite.

Variations and Adaptations

Tres Leches Cake has countless variations that enhance its flavor and presentation. For a tropical twist, consider adding a layer of coconut milk to the milk mixture, creating a coconut Tres Leches Cake that will transport your taste buds to a beach paradise.

Seasonal adaptations can be introduced as well. During the holidays, incorporating caramel or pumpkin spice into the milk mixture can yield a festive dessert perfect for celebrations. Alternatively, during summer, a refreshing berry version using strawberry or raspberry purée will delight your guests.

For dietary modifications, a low-carb or keto version can be created using almond flour instead of regular flour and sugar-free condensed milk. This ensures those watching their carbs can still indulge in this beautifully moist cake.

Flavor variations can include adding lemon or orange zest to the milk mixture for a citrusy boost. Texture modifications, such as folding in toasted nuts or shredded coconut, can add delightful unexpected crunches to each bite.

Finally, present the cake in unique ways, perhaps served in individual mason jars, allowing for cute personal servings that also make for delightful gifts.

Serving and Presentation Guide

When serving Tres Leches Cake, presentation is key. Consider plating the cake on a decorative serving platter and topping it with freshly whipped cream and fresh fruits, such as strawberries or kiwi, to enhance its visual appeal.

Garnishing with a light dusting of cinnamon or cocoa powder adds an extra touch of elegance. If you prefer a modern twist, consider individual portions served in clear glass cups for a rustic feel.

Temperature plays a critical role; the cake must reach a chilled can be more refreshing, especially during warm weather. Serving with a scoop of vanilla ice cream on the side amplifies the indulgent experience.

Portion control is also essential—cut into small squares to allow guests to try other desserts or simply enjoy a smaller, satisfying treat that still feels indulgent. Pair it with a hot cup of coffee or a sweet herbal tea for a complete experience.

Wine and Beverage Pairing

When it comes to wine pairings, a light and fruity white such as Moscato complements the sweetness of the Tres Leches Cake perfectly. Alternatively, a sparkling wine can elevate the dessert experience, providing a refreshing contrast to the rich cake.

For non-alcoholic alternatives, a zesty lemonade or a refreshing iced tea made with mint offers a delightful pairing that balances the cake’s creaminess.

Coffee or tea pair nicely as well; a medium roast coffee or a smooth chai tea can harmonize with the cake’s flavors without overwhelming them.

Temperature considerations are also important when serving beverages alongside the cake; ensure that wines are chilled, while hot beverages should be served steaming to create an inviting contrast in temperatures.

Storage and Shelf Life

Keeping Tres Leches Cake fresh is easy when stored properly. Once cooled and soaked, cover the cake with plastic wrap or store in an airtight container in the refrigerator to maintain its moisture.

For optimal freshness, consume the cake within 3-5 days of preparation; however, it can be safely refrigerated for up to a week if stored correctly. Pay attention to signs of spoilage, which include off-smells or changes in texture.

If freezing is necessary, slice the cake into individual portions, wrap them securely in plastic wrap, and then place them in a freezer-safe container. This helps prevent freezer burn. Thaw in the refrigerator prior to serving; avoid reheating as this can alter the desirable texture.

Reheating the entire cake is not recommended, as it may become soggy. Instead, consider serving chilled slices directly from the refrigerator for the best experience.

Make Ahead Strategies

To ensure efficiency in making Tres Leches Cake, consider preparing the cake and allowing it to soak a day in advance. This not only enhances the flavor but also saves time on the actual day of serving.

Keep each component separate until ready to serve; this means baking the cake and preparing the milk mixture beforehand but only assembling it just before presentation. This keeps the cake from becoming overly wet.

Assemble the cake by pouring the milk mixture over it and topping with whipped cream on the day you plan to serve, ensuring it retains its delightful creaminess.

If you wish to add fresh fruit toppings, prepare those the day you serve to maintain freshness and vibrant color. Avoid making whipped cream too early, as it can weep or lose its volume if stored for extended periods.

Lastly, consider adding fresh elements, like zested citrus or berries, right before serving for a bright, refreshing taste.

Scaling Instructions

When considering scaling your Tres Leches Cake recipe, halving the ingredients can easily yield a smaller cake perfect for intimate gatherings. Simply adjust baking times, keeping an eye out for doneness using a toothpick test.

Doubling or tripling the recipe is also manageable—with larger baking dishes, ensure even baking by rotating the pans halfway through cooking. It may also require slightly longer baking times due to the increased volume, so always check for texture.

Be mindful of equipment adjustments too; larger mixing bowls or multiple baking pans will be necessary to accommodate the increased batter.

Timing should also be adjusted—while the soak time remains the same, preparation may take longer with larger quantities. Ensure appropriate storage considerations are observed if making in advance.

Nutritional Deep Dive

When analyzing the nutrition of Tres Leches Cake, it’s important to consider its macro breakdown. Each serving contains essential proteins from eggs and dairy, combined with carbohydrates from flour and sugars, providing a balanced but indulgent sweet treat.

Micronutrient elements include calcium and vitamin D, primarily derived from the milk content, supporting bone health. Other vitamins such as A and B12 are present, adding to its nutritional profile.

Health benefits must be approached with moderation in mind; while it is a dessert rich in flavor, enjoying it as a part of a well-balanced diet is essential for maintaining health.

Portion analysis suggests that enjoying a smaller slice allows recognition of the cake’s richness while still satisfying sweet cravings. For those mindful of calorie intake, pairing it with fresh fruits can provide a fiber boost.

For those managing weight, consider a mindful approach to portion sizes and serve it alongside fresh herbal teas, providing a fulfilling experience without excess calories.

Dietary Adaptations

For those seeking a gluten-free version of Tres Leches Cake, using almond flour or a gluten-free baking blend can provide an alternative while maintaining a similar taste.

Dairy-free adaptations can be achieved by substituting all three types of milk for coconut-based milks; the result is a deliciously tropical twist that preserves the original concept of the cake.

Vegan modifications can follow the same coconut milk substitutes while replacing eggs with aquafaba to mimic the airy texture of the cake.

For those on low-carb or keto diets, using almond or coconut flour and sugar alternatives can allow enjoyment without compromising dietary goals.

Individuals following the paleo approach can utilize natural sweeteners like honey or maple syrup in place of refined sugars, while ensuring all ingredients align with paleo guidelines.

Troubleshooting Guide

In the pursuit of perfection, you may encounter texture issues such as a dry cake. This often happens when the soaking process lacks thoroughness. Ensure you adequately poke holes in the cake and give it enough time to soak completely.

Flavor balance can sometimes skew too sweet; adding a pinch of salt to the cream mixture can help cut through the sweetness, enhancing overall flavor.

Temperature problems, such as an underbaked center, can be identified using a toothpick. A clean toothpick indicates doneness, while wet batter shows the need for more baking time.

Equipment challenges like mixer malfunctions can hinder the ability to adequately whip cream or mix batter. Keep extra hand tools available to maintain momentum in case of electrical failures.

Ingredient substitutions can occasionally lead to dissatisfaction in flavor. Always check that alternative ingredients have similar characteristics to their original counterparts to prevent unexpected outcomes.

Timing concerns such as soaking too long can lead to a mushy cake. A well-timed soaking strategy rests at around 2-3 hours to achieve the ideal texture without sogginess.

Recipe Success Stories

Readers frequently share success stories about their Tres Leches Cake adventures. Many delight in the ease of preparation, with several noting that family members request boosts of creaminess through added flavors such as espresso.

Variations such as chocolate Tres Leches have emerged as popular adaptations, allowing creativity to flourish while keeping the essence of the original recipe intact.

Adaptation stories often focus on gluten-free or dairy-free adaptations, proving that with the right substitutions, everyone can enjoy this delicious dessert.

Photography tips for showcasing Tres Leches Cakes often highlight the contrast between the layer of cream and fruits on top against the fluffiness of the cake, enticing food-lovers to try their hands at the recipe.

Readers express appreciation for the cake’s ability to freeze well, creating opportunities for batch cooking as they ready their freezers in anticipation of future celebrations.

Frequently Asked Questions

Q1: Can I make Tres Leches Cake ahead of time?
Yes, it’s best to prepare the cake a day in advance, allowing it to soak overnight for optimal flavor.

Q2: How do I know if my cake is done baking?
Use a toothpick inserted into the center; if it comes out clean, the cake is done.

Q3: Can I use different types of milk?
Absolutely! You can customize your milk mixture with coconut or other non-dairy options.

Q4: Is Tres Leches Cake hard to make?
No, it’s relatively easy; just follow the steps carefully for best results.

Q5: How should I store leftover cake?
Cover it tightly and refrigerate. It’s best enjoyed within 3-5 days.

Q6: Can I freeze the cake?
Yes, slice and wrap it tightly before freezing. Thaw in the fridge when ready to eat.

Q7: What flavors can I add to the milk mixture?
Consider vanilla, cocoa, or even citrus zest for added flavor depth.

Q8: Can I make a mini version of the cake?
Yes! Just halve the ingredients and bake in smaller pans.

Q9: How do I prevent the cake from being too soggy?
Ensure to soak it properly but don’t overdo it—around 2-3 hours is perfect.

Q10: Can I replace the whipped cream topping?
Yes, whipped coconut cream works as a delicious dairy-free alternative.

Additional Resources

Explore more related recipes that embrace the richness of Latin American desserts, such as Flan or Churros to complement your Tres Leches Cake.

Technique guides on whipping cream and making sponge cakes will enhance your baking skill set further and support upcoming dessert endeavors.

Ingredient information about the various types of milk and their substitutes can deepen your understanding of achieving the best results in baking.

Consider investing in high-quality kitchen equipment such as a stand mixer or measuring cups for precision in measurements, crucial for the perfect cake.

Seasonal variations allow you to adapt your Tres Leches Cake within the context of holidays or family gatherings, giving new life to a classic recipe.

Join the Conversation

Consider sharing your baking journey through social media by tagging photos of your Tres Leches Cake and engaging with food-loving communities.

Photography tips can enhance your shot, highlighting the cake’s height and creamy layers. Experiment with different lighting and angles for the best visuals.

Sharing recipe reviews can also help foster community engagement, allowing fellow bakers to offer their support and suggestions based on their experiences.

Explore variations as suggested by fellow bakers—their unique twists might inspire your next baking adventure!

The Recipe

Tres Leches Cake

Serves: 10-12

Prep Time: 30 mins

Cook Time: 25 mins

Total Time: 55 mins

Kitchen Equipment Needed

  • Mixing bowl
  • Electric mixer
  • Baking dish
  • Measuring cups and spoons
  • Whisk
  • Toothpick for testing doneness

Ingredients

  • 1 cup all-purpose flour
  • 5 large eggs
  • 1 cup granulated sugar
  • 1/3 cup unsalted butter, melted
  • 1 cup evaporated milk
  • 1 cup sweetened condensed milk
  • 1 cup whole milk
  • 1 tsp vanilla extract
  • 1 cup heavy cream (for topping)
  • Fresh fruit for garnish (optional)
  • Cinnamon for garnish (optional)

Directions

  1. Preheat your oven to 350°F (175°C). Grease a 9×13 inch baking dish.
  2. In a mixing bowl, whisk together flour and sugar until combined.
  3. Add eggs, melted butter, and vanilla extract. Mix well until smooth.
  4. Pour the batter into the prepared baking dish and bake for about 25 minutes or until a toothpick comes out clean.
  5. Once baked, let the cake cool completely.
  6. In a separate bowl, combine evaporated milk, sweetened condensed milk, and whole milk.
  7. Poke holes all over the cooled cake with a fork and gradually pour the milk mixture over, allowing it to soak in.
  8. For the topping, whip heavy cream until soft peaks form and spread it over the soaked cake.
  9. Chill the cake for at least 2 hours or overnight before serving.
  10. Garnish with fresh fruit or cinnamon before slicing and enjoying.

Recipe Notes

  • For a chocolate twist, add cocoa powder to the batter.
  • Ensure the cake is completely cool before soaking to prevent it from falling apart.
  • Feel free to experiment with different flavors by adding citrus zest or flavored extracts to the milk mixture.

Delicious Creamy Creole Red Snapper Recipe for Seafood Lovers

Creamy Creole Red Snapper: A Flavorful Culinary Adventure

⚖️
Difficulty
Moderate

⏲️
Prep Time
15 mins

🕒
Cook Time
30 mins

⏱️
Total Time
45 mins

🍽️
Servings
4

Creamy Creole Red Snapper is not just a dish; it’s an experience that takes you straight to the heart of Southern culinary traditions. With its vibrant blend of spices and rich, creamy sauce, this dish encapsulates the essence of Creole cooking, celebrated for its bold flavors and generous use of aromatic ingredients. The snapper, known for its delicate and flaky flesh, pairs beautifully with the vibrant Bell peppers, onions, and the perfect balance of spices that elevate each bite.

As you embark on this culinary journey, each step brings a symphony of textures and tastes. The snapper is tender, melting in your mouth, while the creamy sauce, infused with hints of garlic, lime, and various spices, thickens to envelop the fish in warmth and richness. This dish is truly a feast for the senses, perfect for hosting a dinner party or enjoying a cozy family meal.

Quick Recipe Highlights

  • Flavor Profile: The Creamy Creole Red Snapper features rich and bold flavors, with a delightful balance of spice and creaminess, complemented by fresh herbs and zesty lime.
  • Texture: The flaky red snapper is beautifully contrasted by the smooth, velvety sauce that clings to its surface, providing an enticing mouthfeel.
  • Aroma: Expect an aromatic mix of sautéed garlic, onions, and vibrant spices that waft through your kitchen as the dish cooks.
  • Visual Appeal: The bright colors of the sautéed vegetables and the creamy sauce create an inviting, eye-catching plate.
  • Skill Level Needed: This recipe requires a moderate cooking skill level, making it accessible for home cooks looking to impress.
  • Special Equipment: A large skillet and a spatula are the primary tools needed, along with standard kitchen gear like knives and measuring cups.

Recipe Overview

  • Difficulty Level: Creamy Creole Red Snapper is moderately challenging; it involves sautéing and simmering but can be mastered with practice.
  • Category: This dish falls under seafood and main courses, perfect for both casual dinners and special occasions.
  • Cuisine: Rooted in Creole cuisine, this dish reflects the rich cultural tapestry of Louisiana cooking, blending French, Spanish, and African influences.
  • Cost: Ingredients are relatively affordable, with the red snapper being the most significant expense, typically ranging from $8 to $14 per pound.
  • Season: While delightful year-round, this dish shines particularly during warmer months when fresh herbs and vegetables are abundant.
  • Occasion: Ideal for family gatherings, celebratory dinners, or a cozy night in, this dish brings warmth and festivity to any table.

Why You’ll Love This Recipe

This Creamy Creole Red Snapper captivates your taste buds with its harmonious blend of spices. Each mouthful introduces a dance of flavors that perfectly balance the subtle sweetness of the snapper with the zing of the Creole sauce. The incorporation of fresh ingredients such as bell peppers and fresh herbs enhances the dish’s overall appeal, making it a memorable culinary experience.

Not only is this recipe delicious, but it is also incredibly convenient to prepare. The dish comes together in under an hour, making it perfect for busy weeknights when you crave something special without extensive preparation. The straightforward steps keep you engaged yet relaxed as you create a splendid meal with less hassle.

Nutritionally, red snapper offers a wealth of health benefits, including being high in protein and low in saturated fats. This dish is light yet satisfying, making it suitable for various dietary needs. Pairing it with whole grains or a light salad rounds off a balanced meal that you can feel good about serving your loved ones.

If you love entertaining, this dish is fantastic for impressing guests at gatherings. Its vibrant colors and rich flavors invite conversation and excitement. You can serve it family-style, allowing everyone to enjoy the communal dining experience with a dish that looks as good as it tastes.

Finally, considering its cost-effectiveness, the Creamy Creole Red Snapper provides a delicious meal without breaking the bank. With thoughtful ingredient selection and occasional substitutions, this dish is accessible to everyone, making it a go-to recipe in your culinary repertoire.

Historical Background and Cultural Significance

The origins of Creole cuisine, much like the diverse people who created it, are rooted deeply in the vibrant culture of Louisiana. Emerging from the fusion of French, Spanish, African, and Native American cooking traditions, this culinary style has evolved over centuries. Each culture contributed its own flavors and cooking techniques, culminating in dishes that tell a story of rich history.

The importance of fish in Creole cooking cannot be overstated, particularly red snapper. Renowned for its delicate flavor, it has been a staple in coastal communities and serves as a reminder of the region’s abundant seafood. This fish has been cherished in local markets and family kitchens, reflecting the sustainable practices of fishing and cooking traditions passed down from generation to generation.

Over the years, the recipe for Creamy Creole Red Snapper has undergone numerous adaptations, reflecting both the availability of ingredients and individual tastes. Culinary creativity in the kitchen has led to variations that incorporate local ingredients or elevate the dish with unique twists. These evolutions continue to keep the tradition alive while allowing for innovation.

Regionally, variations of this dish exist across the Southern United States, with each community adding its personal touch. Whether it’s a dash of a local spice or the inclusion of seasonal vegetables, these regional adaptations allow home cooks to showcase local flavors while honoring the roots of Creole cuisine.

Ingredient Deep Dive

– **Red Snapper**: Red snapper is not just a favorite among chefs; it has cultural significance in various coastal communities worldwide. This fish is rich in omega-3 fatty acids, promoting heart health and offering a light, mild flavor that serves as a perfect canvas for spices and sauces. When selecting red snapper, look for bright eyes and firm flesh, and store it in the coldest part of your refrigerator for up to two days.

– **Cream**: Cream adds richness to the sauce, creating a luxurious mouthfeel that enhances the overall dish. Nutritionally, it is a source of vitamins A and D, but it should be consumed in moderation due to its caloric content. When selecting cream, fresh and high-quality products yield better results, and it’s best kept refrigerated until use.

– **Bell Peppers and Onions**: These vegetables bring crunch and a hint of sweetness to the sauce. They are rich in vitamins and antioxidants while contributing vibrant color to the dish. Choose firm, bright peppers and onions with no soft spots for the best flavor. Store them in a cool, dry place, and they can last for several days.

– **Garlic**: An essential ingredient in many cuisines, garlic provides not only flavor but also numerous health benefits. Garlic is known to support heart health and has anti-inflammatory properties. Fresh garlic should have tight skin and be stored in a cool, dark place away from moisture.

– **Spices**: The Creole spice mix is what makes this dish authentic. Spices like paprika, cayenne, and thyme not only add depth but also enhance your meals’ nutritional value. When selecting spices, opt for fresh, whole spices whenever possible as they retain their flavor longer than pre-ground options.

Common Mistakes to Avoid

  • Overcooking the Fish: Red snapper has a delicate texture, and overcooking will result in a dry dish. Keep a close eye on cooking time, and remove it from heat when it flakes easily with a fork.
  • Ignorance of Seasoning Balance: Too much spice can overshadow the fish’s flavor. Start with a moderate amount and adjust according to your preference to maintain a balanced flavor profile.
  • Not Using Fresh Ingredients: Fresh produce and seafood dramatically enhance flavor. Always select the freshest ingredients to ensure the dish’s success.
  • Skipping the Cream: If you reduce the cream or forget to add it altogether, the sauce will lack richness, impacting the final taste of the dish.
  • Incorrect Temperature: Cooking at too high of a heat can scorch the sauce before the fish is cooked through. Use a moderate heat to allow for even cooking.
  • Neglecting to Taste: Always taste your sauce before serving. Adjust the seasoning as necessary to ensure a well-balanced flavor.
  • Incorrect Storage: If you plan to store leftovers, make sure to cool quickly and store in an airtight container to maintain freshness.
  • Ignoring the Companions: Pairing this dish with inappropriate sides can overwhelm the delicate flavors of the red snapper. Consider light sides that will complement rather than compete with the dish.

Essential Techniques

– **Sautéing**: This technique is important for developing the flavors of your sauce. Master it by maintaining a consistent medium heat and allowing the vegetables to soften without burning. The visual cue for success is the vegetables becoming translucent and slightly caramelized—a signal that they are ready for the next steps.

– **Simmering**: This method allows the flavors to meld beautifully. To master simmering, keep an eye on the heat level to avoid boiling, which can disrupt the sauce’s texture. You’ll know you’re successful when small bubbles gently rise on the surface of the sauce, indicating it’s cooking at the right pace.

Pro Tips for Perfect Creamy Creole Red Snapper

1. Always choose wild-caught red snapper when possible for the best flavor and sustainability. Look for fish with bright, clear eyes and firm flesh.
2. For a richer sauce, consider adding a splash of white wine before adding cream; it adds depth and enhances the overall flavor.
3. Don’t rush the sautéing process; allow the vegetables to soften and develop sweetness—this creates a flavorful base for the sauce.
4. Experiment with spices to customize your dish; consider adding a pinch of cumin or coriander for a unique flavor twist.
5. Serve with a squeeze of fresh lime juice to brighten the dish and elevate the flavors right before serving.
6. If you’re feeling adventurous, replace the red snapper with another flaky fish like tilapia or cod, adjusting cooking times as necessary.
7. Keep the sauce warm until ready to serve, but avoid boiling it; this prevents it from separating and maintains its creamy texture.
8. Pair the dish with a side of rice or crusty bread to soak up any leftover sauce—this enhances the dining experience.

Variations and Adaptations

– **Regional Variations**: In some parts of Louisiana, you may find this dish made with catfish or other local fish, adapting it to what’s freshest and most accessible.
– **Seasonal Adaptations**: Feel free to incorporate seasonal vegetables, such as zucchini or corn, to add freshness and nutrition to your dish.
– **Dietary Modifications**: For a dairy-free version, coconut cream can be an excellent substitute, bringing a different yet delightful richness.
– **Flavor Variations**: Add a hint of heat by including chopped jalapeños or a dash of hot sauce to the sauce for those who enjoy a spicy kick.
– **Texture Modifications**: For a heartier texture, consider adding cooked quinoa or lentils to the sauce, turning it into a comforting one-pot meal.
– **Presentation Alternatives**: Instead of serving on a plate, consider layering the red snapper over a colorful bed of sautéed greens for an impressive presentation that’s also nutritious.

Serving and Presentation Guide

Presentation plays a crucial role in the dining experience. Start by generously spooning the creamy sauce over the flaky red snapper; this allows the sauce to cascade enticingly. For garnishing, consider a sprinkle of freshly chopped parsley or a couple of lime wedges for a pop of color and freshness.

Traditional accompaniments often include fluffy jasmine rice or seasoned cornbread that can absorb the delicious sauce. To modernize the presentation, serve the dish in individual shallow bowls for an elegant touch. Pay attention to the serving temperature; this dish is best enjoyed warm, enhancing both flavor and satisfaction. Practicing portion control will also make your dinner visually appealing and allow guests to savor every bite.

Wine and Beverage Pairing

For the ideal pairing, a crisp white wine such as Sauvignon Blanc complements the delicate flavors of the red snapper without overwhelming it. The acidity of the wine can enhance the richness of the creamy sauce, creating a harmonious balance.

Non-alcoholic alternatives, like a refreshing lemonade or iced tea, can provide a cooling effect to counterbalance the heat from any spices used. If you’re feeling adventurous, a lightly brewed iced herbal tea can also add depth without overpowering the dish. Consider serving these beverages chilled, enhancing the overall dining experience.

Storage and Shelf Life

Proper storage is crucial to maintain the dish’s flavors and safety. Store any leftovers promptly in an airtight container, ensuring they cool to room temperature before sealing. In the refrigerator, Creamy Creole Red Snapper will last for up to 2-3 days.

When reheating, do so gently over low heat to avoid drying out the fish; adding a splash of cream or broth can help revive the sauce’s consistency. If you wish to freeze leftovers, ensure they are in freezer-safe containers and consume within 2 months for optimal quality.

Make Ahead Strategies

To streamline your cooking process, consider preparing the creamy sauce the day before. Allow it to cool and store it separately in the fridge. This approach enhances flavors as they meld overnight.

On the day of serving, simply reheat the sauce while searing the red snapper for fresh, delightful results. If using vegetables, chop them ahead of time and store them in an airtight container to save precious minutes during your cooking session.

Finally, if you plan to incorporate fresh herbs, consider adding them right before serving for a vibrant touch that enlivens the dish.

Scaling Instructions

If you’re looking to adjust the recipe, halving the quantities is straightforward and works well for smaller gatherings. Simply divide each ingredient by two and monitor cooking times closely.

For doubling or tripling the recipe, ensure you have a sufficiently large skillet or divide the cooking into batches to maintain even cooking. Even with a larger quantity, remember that cooking times may vary, so use visual cues to know when it’s ready.

Consider using deeper pans for larger batches, which help retain heat and promote even cooking. Store any leftovers in appropriate-sized containers to facilitate easy reheating and enjoy the meal again later.

Nutritional Deep Dive

The nutritional composition of Creamy Creole Red Snapper offers a balanced meal. Each serving is relatively low in calories while providing an excellent source of protein from the fish. The inclusion of bell peppers and herbs increases the dish’s vitamin and mineral content.

The fat content primarily comes from the cream. It’s essential to be mindful of portion sizes for those monitoring caloric intake, but the heart-healthy aspects of red snapper can contribute positively to a well-rounded diet.

Including a light side of vegetables or whole grains elevates the meal’s nutrient density, supporting overall health. This dish’s wholesome ingredients make it suitable for various dietary requirements, ensuring satisfaction without sacrificing nutrition.

Dietary Adaptations

If you’re looking for gluten-free options, this recipe is naturally gluten-free, so there’s no need for modification. For dairy-free alternatives, substituting coconut cream provides a rich texture without compromising flavor.

Vegan adaptations would require replacing the fish with tofu or tempeh and using a combination of plant-based cream to replicate the sauce’s richness.

For a low-carb or keto version, serve the fish atop a bed of cauliflower rice instead of traditional carbs. You might also consider using avocado puree as a rich, creamy substitute in the sauce.

Additionally, creating a paleo version would involve replacing any processed ingredients with natural counterparts, ensuring wholesome meals throughout.

Troubleshooting Guide

Occasionally, you may run into texture issues with the fish. If the red snapper turns out gummy or tough, it’s usually due to overcooking. Ensure you check for doneness early; it should flake easily without resistance.

Flavor balance is another common concern. If the sauce is too salty, adding a little sugar or more cream can neutralize the taste. Always taste as you go to avoid overpowering seasoning.

Temperature problems can arise if the sauce is too thick or too thin. If it’s too thick, you can incorporate a little broth; conversely, if it’s too thin, allowing it to simmer longer can help it reduce.

If an ingredient substitution caused unexpected changes, take notes to perfect your technique next time. Changes can lead to delightful surprises, making your dish uniquely yours.

Timing concerns can be tricky, especially if you’re unfamiliar with your equipment. Keep a running clock and prepare everything beforehand to smoothly transition from one step to the next.

Recipe Success Stories

Community feedback has been overwhelmingly positive, with many home cooks expressing delight in how easy yet impressive this dish is to prepare. Some have told tales of hosting dinner parties where Creamy Creole Red Snapper became the hallmark of the meal, sparking conversation dynamic with guests.

Variations have been a highlight among those who have tried adapting the recipe. From substituting red snapper with locally caught fish to experimenting with different spices, each cook shares their unique twist, enhancing the communal nature of cooking and sharing recipes.

Readers have suggested pairing this dish with specific sides that elevate the overall meal experience, such as light salads or artisanal bread, creating a wider array of flavors on each plate.

For photography enthusiasts, tips revolve around capturing the vibrant colors and textures of the dish, often recommending natural lighting and close-up shots to highlight its appeal.

Frequently Asked Questions

Can I use frozen red snapper?

Yes, you can use frozen red snapper for this recipe, but it’s crucial to thaw it completely in the refrigerator prior to cooking. This helps ensure even cooking and prevents the fish from becoming rubbery.

What can I substitute for red snapper?

Other flakey fish varieties such as tilapia, cod, or halibut can be used as suitable substitutes. Keep in mind that cooking times may vary based on the thickness of the fish you choose.

Is this dish suitable for meal prep?

Absolutely! The Creamy Creole Red Snapper can be made ahead and stored in the fridge, making it perfect for meal prep. Just reheat gently before serving for the best flavor and texture.

How spicy is this dish?

The spice level can vary based on your preferences. The base recipe is mild, but feel free to adjust the amount of cayenne pepper or add hot sauce for extra heat.

Can I make this dairy-free?

Yes! You can replace the cream with coconut cream or a plant-based heavy cream substitute. This will still provide a creamy texture while keeping it dairy-free.

What are the best sides to serve with this dish?

Great sides include fluffy rice, crusty bread, or a fresh green salad. Light accompaniments will enhance the flavors of the red snapper without overwhelming it.

How do I store leftovers?

Store leftovers in an airtight container in the refrigerator for 2-3 days. It’s best to cool them first before sealing to maintain freshness.

Can I use different vegetables in the sauce?

Absolutely! Feel free to experiment with seasonal vegetables such as zucchini, asparagus, or spinach to customize the flavor and texture of your sauce.

How can I tell if the fish is cooked through?

The fish should flake easily when tested with a fork and should be opaque all the way through. If it appears translucent or is still translucent in the center, it’s not done yet.

What is the best way to reheat the dish?

The best way to reheat Creamy Creole Red Snapper is gently on the stovetop over low heat. Adding a splash of additional cream or broth helps to maintain moisture and texture.

Is this recipe suitable for a keto diet?

Yes, this dish can be enjoyed on a keto diet as it is low in carbohydrates and high in protein and healthy fats. Pair it with low-carb vegetables for a complete keto meal.

Additional Resources

Explore related recipes that spotlight the freshness of seafood or delicious Creole inspirations. Enhance your cooking skills by diving into technique guides focusing on sautéing and simmering efficiently.

If you’re interested in ingredient-specific information, explore sources that delve deeper into the nutritional profiles of fish and creamy sauces. Recommendations for essential kitchen equipment can empower your culinary endeavors.

Seasonal variations can help keep your meals fresh and exciting throughout the year, using the best local ingredients available to you.

Join the Conversation

We encourage you to share your successes and adaptations of the Creamy Creole Red Snapper on social media. Your feedback fosters a sense of community and inspires others to try their hand at this delicious dish.

Tips for photographing your meal to share visually engaging experiences can help make your posts pop. Engaging in recipe reviews will foster connections with fellow food lovers as they share their thoughts and insights.

Feel free to explore and share your unique variations, ensuring the conversation continues and evolves within this culinary community. Your experiences make recipes like this one a living tradition filled with shared joy and flavors.

The Recipe

Creamy Creole Red Snapper

Serves: 4

Prep Time: 15 mins

Cook Time: 30 mins

Total Time: 45 mins

Kitchen Equipment Needed

  • Large skillet
  • Spatula
  • Measuring spoons and cups
  • Knife and cutting board

Ingredients

  • 4 fillets of red snapper
  • 2 tablespoons olive oil
  • 1 cup diced bell peppers (mixed colors)
  • 1 cup diced onion
  • 3 cloves garlic, minced
  • 1 cup heavy cream
  • 1 teaspoon paprika
  • 1/2 teaspoon cayenne pepper
  • Salt and pepper to taste
  • Fresh lime juice for serving
  • Chopped parsley for garnish

Directions

  1. In a large skillet, heat olive oil over medium heat. Add the diced onions and bell peppers and sauté for about 5 minutes, until softened.
  2. Add minced garlic and sauté for another minute until fragrant.
  3. Sprinkle paprika and cayenne over the vegetables, stirring to coat.
  4. Pour in the heavy cream, stirring until combined. Allow the sauce to simmer on low heat for 10-15 minutes, until thickened slightly.
  5. While the sauce is simmering, season the red snapper fillets with salt and pepper. In a separate skillet, heat a bit of olive oil over medium-high heat.
  6. Cook the red snapper for about 3-4 minutes per side, until golden and cooked through.
  7. Once the sauce has thickened, place the cooked red snapper into the sauce and spoon the sauce over the fillets.
  8. Cook for an additional 2 minutes to heat everything through, then serve immediately with a squeeze of lime and a sprinkle of parsley.

Recipe Notes

  • Feel free to adjust the spice levels based on your heat preference.
  • This dish pairs wonderfully with rice or bread to soak up the creamy sauce.
  • For a quick alternative, you can use pre-cut vegetables to save prep time.

Indulge in Decadent Hot Fudge Brownie Bread Today!

Decadent Hot Fudge Brownie Bread: A Chocolate Lover’s Dream

⚖️
Difficulty
Moderate

⏲️
Prep Time
30 mins

🕒
Cook Time
50 mins

⏱️
Total Time
80 mins

🍽️
Servings
12 slices

Indulge your chocolate cravings with our Decadent Hot Fudge Brownie Bread! This deliciously rich loaf combines the fudgy texture of brownies with the comforting goodness of bread, resulting in a sweet treat that’s perfect for any chocolate lover. Imagine slicing into this luscious creation to uncover its warm, gooey fudge center, giving each bite a melt-in-your-mouth sensation. Whether enjoyed as a dessert or a special treat for breakfast, this hot fudge brownie bread promises to satisfy your cravings with every slice.

This recipe is not just about flavors, but also about the experience of baking something truly special. Buzzing with the aroma of fresh chocolate baking in the oven, nothing beats the feeling of pulling this creation from the oven and watching as the chocolate ooze from its depths. It’s soul-soothing, reminiscent of cozy family gatherings where dessert is the highlight. So prepare your taste buds for an extraordinary experience that’s easy to share and even easier to love!

Quick Recipe Highlights

  • Flavor Profile: This brownie bread features rich chocolate and a hint of vanilla, creating a deep flavor that is both comforting and indulgent.
  • Texture: Expect a dense and fudgy interior with a slightly crisp crust that provides the perfect contrast to the ooey gooey center.
  • Aroma: The heavenly scent of baking chocolate mixed with vanilla wafts through the air, captivating everyone in the kitchen.
  • Visual Appeal: This bread presents beautifully with a glossy top and visible fudge swirls throughout, making it enticing for anyone who sees it.
  • Skill Level Needed: This moderate recipe requires basic baking skills and a little love to create a heavenly treat.
  • Special Equipment: You’ll need a standard loaf pan and some mixing bowls along with measuring cups and spatulas for easy preparation.

Recipe Overview

  • Difficulty Level: This loaf requires intermediate baking skills, as achieving the right texture while ensuring the fudge remains gooey can be tricky but very rewarding.
  • Category: This delectable dish falls under the dessert category, specifically as a rich bread that blurs the lines between bakery and confectionery.
  • Cuisine: While drawing inspiration from classic American desserts, this recipe takes brownie traditions and turns them into a unique bread format.
  • Cost: The approximate cost of making this recipe is quite reasonable, primarily accounting for cocoa, butter, and eggs.
  • Season: Ideal for any season, this bread brings warmth on chilly days and sweetness on sunny brunch tables.
  • Occasion: Perfect for birthdays, holidays, or as a delightful afternoon snack, this bread is versatile for various celebrations.

Why You’ll Love This Recipe

One of the standout features of this Decadent Hot Fudge Brownie Bread is its blend of taste and texture. The rich, chocolatey flavor tantalizes your taste buds while the fudgy texture ensures each bite is a chocolatey delight. You’ll savor the contrast of the soft, moist bread with its gooey center, making it hard to resist coming back for that second slice.

This brownie bread is also surrounded by the convenience of preparation – it requires no special techniques beyond basic mixing and baking. With a hands-on time of less than 30 minutes, it’s the perfect choice for a last-minute treat that looks and tastes like it took hours to prepare. Your friends and family will be begging for seconds!

On the nutritional front, the use of eggs and cocoa powder lends a surprising amount of beneficial nutrients—iron from cocoa and protein from eggs—fitting well within a balanced diet when enjoyed in moderation.

Socially, this recipe shines when it comes to entertaining. Arriving at a gathering with a fresh loaf of hot fudge brownie bread will undoubtedly impress guests and is perfect for sharing. This dessert sparks conversation and laughter as everyone delights in its rich, sweet goodness.

Lastly, you’ll find this recipe cost-effective when compared to many store-bought desserts or extravagant pastries. Utilizing common pantry staples, anyone can whip up this delightful treat without breaking the bank. Enjoying such rich flavors at home fosters a sense of creativity and satisfaction.

Historical Background and Cultural Significance

The origins of brownie bread can be traced back to early American cooking, where adaptations of classic desserts evolved to suit home baking methods. Brownies, which first gained popularity in the early 20th century, have always been infused with chocolate and often baked quickly in a pan. However, as the baking world became more innovative, bakers began to experiment by creating hybrid recipes, such as this brownie bread.

Culturally, brownies and baked bread have long been staples at celebrations and family gatherings. Their ability to be made ahead of time and served warm resonates with many traditions that emphasize family and togetherness over shared meals.

As time progressed, variations of brownies shifted from simple recipes to more elaborate creations, often incorporating additional flavors and textures. The introduction of hot fudge into the brownie concept represents a fusion of iconic American flavors, elevating this dish to something truly special.

Ingredient Deep Dive

One of the key ingredients in hot fudge brownie bread is cocoa powder, which has a rich history dating back to ancient civilizations, where it was revered for its flavor and energizing properties. When selecting cocoa powder, opt for high-quality brands that offer a rich chocolate flavor. Store it in a cool, dark place to retain its potency longer. If you run out, you can substitute with unsweetened chocolate, though adjustments in sugar will be necessary.

An equally important ingredient is butter, a crucial component that adds richness and depth to the flavor while contributing to the moisture of the bread. Originating from historical dairy farming, butter transforms recipes by adding creaminess. When choosing butter, look for unsalted options to control the overall salt content of your dish. If you’re out of butter, margarine can serve as a substitute, though the flavor will differ slightly.

Common Mistakes to Avoid

  • Overmixing the Batter: This can lead to dense bread instead of the intended fudgy texture. Ensure you mix until just combined.
  • Underbaking: Not cooking the bread long enough will leave it too gooey in the middle. Always check for doneness using a toothpick, ensuring it comes out with a few moist crumbs.
  • Using Low-Quality Chocolate: Poor quality cocoa can impact flavor significantly. Always use a good quality cocoa powder.
  • Incorrect Oven Temperature: A too hot or too cold oven can affect baking time and texture. Use an oven thermometer to check accuracy.
  • Skimping on the Fudge: Adding insufficient hot fudge to the mixture may result in a disappointing bread. Be generous!
  • Not Prepping the Pan: Failing to grease and flour your pan can lead to sticking. Always ensure your baking dish is prepared.
  • Ignoring Ingredient Temperature: Using cold eggs or butter can affect how well they mix together. Aim for room temperature ingredients.
  • Skipping the Cooling Time: Letting the bread cool completely allows the flavors to meld beautifully. Slicing too soon can ruin the texture.

Essential Techniques

Mixing Your Dry and Wet Ingredients: It’s essential to mix your dry and wet ingredients separately before combining. This ensures a more even distribution of the cocoa and baking powder, preventing clumps. Master this technique by using different bowls to keep your process organized.

Testing for Doneness: Knowing when your brownie bread is done is crucial. Stick a toothpick or knife into the center; it should come out with moist crumbs but not wet batter. This little check can save you from turning a delicious creation into a dry disappointment.

Pro Tips for Perfect Decadent Hot Fudge Brownie Bread

1. Use high-quality cocoa powder for a richer chocolate flavor—opt for Dutch-processed cocoa for a deeper taste.

2. Don’t be afraid to add additional chocolate chips or nuts into the batter for extra texture and flavor depth.

3. If you enjoy a sweeter loaf, consider adding a bit more sugar to complement the bitterness of the cocoa.

4. Let your bread cool before slicing to ensure clean cuts and to preserve the fudgy texture.

5. Serve the bread warm, drizzled with extra hot fudge sauce for an indulgent treat.

6. Make use of leftover chocolate by melting it down and drizzling it over the top for added sweetness and decoration.

7. Experiment with different extracts like almond or peppermint for unique flavor variations.

8. Consider adding a sprinkle of sea salt on top right before baking to enhance flavors significantly.

Variations and Adaptations

Food is always evolving, and so can your brownie bread! For a seasonal adaptation, consider throwing in fresh raspberries or strawberries during the summer months for a refreshing twist. In the autumn, incorporating spices like cinnamon or nutmeg can add warmth and flavor.

If you’re looking for dietary modifications, you can substitute gluten-free flour for all-purpose flour to create a gluten-free version. Additionally, swapping traditional sugar for coconut sugar can offer a lower glycemic alternative.

Flavor variations are limitless. Try adding a layer of caramel sauce for a salted caramel brownie bread or add orange zest to create a chocolate orange fusion. When serving, think about modern presentation alternatives like individual mini loaves, perfect for gifting or parties.

Serving and Presentation Guide

To make your Decadent Hot Fudge Brownie Bread truly shine, consider plating it with finesse. A simple wooden cutting board is an ideal base, showcasing its texture. Drizzle some hot fudge over the top and dust with powdered sugar for an elegant finish. Fresh berries can add a pop of color and freshness to contrast the rich bread.

Garnishing with mint or a dollop of whipped cream can elevate the dessert to the next level. Remember to serve this delicious bread warm, complemented by a cold scoop of vanilla ice cream for a blissful pairing. Additionally, controlling portion sizes can offer a sense of indulgence without overwhelming your guests.

Wine and Beverage Pairing

The rich flavors of decadent chocolate pair beautifully with certain wines. A sweet dessert wine such as a late harvest Riesling enhances the sweetness of the bread and balances out the chocolate’s richness. For something red, a Merlot will highlight the cocoa notes while complementing the fudge.

For non-alcoholic options, consider serving a creamy chocolate milkshake or premium cold brew coffee. The bold flavors in both beverages make for a balanced pairing. Ensure the beverages are served at the right temperature—cold drinks juxtaposed against warm bread are simply divine!

Storage and Shelf Life

To keep your brownie bread fresh, store it in an airtight container at room temperature for up to three days. For longer storage, wrapping the loaf tightly in plastic wrap and aluminum foil can allow you to freeze it for up to three months. Always label your storage containers with dates for easy tracking.

When inspecting for spoilage, look for signs such as dried-out bread or a sour odor. For the best taste, allow frozen bread to thaw completely and reheat it gently in the oven to restore its fudgy texture.

Make Ahead Strategies

To streamline your baking process, you can prepare the batter a day in advance and store it in the fridge. Just give it a good stir before pouring into the pan and baking. This also allows the flavors to develop further, enhancing your final product.

Alternatively, you can bake the bread ahead of time and store it in an airtight container. When it’s time to serve, simply warm up the slices in the oven for a rustic touch and maximum flavor.

Scaling Instructions

If you wish to share your delicious brownie bread creation, doubling or even tripling the recipe is straightforward. Use larger loaf pans or smaller, individual-shaped bakeware to cater to crowd sizes. Ensure you adjust the baking time accordingly, particularly for smaller loaf versions.

For those who want to reduce the recipe, halving the ingredients and using a smaller loaf pan works beautifully. Monitor your baking time closely, as less batter may cook faster than the original recipe indicates.

Nutritional Deep Dive

This Decadent Hot Fudge Brownie Bread is not just a delightful treat; it can also be part of a mindful eating approach when consumed in moderation. One slice approximately contains 250 calories, with a good balance of carbs and fats from chocolate and butter. The presence of protein from eggs also supports a balanced diet while enjoying this indulgent dessert.

Micronutrients found in cocoa, such as magnesium and iron, contribute beneficial health aspects, while the richness of the ingredients provides a satisfying treat that can curb cravings effectively. Keep portion sizes in check, and enjoy responsibly for a guilt-free dessert experience!

Dietary Adaptations

For those needing gluten-free options, substituting wheat flour with almond meal or a gluten-free blend works wonders without compromising on taste. Similar adjustments can be made for a dairy-free option using coconut oil and dairy-free chocolate alternatives, catering to a broader audience.

For vegan adaptations, consider swapping eggs for flax seeds or applesauce, while maintaining the rich flavor with coconut sugar and dairy-free products. These adjustments allow everyone to enjoy the deliciousness of brownie bread, no matter their dietary restrictions!

Troubleshooting Guide

Should your brownie bread turn out too dry, it’s possible you overbaked it. Test your oven’s temperature with an accurate thermometer, as ovens can vary significantly. For overly sweet flavors, reducing the sugar content next time can help balance the chocolate’s richness.

If you find the center is not fudgy enough, consider decreasing the baking time slightly for a gooier texture. Consistent checks can save a loaf from a dry fate!

Recipe Success Stories

Reader feedback on this brownie bread has been overwhelmingly positive, with many sharing their successful baking stories. Some have added layers of caramel or nuts, resulting in unique versions that maintain the delicious base. Community members also share their experiences capturing stunning photos of their creations, encouraging others to try the recipe.

Several readers have suggested making mini loaves as gifts, often leading to rave reviews at holiday gatherings. No matter how you make it, the essence of community surrounds this recipe, making it even more special.

Frequently Asked Questions

1. Can I use different types of chocolate? Absolutely! While dark chocolate provides a deep richness, milk chocolate can create milder sweetness. Experimenting here can yield delicious results!

2. How do I store leftover brownie bread? Keep it in an airtight container at room temperature. For longer storage, wrap it and freeze it. Thawing in the fridge is ideal before serving.

3. Can I add nuts to the recipe? Yes! Chopped walnuts or pecans add a delightful crunch. Just fold them in gently after batter preparation.

4. What can I substitute for eggs? Flaxseed meal mixed with water or applesauce are great egg alternatives. Use 1 tablespoon of flaxseed meal mixed with 2.5 tablespoons of water for each egg.

5. Can I use a different sized pan? Yes, you can use cupcake trays for individual servings or a larger pan if you double the recipe. Adjust the baking time accordingly.

6. What’s the best way to reheat this bread? Reheat in the oven at 350°F (175°C) for about 5-10 minutes. This restores the warm, gooey texture.

7. Can I make this recipe in advance? Yes! The batter can be made a day ahead, and it also freezes well, making it easier to serve fresh treats later.

8. How do I know when it’s done baking? A toothpick inserted into the center should come out with a few moist crumbs but not wet batter. Check it a few minutes before the recommended baking time.

9. Can I use flavored extracts? Definitely! Try adding almond or mint extract for an exciting twist on the classic flavors.

10. Is this recipe easily adaptable for dietary needs? Yes, it’s easily customizable for dairy-free, gluten-free, and vegan diets. Substitute ingredients as mentioned for specific needs.

Additional Resources

For more delicious recipes, check out our cake section for similar dessert inspirations and our baking technique guides to refine your skills. Also, consider exploring our ingredient guides to understand how to make the most out of your pantry staples. Seasonal adaptations can elevate your holiday baking, bringing joy and flavor into every occasion!

Join the Conversation

Don’t hesitate to share your experience in the comments! Join our community on social media and tag us in your creations. We love to see how you make this Decadent Hot Fudge Brownie Bread your own. Engage with other bakers to exchange tips, variations, and photography techniques!

The Recipe

Decadent Hot Fudge Brownie Bread

Serves: 12 slices

Prep Time: 30 mins

Cook Time: 50 mins

Total Time: 80 mins

Kitchen Equipment Needed

  • Loaf pan
  • Mixing bowls
  • Measuring cups
  • Spatula
  • Whisk

Ingredients

  • 1 cup unsalted butter
  • 2 cups granulated sugar
  • 4 large eggs
  • 1 cup unsweetened cocoa powder
  • 1 tsp vanilla extract
  • 1 cup all-purpose flour
  • 1 tsp baking powder
  • 1/2 tsp salt
  • 1 cup hot fudge sauce (store-bought or homemade)

Directions

  1. Preheat your oven to 350°F (175°C). Grease a loaf pan and set aside.
  2. In a large mixing bowl, melt the butter and mix it with sugar until well combined.
  3. Add eggs one at a time, whisking well after each addition, followed by vanilla extract.
  4. In another bowl, sift together cocoa powder, flour, baking powder, and salt.
  5. Gradually add the dry ingredients into the wet mixture, stirring until smooth.
  6. Gently fold in half of the hot fudge sauce into the batter.
  7. Pour the batter into the prepared loaf pan and swirl in the remaining fudge sauce on top.
  8. Bake for 45-50 minutes or until a toothpick comes out with moist crumbs.
  9. Allow the bread to cool in the pan for 10 minutes before transferring to a wire rack.

Recipe Notes

  • Store in an airtight container at room temperature for up to 3 days or freeze for up to 3 months.
  • Feel free to add chocolate chips or nuts for added texture.
  • Drizzle cold vanilla ice cream over warm slices for a delightful treat!

Indulge in Creamy Honey Pepper Chicken Mac and Cheese Delight

Creamy Honey Pepper Chicken Mac and Cheese Delight: A Comforting Culinary Experience

⚖️
Difficulty
Medium

⏲️
Prep Time
20 mins

🕒
Cook Time
30 mins

⏱️
Total Time
50 mins

🍽️
Servings
4 servings

Welcome to the world of creamy comforts where the Creamy Honey Pepper Chicken Mac and Cheese Delight reigns supreme! This dish is not just a meal but a warm hug crafted to elevate your comfort food experience. A rich, velvety cheese sauce envelops perfectly cooked macaroni, adorned with succulent pieces of honey-glazed chicken, all brought to life by a touch of pepper that ignites your palate. A sprinkle of fresh herbs adds a touch of brightness, making it a hearty, satisfying dish perfect for dinnertime gatherings or cozy nights in.

As you dive into this indulgent masterpiece, you’ll discover the beautiful marriage of flavors that this recipe offers. The sweetness of honey blends seamlessly with the savory notes of the chicken, while each spoonful of macaroni offers a creamy texture that dances on your taste buds. This is not just mac and cheese; it’s an explosion of flavors, a burst of satisfaction, and an embrace of warmth, sure to become a family favorite.

Quick Recipe Highlights

  • Flavor Profile: The creamy blend of sharp and smooth cheeses creates a rich flavor, perfectly complemented by the sweetness of honey and kick of pepper.
  • Texture: This dish balances a creamy, luscious sauce with tender chicken pieces and al dente pasta, giving every bite a satisfying mouthfeel.
  • Aroma: The inviting aroma of melty cheese and honey-glazed chicken wafts through the kitchen, making it hard to resist.
  • Visual Appeal: A delightful golden-brown topping and vibrant colors from the pepper make this dish truly eye-catching.
  • Skill Level Needed: While it requires a bit of skill with sauces and baking, even novice cooks can master it with ease!
  • Special Equipment: A large pot, baking dish, and a whisk are essential to achieving the perfect consistency and bake.

Recipe Overview

  • Difficulty Level: This recipe is classified as medium, involving various cooking techniques including sautéing, baking, and creating a creamy sauce, perfect for anyone looking to enhance their culinary skills.
  • Category: The Creamy Honey Pepper Chicken Mac and Cheese Delight fits perfectly into the main course category, offering a substantial meal for any occasion.
  • Cuisine: With roots in American comfort food, this dish combines traditional mac and cheese elements with a gourmet twist, showcasing regional influences.
  • Cost: The ingredient costs are friendly, averaging around $15-20, depending on local prices and seasonal variations.
  • Season: This dish shines during fall and winter, as its rich flavors warm you up during cooler months.
  • Occasion: Perfect for family meals, cozy gatherings, or potlucks, this mac and cheese is sure to impress!

Why You’ll Love This Recipe

The appeal of the Creamy Honey Pepper Chicken Mac and Cheese Delight lies not only in its taste but also its luscious texture. Each spoonful is a harmonious blend of creamy cheese and tender chicken, wrapped in the familiar comfort of macaroni. The contrast of sweet honey and zesty pepper makes each bite exciting – it’s wholesome comfort food elevated to gourmet status. This recipe is designed to be a crowd-pleaser, perfect for families and gatherings alike.

Preparation is fast and straightforward, making this dish a convenient choice for busy weeknights or last-minute entertaining. In less than an hour, you can have a decadent meal ready that feels lovingly homemade. The warming aromas and beautiful presentation resonate with both nostalgia and sophistication, ensuring that everyone at the table feels catered to.

From a nutritional perspective, the combination of cheese, chicken, and macaroni offers a balanced taste while still indulging your comfort food cravings. High in protein thanks to the chicken and packed with carbohydrates from the pasta, this dish serves as a fulfilling option for a satisfying dinner.

The social aspect of this dish makes it even more appealing – it encourages sharing and gathering. Whether it’s family dinners or informal get-togethers with friends, this dish is perfect for bringing people together, fostering warmth, and creating memories around the table.

Cost-effective and easy to prepare, the Creamy Honey Pepper Chicken Mac and Cheese Delight makes an accessible treat for many households. It offers a rich taste without a heavy price tag, ensuring everyone can enjoy a creamy mac and cheese masterpiece.

Historical Background and Cultural Significance

The origins of mac and cheese can be traced back to Italy, but it was in America that it evolved into the classic comfort food we cherish today. The addition of chicken and honey takes this traditional recipe to the next level, enriching the dish’s history with layers of flavor. By incorporating local ingredients and flavors, this adaptation celebrates American ingenuity in the culinary arts.

Within American culture, mac and cheese holds a treasured place, often evoking feelings of nostalgia. From childhood memories of school lunches to family gatherings, it remains a dish that brings people together. The sweet and savory modifications introduce a modern twist, showcasing how culinary traditions evolve while still paying homage to their origins.

As recipes evolve over time, regional variations emerged, with some incorporating different proteins or cheeses. This particular version highlights the delightful sweetness of honey paired with the spice of pepper, a nod to modern palates that appreciate the balance of flavors. The adaptation of honey also reflects a growing trend towards incorporating natural sweeteners into savory dishes, further connecting our culinary practices to contemporary tastes.

Ultimately, the Creamy Honey Pepper Chicken Mac and Cheese Delight serves as a celebration of both heritage and creativity. It is a reminder that while some dishes are grounded in tradition, there is always room for innovation and personal touch, creating new family favorites destined to be cherished in the years to come.

Ingredient Deep Dive

Macaroni

Macaroni, a staple in many households, has a rich history dating back to ancient civilizations. This pasta is beloved for its ability to capture sauce, making it the perfect vehicle for creamy mixtures. It’s typically made from durum wheat, offering a high protein content while remaining versatile for various recipes. When selecting macaroni, opt for brands that promise a firm texture and high-quality ingredients; check for a semolina wheat basis, as this yields superior flavor and integrity.

Proper storage of macaroni should involve an airtight container in a cool, dry place. It can last for years, making it a pantry hero! For substitutions, consider gluten-free pasta or whole grain options to meet dietary preferences without compromising on texture or flavor.

Chicken

Chicken is a globally favored protein that not only provides versatility in cooking but also offers numerous health benefits. Rich in protein, it supports muscle growth and weight management, making it a common choice for healthy meals. When selecting chicken for this recipe, choose fresh or properly frozen cuts, preferably organic for better flavor. Always look for pink, firm meat without any dryness, ensuring freshness.

When storing chicken, refrigerate immediately if fresh or freeze if you won’t use it within a couple of days. Raw chicken should never be left at room temperature. If you’re looking for an alternative, turkey breast can be used as a lean substitute without losing the essential characteristics of the dish.

Cheese

The star of this recipe, cheese, has a fascinating history and varieties that span cultures worldwide. This recipe typically features cheddar, known for its sharp and creamy profile that melts beautifully. The nutritional benefits of cheese are vast, providing calcium, protein, and a depth of flavor that enhances dishes. When choosing cheese, look for aged varieties, which tend to be richer and can elevate your mac and cheese experience.

To store cheese, wrap it tightly in wax paper or plastic wrap, and keep it in the vegetable drawer of your refrigerator. For substitutions, explore alternatives like Gruyère for a nutty flavor or Gouda for a smokier taste, creating exciting changes to this classic recipe.

Common Mistakes to Avoid

  • Not salting the pasta water: This crucial step enhances flavors and ensures that your pasta is seasoned right from the start.
  • Using low-quality cheese: Deli cheeses or pre-shredded options often lack flavor; fresh block cheese generally melts better and tastes superior.
  • Overcooking the pasta: Al dente pasta holds up better in the oven; overcooked pasta can become mushy and unappetizing.
  • Skipping the roux: This technique is vital for creating a thick, creamy sauce; don’t rush through or skip this step for the best results.
  • Not letting the cheese sauce cool: Adding hot cheese to the pasta can lead to clumping; allowing it to cool slightly ensures a smoother sauce.
  • Not incorporating enough pepper: This dish needs a kick! Adjust the spice levels to personal preference, but don’t skimp entirely.
  • Using too much milk: Balance is key; too much milk can lead to a watery sauce. Start with lesser amounts and adjust as necessary.
  • Baking at the wrong temperature: Make sure your oven is correctly preheated to achieve the golden-brown topping that everyone loves.
  • Not letting it rest post-bake: Allowing the mac and cheese to sit for a few minutes after baking ensures it sets and is easier to serve.

Essential Techniques

Making the Roux: This vital technique involves cooking butter and flour together to create a paste, thickening your cheese sauce beautifully. Master this by cooking it just until bubbly and golden, avoiding burnt flour. Visual cues are a bubbling appearance and a slightly nutty smell.

Creating the Cheese Sauce: Combine your roux with milk and whisk until smooth. The key is patience; heat should be medium-low to avoid burning. Watch for bubbles, indicating it’s ready for cheese, but remove it from heat just before it boils for the best texture.

Baking: This technique transforms your dish with a perfect crust. Spread the mixture evenly and top with breadcrumbs before baking at high heat, ensuring golden-brown perfection. Look for a bubbly surface and crisp edges to know when it’s done.

Pro Tips for Perfect Creamy Honey Pepper Chicken Mac and Cheese

1. Use a mix of cheeses like cheddar and mozzarella for a depth of flavor and excellent stretch.

2. For added richness, consider a splash of heavy cream in the cheese sauce.

3. Experiment with different proteins, such as chorizo for a spicy kick, or use shrimp for a seafood twist.

4. Add in cooked vegetables like spinach or broccoli to enhance nutrition without compromising taste.

5. Consider roasting the chicken beforehand to add an extra layer of flavor and moisture.

6. To create a gourmet touch, top with truffle oil before serving or mix in herbs like thyme for a fresh note.

7. Picante sauces or sriracha can amplify the heat and flavor, giving your dish the perfect kick.

8. For a crunch factor, consider adding crushed potato chips or fried onions on top just before serving!

Variations and Adaptations

Regional Variations: Explore Southern twists by incorporating collard greens or Cajun spices. These regional influences can introduce exciting flavors and textures.

Seasonal Adaptations: During the fall, consider stirring in roasted butternut squash or pumpkin puree for a seasonal twist that adds flavor and depth.

Dietary Modifications: To make this dish gluten-free, swap traditional macaroni for gluten-free options, ensuring everyone can enjoy it.

Flavor Variations: Mix in unique cheeses like blue or feta for a sophisticated touch, changing the taste profile significantly.

Texture Modifications: Adding crispy prosciutto or breadcrumbs on top can create delightful textural contrasts in each serving.

Presentation Alternatives: Serve in individual ramekins for a fun twist, allowing guests to enjoy their personalized creamy delight!

Serving and Presentation Guide

To elevate the overall presentation of the Creamy Honey Pepper Chicken Mac and Cheese Delight, opt for stylish plating techniques. Serve in a shallow, wide bowl to showcase its creamy, rich texture while allowing vibrant toppings to shine. A sprinkle of fresh herbs adds a splash of color and brightness.

Garnishing ideas can range from crispy onions to a drizzle of balsamic glaze, enhancing the visual effect while adding extra dimensions of flavor. Pair the dish with warm, crusty bread or a light salad for balance and versatility, and consider offering hot sauce on the side for guests who desire a heat boost.

Serving temperature plays a crucial role; mac and cheese should be served hot to enjoy the creamy texture fully. For portion control, consider using a measuring cup to serve equal quantities, ensuring everyone gets a fair share of cheesy goodness.

Wine and Beverage Pairing

For wine pairings, a rich Chardonnay complements the creamy cheese well, with its buttery notes enhancing the dish’s flavors. Alternatively, a Pinot Grigio offers a refreshing counterpoint, balancing the richness while cleansing the palate. If you prefer a non-alcoholic option, consider sparkling water with a twist of lemon to cut through the creaminess.

When it comes to coffee or tea pairings, opt for a dark roast coffee to introduce a slight bitterness that balances the richness of mac and cheese, while a spiced chai can provide aromatic warmth.

Storage and Shelf Life

For proper storage of your leftover Creamy Honey Pepper Chicken Mac and Cheese Delight, cool the dish thoroughly before placing it in an airtight container. It can be stored in the refrigerator for up to 3-4 days. If you wish to freeze portions, do so in freezer-safe containers, ensuring to label and date them.

Signs of spoilage include unusual smells, off colors, or changes in texture. For reheating, heat in the oven for the best texture or in a microwave with a splash of milk to maintain creaminess. Avoid reheating multiple times, as it can compromise quality.

Make Ahead Strategies

For meal prep, consider cooking macaroni and chicken in advance. Store them separately, and combine them with the cheese sauce just before baking. This strategy allows for quick assembly on busy evenings without sacrificing flavor.

Assembling the dish in advance can also work; simply layer it in the baking dish and refrigerate until ready to bake. This makes entertaining effortless, allowing you to enjoy time with guests rather than being stuck in the kitchen. When it comes time to bake, extend the cooking duration slightly if fully chilled.

Scaling Instructions

To halve the recipe, use half of each ingredient, noting that the cooking time might slightly vary. For doubling or tripling, ensure your cooking equipment can accommodate the increased quantities. A larger pot will be necessary for boiling pasta and prepping sauces, and plan for larger baking dishes as well.

With regards to timing modifications, when cooking in larger batches, consider adjusting the overall cooking time, keeping an eye on bubbling and browning to ensure optimum results. Take care to store any additional servings properly, ensuring freshness for future meals.

Nutritional Deep Dive

The Creamy Honey Pepper Chicken Mac and Cheese Delight is a hearty meal that balances flavor and nutrition. Each serving delivers a significant amount of protein from chicken and cheese, essential for muscle recovery and overall health. In terms of carbohydrates, the macaroni provides energy for an active lifestyle, making it ideal for families and busy individuals.

Micronutrient analysis shows benefits as well. Cheese offers calcium for bone health, while chicken contributes iron, promoting healthy blood flow. By incorporating a variety of vegetables, you can enhance the micronutrient profile, introducing vitamins A and C for a well-rounded meal.

Dietary Adaptations

To make the Creamy Honey Pepper Chicken Mac and Cheese Delight gluten-free, substitute traditional macaroni with gluten-free pasta, ensuring everyone can enjoy this dish without worry.

For a dairy-free option, consider using cashew cheese or a vegan cheese alternative. Coconut milk can replace dairy in the sauce, maintaining creaminess while accommodating those with lactose intolerance.

For vegan adaptations, replace chicken with chickpeas or plant-based proteins, and ensure all cheese alternatives are dairy-free. Additionally, explore low-carb options by using zucchini noodles instead of pasta, catering to keto diets while maintaining flavor.

Troubleshooting Guide

If your cheese sauce becomes too thick, a splash of milk can help loosen it while maintaining creaminess. Conversely, if it’s too thin, allowing it to simmer longer or adding a cornstarch slurry can thicken it quickly.

In cases of undercooked pasta, ensure that it’s al dente before baking, as it will continue cooking in the oven. Should your mac and cheese turn out bland, remember that seasoning at each stage is key, incorporating salt, pepper, and perhaps a hint of garlic or onion powder to enhance flavor.

Recipe Success Stories

Numerous community members have shared rave reviews about the Creamy Honey Pepper Chicken Mac and Cheese Delight. Readers have adapted it to include seasonal vegetables or different meats and discovered new favorites, making it a versatile choice in any kitchen.

Photographic success stories boast vibrant images of bubbling mac and cheese, showcasing individual variations from different households. It inspires creativity, prompting others to share their unique twists on this delicious dish, fostering community around a beloved recipe.

Frequently Asked Questions

Can I use cooked chicken for this recipe?
Absolutely! Using pre-cooked chicken can save time and adds a wonderful flavor to the mac and cheese.

What is the best cheese for macaroni and cheese?
Cheddar is a classic choice, but a combination of cheeses such as mozzarella or gouda can create a richer flavor profile.

Can I make this dish ahead of time?
Yes! You can prepare it in advance and bake it just before serving, making it an excellent choice for gatherings.

How do I reheat leftovers?
The best way to reheat is in the oven at a low temperature to maintain creaminess; adding a bit of milk helps.

Is it necessary to bake the mac and cheese?
Baking adds a beautiful golden crust, but you can enjoy it stovetop without baking if preferred.

Can I make this dish vegetarian?
Sure! Simply omit the chicken and consider adding vegetables like spinach or mushrooms to amp up flavor and nutrition.

Can I freeze mac and cheese?
Yes, you can freeze it! Just ensure it’s in an airtight container and consumed within 3 months for best flavor.

What can I add for more flavor?
Adding herbs like thyme or spices such as cayenne pepper can elevate the flavors beautifully.

How long does mac and cheese last in the fridge?
It typically stays good for 3-4 days when kept in an airtight container in the refrigerator.

Can I adjust the spiciness of the dish?
Absolutely! Customize the pepper levels to suit your taste; start mild and adjust from there.

Additional Resources

For those looking to explore similar dishes, this blog features an array of comforting recipes, from classic lasagnas to innovative pasta bakes. Visit our technique guides to understand essential culinary skills like bechamel and roux making. Additionally, explore more about cheese varieties to elevate your cooking further!

Join the Conversation

We invite you to share your experiences with the Creamy Honey Pepper Chicken Mac and Cheese Delight! Post your photos, variations, and personal tips on our social media channels. Together, we can create a community filled with culinary creativity, sharing stories and flavor inspirations. Your feedback matters, and we’d love to hear how this recipe has become a part of your mealtime memories!

The Recipe

Creamy Honey Pepper Chicken Mac and Cheese Delight

Serves: 4

Prep Time: 20 mins

Cook Time: 30 mins

Total Time: 50 mins

Kitchen Equipment Needed

  • Large pot
  • Colander
  • Whisk
  • Baking dish
  • Measuring cups and spoons
  • Chef’s knife

Ingredients

  • 8 oz macaroni
  • 2 cups chicken, cooked and diced
  • 2 cups shredded cheddar cheese
  • 1 cup grated parmesan cheese
  • 3 cups milk
  • 1/4 cup honey
  • 2 tablespoons butter
  • 1/4 cup flour
  • 1 teaspoon black pepper
  • Salt to taste
  • 1/2 cup breadcrumbs (optional)

Directions

  1. Preheat your oven to 350°F (175°C).
  2. Cook the macaroni in a large pot of salted boiling water until al dente. Drain and set aside.
  3. In the same pot, melt the butter over medium heat. Whisk in the flour and cook for about 1 minute.
  4. Gradually add the milk while whisking to avoid lumps. Cook until thickened, around 5-7 minutes.
  5. Lower heat and add cheddar and parmesan cheese, stirring until melted and smooth.
  6. Stir in the cooked chicken, honey, and black pepper. Season with salt to taste.
  7. Combine the cheese sauce with the macaroni, mixing well to coat.
  8. Transfer the mixture to a greased baking dish. If desired, sprinkle breadcrumbs on top.
  9. Bake in the preheated oven for 20 minutes, or until bubbly and golden.
  10. Let it rest for a few minutes before serving to ensure it sets.

Recipe Notes

  • Leftovers can be stored in the fridge for 3-4 days in an airtight container.
  • Feel free to add vegetables for extra nutrition!
  • Substitute your favorite cheeses or proteins as desired.