Delicious Parmesan Zucchini Potato Muffins for Healthy Snacking

Parmesan Zucchini Potato Muffins: A Savory Delight for All

⚖️
Difficulty
Easy

⏲️
Prep Time
15 mins

🕒
Cook Time
25 mins

⏱️
Total Time
40 mins

🍽️
Servings
12 muffins

Parmesan Zucchini Potato Muffins are a delightful combination of savory flavors and nutritious vegetables. The rich, nutty taste of Parmesan cheese melds perfectly with the moisture of zucchini and the earthiness of potatoes, creating a muffin that’s not only delicious but also satisfying. Each bite delivers a hearty texture, making these muffins a wonderful choice for breakfast, a snack, or even as a side dish to complement your meals.

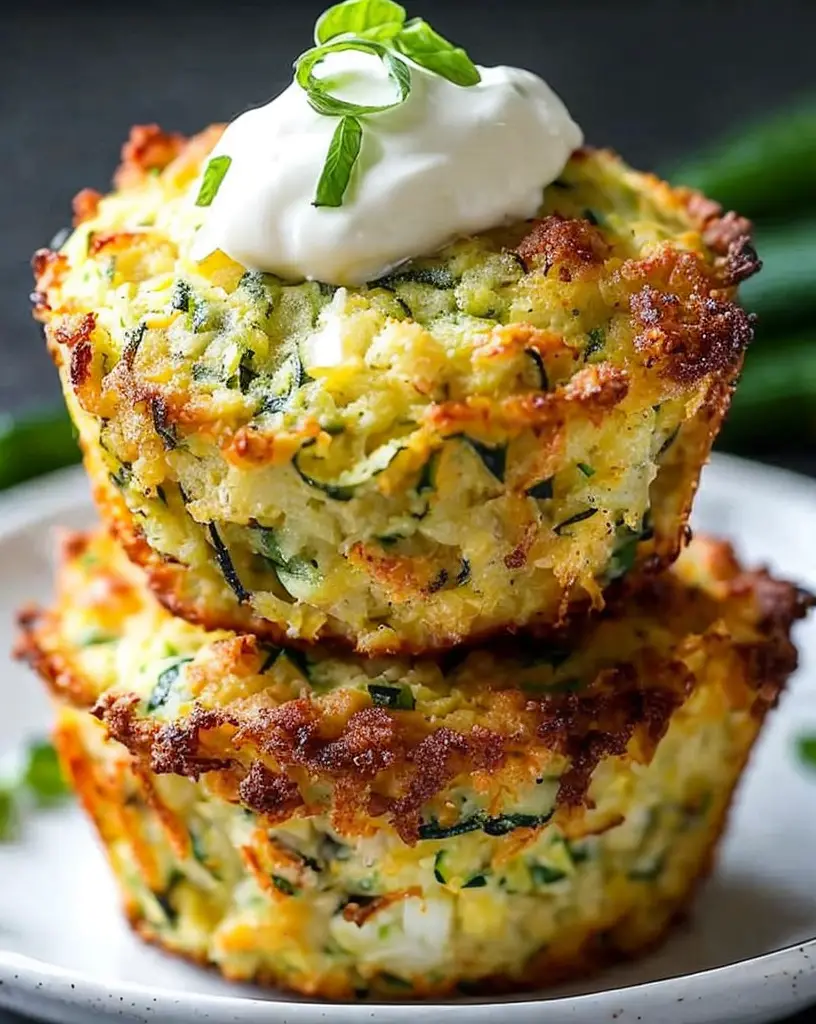
These muffins are perfect for those who are looking to enjoy wholesome ingredients packed into a tasty format. With their appealing golden-brown crust and tender center, Parmesan Zucchini Potato Muffins not only taste amazing but also look tempting on the table. The aroma of baked Parmesan and fresh vegetables fills the kitchen, inviting everyone to enjoy them right out of the oven.

Quick Recipe Highlights

  • Flavor Profile: A scrumptious blend of cheesy, savory, and subtly herbaceous notes from the zucchini and potatoes, balanced with the richness of Parmesan.
  • Texture: Each muffin has a soft, moist interior with a slightly crispy exterior, providing a satisfying contrast.
  • Aroma: The delightful scent of baked cheese and fresh herbs wafts through the air, elevating your dining experience.
  • Visual Appeal: These muffins present beautifully with their golden tops, flecks of green zucchini, and inviting overall look.
  • Skill Level Needed: An easy recipe for all skill levels, perfect for beginner cooks looking to impress.
  • Special Equipment: Just a muffin tin and a mixing bowl, making this recipe accessible and convenient.

Recipe Overview

  • Difficulty Level: This recipe is categorized as easy due to straightforward steps and minimal ingredients. It’s ideal for beginners who want to create something delicious without getting overwhelmed.
  • Category: These muffins can serve as breakfast items, snacks, or side dishes, making them versatile for any meal of the day.
  • Cuisine: While not traditionally tied to a specific cuisine, this recipe draws influences from Mediterranean flavors through the use of Parmesan cheese and fresh vegetables.
  • Cost: With affordable ingredients like potatoes and zucchini, these muffins offer a budget-friendly option for satisfying your savory cravings.
  • Season: Zucchini is commonly available in summer but can be found year-round, making this recipe adaptable to various seasons.
  • Occasion: Perfect for brunch gatherings, potlucks, or family breakfasts. These muffins are sure to become a crowd favorite.

Why You’ll Love This Recipe

These Parmesan Zucchini Potato Muffins are not only delicious but also incredibly appealing in terms of taste and texture. The savory blend of ingredients creates a muffin that is rich and satisfying, while the addition of zucchini keeps them moist and tender, ensuring you can enjoy them for any meal. Whether paired with a salad or enjoyed alone, these muffins provide a delightful burst of flavor.

For busy individuals and families, the convenience of this recipe is a major plus. The muffins can be made in advance and stored for later meals, making them an excellent solution for quick breakfasts on hectic mornings. They are easy to grab on the go, providing a wholesome option without sacrificing flavor.

Nutritionally, these muffins shine due to the inclusion of zucchini and potatoes, both of which are packed with vitamins and minerals. Zucchini is a low-calorie vegetable that adds fiber and helps keep you feeling full, while potatoes provide a good source of carbohydrates, making these muffins an excellent energy booster.

When it comes to entertaining, these muffins serve well for guests, proving to be a hit at gatherings. Whether serving them at a brunch or a picnic, they are easy to share and encourage conversation around the table. People will love to know your secret for making such delightful muffins!

Additionally, the cost-effectiveness of this recipe cannot be ignored. With affordable ingredients and the option to freeze leftovers, these muffins are an accessible and practical option for anyone looking to enjoy delicious food without breaking the bank.

Historical Background and Cultural Significance

The origins of zucchini muffins can be traced back to regions where zucchini is a staple vegetable, particularly in Mediterranean cuisines. These regions have historically embraced the use of seasonal produce in their cooking, often incorporating what was fresh into versatile dishes such as muffins. Over time, the integration of cheese, particularly Parmesan, has made these muffins even more flavorful and appealing.

Culturally, such savory baked goods represent a trend towards healthier eating, focusing on incorporating vegetables into everyday meals. In many cultures, including Italian, the emphasis on using fresh ingredients and minimizing waste aligns with the philosophy behind these muffins. The goal is to create something delicious that makes the most of seasonal produce.

The evolution of this recipe has led to various adaptations, with some preferring additional spices or herbs to elevate the flavor. The basic concept of combining grains, vegetables, and cheese has remained popular due to its simplicity and adaptability for different palates.

Regional variations are seen in the way these muffins are prepared, as some areas may use local cheeses or experiment with additional ingredients. This adaptability has allowed the concept of cheesy vegetable muffins to transcend boundaries and capture the hearts of food lovers everywhere.

Ingredient Deep Dive

Zucchini: Zucchini is a versatile vegetable that has its roots in Southern Italy, where it thrives in warm climates. It is an excellent source of hydration thanks to its high water content and provides dietary fiber essential for digestive health. When selecting zucchini, look for firm specimens without soft spots, and store them in a cool place to maintain freshness.

Potatoes: Potatoes have a long history as a dietary staple around the world, originating from ancient Peru. Their carbohydrate content makes them a valuable source of energy, and they are rich in vitamins C and B6. Choose potatoes that are unblemished and firm, and store them in a dark, cool place to prevent sprouting.

Parmesan Cheese: Parmesan cheese, with its nutty flavor and granular texture, has been cherished in Italian cuisine for centuries. It is a rich source of calcium and protein that enhances various dishes. Use freshly grated Parmesan for the best flavor, and store it in an airtight container in the refrigerator to maintain its quality.

Common Mistakes to Avoid

  • Over-mixing the batter: Mixing too much can lead to dense muffins; stir just until combined.
  • Using overly wet zucchini: Squeeze out excess moisture from zucchini for better texture.
  • Inaccurate ingredient measurements: Use a kitchen scale or measuring cups for precise amounts.
  • Underbaking the muffins: Always check doneness with a toothpick; it should come out clean.
  • Skipping the muffin liners or greasing the pan: This can cause muffins to stick; line or grease the pan properly.
  • Not preheating the oven: Proper oven temperature is essential for the right rise and texture.
  • Crowding the muffin tin: Leave space between muffins for even baking.
  • Not allowing muffins to cool: Letting them cool in the pan can cause sogginess; transfer to a wire rack.
  • Using low-quality cheese: Aged Parmesan adds depth; avoid pre-grated cheese for the best flavor.
  • Ignoring ingredient freshness: Use fresh vegetables and cheese for optimal taste and nutrition.

Essential Techniques

Understanding how to combine dry and wet ingredients properly is crucial for perfect muffins. Begin by incorporating your dry ingredients into a separate bowl before gradually blending them with your wet mixture. This process not only enhances the aeration of the batter but also ensures that the muffins rise evenly, creating a pleasing texture.

Another important technique is to prepare your vegetables correctly. For zucchini, make sure to grate it finely and, if necessary, squeeze out excess water to prevent the muffins from becoming soggy. These simple steps enhance your muffins’ flavors and contributed texture, resulting in a delightful finished product.

Pro Tips for Perfect Parmesan Zucchini Potato Muffins

– Ensure the oven is fully preheated for even baking, as starting in a cold oven can lead to unevenly cooked muffins.
– Experiment with herbs: Adding fresh or dried herbs like thyme or oregano can elevate the flavor profile significantly.
– Use a mix of potato types for enhanced flavor and texture; for a gourmet touch, try mixing in sweet potatoes.
– For a unique twist, incorporate ingredients like sun-dried tomatoes or olives to give your muffins a Mediterranean flair.
– Allow the muffins to cool completely before storing to maintain freshness and prevent moisture build-up.
– Consider a dash of cayenne pepper for heat; it pairs surprisingly well with the richness of the cheese.
– For extra richness, swap half of the zucchini with grated carrots for a colorful twist.
– Freeze your muffins for long-term storage. They are a fantastic grab-and-go snack when you need something quick.

Variations and Adaptations

For a seasonal adaptation, consider incorporating diced bell peppers or corn in the summer for a fresh bite. In autumn, using pumpkin puree instead of some potato would add a lovely flavor while still keeping your muffins moist and flavorful.

When aiming for dietary modifications, simply substitute regular flour with almond or coconut flour for gluten-free options. For those avoiding dairy, consider using nutritional yeast and a dairy-free cheese alternative to flavor the muffins.

Flavor variations can also be achieved by adding spices such as smoked paprika or Italian seasoning, giving an unexpected twist to the classic recipe. Different cheese options, like feta or goat cheese, can also transform the overall flavor, allowing you to tailor the dish to your preferences.

Serving and Presentation Guide

For plating, arrange your muffins on a wooden board or platter to create a rustic feel. Garnishing with chopped herbs, such as parsley or basil, can add a splash of color and freshness to your presentation. Serve with a light dipping sauce or olive oil for a gourmet touch, enhancing the overall tasting experience.

Temperature plays a significant role in serving; muffins can be enjoyed warm or at room temperature, making them flexible for various meal settings. Consider pairing your muffins with scrambled eggs or a mixed green salad for a balanced meal, and keep portion sizes in check for a healthy approach.

Wine and Beverage Pairing

For wine pairings, a crisp Sauvignon Blanc complements the savory notes of the muffins beautifully, enhancing the overall dining experience. Alternatively, a fruity Chardonnay would also pair nicely, offering a creamy contrast to the texture.

If you’re seeking non-alcoholic alternatives, a refreshing herbal iced tea or sparkling lemonade can provide a delightful contrast to the savory flavors of the muffins. For those who enjoy coffee or tea, a light roast coffee would not overpower the flavor while providing a pleasant accompaniment.

Storage and Shelf Life

Proper storage is essential for keeping these muffins fresh. Store them in an airtight container at room temperature for up to three days. If you need to keep them longer, consider refrigerating them, where they will last for about a week.

Signs of spoilage include an off smell or unusual texture; always check before consuming stale muffins. When reheating, a quick microwave session or a brief time in a toaster oven will revive their original taste and texture.

For long-term storage, you can freeze the muffins. Place them in a freezer-safe bag, and they will keep for up to three months. To enjoy, simply thaw them in the refrigerator overnight or enjoy them directly from the freezer for a chilled treat.

Make Ahead Strategies

To make your life easier, prepare the batter the night before and store it in the refrigerator. This way, you can simply fill the muffin tins in the morning and bake them fresh. Alternatively, fully bake the muffins in advance and cool them completely before storage.

You can store batter between steps by chilling any prepared ingredients separately, ensuring freshness while maintaining the quality for baking later. Given that the muffins will still rise during baking, this strategy helps preserve flavor.

Finally, for the best quality, consider adding fresh elements such as a dollop of pesto or a sprinkle of fresh herbs right before serving, enhancing both flavor and presentation.

Scaling Instructions

If you’re planning to halve the recipe, ensure you adjust the baking time accordingly; smaller batches typically bake faster. Always keep an eye on the muffins and perform the toothpick test for doneness.

When doubling or tripling the recipe, consider using multiple muffin tins to speed up the process. You may also choose to bake them in batches or adjust the oven racks to accommodate larger quantities.

Timing is crucial when scaling; larger batches could have different baking times, so always plan for additional minutes as needed. Additionally, ensure that your mixing bowl and muffin tins are large enough to handle the increased volume without causing spillovers.

Nutritional Deep Dive

Understanding the nutritional benefits of your ingredients will enhance your appreciation of these muffins. The base of zucchini and potatoes provides essential vitamins and minerals, contributing to overall health. Zucchini is particularly low in calories yet high in antioxidants, making it a great addition to any diet.

Parmesan cheese contributes protein and calcium but can also be higher in sodium. Balancing the muffin’s ingredients helps control this while maximizing nutrient intake.

A typical muffin offers a balanced macros profile, giving you energy from complex carbohydrates while providing fiber from the zucchini. Portion control is essential, especially if mindful of caloric intake, so enjoy these muffins while staying within your dietary goals.

Dietary Adaptations

For gluten-free options, substitute regular flour with a gluten-free blend or almond flour—a great way to ensure everyone can enjoy these muffins.

Those who are dairy-free can replace Parmesan with nutritional yeast and a dairy-free cheese alternative, ensuring that flavour is still vibrant and cheesy without the dairy. This adaptation retains the delicious essence of the original recipe.

Vegans can easily swap out the eggs for flax eggs or applesauce, making them not only egg-free but also suitable for those following plant-based diets. Exploring low-carb variations by using cauliflower rice instead of potato can be another great alternative.

Troubleshooting Guide

If you encounter texture issues, such as overly dense muffins, check if you may have over-mixed the batter or added excess moisture. Allowing the batter to rest for a few minutes can also yield a lighter texture.

Flavor balance problems can often be attributed to under-seasoning—make sure to taste the batter before baking, and don’t shy away from extra seasoning as needed.

For temperature-related challenges, ensure that the muffins are baked at the correct temperature, as ovens can vary. Adjusting the rack position can also affect results; lower racks often yield more even baking.

If substitutions have led to unexpected results, revisit the proportions you’ve used, as some ingredients may not provide the same structure or flavor. Lastly, maintain proper timing to ensure everything is baked to chewy perfection.

Recipe Success Stories

Many readers have shared their delightful experiences with Parmesan Zucchini Potato Muffins, praising their flavor and ease of preparation. Community feedback often highlights how families enjoy these muffins for brunch or even as part of school lunches.

Variations have also captured attention, with readers experimenting with different cheeses and vegetables to elevate the recipe. Adjusting the spices has become a favored method for many, creating personal touches that resonate with individual palates.

Adaptation stories often involve making these muffins healthier by swapping ingredients, showing that innovation keeps the recipe fresh while maintaining the original spirit. Tips for photography have also emerged, with readers showcasing their beautiful creations on social media, inspiring others to recreate the dish at home.

Frequently Asked Questions

Can I freeze Parmesan Zucchini Potato Muffins?

Yes, these muffins freeze well! Store them in an airtight container or freezer bag, and they will maintain their flavor for up to three months. Thaw them overnight in the refrigerator for the best results.

How do I know when my muffins are done?

Perform the toothpick test: insert a toothpick in the center of a muffin, and if it comes out clean or with a few crumbly bits, they are ready. If wet batter clings to the toothpick, bake for a few more minutes.

Can I substitute zucchini with other vegetables?

Absolutely! You can use finely grated carrots, yellow squash, or even finely chopped spinach as substitutions. Just ensure that you adjust moisture content as needed.

How long do these muffins stay fresh?

When stored in an airtight container at room temperature, they can last for up to three days. Refrigeration extends their life to about a week.

Can I make a mini version of these muffins?

Yes, you can use a mini muffin tin! Bake for about 15-20 minutes, checking for doneness with a toothpick for proper cooking times.

What can I serve with these muffins?

They pair excellently with yogurt, fresh fruit, or a side salad for a complete meal. Enjoy them with scrambled eggs for a hearty breakfast.

Are these muffins suitable for kids?

Yes, they are great for kids due to their bite-sized nature and healthy ingredients. You can also adjust the seasonings to suit their tastes.

Can I use store-bought shredded zucchini?

While you can, homemade shredded zucchini will yield better flavor and freshness. Store-bought options can sometimes be wetter, affecting the texture of your muffins.

What other cheeses work well in this recipe?

Feta, cheddar, or mozzarella can also be wonderful substitutes if you want to vary the flavors. Each cheese will add its unique taste and texture.

How can I make these muffins healthier?

Consider reducing the cheese amount, using whole-grain flour, or adding more vegetables to increase fiber content while keeping it wholesome and delicious.

Additional Resources

If you’re looking to explore more recipes like these Parmesan Zucchini Potato Muffins, check out our selection of vegetable muffins that incorporate seasonal produce. We also offer unique tips for mastering muffin-making techniques, including proper mixing and baking strategies.

Additionally, learn more about ingredient nutrition, which can help you customize your dishes to suit dietary preferences. Our kitchen equipment guides will assist you in choosing the best tools to elevate your cooking. Finally, seasonal variations can keep your meals exciting throughout the year, ensuring that every recipe feels fresh and delicious.

Join the Conversation

We love hearing from our readers! Share your experiences with Parmesan Zucchini Potato Muffins on social media by tagging us. Share your photos and variations as a source of inspiration for others looking to try this delicious recipe. We encourage you to leave reviews, impart advice, and engage with the community, creating a delicious dialogue around food and cooking!

The Recipe

Parmesan Zucchini Potato Muffins

Serves: 12 muffins

Prep Time: 15 mins

Cook Time: 25 mins

Total Time: 40 mins

Kitchen Equipment Needed

  • Muffin tin
  • Mixing bowl
  • Grater for zucchini
  • Measuring cups and spoons
  • Whisk or spoon for mixing

Ingredients

  • 1 cup grated zucchini, excess moisture squeezed out
  • 1 cup mashed potatoes
  • 1 cup all-purpose flour
  • 1 cup grated Parmesan cheese
  • 2 large eggs
  • 1 teaspoon baking powder
  • Salt and pepper to taste
  • 1 teaspoon garlic powder (optional)
  • 2 tablespoons chopped fresh herbs (parsley, thyme, or basil)

Directions

  1. Preheat your oven to 375°F (190°C) and grease your muffin tin or line it with paper liners.
  2. In a large bowl, combine the grated zucchini, mashed potatoes, and beaten eggs.
  3. Add in the flour, Parmesan cheese, baking powder, and seasonings. Stir just until combined; do not over-mix.
  4. Fold in the fresh herbs for added flavor.
  5. Evenly distribute the batter into the muffin tin, filling each cup about 3/4 full.
  6. Bake for 20-25 minutes, or until the tops are golden brown and a toothpick inserted comes out clean.
  7. Let them cool slightly before removing from the tin. Serve warm or at room temperature.

Recipe Notes

  • Feel free to experiment with different cheese types for varied flavors.
  • These muffins can be made ahead of time and stored in the fridge or freezer.
  • Adjust seasoning according to your preference; add more herbs for an intensified flavor.

Delicious Garlic Butter Steak Fried Rice Recipe for Meat Lovers

Garlic Butter Steak Fried Rice: The Ultimate Flavorful Comfort Dish

⚖️
Difficulty
Medium

⏲️
Prep Time
10 mins

🕒
Cook Time
20 mins

⏱️
Total Time
30 mins

🍽️
Servings
4 servings

If you’re on the hunt for a meal that combines the luxurious flavors of garlic butter with the heartiness of steak and the satisfying texture of fried rice, look no further than this Garlic Butter Steak Fried Rice. This dish is not only incredibly delicious, but it’s also a one-pan wonder that can be easily made at home. Infused with rich, savory garlic butter, each bite transports you to a culinary paradise, offering the perfect blend of protein, vegetables, and carbs that we all crave.

Imagine tender steak pieces sautéed to perfection, combined with fluffy fried rice kissed by the bold aroma of garlic. This recipe is a celebration of flavors that comes together quickly, making it an excellent option for a weeknight dinner or a meal prep solution. Whether you enjoy it solo or as a hearty side, Garlic Butter Steak Fried Rice is guaranteed to impress your friends and family.

Quick Recipe Highlights

  • Flavor Profile: Rich, savory, and buttery with a kick of garlic, complemented by the freshness of vegetables.
  • Texture: Tender steak mingles with fluffy rice for a delightful mouthfeel and texture.
  • Aroma: The robust aroma of garlic butter fills the kitchen, creating an irresistible allure.
  • Visual Appeal: Vibrantly colored veggies contrast beautifully with the golden rice and savory steak pieces.
  • Skill Level Needed: Suitable for home cooks of all levels, with straightforward and easy-to-follow steps.
  • Special Equipment: A large skillet or wok is recommended for optimal cooking results.

Recipe Overview

  • Difficulty Level: This Garlic Butter Steak Fried Rice is classified as medium difficulty. It requires basic cooking techniques but may need some attention to timing.
  • Category: This dish falls into the dinner category, perfect for comforting weeknight meals or casual gatherings.
  • Cuisine: Drawing inspiration from Asian culinary traditions, this recipe emphasizes quick cooking methods with fresh, flavorful ingredients.
  • Cost: The ingredients are relatively affordable, with steak being the most significant expense, making it accessible for most budgets.
  • Season: Ideal for any season but particularly delightful in cooler months when comfort food is a priority.
  • Occasion: This recipe is perfect for casual dinners, family gatherings, and meal prep for the week ahead.

Why You’ll Love This Recipe

With its exquisite taste and texture, Garlic Butter Steak Fried Rice captivates the palate. The combination of succulent steak and perfectly cooked rice offers an indulgent dish without needing multiple courses. It’s not only a feast for the stomach but also a balm for the soul, as the heartfelt flavors echo a comforting embrace that makes everyone feel at home.

The convenience of preparation is another reason to love this recipe. With everything cooked in one pan, clean-up is minimal, allowing you more time to enjoy your meal. Just chop your ingredients, toss them into the pan, and watch as they meld into a heavenly dish. It’s a weeknight wonder that won’t leave you scrambling for dinner ideas.

Beyond taste and convenience, Garlic Butter Steak Fried Rice is packed with nutritional benefits. The combination of steak, vegetables, and rice provides essential proteins, vitamins, and minerals, making it a well-rounded meal. Enjoy it guilt-free knowing that you’re nourishing your body while indulging your taste buds.

This dish shines in social settings, whether you’re hosting a dinner party or enjoying a family meal. Its vibrant colors and enticing aroma make it an attractive centerpiece on the table, sparking conversation and delight. Plus, it’s easy to double or triple the recipe for larger gatherings, ensuring everyone gets to savor its amazing flavors.

Finally, Garlic Butter Steak Fried Rice is cost-effective and accessible. Most of the ingredients are staples likely already in your kitchen, and the recipe allows for creative flexibility with what you have on hand. This makes it not just a delicious meal, but also a smart choice for anyone looking to stay within a budget.

Historical Background and Cultural Significance

The roots of fried rice can be traced back to China, where utilizing leftover ingredients was a common practice among the culinary traditions. This ingenious method of extending meals turned simple staples like rice into delicious, elevated dishes. The integration of garlic butter reflects modern influences and is a creative twist that evolutionarily adapts traditional recipes for contemporary tastes.

In many Asian cultures, fried rice represents convenience and adaptability, making it a beloved dish for families. It’s often served during special occasions, symbolizing prosperity and good fortune. Today, variations of fried rice can be found worldwide, each incorporating unique ingredients and local flavors, reinforcing its global popularity.

Over the years, as fusion cuisine emerged, chefs began to experiment with classic recipes like fried rice, infusing them with diverse ingredients such as garlic butter. This evolution has kept the dish fresh and exciting, inspiring home cooks to personalize it. Garlic Butter Steak Fried Rice captures this spirit, merging traditional concepts with modern flavors that resonate with today’s food enthusiasts.

Regional variations abound, showcasing how different cultures interpret fried rice. In Hispanic recipes, for instance, chorizo might replace steak, while in Indian cuisine, spices like turmeric and cumin are often added. Garlic Butter Steak Fried Rice honors this diversity while standing out with its unique combination of flavors.

Ingredient Deep Dive

Steak: Steaks are not only delicious but also a fantastic source of protein and essential nutrients like iron and B vitamins. Opt for cuts like sirloin or flank steak for a great balance of flavor and tenderness. When selecting steak, look for even marbling for enhanced juiciness. Store it in the fridge, but for longer shelf life, freeze it. If you’re unable to use steak, chicken or tofu can work well as substitutes in this recipe.

Garlic: Garlic is revered not just for its flavor but also for its health benefits, including potential immunity boosts and heart health support. Fresh garlic offers the most intense flavor, and it’s typically easy to peel and chop. Store whole bulbs in a cool, dry place, and if you have leftovers, consider preserving them in oil. You can also use garlic powder or minced garlic as an alternative while adjusting the quantities.

Rice: Fried rice is best made with day-old rice, which has dried out a bit and won’t clump together when cooked. Short-grain or long-grain rice works well, but it’s vital to rinse it thoroughly before cooking to remove excess starch. Store cooked rice in an airtight container in the fridge, and for a change, try brown or cauliflower rice for a nutritious twist.

Vegetables: Incorporating a variety of colorful vegetables not only improves the meal’s aesthetic appeal but boosts its nutritional profile. Common choices include peas, carrots, and bell peppers. Fresh vegetables enhance flavor and texture, but you can also use frozen vegetables for convenience. Store them in the refrigerator and keep an eye on freshness to prevent spoilage.

Common Mistakes to Avoid

  • Using fresh rice: Freshly cooked rice can become mushy when fried. Always use cold, day-old rice for better texture.
  • Overcrowding the pan: Cooking too much at once can create steaming instead of frying. Work in batches if necessary to achieve that delightful fried texture.
  • Not seasoning adequately: Taste the dish as you cook and adjust seasoning. Garlic butter enhances flavor, but don’t forget to balance it with soy sauce or salt for depth.
  • Cooking steak improperly: Overcooking steak can lead to toughness. Aim for medium-rare for the best results.
  • Skipping the garlic: Garlic is essential for flavor in this dish. Don’t underestimate the importance of this ingredient.
  • Neglecting to prep: Having all ingredients prepped before cooking can streamline the process and ensure an even cook.
  • Cooked steaks sitting too long: Letting the steak rest for too long after cooking will lead to excess moisture; use it right after cooking.
  • Forgetting about garnishes: Fresh herbs or scallions elevate the dish, adding color and freshness that shouldn’t be overlooked.
  • Not properly heating the pan: Ensure the skillet is hot before adding ingredients. This prevents sticking and promotes even cooking.
  • Using low-quality ingredients: Invest in quality ingredients, especially steak and butter, for the best flavors and texture.

Essential Techniques

Proper Stir-Frying: Stir-frying is crucial for achieving that restaurant-style finish. Make sure to keep ingredients moving in the pan to prevent burning. The high heat will ensure a delightful char and sear on your ingredients. Look for a crispy texture on the steak and slight browning on the rice as visual cues for success.

Resting the Steak: Always allow steaks to rest after cooking. This technique helps redistribute juices, ensuring juiciness in each bite. Aim for a resting time of around five minutes before slicing. A properly rested steak is flavorful and tender, enhancing the overall quality of your fried rice.

Chopping Vegetables Evenly: Consistency in vegetable size ensures even cooking. Uniformly diced vegetables will cook at the same rate, preventing some from becoming overcooked while others remain raw. Take your time while chopping to get the best results.

Timing Your Steps: Timing is everything in cooking. Pay attention to the order in which you add your ingredients, starting with those that take longer to cook. This ensures everything comes together perfectly and minimizes wasted time.

Pro Tips for Perfect Garlic Butter Steak Fried Rice

1. Use leftover rice: For the best texture and flavor, always use chilled, day-old rice from your refrigerator.
2. Choose the right cut of steak: Flank or sirloin steaks provide great flavor without breaking the bank.
3. Avoid overcrowding: Cook in batches if necessary to prevent steaming and maintain a fried texture.
4. Master your heat: Cooking at high heat ensures quick cooking and prevents sogginess.
5. Let the garlic infuse: Sauté the garlic gently for maximum flavor; overcooking can cause bitterness.
6. Garnish generously: Fresh herbs like cilantro or scallions can add a fresh pop of flavor.
7. Experiment with sauces: Feel free to mix in your favorite stir-fry sauces for added complexity.
8. Allow for rest time: Rest your cooked steak for juicy, flavorful results before adding to the rice.

Variations and Adaptations

Want to experiment? Consider some regional variations such as adding oyster sauce for a more umami taste or incorporating kimchi for a spicy kick. Seasonal adaptations like adding asparagus in spring or squash in fall allow for a fresher take based on available ingredients.

For those with dietary restrictions, substituting with zucchini noodles or cauliflower rice creates a low-carb version of this dish. Want more crunch? Consider adding toasted nuts or seeds on top for a delightful variant and an added layer of texture.

Lastly, play with flavors and spices—adding chili sauce can ramp up the heat, while introducing lemon zest provides a refreshing twist. This recipe is versatile enough to accommodate diverse preferences.

Serving and Presentation Guide

When plating Garlic Butter Steak Fried Rice, opt for wide, shallow bowls that allow for a generous serving of the rice and steak. Garnish with freshly chopped scallions and cilantro for color and a burst of flavor.

For traditional accompaniments, consider serving alongside pickled vegetables or a fresh cucumber salad to balance the richness. If you prefer a modern approach, try serving with a side of avocado for creaminess.

Temperature matters—serve the dish hot off the stove, ensuring the best flavor and texture. For portion control, use a measuring cup or scoop to ensure even servings for family meals or gatherings.

Wine and Beverage Pairing

Pair your Garlic Butter Steak Fried Rice with a light, refreshing white wine like Sauvignon Blanc or a crisp Riesling. These wines balance the richness of the steak and garlic butter beautifully.

For a non-alcoholic alternative, consider serving iced green tea, which enhances the dish’s Asian roots while providing a refreshing palate cleanser.

Coffee lovers might enjoy a dark roast, which brings out the umami flavors inherent in the dish. Alternatively, a soothing herbal tea can complement the robust flavors without overwhelming them.

Storage and Shelf Life

Leftover Garlic Butter Steak Fried Rice should be stored in an airtight container in the refrigerator, where it can last for up to three days. Reheat thoroughly before serving, as rice should always be heated to steaming hot to ensure safety.

If you need to keep it longer, consider freezing for up to three months. Make sure to cool it fully before transferring to a freezer-safe container. When reheating, add a splash of water to the container before microwaving to prevent dryness.

Signs of spoilage can include an off odor or slimy texture; always use your best judgment before consuming leftovers.

Make Ahead Strategies

To prepare Garlic Butter Steak Fried Rice ahead of time, consider prepping the ingredients in advance. Chop vegetables, marinate the steak, and store them separately in the fridge. This reduces stress on cooking day.

Another strategy is to cook rice ahead and store it in the fridge. This allows you to easily whip it up when ready. Just ensure it is cooled completely before storage to avoid clumping.

If you’re planning to serve it later, consider undercooking the ingredients slightly to retain their texture and freshness during reheating. Finally, add fresh herbs post-reheating to maintain their vibrant flavor profile.

Scaling Instructions

Scaling the Garlic Butter Steak Fried Rice recipe for larger gatherings is straightforward. To double or triple the batch, simply increase your ingredient quantities while keeping the cooking method the same.

Adjustments may be necessary for cooking time—as larger quantities may require a bit more time to ensure everything is cooked evenly. For equipment, if your skillet isn’t big enough, consider using two pans simultaneously.

When halving the recipe, remember to modify cooking times accordingly. Store any leftovers promptly to maximize freshness, and remember, the flavor may intensify as it sits!

Nutritional Deep Dive

Garlic Butter Steak Fried Rice is not only delicious but also offers a solid macro breakdown. With lean protein from the steak, carbohydrates from the rice, and healthy fats from the garlic butter, it makes for a balanced meal.

Micronutrient benefits abound, especially when you include a variety of colorful vegetables. Vitamins A, C, and K can be sourced from additions like peppers, peas, and carrots, contributing to overall health.

This dish serves as a great energy source—ideal for post-workout meals. Portion control is critical to maintaining a healthy balance, so consider dividing the dish into smaller servings if you’re keeping an eye on caloric intake.

Dietary Adaptations

To cater to various dietary needs, Garlic Butter Steak Fried Rice can easily be adapted. For a gluten-free version, use tamari or coconut aminos instead of soy sauce for flavor without gluten.

Vegan options are achievable by substituting steak with marinated mushrooms or tofu, maintaining richness with plant-based butter. For those on keto, replacing rice with cauliflower rice can still deliver the flavors you crave while keeping carbs low.

Individuals observing a dairy-free lifestyle can simply swap the garlic butter for plant-based alternatives, ensuring they don’t miss out on rich flavors while adhering to their dietary needs.

Troubleshooting Guide

If your Garlic Butter Steak Fried Rice ends up mushy, it’s likely due to using freshly cooked rice. Always opt for cold, day-old rice to achieve the ideal texture.

If the dish lacks flavor, revisit your seasoning. Garlic, soy sauce, and even a touch of chili can elevate each bite significantly. Remember to taste as you cook for the best results.

Feel free to adjust cooking times to avoid overcooked vegetables, which can ruin the freshness of the dish. Inspect your heat level too; too low will lead to steaming rather than frying.

Lastly, if you encounter issues with sticking, ensure your pan is adequately heated and use enough oil or butter to provide a non-stick surface.

Recipe Success Stories

Community feedback has overwhelmingly been positive for Garlic Butter Steak Fried Rice. Enthusiastic cooks rave about its delicious flavors and ease of preparation, making it a weekly favorite.

By experimenting with different vegetables or proteins, many have shared their adaptation successes, turning this dish into a canvas for creativity. Photography tips abound, with home cooks eager to capture the vibrant colors and inviting textures for social media.

Readers have also provided feedback on alternative sauces, leading to unique variations that still hold true to the essence of this beloved dish.

Frequently Asked Questions

Can I use leftover steak in this recipe?

Absolutely! Leftover steak works wonderfully and can save time. Just slice it thin and add it during the last few minutes to heat through.

How can I make this dish spicier?

Adding chili sauce, sriracha, or fresh chopped chilies can heat things up. Adjust the spice level to your preference!

Can I make this recipe vegetarian?

Yes! Substitute the steak with hearty vegetables or tofu. You can also add more protein with beans or chickpeas.

What type of rice is best for fried rice?

Day-old jasmine or basmati rice is preferred, as it provides the best texture. Make sure it’s cooled and fluffy.

How should I store leftovers?

Store leftovers in an airtight container in the fridge for up to three days. Reheat thoroughly before consuming.

Is this dish suitable for meal prep?

Absolutely! It makes for a great meal prep option, simply portion it out and store in the fridge for quick and easy meals.

Can I add other vegetables?

Yes! Feel free to add any vegetables you have on hand, such as broccoli, bell peppers, or snow peas, for added nutrition and crunch.

What can I serve with this dish?

Garlic Butter Steak Fried Rice pairs well with pickled vegetables, salads, or even a side of steamed bok choy.

How do I prevent my rice from getting mushy?

Use cold, day-old rice for frying. Fresh rice can clump together and become mushy when stir-fried.

Can I freeze this dish?

Yes, it can be frozen for up to three months. Cool it completely, then store in freezer-safe containers.

Additional Resources

For those looking to expand their culinary skills, consider exploring related recipes like Shrimp Fried Rice or Vegetarian Tofu Stir-Fry. Additionally, technique guides on stir-frying can enhance your cooking knowledge.

Ingredient information can provide insights into seasonality and selection tips to improve your grocery shopping experience. For equipment recommendations, consider investing in a good quality skillet or wok that can withstand high heat for perfect stir-frying results.

Seasonal variations can also inspire creativity; think pumpkin-inspired fried rice in the fall or light cucumber and ginger flavors in the summer months.

Join the Conversation

We’d love to hear your thoughts on Garlic Butter Steak Fried Rice! Share your experiences, success stories, and any unique twists you’ve tried. Engage with us on social media by posting pictures of your dishes and tagging our profiles.

Your feedback is important to us; recipe reviews help the community find great dishes while offering valuable insights. Share photography tips and join the conversation to explore innovative variations in cooking. Embrace the flavors of Garlic Butter Steak Fried Rice and make it your own, creating delightful memories along the way.

The Recipe

Garlic Butter Steak Fried Rice

Serves: 4 servings

Prep Time: 10 mins

Cook Time: 20 mins

Total Time: 30 mins

Kitchen Equipment Needed

  • Large skillet or wok
  • Spatula
  • Cutting board
  • Chefs knife

Ingredients

  • 2 cups day-old rice
  • 8 oz flank steak, sliced
  • 4 tablespoons garlic butter
  • 1 cup mixed vegetables (carrots, peas, bell peppers)
  • 2 cloves garlic, minced
  • 3 tablespoons soy sauce
  • 2 green onions, chopped
  • Salt and pepper to taste

Directions

  1. Prepare the ingredients by chopping the vegetables and slicing the steak.
  2. In a large skillet, melt garlic butter over high heat. Add the steak slices and season with salt and pepper. Cook until browned and cooked through, about 4-6 minutes. Remove and set aside.
  3. In the same skillet, add the mixed vegetables and garlic. Sauté until the vegetables are tender, about 3-4 minutes.
  4. Add the day-old rice and toss to combine. Pour in soy sauce and mix well to evenly distribute the flavors.
  5. Add the cooked steak back into the skillet, combine, and stir-fry for an additional 2 minutes.
  6. Remove from heat, garnish with chopped green onions, and serve hot.

Recipe Notes

  • Feel free to customize the vegetables based on your preferences or what you have on hand.
  • This dish can easily be doubled or halved based on servings needed.
  • Add chili sauce while cooking for a kick of heat.

Cozy Shepherd’s Pie Soup Recipe for Comforting Family Meals

Warm Shepherds Pie Soup: A Cozy Twist on a Classic

⚖️
Difficulty
Easy

⏲️
Prep Time
15 mins

🕒
Cook Time
45 mins

⏱️
Total Time
60 mins

🍽️
Servings
4

Warm Shepherds Pie Soup is a delightful twist on the beloved classic dish, perfect for cozy dinners with family or friends. This hearty soup captures the essence of traditional shepherd’s pie, featuring ground meat, vegetables, and savory flavors all simmered into a comforting broth. Each spoonful is a warm embrace, transporting you back to childhood memories of home-cooked meals on chilly evenings. The richness of this soup makes it a satisfying choice for any occasion, filling the kitchen with delightful aromas that beckon everyone to gather around the table.

This warm shepherd’s pie soup balances familiar flavors with the satisfying texture of traditional shepherd’s pie. The creamy potatoes blended smoothly with tender vegetables and hearty meat create a comforting texture that’s both rustic and inviting. As the soup cooks, it develops layers of flavor, with the herbs and spices bringing a fragrant depth that enhances the overall experience of this dish. With a sprinkle of fresh herbs on top, this soup is not only hearty but visually appealing as well.

Quick Recipe Highlights

  • Flavor Profile: Rich and savory with hints of herbs and roasted vegetables, each bite is fulfilling and packed with flavor.
  • Texture: Creamy and smooth from the potatoes with tender chunks of vegetables and meat, creating a comforting mouthfeel.
  • Aroma: Inviting scents of thyme, rosemary, and garlic waft invitingly through your kitchen as the soup simmers.
  • Visual Appeal: A beautiful blend of earthy colors, from the golden potatoes to vibrant vegetables, making it a feast for the eyes.
  • Skill Level Needed: Easy, requiring just basic cooking techniques, perfect for both novice cooks and seasoned chefs.
  • Special Equipment: A large pot or Dutch oven is essential for simmering this soup to perfection.

Recipe Overview

  • Difficulty Level: With straightforward steps and readily available ingredients, this soup is perfect for anyone looking to create a comforting dish without extensive culinary experience.
  • Category: This falls under comfort food and is ideal for cozy dinners, lunch, or even potlucks.
  • Cuisine: A beloved staple in British cuisine, shepherd’s pie has evolved over generations, with this soup variant giving it a refreshing spin.
  • Cost: The ingredients are budget-friendly, making this recipe economical for families or anyone looking to enjoy a hearty meal without breaking the bank.
  • Season: Perfect for fall and winter, this soup warms you up during the cold months with its comforting qualities.
  • Occasion: Ideal for family gatherings, winter parties, or simply a cozy night in, this dish can accommodate various dining scenarios.

Why You’ll Love This Recipe

This warm shepherd’s pie soup is the perfect dish for those who appreciate the timeless flavors of the classic casserole. Its rich taste and hearty ingredients make it a comforting option for chilly days. With potatoes, ground meat, and vegetables simmering together, the flavors meld beautifully, creating a warm hug in a bowl. Each spoonful presents a wonderful balance of savory and slightly sweet flavors that dance on the palate, making every bite irresistible.

The convenience of preparing this soup is another reason it stands out. It’s a one-pot wonder, which means less cleanup and more time to relax and enjoy your meal. Simply chop, sauté, and simmer! In less than an hour, you can have a delicious meal ready to serve, allowing you to focus on what matters most—spending time with loved ones. Plus, it’s an excellent option for meal prep, as it stores well and can be reheated for quick lunches or dinners throughout the week.

Nutritionally, this soup offers a myriad of benefits. Packed with protein from the meat, fiber from the vegetables, and vitamins from the potatoes, it provides a balanced meal in every serving. You can easily tweak ingredients to boost nutritional value, adapting it to include more of your favorite vegetables or leaner cuts of meat. This flexibility makes it a healthy choice that fits different dietary preferences.

One of the most delightful aspects of this recipe is its social appeal. It’s a fantastic dish for gatherings, inviting everyone to dig in and share stories over bowls of comforting warmth. When you serve this soup, you’re not just offering a meal; you’re creating an opportunity for connection, laughter, and enjoyment around the table. With its heartiness, it’s sure to satisfy guests and leave them asking for the recipe.

Cost-effectiveness is a critical factor that makes this warm shepherd’s pie soup a go-to recipe in many homes. With ingredients that are affordable and can be purchased in bulk, this soup not only nourishes but also saves on grocery bills. Its versatility means you can make several variations without significantly increasing costs, allowing you to feed a crowd without straining your budget.

Historical Background and Cultural Significance

The origins of shepherd’s pie date back to the late 18th century in the United Kingdom, where leftovers were creatively repurposed as a savory dish topped with a layer of mashed potatoes. Originally made with leftover lamb or mutton, this hearty pie became a staple among rural communities. The warm shepherd’s pie soup embodies this tradition, representing a blend of practicality and comfort, making it perfect for kitchen leftovers from the week.

Culturally, shepherd’s pie has come to symbolize home-cooked meals that bring families together. The dish evokes a sense of nostalgia, often associated with family gatherings and Sunday roasts. This warm shepherd’s pie soup transforms the traditional aspects of shepherd’s pie into a more accessible format, ensuring that its comforting flavor remains relevant in modern times.

As culinary trends evolve, the shepherd’s pie recipe has also adapted, with variations reflecting local and seasonal ingredients. This warm shepherd’s pie soup is part of that evolution, offering a flexible option that can be tailored according to dietary needs and preferences while maintaining the core flavors of the original dish.

Regional variations of shepherd’s pie can be found across the globe, with different nations putting their unique spin on it. In Ireland, it is typically made with lamb and referred to as “cottage pie” when made with beef. This soup version showcases the versatility of this beloved dish, allowing it to be served in various forms while honoring its rich history.

Ingredient Deep Dive

**Ground Beef:** Traditionally used in shepherd’s pie, ground beef is a protein-packed ingredient that adds richness to the soup. It’s essential to choose lean cuts to keep the dish healthier without sacrificing flavor. When selecting ground beef, look for bright red color and avoid packages with excessive liquid, which may indicate lower quality. Store it in the refrigerator for up to two days or freeze it for longer preservation.

**Potatoes:** The base of this soup, potatoes contribute creaminess and body. They are rich in vitamins and minerals, including potassium and vitamin C, and provide a wonderful texture. For optimal flavor, choose waxy varieties like Yukon Gold or red potatoes for smoother mashing. Store potatoes in a cool, dark place to prevent sprouting, and consider using leftovers for other meals to minimize waste.

**Carrots and Peas:** Carrots add sweetness and color, while peas provide a pop of freshness. Both vegetables are nutrient-dense, rich in vitamins, and add wonderful textures to the soup. Look for firm carrots with a rich orange hue and fresh peas that are vibrant and crisp. Store in the fridge’s vegetable drawer, and feel free to substitute frozen varieties for convenience.

**Onion and Garlic:** Essential aromatics, onion and garlic form the flavorful backbone of the soup. Onions add sweetness and depth, while garlic enhances the overall flavor profile. Choose onions with smooth, firm skins, and opt for garlic heads that are plump and unblemished. Store both in a cool, dry place, and be mindful of how long they’ve been stored to ensure maximum flavor.

Common Mistakes to Avoid

  • Overcooking the Meat: When browning the ground beef, ensure you don’t overcook it as this can lead to a dry texture. Brown it until it’s just cooked through, and remember it will continue to cook in the soup.
  • Underseasoning the Soup: Many beginners fail to season their soup properly. Taste as you go and adjust with salt and pepper, or herbs to enhance the flavor.
  • Using Starchy Potatoes: While starchy potatoes can work, they may result in a gumminess in your soup. Opt for waxy varieties to maintain a creamy texture.
  • Neglecting Aromatics: Don’t skip out on onions and garlic—they are crucial for building flavor. Sauté them thoroughly to sweeten their taste before adding the rest of the ingredients.
  • Adding Vegetables Too Late: Add vegetables to the soup early enough for them to soften and release their flavors. Adding them too late can leave them crunchy.
  • Failure to Deglaze: After browning meat, make sure to deglaze your pot with broth or water to lift the flavorful bits stuck to the bottom, enhancing the soup’s depth.
  • Poor Storage: If you have leftovers, store them in airtight containers to avoid spoilage. Not storing them correctly can compromise texture and flavor.
  • Skipping the Garnish: A simple garnish of fresh herbs can elevate the appearance and flavor of your soup. Always consider a finishing touch before serving.

Essential Techniques

Sautéing is an essential technique for building flavor in this warm shepherd’s pie soup. It involves cooking food quickly in a little oil over high heat, resulting in caramelization that enhances taste. To master sautéing, ensure your pan is preheated and avoid overcrowding—this ensures that each ingredient achieves that desirable golden brown.

Simmering is another critical technique for this recipe, allowing flavors to meld and develop. It involves cooking the soup over low heat for an extended period. To achieve successful simmering, ensure that you bring the soup to a boil first, then reduce to a low, steady heat, and maintain this throughout the cooking process. Look for small bubbles rising to the surface as your cue for the right simmering temperature.

Pro Tips for Perfect Warm Shepherds Pie Soup

1. For a deeper flavor, consider browning your ground meat with some herbs—like thyme or rosemary—before adding in other ingredients to infuse the flavors early on.
2. Don’t rush the sautéing process; properly caramelized aromatics will provide a far superior flavor foundation for your soup.
3. Swap out the regular beef for lamb for a more traditional flavor, staying true to the roots of shepherd’s pie while adding richness.
4. Adjust the soup’s consistency by adding little by little until you reach your desired thickness—remember you can always add but can’t take away!
5. For a lighter option, use lean ground turkey or chicken in place of beef to reduce the fat content while still providing protein.
6. Incorporate seasonal vegetables into the soup for added nutrition and flavor, tailoring the recipe to what is available in your local market.
7. Consider blending a portion of the soup to create a creamier texture without needing to add heavy cream or thickening agents.
8. Experiment with toppings like cheese or crispy breadcrumbs toasted in the oven for extra texture.

Variations and Adaptations

For regional variations, consider exploring the use of different meats based on local preferences; you might find pork or even bison in the mix. Seasonal adaptations could involve using root vegetables in the winter, like parsnips, or vibrant summer produce like zucchini in warmer months, making this soup versatile year-round.

Dietary modifications can be easily incorporated by using plant-based meat alternatives for a vegan version or dairy-free options for those with lactose intolerance. To enjoy flavor variations, experiment with various herbs and spices, such as smoked paprika or curry powder, for a unique twist.

Texture modifications can also come into play; for a chunkier soup, reserve some of the vegetables and add them last, or even forgo blending for a more rustic result. Lastly, get creative with presentation by serving in bread bowls or topping with a sprinkle of fresh herbs and a drizzle of olive oil.

Serving and Presentation Guide

For optimal plating, ladle the warm shepherd’s pie soup into deep bowls, allowing for generous servings that highlight the hearty nature of the dish. To elevate presentation, consider garnishing with fresh parsley or chives for a pop of color. Topping with a dollop of sour cream or a sprinkle of shredded cheese can add an extra layer of indulgence.

Traditional accompaniments include crusty bread or biscuits for dipping, enhancing the entire eating experience. When serving, aim for a piping hot temperature, which not only rejuvenates but adds to the comforting nature of the meal. Remember, portion control is essential; offering appropriate servings ensures everyone enjoys without overloading their plates.

Wine and Beverage Pairing

For wine pairings, look for rich reds like Merlot or Cabernet Sauvignon that complement the hearty flavors of the soup beautifully. These wines add depth and character, enhancing the overall dining experience. If you prefer lighter choices, a Pinot Noir can provide a lovely balance with its bright fruit notes.

Non-alcoholic beverages such as sparkling water or homemade iced tea can accompany the meal just as well. A dash of lemon added to the sparkling water can provide a refreshing lift. To round off your meal, consider pairing with a robust iced coffee that contrasts nicely with the warm, creamy flavors of the soup.

Storage and Shelf Life

For proper storage, allow the warm shepherd’s pie soup to cool before transferring it to airtight containers. It can be refrigerated for up to four days; ensure that it’s consumed within this period for the best flavor and safety. When freezing, portion the soup into freezer-safe containers and label with dates for organization, allowing for easy meal prep later.

Signs of spoilage include off smells or changes in texture, indicating it’s time to discard. For reheating, gently warm the soup on the stove over low heat, stirring occasionally, to maintain its creamy texture. Alternatively, it can be reheated in the microwave in short intervals, keeping a watchful eye to avoid uneven heating.

Make Ahead Strategies

To streamline the cooking process, consider preparing your ingredients ahead of time. Chop vegetables and store them in airtight containers in the refrigerator for up to a day prior. You can also brown the meat and store it separately, making the assembly of your warm shepherd’s pie soup even quicker when it’s dinnertime.

Additionally, consider a prep timeline where you can cook the soup a day in advance. This not only enhances the flavors but allows you to enjoy a stress-free cooking experience when it comes time to eat. During reheating, add fresh elements like herbs or a squeeze of lemon juice for brightness without compromising quality.

Scaling Instructions

Scaling the warm shepherd’s pie soup recipe for larger gatherings is easily manageable. For halving the recipe, simply review ingredient measurements and adjust proportionally. Keep in mind that cooking times may also be slightly reduced as the volume decreases.

If you wish to double or triple the recipe for a crowd, use a large pot or divide into batches if necessary. Monitor cooking times as larger volumes take longer to simmer; you can gauge readiness by checking the tenderness of the vegetables and meat throughout the cooking process. Ensure that proper storage containers are available for leftovers or to provide meals for the next day.

Nutritional Deep Dive

A close look at the nutritional breakdown highlights macro components: this warm shepherd’s pie soup is rich in protein from the meats and packed with carbohydrates primarily from potatoes. This balance of macros contributes to a fulfilling and substantial meal that sustains energy levels.

Micronutrient analysis reveals the presence of vitamins A and C from the vegetables and potassium from the potatoes, supporting overall health. In terms of dietary considerations, it is essential to note that with minor tweaks like using lean meats or adding extra veggies, this soup can promote a balanced approach for those monitoring calorie intake or health goals.

Evaluating portion analysis helps in understanding the benefits of keeping servings modest. A standard serving provides ample nutrition without overwhelming caloric intake, making it suitable for diverse dietary preferences and strategies. For weight management, this soup serves as an ideal meal option that’s satisfying and nourishing.

Dietary Adaptations

For those following a gluten-free lifestyle, it’s simple to modify the warm shepherd’s pie soup by ensuring that all ingredients are certified gluten-free, particularly broths and seasonings. Additionally, those with dairy sensitivities can substitute dairy ingredients with almond or coconut milk or use dairy-free toppings.

Vegans can easily create a plant-based version by replacing meat with lentils or mushroom-based products, ensuring the recipe remains satisfying and delicious. Transforming this recipe into low-carb variations can be done by substituting potatoes with cauliflower, resulting in a creamy base that aligns with dietary preferences.

Keto-friendly adaptations require using higher-fat meats and eliminating starchy vegetables. For a paleo approach, you can focus on fresh vegetables, quality meats, and natural fats, ensuring everything is whole and unprocessed. Low-FODMAP considerations involve omitting high-FODMAP ingredients like onion and garlic, using alternatives such as garlic-infused oil instead.

Troubleshooting Guide

Texture issues may arise if the soup is blended too early; ensure some pieces remain intact for that comforting feel. Monitor cooking times carefully, as undercooked vegetables can result in crunchiness, while overcooked ones may disintegrate into the broth.

Flavor balance is another common challenge. If the soup tastes bland, consider adding a pinch of salt or a splash of vinegar for brightness, ensuring all flavors harmonize well. Temperature problems can usually be resolved by simply reheating gently on the stove until warmed through, or adjusting the consistency with additional broth.

If you encounter equipment challenges, ensuring your pot is adequately sized will help prevent spills while promoting even cooking. Ingredient substitutions can impact flavor; for an unfamiliar spice or herb, start with half the expected amount and adjust based on preference, as flavors may change during cooking.

Recipe Success Stories

Community feedback surrounding the warm shepherd’s pie soup has been tremendously positive, with many expressing how this recipe helped bridge generations. Readers share stories of making it with their children or recreating family traditions, showcasing the feel-good nature of this dish.

Variation successes are plentiful, with many readers reporting back on their delicious adaptations, such as vegan modifications that still retained the comforting essence of the original. Adaptation stories highlight the flexibility of the recipe, with readers noting how they used seasonal vegetables to enhance freshness.

Photography tips have encouraged readers to be creative in their presentations, showcasing their own unique styles and garnishes. Engaging with the community, feedback has led to even more variations emerging, solidifying this warm shepherd’s pie soup as a beloved recipe that resonates with many home cooks.

Frequently Asked Questions

Can I use store-bought broth instead of homemade?
Absolutely! Store-bought broth can save time and still provide great flavor. Just make sure to choose a low-sodium option if you’re watching your salt intake.

How do I store leftovers?
Allow the soup to cool before transferring it to airtight containers. It can be kept in the fridge for up to four days or frozen for longer storage.

Can I make this soup in a slow cooker?
Yes! Sauté your ingredients as instructed, then transfer everything to a slow cooker. Cook on low for 6-8 hours.

Can I freeze this soup?
Yes, it freezes well. Portion the soup into freezer-safe containers and store for up to three months.

How do I reheat frozen soup?
For best results, thaw overnight in the fridge before reheating on the stove. You can also reheat directly from frozen; just give it extra time to warm through.

What if I don’t like certain vegetables?
Feel free to customize the vegetable ingredients to your preference! Potatoes, carrots, and peas are traditional, but any mix of veggies you enjoy will work.

Can I use vegan meat substitutes?
Yes, using plant-based alternatives is a great way to make this a vegan dish while still enjoying that comforting flavor profile.

Is this soup kid-friendly?
Yes! Its mild, comforting flavors make it quite appealing to children.

How can I thicken the soup?
For a thicker soup, you can mash some of the potatoes during cooking or use a cornstarch slurry to reach your desired consistency.

How do I make my soup spicier?
For added heat, consider using a pinch of cayenne pepper or serving with hot sauce on the side.

Additional Resources

If you’re inspired by this warm shepherd’s pie soup, you might also enjoy related recipes such as hearty vegetable soup or classic beef stew that echo similar comforting flavors. Technique guides on sautéing and simmering can further enhance your cooking skills, ensuring delicious results every time.

For ingredient information, explore seasonal produce guides to find the freshest options to include in your soups. Equipment recommendations can also help elevate your cooking experience—consider investing in quality cookware that retains heat evenly and provides versatility, ensuring success in every meal.

Join the Conversation

We invite you to share your experiences with this warm shepherd’s pie soup! Engage with us on social media by posting photos or commenting on your variations. Reader suggestions and feedback enrich our community, encouraging everyone to explore their creativity in the kitchen. Your reviews and experiences can guide others, creating a delicious shared journey full of culinary delights.

The Recipe

Warm Shepherds Pie Soup

Serves: 4

Prep Time: 15 mins

Cook Time: 45 mins

Total Time: 60 mins

Kitchen Equipment Needed

  • Large pot or Dutch oven
  • Cutting board
  • Sharp knife
  • Wooden spoon or spatula
  • Measuring cups and spoons

Ingredients

  • 1 lb ground beef
  • 4 medium potatoes, peeled and diced
  • 2 medium carrots, diced
  • 1 cup frozen peas
  • 1 onion, chopped
  • 2 cloves garlic, minced
  • 4 cups beef broth
  • 1 tsp thyme
  • 1 tsp rosemary
  • Salt and pepper to taste
  • 2 tbsp olive oil

Directions

  1. Heat olive oil in a large pot over medium heat. Add chopped onions and minced garlic, sauté until softened.
  2. Add ground beef, breaking it apart, and cook until browned.
  3. Stir in diced carrots, potatoes, thyme, rosemary, salt, and pepper. Cook for about 5 minutes.
  4. Pour in the beef broth and bring the soup to a boil.
  5. Reduce heat and let it simmer for 30-40 minutes, or until the vegetables are tender.
  6. Stir in the frozen peas and cook for an additional 5 minutes.
  7. Adjust seasoning if needed, and serve hot.

Recipe Notes

  • Feel free to use a mix of ground meats for varied flavor.
  • This soup can be blended for a creamier consistency, if desired.
  • For additional depth of flavor, consider adding a splash of Worcestershire sauce to the broth.

Elevate Your Dinner with This Million Dollar Roast Beef Tenderloin

Million Dollar Roast Beef Tenderloin Recipe: Elevate Your Dinner Experience

⚖️
Difficulty
Medium

⏲️
Prep Time
15 mins

🕒
Cook Time
45 mins

⏱️
Total Time
60 mins

🍽️
Servings
6

Indulge in the luxurious flavors of the Million Dollar Roast Beef Tenderloin Recipe, a dish that beautifully balances rich taste and elegant presentation. This tender beef tenderloin, seasoned to perfection, is the highlight of any dinner table, boasting a succulent interior and a delightful crust. It’s perfect for special occasions or just a weekend family dinner, where the love for food unites everyone. Imagine serving this gourmet dish that not only tantalizes the taste buds but also creates warmth and cohesion among those gathered around it.

Infused with herbs and a hint of garlic, the roast beef tenderloin delivers a sensational flavor experience that is sure to impress. The aroma alone will have everyone gathered in the kitchen, anticipating a delicious feast. The presentation is nothing short of stunning, with perfectly roasted meat that glistens and is complemented by vibrant seasonal vegetables. The million-dollar aspect comes not just from its cost but from the unforgettable experience it offers to you and your loved ones.

Quick Recipe Highlights

  • Flavor Profile: This roast beef tenderloin features a robust flavor that combines savory herbs, garlic, and buttery notes for an unforgettable taste experience.
  • Texture: The tenderloin is exquisitely tender, providing a melt-in-your-mouth sensation, perfectly contrasting with a crispy outer crust.
  • Aroma: The garlic and rosemary create a mouthwatering aroma that will fill your kitchen, inviting everyone to the dining table.
  • Visual Appeal: The dish presents beautifully, with a golden-brown crust and juicy pink interior that is visually stunning on any plate.
  • Skill Level Needed: While it requires basic cooking skills, understanding how to perfectly roast tenderloin will elevate your culinary expertise.
  • Special Equipment: A meat thermometer is crucial for ensuring the perfect level of doneness and a roasting pan is essential for even cooking.

Recipe Overview

  • Difficulty Level: This dish is categorized as medium in difficulty, as it involves some precise timing and handling of the steak but is accessible to most cooks with basic competency.
  • Category: The million-dollar roast beef tenderloin is a gourmet main course, perfect for formal dinners or festive holiday gatherings.
  • Cuisine: Rooted in classic American cuisine, this recipe draws inspiration from traditional holiday meals celebrated with family and friends.
  • Cost: The cost can vary based on the quality of meat chosen, but investing in a high-quality beef tenderloin results in a flavor that makes it worth every penny.
  • Season: While this dish is delightful year-round, it shines during the winter and holiday seasons when festive gatherings are prevalent.
  • Occasion: Ideal for celebrations or special gatherings, it provides both elegance and comfort, perfect for weddings, anniversaries, or holiday dinners.

Why You’ll Love This Recipe

First and foremost, the Million Dollar Roast Beef Tenderloin encapsulates an exquisite taste and texture appeal. The slow roasting process preserves the natural juices of the beef, resulting in an extraordinarily juicy and flavorful roast. Each slice reveals just the right amount of pink doneness, which emphasizes its tenderness. The high-quality meat combined with expertly balanced seasoning ensures that every bite will leave you craving more.

The convenience of this recipe is another reason to love it. With a straightforward preparation method that requires minimal hands-on time, you can focus on entertaining your guests. Simply season the beef, pop it in the oven, and let it roast while you prepare some side dishes or cocktails. This ease of preparation does not sacrifice flavor, making it a practical yet impressive option for gatherings.

From a nutritional perspective, beef tenderloin is a rich source of protein, iron, and essential vitamins, making it a healthy addition to your meal rotation. When paired with wholesome sides, you can maintain a balanced diet while indulging in the sumptuous flavors of this impressive dish.

This recipe’s social and entertaining value cannot be overstated. Serving the Million Dollar Roast Beef Tenderloin encourages communal dining, fostering conversation and camaraderie among your guests. As you slice and serve the roast at the table, it transforms your meal into a delightful experience filled with warmth and connection.

Lastly, the cost-effectiveness of this dish makes it appealing despite its luxurious reputation. While high-quality beef tenderloin can be an investment, the flavor and satisfaction it provides make it a valuable choice for special occasions. When divided among guests, this recipe becomes an affordable way to share an exceptional dining experience with friends and family.

Historical Background and Cultural Significance

The origin of roast beef is often linked to the traditional British Sunday roast, which has evolved over centuries into a beloved staple across various cultures. Beef tenderloin, known for its tenderness, became a popular choice in the 19th century, especially among those seeking high-status meals during festive occasions.

Culturally, roast beef is celebrated as a symbol of gathering and celebration. In many households, serving roast beef during holidays such as Christmas or Easter signifies warmth and togetherness, making it a significant part of communal dining experiences.

Over the years, the preparation and presentation of roast beef have undergone numerous adaptations, with chefs adding creative twists and flavors to impress their patrons. The Million Dollar Roast Beef Tenderloin Recipe reflects this evolution, marrying traditional techniques with modern flair in its seasoning and side pairings.

Regional variations also exist with roast beef, from classic English roasts to American barbecue styles. Each culture adds its unique touch, making this humble cut of meat a canvas for culinary expression across the globe.

Ingredient Deep Dive

Beef Tenderloin: The star of this dish, beef tenderloin is prized for its tenderness and rich flavor. Historically, this cut has been associated with luxury dining, often reserved for special occasions. Nutritionally, it is a significant source of protein, providing essential amino acids necessary for a balanced diet. When selecting beef tenderloin, look for a bright red color and fine marbling. To store, wrap it tightly in plastic wrap and keep it refrigerated, ideally using it within a few days of purchase. You can substitute with sirloin or ribeye if tenderloin isn’t available, but the texture and flavor will vary.

Garlic: A vital aromatic ingredient that adds depth and fragrance, garlic has been used in cuisines around the world for centuries. Its health benefits include boosting the immune system and reducing blood pressure. When selecting garlic, choose firm, plump bulbs with dry skins. Store in a cool, dark place, and you can substitute fresh garlic with garlic powder, adjusting the quantity for taste.

Common Mistakes to Avoid

  • Not letting the beef reach room temperature before cooking can lead to uneven cooking; always rest it out for at least 30 minutes.
  • Skipping the sear before roasting can miss out on developing crucial flavor; always sear well on high heat.
  • Using a dull knife to slice can ruin presentation; ensure to use a sharp carving knife for precise cuts.
  • Not allowing the roast to rest after cooking can lead to juices running out; let it rest for at least 15 minutes before slicing.
  • Over-seasoning can overpower the natural flavor of the beef, so stick to a balanced amount of salt and pepper.
  • Using an inaccurate meat thermometer may result in over or under-cooked meat; always calibrate your thermometer before use.
  • Failing to keep an eye on the cooking time can lead to dry meat; set a timer and check regularly.
  • Ignoring the importance of using high-quality beef can affect the overall flavor and texture; always choose the best meat possible.
  • Not pairing the right sides can create an unbalanced meal; aim for sides that complement the richness of the beef.
  • Using a roasting pan that isn’t suitable for oven use can reduce cooking quality; opt for one that can withstand high heat.

Essential Techniques

Searing: Searing the beef tenderloin locks in moisture and creates a beautiful crust. To master this, let your meat come to room temperature, then heat a skillet until it shimmers before adding the tenderloin. The common pitfall is to rush this step or not use enough oil, which can lead to sticking. You’ll know it’s ready when it releases from the pan effortlessly.

Resting Meat: Resting cooked meat allows juices to redistribute, ensuring a tender and juicy roast. After removing the tenderloin from the oven, tent it with foil and let it rest for at least 15 minutes. Common pitfalls include slicing too soon, leading to dry meat. Look for a shiny surface and slight resistance when prodding—this indicates it’s properly rested.

Pro Tips for Perfect Million Dollar Roast Beef Tenderloin

1. Always choose a quality cut of tenderloin for the best flavor and tenderness. Look for one with good marbling to enhance juiciness.

2. Let the beef come to room temperature before cooking. This ensures even cooking throughout the roast.

3. Use a reliable meat thermometer to check for doneness, aiming for 125°F for medium-rare.

4. Ensure your pan is hot enough before searing; the sound of sizzling is key for a perfect crust.

5. Don’t overcrowd the pan when searing; it can lower the temperature and steam the meat instead of browning it.

6. Allow the roast to rest properly—this is crucial for juicy results. Tent with foil and avoid cutting until ready to serve.

7. Consider adding fresh herbs like thyme or rosemary during the last few minutes of roasting for added flavor.

8. Pair your beef with seasonal sides like roasted veggies or creamy potatoes to create a well-rounded meal.

Variations and Adaptations

For regional variations, consider incorporating spices or marinades that reflect local flavors; for instance, a Southern-inspired rub can impart a different character to the tenderloin.

Seasonal adaptations could include using herbs and vegetables that are in season, such as asparagus or spring peas, to accompany your roast.

If dietary modifications are needed, opt for a gluten-free marinade and serve with low-carb side dishes to cater for specific diets.

Flavor variations include experimenting with different crusts, such as using a coffee rub or Asian-inspired soy sauce marinade for unique taste profiles.

Texture modifications can be made by including toppings like a herb crust or a mushroom duxelles to add dimension to each bite.

For presentation alternatives, consider slicing the tenderloin into medallions and serving them on skewers for an elegant appetizer option.

Serving and Presentation Guide

For plating techniques, consider using a warm plate to present your roast, ensuring that the dish remains inviting while served. Rearranging vegetable sides around the sliced tenderloin adds color and texture and captures the eye.

Garnish ideas include fresh herbs or a drizzle of balsamic reduction for a sophisticated touch that enhances both flavor and visual appeal.

Traditional accompaniments like Yorkshire pudding or horseradish sauce complement the richness of the beef; don’t be afraid to serve with your family’s beloved favorites.

Modern serving suggestions might involve serving the roast on a wooden board, allowing guests to slice their own portions while engaging them in the dining process.

Temperature considerations are key; serve tenderloin warm, allowing residual heat to keep it enjoyable for your guests without drying it out.

Portion control tips suggest serving 4-6 oz of meat per person, allowing for a satisfying meal without overindulging.

Wine and Beverage Pairing

For wine pairings, consider a full-bodied red like a Cabernet Sauvignon or Malbec, which pairs beautifully with the richness of the tenderloin.

Non-alcoholic alternatives like a refreshing cranberry juice cocktail or iced tea are also excellent choices that complement the meal without overpowering it.

If coffee or tea is appropriate, a robust dark roast coffee can enhance dessert flavors, particularly if chocolate is involved.

When serving wine, ensure it is decanted at least an hour before serving to allow for aeration, which enhances its flavor profile.

Temperature considerations are crucial; serve your red wine slightly below room temperature for the best flavor experience.

Storage and Shelf Life

Proper storage methods for leftover roast involve wrapping the meat tightly in plastic wrap and refrigerating. Ensure it’s consumed within 3-4 days for optimal freshness.

Temperature requirements dictate that your roast should never be stored at room temperature to avoid contamination; always refrigerate or freeze promptly.

For container recommendations, airtight containers are best to keep the meat moist and prevent it from absorbing other odors from the fridge.

Signs of spoilage include a sour smell, sliminess, or discoloration—when in doubt, it’s best to toss it out.

Reheating instructions suggest using a low oven or skillet to warm leftovers gently, ensuring they don’t become tough or dry.

Freezing guidelines allow for longer preservation; wrap leftovers in heavy-duty aluminum foil or freezer bags to maintain quality up to 3 months.

Make Ahead Strategies

For a prep timeline, consider marinating the tenderloin up to 24 hours ahead to enhance flavor without needing last-minute effort.

You can store various components separately, such as herbs and seasonings, to ease the assembly and cooking on the day of service.

Assessing quality impact, pre-prepared ingredients can significantly enhance the flavors, while rushed preparations may lead to less impressive results.

Assembly tips recommend having all your side dishes prepped and ready to go, so you can focus solely on the tenderloin during cooking time.

Reheating guidelines encourage gradual warming to preserve texture; aim for gentle heat and moisture to maintain tenderness.

Fresh element additions like cutting fresh herbs or lemon zest can elevate the final presentation and flavor just before serving.

Scaling Instructions

For halving the recipe, ensure you adjust cooking times slightly, monitoring the meat temperature closely for doneness.

Doubling or tripling the recipe may require using multiple pans to ensure even cooking throughout; be mindful of oven capacity and airflow.

Equipment adjustments include ensuring your roasting pan is large enough and considering larger cooking appliances like commercial ovens for big gatherings.

Timing modifications advise checking on the meat earlier when scaling up, as larger roasts may require prolonged cooking times depending on size.

Storage considerations are crucial; leftover portions can easily be frozen for future meals, maintaining quality while providing convenience.

Nutritional Deep Dive

The macro breakdown of the Million Dollar Roast Beef Tenderloin highlights its high protein content, which is vital for muscle repair and growth. This dish typically contains moderate fat, particularly when sourced from a well-marbled cut of meat.

Micronutrient analysis reveals significant iron content, aiding in oxygen transportation throughout the body, as well as B vitamins that support overall metabolism and energy levels.

The health benefits extend to supplying essential amino acids; maintaining a balanced diet alongside this dish can support weight management and muscle health.

Dietary considerations include awareness of portion sizes due to its richness; consider pairing with abundant vegetables to create a well-rounded plate.

Portion analysis suggests that managing serving sizes can ensure a fulfilling meal without excess calories, especially crucial for the health-conscious.

Weight management tips highlight opting for lean cuts of meat and balancing meals with whole grains and vegetables for a satisfying dining experience.

Dietary Adaptations

For gluten-free adaptations, ensure all spices and condiments used are certified gluten-free to avoid any cross-contamination.

Dairy-free modifications can be achieved through substituting butter with olive or avocado oil for any finishing touches required in the recipe.

Vegan alternatives would focus on plant-based protein options, but they won’t replicate the true taste of beef tenderloin; consider using grilled portobello mushrooms instead.

Low-carb adaptations can replace traditional starchy sides with cauliflower mash or zoodles for a satisfying yet healthier dining experience.

Keto dieters can relish this dish as the beef’s high protein and fat ratios work well within their dietary limits, pairing it with low-carb sides.

Paleo followers may thrive on this recipe, as it aligns with whole foods and unprocessed meat, provided they select compatible side dishes.

Low-FODMAP options will require careful management of garlic and possible substitutions with garlic-infused oil to prevent digestive discomfort.

Other specific diets can utilize this recipe by focusing on portion control and balancing sides to satisfy various nutritional guidelines.

Troubleshooting Guide

If you encounter texture issues, consider that overcooking may cause the meat to become tough; aim for medium-rare for the best results.

Flavor balance can be adjusted by underseasoning; always taste and adjust with additional seasoning if necessary before roasting.

Temperature problems are often due to an inaccurate oven; invest in an oven thermometer to ensure accurate cooking temperatures.

Equipment challenges can arise if your roasting pan is too small; always check your cookware’s capacity beforehand.

Ingredient substitutions may lead to undesired outcomes; when swapping ingredients, ensure they match the flavor profile of the original.

Timing concerns can be rectified by closely monitoring the meat’s internal temperature; use a reliable meat thermometer to avoid surprises.

Recipe Success Stories

Community feedback on the Million Dollar Roast Beef Tenderloin has been overwhelmingly positive, with many readers sharing their personal twists and adaptations.

Many home cooks have expressed that this dish has become their go-to for entertaining, often adapting side dishes based on seasonal availability.

Adaptation stories highlight how creative cooks have introduced unique marinades and spice blends to elevate the classic flavors.

Reader suggestions include tips on perfecting cooking times and ensuring juicy, flavorful outcomes, which many have successfully implemented.

Photography tips shared among the community focus on capturing the visual appeal of the roast, enhancing the deliciousness showcased in each serving.

Frequently Asked Questions

Q1: Can I use another cut of beef for this recipe?
A1: Yes, while tenderloin is recommended for its tenderness, you can use cuts like ribeye or sirloin, keeping in mind the texture and cooking times will differ.
Q2: How should I store leftovers?
A2: Wrap leftovers in plastic wrap or place them in an airtight container and refrigerate. Consume within 3-4 days for the best quality.
Q3: Can I prepare this dish ahead of time?
A3: Yes, you can marinate the tenderloin up to 24 hours in advance and prepare sides ahead to save time on the day of serving.
Q4: What temperature should I cook the tenderloin to?
A4: For medium-rare, aim for an internal temperature of 125°F; rest it afterwards for optimal juiciness.
Q5: Can I freeze the cooked tenderloin?
A5: Yes, after cooling, wrap it tightly and freeze. It can be stored for up to 3 months. Reheat gently to retain texture.
Q6: What’s the best way to reheat the tenderloin?
A6: Reheat in a low oven, around 250°F, covered lightly with foil to prevent drying out.
Q7: Can this recipe be scaled for larger gatherings?
A7: Absolutely! Just ensure to adjust cooking times based on the size of the roast and monitor doneness closely.
Q8: What sides pair best with roast beef tenderloin?
A8: Classic sides include roasted potatoes, seasonal vegetables, or a light salad; balance richness with freshness.
Q9: How do I know when the roast is done?
A9: The best way is to use a meat thermometer; check the internal temperature in the thickest part of the meat.
Q10: What are good wine pairings?
A10: Full-bodied reds like Cabernet Sauvignon complement the beef well; consider a Merlot or Malbec for a softer flavor.

Additional Resources

If you’re looking for related recipes, consider trying classic side dishes like garlic mashed potatoes or roasted Brussels sprouts, which pair excellently with roast beef.

Technique guides are abundant online—look for videos on searing meat or mastering the perfect roast for additional skills.

Ingredient information can be beneficial to learn more about the origins and benefits of beef, garlic, and other components of this dish.

For equipment recommendations, invest in quality cookware such as a heavy-bottomed roasting pan and a reliable meat thermometer for best results.

Seasonal variations can keep your meals interesting; consider lighter side dishes in spring and summer or root vegetables in the winter months.

Join the Conversation

Sharing on social media can inspire others as you showcase your Million Dollar Roast Beef Tenderloin. Encourage your followers to share their own interpretations of this recipe.

Photography tips for capturing the beauty of your dish can include focusing on natural lighting and emphasizing the tender slices of meat against colorful sides.

Recipe reviews often lead to a vibrant community feedback loop; encourage your readers to leave comments on their experiences and variations.

Recipe variations can spark creativity; invite readers to share their unique aspects of the Million Dollar Roast Beef Tenderloin, expanding its legacy in the culinary world.

The Recipe

Million Dollar Roast Beef Tenderloin

Serves: 6

Prep Time: 15 mins

Cook Time: 45 mins

Total Time: 60 mins

Kitchen Equipment Needed

  • Oven-safe skillet or roasting pan
  • Meat thermometer
  • Sharp knife for carving
  • Cutting board
  • Aluminum foil

Ingredients

  • 1 (2-3 lb) beef tenderloin, trimmed
  • 2 tablespoons olive oil
  • 4 cloves garlic, minced
  • 2 tablespoons fresh rosemary, chopped
  • 2 tablespoons fresh thyme, chopped
  • Salt and pepper to taste

Directions

  1. Preheat your oven to 400°F (200°C).
  2. Let the beef tenderloin sit at room temperature for about 30 minutes.
  3. In a small bowl, mix together olive oil, garlic, rosemary, thyme, salt, and pepper.
  4. Rub the mixture all over the beef tenderloin.
  5. Heat a skillet over medium-high heat, and sear the tenderloin on all sides until browned.
  6. Transfer the beef to the preheated oven and roast for about 25-30 minutes or until reaching the desired doneness.
  7. Remove from the oven and let it rest for at least 15 minutes before slicing.
  8. Slice against the grain and serve with desired sides.

Recipe Notes

  • For extra flavor, consider marinating the meat overnight in a mixture of olive oil, garlic, and herbs.
  • Leftovers can be used in salads or sandwiches for a delicious next-day meal.
  • Experiment with different herbs or seasoning blends to customize the flavor to your liking.

Indulge in Chocolate-Enrobed Berry Gelee Delights Today

Chocolate-Enrobed Berry Gelee Delights: A Luxurious Dessert Experience

⚖️
Difficulty
Moderate

⏲️
Prep Time
30 mins

🕒
Cook Time
15 mins

⏱️
Total Time
45 mins

🍽️
Servings
12 servings

Berry gelee delights, enveloped in rich chocolate, are the epitome of dessert indulgence. Each bite offers a delightful burst of juicy fruit flavor, harmonizing beautifully with the luscious chocolate coating. Picture the vibrant hues of strawberries, raspberries, and blueberries, all balanced by the deep, velvety richness of dark chocolate. This elegant treat isn’t just about taste; it’s about the experience—each gelee is designed to excite the senses, making it the perfect end to any meal.

The combination of refreshing berries and smooth chocolate creates a symphony of flavors that will impress your guests at any gathering, be it a casual brunch or a sophisticated dinner party. The smooth and silky texture of the chocolate contrasts wonderfully with the tender, wobbly nature of the fruit gelee, making for a textural marvel that’s sure to leave a lasting impression. This recipe is not just a dessert; it’s a celebration of flavors and textures that delight the palate and brighten the table.

Quick Recipe Highlights

  • Flavor Profile: The delightful mix of sweetness from the berries and the bitterness of dark chocolate creates a perfect balance, making every bite a flavor sensation.
  • Texture: The smooth and glossy chocolate contrasts with the soft and gelatinous gelee, providing an exciting mouthfeel.
  • Aroma: The fragrant berry notes combined with the seductive scent of melting chocolate create an irresistible aroma.
  • Visual Appeal: With their vibrant colors and shiny chocolate coating, these gelee delights are as beautiful as they are delicious.
  • Skill Level Needed: Moderate skill is required, predominantly in the preparation of the berry gelee and chocolate tempering process.
  • Special Equipment: A saucepan, a heatproof bowl, a whisk, a mold for gelée, and a thermometer are essential for this recipe.

Recipe Overview

  • Difficulty Level: This chocolate-enrobed berry gelee delight recipe requires moderate culinary skills due to the necessity of preparing a stable gelee and correctly tempering chocolate.
  • Category: This dessert fits perfectly into the category of confectionery, showcasing both fruit and chocolate as key ingredients.
  • Cuisine: This recipe blends elements of both French and modern pastry techniques, combining traditional ingredients with innovative presentation.
  • Cost: The approximate cost for this recipe will be moderate, primarily due to the quality of chocolate and fresh berries used.
  • Season: Ideal for spring and summer when berries are fresh and in season, allowing for the best flavor and freshness.
  • Occasion: These gelee delights are perfect for celebrations like anniversaries, birthdays, or any gatherings that call for an elegant dessert.

Why You’ll Love This Recipe

The taste and texture of these Chocolate-Enrobed Berry Gelee Delights make them a standout dessert. The juicy berries provide a refreshing burst of flavor, while the rich, glossy chocolate coating adds a velvety smoothness that envelops your senses. Each component shines distinctly yet harmoniously, captivating your taste buds and making this dessert a true delight.

Convenience plays a significant role in its appeal. Despite the elaborate appearance, this recipe is straightforward. With easy steps that create stunning results, you can impress guests without spending hours in the kitchen. The berry gelee can be prepared ahead of time, streamlining your dessert preparation.

This dessert offers nutritional advantages, as berries are loaded with antioxidants and vitamins. The use of quality dark chocolate also adds health benefits, such as improved heart health when consumed in moderation. This balance between indulgence and nourishment is a key element of the allure.

Socially, these delightful treats are conversation starters. Their extraordinary presentation means guests will be eager to share their experience. They add elegance to any occasion, encouraging appreciation for your culinary efforts and creativity.

Cost-effectiveness makes this recipe even more inviting. While it may seem gourmet, a simple breakdown reveals that it’s achievable. With seasonal fruits and quality chocolate, you’ll create a dessert that looks extravagant without breaking the bank.

Historical Background and Cultural Significance

The origins of gelee date back to ancient times when natural gelatin from animal bones and skins was used to create jelly-like textures in various cultures. The incorporation of fruits into this genre emerged in Europe during the 18th century, where berry jellies became a popular offering at fine dining establishments. Berries represented seasonal abundance and were celebrated for their vibrant flavors and colors.

Culturally, berry desserts have held significance across many societies. In regions like North America and Northern Europe, berry picking is a cherished tradition that not only highlights the importance of local harvests but also fosters community spirit and conservation. Such desserts are often featured in festivals celebrating the harvest, reinforcing their cultural importance.

Over time, the evolution of recipes has introduced modern techniques and ingredients, enabling the creation of sophisticated dessert presentations. The marriage of chocolate with berry-based items has been embraced in many contemporary culinary practices, celebrated for their balance of sweetness and acidity.

Certain regions have variations of chocolate-enrobed fruit, each with unique local influences. For instance, in Switzerland, chocolate-covered local berries are a popular confection, while in Thailand, similar presentations are made using tropical fruits, showcasing how different cultures interpret this delightful dessert form.

Ingredient Deep Dive

– Berries: Berries like strawberries, raspberries, and blueberries are rich in vitamins, antioxidants, and fiber, essential for maintaining a healthy diet. They also represent seasonal joy and are often associated with summer festivities. When selecting berries, look for plump, fragrant, and vibrant specimens. Store them in the refrigerator and consume them within a few days for optimal freshness. If fresh berries aren’t available, frozen alternatives can be used, although they may release more juice during preparation.

– Dark Chocolate: Dark chocolate is celebrated for its health benefits, including heart health and improved brain function due to its high antioxidant content. Historically, chocolate was considered a luxury item, often utilized in ceremonial contexts. When choosing chocolate, opt for high-quality brands with at least 70% cocoa for a rich flavor. Store chocolate in a cool, dry place and avoid exposure to heat. White or milk chocolate can be used as substitutions, though they will alter the flavor profile.

Common Mistakes to Avoid

  • Not measuring ingredients accurately—Precision is key in achieving the right consistency.
  • Using chocolate that’s not tempered—Improperly tempered chocolate can result in a dull finish and poor texture.
  • Skipping the cooling step for the gelee—Allowing the gelee to set properly ensures a firm, sliceable dessert.
  • Overheating the chocolate—Chocolate should never be overheated; it can scorch and ruin the dish.
  • Inadequate cleaning of utensils—Cocoa fat can prevent proper adherence if equipment is greasy.
  • Using overly ripe berries—Overly ripe berries can lead to a mushy texture and off flavors.
  • Not using a water bath—Why this is important? It prevents overheating and ensures smooth melting of the chocolate.
  • Crowding the cooling rack—Ensure proper space between each piece to avoid sticking.
  • Cutting gelee before it is fully set—This can lead to a messier presentation.
  • Neglecting to taste as you go—Always taste to adjust flavors as necessary before final assembly.

Essential Techniques

Tempering chocolate is critical for finishing the gelee delights with a shiny appearance and crisp texture. This technique prevents the chocolate from blooming and gives a satisfying snap when bitten. To master this, gently heat chocolate gradually, stirring constantly, until it reaches the required temperature without burning.

Gelatin preparation is similarly vital for achieving the correct texture in your gelee. When dissolving gelatin, ensure you properly hydrate it in cold liquid before heating to achieve a smooth incorporation. Common pitfalls include not allowing enough time for the gelatin to bloom, which could prevent the dessert from setting correctly.

Pro Tips for Perfect Chocolate-Enrobed Berry Gelee Delights

Use high-quality chocolate for an outstanding flavor that stands out against the fresh fruit. Properly temper chocolate for a glossy finish and crisp bite. Select berries at their peak to ensure maximum flavor impact. Allow the gelee ample time to cool completely in the refrigerator to set properly. For an extra touch, consider adding a hint of citrus zest to the gelee for brightness. Experiment with different combinations of fruits to customize your dessert. When serving, a light dusting of cocoa powder or finely chopped nuts can elevate the presentation beautifully.

Variations and Adaptations

For regional variations, consider using locally sourced fruits that are in season for your area. Seasonal adaptations include using stone fruits like peaches in the summer or citrus zest added in winter months for an aromatic boost. Dietary modifications may involve using vegan dark chocolate options or substituting gelatin with agar-agar for a plant-based recipe. Flavor variations can be achieved by infusing the chocolate with chili powder or sea salt for an unexpected kick. Presentation alternatives include serving the gelee delights in individual shot glasses for a modern twist or garnishing with mint leaves for added freshness.

Serving and Presentation Guide

When plating your chocolate-enrobed gelee, use a clean white plate to highlight the vibrant colors. Consider arranging them in a spiral or linear pattern for visual appeal. Garnish with fresh mint or edible flowers to elevate the dish further. Traditional accompaniments such as a dollop of whipped cream or a side of vanilla ice cream can create a delightful contrast. These desserts are best served chilled, maintaining that refreshing essence while showcasing the layers of flavor and texture for a memorable experience.

Wine and Beverage Pairing

For wine pairings, a sparkling rosé complements the sweetness of the berries while enhancing the chocolate’s richness. If you prefer non-alcoholic options, herbal teas infused with lemon or fruity strawberry lemonade serve as refreshing matches. Coffee can also be a delightful accompaniment, especially espresso, as its bold flavor balances the sweetness of the dessert. Serve beverages slightly chilled or at room temperature to maintain a pleasant palette balance.

Storage and Shelf Life

Store the chocolate-enrobed berry gelee delights in an airtight container in the refrigerator to preserve freshness. They can last up to 5 days if kept properly. To maintain quality, avoid stacking too many layers or using plastic wrap directly on the chocolate, as it can create condensation. Signs of spoilage include visible moisture on the surface or off scents. If you plan to store them longer, consider freezing them; however, reshape them for best results once thawed.

Make Ahead Strategies

You can make the gelee a day in advance, allowing enough time for it to set completely and save you stress on the day of your event. Store it in the fridge until it’s time to enrobe in chocolate. Use an airtight container to minimize exposure to air. For convenience, temper the chocolate just before assembling and serving; this ensures freshness and the best texture. Quality is key, so only assemble when ready to serve for optimal impact.

Scaling Instructions

Scaling this recipe can be as simple as adjusting the quantities of ingredients. If halving or doubling, keep the same proportions and adjust your cooking times accordingly. For larger gatherings, consider preparing multiple batches at once while ensuring your kitchen equipment can handle increased volumes. You may need to allow separated gelee times to cool adequately, especially if space is limited.

Nutritional Deep Dive

Each serving of these delights provides a delicious balance of macronutrients, with healthy fats from chocolate and complex carbohydrates from the berries. The high antioxidant level from both ingredients contributes to discovered health advantages, including improved cardiovascular health and boosted immunity. The rich flavor allows small portions for satisfying sweetness, aiding in mindful eating practices. For overall dietary considerations, being aware of sugar content and moderation in enjoying these treats supports a balanced lifestyle.

Dietary Adaptations

Gluten-free adaptations of this recipe require no adjustments, as the main ingredients are naturally devoid of gluten. For a dairy-free alternative, opt for dark chocolate labeled as dairy-free or vegan. A vegan version can also be achieved by using agar-agar for the gelee, enhancing its plant-based properties. Low-carb and keto followers can experiment with reducing sugar content or utilizing sugar substitutes for the gelee while maintaining flavor balance. Other specific diets can explore variations that suit individual preferences without compromising on the delight of the recipe.

Troubleshooting Guide

If you encounter texture issues with your gelee, the most common fix is to ensure the gelatin is properly dissolved and thoroughly mixed in. For flavor balance, be mindful of the amount of sweetener versus the natural sweetness of the fruit; adjustments should be made to create a more harmonious profile. Temperature problems arise if hot chocolate isn’t tempered correctly, resulting in a dull finish; thus, practicing the correct techniques is crucial. Should you face equipment challenges due to unsuitable kitchen tools, improvise by using alternative utensils while maintaining consistency in your process.

Recipe Success Stories

Community feedback highlights the impressive presentation quality of these delights, often prompting rave reviews from friends and family alike. Variations suggest community adaptations like infusing mint or lavender into the gelee, demonstrating authentic culinary creativity. Reader suggestions on pairing these desserts with specific wines or incorporating sauces have led to intriguing discussions. Also, those sharing photography tips offer insights into capturing the glossy finish beautifully, enhancing the visual appeal of the final product.

Frequently Asked Questions

Can I use frozen berries for the gelee?

Yes, you can use frozen berries. Just thaw them before use, noting that excess juice may be released during preparation.

How do I store leftovers?

Leftovers should be stored in an airtight container in the refrigerator, where they will last up to five days.

What kind of chocolate is best for this recipe?

High-quality dark chocolate with at least 70% cocoa content is recommended for a rich flavor that complements the berries.

Can I make this recipe vegan?

Yes, use vegan chocolate and agar-agar in place of gelatin for a completely plant-based dessert.

Do I need special tools for this recipe?

While you can manage with basic kitchen tools, having a thermometer for chocolate tempering and molds for the gelee enhances outcomes.

How can I enhance the flavor of my berry gelee?

Consider adding a splash of citrus juice or zest for brightness, or use flavored extracts like vanilla or almond.

Is this recipe suitable for kids?

Yes, this dessert is suitable for all ages, but be mindful of potential allergies to chocolate or specific fruits.

What if my gelee didn’t set properly?

If your gelee didn’t set, you can reheat it gently, add more gelatin, and allow it to cool again.

What’s the best way to serve these delights?

Serve chilled and plated attractively. Garnish with mint leaves or edible flowers for an elevated presentation.

Can I make these in advance?

Absolutely! The gelee can be prepared a day ahead. Just enrobe in chocolate shortly before serving for best results.

Additional Resources

If you’re looking for more berry-focused recipes, try our refreshing berry pavlova or berry smoothie bowls. For technique guides, consider checking out our chocolate tempering and dessert plating tutorials for improved skills. Ingredient information on the health benefits of berries and chocolate can further enhance your understanding of food dynamics. Lastly, explore equipment recommendations for pastry-making essentials to elevate your baking experience.

Join the Conversation

We would love to hear how you enjoyed making your Chocolate-Enrobed Berry Gelee Delights! Share your photos on social media and tag us, or leave a review to inspire others in the community. Consider sharing your variations or unique pairing ideas to continue enhancing our collective culinary experiences. Join our community for discussions, tips, and recipes that will inspire your next baking adventure!

The Recipe

Chocolate-Enrobed Berry Gelee Delights

Serves: 12 servings

Prep Time: 30 mins

Cook Time: 15 mins

Total Time: 45 mins

Kitchen Equipment Needed

  • Heatproof bowl
  • Saucepan
  • Whisk
  • Mold for the gelee
  • Thermometer

Ingredients

  • 2 cups mixed fresh berries (strawberries, raspberries, blueberries)
  • 1/4 cup granulated sugar
  • 1/2 cup water
  • 1 tablespoon gelatin powder
  • 1 cup dark chocolate (at least 70% cocoa)
  • 1 tablespoon coconut oil (optional, for shine)

Directions

  1. In a saucepan, combine water and sugar over medium heat, stirring until dissolved.
  2. Add fresh berries to the mixture, bringing it to a light simmer, allowing it to cook for 5 minutes.
  3. Remove from heat, strain the mixture, and reserve the berry juice.
  4. In a small bowl, sprinkle gelatin over 2 tablespoons of cold water. Let it sit for 5 minutes to bloom.
  5. Once bloomed, add the gelatin to the warm berry juice, mixing well until fully dissolved.
  6. Pour the mixture into molds and refrigerate for at least 3-4 hours to set completely.
  7. Once set, melt the dark chocolate with coconut oil in a heatproof bowl over simmering water, stirring frequently.
  8. Remove the gelee from the molds, dipping each piece into the melted chocolate to coat evenly.
  9. Place chocolate-coated gelee on a cooling rack to set. Refrigerate until serving.
  10. Enjoy your Chocolate-Enrobed Berry Gelee Delights!

Recipe Notes

  • For a sweeter touch, adjust the sugar based on your berry sweetness.
  • For a more vibrant color, you can add a few drops of natural food coloring to the gelee mixture.
  • Experiment with different fruits such as peaches or mango for a tropical twist.