Elevate Dinner with Seared Snapper and Lobster Cream Sauce

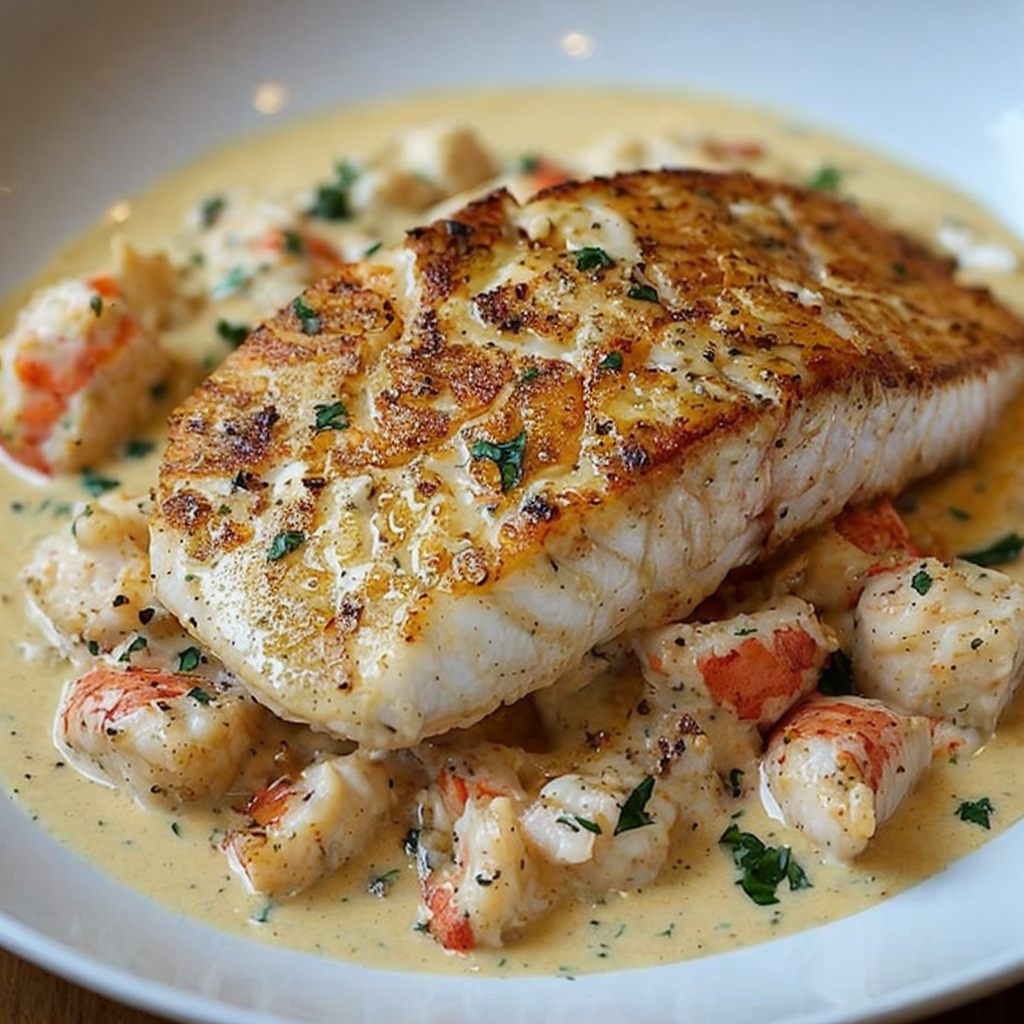
Seared Snapper with Lobster Cream Sauce: A Luxurious Seafood Delight

⚖️
Difficulty
Medium

⏲️
Prep Time
15 mins

🕒
Cook Time
20 mins

⏱️
Total Time
35 mins

🍽️
Servings
4

Indulge in a culinary masterpiece with our Seared Snapper with Lobster Cream Sauce. This dish perfectly blends the flaky, tender texture of snapper with the richness of lobster and a velvety cream sauce, creating an unforgettable dining experience. Ideal for special occasions or a romantic dinner, this recipe is sure to impress with its luxurious flavors and beautiful presentation.

Imagine the aroma of fresh seafood filling your kitchen as you prepare this delightful dish. The snapper’s mild flavor is complemented by the sweet, buttery notes of lobster, creating a perfect balance that tantalizes the palate. With the addition of herbs and a touch of citrus, this recipe transforms simple ingredients into a gourmet delight that your guests will rave about.

Quick Recipe Highlights

  • Flavor Profile: The Seared Snapper offers a mild, buttery flavor, while the Lobster Cream Sauce adds a touch of sweetness and richness.
  • Texture: The snapper is flaky and tender, complemented by the creamy, luscious lobster sauce that coats every bite.
  • Aroma: Enjoy enticing seafood aromas infused with hints of garlic, herbs, and a touch of lemon.
  • Visual Appeal: This dish is visually stunning, featuring beautifully seared snapper garnished with a rich, bright sauce.
  • Skill Level Needed: While it requires some culinary techniques like searing and making a sauce, it’s accessible for home cooks.
  • Special Equipment: A large skillet is essential for searing the fish, and a saucepan for the sauce preparation.

Recipe Overview

  • Difficulty Level: This recipe is rated medium, requiring a few steps and techniques that may challenge novice cooks but are manageable with a bit of care.
  • Category: Perfect for seafood lovers, this dish falls under the category of luxurious entrees, suitable for both everyday meals and special occasions.
  • Cuisine: Influenced by coastal culinary traditions, this recipe embodies the spirit of seafood-rich cuisines, focusing on fresh ingredients and bold flavors.
  • Cost: Depending on the availability of lobster and snapper, costs may vary but are generally reasonable for a gourmet dish featuring premium ingredients.
  • Season: Ideal for spring and summer when seafood is at its peak freshness, and floral herb flavors are vibrant.
  • Occasion: Perfect for dinner parties, anniversaries, or any celebration where you want to impress.

Why You’ll Love This Recipe

The taste and texture of Seared Snapper with Lobster Cream Sauce will leave you longing for more. The delicate snapper, kissed with a golden crust, provides a satisfying contrast to the smooth, rich lobster sauce. Together, they create a harmonious blend of flavors that is both comforting and indulgent.

Preparation is a breeze, allowing you to enjoy more time with your guests rather than being stuck in the kitchen. The quick cooking time ensures that even on busy nights, you can whip up a restaurant-quality meal in under 40 minutes.

This dish also offers nutritional benefits, as snapper is an excellent source of lean protein and omega-3 fatty acids. Paired with a creamy lobster sauce, it provides necessary nutrients while satisfying your culinary cravings.

For social gatherings, this recipe is a showstopper. Its elegant presentation and sumptuous flavors are bound to spark conversation, making it perfect for hosting friends and family.

Affordability becomes a non-issue when you consider how much you can impress guests with such a meal. With smart shopping and effective use of ingredients, this dish remains accessible to many home cooks.

Historical Background and Cultural Significance

The origins of snapper date back to ancient times as a staple in coastal diets, revered for its mild taste and versatile cooking methods. Lobster, regarded as a delicacy, has a rich history tied to coastal communities and has been a symbol of luxury in meals.

This dish represents a blend of culinary influences from various regions, particularly Mediterranean and coastal American cuisines where seafood reigns supreme. Over the years, recipes have evolved to include rich sauces and diverse pairings enhancing the original flavors.

In many cultures, seafood represents celebration and abundance, frequently appearing in festive gatherings and special occasions. This combination of ingredients captures the essence of togetherness and the joy of dining.

Regional variations exist, with some cultures favoring complementary ingredients like saffron or spicy peppers, showcasing the versatility of snapper and lobster in diverse culinary landscapes.

Ingredient Deep Dive

Snapper: This fish is celebrated for its mild flavor and tender, flaky texture. Known to be low in calories yet high in protein, snapper is an excellent choice for a healthy diet. When selecting snapper, look for bright, clear eyes and firm flesh. Store it in the coldest part of your refrigerator and consume within a couple of days for optimal freshness, or freeze it for longer preservation.

Lobster: Lobster has been cherished for centuries, often considered the king of shellfish. Packed with protein, vitamins, and essential minerals, it’s a fantastic addition to any meal. When choosing lobster, freshness is key; opt for live or freshly cooked lobsters with firm shells. For storage, keep live lobsters in a cool, damp environment or use cooked lobster within a few days, freezing any leftovers if necessary.

Common Mistakes to Avoid

  • Overcooking the snapper: Overcooked fish can become dry; aim for a golden crust while keeping it moist inside.
  • Underseasoning: Seafood benefits from adequate seasoning, so don’t skip salt, pepper, or herbs while cooking.
  • Ignoring sauce consistency: Make sure the lobster cream sauce is thick enough to coat the fish without being too runny.
  • Skipping resting time: Allow the fish to rest briefly after cooking to redistribute juices and enhance flavor.
  • Using non-fresh ingredients: Fresh ingredients significantly impact flavor; always use the freshest seafood you can find.
  • Neglecting the right pan: A hot, well-prepared skillet is essential for a perfect sear on your snapper.
  • Not tasting as you go: Always taste your sauce and adjust seasoning before serving to ensure perfect flavor.
  • Being too ambitious: If you’re new to cooking seafood, consider practicing the techniques separately before combining them in this recipe.

Essential Techniques

Searing: Searing is crucial for creating a beautiful, flavorful crust on your snapper. Master this by preheating your skillet until hot, adding oil, and letting the fish cook undisturbed to achieve a golden-brown exterior.

Making a Cream Sauce: Crafting a creamy sauce requires attention to detail. Start by building flavors with aromatics, then slowly whisk in cream, ensuring it thickens without boiling. Look for a smooth, glossy texture free of lumps.

Pro Tips for Perfect Seared Snapper with Lobster Cream Sauce

1. Always ensure your pan is hot before adding the snapper to achieve that perfect sear.

2. Use a blend of fresh herbs to enhance the aroma and flavor of your lobster sauce.

3. Incorporate a splash of white wine into the sauce for an added depth of flavor.

4. Pair your dish with a light side salad to balance the richness of the cream sauce.

5. Consider using homemade fish stock for even more flavor in the sauce.

6. Be cautious when salting the sauce as lobster itself is naturally salty.

7. Avoid freezing the lobster after it’s cooked, as its texture may deteriorate.

8. Serve immediately for the best texture and flavor experience.

Variations and Adaptations

There are numerous variations you can try with Seared Snapper with Lobster Cream Sauce. For a spicy kick, consider adding jalapeños or a dash of hot sauce to the lobster sauce. In regions where lobster may be harder to source, consider substituting crab or shrimp for a similar but distinct flavor.

For a lighter version, substitute cream with a blend of coconut milk and herbs, giving the dish a tropical twist. Additionally, serving with seasonal vegetables instead of traditional starches makes for a healthier presentation.

If you prefer a vegetarian approach, use a plant-based cream sauce and substitute the fish with grilled portobello mushrooms for a hearty meal.

Finally, for those who love citrus, adding lemon or lime juice to the sauce brightens the entire dish and balances the creaminess beautifully.

Serving and Presentation Guide

For an elegant presentation, serve the snapper on a large, white plate to showcase its beautiful golden color. Drizzle the lobster cream sauce artistically around the fish rather than drowning it to enhance visual appeal. Garnish with fresh herbs or edible flowers for a pop of color that captivates the eye.

Consider pairing this dish with a light lemon wedge for guests to squeeze over their serving, allowing for a fresh burst of flavor with each bite. Small, well-portioned servings encourage slower tasting and enhance the dining experience.

Wine and Beverage Pairing

The best wine pairing for Seared Snapper with Lobster Cream Sauce is a crisp Sauvignon Blanc, which complements the seafood without overpowering the flavors. Alternatively, a light Chardonnay offers a buttery contrast that harmonizes beautifully with the creamy sauce.

If you’re looking for a non-alcoholic option, consider serving sparkling water infused with citrus fruits for a refreshing touch alongside this rich dish. For coffee lovers, a light roast or a refreshing iced tea could work well after the meal.

Storage and Shelf Life

To maintain the integrity of your meal, refrigerate any leftovers in an airtight container but consume within two days. To reheat, gently warm in a skillet over low heat, adding a splash of cream if the sauce has thickened too much. Never freeze the assembled dish, as this can compromise the texture of the fish and sauce.

For best results, store leftovers separately, keeping the snapper and sauce in distinct containers. When done properly, snapper can last 1-2 days in the refrigerator without significant loss of quality.

Make Ahead Strategies

You can prepare components of this dish in advance to save time on cooking day. The lobster sauce can be made early in the day; just reheat gently before serving. The snapper can be prepped by seasoning and resting in the refrigerator until you’re ready to sear it.

Consider preparing side dishes ahead of time and reheating them before serving to streamline the entire dinner process. Store the snapper and the rest of the components separately to maintain their individual textures and flavors.

Scaling Instructions

If you need to halve or double the recipe for larger gatherings, keep ingredient ratios consistent. Adjust cooking times slightly, as larger or smaller portions will affect how quickly they cook. Always monitor the doneness of the fish to achieve the desired result.

For equipment adjustments, ensure that your pans are large enough to accommodate more fish without overcrowding, which can lead to uneven cooking. When scaling, timing may need adjustments, but keep an eye on everything closely.

Nutritional Deep Dive

Seared Snapper with Lobster Cream Sauce offers a balanced nutritional profile. Snapper is low in calories but high in essential nutrients like omega-3 fatty acids, which are deficient in many diets. The addition of lobster increases protein content while providing important vitamins and minerals like zinc and vitamin B12.

On the other hand, the cream sauce can add saturated fats; however, they also provide calories necessary for energy. Balancing this dish with lighter sides promotes a well-rounded meal while still enjoying its flavors.

Dietary Adaptations

This recipe can easily adapt to various dietary preferences, such as gluten-free by ensuring no gluten-containing sauces are used. For those who are dairy-free, consider using almond or cashew cream substitutions, which can replicate the texture without the milk solids.

If following a low-carb or keto diet, the lobster sauce can remain unchanged while serving the snapper on a bed of sautéed greens instead of traditional starches. Creating variations for vegan diets would require plant substitutes, removing all animal products while maintaining a delicious profile.

Troubleshooting Guide

If your snapper turns out too dry, try searing on lower heat or adjusting cooking time. For a sauce that’s too thin, let it simmer longer to reduce and thicken. On the other hand, if the lobster sauce separates, consider whisking it again on low heat to recombine the ingredients.

Should you face seasoning issues, always taste and adjust – adding a hint of salt or acidity can transform the dish. If your pan isn’t hot enough, it may lead to sticking or poor searing, so always ensure proper preheating for a successful sear.

Recipe Success Stories

Home cooks report rave reviews from guests after preparing the Seared Snapper with Lobster Cream Sauce. Many have shared adaptation successes, from different seafood substitutions to innovative sauce variations that cater to personal tastes. Photography tips abound as readers share their beautiful plating results, showcasing the vibrant colors and textures of this stunning dish.

Readers noted that trying this recipe for special occasions, such as anniversaries or family gatherings, made for memorable evenings, with many coming back for seconds. This recipe’s flexibility in accommodating dietary needs also stands out as a favorite feature for a diverse guest list.

Frequently Asked Questions

Q: Can I use frozen snapper? A: Yes, but ensure it is fully thawed and patted dry before cooking for the best texture.

Q: How can I make this dish spicier? A: Add a pinch of cayenne pepper or chopped jalapeños to the lobster sauce for a kick.

Q: What can I substitute for lobster? A: Crab meat or shrimp can be excellent alternatives in the cream sauce.

Q: How do I know when snapper is cooked? A: It should be opaque and flake easily with a fork when done.

Q: Can I prepare the lobster sauce ahead of time? A: Absolutely! It can be prepared several hours ahead and reheated before serving.

Q: Is there a vegetarian version of this dish? A: Yes, you can use grilled vegetables with a plant-based cream sauce.

Q: What sides pair well with this dish? A: Light salads, roasted vegetables, or herbed rice make great accompaniments.

Q: Can I make this dish gluten-free? A: Yes, as long as you use gluten-free options for any stock or sauces.

Q: Does snapper need to be scaled before cooking? A: Yes, scaling should be done to prepare the fish properly unless using fillets.

Q: How long does leftover snapper last? A: Store it in the refrigerator and consume within 2 days for the best quality.

Additional Resources

For more seafood recipes, check out our collection of gourmet dishes featuring seasonal ingredients. Enhance your skills in sauce-making with our technique guides, or discover more about selecting the freshest seafood with our ingredient information guide. Investing in quality kitchen equipment can also elevate your cooking experience, find out what tools you need for perfect preparation every time.

Join the Conversation

We value your feedback and encourage social media sharing of your cooking experiences with this recipe! Use the hashtag #SearedSnapperWithLobsterCream and join our community of seafood enthusiasts. Share photography of your creations, discuss variations, and engage with others who share your love for gourmet cooking!

The Recipe

Seared Snapper with Lobster Cream Sauce

Serves: 4

Prep Time: 15 mins

Cook Time: 20 mins

Total Time: 35 mins

Kitchen Equipment Needed

  • Large skillet
  • Saucepan
  • Whisk
  • Spatula
  • Measuring cups and spoons

Ingredients

  • 4 snapper fillets
  • 1 cup heavy cream
  • 1 cup cooked lobster meat, chopped
  • 2 tablespoons butter
  • 2 cloves garlic, minced
  • 1 tablespoon lemon juice
  • Salt and pepper to taste
  • Fresh herbs for garnish

Directions

  1. Heat the skillet over medium-high heat and melt 1 tablespoon of butter.
  2. Season the snapper fillets with salt and pepper and place them in the skillet, cooking for about 4-5 minutes on each side until golden brown and cooked through. Remove and keep warm.
  3. In the same skillet, add remaining butter and sauté garlic for 1 minute.
  4. Pour in the heavy cream and bring to a simmer, stirring constantly.
  5. Add the lobster meat and lemon juice to the cream, mixing gently to combine. Season with salt and pepper.
  6. Serve the snapper topped with lobster cream sauce and garnish with fresh herbs.

Recipe Notes

  • For a lighter sauce, substitute half of the heavy cream with chicken or vegetable stock.
  • If snapper is unavailable, other white fish such as halibut or cod can be used.
  • Adjust the consistency of the sauce by adding more or less cream as per preference.
  • Fresh herbs like parsley or dill can enhance the flavor and presentation.

Delicious Garlic Butter Bacon Alfredo Pizza Twists Recipe

Garlic Butter Bacon Alfredo Pizza Twists: Deliciously Cheesy and Savory Treats!

⚖️
Difficulty
Easy

⏲️
Prep Time
20 mins

🕒
Cook Time
15 mins

⏱️
Total Time
35 mins

🍽️
Servings
4 servings

If you’re looking for a mouthwatering snack that combines the rich flavors of garlic butter, crispy bacon, and creamy Alfredo sauce, then these Garlic Butter Bacon Alfredo Pizza Twists are just what you need! Perfectly twisted pizza dough envelops a cheesy, savory filling, promising to satisfy even the most discerning taste buds. These delightful pizza twists are ideal for gatherings, game nights, or simply as a fun family dinner that everyone will love.

The combination of the savory garlic butter and crispy bacon creates an irresistible aroma that fills your kitchen, leaving everyone eager to dig in. Each twist is baked to golden perfection with a melty cheese core that promises a burst of flavor in every bite. Whether you serve them as an appetizer or a main dish, these pizza twists are sure to impress with their delightful presentation and unbeatable taste!

Quick Recipe Highlights

  • Flavor Profile: The combination of rich garlic butter and crispy bacon provides a mouthwatering depth, balanced by the creamy Alfredo sauce.
  • Texture: The crunchy exterior gives way to a gooey, cheesy center, making every bite a delightful experience.
  • Aroma: Expect an inviting aroma of garlic and butter that will have your mouth watering before the first bite.
  • Visual Appeal: The golden, crispy twists with a hint of melted cheese are sure to catch the eye at any gathering.
  • Skill Level Needed: This recipe requires basic cooking skills, making it accessible even for novice cooks.
  • Special Equipment: You’ll need a baking sheet, parchment paper, and a twisting technique to master this recipe.

Recipe Overview

  • Difficulty Level: This Garlic Butter Bacon Alfredo Pizza Twists recipe is rated easy, making it perfect for beginners or those short on time.
  • Category: These pizza twists fall under the category of appetizers or party snacks, ideal for sharing.
  • Cuisine: Inspired by Italian flavors, this recipe brings a fun twist to traditional handcrafted pizza.
  • Cost: The ingredients are affordable and commonly found in most kitchens, making this an economical dish to prepare.
  • Season: This dish is versatile and can be enjoyed year-round, but particularly shines during gatherings and parties.
  • Occasion: Perfect for game nights, birthday parties, or as a cozy family dinner treat.

Why You’ll Love This Recipe

First and foremost, the irresistible blend of garlic butter and bacon makes these pizza twists a flavor explosion, satisfying every salty and savory craving you might have. The creamy Alfredo sauce adds a richness that ties the flavors together, transforming these twists into a delectable treat. Each bite presents a satisfying combination of crunchy outside and gooey, cheesy inside, making them hard to resist.

Convenience is another highlight of this recipe. With a prep time of only 20 minutes and a cook time of 15 minutes, you can whip up these indulgent snacks in no time. Plus, they are perfect for batch cooking—you can make a large quantity and freeze them for future cravings. When new friends drop by, these pizza twists are a guaranteed crowd-pleaser with minimal effort.

In terms of nutritional advantages, while these twists are definitely a treat, they do offer some protein from the bacon and cheese, and the garlic provides excellent health benefits. Serve them alongside a green salad for a balanced meal that still feels indulgent and satisfying.

Socially, Garlic Butter Bacon Alfredo Pizza Twists are a fantastic dish for entertaining. They’re easy to share, fun to eat, and make for a great conversation starter at parties or get-togethers. Perfect for casual dining, they encourage camaraderie as your guests help themselves to these cheesy delights.

Finally, cost-effectiveness makes this recipe truly appealing. You can find the ingredients at your local grocery store without breaking the bank, enabling you to feed friends or family without feeling guilty. A simple yet delicious recipe that doesn’t skimp on flavor or texture, Garlic Butter Bacon Alfredo Pizza Twists offer incredible value.

Historical Background and Cultural Significance

The history of pizza can be traced back to ancient civilizations, but modern pizza as we know and love it today originated in Naples, Italy. The concept of twisting pizza dough into a fun shape comes from the evolution of pizza consumption—people love to break traditional dining norms, and these twists offer a new take on a classic beloved dish. This recipe brings Italian heritage into contemporary cooking, allowing home cooks to enjoy an Italian classic with an exciting twist.

Throughout the years, pizza has transcended borders and has become a staple in various cultures around the world. By incorporating local flavors and ingredients, people have tailored this classic dish to their unique culinary styles. Garlic Butter Bacon Alfredo Pizza Twists combine the rich savory elements that resonate with American tastes while maintaining a nod to Italian roots.

As the popularity of pizza increases globally, so does the creativity in preparing and presenting it. This recipe reflects more than just a meal; it embodies the spirit of innovation in the kitchen. Garlic Butter Bacon Alfredo Pizza Twists symbolize the adventurous nature of cooks wanting to experiment with traditional dishes.

Regional variations of this dish are numerous. In Italy, one may find a simple garlic and olive oil combination, while American kitchens might incorporate toppings like bacon or Alfredo sauce due to local tastes. Each region brings its unique identity to pizza, proving that this beloved dish knows no bounds in creativity and flavor.

Ingredient Deep Dive

Garlic: Garlic has been celebrated for its flavor and medicinal properties throughout history. This aromatic bulb enhances flavors and adds depth to various dishes. Nutritionally, garlic contains compounds like allicin, known for its health benefits, including heart health improvement and anti-inflammatory properties. When selecting garlic, look for firm bulbs without any soft spots, and store them in a cool, dark place to maintain freshness. If fresh garlic is unavailable, garlic powder can serve as an alternative, though the flavor may not be as strong.

Bacon: A fan favorite, bacon is often referred to as the ‘candy of meat’ due to its irresistible taste. The crispy texture and savory flavor enhance virtually any dish. Nutritionally, bacon is a source of protein and essential nutrients but should be eaten in moderation due to its fat and sodium content. When choosing bacon, seek out high-quality cuts, ideally from heritage breeds. Store cooked bacon in the refrigerator for up to a week, or freeze uncooked strips for extended storage. If you’re looking for substitutions, turkey bacon can work, though the taste and texture will differ.

Common Mistakes to Avoid

  • Using low-quality ingredients: Using subpar cheese or bacon can affect the overall flavor of the twists. Always choose quality ingredients for the best results.
  • Not preheating the oven: Preheating is crucial for achieving a perfectly crispy exterior. An unheated oven will lead to uneven cooking.
  • Overstuffing the twists: Adding too much filling can result in the dough bursting open during baking. Be generous but mindful of filling amounts.
  • Not twisting the dough tightly enough: Loose twists can result in a less visually appealing product and may also affect texture and cooking time.
  • Skipping parchment paper: This ensures easy cleanup and prevents the twists from sticking to the baking sheet.
  • Baking at the wrong temperature: Baking at a lower temperature may result in soggy, undercooked twists. Ensure you bake at the recommended temperature.
  • Not allowing the twists to cool: Cutting into hot twists can lead to a messy presentation. Allow them to cool slightly before serving.
  • Omitting the garlic butter glaze: The garlic butter not only adds flavor but helps crisp the twists. Don’t forget this important step!
  • Incorrect serving temperature: These twists are best served warm, so ensure they hit the table shortly after baking for the best experience.
  • Neglecting to experiment with seasonings: Don’t hesitate to add herbs or spices to the garlic butter for additional flavor complexity.

Essential Techniques

Twisting the dough is a unique technique that adds flair to your pizza twists. To master this technique, start by rolling the dough into strips uniformly. Holding two ends, twist them in opposing directions, ensuring the filling stays intact. Common pitfalls include twisting too loosely, which can cause filling spills, or overly tight twists that might restrict cooking. Aim for a balance, and watch for even spirals for visual appeal.

Another important technique is preparing the garlic butter glaze. This step introduces flavor and promotes browning while baking. Melt unsalted butter in a saucepan with minced garlic, stirring until fragrant. Be cautious not to burn the garlic as it can turn bitter. Once prepared, brush it generously over the twists before baking, ensuring even coverage for consistent flavor and appearance.

Pro Tips for Perfect Garlic Butter Bacon Alfredo Pizza Twists

To make your twists exceptional, opt for fresh pizza dough or homemade dough for superior flavor and texture. Use high-quality mozzarella cheese for excellent melting properties. Allow your dough to rest before rolling out, making it easier to handle and shape. For an extra punch of flavor, incorporate a pinch of Italian herbs into the garlic butter glaze. Make sure to preheat the baking sheet to achieve a crispy bottom crust. Experiment with your favorite meats or vegetables for unique filling variations.

Variations and Adaptations

For a twist on flavor, try replacing bacon with diced ham or cooked sausage. This keeps the savory aspect but offers diversity in taste. During seasonal changes, consider incorporating roasted vegetables for a festive flair. For dietary adaptations, replace traditional pizza dough with gluten-free alternatives to cater to those with gluten sensitivities. Vegan options can be achieved using plant-based cheeses, and alternative spreads can replace the Alfredo sauce for dairy-free flexibility. Finally, consider different cheese varieties like pepper jack or gouda for unique flavor contributions!

Serving and Presentation Guide

Presentation is key when serving these pizza twists! Arrange the twists on a large platter, drizzled with any remaining garlic butter for an eye-catching touch. Garnish with freshly chopped parsley for a pop of color. Consider serving them alongside a spicy dipping sauce, such as marinara or a creamy ranch, to enrich the flavor experience. To maintain an inviting temperature, serve immediately from the oven or place in a warming drawer during gatherings. Portion control is also important; aim for two to three twists per person as a satisfying starter!

Wine and Beverage Pairing

A delightful pairing for Garlic Butter Bacon Alfredo Pizza Twists is a crisp white wine such as Chardonnay or Sauvignon Blanc, as their acidity complements the richness of the cheese and bacon. If you prefer a red wine, a Pinot Noir can make for a lovely match, balancing the savory notes without overpowering the dish. For non-alcoholic options, consider fizzy sparkling water with lemon or a light iced tea to cleanse the palate. Always serve beverages chilled to enhance the dining experience!

Storage and Shelf Life

For optimal storage, place leftovers in an airtight container and refrigerate promptly. These twists are best consumed within 3 days, retaining flavor and texture. If you wish to store them longer, freezing is an option! Ensure they cool completely before wrapping individually in plastic wrap and then in foil. They’ll keep well in the freezer for up to 2 months. When you’re ready to enjoy, simply reheat in the oven at 350°F until warm and crispy, never microwave, as it can yield soggy twists.

Make Ahead Strategies

To ease your kitchen workload, consider preparing the filling ahead of time. You can make the garlic butter and bacon mixture a day in advance and refrigerate it until you’re ready to use it. Additionally, you can roll out the pizza dough and shape it into twists a few hours before serving. The beauty of this recipe lies in its flexibility; just make sure the twists are baked fresh for the best crispy experience. Reheating is straightforward, but keep the freshly added garlic butter glaze on hand to brush on afterward.

Scaling Instructions

Scaling this recipe is straightforward. To halve the recipe, reduce all ingredients equally, ensuring the dough is still manageable for twisting. If you’re looking to double or triple the recipe for larger gatherings, simply adjust the ingredient amounts accordingly and ensure you have enough baking sheets at your disposal. Depending on your oven size, you may need to bake them in batches to avoid overcrowding, which could lead to uneven cooking. When considering storage, account for the increased volume accordingly.

Nutritional Deep Dive

Analyzing the macros, each twist provides a good amount of protein, primarily from the bacon and cheese. The carbohydrates mainly come from the pizza dough, contributing to energy. However, be aware of the fat content from the bacon and butter. It’s advisable to consider portion control when indulging in this delicious treat. Incorporating nutritious side dishes, like a salad, can help balance the meal and manage caloric intake. For weight management, consider enjoying these twists on special occasions rather than as an everyday snack.

Dietary Adaptations

For gluten-free individuals, opt for almond flour or pre-made gluten-free pizza dough to mimic the texture of traditional dough without gluten. If dairy is a concern, explore cashew-based cheeses or nutritional yeast for a similar creaminess without the lactose. Vegans can benefit from this recipe by replacing the bacon with seasoned tofu or vegan sausage alternatives, alongside plant-based cheese options. Those following a low-carb or keto regimen can use cauliflower crusts as a suitable substitute while maintaining a delicious flavor profile.

Troubleshooting Guide

If you encounter texture issues—like sogginess—it may be due to excess moisture in your filling. Ensure your bacon is thoroughly cooked and drained before mixing. Flavor balance problems could arise if not enough seasoning is used; adjust accordingly with salt and spices based on personal preference. If your dough sticks excessively, light flouring during rolling will help manage it. Equipment challenges can surface from using worn-out baking sheets; be sure to purchase or maintain quality kitchen tools to avoid mishaps.

Recipe Success Stories

Community feedback highlights how versatile this recipe is; many have successfully modified it to suit family preferences, with variations including additional seasonings or different cheese types. Adaptations from readers mentioning their favorite substitutions have been positively received, showcasing the recipe’s flexibility. Numerous individuals have loved sharing their photos online, creating a community of enthusiastic home cooks aspiring to recreate these delicious twists at home. Engaging with readers invites even more creativity, further enriching the recipe’s legacy.

Frequently Asked Questions

What are the best ways to serve Garlic Butter Bacon Alfredo Pizza Twists?

These twists are delightful when served warm, straight from the oven. A platter presentation with additional dipping sauces like marinara or ranch enhances the experience and invites sharing.

Can I use different types of cheese for this recipe?

Absolutely! Feel free to experiment with different cheese varieties. Cheddar, gouda, or even pepper jack can add exciting flavors and melt beautifully.

How should I store leftover Pizza Twists?

Store remaining twists in an airtight container in the refrigerator for up to three days. For longer storage, wrap them tightly in plastic and freeze for up to two months.

Can these Pizza Twists be made ahead of time?

Yes! You can prepare the filling and roll out the dough in advance. Just store components separately in the refrigerator until you’re ready to bake.

What other fillings can I use for this recipe?

You can get creative with the filling! Consider vegetables like spinach or mushrooms, or switch out bacon for cooked chicken or pepperoni for variety.

Are these twists safe for freezing?

Yes! They freeze well. Make sure they are completely cooled before wrapping them individually to avoid freezer burn.

What is the best way to reheat frozen twists?

The best method is to reheat them in the oven at 350°F until warmed and crispy to restore their original texture.

Can I make these Pizza Twists vegan?

Yes! Substitute bacon for tofu or seitan and use dairy-free cheese; you can also create a vegan Alfredo sauce using cashews or nutritional yeast.

What is the ideal dipping sauce for these Pizza Twists?

Popular choices include marinara sauce, ranch dressing, and garlic aioli. These contrasting flavors add enjoyment and enhance the overall dish.

How long does it take to make these Pizza Twists?

The total time from prep to serving is approximately 35 minutes, making this a quick and easy snack or meal option!

Additional Resources

Explore our related recipes such as Cheese-Stuffed Breadsticks and Spicy Pepperoni Rolls for more delightful snack ideas. For more cooking techniques, check out our guides on bread-making and pizza dough preparation. Interested in specific ingredients? Our ingredient guides on cheese varieties or herb uses will enhance your culinary knowledge. Lastly, consider acquiring kitchen equipment like a pizza stone or rolling mat for improved cooking experiences.

Join the Conversation

We encourage you to connect with us on social media to share your experience with Garlic Butter Bacon Alfredo Pizza Twists! Tag us in your photos and share your unique twists on the recipe. For those who have tried the recipe, your reviews and suggestions create a vibrant community where home cooks can learn from one another. Engaging with the recipe helps us grow and adapt, encouraging further experimentation and variations that will wow our readers.

The Recipe

Garlic Butter Bacon Alfredo Pizza Twists

Serves: 4 servings

Prep Time: 20 mins

Cook Time: 15 mins

Total Time: 35 mins

Kitchen Equipment Needed

  • Baking sheet
  • Parchment paper
  • Mixing bowl
  • Baking brush

Ingredients

  • 1 pound pizza dough
  • 1/2 cup unsalted butter, melted
  • 4 cloves garlic, minced
  • 1 cup cooked bacon, crumbled
  • 1 cup mozzarella cheese, shredded
  • 1/2 cup Alfredo sauce
  • 1/4 teaspoon salt
  • 1/4 teaspoon black pepper
  • 1/4 teaspoon Italian seasoning

Directions

  1. Preheat your oven to 375°F (190°C) and line a baking sheet with parchment paper.
  2. In a skillet, melt butter and sauté minced garlic until fragrant. Stir in crumbled bacon and season with salt, pepper, and Italian seasoning.
  3. Roll out the pizza dough on a floured surface and cut it into strips, roughly 1 inch wide.
  4. Spread a thin layer of Alfredo sauce on each strip, followed by a generous sprinkling of the bacon-garlic mixture and mozzarella cheese.
  5. Starting from one end, twist each strip gently, and place them on the prepared baking sheet.
  6. Brush the twists with the remaining garlic butter, ensuring even coverage. Sprinkle extra cheese if desired.
  7. Bake for 15 minutes, or until golden brown. Remove from the oven and serve warm.

Recipe Notes

  • Feel free to customize the filling by adding vegetables or changing up the cheese used.
  • For added kick, sprinkle some red pepper flakes in the filling.

Mongolian Beef Noodles: Quick and Easy Recipe for Takeout-Style Flavor

easy beef noodle stir fry, quick Mongolian noodles, Asian beef noodle recipe, sweet and savory beef noodles, stir fry beef noodles recipe

Mongolian Beef Noodles: Quick and Easy Recipe

Mongolian Beef Noodles combine the bold, sweet, and savory flavors of classic Mongolian beef with hearty noodles to create a satisfying one-bowl dish. This quick and easy recipe is perfect for busy weeknights or when you’re craving takeout-style comfort food at home. The tender beef, flavorful sauce, and perfectly cooked noodles make it a favorite for the entire family.

For insights on how to elevate your stir-fry game, explore stir-fry techniques, or discover the best noodles for stir fry for a deeper understanding of ingredient choices.


Why Mongolian Beef Noodles Are a Must-Try

  • Quick Preparation: Ready in under 30 minutes, making it ideal for weeknight dinners.
  • Balanced Flavors: The combination of soy sauce, ginger, garlic, and brown sugar creates a perfectly balanced sauce.
  • Customizable Ingredients: Easily adaptable with different vegetables or proteins.

For another hearty noodle-based meal, check out Italian Drunken Noodles.


Ingredients for Mongolian Beef Noodles

Core Ingredients

  • Beef: Flank steak or sirloin, sliced thinly against the grain.
  • Noodles: Lo mein, ramen, or rice noodles.
  • Sauce Base: Soy sauce, brown sugar, garlic, ginger, and hoisin sauce.
  • Vegetables: Snow peas, bell peppers, or carrots.

Optional Add-Ins

  • Chili flakes for a spicy kick.
  • Sliced green onions and sesame seeds for garnish.

Tools

  • A wok or large skillet for stir-frying.
  • Sharp knife for precise beef slicing.
  • Mixing bowls for sauce preparation.

Step-by-Step Recipe Guide

  1. Prepare the Beef: Marinate sliced beef in a mixture of soy sauce and cornstarch for 10-15 minutes.
  2. Cook the Noodles: Boil the noodles as per package instructions, drain, and set aside.
  3. Make the Sauce: Whisk together soy sauce, brown sugar, minced garlic, grated ginger, and hoisin sauce.
  4. Stir-Fry the Beef: Heat oil in a wok, cook the beef over high heat until browned, and set aside.
  5. Cook the Vegetables: In the same wok, stir-fry vegetables until tender-crisp.
  6. Combine Everything: Add the cooked noodles, beef, and sauce to the wok. Toss until evenly coated and heated through.
  7. Serve: Garnish with green onions and sesame seeds before serving.

Variations for Every Taste

Vegetarian Version

  • Replace beef with tofu or tempeh.
  • Use vegetable broth instead of beef broth in the sauce.

Spicy Twist

  • Add sriracha or chili paste to the sauce for heat.
  • Garnish with fresh red chili slices.

Alternative Noodles

  • Swap lo mein for soba or zucchini noodles for a low-carb option.

Pairing Suggestions

  • Appetizers: Egg rolls or potstickers.
  • Sides: Garlic green beans or a crisp cucumber salad.
  • Beverages: Jasmine tea or a cold lager.

For a complementary dish, try Chicken Spaghetti for a creamy pasta option.


FAQs About Mongolian Beef Noodles

1. What’s the best beef for this recipe?

Flank steak or sirloin are ideal due to their tenderness when sliced thinly.

2. Can I make this dish gluten-free?

Yes, use gluten-free soy sauce and rice noodles.

3. Do I need a wok?

No, a large skillet works perfectly, though a wok distributes heat more evenly.

4. How do I store leftovers?

Refrigerate in an airtight container for up to 3 days.

5. Can I freeze this dish?

Yes, freeze the sauce and beef separately for up to 3 months. Cook noodles fresh when reheating.


Internal Linking Opportunities


Conclusion

Mongolian Beef Noodles combine the best of Asian-inspired flavors with the convenience of a one-bowl meal. Whether you’re craving takeout or looking to impress at dinner, this recipe offers a quick and delicious solution. Customize it with your favorite vegetables, noodles, or heat levels to make it uniquely yours.

Slow Cooker Maple Dijon Pork Tenderloin: A Sweet and Savory Dinner Recipe

maple mustard pork tenderloin, slow-cooked pork recipe, pork tenderloin with maple glaze, Dijon mustard pork roast, easy slow cooker pork dinner

Slow Cooker Maple Dijon Pork Tenderloin: A Sweet and Savory Delight

This article highlights the steps to prepare a rich, flavorful Slow Cooker Maple Dijon Pork Tenderloin. By combining the sweetness of maple syrup, the tang of Dijon mustard, and the juiciness of tender pork, this dish offers a simple yet elegant dinner solution. Perfect for busy weeknights or special occasions, it’s a hands-off recipe that delivers gourmet results.


Why This Recipe Stands Out

The use of a slow cooker ensures the pork tenderloin remains moist and tender while the maple Dijon sauce develops deep flavors over time. This method is ideal for creating a hassle-free dish that looks and tastes like it took hours of careful preparation. Learn about slow cooker tips for beginners to enhance your cooking experience.

Real maple syrup and Dijon mustard are essential to achieve the dish’s balance of sweet and tangy. Check out the benefits of real maple syrup in recipes for more insights on why quality ingredients matter.


Ingredients You’ll Need

Core Ingredients

  • Pork Tenderloin: Choose a cut that is fresh and trimmed of excess fat.
  • Maple Syrup: Opt for real maple syrup for the best flavor.
  • Dijon Mustard: Adds tanginess and complexity.
  • Soy Sauce: Balances the sweetness with a savory touch.
  • Chicken Broth: Provides a flavorful base for the sauce.
  • Garlic: Minced for aromatic depth.

Optional Add-Ins

  • Fresh herbs like rosemary or thyme.
  • Chopped apples for a sweet and fruity note.

Step-by-Step Recipe Guide

  1. Preparation:
    • Trim any visible fat from the pork tenderloin.
    • In a bowl, whisk together maple syrup, Dijon mustard, soy sauce, chicken broth, and minced garlic.
  2. Sear the Pork: (Optional but recommended)
    • Heat a skillet with olive oil and sear the pork on all sides for a golden crust.
  3. Layer in the Slow Cooker:
    • Place the pork tenderloin in the slow cooker and pour the sauce mixture over it.
  4. Cooking Process:
    • Cook on low for 4-6 hours or high for 2-3 hours.
    • Baste the pork occasionally with the sauce for added flavor.
  5. Finish and Serve:
    • Once cooked, remove the pork and let it rest for 5-10 minutes before slicing.
    • If desired, thicken the sauce using cornstarch or flour. Serve with the sauce drizzled on top.

Creative Variations

  • Protein Alternatives:
    Substitute pork with chicken thighs or pork loin for a different texture.
  • Vegetable Add-Ins:
    Add carrots, potatoes, or green beans to the slow cooker for a complete meal.
  • Spicy Option:
    Include a pinch of chili flakes for a slight kick.

Explore Crockpot Cabbage Sausage Potatoes for another hearty slow cooker recipe.


FAQs About Maple Dijon Pork Tenderloin

1. Can I use pork loin instead of tenderloin?

Yes, but adjust the cooking time as pork loin takes longer to cook due to its thickness.

2. Do I need to sear the pork?

Searing enhances flavor and creates a golden crust, but it’s optional.

3. Can I make this dish ahead of time?

Absolutely! You can marinate the pork overnight in the sauce for deeper flavor.

4. How do I store leftovers?

Store in an airtight container in the refrigerator for up to three days.

5. Can I freeze this dish?

Yes, freeze the cooked pork and sauce separately for up to three months.


Internal Linking Opportunities


Conclusion

Slow Cooker Maple Dijon Pork Tenderloin is a recipe that combines simplicity with sophisticated flavors. With minimal effort, you can create a dish that’s perfect for impressing guests or treating your family to a special meal. Try this recipe today and savor the balance of sweet, tangy, and savory in every bite.

Slow Cooker Butter Garlic Asparagus and Mushrooms: A Flavorful Vegetable Side Dish

garlic butter asparagus, slow-cooked vegetables, crockpot asparagus and mushrooms, buttery garlic mushrooms, vegetable side dish, slow cooker garlic recipes

Slow Cooker Butter Garlic Asparagus and Mushrooms

Slow Cooker Butter Garlic Asparagus and Mushrooms is a delightful side dish that combines simplicity with robust flavors. Perfect for holidays, weeknight dinners, or special gatherings, this dish uses the gentle heat of a slow cooker to infuse asparagus and mushrooms with the rich essence of garlic butter. It’s a must-try for fans of easy yet elegant vegetable sides.


Why Use a Slow Cooker for Vegetables?

The slow cooker allows vegetables like asparagus and mushrooms to cook evenly while soaking up the rich butter garlic sauce. This method enhances the natural flavors without requiring constant attention. For tips on slow-cooking vegetables to perfection, explore Slow Cooker Tips for Beginners.


Ingredients You’ll Need

Main Ingredients

  • Asparagus: Fresh spears, trimmed.
  • Mushrooms: Button, cremini, or baby bella, cleaned and halved.
  • Butter: Unsalted, melted.
  • Garlic: Minced for a punch of flavor.
  • Seasonings: Salt, pepper, and optional chili flakes for spice.

Optional Add-Ins

  • Lemon zest for brightness.
  • Grated Parmesan for a savory finish.
  • Fresh parsley for a pop of color.

How to Prepare Slow Cooker Butter Garlic Asparagus and Mushrooms

  1. Prepare Ingredients: Trim asparagus, clean mushrooms, and melt butter.
  2. Mix the Sauce: Combine butter, minced garlic, salt, and pepper in a bowl.
  3. Layer in the Slow Cooker: Place vegetables in the slow cooker, pour the sauce over, and toss gently to coat.
  4. Cook: Cover and cook on low for 2-3 hours or until vegetables reach desired tenderness.
  5. Serve: Garnish with Parmesan or parsley, and serve immediately.

Creative Variations

  • Vegetarian Upgrade: Add cherry tomatoes for a sweet, tangy touch.
  • Protein Option: Incorporate cooked bacon or sausage slices for a heartier dish.
  • Spicy Twist: Sprinkle red chili flakes for heat.

For more ideas on garlic-infused sides, check out Garlic Bacon Kale.


FAQs About This Dish

1. Can I use frozen asparagus?

Yes, thaw and pat dry before cooking to avoid excess moisture.

2. What other vegetables can I add?

Broccoli, zucchini, or bell peppers work well as substitutes or additions.

3. Can I make this dish ahead of time?

Yes, assemble the ingredients in the slow cooker, refrigerate, and cook later.

4. How do I store leftovers?

Store in an airtight container in the fridge for up to 3 days.

5. Can I use olive oil instead of butter?

Yes, olive oil provides a lighter alternative while retaining great flavor.


Internal Linking Opportunities


Conclusion

Slow Cooker Butter Garlic Asparagus and Mushrooms is an effortless and flavorful dish that brings out the best in fresh vegetables. With its rich garlic butter sauce and customizable options, this recipe is versatile enough to complement any main course. Try it for your next gathering or weeknight dinner and enjoy the ease and elegance of slow cooking!