Indulgent Million-Dollar Chicken Recipe for Ultimate Dinner Bliss

Indulgent Million-Dollar Chicken: A Creamy Delight for Your Tastebuds

⚖️
Difficulty
Medium

⏲️
Prep Time
15 mins

🕒
Cook Time
30 mins

⏱️
Total Time
45 mins

🍽️
Servings
4 servings

Indulgent Million-Dollar Chicken is the culinary equivalent of finding a hidden treasure in your pantry. This dish is not just another chicken recipe; it’s a delightful marriage of creamy goodness and exquisite flavors. Imagine juicy chicken breasts enveloped in a luxurious creamy sauce, punctuated with the richness of cheese and herbs. Each bite offers a comforting warmth that calls you to gather with family and friends, making it the perfect centerpiece for any meal.

What truly sets this recipe apart is its effortless blend of gourmet taste and simplicity. It requires minimal prep yet delivers an impressive outcome. The creamy sauce creates a mouthwatering experience, while layers of flavor—from the savory garlic to the peppery notes of thyme—will have everyone asking for seconds. Perfect for a bustling weeknight or a relaxing Sunday dinner, this Million-Dollar Chicken promises to elevate your dining experience to new heights.

Quick Recipe Highlights

  • Flavor Profile: The combination of creamy cheese, garlic, and thyme creates a savory and rich flavor that enchants the palate.
  • Texture: The dish features tender, juicy chicken paired with a velvety sauce that coats each bite, offering a satisfying mouthfeel.
  • Aroma: The intoxicating aroma of sautéed garlic and herbs wafts through your kitchen, enticing everyone at home.
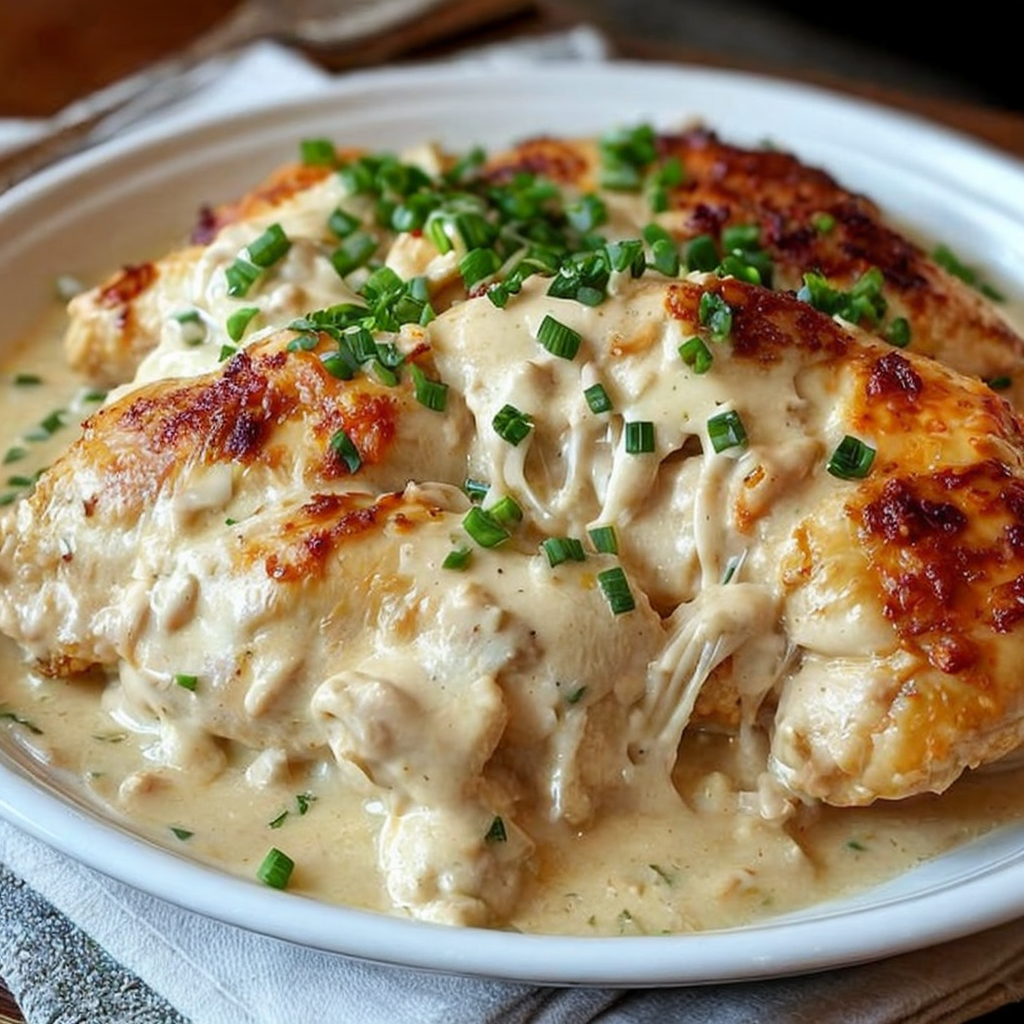
  • Visual Appeal: The creamy sauce glistens on the golden-brown chicken, creating a visually stunning dish that looks as good as it tastes.
  • Skill Level Needed: This recipe is approachable for beginners, requiring basic cooking skills and techniques.
  • Special Equipment: You’ll need a skillet, a spatula, and a measuring cup for this easy recipe.

Recipe Overview

  • Difficulty Level: This medium difficulty meal allows for culinary exploration, giving beginners a chance to build confidence whilst delighting seasoned cooks seeking an impressive yet simple dish.
  • Category: This recipe fits beautifully into main courses, particularly for dinner or special occasions, providing a hearty meal option.
  • Cuisine: While it draws inspiration from American comfort food, the use of creamy ingredients gives this dish a touch of European flair.
  • Cost: An approximate cost of $15-$20 makes this recipe affordable, especially when feeding a family or a small gathering.
  • Season: Any time of year is perfect for this dish, whether enjoyed in a cozy winter meal or a light summer gathering.
  • Occasion: Ideal for family dinners, special occasions, or as a comforting dish for guests, the Indulgent Million-Dollar Chicken fits perfectly into any culinary context.

Why You’ll Love This Recipe

The taste and texture of Indulgent Million-Dollar Chicken are irresistible. The tender chicken breast, paired with a rich and creamy sauce, creates an explosion of flavors in your mouth. Each bite feels indulgent yet comforting, making it a go-to comfort food for any occasion. Not only does it deliver on taste, but the sauce also provides a luxurious texture that makes the dish feel special.

Preparation is straightforward, which will delight busy home cooks. The combination of a short prep time and quick cooking means that you can have dinner on the table in under an hour without compromising on flavor. This recipe beautifully balances convenience and gourmet, ensuring that even the busiest nights can feel indulgent.

From a nutritional standpoint, chicken is a great source of lean protein, essential for building and repairing tissue. This dish can easily provide a nutritional boost when paired with vegetables like broccoli or spinach. The creamy sauce further enriches the meal, especially when using quality ingredients that provide flavor without excessive calories.

Socially, this recipe shines when serving guests or family. Its impressive appearance and delightful aroma invite conversation and enjoyment around the dining table. Whether you’re celebrating a birthday or just enjoying a Friday night in, this meal fosters sharing and connection, making it perfect for gatherings.

Lastly, the cost-effectiveness of this dish compared to fine dining makes it accessible for many. Transforming simple ingredients into a luxurious experience means you can enjoy restaurant-quality meals at home without breaking the bank.

Historical Background and Cultural Significance

The origins of this recipe may not be precisely documented, but it’s clear that creamy chicken dishes have been popular in many cultures, especially in the Americas. The inspiration behind the Indulgent Million-Dollar Chicken stems from a blend of classic American flavors with modern cooking techniques, making it relevant and appealing today.

Culturally, comfort food like this chicken recipe plays an essential role in family traditions. It evokes memories of gathering around the dinner table to share food, laughter, and stories. Over time, such recipes have evolved from simple home-cooked meals to gourmet renditions, allowing home cooks to impress their loved ones.

The evolution of creamy chicken recipes has seen variations across regions, with each culture putting its unique spin on the dish. From creamy French coq au vin to the Italian pollo al limone, the common theme of tender chicken and rich sauces prevails, demonstrating the adaptability of this beloved meal.

Regional variations can include the addition of local herbs, spices, or even vegetables that highlight seasonal ingredients. This adaptability allows the Indulgent Million-Dollar Chicken to remain a relevant and delightful option for dining occasions throughout the year.

Ingredient Deep Dive

Chicken is the star ingredient of this recipe. Its popularity can be traced back to its abundance and versatility in many culinary traditions worldwide. Nutritionally, chicken is a lean protein source that aids muscle growth and repair. When selecting chicken breasts, look for those that are free-range and organic for better flavor and quality. Store fresh chicken in the refrigerator and use it within 1-2 days or freeze for later use.

The creamy sauce often features heavy cream or sour cream, which not only adds richness but also contributes to the smooth texture of the dish. Cream has a long history in cooking, often used in European cuisine to create decadent sauces. For added nutrition without sacrificing flavor, consider substituting heavy cream with Greek yogurt, which is lower in fat and high in protein.

Herbs like thyme and garlic enhance the flavor profile significantly. Thyme has been revered for centuries due to its culinary uses and medicinal properties. Always choose fresh thyme over dried for the best flavor and aroma. Garlic adds depth to the dish; select firm bulbs with no sprouting to ensure freshness. Store garlic in a cool, dry place, and use it within a few weeks for peak flavor.

Common Mistakes to Avoid

  • Not seasoning the chicken adequately can lead to bland flavors. Always season your protein generously with salt and pepper before cooking.
  • Overcooking the chicken can result in a dry texture. Use a meat thermometer to check for doneness—165°F is the target temperature.
  • Skipping the resting period after cooking can cause juices to escape when you slice the chicken, leading to a dry meal.
  • Using low-quality cream will affect the overall flavor and texture of the sauce; opt for high-quality heavy cream for the best results.
  • Using too much flour in the sauce can create a pasty texture; always start with a small amount and adjust as needed.
  • Not allowing the garlic to sauté before adding other ingredients can result in a raw garlic flavor; always let it cook briefly until fragrant.
  • Overcrowding the pan while cooking chicken can lead to steaming rather than browning, inhibiting the flavor.
  • Neglecting to taste and adjust seasoning towards the end of cooking can lead to unbalanced flavors. Always make adjustments as necessary.

Essential Techniques

Perfectly searing chicken requires heat management and timing. Begin with a hot skillet to achieve a golden-brown crust. Allow the chicken to sear undisturbed for the recommended time to establish a flavorful crust. If you encounter sticking, it means the chicken isn’t ready to flip just yet.

Creating a luxurious sauce involves deglazing the pan after searing the chicken. Using chicken broth helps lift any caramelized bits from the bottom of the skillet, adding depth to your sauce. Stir continuously to avoid lumps and ensure a smooth finish.

Properly emulsifying your cream helps integrate it seamlessly into the sauce. Begin by adding a little of the hot liquid to the cream before combining; this helps prevent curdling. Whisk continuously and watch for visual cues—the sauce should thicken but remain pourable.

Pro Tips for Perfect Indulgent Million-Dollar Chicken

Utilize fresh herbs for the best flavor profile—fresh thyme elevates the dish’s aromatic experience. Take care not to chop them too finely, allowing their essence to infuse the sauce.

Try marinating the chicken in a mixture of olive oil, lemon juice, and herbs for an added flavor boost. Opt for at least half an hour before cooking for optimum tenderness.

Always allow your chicken to reach room temperature for even cooking. This simple step ensures that your chicken cooks at a consistent temperature for perfectly juicy results.

Serve the dish over a bed of rice or pasta to soak up the delightful sauce. This not only enhances the meal but also creates a beautiful presentation on the plate.

Consider garnishing with parsley or fresh thyme to add color and a touch of freshness. The finishing touches can transform the overall appeal of the dish.

For an additional crunch, finish your dish with toasted breadcrumbs before serving. This gives a delightful texture that contrasts beautifully with the creamy sauce.

Variations and Adaptations

For regional variations, consider adding ingredients like sun-dried tomatoes or olives for Mediterranean flair. Alternatively, flavors such as curry or coconut can transform the dish into a tropical delight.

Seasonal adaptations may include adding vegetables like asparagus or peas in the spring for a fresh twist, or incorporating root vegetables in the fall for a cozy feel.

Dietary modifications could involve using plant-based chicken substitutes for a vegan option, adjusting the recipe without sacrificing flavor or satisfaction.

Flavor variations may include a splash of white wine in the sauce for a more complex taste. Additionally, experimenting with other herbs like rosemary or oregano can yield delightful results.

Exploring texture modifications can involve incorporating sautéed mushrooms for a meaty contrast or adding spinach for an extra layer of nutrition.

For presentation alternatives, serve the dish in individual cast-iron skillets or rustic bowls topped with microgreens for a visually appealing touch at dinner parties.

Serving and Presentation Guide

When plating your Indulgent Million-Dollar Chicken, ensure that the chicken is the focal point. Place it gently on a bed of fluffy rice or creamy mashed potatoes.

Consider garnishing with fresh herbs to elevate the dish’s aesthetic appeal. A sprinkle of freshly cracked black pepper can add an inviting touch.

Traditional accompaniments might include a side of roasted vegetables or a fresh green salad. Modern servings can explore fun additions, such as crispy breadsticks or garlic knots.

Temperature-wise, serve the chicken hot, allowing the creamy sauce to warm the accompanying sides. This creates a harmonious dish that provides comfort in every bite.

For portion control, consider slicing the chicken into medallions and arranging them artfully with the sauce drizzled over the top, giving a restaurant-quality appearance.

Wine and Beverage Pairing

When selecting wine to accompany your Indulgent Million-Dollar Chicken, a chilled Chardonnay or a light Pinot Grigio complements the creamy texture beautifully. These wines’ acidity cuts through the richness, enhancing the overall dining experience.

For non-alcoholic alternatives, consider serving sparkling water with a slice of lemon for a refreshing palate cleanser. Alternatively, a lightly brewed iced tea can provide a refreshing contrast.

Coffee or tea can be considered as after-dinner options, allowing guests to unwind post-meal. A well-brewed cup of coffee can enhance dessert flavors should you choose to serve something sweet afterward.

When serving wine, ensure that it’s at the right temperature—white wine should be chilled, while red options can be slightly cooler than room temperature to maintain freshness.

Serving suggestions may include decanting the wine ahead of time to enhance aromas, inviting your guests to taste the nuances alongside their meal.

Storage and Shelf Life

To store leftover Indulgent Million-Dollar Chicken, place it in airtight containers and refrigerate for up to three days. Make sure to cool it completely before transferring it to avoid condensation.

When it comes to freezing, ensure you use freezer-safe containers for optimal storage. The dish can last for up to three months when frozen, but note that the cream sauce may change texture upon thawing.

Signs of spoilage include a sour smell or a change in color. Always taste a small portion before reheating if you are unsure about its freshness.

Reheating should be a gentle process—use low heat on the stovetop, adding a splash of cream or broth to restore its creamy consistency if needed.

When reheating in the microwave, use a covered dish with a microwave-safe lid. Stir occasionally to promote even heating and avoid hot spots.

Make Ahead Strategies

For best results, prep indulgent Million-Dollar Chicken components ahead of time. Marinate the chicken overnight for an infusion of flavor and tenderness.

You can prepare the creamy sauce in advance and store it separately. Reheat it gently on the stovetop while cooking the chicken to ensure it blends smoothly.

Set aside your chosen vegetables, chopping them in advance for a quicker cooking process when it’s time to put the dish together.

Assess quality at each step, ensuring meats, sauces, and vegetables remain fresh and flavorful until serving. Freezing components individually can help retain clarity in texture and taste.

Consider adding fresh elements—such as herbs or greens—just before serving for the best visual appeal and nutritional benefits, ensuring a lively presentation.

Scaling Instructions

For halving the recipe, simply divide all ingredients and cooking times by two, ensuring that any cooking methods remain consistent for optimal flavor.

Doubling or tripling the recipe requires larger pots to accommodate multiple servings. Adjust cooking times slightly, as larger amounts may require longer to reach the correct internal temperature.

Keep an eye on oven or stovetop temperature adjustments depending on the increase in quantity; monitor sauces and ensure thorough mixing.

When scaling, consider that allowing extra time for preparation, such as marinating, can enhance flavors even more when cooking in larger batches.

Storage tips remain consistent—store in larger containers if needed to accommodate increased quantities without compromising freshness.

Nutritional Deep Dive

In assessing the macros of Indulgent Million-Dollar Chicken, the dish typically offers a balanced ratio of protein and fats, thanks primarily to the chicken and cream.

Micronutrient analysis sheds light on beneficial elements, such as B vitamins from chicken, which are essential for energy metabolism and brain function.

Incorporating vegetables can elevate the fiber content, beneficial for digestion and overall health. The addition of greens can transform the meal into a well-rounded nutritional powerhouse.

Health benefits of this recipe include its ability to provide essential nutrients while still indulging the senses with rich flavors. The complexity of the sauce can encourage further vegetable intake.

Portion control is vital; understanding serving sizes helps with weight management while still enjoying indulgent meals. Aim for balance when combining with sides to create a nutritionally sound dinner.

Dietary Adaptations

For a gluten-free adaptation, simply ensure that all sauces and toppings are free from wheat-related ingredients. Make the sauce using cornstarch instead of flour for thickening.

Dairy-free versions can utilize coconut cream or cashew cream to create a similar texture and flavor profile without lactose.

Vegan adaptations involve replacing chicken with hearty vegetables or tofu, while maintaining the cream sauce’s richness using blended nuts or plant-based milk.

Low-carb variations may substitute high-carb sides like rice with cauliflower rice or sautéed vegetables. These adjustments can retain the dish’s essential flavors while reducing carbs significantly.

Keto adaptations recommend using full-fat dairy elements and avoiding starchy vegetables, allowing this creamy chicken to fit into a low-carb dietary lifestyle.

For those following the paleo diet, omit any processed ingredients and utilize fresh herbs and seasonal vegetables to make the meal compliant while still delivering on taste.

Troubleshooting Guide

If you encounter texture issues with your sauce being too thick, add a little chicken broth or water to loosen it up gradually until the desired consistency is reached.

For flavor balance, consider if it’s too bland; a little pinch of salt or acidity with lemon juice can liven up the dish effectively. Always taste before serving.

Temperature problems may arise if the chicken undercooks; use a meat thermometer to avoid any surprises and guarantee safe cooking.

Equipment challenges can arise from inadequate pans; ensure you use a heavy-bottomed skillet for even heat distribution, which is crucial when searing chicken.

Ingredient substitutions may lead to unexpected flavor changes; keep essential spices on hand to ensure you don’t compromise on the dish’s intended profile.

If timing between steps becomes problematic, it’s worth setting up a staging area where sauces are easily prepped ahead and cooked later for efficiency.

Recipe Success Stories

Community feedback often highlights the creamy flavor and ease of preparation as standout features, prompting repeat requests for this dish at family gatherings.

Variation successes include readers sharing their twists, like adding mushrooms or different herbs, proving the dish’s adaptability while retaining its core appeal.

Adaptation stories reveal how busy weeknight meals can align perfectly with this recipe, uniting families around a comforting and indulgent dinner effortlessly.

Photography tips have been a highlight, where readers recommend capturing the shiny sauce glistening over the chicken to entice those scrolling past.

Sharing personal stories of creating this dish for special occasions adds a layer of communal joy. The recipe’s flexibility allows it to fit various traditions and celebrations.

Frequently Asked Questions

Can I use other meats for this recipe? Yes, while chicken is traditional, you can substitute with pork or turkey. Ensure that the cooking times are adjusted as these proteins have different compositions.

How do I store leftovers? Store leftovers in an airtight container in the refrigerator for up to three days. Reheat gently when ready to enjoy.

Is this recipe suitable for meal prep? Absolutely! You can prepare components ahead of time, making mealtime even easier.

Can I make this dish spicy? Certainly! Adding red pepper flakes or diced jalapeño during cooking can give the dish a delightful kick.

What sides pair well with this chicken? This indulgent dish pairs beautifully with rice, mashed potatoes, or a fresh green salad.

Is the creamy sauce necessary? While it is the signature of the dish, a tomato-based sauce or herb-infused broth could offer a lighter alternative.

Can I reheat the dish in the microwave? Yes, but it is best reheated on a stovetop over low heat to prevent the sauce from separating.

How can I make this recipe gluten-free? Use cornstarch or gluten-free flour in place of regular flour for the sauce adjustment.

What’s the best way to thicken the sauce? Gradually add flour or cornstarch mixed with water to the simmering sauce until you reach the desired consistency.

Can I freeze the creamy chicken? Yes, but the creamy sauce may change texture when thawed. Make sure to reheat gently to restore its consistency.

Additional Resources

Consider exploring related recipes for different chicken dishes or creamy casseroles to expand your culinary repertoire. Technique guides can help enhance your cooking skills, while ingredient information will deepen your understanding of what goes into your meals.

For equipment recommendations, ensure you have the right tools to make cooking enjoyable and efficient. Seasonal variations can inspire creativity with ingredients you may want to experiment with throughout the year.

Join the Conversation

We invite you to share your experiences with the Indulgent Million-Dollar Chicken on social media! Use our tag to highlight your beautiful creations and connect with other cooking enthusiasts. Don’t forget to leave your recipe reviews or suggestions for variations that you’ve tried, as community engagement makes this culinary journey even more rewarding.

The Recipe

Indulgent Million-Dollar Chicken

Serves: 4 servings

Prep Time: 15 mins

Cook Time: 30 mins

Total Time: 45 mins

Kitchen Equipment Needed

  • Skillet
  • Measuring cups
  • Spatula
  • Meat thermometer

Ingredients

  • 4 chicken breasts
  • 1 cup heavy cream
  • 1 cup chicken broth
  • 1 cup shredded cheese (cheddar or your choice)
  • 2 tbsp olive oil
  • 4 cloves garlic, minced
  • 1 tsp fresh thyme, chopped
  • Salt and pepper to taste
  • 2 tbsp flour or cornstarch (optional, for thickening)

Directions

  1. Heat olive oil in a skillet over medium heat.
  2. Season chicken breasts with salt and pepper, then add them to the skillet.
  3. Cook for 6-7 minutes on each side until golden brown and fully cooked, then remove and set aside.
  4. In the same skillet, add minced garlic and thyme, sautéing for about 1 minute until fragrant.
  5. Pour in heavy cream and chicken broth, stirring to combine.
  6. If desired, mix flour or cornstarch with a bit of water to create a slurry, then add it to the skillet to thicken the sauce.
  7. Return the chicken to the skillet and sprinkle with cheese, allowing it to melt into the sauce.
  8. Serve hot, garnished with fresh herbs and alongside your favorite sides.

Recipe Notes

  • Feel free to add vegetables like spinach or mushrooms for added nutrition.
  • Experiment with different types of cheese for unique flavors.
  • Can be made ahead and reheated for convenience, although sauce texture may vary.

Delicious Hawaiian Pineapple Coconut Thumbprint Cookies Recipe to Try

Hawaiian Pineapple Coconut Thumbprint Cookies: A Tropical Delight

⚖️
Difficulty
Easy

⏲️
Prep Time
20 mins

🕒
Cook Time
15 mins

⏱️
Total Time
35 mins

🍽️
Servings
24 cookies

Indulge in a taste of the tropics with these delightful Hawaiian Pineapple Coconut Thumbprint Cookies. These cookies combine the natural sweetness of ripe pineapples with the creaminess of coconut, creating a treat that is not only delicious but also evokes memories of sun-kissed sandy beaches. Each buttery cookie is filled with a luscious pineapple filling that bursts with flavor, making them the perfect snack for any occasion.

These cookies are a wonderful fusion of tropical ingredients that provides a delightful explosion of flavor in every bite. The unique blend of sweet and savory makes them suitable for both casual gatherings and festive celebrations. With their vibrant appearance and mouthwatering aroma, these Hawaiian Pineapple Coconut Thumbprint Cookies will undoubtedly impress anyone who tries them.

Quick Recipe Highlights

  • Flavor Profile: A delicious mix of sweetness from the pineapple and coconut creates a refreshing and satisfying taste.
  • Texture: Each bite delivers a crisp exterior with a soft, chewy center and a gooey, fruity filling.
  • Aroma: A delightful fragrance of coconut and fresh pineapple wafts through the kitchen as these cookies bake.
  • Visual Appeal: Golden-brown cookies filled with vibrant pineapple filling present an inviting appearance.
  • Skill Level Needed: Suitable for beginner bakers, no complex techniques required.
  • Special Equipment: Standard baking tools like a mixing bowl, baking sheet, and parchment paper are needed.

Recipe Overview

  • Difficulty Level: These cookies are easy to make, requiring basic baking skills that are perfect for novice bakers.
  • Category: A delightful dessert perfect for cookie lovers, as well as an excellent treat for parties and gatherings.
  • Cuisine: Inspired by Hawaiian culinary traditions, these cookies celebrate the flavors of tropical fruit.
  • Cost: Generally inexpensive, most ingredients are common pantry items or easily sourced, keeping the budget friendly.
  • Season: Great for any season, particularly during summer and spring when tropical flavors shine.
  • Occasion: Ideal for birthday parties, potlucks, or casual get-togethers, bringing a touch of the islands to any event.

Why You’ll Love This Recipe

These Hawaiian Pineapple Coconut Thumbprint Cookies offer an unforgettable taste experience that balances sweetness and tartness in perfect harmony. Each cookie’s outer shell is crafted to be soft yet slightly crisp, enveloping a chewy core generously filled with a pineapple jam that captures the essence of fresh Hawaiian fruit. The addition of shredded coconut enhances the texture, giving each bite a delightful chewiness that pairs beautifully with the buttery cookie base.

Convenience plays a major role in why these cookies will become your new go-to recipe. They require minimal preparation and a short cooking time, allowing you to whip up a batch in just over half an hour. Perfect for unexpected visitors or a special treat for the family, these cookies are effective and rewarding.

From a nutritional perspective, these cookies incorporate natural sugars from fresh fruits and coconut, providing a sweet treat that comes with added benefits. Pineapple is known for its high vitamin C content, and coconut adds healthy fats and fiber. Enjoying one or two cookies can still allow for a balanced diet while indulging in a little sweetness.

These cookies shine during social gatherings, making them an inviting addition to any dessert table. Their vibrant flavors and tropical allure can serve as a conversation starter, inviting guests to try something new and delightful. Imagine the smiles and compliments when you introduce these to your friends and family!

Affordability is another reason to love this recipe. The ingredients are generally inexpensive and readily available at your local grocery store, making it easy to create a delicious, tropical treat without breaking the bank. Baking these Hawaiian Pineapple Coconut Thumbprint Cookies offers both affordability and pleasure, making them a worthwhile addition to your repertoire.

Historical Background and Cultural Significance

The origin of thumbprint cookies can be traced back centuries to various European cultures where they were known as “jam-filled biscuits.” They have evolved over time, taking on new flavors and textures based on regional ingredients. In Hawaiian cuisine, it is common to incorporate tropical fruits like pineapple and coconut, making these cookies a modern embodiment of island flavors.

Culturally, the use of fresh, local ingredients is essential in Hawaiian cooking. Pineapple holds a special place in Hawaiian traditions, symbolizing hospitality and warmth. It’s often used in various dishes and desserts, reflecting the islands’ rich agricultural landscape and importance of family gatherings.

The evolution of this cookie reflects the blending of different culinary traditions, particularly American and Hawaiian. It illustrates how classic recipes can be adapted to include local ingredients, celebrating the diversity of flavors that each culture contributes to the culinary world.

Regionally, variations of thumbprint cookies include different fillings based on seasonal fruits or personal preferences. In Hawaii, common fillings often emphasize local produce, showcasing the islands’ abundant fruit. These adaptations reflect the creativity found in island kitchens, continuously evolving and embracing both traditional and modern influences.

Ingredient Deep Dive

Pineapple
Pineapples are native to South America but have become a staple in tropical climates worldwide, especially in Hawaii. Their sweet and tangy flavor profile makes them a favorite ingredient in desserts. Nutritionally, pineapple offers a rich source of vitamin C, manganese, and dietary fiber. When selecting pineapples, look for those that are firm, plump, and fragrant, indicating freshness. Store fresh pineapples at room temperature, but once cut, refrigerate to maintain flavor.

Coconut
Coconuts are integral to many tropical cuisines and are revered in Hawaiian culture for their versatility. They provide healthy fats and fiber, enhancing the nutritional value of recipes. French or Thai coconut varieties are typically favored for their rich flavor. When selecting shredded coconut, opt for unsweetened varieties for a more natural taste. Store coconut in an airtight container in a cool, dry place to maintain freshness.

Common Mistakes to Avoid

  • Not chilling the dough: Chilling the dough before baking helps cookies maintain shape and prevents spreading.
  • Using fresh pineapple instead of canned: Fresh pineapple can be too watery; opt for canned to achieve a better filling consistency.
  • Overbaking: Keep an eye on the cookies during baking to ensure they stay soft and chewy.
  • Neglecting to mix ingredients properly: Mix until combined to avoid texture inconsistencies in the final product.
  • Using the wrong size of thumbprint: Ensuring the thumbprint is deep enough to hold the filling will prevent overflow during baking.
  • Skipping the taste test: Always taste the pineapple filling before baking, adjusting sweetness as needed.
  • Incorrect measuring of ingredients: Use precise measurements to maintain the recipe balance necessary for perfect cookies.
  • Not allowing cookies to cool: Allow the cookies to cool on the baking sheet to maintain their structure and flavor.
  • Using sweetened coconut in the batter: Sweetened coconut can make cookies overly sweet, affecting overall balance.
  • Not preheating the oven: Always preheat your oven to ensure even baking results.

Essential Techniques

Making Thumbprints
Creating the perfect thumbprint involves using your thumb to gently press the center of each cookie before baking. This technique ensures that the cookies receive the desired shape and the filling has a place to sit without overflowing. To master this, press firmly but don’t go all the way through to the bottom of the cookie.

Chilling Dough
Chilling your cookie dough is a crucial step that helps solidify the fats in the batter, creating a firmer texture. By resting the dough in the refrigerator for at least 30 minutes, you will prevent the cookies from spreading too much during baking. Look for a dough that is firm yet pliable when it’s ready to bake.

Pro Tips for Perfect Hawaiian Pineapple Coconut Thumbprint Cookies

1. Use ripe, sweet pineapples for the best filling flavor, ensuring the pinnacle of freshness and sweetness.
2. For added texture, consider adding chopped nuts to the batter alongside shredded coconut for a delightful crunch.
3. If you prefer a stronger coconut flavor, try using coconut extract in addition to shredded coconut.
4. Maintain consistency in bagging the filling by using a piping bag for easier and neater application.
5. Experiment with other tropical fruit fillings such as mango or passion fruit for a unique twist.
6. Be mindful of the baking time according to your oven’s specifications, as ovens can vary greatly in performance.
7. To enhance the visual appeal, drizzle warm cookies with a glaze made from powdered sugar and coconut milk.
8. To extend freshness, store cookies in an airtight container layered with wax paper between them to maintain softness.

Variations and Adaptations

Culinary creativity can lead you to explore various exciting adaptations of these cookies. Incorporating other tropical flavors such as fresh mango or guava into the thumbprint filling can provide a delightful twist. Seasonal adaptations may include substituting fresh fruits abundant in summer or fall, offering variety throughout the year. For dietary modifications, consider using gluten-free flour in place of all-purpose flour, and opt for dairy-free butter substitutes if required. You can also add extracts or spices to the base dough for enhanced flavors, resulting in unique variations tailored to personal preferences.

Serving and Presentation Guide

Plating these Hawaiian Pineapple Coconut Thumbprint Cookies can enhance their tropical allure. Consider stacking them on a vibrant platter surrounded by fresh pineapples or tropical flowers to evoke the spirit of Hawaii. Adding garnishes like toasted coconut flakes or mint leaves creates an inviting ambiance. Serve at room temperature to allow flavors to bloom fully. For an artistic touch, drizzle chocolate or a coconut glaze over the top of the cookies before displaying them.

Wine and Beverage Pairing

For wine pairings, a light, fruity white wine such as Riesling complements the sweetness of the cookies. Alternatively, a sparkling wine can bring out the tropical flavors beautifully. For non-alcoholic options, consider serving coconut water or tropical fruit juices to maintain the island theme. Pairing with tea, especially a citrus-flavored green tea, heightens the freshness of the flavors while balancing the sweetness of the cookies.

Storage and Shelf Life

To maximize the freshness of your Hawaiian Pineapple Coconut Thumbprint Cookies, store them in an airtight container at room temperature for up to a week. If you wish to prolong their shelf life, consider freezing them; they can last for up to three months when properly sealed. Checking for spoilage involves looking for changes in color or texture, such as hardening or an off smell. When reheating, a brief stint in the microwave or oven can restore their soft and chewy texture.

Make Ahead Strategies

For those planning ahead, the dough can be prepared in advance and stored in the refrigerator for up to three days. This approach offers flexibility during busy baking sessions. Additionally, you can make the filling a day ahead, keeping it in the refrigerator until you’re ready to bake. When assembling, ensure that the cookies are assembled shortly before baking to preserve freshness and flavor integrity.

Scaling Instructions

Scaling this recipe is straightforward; to halve it, simply divide all ingredient amounts by two. Conversely, if you wish to double or triple the recipe for a larger crowd, keep in mind that you may need to bake cookies in batches. Ensure that your baking sheets have enough space and adjust baking times slightly if using multiple sheets at once.

Nutritional Deep Dive

Analyzing these Hawaiian Pineapple Coconut Thumbprint Cookies shows a balanced macronutrient profile, making them a fun treat rather than an everyday snack. Each cookie contains carbohydrates primarily from the added sugars and flour, while healthy fats come from the coconut. Be mindful of portion sizes, especially if you’re watching caloric intake. These cookies can fit well into a balanced diet when consumed in moderation, allowing for indulgence without compromising on health goals.

Dietary Adaptations

For those following specific dietary requirements, adaptations can be easily applied. For example, to create a gluten-free version, substitute all-purpose flour with gluten-free flour blends. A vegan version can be achieved by using plant-based butter and flaxseed meal as an egg substitute. Dairy-sensitive individuals may also enjoy these cookies by removing any dairy components and opting for dairy-free products. Other diets, like keto or paleo, can be catered to by introducing alternative sweeteners or nut-based flours.

Troubleshooting Guide

Common issues when baking these cookies may include overly dry textures or lack of pineapple flavor. If the cookies become too dry, reducing the baking time slightly can help preserve moisture. For flavor balance, adjusting the sweetness of the filling by tasting and tailoring to preference is essential. Equipment challenges such as wrong oven temperatures can be addressed by using an oven thermometer for accuracy. If finding substitutions necessary, maintaining the essence of the original ingredients is key to successful troubleshooting.

Recipe Success Stories

Community feedback around the Hawaiian Pineapple Coconut Thumbprint Cookies has been overwhelmingly positive, with many bakers praising their vibrant flavors and appealing presentation. Variations shared by readers include adding lime zest to the filling and using macadamia nuts for an extra crunch. Adaptation stories recount how these cookies have become family favorites during gatherings or birthdays, showcasing the special place they hold in the hearts of many bakers.

Frequently Asked Questions

Can I use fresh pineapple instead of canned?

While fresh pineapple can be used, it may require cooking down to reduce moisture and achieve the desired consistency to prevent overly watery filling. Canned pineapple is often more practical for this recipe.

How do I store leftover cookies?

Store leftover cookies in an airtight container at room temperature for up to one week. If freezing, wrap them tightly and use within three months for best quality.

Can I freeze the dough?

Yes, you can freeze the dough! Shape it into a disc, wrap it tightly, and store it in the freezer. When ready to bake, thaw it in the refrigerator overnight and then proceed with the recipe.

What should I do if the dough is too sticky?

If the dough is too sticky, adding a little more flour can help achieve the right consistency. Make sure to mix it in gradually to avoid overdoing it.

Can I add more coconut to the recipe?

Absolutely! You can increase the shredded coconut quantity for a more intense coconut flavor. Just be mindful that it may affect the dough’s consistency slightly, so add flour if needed.

Is this recipe suitable for a vegan diet?

Yes, by substituting butter with plant-based margarine and using flax egg in place of regular eggs, you can create a delightful vegan version of these cookies.

How can I make the cookies more chewy?

To create a chewier texture, you can slightly reduce the baking time and ensure that you use brown sugar in the recipe. Brown sugar retains moisture, enhancing the chewiness.

What can I use instead of thumbprints?

If you don’t want to use your thumb for creating impressions, you can use the back of a small spoon or your index finger to create the indentations.

Can I substitute the filling with something else?

Yes, many alternatives work well in place of pineapple filling. Consider using other fruit jams or spreads like mango or passionfruit for a different but delightful twist.

How do I know when my cookies are done baking?

Cookies are typically done when they are slightly golden on the edges. A gentle touch should leave a slight indentation, but the center will appear soft, as they firm up upon cooling.

Additional Resources

To dive deeper into your baking journey, check out our related recipes such as Hawaiian Coconut Cream Pie or Tropical Fruit Salad. Technique guides like “How to Achieve the Perfect Cookie Texture” offer invaluable insights, helping you to refine your cookie-baking skills. Additionally, gaining ingredient knowledge on tropical fruits can enhance your future baking adventures, making your kitchen a hub for creative and seasonal culinary expressions.

Join the Conversation

We invite you to share your experience with making Hawaiian Pineapple Coconut Thumbprint Cookies! Capture your creations and post them on social media using our hashtag. We love receiving feedback and seeing variations you’ve experimented with, as well as any special tips you’ve discovered along the way. Join our baking community by leaving reviews and suggestions that can inspire fellow bakers and food enthusiasts worldwide.

The Recipe

Hawaiian Pineapple Coconut Thumbprint Cookies

Serves: 24 cookies

Prep Time: 20 mins

Cook Time: 15 mins

Total Time: 35 mins

Kitchen Equipment Needed

  • Baking sheet
  • Parchment paper
  • Mixing bowl
  • Wooden spoon
  • Measuring cups and spoons
  • Cookie scoop or spoon

Ingredients

  • 1 cup unsalted butter, softened
  • ¾ cup granulated sugar
  • 2 cups all-purpose flour
  • 1 cup shredded coconut
  • ½ cup pineapple filling or preserves
  • 1 large egg
  • 1 tsp vanilla extract
  • 1 tsp baking powder
  • ½ tsp salt

Directions

  1. Preheat your oven to 350°F (175°C) and line a baking sheet with parchment paper.
  2. In a mixing bowl, cream together the softened butter and sugar until light and fluffy.
  3. Mix in the egg and vanilla extract until combined.
  4. In a separate bowl, whisk together the flour, baking powder, salt, and shredded coconut.
  5. Gradually add the dry ingredients to the wet mixture, mixing until just combined.
  6. Using a cookie scoop or spoon, portion the dough onto the prepared baking sheet, spacing them evenly.
  7. Use your thumb to create an indentation in the center of each cookie.
  8. Fill each thumbprint with a small spoonful of pineapple filling.
  9. Bake for 15-18 minutes, until the edges are lightly golden.
  10. Allow the cookies to cool on the baking sheet for a few minutes before transferring them to a wire rack to cool completely.

Recipe Notes

  • You can substitute the pineapple filling with other fruit preserves such as mango or guava.
  • For added flavor, try incorporating lime or lemon zest in the dough for a tropical kick.
  • These cookies are best enjoyed fresh, but they store well in an airtight container at room temperature for several days.

Chocolate-Dipped Cookie Dough Bars: Easy No-Bake Recipe & Tips

Chocolate-Dipped Cookie Dough Bars – The Ultimate Guide

Chocolate-dipped cookie dough bars are the ultimate indulgence for anyone who loves the rich, creamy taste of edible cookie dough combined with the decadence of chocolate. These bars are perfect for parties, holidays, or simply satisfying your sweet tooth. In this comprehensive guide, we’ll explore everything you need to know about making chocolate-dipped cookie dough bars, from selecting the right ingredients to advanced techniques for perfecting the recipe.


Why Chocolate-Dipped Cookie Dough Bars are a Must-Try Treat

Chocolate-dipped cookie dough bars are more than just a dessert—they’re a celebration of flavor and texture. The combination of creamy cookie dough and smooth chocolate creates a treat that’s irresistible. Here’s why you should add this recipe to your dessert repertoire:

  • Versatility: Perfect for parties, gifts, or a quick snack.
  • Ease of Preparation: No baking required, making it beginner-friendly.
  • Customizable: Add your favorite mix-ins or toppings.
  • Crowd-Pleasing: Loved by both kids and adults.

For more insights into the safety of edible cookie dough, check out this guide on food safety and raw flour. Additionally, if you’re curious about the history of chocolate, this article on the origins of chocolate is a fascinating read.


Ingredients for Chocolate-Dipped Cookie Dough Bars

To make the perfect chocolate-dipped cookie dough bars, you’ll need the following ingredients:

  • For the Cookie Dough:
    • Heat-treated flour (to ensure safety).
    • Unsalted butter (softened).
    • Brown sugar and granulated sugar.
    • Vanilla extract.
    • Milk or cream.
    • Salt.
  • For the Chocolate Coating:
    • Semi-sweet or dark chocolate.
    • Optional: White chocolate or milk chocolate for drizzling.
  • Optional Add-Ins:
    • Chocolate chips, sprinkles, or crushed nuts.

Step-by-Step Recipe for Chocolate-Dipped Cookie Dough Bars

Step 1: Preparing the Cookie Dough

  • Heat-treat the flour by microwaving or baking it to kill any bacteria.
  • Cream the butter and sugars until light and fluffy.
  • Mix in the vanilla extract and milk.
  • Gradually add the heat-treated flour and salt, mixing until combined.

Step 2: Shaping the Bars

  • Press the dough into a lined baking dish.
  • Chill the dough in the refrigerator for at least 1 hour to firm it up.

Step 3: Cutting the Bars

  • Slice the chilled dough into even rectangles or squares.

Step 4: Dipping in Chocolate

  • Melt the chocolate using a double boiler or microwave.
  • Dip each bar into the melted chocolate, ensuring even coverage.
  • Place the coated bars on parchment paper to set.

Step 5: Adding Optional Toppings

  • Drizzle with additional chocolate or sprinkle with sea salt for extra flavor.

Tips for Perfect Chocolate-Dipped Cookie Dough Bars

  • Use Heat-Treated Flour: Ensures the dough is safe to eat.
  • Chill the Dough: Makes it easier to cut and dip.
  • Choose High-Quality Chocolate: For the best flavor and texture.
  • Store Properly: Keep in an airtight container to maintain freshness.

For more tips on creating healthier desserts, check out this guide to healthy dessert alternatives.


Variations of Chocolate-Dipped Cookie Dough Bars

  • Chocolate Chip Cookie Dough Bars: Add mini chocolate chips to the dough.
  • Peanut Butter Cookie Dough Bars: Incorporate peanut butter into the dough.
  • Funfetti Cookie Dough Bars: Mix in colorful sprinkles.
  • Vegan Option: Use plant-based butter and dairy-free chocolate.
  • Gluten-Free Option: Substitute with gluten-free flour.

Advanced Techniques for Chocolate-Dipped Cookie Dough Bars

  • Tempering Chocolate: For a glossy, snap-worthy coating.
  • Layering Flavors: Adding a caramel or peanut butter layer beneath the chocolate.
  • Using a Double Boiler: For smooth, lump-free melted chocolate.
  • Decorating Ideas: Using edible gold dust or custom designs.

Pairing Chocolate-Dipped Cookie Dough Bars with Other Treats

  • Dessert Platters: Pair with browniesmacarons, or fruit tarts.
  • Beverages: Serve with milkcoffee, or hot chocolate.
  • Ice Cream: Use as a topping for vanilla ice cream.
  • Gift Ideas: Package in decorative boxes for holidays or special occasions.

Health and Safety Considerations

  • Importance of using heat-treated flour to avoid foodborne illness.
  • Nutritional information (calories, sugar content, etc.).
  • Tips for moderation and portion control.
  • Allergy-friendly alternatives (e.g., nut-free, dairy-free).

Frequently Asked Questions (FAQs)

  • Is it safe to eat raw cookie dough?
    • Explanation of heat-treated flour and its purpose.
  • Can I freeze chocolate-dipped cookie dough bars?
    • Instructions for freezing and thawing.
  • How long do these bars last?
    • Storage tips and shelf life.
  • Can I use store-bought cookie dough?
    • Pros and cons of homemade vs. store-bought.
  • What type of chocolate is best for dipping?
    • Recommendations for semi-sweet, dark, or milk chocolate.
  • How do I prevent the chocolate from cracking?
    • Tips for proper tempering and storage.

Conclusion

Chocolate-dipped cookie dough bars are a versatile, delicious, and easy-to-make treat that’s perfect for any occasion. Whether you’re making them for a party or as a gift, this recipe is sure to impress. Don’t forget to experiment with flavors and share your creations with friends and family!


Internal Links Used as Rich Anchor Text

Delicious No Bake Pecan Coconut Praline Cookies Recipe to Try

No Bake Pecan Coconut Praline Cookies: Easy & Delicious Treats

⚖️
Difficulty
Easy

⏲️
Prep Time
15 mins

🕒
Cook Time
0 mins

⏱️
Total Time
15 mins

🍽️
Servings
24 cookies

Indulge in the delightful taste of No Bake Pecan Coconut Praline Cookies, a scrumptious treat that comes together effortlessly. These cookies are not only easy to make, but they’re also loaded with rich flavors and satisfying textures that will leave you craving more. The combination of sweet coconut and crunchy pecans creates a perfect balance of taste that is enhanced by a hint of brown sugar, making these cookies a must-try for any dessert lover.

While most cookie recipes require baking, this easy recipe allows you to enjoy cookies without turning on the oven. Just mix, drop, and chill! As they set, the flavors deepen, resulting in a cookie that is chewy on the outside and soft in the center. Whether you need a quick snack or a sweet addition to your party platter, these no bake cookies are an excellent choice that everyone will adore.

Quick Recipe Highlights

  • Flavor Profile: The sweet and nutty flavor of pecans combined with the tropical essence of coconut creates an irresistible taste that will transport your taste buds.
  • Texture: Enjoy a delightful crunch from the pecans paired with the chewy consistency of the coconut, making each bite a textural delight.
  • Aroma: The warm aroma of caramelized sugar mingles with the nutty scents of pecans, creating a comforting and inviting fragrance.
  • Visual Appeal: These cookies have a gorgeous golden hue, dotted with pieces of pecans and flakes of coconut, making them as beautiful as they are tasty.
  • Skill Level Needed: This recipe is perfect for beginners; it doesn’t require baking skills, just a simple mixing process!
  • Special Equipment: All you need is a mixing bowl, a spoon, and a baking sheet for chilling – no fancy gadgets required!

Recipe Overview

  • Difficulty Level: This recipe is rated as easy, making it suitable for novice bakers and busy home cooks alike.
  • Category: Ideal for desserts, snacks, or party treats, these cookies fit perfectly into any gathering or afternoon tea.
  • Cuisine: Inspired by traditional Southern desserts, these cookies reflect a rich culinary heritage that celebrates nutty flavors and sweet indulgence.
  • Cost: The recipe is budget-friendly, with ingredients typically costing under $10, making it accessible for all.
  • Season: Enjoy these cookies year-round; they’re especially great for summer gatherings, as no baking is involved, keeping your kitchen cool.
  • Occasion: Perfect for birthday parties, holiday celebrations, or simply as a delightful treat to share with friends.

Why You’ll Love This Recipe

The taste and texture of No Bake Pecan Coconut Praline Cookies offer a delightful experience. The contrast between crunchy pecans and chewy coconut creates a mouthwatering treat. Each cookie delivers a burst of flavor, making them irresistible to snack on at any time of the day.

Convenience is another great aspect of these cookies. With minimal prep time and no cooking required, you can whip up a batch in a flash. They’re ideal for last-minute gatherings or satisfying sudden sweet cravings without the fuss of baking.

These cookies also come with nutritional advantages. Pecans are packed with healthy fats, protein, and essential vitamins, while coconut adds fiber and an array of nutrients. Together, they offer a tasty remedy for your sweet tooth without compromising on health.

In social scenarios, these cookies shine as a conversation starter at parties. They can be easily shared, making them perfect for gatherings. Their unique flavor profile often sparks interest that keeps guests coming back for more.

From a budget perspective, this recipe is cost-effective. With a handful of ingredients that are readily available, you can create a scrumptious dessert that won’t break the bank, making them a go-to for every occasion.

Historical Background and Cultural Significance

No Bake Pecan Coconut Praline Cookies have roots in the Southern cooking tradition, where pecans are a staple ingredient. These delectable treats reflect a culinary practice that values simplicity and taste, allowing home cooks to create indulgent desserts without extensive effort.

Culturally, pecans hold a significant place in various Southern festivities, often served during holidays and family gatherings. The use of coconut adds a tropical twist, showcasing the fusion of regional flavors that have evolved over the years.

This recipe has evolved from traditional pralines, which originally relied on cooking down sugar to achieve a caramelized state. The no-bake version offers a modern, simplified alternative, making this treat accessible to bakers of all skill levels.

Variations of these cookies exist across different regions, with some incorporating chocolate or different nuts. Each adaptation contributes to the rich tapestry of culinary creativity surrounding pecans and coconut desserts, reflecting local tastes and ingredient availability.

Ingredient Deep Dive

Pecans: Pecans are a culinary treasure in the Southern United States, known for their rich flavor and crunchy texture. Nutritionally, they are high in healthy fats, fiber, and several essential vitamins, such as vitamin E and zinc. When selecting pecans, look for plump, unblemished nuts with a rich aroma. Store them in an airtight container in a cool, dark place to maintain freshness, and consider freezing any excess for longer-term use.

Coconut: Coconut, often associated with tropical regions, provides a unique sweetness and chewiness. It’s a good source of dietary fiber, which can aid digestion, and is often used in various dessert recipes. Fresh coconut is preferred, but dried unsweetened coconut works well for cookies. For storage, keep it in an airtight container in a cool area, and feel free to substitute with other types of coconut products, such as coconut flour or coconut oil, depending on your recipe’s requirements.

Common Mistakes to Avoid

  • Using sweetened coconut: Opt for unsweetened coconut to prevent an overly sweet cookie.
  • Skipping the chilling step: Allow the cookies to set completely in the refrigerator for the best texture.
  • Not measuring ingredients accurately: Precision is key in achieving the perfect consistency.
  • Overmixing: Mix just until combined to maintain a soft texture.
  • Using stale nuts: Always use fresh pecans for the best flavor and crunch.
  • Not letting the mixture cool: If the mixture is too warm, it may not hold its shape when dropped onto the baking sheet.
  • Ignoring ingredient substitutions: Ensure that your substitutions are compatible for the best results.
  • Not spacing cookies properly: Leave enough space between the cookies on the sheet to allow for spreading.

Essential Techniques

Mixing: Proper mixing of ingredients is crucial for evenly distributing flavors. Combine the wet and dry components gradually, ensuring everything is well mixed without overworking the dough, which could lead to dense cookies. A visual cue for success is when the mixture clings together and holds its shape.

Chilling: Chilling the dough is essential for no-bake recipes to help it set properly. Use a shallow dish to ensure even cooling, and give it enough time to firm up before shaping. Look for a slightly firm mixture that can hold its shape when scooped.

Pro Tips for Perfect No Bake Pecan Coconut Praline Cookies

– Use fresh ingredients for the best flavor—fresh coconut and pecans make a significant difference in taste.
– Experiment with different types of nuts or add-ins, such as chocolate chips or dried fruits, to tailor your cookies to your liking.
– Ensure the mixture is not too hot when adding coconut; otherwise, it can cause the coconut to clump together.
– Use a cookie scoop for even-sized cookies that will chill uniformly.
– Allow ample chilling time to let the flavors meld and the texture become firm.
– For extra crunch, lightly toast the pecans before incorporating them into the mixture.
– Consider garnishing with a sprinkle of sea salt for a sweet-salty flavor twist.
– Pair these cookies with a glass of milk or a hot beverage for the perfect indulgent treat.

Variations and Adaptations

For a twist, try adding different types of nuts like walnuts or almonds, which will alter the flavor profile while maintaining the essence of the original recipe. Seasonal adaptations can include swapping out pecans for pumpkin seeds in the fall, adding cozy spices like cinnamon or nutmeg for warmth.

For dietary modifications, this recipe can easily be made vegan by using maple syrup instead of honey or agave. Additionally, you can create a low-carb version by substituting traditional sweeteners with sugar-free alternatives.

To reinvent the flavor, consider incorporating extracts such as almond or vanilla to enhance the taste. Texture modifications can include rolling the cookies in crushed nuts or coconut for an exterior crunch. For presentation, stack them neatly in a jar or plate for a rustic look that invites sharing.

Serving and Presentation Guide

When serving your No Bake Pecan Coconut Praline Cookies, consider a simple presentation on a decorative platter. Create different heights by stacking a few cookies with others set beside them. For added flair, sprinkle some toasted coconut flakes on top or around the platter to create visual interest.

Garnishing with a drizzle of chocolate can enhance the cookies’ appearance and introduce a delightful flavor contrast. Serve with a side of coffee or milk for a classic approach. Pay attention to portion sizes, as these cookies are rich and satisfying; offering two cookies per serving is often just right for guests.

Wine and Beverage Pairing

To pair beautifully with No Bake Pecan Coconut Praline Cookies, consider a light dessert wine like a Muscat, which complements the sweetness of the cookies without overwhelming them. If you’re opting for a non-alcoholic alternative, a refreshing coconut water or herbal tea can seamlessly accompany the rich flavors of the cookies.

Coffee lovers might appreciate pairing these cookies with a cup of hazelnut or caramel flavored coffee, enhancing the nutty notes of the pecans. Remember to serve beverages chilled or at room temperature to elevate the overall experience.

Storage and Shelf Life

To maintain freshness, store your No Bake Pecan Coconut Praline Cookies in an airtight container in the refrigerator. This method will keep them good for about a week. For longer storage, consider placing them in the freezer, where they can last up to three months with minimal loss of quality.

If you notice the cookies becoming sticky or losing their shape, it might be a sign that they are losing their moisture and freshness. For reheating, simply let them sit at room temperature or lightly warm them in the microwave, but avoid overheating to maintain texture.

Make Ahead Strategies

These cookies are perfect for making ahead, allowing your schedule to be more flexible. Prepare the mixture and shape the cookies, then place them on a baking sheet and store in the refrigerator. You can also make the cookie mix up to a week in advance and prepare to chill them later on.

If you want to save time on the day of serving, consider preparing the pecans and coconut ahead of time. Keep the ingredients ready for mixing, allowing for quick assembly. Just remember to incorporate fresh elements, such as coconut or nuts, right before serving for an optimal taste experience.

Scaling Instructions

Halving this no bake cookie recipe is simple; just adjust the ingredient amounts accordingly while keeping the ratios the same, allowing you to create a smaller batch when necessary. If you decide to double or triple the recipe, ensure you have extra mixing space and equipment to accommodate the larger quantity.

Timing doesn’t significantly change with batch adjustments, but expect a slight increase in chilling time for larger quantities. For storage, use larger containers to separate cookie layers with parchment paper adequately to prevent sticking.

Nutritional Deep Dive

Macro breakdown for No Bake Pecan Coconut Praline Cookies reveals a good balance of carbohydrates from the coconut and protein from the pecans. This recipe also provides healthy fats, making it a wholesome treat without excessive empty calories.

A micronutrient analysis shows these cookies contain essential vitamins and minerals, including vitamin E from the pecans and folate from coconut. The overall health benefits highlight them as a satisfying snack that can fit within most balanced dietary plans.

For portion analysis, consider sticking to one or two cookies to manage caloric intake while enjoying the rich flavors. They can be particularly satisfying as a post-workout snack, providing energy without invoking a sugar crash.

Dietary Adaptations

To cater to various dietary needs, these cookies can easily become gluten-free by ensuring all ingredients used are certified gluten-free, as coconut and pecans are naturally gluten-free. For a dairy-free alternative, simply use plant-based sweeteners instead of honey.

For vegan versions, explore the use of flaxseeds or chia seeds as binding agents in place of animal products, creating a light treat suitable for vegan diets. Keto enthusiasts can opt for sugar-free sweeteners to maintain low carbohydrate levels while enjoying this recipe without guilt.

For followers of the Paleo diet, the recipe aligns perfectly with natural, unprocessed ingredients, making it a welcome addition to their treat selections. Each dietary adaptation allows for continued enjoyment of these delicious cookies, proving their versatility.

Troubleshooting Guide

For texture issues, if the cookies aren’t firming up, increase the chilling time in the refrigerator or adjust the amount of coconut. If they become too soft, consider adding more dry ingredients like coconut flour or almond flour for stability.

If flavor balance seems off, remember that tasting the mixture before chilling can help adjust the sweetness. Adding a pinch of salt can also enhance flavors significantly. For equipment challenges, ensure your mixing bowl is appropriately sized to prevent spillage, and check that your storage containers are airtight to avoid moisture issues.

Timing concerns can affect texture; if you leave the cookies out too long before chilling, they may not set correctly. Always follow the recommended chilling time for the best results.

Recipe Success Stories

Community feedback on No Bake Pecan Coconut Praline Cookies has been overwhelmingly positive, with many praising their simplicity and delicious outcomes. Variations shared by readers often include creative ingredient exchanges, demonstrating the flexibility of the recipe in catering to personal preferences.

Adaptation stories highlight how readers have successfully incorporated different flavors and textures, offering tips for transforming the cookie mixture into bite-sized energy balls or even adding spices for a unique twist. Photography tips shared by the community have enriched presentations, guiding others to showcase their delicious cookie creations beautifully.

Frequently Asked Questions

1. How long do these cookies last?

Stored in an airtight container in the fridge, No Bake Pecan Coconut Praline Cookies stay fresh for about a week. For longer preservation, freeze them, which can extend their shelf life up to three months.

2. Can I use different nuts?

Absolutely! Feel free to substitute pecans with walnuts, almonds, or hazelnuts based on your preference. Each nut will bring its unique flavor profile to the cookies.

3. Is it possible to make these cookies vegan?

Yes, by using plant-based sweeteners instead of honey, you can easily make these delicious cookies vegan-friendly without compromising on taste.

4. How do I store these cookies?

Store the cookies in an airtight container in the refrigerator to maintain freshness, or freeze them for longer storage, ensuring they’re well-wrapped to prevent freezer burn.

5. What can I add to the mix?

You can enhance your cookies by adding chocolate chips, dried fruits, or spices like cinnamon to create unique variations that reflect your taste.

6. Do I need a mixer for this recipe?

No mixer is necessary; a mixing bowl and spoon will suffice. Just mix the ingredients by hand for the perfect consistency.

7. Can I leave out the sugar altogether?

While sugar contributes to the cookie’s flavor and texture, reducing it might change the result. Consider using natural sweeteners if you’re aiming to cut sugar completely.

8. Can I make these cookies ahead of time?

Yes! You can prepare them a day in advance and keep them chilled until you’re ready to serve. They taste even better after giving the flavors time to meld.

9. Why are my cookies falling apart?

If the cookies don’t hold together, they may need more chilling time or additional binding ingredients, such as crushed oats or coconut flour to help bind them.

10. Can I add a chocolate coating?

Definitely! After the cookies have chilled, you can dip them in melted chocolate for an indulgent chocolate-covered treat that pairs wonderfully with the flavors.

Additional Resources

Explore more recipes that feature nuts and coconut for additional inspiration in your baking. Techniques for working with sweeteners and understanding their impact will enhance your cooking skills. Ingredient information can guide you in selecting the freshest components for optimal results.

Check out related dessert recipes that are also no bake, showcasing different flavor combinations, or dive into seasonal variations that utilize specific ingredients to celebrate various occasions.

Join the Conversation

We love hearing your feedback and experiences with our No Bake Pecan Coconut Praline Cookies! Share your photos, variations, and suggestions on social media. Join our community of dessert lovers excited to engage and inspire each other with delectable treats. Your recipe reviews and experiences can help others discover the joy of creating these easy, mouthwatering cookies!

The Recipe

No Bake Pecan Coconut Praline Cookies

Serves: 24 cookies

Prep Time: 15 mins

Cook Time: 0 mins

Total Time: 15 mins

Kitchen Equipment Needed

  • Mixing bowl
  • Spoon or spatula
  • Baking sheet
  • Parchment paper (optional)

Ingredients

  • 1 cup pecans, chopped
  • 1 cup unsweetened coconut flakes
  • ½ cup brown sugar
  • ¼ cup unsweetened nut butter (peanut or almond)
  • ¼ cup honey or maple syrup
  • 1 teaspoon vanilla extract
  • Pinch of salt

Directions

  1. In a mixing bowl, combine the chopped pecans, coconut flakes, brown sugar, and salt.
  2. In a small saucepan, heat the nut butter and honey (or maple syrup) over low heat until melted. Stir in vanilla extract.
  3. Pour the melted mixture over the dry ingredients and mix until thoroughly combined.
  4. Using a cookie scoop or spoon, drop spoonfuls of the mixture onto a lined baking sheet.
  5. Chill in the refrigerator for at least 2 hours until firm.
  6. Enjoy your homemade no bake cookies!

Recipe Notes

  • For a chocolate twist, consider drizzling melted chocolate on top before chilling.
  • Substitute agave syrup for honey to make the recipe completely vegan.
  • Feel free to experiment with other nuts or add dried fruits for additional flavor.

Delicious Steak Bites and Fettuccine in Garlic Butter Sauce

Delicious Steak Bites and Fettuccine in Garlic Butter Sauce: A Flavor Explosion

⚖️
Difficulty
Moderate

⏲️
Prep Time
15 mins

🕒
Cook Time
20 mins

⏱️
Total Time
35 mins

🍽️
Servings
4

Steak Bites and Fettuccine in Garlic Butter Sauce is not just a meal; it’s an experience that captures the essence of comfort food with an elegant twist. The tender, juicy steak bites sear to perfection and mingle beautifully with a rich garlic butter sauce that coats every strand of al dente fettuccine. The aroma of garlic lightly wafting through your kitchen creates an irresistible allure, making this dish perfect for date nights or family gatherings. Imagine sitting down to a plate bursting with flavor and the enticing scent of garlic teasing your senses—this is a recipe that promises not just fullness, but satisfaction.

The combination of ingredients in this dish results in multiple layers of flavor. The high-quality steak adds a robust heartiness, while the garlic and butter bring a creamy, savory enhancement. As you twirl the fettuccine on your fork, the buttery sauce envelopes each bite, ensuring a delightful mouthfeel with every forkful. With the right balance of seasoning and a touch of freshly grated Parmesan, this dish is a celebration of simple yet divine cooking that leaves a lasting impression.

Quick Recipe Highlights

  • Flavor Profile: The robust flavor of seasoned steak combines seamlessly with the rich umami notes of garlic butter, creating a dish with depth and comfort.
  • Texture: Tender steak bites provide a satisfying contrast to the silky smooth fettuccine, making every bite an enjoyable experience.
  • Aroma: The enticing aroma of sautéed garlic and sizzling steak fills the air, making it impossible to resist this dish.
  • Visual Appeal: The glossy finish of the garlic butter sauce on the fettuccine paired with vibrant green parsley creates a feast for the eyes.
  • Skill Level Needed: This recipe calls for basic cooking skills, making it accessible to both novice and seasoned cooks.
  • Special Equipment: A skillet for sautéing, a pasta pot for cooking fettuccine, and a cutting board for prepping steak.

Recipe Overview

  • Difficulty Level: This dish is moderate in difficulty, requiring attention to both the searing of the steak and the cooking of the pasta simultaneously.
  • Category: Perfect for a gourmet dinner, it can serve as a main course in both casual and elegant dining experiences.
  • Cuisine: This dish blends elements of Italian and American cuisines, showcasing the comfort of pasta alongside the heartiness of steak.
  • Cost: Ingredients such as quality steak and fresh pasta can be slightly more expensive, making this a special occasion meal.
  • Season: Enjoyable all year round, it’s particularly delightful in cooler months when rich, hearty meals are especially comforting.
  • Occasion: Ideal for date nights, dinner parties, or family gatherings, this dish is sure to impress.

Why You’ll Love This Recipe

The combination of taste and texture in Steak Bites and Fettuccine in Garlic Butter Sauce offers a delightful culinary experience. The richness of the garlic butter enhances the taste of the steak, while the fettuccine adds heartiness to the meal. Every bite offers a balance of savory and creamy flavors that will keep you coming back for more.

Beyond flavor, it’s also a quick and convenient dish to prepare. With just 15 minutes of prep and 20 minutes of cooking time, you can produce a gourmet meal with minimal effort. This makes it a fantastic choice for a weeknight dinner or when entertaining unexpectedly.

From a nutritional standpoint, this dish provides a good source of protein and includes carbohydrates from the fettuccine, making it a balanced meal option. Fresh ingredients ensure that you’re not only satisfying your hunger but also nourishing your body.

On the social front, this dish fosters togetherness. The sizzling steak and aromatic garlic butter create an inviting atmosphere, making it a perfect centerpiece for shared meals with loved ones. As people gather around the table, the flavors and laughter flow freely.

Lastly, the cost-effectiveness of this dish makes it appealing. Although the initial investment might be higher when sourcing quality steak, the end result is a restaurant-quality meal at home, ultimately saving you money on dining out.

Historical Background and Cultural Significance

Steak bites have roots in various culinary traditions, particularly those associated with grilling and searing meats. Traditionally, cooking bites of steak quickly over high heat allowed for flavorful outer crusts while maintaining tenderness inside. Similarly, pasta has been celebrated in Italian culture for centuries, representing not only nourishment but also sharing and community.

The significance of garlic in culinary history dates back thousands of years, known for its bold flavor and health benefits. In various cultures, garlic is considered a medicinal herb, enhancing not just flavor but also wellbeing.

As recipes evolve, the fusion of steak and pasta presents a contemporary take on comfort food while drawing inspiration from traditional meals served across countries. Regions known for their steakhouses have adapted Italian pasta recipes, illustrating a beautiful blend of flavors and traditions.

Many variations of steak and pasta dishes exist globally, showcasing regional ingredients and cooking styles. This dish pays homage to these adaptations while allowing anyone to enjoy a taste of cultural cuisine in their home.

Ingredient Deep Dive

Steak is the star of this dish, bringing not only flavor but a rich source of protein. The most appropriate cuts to use for this recipe include sirloin or ribeye due to their flavor and tenderness. When selecting steak, look for marbling, which signifies fat content and contributes to the juiciness after cooking. Proper storage involves keeping it in the fridge and using fresh within a few days or freezing for later use. Should you need substitutions, chicken breast or tofu can serve as excellent alternatives for the protein source.

Fettuccine provides a luxurious texture that holds sauces beautifully. Traditionally made with eggs, selecting fresh fettuccine from the store can elevate your dish. Store dried pasta in a cool, dry place, while fresh pasta should be kept in the fridge and consumed within a week. For dietary alternatives, substitute traditional wheat fettuccine with gluten-free pasta, ensuring similar cooking times for optimal results.

Garlic not only adds flavor but also boasts various health benefits including anti-inflammatory properties. Choose firm, dry garlic bulbs that are without blemish. Store garlic in a cool, dark place, ensuring it remains unpeeled until ready to use. For substitutions, garlic powder may work in a pinch, though it won’t provide the same depth of flavor.

Butter forms the sauce base, creating a luxurious richness. Look for unsalted butter to control the seasoning in the final dish, and consider ghee or plant-based butter as alternatives for those with dietary restrictions. Storing butter should happen in cold areas to maintain its quality.

Common Mistakes to Avoid

  • Overcooking the steak can lead to dryness; always use a meat thermometer for perfect results, aiming for medium-rare.
  • Not seasoning the steak adequately before cooking will result in a bland taste; season generously with salt and pepper.
  • Cooking fettuccine in water that isn’t adequately salted can affect the overall flavor of the dish; choose a saltwater solution.
  • Allowing the garlic to burn in the pan will introduce bitterness; sauté until fragrant, typically 30 seconds.
  • Not letting the steak rest before slicing allows juices to spill, resulting in a less juicy texture.
  • Using the wrong type of pasta can change the flavor and texture; stick with fettuccine for a creamy sauce coating.
  • Forgetting to reserve some pasta water may prevent achieving the desired sauce consistency.
  • Not finishing the dish with fresh herbs can lead to a flat taste; use parsley or basil for a vibrant touch.
  • Overcrowding the skillet when searing steak leads to steaming instead of browning; work in batches for optimal sear.
  • Serving the dish at the wrong temperature diminishes the flavor; ensure everything is served hot for best enjoyment.

Essential Techniques

Achieving a perfect sear on steak bites is critical for flavor. The two-step process involves preheating the skillet until it’s smoking hot and then letting the steak cook undisturbed for a few minutes. This technique locks in juices and develops a crust, which adds complexity to the dish.

Cooking pasta al dente is essential for achieving the best texture that holds up in a rich sauce. This requires precise timing and testing a strand at the suggested cooking time; it should feel firm with a slight chew when bitten.

Sautéing garlic to release its full flavor is an integral skill. Use medium heat and watch for the change in color to a light golden hue to prevent burning. Add other ingredients immediately to halt the cooking process and keep flavor intact.

Bringing all components together effectively ensures a harmonious dish. Combining fettuccine with the steak and garlic butter in the skillet enhances flavors, allowing each bite to enjoy the full depth of ingredients.

Pro Tips for Perfect Steak Bites and Fettuccine in Garlic Butter Sauce

1. Selecting high-quality steak is crucial; prime or choice cuts yield the best results, ensuring a tender and flavorful dish.
2. For an added flavor boost, marinate steak bites briefly before cooking—ingredients such as garlic, soy sauce, and olive oil work well.
3. While cooking, use tongs for flipping steak bites to achieve an even sear without piercing and losing juices.
4. In the final moments of cooking, consider adding a splash of white wine to deglaze the pan, adding acidity and depth to the sauce.
5. Utilize fresh herbs at the end for a pop of color and flavor; parsley or chives are perfect choices to elevate this dish.
6. When plating, drizzle extra garlic butter sauce over the top; it adds richness and visual appeal.
7. Consider enriching the dish with a sprinkle of fresh grated cheese just before serving for an extra layer of flavor.
8. If serving for guests, consider a side salad for a fresh contrast to the rich pasta and steak, balancing the meal.

Variations and Adaptations

For a regional twist, consider adding sun-dried tomatoes or spinach to the fettuccine, offering Italian-inspired flavors paired with your steak. Seasonal adaptations such as asparagus or zucchini can be sautéed alongside the garlic for a fresh take in the spring and summer months. For dietary modifications, substitute traditional pasta with zucchini noodles to create a low-carb version of this dish.

Flavor variations can be explored by adding spices such as paprika or chili flakes for a heat element, elevating the traditional garlic butter taste. You can also try using different cheeses, like blue cheese or goat cheese, for a varied taste experience. Presentation alternatives could include serving the dish in bowls rather than plates, combined with a sprinkle of microgreens for added flair.

Serving and Presentation Guide

Plating techniques transform your dish into a visually appealing masterpiece. Start with a base of fettuccine, tapering inwards, followed by steak bites artfully placed on top. Drizzle the garlic butter sauce to create an elegant sheen over the dish, highlighting the rich components.

For garnishing, consider a light sprinkling of freshly chopped parsley or basil atop the dish for a pop of color. Pair with a side of crusty bread for dipping into the sauce, enhancing the overall dining experience. Traditional accompaniments such as a fresh salad served alongside can balance the richness of the dish well.

Modern serving suggestions may include whether to serve the steak bites as an appetizer or as part of a main course, depending on your gathering. Be sure all components are served hot together, ensuring the best flavor and enjoyment. Lastly, keep portion control in mind; this dish is rich, so smaller servings may be appreciated.

Wine and Beverage Pairing

For wine pairings, a robust red wine such as Cabernet Sauvignon complements the rich flavors of steak beautifully while cutting through the creaminess of the butter sauce. A full-bodied Chardonnay can also serve as an excellent match, enhancing buttery notes of the dish.

For non-alcoholic alternatives, consider sparkling water with a twist of lime to cleanse the palate or a rich herbal tea for a cozy option post-meal. If coffee is preferred post-dinner, a medium roast coffee pairs beautifully, harmonizing with the steak’s flavors.

Temperature considerations for serving wine should be noted; reds are best served at room temperature, while whites should be chilled for ultimate refreshment. For the best experience, serve the wine in suitable glassware to enhance aroma and taste, making a complete dining experience.

Storage and Shelf Life

Proper storage methods are vital to maintaining the quality of Steak Bites and Fettuccine. Store any leftovers in an airtight container in the refrigerator and aim to consume them within 3 days for the best taste and texture.

Retain optimal temperature requirements by ensuring the dish cools down before sealing, as condensation can affect quality upon refrigeration. For long-term storage, consider freezing individual portions for easy reheating later on.

Using glass containers is highly recommended; they preserve freshness and flavor better than plastic. Look out for signs of spoilage such as unwanted odors or discoloration, as these indicate that the dish has gone bad.

For reheating, consider using the stove over medium-low heat, adding a splash of water or butter to revive the sauce. If frozen, thaw in the fridge overnight before reheating to ensure consistent warming without drying out.

Make Ahead Strategies

Preparation can be streamlined through a prep timeline starting with slicing and marinating the steak. This provides enhanced flavor and tenderness, which allows you to maximize time spent cooking closer to serving.

When storing components between steps, consider refrigerating steak bites after marinating and pasta; they can sit together for optimal flavor combination. Keep sauces prepared earlier can save you significant cooking time later on.

While the quality is paramount, assembling the dish shortly before serving keeps flavors fresh. For reheating, gently warm steak and butter sauce together over low heat. To create a delightful contrast, add freshly cooked pasta just before serving to keep it from becoming mushy.

Focusing on fresh additions such as herbs and grated cheese at the end will keep this dish vibrant and enjoyable even when prepared ahead.

Scaling Instructions

Scaling this recipe is simple; halving the ingredient amounts is straightforward for a cozy dinner for two without sacrificing flavor. Doubling or tripling the recipe for larger gatherings requires careful attention to cooking times, as batches might take longer to sear properly.

When adjusting, ensure your equipment can accommodate larger quantities without overcrowding; consider using more skillets if necessary for even cooking. Timing adjustments may arise, especially with larger portions; check doneness regularly to avoid overcooking.

Finally, for storage considerations, keep adjustments in mind. Larger batches may store or freeze differently, so monitor based on portion sizes when reserving for later consumption.

Nutritional Deep Dive

Focusing on the macro breakdown, Steak Bites and Fettuccine offers a good combination of proteins, fats, and carbohydrates that create a balanced meal. Each serving provides substantial protein from the steak, essential for muscle building and repair, while the fettuccine delivers energy through carbohydrates.

Micronutrient analysis shows the abundance of vitamins present in garlic, such as vitamin C, and provide anti-inflammatory benefits. The dish’s richness from garlic butter is balanced enough not to overwhelm your caloric needs when consumed in moderation.

When considering portioning, it’s crucial to be aware of the overall caloric content. Portion control is vital, especially when indulging in rich foods, making it smart to enjoy alongside lighter sides to promote balanced eating habits.

Health benefits, when consuming moderate quantities, can include improved energy levels from carbohydrates and muscle recovery properties from protein, positioning this dish as both a flavorful and functional meal option.

Dietary Adaptations

For gluten-free adaptations, consider using gluten-free fettuccine or spiralized options such as zucchini noodles, maintaining the essence of the dish without compromising dietary needs. Dairy-free alternatives can replace butter with margarine or olive oil, while still achieving a rich flavor.

Vegan variations can take it further by using plant-based steak alternatives, ensuring a satisfying mouthfeel. Eliminating animal products entirely also encourages creativity with added vegetables for essence and flavor.

Low-carb and keto followers might swap traditional fettuccine with cauliflower rice, a prime option that retains a delightful texture while being low in carbohydrates. Discussing special diets such as paleo, focus on unprocessed ingredients like whole foods would align perfectly with the values of the diet.

Special consideration awarded to low-FODMAP diets can have you replacing certain ingredients like garlic with garlic-infused oils or powders that provide similar flavors without FODMAP triggers.

Troubleshooting Guide

If facing texture issues, examine whether the sautéed steak bites are chewy or firm—this can be directly correlated to cooking temperature and time. Adjusting cooking methods or using a meat thermometer can improve outcomes tremendously.

For flavor balance, if the dish is overly salty, consider adding a splash of cream to mellow the taste or additional garlic butter to harmonize flavors. Understanding the seasoning is key to achieving desired results.

Temperature problems, especially when serving, can diminish your dining experience; ensure everything is warmed thoroughly before serving. Pre-heating all components will enhance enjoyment.

Ingredient substitutions present challenges; monitor sweetness if using sweet soy sauce in place of regular soy sauce. Adjust based on palette preference, ensuring authentic flavors are maintained.

Finally, timing concerns arise during hectic kitchen environments. Preparing cooking elements in sequences while keeping track of timing can prevent overcooking and waste.

Recipe Success Stories

Community feedback for Steak Bites and Fettuccine highlights rave reviews for its delightful flavors. Readers often mention the satisfying aspect of the dish and how it’s been well received by family and friends during gatherings.

Variation successes include adaptations like adding spicy elements, which many have praised for elevating the traditional recipe. Reader suggestions on accompanying dishes such as roasted vegetables have been great recommendations.

Photography tips provided by users have uncovered creative plating ideas, inspiring others to try their hand at capturing the beautiful presentation of this dish. Success stories resonate clearly with those making this recipe for the first time, and it often sparks new ideas for creating similar combinations.

Celebrating social media sharing offers an open space for sharing photographs and unique takes on the recipe, further uniting the community. Engaging dialogue among readers continues to evolve around this dish, enhancing its popularity and presence in home kitchens.

Frequently Asked Questions

Can I use other types of pasta instead of fettuccine?

Yes, you can use other types of pasta, such as pappardelle, linguine, or even penne, depending on your preference. Just ensure the cooking time is adjusted accordingly.

How can I ensure my steak is cooked perfectly?

Using a meat thermometer is the best way to ensure your steak reaches the desired doneness. Aim for an internal temperature of 135°F for medium-rare.

Can I make this dish ahead of time?

Yes, you can prepare the steak bites and garlic butter sauce ahead of time. Reheat everything together just before serving to maintain flavor and freshness.

What can I serve this dish with?

This dish pairs wonderfully with a light salad, roasted vegetables, or fresh crusty bread to soak up the delicious garlic butter sauce.

Is there a vegetarian alternative?

Certainly! Consider using plant-based steak substitutes made from mushrooms, lentils, or jackfruit to create a similar texture and flavor profile.

What wine pairs best with steak bites?

A robust Cabernet Sauvignon complements the rich flavors of the steak and sauce beautifully, balancing the dish’s richness perfectly.

How long does leftover steak fettuccine last in the fridge?

Leftovers can be stored in an airtight container in the refrigerator for up to three days. Reheat gently on the stove or in the microwave.

Can I freeze this dish?

Yes, you can freeze individual portions. Just be sure to cool the dish completely first and use airtight containers to prevent freezer burn.

What are some common mistakes when making this dish?

Common mistakes include overcooking the steak, inadequately salting the pasta water, and burning the garlic. Proper attention to detail can enhance outcomes!

Can I add other vegetables to this dish?

Absolutely! Consider including sautéed mushrooms, spinach, or asparagus for added flavor and nutrition. Just ensure they’re cooked to your liking.

Additional Resources

If you enjoyed this recipe, consider exploring similar recipes, including Lemon Garlic Shrimp Pasta and Creamy Chicken Alfredo, which both utilize the same techniques and offer delightful flavors. For those interested in refining their cooking skills, technique guides on sautéing and searing can offer deeper insights.

Additionally, ingredient information on selecting the best cuts of meat or fresh pasta can enhance your cooking endeavors while ensuring you have quality results at home. Equipment recommendations vary from high-quality skillets to pasta pots—both vital for producing excellent dishes.

Seasonal variations can inspire creativity with fresh, seasonal vegetables and herbs to elevate this dish, offering fresh twists catered specifically to the time of year.

Join the Conversation

We invite you to share your experiences with cooking Steak Bites and Fettuccine in Garlic Butter Sauce on social media! Post your pictures and variations, and don’t hesitate to leave a comment sharing your thoughts and feedback. Your culinary adventures inspire others to try this dish and make it their own.

Engage with us by following our blog and sharing your successes in the kitchen. Your photographs and stories can offer valuable insights to fellow home cooks ready to dive into the delicious world of this recipe. Let’s create a vibrant cooking community together!

The Recipe

Steak Bites and Fettuccine in Garlic Butter Sauce

Serves: 4

Prep Time: 15 mins

Cook Time: 20 mins

Total Time: 35 mins

Kitchen Equipment Needed

  • Skillet
  • Pasta pot
  • Cutting board
  • Knife
  • Measuring spoons
  • Meat thermometer

Ingredients

  • 1 lb steak (sirloin or ribeye), cut into bite-sized pieces
  • 8 oz fettuccine
  • 4 tbsp unsalted butter
  • 4 cloves garlic, minced
  • Salt and pepper, to taste
  • Fresh parsley, chopped, for garnish
  • Parmesan cheese, grated, for serving (optional)

Directions

  1. Cook fettuccine according to package instructions. Reserve 1/2 cup pasta water, then drain and set aside.
  2. In a skillet over medium-high heat, melt 2 tbsp of butter. Season steak bites with salt and pepper, then add to skillet. Sear until browned, about 3-4 minutes. Remove from skillet and set aside.
  3. In the same skillet, melt remaining butter and sauté garlic until fragrant, about 30 seconds.
  4. Add the cooked fettuccine and steak bites back into the skillet, tossing to coat in the garlic butter. Add reserved pasta water as needed to create a silky sauce.
  5. Plate the dish, garnish with fresh parsley and Parmesan cheese if desired. Enjoy!

Recipe Notes

  • For a spicy kick, add red pepper flakes to the garlic butter sauce.
  • Feel free to include seasonal vegetables in the skillet for added nutrition.
  • Use high-quality steak for the best flavor and texture.