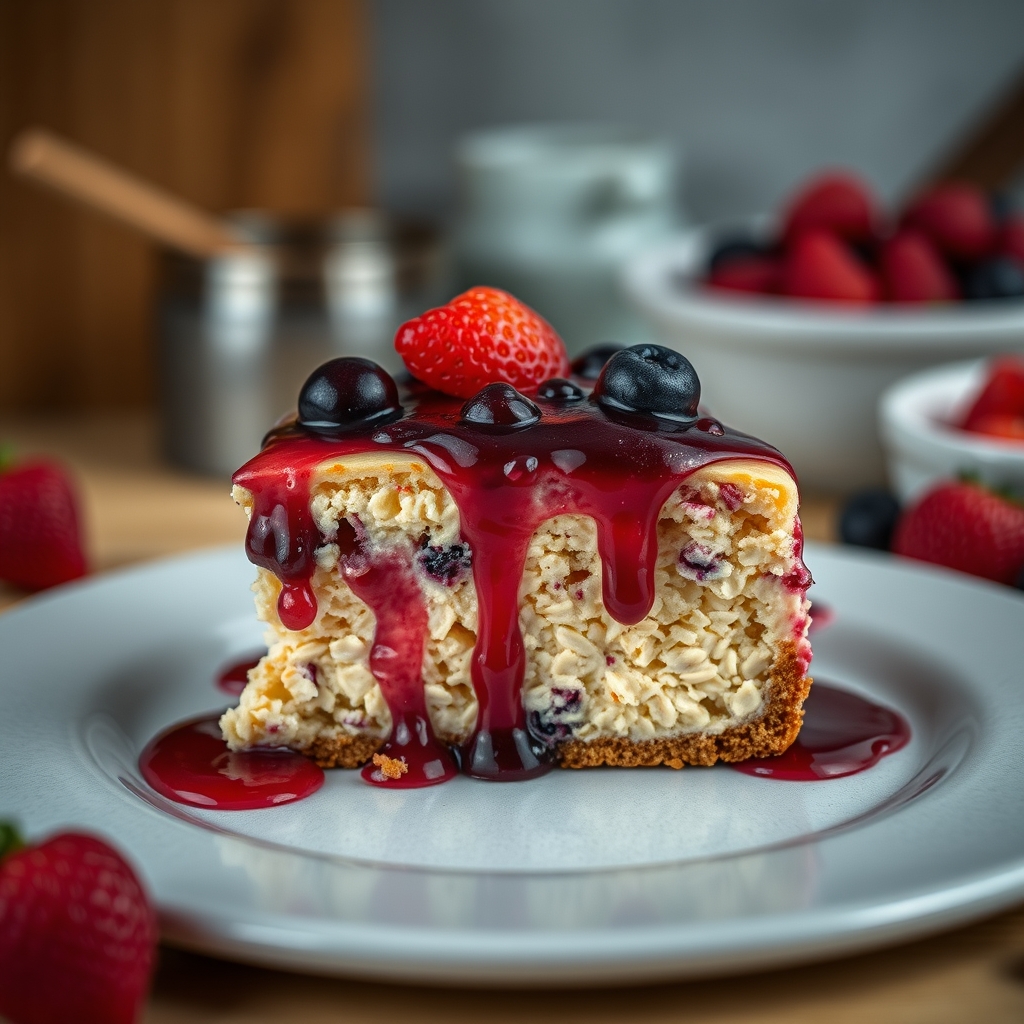
Custard Oats with Mixed Berry Compote
There’s something undeniably comforting about a warm bowl of creamy oats, especially when they’re infused with the rich, velvety texture of custard and topped with a vibrant mixed berry compote. This recipe for Custard Oats with Mixed Berry Compote is a breakfast dream—luxurious yet simple, nourishing yet indulgent. Whether you’re looking for a cozy morning meal or a wholesome dessert, this dish delivers on flavor, texture, and satisfaction. Let’s dive into why this recipe deserves a spot in your regular rotation.
Why You’ll Love This Recipe
First, let’s talk about what makes this recipe so special. If you’re on the fence about trying it, here are a few reasons why it’s bound to become a favorite:
- Creamy Meets Tangy: The luscious custard-infused oats pair perfectly with the bright, slightly tart mixed berry compote, creating a balanced bite every time.
- Nutritious and Satisfying: Packed with fiber from the oats and antioxidants from the berries, this dish keeps you full and energized without weighing you down.
- Meal Prep Friendly: Make a big batch ahead of time and enjoy effortless breakfasts all week long—just reheat and top with fresh compote.
- Versatile: Serve it warm for breakfast, chilled for a dessert-like treat, or even as a brunch showstopper when hosting guests.
- Kid-Approved: The natural sweetness of the berries and the creamy texture make it a hit with even the pickiest eaters.
Ingredients Breakdown
Understanding the ingredients is key to making this dish shine. Here’s what you’ll need and why each component matters:
- Rolled Oats: The base of the dish, providing a hearty texture and slow-releasing energy. Avoid quick oats for the best consistency.
- Milk (Dairy or Plant-Based): Adds creaminess and richness. Whole milk makes the custard extra luxurious, but almond or oat milk works beautifully for a dairy-free version.
- Egg Yolks: The secret to the custard-like texture, giving the oats a silky, pudding-like quality.
- Vanilla Extract: Enhances the warmth and depth of flavor in both the oats and compote.
- Mixed Berries (Strawberries, Blueberries, Raspberries): Brings natural sweetness, a pop of color, and a tangy contrast to the creamy oats.
- Maple Syrup or Honey: A touch of natural sweetness to balance the tartness of the berries.
- Lemon Juice: Brightens the compote and keeps the berries from becoming too cloying.
How to Make Custard Oats with Mixed Berry Compote
Now, let’s walk through the steps to create this delightful dish. Follow along for foolproof results:
- Prepare the Oats: In a medium saucepan, combine rolled oats and milk over medium heat. Stir occasionally until the mixture begins to simmer.
- Temper the Egg Yolks: In a separate bowl, whisk the egg yolks with a splash of milk. Slowly pour a small amount of the hot oat mixture into the yolks while whisking continuously to prevent scrambling.
- Combine and Thicken: Pour the tempered yolks back into the saucepan, stirring constantly. Cook for another 3-4 minutes until the oats thicken into a custard-like consistency. Remove from heat and stir in vanilla extract.
- Make the Compote: In another saucepan, combine mixed berries, maple syrup, and lemon juice. Cook over medium heat until the berries break down and the mixture thickens slightly, about 5-7 minutes.
- Serve: Spoon the custard oats into bowls and top generously with the warm mixed berry compote. Add a drizzle of extra syrup or a sprinkle of nuts if desired.
Pro Tips for the Best Results
Want to take this recipe to the next level? Here are some insider secrets:
- Don’t Rush the Tempering: Adding the yolks too quickly can result in scrambled eggs. Take your time and whisk constantly.
- Use Frozen Berries: No fresh berries? Frozen work just as well and often have a more concentrated flavor.
- Toast the Oats: For an extra layer of nuttiness, toast the oats in a dry pan for a few minutes before adding the milk.
- Chill for Dessert: Let the oats cool and set in the fridge for a chilled, pudding-like treat.
Variations and Substitutions
This recipe is wonderfully adaptable. Here are some ways to make it your own:
- Dairy-Free: Swap the milk for almond, coconut, or oat milk, and use a plant-based sweetener.
- Protein Boost: Stir in a scoop of vanilla protein powder or top with Greek yogurt.
- Spiced Version: Add cinnamon, nutmeg, or cardamom to the oats for a warm, aromatic twist.
- Different Fruits: Try peaches, apples, or even tropical fruits like mango for a seasonal spin.
What to Serve With It
While this dish is fantastic on its own, here are some pairings to round out your meal:
- Crunchy Toppings: Toasted nuts, granola, or coconut flakes add a satisfying contrast.
- Whipped Cream or Yogurt: A dollop of either enhances the creaminess.
- Side of Protein: Pair with scrambled eggs or turkey sausage for a heartier breakfast.
- Tea or Coffee: A warm cup of chai or a latte complements the flavors beautifully.
How to Store and Reheat
Got leftovers? Here’s how to keep them fresh:
- Refrigeration: Store oats and compote separately in airtight containers for up to 3 days.
- Reheating: Warm the oats in the microwave with a splash of milk to loosen the texture. The compote can be enjoyed cold or gently reheated.
- Freezing: Freeze the oats (without toppings) for up to a month. Thaw overnight in the fridge before reheating.
Frequently Asked Questions (FAQs)
Let’s tackle some common questions:
- Can I use steel-cut oats instead? Yes, but they’ll take longer to cook and may require more liquid. Adjust accordingly.
- Is there a way to make this without eggs? Absolutely! Skip the yolks and use cornstarch or chia seeds to thicken the oats instead.
- Can I make this recipe vegan? Yes—use plant-based milk, skip the egg yolks, and opt for maple syrup instead of honey.
- How can I make the compote thicker? Simmer it longer, or add a teaspoon of chia seeds to help thicken the juices.
Final Thoughts
Custard Oats with Mixed Berry Compote is more than just a breakfast—it’s a celebration of textures and flavors that feels like a hug in a bowl. Whether you’re savoring it on a slow weekend morning or meal-prepping for busy weekdays, this dish is sure to bring joy to your table. Give it a try, and don’t be afraid to make it your own with your favorite toppings or seasonal fruits. Happy cooking!
Print
Custard Oats with Mixed Berry Compote
Description
A creamy, comforting bowl of custard-infused oats topped with a vibrant mixed berry compote. Perfect for a cozy morning or a healthy dessert alternative.
Ingredients
For the Crust:
- For the custard oats:
- 1 cup rolled oats
- 2 cups milk (dairy or plant-based)
- 1 egg yolk
- 2 tbsp honey or maple syrup
- 1 tsp vanilla extract
- Pinch of salt
- For the mixed berry compote:
- 1 cup mixed berries (fresh or frozen)
- 1 tbsp honey or maple syrup
- 1 tsp lemon juice
- 1/2 tsp cornstarch (optional, for thickening)
- For serving:
- Extra berries
- Nuts or seeds (optional)
- Extra drizzle of honey (optional)
Instructions
1. Prepare the Crust:
- 1. In a saucepan, combine oats, milk, and salt. Bring to a gentle simmer over medium heat, stirring occasionally.
- 2. In a small bowl, whisk egg yolk with honey and vanilla. Temper by slowly adding 1/4 cup of the hot oat mixture while whisking constantly.
- 3. Pour the tempered egg mixture back into the saucepan, stirring continuously for 2-3 minutes until thickened to a custard-like consistency.
- 4. Remove from heat and cover to keep warm while preparing compote.
- 5. For the compote: In another saucepan, combine berries, honey, and lemon juice. Cook over medium heat until berries break down (5-7 minutes).
- 6. If using, mix cornstarch with 1 tsp water and stir into compote to thicken. Cook 1 more minute, then remove from heat.
- 7. Serve oats topped with warm compote, extra berries, and optional toppings.
Notes
For vegan version: Use plant milk, replace egg with 1 tbsp chia seeds soaked in 3 tbsp water, and use maple syrup. Compote can be made ahead and stored refrigerated for 3 days.