Delicious Strawberry Cheesecake Dump Cake: Easy Recipe Inside

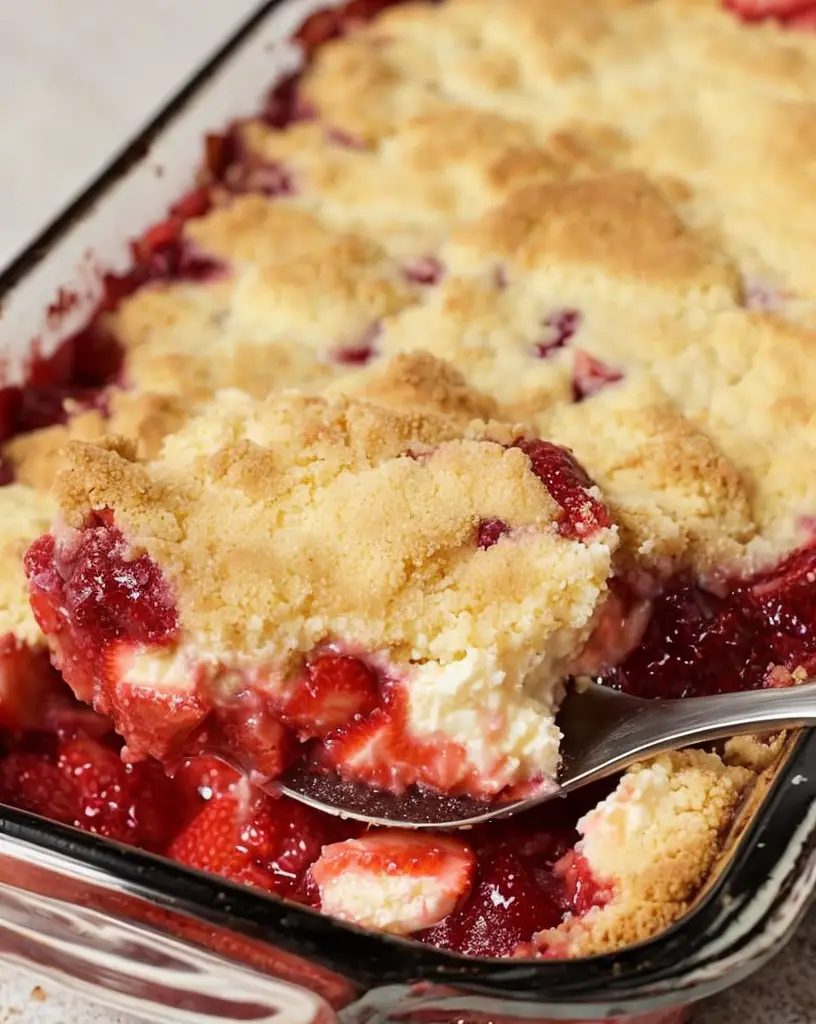
Delicious Strawberry Cheesecake Dump Cake: A Sweet Delight

⚖️
Difficulty
Easy

⏲️
Prep Time
15 mins

🕒
Cook Time
45 mins

⏱️
Total Time
60 mins

🍽️
Servings
8 servings

This Strawberry Cheesecake Dump Cake is the perfect blend of fresh strawberries and creamy cheesecake, topped with a buttery cake layer. It’s an effortless dessert that comes together quickly and relies on the delicious flavor of ripe strawberries to shine. Imagine digging into a warm slice of this creation, where each bite reveals a soft, sweet base complemented by the velvety texture of cheesecake filling. Whether you’re celebrating a special occasion or just satisfying a sweet tooth, this dessert will leave everyone asking for seconds.

Not only is this dessert delicious, but it’s also incredibly easy to make—no baking expertise is required. Just layer the ingredients, and let your oven do the magic. The delightful aroma of strawberries mingling with the warm cake fills your kitchen, setting the perfect ambiance for family time. This comforting dessert not only presents beautifully on the table but also brings warmth to the heart as you share it with loved ones.

Quick Recipe Highlights

  • Flavor Profile: The combination of tangy cream cheese and sweet strawberries creates a perfect flavor balance that’s both refreshing and indulgent.
  • Texture: Enjoy a delightful contrast between the fluffy cake layer on top and the creamy, rich cheesecake underneath.
  • Aroma: The sweet scent of strawberries baking alongside buttery cake is undeniably inviting.
  • Visual Appeal: This dessert boasts vibrant red strawberries peeking through a golden, crumbly layer, making it a stunning addition to any spread.
  • Skill Level Needed: This recipe is accessible for all skill levels—perfect for beginners or seasoned bakers looking for a quick win.
  • Special Equipment: All you need is a baking dish and a mixing bowl—no fancy gadgets required!

Recipe Overview

  • Difficulty Level: Making Strawberry Cheesecake Dump Cake is simple enough for anyone to master, as it involves minimal steps, which makes it a go-to recipe for potlucks and family gatherings.
  • Category: This dessert fits perfectly into the dessert category, fulfilling those sweet cravings while being versatile enough for any occasion.
  • Cuisine: While this dessert can be traced back to classic American desserts, its universal appeal makes it popular in various culinary traditions, merging the flavors of cheesecake and fruit.
  • Cost: Depending on seasonal availability, this recipe is quite economical, as strawberries and other ingredients can be bought at reasonable prices.
  • Season: The best time to enjoy this cake is during the strawberry season, which typically spans late spring and early summer, ensuring the fruits are ripe and bursting with flavor.
  • Occasion: Ideal for celebrations, family gatherings, and summer picnics, it’s a dessert that brings joy to any event.

Why You’ll Love This Recipe

The delightful taste and texture of Strawberry Cheesecake Dump Cake will make it a favorite among your family and friends. The creamy cheesecake layer pairs perfectly with the strawberry topping, creating a dessert that is both satisfying and refreshing. The ease of preparation and the minimal ingredients required make it a convenient choice for busy days or sudden cravings.

Not only is this dessert delicious, but it also has some nutritional advantages due to the fruit content. Strawberries are rich in vitamins and antioxidants, providing a healthier aspect to your dessert indulgence. When serving this cake, it has a social and entertaining value, sparking conversations and smiles, making it a hit at any gathering.

Cost-effectiveness is just another bonus, as you can prepare this delicious dessert without breaking the bank. Using in-season strawberries can greatly reduce costs while enhancing the flavor, making this dessert both accessible and approachable.

Historical Background and Cultural Significance

Strawberry cheesecake has a rich history that traces back to the ancient Greeks, who first created a cheese-based dessert. Over the centuries, recipes evolved, leading to the modern cheesecake we know today. The incorporation of strawberries adds a delightful twist and a refreshing element.

Culturally, this dessert is significant in many American households, often associated with summer barbecues and family reunions. The striking colors and flavors symbolize warmth, joy, and togetherness during these special occasions.

The evolution of the recipe has led to various adaptations and innovations, like the dump cake variety we have today, where the ingredients are layered and baked without the need for extensive preparation. This unique take has made it a beloved choice among home bakers looking for a quick and delicious dessert.

Regional variations are also quite common, with some regions adding their local fruits or flavors, showcasing how versatile and enjoyable this dessert can be.

Ingredient Deep Dive

  • Strawberries: Strawberries are not only a staple in desserts but also carry cultural significance as symbols of summer and warmth. Nutritionally, they are low in calories and rich in fiber, vitamins C and K, and antioxidants. When selecting strawberries, look for bright red, firm berries with no green or white patches. For storage, keep them unwashed in the refrigerator for up to a week. For an alternative, consider using other berries like blueberries or raspberries.
  • Cream Cheese: This key ingredient provides richness and creaminess to the cheesecake layer. Cream cheese has a long history in American desserts, often used in cheesecakes and frostings. It’s a good source of protein, but when choosing, go for blocks rather than spreads for a thicker consistency. Store cream cheese in the refrigerator and use within a few weeks of opening. For a lighter version, use low-fat or Neufchâtel cheese as a substitute.
  • Cake Mix: The versatility of cake mix allows for easy preparation and can drastically cut down baking time. Cake mixes have been popularized in the 20th century, making baking accessible to all. Opt for a yellow or white cake mix for best results in this recipe. Cake mixes can be stored in a cool, dry place for a long time, making them a pantry staple. You can also make your own cake mix from scratch using flour, sugar, baking powder, and salt.

Common Mistakes to Avoid

  • Using underripe or overripe strawberries can interfere with overall taste—choose strawberries that are fresh, bright, and firm.
  • Not letting the cream cheese soften before mixing can result in a lumpy texture; always bring it to room temperature.
  • Skipping the layer technique may cause thick spots instead of a cohesive texture, so ensure layers are well distributed.
  • Overmixing the batter can lead to dense rather than fluffy cake—mix just until incorporated.
  • Baking at incorrect temperatures can yield undesired results; always preheat your oven and check that it’s calibrated.
  • Not checking for doneness can leave you with undercooked layers; a toothpick should come out clean from the center when done.
  • Using a pan that is too small can cause spillage and even uneven baking; ensure you use the recommended size.
  • Not allowing the cake to cool slightly before serving can cause it to crumble or fall apart; let it set for at least 10 minutes.
  • Neglecting to double-check ingredient measurements can result in off flavors and textures; precision is key in baking.
  • Forgetting to prepare your pan can lead to sticking; make sure to grease it properly to allow for easy removal.

Essential Techniques

Using the layering technique is crucial in this dump cake to achieve the desired texture. Start by evenly distributing ingredients to ensure all flavors blend harmoniously. When mixing the cheesecake layer, it is essential to whip until smooth, incorporating enough air to keep it light. Remember to avoid overmixing, as this can lead to a denser texture.

Pay attention to oven temperature and time. This recipe requires patience; allow the cake to cool appropriately to maintain its shape. The visual cues, like a golden crust on top and bubbling around the edges, are indicators that your cake is ready to be taken out.

Pro Tips for Perfect Strawberry Cheesecake Dump Cake

– Always select the freshest strawberries to elevate the dessert’s flavor; visiting a local farmer’s market can yield the best picks.
– Enhance flavor by adding a teaspoon of vanilla extract to the cream cheese mixture for an extra layer of depth.
– Allow the dump cake to cool before serving for better slicing; this avoids a messy presentation.
– For added crunch, consider sprinkling toasted nuts over the top just before serving.
– If you enjoy a tart flavor, a drizzle of balsamic reduction over the final presentation can complement the dessert beautifully.
– Storing leftovers in an airtight container in the fridge will keep it fresh for several days.
– For variations, incorporate lemon zest into the cheesecake layer for a refreshing twist.
– Transform your dump cake into individual servings by layering it in jars for a beautiful presentation.

Variations and Adaptations

This Strawberry Cheesecake Dump Cake is wonderfully versatile. For regional variations, consider swapping strawberries with other summer fruits, such as peaches or cherries, to create a different flavor experience. Seasonal adaptations allow you to adjust the recipe according to what’s fresh, giving you creative leeway year-round.

Dietary modifications are also an excellent approach; for gluten-free options, use gluten-free cake mix, and for dairy-free versions, alternative cream cheeses can easily be swapped in. Flavor variations may include adding a pinch of cinnamon or almond extract to enhance the existing flavors.

You can also play around with texture; integrate crushed cookies or graham cracker crumbs into the topping before baking. For a sophisticated touch, serve the dessert in elegant dishware with a dollop of whipped cream on top.

Serving and Presentation Guide

Plating techniques for this dump cake can elevate your dessert experience. Consider using a large, flat spatula to serve pieces onto plates, showcasing the layers beautifully. Garnishing ideas might include fresh mint leaves or a dusting of powdered sugar for a visually appealing finish and enhanced flavor.

Traditional accompaniments include a scoop of vanilla ice cream or a drizzle of whipped cream. Modern serving suggestions could involve presenting in individual cups or jars to offer guests a personal touch. Temperature considerations are essential as well; serving the cake warm with cold toppings provides a delightful contrast.

Lastly, portion control tips suggest cutting slices into smaller sizes if served as part of a larger dessert table, allowing guests to sample various options.

Wine and Beverage Pairing

When pairing wine with Strawberry Cheesecake Dump Cake, consider a sweet dessert wine, such as Moscato or Riesling, that enhances the fruity flavors. If you prefer a non-alcoholic alternative, a refreshing strawberry lemonade or iced herbal tea can complement the dessert beautifully.

If coffee or tea is preferred, opt for a creamy cappuccino or a light chamomile tea, which pairs well with the rich cheesecake flavors. Temperature considerations play an essential role; beautifully chilled wines or warm beverages offer a delightful contrast to the cold dessert.

Serving suggestions include using vintage glassware for the wine or unique cups for the iced drinks, enhancing the overall dining experience.

Storage and Shelf Life

Proper storage methods are crucial to maintaining the quality of the Strawberry Cheesecake Dump Cake. After cooling, store it in an airtight container in the refrigerator to keep it fresh for up to 3-4 days. Ensure the cake is well-covered to prevent drying out and exposure to other fridge odors.

For reheating, gently warm individual slices in the microwave for a few seconds. The cake can also be frozen; wrap tightly in plastic wrap and then in aluminum foil, which keeps it fresh for up to 3 months. When thawing, leave it in the refrigerator overnight for best texture maintenance.

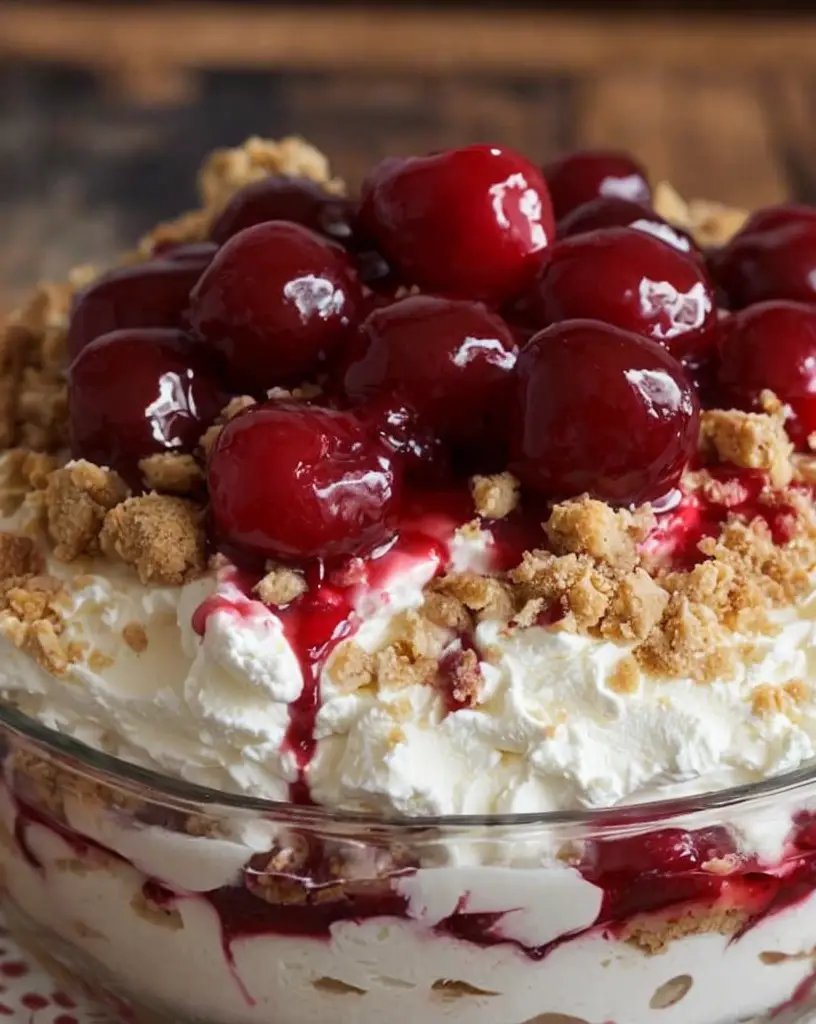
Watch for signs of spoilage, including a sour smell or mold growth, which could suggest the cheesecake layer has gone bad. If you didn’t eat it all before it loses quality, repurposing leftover cake into a trifle can be a delicious option.

Make Ahead Strategies

To streamline your preparation, consider making the strawberry topping ahead of time. Store it in the refrigerator, allowing the flavors to meld beautifully, while preparing the cheesecake layer can also be completed a day in advance. This minimizes the day-of workload significantly.

Assembly tips include layering the cake mix, strawberries, and cheesecake mixture just before baking to ensure freshness. Once baked, store the cake in the refrigerator until ready to serve, as it holds well overnight.

Quality impact assessment shows that fresh strawberries maintain their flavor and texture better if added just before baking. For reheating, ensure you bring it to room temperature before placing it in the oven to avoid shock.

Scaling Instructions

Scaling this recipe is easy and can accommodate various gatherings. For halving the recipe, simply divide each ingredient by two and use a smaller pan for baking. If doubling or tripling, increase the ingredients proportionately but consider larger baking sheets to prevent overflows.

Equipment adjustments may be necessary; larger mixers can accommodate larger batches more efficiently, which reduces preparation time. Timing modifications should account for additional cooking time, so check for doneness by inserting a toothpick into the center as baking times may vary.

Storage considerations become essential if you plan on making multiple batches—label containers to help keep track of each variation for best management.

Nutritional Deep Dive

Analyzing macro breakdown, this dessert includes healthy fats from cream cheese, carbohydrates from the cake mix, and natural sugars from strawberries. The creamy layer offers protein content, while the fruity topping provides fiber.

Micronutrient analysis reveals significant amounts of vitamins and antioxidants, particularly from strawberries, which contribute to heart health and improved immune function. Making dietary considerations easier, this dessert can be tweaked for specific dietary needs, maintaining delicious flavors while fulfilling nutritional requirements.

Portion analysis ensures you enjoy this dessert without guilt; a standard serving can easily fit within a balanced diet when paired thoughtfully with other meals. Weight management tips suggest enjoying smaller portions or adding fresh fruit to enhance volume without added calories.

Dietary Adaptations

This Strawberry Cheesecake Dump Cake can easily cater to various dietary restrictions. For gluten-free options, select a gluten-free cake mix and ensure all other ingredients are certified gluten-free. For dairy-free adaptations, non-dairy cream cheese can successfully replace traditional cream cheese, making it vegan-friendly.

Low-carb enthusiasts can substitute low-carb sweeteners for sugar and incorporate almond flour for the cake mix, creating a cake indulgence that aligns with keto requirements. For those on a paleo diet, using almond flour for the cake base can maintain the dessert’s integrity while keeping it compliant.

If you’re avoiding FODMAPs, replace strawberries with servings of blueberries and ensure any cream cheese substitutes fit your dietary profile, allowing for a delicious treat that considers individual dietary needs.

Troubleshooting Guide

Should you encounter texture issues, ensure cream cheese is blended until smooth before mixing with other ingredients. If you find that your cake is too dense, it might be due to overmixing—aim for gentle folding rather than vigorous stirring.

For flavor balance, taste the strawberry mixture before baking; if it seems bland, a touch of sugar or lemon juice can elevate flavors remarkably. Temperature problems arise when ovens are not calibrated properly—always invest in an oven thermometer for accuracy.

Ingredient substitutions can lead to unexpected results, so whenever trying a new ingredient, start with small batches to see how the flavors meld. Timing concerns during baking can often be solved with careful monitoring, ensuring doneness is achieved without burnt edges or undercooked centers.

Recipe Success Stories

Community feedback for this Strawberry Cheesecake Dump Cake is overwhelmingly positive, with readers praising its simplicity and delightful flavor. Sharing variations such as added spices or pecans gives others inspiration to try their unique spins on the classic dessert.

Adaptation stories highlight how readers have transformed the recipe to meet seasonal availability; many have had success using peaches in the summer or apples during fall.

Photography tips suggest presenting the dump cake on beautiful heirloom plates, with a scoop of ice cream, to create appetizing visuals that draw attention and compliments alike.

Frequently Asked Questions

Can I use frozen strawberries instead of fresh? Yes, you can use frozen strawberries, but they should be thawed and drained to prevent excess moisture from affecting the cake’s texture.

How do I know when the cake is done? The cake is done when golden brown and a toothpick inserted in the center comes out clean.

Can I make this dessert vegan? Absolutely! Use non-dairy cream cheese and a vegan cake mix for a delicious vegan-friendly option.

Is it okay to prepare this dessert the night before? Yes, this cake can be assembled in advance and baked the next day for convenience.

Can I reduce the sugar in this recipe? Yes, you can adjust the sugar to your taste, but be mindful that it may affect the final texture and sweetness.

How should I store leftover cake? Store leftovers in an airtight container in the refrigerator for up to four days for best freshness.

Can I add other fruits to the cake? Yes, feel free to add berries, peaches, or even tropical fruits to customize your flavor experience.

What kind of pan should I use? A 9×13-inch baking dish is recommended for even cooking.

Can I freeze the dump cake? Yes, you can freeze it once baked and cooled. Wrap tightly in plastic wrap before placing it in the freezer for optimal freshness.

How long will the cake last in the fridge? It should last about 3 to 4 days in the refrigerator but is best enjoyed fresh.

Additional Resources

To expand your dessert repertoire, explore related recipes like classic cheesecake, fruit cobbler, or easy dump cakes with other fruits. Technique guides on baking basics can enhance your skills and confidence in the kitchen, while ingredient-specific information will help you make the most out of fresh produce.

Investing in essential kitchen equipment can enhance your baking experience, so check out mixers or quality bakeware. Seasonal variations invite you to adjust ingredients based on what’s in season, delivering the freshest flavors to your table.

Join the Conversation

We encourage you to share your experiences with Strawberry Cheesecake Dump Cake! Snap pictures of your creations and share them on social media with relevant tags for a chance to connect with fellow bakers.

Leave your reviews and feedback, as community engagement enriches the recipe experience, bringing new adaptations and inspirations to light. Don’t hesitate to suggest your unique variations; sharing ideas helps everyone improve their baking journeys.

The Recipe

Strawberry Cheesecake Dump Cake

Serves: 8 servings

Prep Time: 15 mins

Cook Time: 45 mins

Total Time: 60 mins

Kitchen Equipment Needed

  • 9×13-inch baking dish
  • Mixing bowls
  • Measuring cups and spoons
  • Spatula

Ingredients

  • 1 pound fresh strawberries, hulled and sliced
  • 8 ounces cream cheese, softened
  • 1 cup sugar
  • 1 teaspoon vanilla extract
  • 1 box yellow cake mix
  • 3/4 cup unsalted butter, melted
  • 1/4 cup milk

Directions

  1. Preheat the oven to 350°F (175°C).
  2. Spread sliced strawberries evenly in the bottom of the baking dish.
  3. In a bowl, beat together cream cheese, sugar, and vanilla until smooth. Spread over the strawberries.
  4. In another bowl, combine the cake mix, melted butter, and milk. Pour this mixture over the cream cheese layer.
  5. Bake for 45 minutes, or until the top is golden brown and a toothpick comes out clean.
  6. Let cool for 10 minutes before serving.

Recipe Notes

  • Feel free to substitute other berries for a different flavor!
  • Add lemon zest for a slightly zesty kick.
  • Store leftovers in the refrigerator for up to 4 days.

Indulge in This Easy Cherry Cheesecake Fluff Recipe Today

Delectable Cherry Cheesecake Fluff: A No-Bake Delight

⚖️
Difficulty
Easy

⏲️
Prep Time
15 mins

🕒
Cook Time
0 mins

⏱️
Total Time
15 mins

🍽️
Servings
6 servings

Cherry Cheesecake Fluff is a luscious and creamy dessert that embodies the classic flavors of cherry cheesecake without all the fuss of baking. Imagine a light, airy mixture of cream cheese and whipped topping swirled with sweet cherry filling, all sitting atop a graham cracker crust that adds the perfect crunch. This delightful treat is ideal for summer gatherings, picnics, or whenever you crave a refreshing dessert that’s easy to make. The vibrant color and delicious flavor combination will wow your guests and leave them asking for seconds.

This recipe captures the essence of a rich cherry cheesecake in a fluffy, no-bake form. The tartness of the cherries perfectly complements the sweetness of the cream cheese mixture, creating a balanced flavor that is utterly enjoyable. With minimal effort required, you can whip this dessert together in just a few minutes, making it an excellent choice for both novice cooks and seasoned bakers who want something quick and delicious. Prepare yourself for a treat that is as pleasing to the eyes as it is to the palate!

Quick Recipe Highlights

  • Flavor Profile: Delightfully sweet with a perfect balance of tart cherries and creamy cheesecake.
  • Texture: Light and fluffy, combined with a crunchy graham cracker crust.
  • Aroma: Inviting notes of fresh cherries and creamy vanilla make this dessert irresistible.
  • Visual Appeal: The rich red of the cherry topping against the creamy filling is visually striking.
  • Skill Level Needed: This easy recipe requires no baking skills, making it perfect for beginners.
  • Special Equipment: A mixing bowl, whisk, and a dish for serving are all you need.

Recipe Overview

  • Difficulty Level: The Delectable Cherry Cheesecake Fluff is considered easy and requires minimal kitchen skills.
  • Category: This dessert fits perfectly as a summer treat or a satisfying end to any meal.
  • Cuisine: Inspired by classic American desserts, it features traditional flavors found in cheesecake recipes.
  • Cost: Ingredients are budget-friendly, typically costing around $10-$15 for the whole recipe.
  • Season: Best enjoyed during warmer months when cherries are in season and a refreshing dessert is ideal.
  • Occasion: Perfect for family gatherings, potluck dinners, or casual get-togethers.

Why You’ll Love This Recipe

The Delectable Cherry Cheesecake Fluff stands out thanks to its wonderfully appealing taste and texture. The fluffy cream cheese combines seamlessly with the sweet cherry topping to deliver a dessert that tastes indulgent yet remains light on the palate. Each bite reveals the creamy filling mixed with crunchy graham cracker bits and juicy cherries, inviting you to savor the intricacies of every layer.

Convenience is another excellent aspect of this recipe. With just a few simple steps, you can assemble this dessert without ever turning on the oven. This quality makes it a fantastic last-minute option for unexpected guests or those days when you just want to treat yourself without a significant commitment in the kitchen. Additionally, the quick prep time means you can have this dessert chilling while preparing your main course.

Nutritionally, this dessert can be made lighter by selecting low-fat cream cheese and whipped topping, allowing you to enjoy a sweet treat without the guilt. Plus, cherries are packed with antioxidants, making this creamy delight not just a tasty choice but a somewhat healthier one in moderation. It’s a dessert you can feel good about serving to friends and family.

When it comes to entertaining, the Delectable Cherry Cheesecake Fluff is not only a showstopper but also a conversation starter. Its beautiful presentation and inviting aroma draw guests in, making it an excellent choice for gatherings. Serving this fluff dessert demonstrates thoughtfulness in catering to diverse palates, ensuring that everyone can enjoy a piece of this delicious treat.

Finally, this recipe is incredibly cost-effective. The ingredients are usually staples in most kitchens and can often be found on sale, making this a budget-friendly dessert option. The ability to create such a delightful and impressive dessert without breaking the bank is a huge plus for home cooks.

Historical Background and Cultural Significance

The origins of cheesecake can be traced back to ancient Greece, where the sweet dessert was made with cheese, flour, and honey. However, it is the American cheesecake that revolutionized how we see this dessert today, evolving into various styles and interpretations. The introduction of cream cheese in the 19th century marked a significant turn, leading to the rich and creamy texture we associate with cheesecake now.

Cheesecake has become an integral part of American culinary culture, especially during celebrations and holidays. It is often featured in family gatherings, birthdays, and holidays, symbolizing good luck and prosperity. Cherry topping, in particular, adds a touch of seasonal freshness, making it a favorite in summer months when cherries are at their peak.

As recipes for cheesecakes evolved, many variations emerged, including the fluff style, which focuses on lightness and ease of preparation. The Cherry Cheesecake Fluff is a contemporary twist that allows people to enjoy cheesecake flavors without the complicated process of baking a traditional cheesecake. This native adaptation speaks to the adaptability of culinary practices across cultures and generations.

Regional variations of cheesecake exist worldwide, from the Italian ricotta cheesecake to the Japanese cotton cheesecake, showcasing how this dessert has adapted to different cultures and tastes. The Cherry Cheesecake Fluff combines these influences, melding classic elements with modern convenience, making it accessible to new generations who enjoy experimenting in the kitchen.

Ingredient Deep Dive

Cherry Filling: Cherries have significant cultural and historical value, often celebrated in various traditions and cuisines. They are rich in vitamins and antioxidants, providing numerous health benefits, including reducing inflammation and promoting heart health. When selecting cherries, opt for bright, firm fruit with a sweet aroma. They can be stored in the fridge for up to a week, and if you need a substitute, canned cherries or cherry pie filling can work well.

Cream Cheese: This essential ingredient creates that creamy characteristic associated with cheesecakes. First developed in the United States in the late 19th century, cream cheese has become a staple in many desserts. It is high in fat but provides essential nutrients like calcium. When purchasing cream cheese, look for blocks without additives. Store it in the fridge, and if you’re avoiding dairy, vegan cream cheese is a wonderful substitute that mimics the texture and flavor.

Common Mistakes to Avoid

  • Using warm cream cheese: Always ensure cream cheese is at room temperature for the right consistency and smooth blending.
  • Not mixing enough: Insufficient mixing can lead to lumps in the fluff; beat until fully incorporated for smoothness.
  • Overwhipping the cream: Whipping cream too much can turn it into butter; stop when you achieve soft peaks.
  • Forgetting the crust: Always prepare the crust in advance to allow it to set and achieve the right texture.
  • Using too much cherry filling: While cherries add flavor, excessive filling can make the dessert runny; balance is key.
  • Skipping refrigeration: Refrigerate the fluff for at least 2 hours to develop flavor and ensure the right texture.
  • Not tasting: Always taste your mixture before assembling to ensure the flavor balance is to your liking.
  • Poor storage: Store leftovers in an airtight container to keep them fresh; avoid vacuum sealing as it can change the texture.

Essential Techniques

Mixing Ingredients: Mixing is crucial for achieving a light and airy texture. Start with soft cream cheese to prevent lumps and gradually fold in whipped cream for better incorporation. Watch for consistency and avoid overmixing to retain the fluffiness of your dessert.

Layering: Proper layering creates beautiful visual appeal and flavor balance. Alternate layers of crust, cheesecake filling, and cherry topping for a stunning effect. Gently spread each layer, ensuring even distribution to enhance the taste with each bite.

Pro Tips for Perfect Delectable Cherry Cheesecake Fluff

1. Experiment with different fruit toppings like blueberries or strawberries for a unique twist on the classic recipe.

2. For added flavor, consider mixing a teaspoon of almond extract into the cream cheese mixture.

3. Chill your mixing bowl and beaters before whipping cream for better volume and a fluffier texture.

4. Use a food processor to crush graham crackers for the crust for an even texture.

5. Feel free to add mini chocolate chips to the cream cheese mixture for a chocolate version.

6. Make it individual: Serve the fluff in small cups for parties; this makes for beautiful presentations.

7. Use fresh mint leaves as a garnish for a touch of elegance and freshness.

8. If you have leftovers, consider using them as a topping for pancakes or waffles the next morning!

Variations and Adaptations

Regional variations could feature different fruit toppings based on local availability—consider peach, raspberry, or blueberry fluff instead of cherry for unique flavor profiles. Seasonal adaptations include using pumpkin puree during fall or rich chocolate ganache during winter holidays, making this dessert adaptable year-round.

Dietary modifications can be made by using gluten-free graham crackers for a gluten-free dessert, or utilizing dairy-free cream cheese and whipped cream for a vegan version. Flavor variations are endless: add peanut butter for a nutty twist or caramel sauce for a decadent treat.

Texture modifications, such as mixing in crushed nuts for crunch or adjusting the cream-to-filling ratio, allow experimentation for different mouthfeels. Presentation alternatives include parfait-style layers in clear cups that show off the colors beautifully for entertaining.

Serving and Presentation Guide

For plating techniques, consider using a clear glass dish to showcase the beautiful layers of the cheesecake fluff. Garnish with fresh cherries and mint leaves for an added pop of color. Traditional accompaniments like whipped cream can enhance the dessert’s creamy texture, while drizzling chocolate sauce adds a luxurious touch.

Modern serving suggestions include individual-sized jars or cups for a trendy look. Ensure the temperature is well-cooled before serving for a refreshing treat, and portion control can be easily managed by serving in small glasses, ensuring everyone enjoys a treat without overindulgence.

Wine and Beverage Pairing

Pair your Delectable Cherry Cheesecake Fluff with a sweet Riesling or Moscato, which complements the cherry flavors beautifully. For a non-alcoholic alternative, consider sparkling water with a splash of cherry syrup for a refreshing drink. If you prefer coffee, a medium roast with smooth notes pairs perfectly to cut through the dessert’s richness.

Storage and Shelf Life

Store any leftovers covered tightly with plastic wrap in the refrigerator for up to 3 days. It is best served fresh, but if necessary, carefully transfer to an airtight container for storage. Ensure it is well-chilled before serving again to maintain flavor and texture, avoiding temperature-related spoilage.

Make Ahead Strategies

For a successful make-ahead dessert, prepare the whipped cream and cream cheese mixture the night before and store it in the refrigerator. Assemble the cherry topping on the day of serving to maintain the freshness of the cherries. This timeline can help simplify your hosting duties on the big day.

Scaling Instructions

To halve the recipe, simply divide all ingredient measurements by two, ensuring that the assembly technique remains the same. If you need to double or triple the recipe, utilize larger mixing bowls and make sure you have a larger dish for presentation. Keep an eye on chilling times, as larger quantities may require slightly longer to set properly.

Nutritional Deep Dive

The Delectable Cherry Cheesecake Fluff is rich in macros, providing a good balance of fats, carbohydrates, and proteins primarily from cream cheese and whipped topping. Each serving offers crucial micronutrients, including calcium from the cream and vitamin C from the cherries, which are essential for overall health benefits. Understanding portion sizes can help control calorie intake without sacrificing sweet indulgence.

Dietary Adaptations

To make this dessert gluten-free, use gluten-free graham crackers for the crust. For those who are dairy-free, consider using vegan cream cheese and coconut whipped topping, resulting in a delicious similar texture and flavor. A low-carb adaptation can replace sugar with a sugar substitute, adjusting the recipe for keto-friendly needs without sacrificing taste.

Troubleshooting Guide

If you find your cheesecake fluff too runny, ensure that the cream cheese is well-blended and the whipped cream remains fluffy to hold its structure. For flavor balance issues, try adding a little more sweetness or acidity from lemon juice for better taste. Additionally, if your filling is too thick, consider thinning it with a splash of milk until you achieve the desired consistency.

Recipe Success Stories

Community feedback has been overwhelmingly positive, with many people sharing their successful adaptations, such as incorporating different seasonal fruits and flavorings. Readers particularly enjoy how this dessert can be made with simple ingredients found around the house, making it accessible and adaptable for any family event or personal craving. Photography tips suggest focusing on natural light and vibrant contrast to showcase the beautiful layers of this fluff dessert, making it more appealing for social sharing.

Frequently Asked Questions

Can I make this dessert in advance? Absolutely! This fluff can be made a day ahead; just avoid adding the cherry topping until shortly before serving for the freshest taste.

How long can I keep leftovers? Leftovers can be kept in the fridge for about 3 days. Just ensure it’s covered to maintain freshness.

What if I don’t have graham crackers? You can substitute them with crumbled cookies or crushed nuts for a different flavor profile.

Can I substitute the cherries? Yes, any fruit topping works wonderfully, and you can even use canned or frozen fruit for convenience.

Is it suitable for gluten-free diets? Definitely! Just opt for gluten-free graham crackers for the crust.

What thickness should the cheesecake fluff be? The fluff should be light and airy, not overly dense. Whipped cream should be soft and just incorporated into the cream cheese.

What’s the best way to serve it? Serving it in individual cups or a big dish are both great methods; choose based on the occasion.

Can I freeze the cheesecake fluff? Freezing is not recommended due to the texture of the whipped cream. It’s best when fresh.

How can I adjust the sweetness? You can taste the mixture before adding the cherry topping, adjusting sweetness with sugar or sweeteners as needed.

What’s the best way to incorporate flavors? Mixing in extracts, like almond or vanilla, can elevate the flavors beautifully.

Additional Resources

For more delightful dessert recipes, check out our tutorials on making traditional cheesecakes, ingredient guides, or explore creative layering techniques that can enhance your dessert presentations. We also provide tips on selecting the freshest seasonal fruits to incorporate into your baking, ensuring your desserts are always flavorful and appealing.

Join the Conversation

We would love to hear your thoughts! Share your variations, photographs, or any cooking tips you developed while making this Delectable Cherry Cheesecake Fluff. Engage with us on social media to showcase your creations, join our community discussions about favorite recipes, and provide feedback on what you’d like to see more of in the future!

The Recipe

Delectable Cherry Cheesecake Fluff

Serves: 6 servings

Prep Time: 15 mins

Cook Time: 0 mins

Total Time: 15 mins

Kitchen Equipment Needed

  • Mixing bowls
  • Hand mixer or stand mixer
  • Measuring cups and spoons
  • Spatula
  • 9-inch pie dish or equivalent serving container

Ingredients

  • 1 package (8 oz) cream cheese, softened
  • 1 cup heavy whipping cream
  • 1 cup cherry pie filling
  • ½ cup powdered sugar
  • 1 tsp vanilla extract
  • 1 ½ cups graham cracker crumbs
  • ½ cup melted butter

Directions

  1. In a bowl, combine graham cracker crumbs and melted butter. Press into the bottom of the pie dish.
  2. In a separate bowl, beat cream cheese until smooth. Add powdered sugar and vanilla, mixing until blended.
  3. In another bowl, whip the heavy cream until soft peaks form. Gently fold into the cream cheese mixture.
  4. Spread the cheesecake filling over the crust in the pie dish evenly.
  5. Top with cherry pie filling, spreading it gently over the cheesecake layer.
  6. Refrigerate for at least 2 hours before serving to allow it to set properly.

Recipe Notes

  • Feel free to replace cherry pie filling with your favorite fruit topping.
  • This recipe can be made gluten-free by using gluten-free graham crackers.
  • For a richer flavor, you can add a touch of almond extract to the cream cheese mixture.
  • Keep leftovers in an airtight container in the refrigerator for up to three days.

Deliciously Quick Veggie Pancake Scramble for Healthy Breakfasts

Veggie Pancake Scramble: Quick & Nutritious!

⚖️
Difficulty
Easy

⏲️
Prep Time
10 mins

🕒
Cook Time
15 mins

⏱️
Total Time
25 mins

🍽️
Servings
4

Veggie Pancake Scramble is the perfect quick and nutritious meal to kick-start your day! Packed with vibrant vegetables and wholesome ingredients, this dish delivers a delightful mix of flavors and textures that will excite your palate. Imagine a hearty breakfast that is not only easy to prepare but also bursting with colors, from the rich orange of the carrots to the bright green of the spinach. This scramble brings everything you need in one pan, making it an excellent choice for busy mornings or lazy brunches.

As you take your first bite of this veggie pancake scramble, you’ll be greeted with a satisfying blend of fluffy pancake pieces scrambled with flavorful veggies. The crispy edges and soft centers create a complex mouthfeel that is both comforting and appetizing. The layers of flavor come together to make this dish a wholesome treat for the senses, filling you up while also nourishing your body.

Quick Recipe Highlights

  • Flavor Profile: The mix of bell peppers, onions, and herbs with fluffy pancake pieces creates a savory taste that’s perfectly balanced.
  • Texture: The soft pancake contrasts wonderfully with the slight crunch of the sautéed vegetables.
  • Aroma: As it cooks, the comforting scents of sautéed onions and fresh herbs waft through the kitchen, promising a delicious meal.
  • Visual Appeal: The colorful array of vegetables nestled in the golden pancake pieces not only looks inviting but also makes you eager to dig in.
  • Skill Level Needed: This recipe is beginner-friendly, perfect for those who want to whip up a nutritious breakfast without complex techniques.
  • Special Equipment: All you need is a non-stick skillet and a spatula to effortlessly make this delightful dish.

Recipe Overview

  • Difficulty Level: This veggie pancake scramble is classified as easy, making it suitable for cooks of all skill levels. Even if you’re new to cooking, you’ll find this recipe straightforward and quick.
  • Category: Ideal for breakfast or brunch, this recipe can be enjoyed any time of the day, making it both versatile and satisfying.
  • Cuisine: This dish draws inspiration from American breakfast traditions, particularly combining elements from pancakes and vegetable scrambles.
  • Cost: Economically priced, most ingredients are pantry staples, resulting in a dish that is budget-friendly without sacrificing flavor.
  • Season: Enjoy this meal year-round, as it allows for seasonal variations with fresh veggies available in each season.
  • Occasion: Perfect for a family breakfast, brunch gatherings, or even a quick weeknight dinner.

Why You’ll Love This Recipe

The taste and texture of the Veggie Pancake Scramble make it an irresistible choice for any meal. The combination of fluffy pancake pieces and tender vegetables gives a satisfying mouthfeel while tickling your taste buds. Whether you’re a fan of sweet or savory, this dish bridges the gap by being hearty and wholesome, yet light enough to leave you feeling energized.

Convenience is key, and the preparation of this recipe is a breeze. The simple ingredients come together quickly, making it perfect for those rushed mornings or simple weekday dinners. In just 25 minutes, you can have a delicious and nutritious meal ready to enjoy.

Nutritionally, this scramble is packed with vitamins and minerals thanks to the abundance of vegetables. With ingredients rich in fiber, this meal helps maintain digestive health while offering essential nutrients like Vitamin A and C. It’s a great way to incorporate more vegetables into your diet effortlessly.

Socially, the Veggie Pancake Scramble excels as an entertaining dish. It allows for personalization, encouraging friends and family to create their own versions. Set out an array of toppings and watch as everyone crafts their unique meal, fostering a fun communal experience.

Moreover, the affordability of this dish can’t be overstated. Utilizing leftover veggies or pantry staples, it delivers on health and flavor without breaking the bank. It’s a perfect budget recipe that doesn’t compromise on nutrition or enjoyment.

Historical Background and Cultural Significance

The origins of pancakes date back thousands of years, with variations found in cultures worldwide. Pancakes have morphed through the ages, adapting to regional ingredients and preferences. The Veggie Pancake Scramble draws from these time-honored traditions while incorporating fresh, local produce to create a modern version suitable for health-conscious eaters.

In many cultures, breakfast has always been an important meal, and the addition of nutritious vegetables to traditional pancake recipes reflects a growing awareness of health and wellness. This dish promotes a message of balance, showcasing how traditional recipes can evolve to meet contemporary nutritional demands.

Over time, pancakes have transitioned from being considered merely a sweet indulgence to a canvas for creativity, allowing cooks to experiment with various flavors. The Veggie Pancake Scramble exemplifies this evolution, providing a savory twist that is gaining popularity among health-conscious individuals.

Regional variations exist as families add their special touches, whether through specific spices, herbs, or seasonal vegetables. This adaptability offers a glimpse into local culinary traditions, making each cook’s version unique.

Ingredient Deep Dive

Vegetables: Vegetables play a crucial role in the Veggie Pancake Scramble, enhancing both nutrition and flavor. Loaded with vitamins, minerals, and fiber, veggies such as bell peppers and spinach contribute to overall health. When selecting fresh produce, look for bright, firm vegetables without blemishes. Roasting or sautéing these ingredients maximizes their flavor, making them essential to the success of this dish.

Flour: The foundation of the pancake comes from flour, a source of carbohydrates that provides energy. Whole wheat or gluten-free options can easily be substituted based on dietary preferences. It’s advisable to store flour in a cool, dry place to maintain its freshness. Be mindful of expiration dates, and remember that different types of flour can alter both taste and texture.

Common Mistakes to Avoid

  • Not preheating the skillet: Ensure the pan is adequately heated to get golden-brown pancakes that won’t stick.
  • Overmixing the batter: Mix until just combined; too much mixing can lead to tough pancakes.
  • Using the wrong pan: A non-stick skillet ensures easy flipping and cooking without burnt pieces.
  • Neglecting seasoning: Don’t forget to season your batter and veggies with salt and pepper for enhanced flavor.
  • Adding too much liquid: Adjusting for moisture is crucial; the batter should be thick enough to hold its shape.
  • Skipping resting time: Letting the batter rest allows for a better texture and fluffiness in the final product.
  • Using old produce: Freshness matters; wilted or aging vegetables compromise taste and nutrition.
  • Ignoring cooking temps: A medium heat setting ensures proper cooking without burning the pancakes.

Essential Techniques

To achieve perfectly fluffy pancakes, start by understanding the importance of ingredient proportions. Mastering pancake techniques ensures that your batter has the right consistency. Use the “just combine” rule while mixing to avoid overdevelopment of gluten.

Another key technique is the flipping process. Timing is critical; wait until bubbles form on the surface before flipping to ensure they cook evenly. If done correctly, they’ll puff beautifully, giving you that desired light and airy texture.

Pro Tips for Perfect Veggie Pancake Scramble

Use a variety of vegetables to enhance the flavor and nutritional value of your dish. Personalize your fluffy pancakes with seasonal veggies for freshness. Experiment with spices such as smoked paprika or garlic powder to elevate your flavor profile. For added protein, consider including scrambled eggs or tofu. Adjust the thickness of the batter according to your preference for denser or lighter pancakes. Always ensure to lightly oil your pan to avoid sticking while frying. Add fresh herbs at the last minute for a burst of flavor.

Variations and Adaptations

For a sweet variation, add shredded carrots or mashed bananas for a more dessert-like pancake. Season your sweetness with cinnamon or vanilla extract for extra depth of flavor.

Seasonal adaptations can be made to incorporate available produce like zucchini in the summer or pumpkin puree in the fall. For a low-carb approach, swap flour for almond or coconut flour, and serve with a creamy avocado sauce.

Introduce bold flavors by trying different herbs such as dill or cilantro in your mix. Texture modifications can be achieved by adding cooked quinoa or oats into your pancake batter. Finally, experiment with presentation styles; serve with a vibrant salsa or topped with poached eggs for visual appeal.

Serving and Presentation Guide

Plating techniques can play a big role in enhancing the dish’s appeal. Arrange your pancake scramble in a circular shape on the plate, allowing the colorful vegetables to show through. Garnish with fresh herbs or a drizzle of olive oil to add a finishing touch.

Consider accompanying your veggie pancake scramble with traditional sides like crispy bacon or a green salad for a balanced meal. Serve at a warm temperature to enhance the flavors, and keep portion control in mind by serving smaller amounts for a family style presentation.

Wine and Beverage Pairing

For wine pairing, a crisp Sauvignon Blanc complements the fresh flavors, while mimosa adds a delightful brunch touch. Non-alcoholic alternatives include invigorating herbal teas or sparkling water with lemon for a refreshing contrast.

If you’re enjoying this dish for breakfast, light coffee or a mildly scented tea can elevate your morning experience. Please pay attention to serving temperatures for beverages; portions should be chilled for refreshment.

Storage and Shelf Life

To store leftovers, keep your Veggie Pancake Scramble in an airtight container in the refrigerator for up to three days. For longer preservation, freezing is an option; simply store in a freezer-friendly bag for up to a month.

When reheating, ensure it is done consistently, either by using a microwave or skillet on low heat to avoid drying out. Check for signs of spoilage like unpleasant odors or changes in texture before consuming.

Make Ahead Strategies

Prep vegetables and batter the night before for easy assembly in the morning. Store them separately for optimal freshness, and combine them just before cooking.

Freezing individual portions can be handy; simply thaw and reheat when ready. Consider keeping additional garnishes on hand, like fresh herbs or avocado, to elevate the final dish just before serving.

Scaling Instructions

To halve the recipe, simply divide the ingredients in half, ensuring you adjust cooking times appropriately. For larger gatherings, consider doubling or tripling the recipe while also ensuring to use a larger pan or batch cooking method.

When scaling, ensure that your utensil sizes can accommodate increased quantities, such as larger mixing bowls for the batter. Keep in mind that cooking times may vary based on the volume of ingredients used.

Nutritional Deep Dive

A macro breakdown reveals a well-balanced dish providing protein from eggs (if added), fiber from vegetables, and carbohydrates from the pancake base. This balance contributes to sustained energy levels throughout your day.

Micronutrient analysis shows a rich offering of vitamins A and C, especially when using fresh vegetables, benefiting your immune system and eyesight. It’s a nutritious choice for those looking for healthy breakfast or lunch options.

Dietary considerations are important; this dish appeals to a wide audience including vegetarians and those looking to add more vegetables to their meals. Portion analysis indicates 4 servings, making it ideal for family or friend gatherings while being conducive to portion control.

Dietary Adaptations

For gluten-free options, substitute traditional flour with almond or rice flour. This maintains texture while accommodating dietary restrictions.

Dairy-free versions can easily replace milk with plant-based alternatives like almond milk or oat milk. For a vegan approach, swap eggs with a flaxseed mixture or omit them entirely.

Low-carb eaters can enjoy by using a lower-carb flour and focusing on veggie ratios, while those following paleo or keto diets can opt for ingredient adjustments that suit their specific requirements.

Troubleshooting Guide

Texture issues may arise; if pancakes are too dense, consider adding more liquid to the batter. For a flat pancake, ensure your baking powder is fresh to help lift the batter during cooking.

Flavor balance can be fixed by adjusting seasonings; if it tastes bland, a pinch more salt or fresh herbs can brighten the dish.

Temperature problems can be resolved by ensuring the skillet is sufficiently preheated before adding the batter to avoid soggy pancakes. If your pancakes are burning, lower your heat and monitor closely to prevent this while still achieving a golden finish.

Recipe Success Stories

Community feedback has shown this recipe to be a favorite among families. Readers often share their variations, such as adding unique spices or alternative vegetables to personalize their scramble.

Photography tips have encouraged others to showcase their versions, emphasizing the vibrant colors of the dish. These successes demonstrate the versatility and charm of the Veggie Pancake Scramble, making it a popular choice for conscious eaters.

Frequently Asked Questions

Can I freeze the Veggie Pancake Scramble?

Yes, you can freeze the pancake scramble for up to a month. Ensure it is stored in a freezer-friendly container and reheat thoroughly before serving.

What are the best vegetables to use?

Some great options include bell peppers, spinach, onions, zucchini, and tomatoes. Feel free to experiment based on your personal preferences.

How do I prevent the pancakes from sticking to the pan?

Make sure to use a non-stick skillet and heat it properly before adding the batter. A light coating of cooking spray or oil can also help.

Can I make this recipe vegan?

Absolutely! Substitute eggs with a flaxseed mixture or simply omit them for a delicious vegan-friendly scramble.

Is it possible to use leftover pancakes?

Yes! Chopped leftover pancakes can be incorporated into the scramble for a quick and easy meal with minimal waste.

How can I increase the protein content?

You can add scrambled eggs, tofu, or cooked beans to your Veggie Pancake Scramble to boost the protein content significantly.

What kitchen equipment do I need for this recipe?

A non-stick skillet and a spatula are essential for making this dish. You may also want measuring cups and spoons for accurate ingredient measurements.

Can I use different types of flour?

Yes! You can customize your pancakes using whole wheat flour, almond flour, or other gluten-free alternatives according to your dietary needs.

How do I store leftover Veggie Pancake Scramble?

Store leftovers in an airtight container in the refrigerator for up to three days or freeze them in single servings for longer shelf life.

What are some great toppings for this scramble?

Consider toppings such as avocado, salsa, fresh herbs, or a dollop of yogurt to enhance your Veggie Pancake Scramble experience.

Additional Resources

For those interested in expanding their cooking repertoire, consider exploring related recipes that incorporate similar principles, such as veggie fritters or breakfast wraps. Technique guides on flipping pancakes or basic veggie preparation can also enhance your culinary skills.

Ingredient recommendations might include tips on sourcing organic produce or trying seasonal varieties for the freshest flavor. Equipment recommendations can inspire confidence in choosing the right tools for successful meal preparation. Finally, explore seasonal variations to keep your meals exciting throughout the year.

Join the Conversation

We’d love to hear from you! Share your personal experiences and variations of the Veggie Pancake Scramble on social media platforms. Capture mouth-watering photographs of your dish and tag us to inspire others in the community.

Read through recipe reviews and consider contributing your own feedback—your suggestions could help others discover the joy of this delicious scramble! Engage with fellow cooking enthusiasts, and don’t hesitate to share your culinary journey and creativity.

The Recipe

Veggie Pancake Scramble

Serves: 4

Prep Time: 10 mins

Cook Time: 15 mins

Total Time: 25 mins

Kitchen Equipment Needed

  • Non-stick skillet
  • Spatula
  • Mixing bowl
  • Measuring cups and spoons

Ingredients

  • 1 cup all-purpose flour
  • 1 cup milk (or dairy-free alternative)
  • 2 large eggs
  • 1 cup mixed chopped vegetables (bell peppers, spinach, onions)
  • 2 tablespoons olive oil
  • 1 teaspoon baking powder
  • Salt and pepper to taste

Directions

  1. In a mixing bowl, combine flour, baking powder, salt, and pepper.
  2. Add milk and eggs, whisking until just combined.
  3. Stir in the chopped vegetables.
  4. Heat olive oil in a non-stick skillet over medium heat.
  5. Scoop batter into the skillet, forming pancakes based on desired size.
  6. Cook until bubbles form, then flip and cook until golden brown.
  7. Remove from heat and serve warm with your favorite toppings.

Recipe Notes

  • Feel free to replace vegetables based on your preferences or what is in season.
  • For a vegan version, consider using flax eggs and plant-based milk.
  • Adding cheese gives extra creaminess; feel free to sprinkle shredded cheese before flipping.

Delicious Crab and Shrimp Stuffed Bell Peppers Recipe

Crab and Shrimp Stuffed Bell Peppers: A Seafood Lover’s Delight

⚖️
Difficulty
Medium

⏲️
Prep Time
20 mins

🕒
Cook Time
25 mins

⏱️
Total Time
45 mins

🍽️
Servings
4

Crab and Shrimp Stuffed Bell Peppers are not just a dish; they are a culinary experience bursting with ocean-fresh flavors, making them an inviting center piece for any dinner table. Picture vibrant bell peppers, perfectly roasted, engulfing a savory filling of sweet crab meat and succulent shrimp, enhanced by a blend of spices that tantalizes your taste buds. With each bite, you can enjoy the harmony of the sea, wrapped in the delightful crunch of the peppers, elevating this recipe to gourmet status.

This incredible dish is perfect for both special occasions and casual gatherings. Its vivid presentation combines color and texture, making it a feast for the eyes as well as the palate. Whether you’re hosting friends or treating your family, these stuffed bell peppers are sure to leave a lasting impression, inviting each guest to take a bite of the ocean.

Quick Recipe Highlights

  • Flavor Profile: This dish combines the sweetness of crab and shrimp, seasoned to perfection, which pairs beautifully with the mild flavor of the bell peppers.
  • Texture: The stuffing provides a creamy texture from the cheese, while the bell pepper outer layer adds a satisfying crunch.
  • Aroma: A delightful aroma wafts through your kitchen as the peppers roast, filled with the inviting scents of garlic and fresh herbs.
  • Visual Appeal: The vibrant colors of the stuffed peppers make this dish visually stunning, perfect for impressing dinner guests.
  • Skill Level Needed: This recipe is moderately easy, suitable for home cooks looking to expand their culinary skills.
  • Special Equipment: You will need a baking dish and a skillet for cooking the filling.

Recipe Overview

  • Difficulty Level: Medium, as it requires multitasking between preparing the filling and roasting the peppers.
  • Category: Main Course, ideal for seafood lovers or those looking to introduce seafood into their diet.
  • Cuisine: American cuisine with a coastal twist, showcasing the use of local seafood for a hearty meal.
  • Cost: The ingredients range in price, with crab usually higher, but the dish remains cost-effective given its generous servings.
  • Season: Best enjoyed in warmer months when fresh seafood is readily available.
  • Occasion: Perfect for gatherings, family meals, or a cozy dinner party.

Why You’ll Love This Recipe

Every bite of these Crab and Shrimp Stuffed Bell Peppers provides a delightful balance of flavors and textures that will excite your palate and leave you craving more. With the sweetness of crab and lively shrimp, the flavor harmony elevates an ordinary meal into a gourmet experience. The addition of spices and herbs enriches the filling, making it both comforting and satisfying.

Convenience is another hallmark of this recipe. Preparing the filling can be done in advance, making it easy to pop the stuffed peppers into the oven just before serving. This means less time in the kitchen while ensuring that you can enjoy more time with your guests. Less kitchen chaos leads to a more relaxing dining experience—something everyone appreciates.

Nutritionally, this dish is a winner. Packed with proteins from the seafood and vitamins from the bell peppers, it’s a nutrient-dense option that satiates and nourishes without compromising on taste. Eating healthy doesn’t mean sticking to bland meals; this recipe brings joy back into your cooking.

Crab and Shrimp Stuffed Bell Peppers are excellent for gathering loved ones around the dinner table. The generous servings encourage sharing and conversation, making every meal a memorable occasion. Perfect for entertaining, they’re sure to impress both seafood aficionados and those new to the delights of shellfish.

Finally, this recipe stands out for its cost-effectiveness. While seafood might seem expensive, purchasing in bulk, or selecting frozen crab and shrimp can significantly reduce costs, allowing you to serve this exquisite dish without breaking the bank. This makes it accessible, delicious, and delightful.

Historical Background and Cultural Significance

Crab and Shrimp Stuffed Bell Peppers have their origins in coastal regions where seafood is abundant and celebrated. The innovative use of bell peppers as a vessel for holding flavorful fillings showcases the creativity of traditional American cuisine. This dish exemplifies the fusion of land and sea, creating a harmonious dining experience emblematic of coastal cooking.

In various cultures, stuffed vegetables are commonplace, with each region adding its flair. This recipe draws from the rich sea heritage, particularly prevalent in Southern culinary traditions where fresh, local seafood is a staple in home cooking. The blending of diverse ingredients reflects a culinary evolution that has made its way into contemporary American dishes.

As this dish evolved, so did the fillings; chefs began incorporating not just seafood, but grains and cheeses, making it adaptable to different tastes and dietary restrictions. Today, this recipe serves as a canvas for creativity, inviting variations that can reflect personal preferences or the availability of seasonal ingredients.

Within the dish, you can find regional variations that highlight local seafood, further deepening its cultural importance. In some southern states, the inclusion of shrimp and grits into the stuffing reflects a beloved local dish, demonstrating how Crab and Shrimp Stuffed Bell Peppers can showcase local culture while offering a taste of the ocean.

Ingredient Deep Dive

Bell Peppers
Bell peppers are not just colorful; they are an excellent source of vitamins A and C, contributing to overall health. They can be found in various colors, each offering a slightly different taste profile. When selecting bell peppers, choose firm, shiny ones with no blemishes for the best flavor and quality. Store them in the fridge to maintain freshness, and if you want to use different varieties, these can be substituted with other peppers like poblano or jalapeño for a spicy kick.

Crab Meat
Crab meat is a delicacy enjoyed around the world, rich in high-quality protein and omega-3 fatty acids. When purchasing crab, consider sustainability and opt for fresh or pasteurized crab meat for the best flavor. For storage, keep the crab meat in an airtight container in the fridge, and be mindful of the shelf life; it should be consumed shortly after opening. If you’re looking to save money or make substitutions, canned crab meat or imitation crab can work, although they will offer different textures and flavors.

Shrimp
Shrimp is a versatile ingredient that pairs well with many flavors, including the sweetness of crab. It is low-calorie yet packed with nutrients. Fresh shrimp should have a mild scent, and their shells should look clean and intact. For storage, ensure they’re kept cold and consumed within a couple of days or frozen for longer storage. Substituting shrimp can be done with other seafood such as lobster or a combination of fish if desired.

Common Mistakes to Avoid

  • Not seasoning enough: Ensure you taste the filling before stuffing the peppers to adjust the seasoning.
  • Overcooking the shrimp: Shrimp cooks quickly, so watch it closely to avoid a rubbery texture.
  • Under-roasting the peppers: To enhance their sweetness, roast the peppers until they are slightly charred.
  • Using too much liquid: Excess moisture can lead to soggy peppers; ensure the filling is not overly wet.
  • Skipping the cheese: Cheese adds creaminess and flavor; omitting it can make the dish taste flat.
  • Ignoring temperature: Serving the peppers hot ensures the best taste and texture; let them cool too long, and they can lose flavor.
  • Not covering the dish: Covering while baking helps retain moisture and prevents the filling from drying out during cooking.
  • Rushing the tin: Allow the dish to sit before serving; this helps the flavors meld together.

Essential Techniques

The first essential technique is the proper roasting of bell peppers. Roasting enhances their natural sweetness and provides a tender outer layer. To master this, preheat your oven and ensure the peppers are cut correctly to allow for even roasting. Avoid overcooking by checking them regularly for tenderness.

Another key technique is creating the filling. Start with the seafood—ensure it’s fresh and well-prepared. Gradually mix in your seasonings, breadcrumbs, and cheese. To avoid a filling that’s too wet or dry, consider adding ingredients in increments and tasting as you go for balance.

Pro Tips for Perfect Crab and Shrimp Stuffed Bell Peppers

1. Use fresh seafood for best flavor; opt for lump crab meat and large shrimp for superior texture and taste.
2. Pre-cook the filling slightly to meld flavors and enhance the final dish’s taste.
3. Mix in some herbs like parsley or dill for fresh notes that brighten the flavor.
4. For extra crunch, top with breadcrumbs or crushed crackers before baking.
5. Allow the dish to rest for a few minutes after baking, allowing the filling to settle and easier serve.
6. Experiment with different types of cheeses to discover your favorite combination.
7. Pre-roast the peppers slightly to reduce cook time during the final bake.
8. Consider using a variety of colored peppers for a more vibrant presentation.

Variations and Adaptations

For a spicy twist, consider using jalapeño peppers instead of bell peppers, creating a stunning contrast in heat and sweetness. You can also adapt the stuffing by adding seasonal vegetables like zucchini or corn for a fresh summer profile.

For those with dietary restrictions, try a gluten-free breadcrumb option or make it veggie-friendly by swapping the seafood for a hearty bean mixture. Experimenting with different types of cheese can also yield unique flavor combinations—feta for tang, or a smoky gouda can transform the taste.

Presentation can be modified by arranging the peppers on a bed of rice or quinoa, adding color and texture. This not only enhances the dish but can also make it more filling.

Serving and Presentation Guide

When plating your Crab and Shrimp Stuffed Bell Peppers, consider using a large platter to display them attractively. A drizzle of sauce or a sprinkle of fresh herbs can elevate the appearance. Fresh lemon wedges beside the peppers can add a dash of color and enhance flavor on the plate.

For garnishing, a light sprinkle of chopped parsley or chives on top lends freshness and color contrast. Serve with sides that compliment the seafood flavors, like a light salad or steamed vegetables, to create a wholesome meal.

Bear in mind temperature when serving; allow the stuffed peppers to cool slightly after baking, ensuring they are warm but not so hot they impede enjoyment. Portion control is key; these are rich little packages, so consider serving one pepper per person as an entrée, or slice them in half for a shared appetizer.

Wine and Beverage Pairing

Pair your Crab and Shrimp Stuffed Bell Peppers with a crisp white wine, like a Sauvignon Blanc or a light Pinot Grigio. These wines will complement the seafood without overwhelming it. For those preferring red wine, a light-bodied Pinot Noir can also work well.

If you’re looking for non-alcoholic options, a mocktail with citrus flavors like a lemonade spritzer can enhance the meal. Alternatively, sparkling water with a splash of fruit juice is refreshing alongside seafood. When it comes to tea, a light green or herbal tea can provide a soothing end after your sumptuous meal.

Storage and Shelf Life

To store leftover Crab and Shrimp Stuffed Bell Peppers, place them in an airtight container and refrigerate. They typically remain fresh for 3-4 days. When refrigerating, ensure that they cool to room temperature first to avoid condensation.

For reheating, use an oven to maintain the texture, but a microwave will work as well. Should you want to freeze them, make sure they are cooled completely, and store them in a freezer-safe container. They can be kept frozen for up to 2-3 months. When ready to eat, thaw overnight in the fridge before reheating to enjoy again.

Make Ahead Strategies

One effective strategy to save time is to prepare the filling in advance. You can make the seafood mixture a day before and store it in the refrigerator. On the day of serving, simply stuff the peppers and bake them for a quick meal.

If you prefer to prepare everything ahead of time, you can assemble the stuffed peppers entirely but keep them uncooked in the fridge. They can be cooked straight from the refrigerator—just add a few extra minutes to the baking time.

This meal maintains freshness well as a prepare-ahead option, allowing flavors to deepen overnight. However, avoid pre-cooking the peppers, as they can become soggy when reheated.

Scaling Instructions

To scale the recipe down, simply halve the ingredients while following the same proportions for filling and seasoning. For a larger gathering, multiplying the recipe is straightforward. Doubling or even tripling the filling mix is usually seamless as long as you have adequate cooking space.

Adjust cooking times accordingly—larger batches in the same dish may require additional baking time, while smaller portions could be ready sooner.

Always consider the size of your baking dish when strategizing for scaling; using multiple smaller dishes may yield even cooking results. Ensure proper storage practices for any filling that’s not used right away, to keep it fresh for later use.

Nutritional Deep Dive

Each serving of Crab and Shrimp Stuffed Bell Peppers is packed with protein, healthy fats, and essential vitamins. The rich crab and shrimp provide substantial protein while the peppers add fiber and Vitamin C, promoting digestive health and immune function.

In terms of micronutrient analysis, you’ll find healthy doses of selenium from the seafood, which is essential for thyroid health, alongside antioxidants from the bell peppers. This comprehensive blend fosters overall well-being and supports various nutritional needs.

When considering dietary balances, this dish aligns well with low-carb or high-protein dietary approaches, making it a well-rounded option for various eating plans without sacrificing flavor. Careful portioning allows for enjoyability without over-consuming calories, maintaining a healthy approach to meal enjoyment.

Dietary Adaptations

For a gluten-free version of the Crab and Shrimp Stuffed Bell Peppers, simply use gluten-free breadcrumbs or omit them altogether, relying on the seafood for flavor. Dairy-free adaptations can employ nut-based cheeses to replicate the creamy texture without the dairy.

For those following a vegan lifestyle, the seafood can be swapped with plant-based protein sources, such as chickpeas or lentils, creating a filling that aligns with vegan preferences. Low-carb diets can utilize cauliflower rice instead of breadcrumbs or reduce the quantity used to lessen overall carbohydrate intake.

You can also adapt the recipe for a paleo diet by eliminating any processed ingredients found in many breadcrumbs and using alternative vegetables as the base.

Troubleshooting Guide

If your stuffed peppers are soggy, ensure that your filling does not contain excessive moisture; ingredients like tomatoes or sauces might require draining before mixing. If you’re facing flavor balance issues, a sprinkle of salt or squeeze of lemon before serving can elevate flavors significantly.

For temperature problems, invest in an oven thermometer to ensure you’re cooking at the correct temperature and prevent undercooking or overcooking your peppers. Equally, consider the quality and freshness of your seafood – poor ingredients lead to poor outcomes.

Should equipment challenges arise, particularly with cooking times, remember that different ovens vary. Check your dish periodically and adjust timings as needed. Substitutions can alter the taste considerably, so use interface measurements to balance flavors correctly.

Recipe Success Stories

This dish has garnered rave reviews from community members, with many expressing their joy in cooking and sharing it with loved ones. Success stories reveal countless adaptations, from ingredient variations to unique spices, showcasing the creativity it inspires within home cooks.

Photos shared by readers reveal delectable variations, inspiring others to try their own renditions. Many have expressed satisfaction with how accommodating the recipe is towards dietary restrictions yet allowing each person to enjoy the dish collectively.

Community feedback has been instrumental in refining techniques and enhancing flavors, reinforcing the recipe’s flexibility. Readers have shared their tips on experimenting with seasonal ingredients like zucchini in summer or nuts for added texture.

Frequently Asked Questions

Can I use frozen seafood?
Absolutely! Frozen seafood works well for this dish, just be sure to thaw and drain excess moisture before using for the filling to avoid sogginess.

How do I prevent bell peppers from burning?
A good practice is to check on your peppers frequently as they roast. Covering them with foil for part of the cooking process can help in preventing burning while they soften.

Can I make this recipe ahead of time?
Yes! You can prepare the filling in advance or even assemble the entire dish, refrigerate, and bake it later for convenience.

What can I substitute for the crab?
If you cannot find crab, consider using imitation crab or an alternative seafood like salmon or even a plant-based protein for a vegan option.

How long do leftovers last?
Leftovers can be stored in the fridge for about 3-4 days. Ensure they are in an airtight container for best results.

Can I freeze stuffed bell peppers?
Yes! Just ensure they are well sealed and you can freeze them for 2-3 months. Allow them to thaw overnight before reheating.

Are these suitable for meal prep?
Yes! They are perfect for preparing in bulk, making them an easy and nutritious option for the week ahead.

Can I substitute other vegetables?
Definitely! Feel free to experiment with zucchini or eggplant as alternative vessels for stuffing.

Do I need to parboil the peppers first?
No, it’s not necessary. Baking them directly allows them to retain their structure and flavor beautifully.

What sides pair well with these peppers?
A light salad or steamed vegetables work well, complementing the seafood and keeping the meal balanced and bright.

Additional Resources

For those seeking related recipes, consider trying our Seafood Paella or a classic Shrimp Scampi as delightful options. Explore technique guides focusing on seafood preparation or variations on vegetable stuffing techniques to broaden your culinary repertoire.

Incorporating seasonal ingredients can enhance the dish, and considering equipment recommendations will simplify your cooking process. Understanding ingredient origins can further enrich your cooking experience, providing insight into how flavors combine harmoniously.

Join the Conversation

We encourage readers to share their experiences and adaptations of the Crab and Shrimp Stuffed Bell Peppers. Engage with us on social media platforms, showcasing your photography and sharing in the joy of cooking.

Your recipe reviews and suggestions inspire others, creating a community of shared tastes and flavors. Feel free to post your variations, as each has the potential to ignite creativity and spark new ideas in the kitchen.

The Recipe

Crab and Shrimp Stuffed Bell Peppers

Serves: 4

Prep Time: 20 mins

Cook Time: 25 mins

Total Time: 45 mins

Kitchen Equipment Needed

  • Baking dish
  • Skillet
  • Mixing bowls
  • Sharp knife
  • Cutting board

Ingredients

  • 4 large bell peppers
  • 1 cup lump crab meat
  • 1 cup cooked shrimp, chopped
  • 1 cup cooked rice
  • 1/2 cup breadcrumbs
  • 1/2 cup shredded cheese (your choice)
  • 2 tablespoons sour cream
  • 1 teaspoon garlic powder
  • Salt and pepper to taste
  • Fresh herbs for garnish (optional)

Directions

  1. Preheat the oven to 375°F (190°C).
  2. Cut the tops off the bell peppers and remove the seeds.
  3. In a skillet, combine crab meat, shrimp, rice, bread crumbs, cheese, sour cream, and seasonings. Mix well to combine.
  4. Stuff the bell peppers generously with the seafood mixture.
  5. Place the stuffed peppers upright in a baking dish. Cover with foil.
  6. Bake in the preheated oven for 25 minutes. Remove the foil for the last 10 minutes to allow the tops to brown.
  7. Serve warm, garnished with fresh herbs.

Recipe Notes

  • Feel free to adjust the seasonings to your taste.
  • For a spicier kick, add some chopped jalapeños to the filling.
  • This recipe is easily doubled for larger gatherings.
  • Store leftovers in an airtight container in the fridge for up to 4 days.

Mushroom Lasagna Recipe: A Warm and Cozy Comfort Dish

Mushroom Lasagna – A Cozy Comfort Dish

⚖️
Difficulty
Medium

⏲️
Prep Time
30 mins

🕒
Cook Time
1 hour

⏱️
Total Time
1 hour 30 mins

🍽️
Servings
6 servings

Mushroom lasagna is not just a meal; it’s an experience that wraps you in warmth and cozy flavors. The richness of the lasagna, layered with a delightful mix of mushrooms, cheese, and a savory marinara sauce, makes it a perfect dish for any occasion. Each bite offers a burst of earthy flavors from the mushrooms, balanced with the creaminess of the cheese, creating a symphony of tastes that will leave you craving more.

As you prepare this layered delight, the kitchen fills with an inviting aroma that promises comfort and satisfaction. The golden edges of the lasagna come out beautifully crisp from the oven, contrasting with the soft, gooey interior. Whether you’re cooking for a family dinner or a gathering with friends, this mushroom lasagna brings everyone together, offering a plateful of love and heartwarming taste.

Quick Recipe Highlights

  • Flavor Profile: The rich umami of mushrooms, combined with creamy ricotta and tangy marinara sauce, delivers a complex flavor that satisfies savory cravings.
  • Texture: Smooth ricotta layers meld with the chewy lasagna noodles, while sautéed mushrooms add a satisfying bite that enhances each mouthful.
  • Aroma: The dish emits a mouthwatering scent of roasted garlic, fresh herbs, and baked cheese, inviting everyone to the dinner table.
  • Visual Appeal: A golden-brown top with bubbling cheese and colorful layers creates a beautiful presentation that draws people in.
  • Skill Level Needed: While the steps are straightforward, some knife skills and familiarity with layering will elevate your dish.
  • Special Equipment: A large baking dish or lasagna pan is essential, alongside basic kitchen tools like a sauté pan and spatula.

Recipe Overview

  • Difficulty Level: This mushroom lasagna ranks as medium difficulty due to multiple components. However, each step is manageable, making it accessible for most home cooks.
  • Category: Ideal for lunch or dinner, this dish serves as the perfect weeknight meal or can be dressed up for special occasions.
  • Cuisine: Rooted in Italian traditions, this recipe showcases the versatility of mushrooms as a delicious meat alternative, suitable for vegetarians.
  • Cost: The ingredient cost is relatively budget-friendly, making mushroom lasagna a great option for feeding a crowd without breaking the bank.
  • Season: Though delicious year-round, this hearty dish is especially satisfying in the fall and winter, when cozy meals are most desired.
  • Occasion: Perfect for family gatherings, potlucks, or a dinner party, mushroom lasagna is a crowd-pleaser that can feed many.

Why You’ll Love This Recipe

The robust taste and texture of mushroom lasagna make it a standout dish that will have your taste buds singing. Each layer infuses the dish with rich flavors that give it a depth often missing from traditional lasagna. The mushrooms not only add to the flavor but also introduce a unique texture that keeps each bite interesting.

Convenience is another factor that enhances the appeal of this recipe. While it may take some time to assemble, you can prepare it in advance, saving you the rush during dinner prep. Simply reheat before serving, allowing the flavors to meld beautifully over time.

Nutritionally, mushroom lasagna offers a wholesome blend of ingredients. Mushrooms are low in calories yet rich in vitamins and minerals. Combined with the protein from cheese and the fiber from whole grain noodles, this dish provides a balanced meal.

Socially, this lasagna is built for sharing. Preparing a large tray means there will be plenty to go around for family and friends, making it a wonderful choice for social gatherings where conviviality is key.

Additionally, the cost-effectiveness of mushroom lasagna makes it readily accessible. With basic pantry staples and affordable veggies, you can create a nourishing meal without stretching your budget.

Historical Background and Cultural Significance

The origins of lasagna trace back to ancient Greece, but it has since evolved into a cherished Italian staple. Each region in Italy boasts its unique version, often influenced by local ingredients and traditions. The use of mushrooms adds a contemporary twist, reflecting vegetarian dietary trends while honoring classic roots.

In Italy, lasagna is more than a meal; it’s a tradition shared among families. During special occasions, including Sunday dinners and holidays, lasagna plays a central role, symbolizing the warmth of home-cooked meals and togetherness.

Over the years, lasagna has undergone remarkable transformations, with various iterations emerging that include an array of proteins and vegetables. The mushroom version highlights plant-based ingredients, appealing to vegetarian diets while still providing comfort and flavor.

Different regions also showcase variations in sauces and cheeses. While traditional recipes often rely on bechamel sauce or meat ragu, this mushroom lasagna exemplifies how the dish can be adapted to cater to changing palates and ingredients availability.

Ingredient Deep Dive

Mushrooms are a key ingredient in this dish, noted for their ability to absorb flavors. Rich in antioxidant properties, they support heart health and offer a variety of essential vitamins. Look for firm, fresh mushrooms, avoiding any with dark spots or an overly slimy texture. Store them in a paper bag in the refrigerator to maintain freshness. If you’re unable to find fresh mushrooms, consider dried or frozen options, though adjust your cooking process accordingly.

Lasagna noodles serve as the foundation, providing structural integrity to the dish. Choosing whole grain options increases the fiber content, making the dish healthier. Store these noodles in a cool, dry place, and ensure to cook them al dente for optimal texture. If gluten is a concern, look for gluten-free options, which are widely available and work just as well.

Cheese plays a significant role in adding creaminess and richness. Ricotta is traditionally used, though cottage cheese can be a useful substitution. When selecting cheese, opt for fresh, high-quality products, and store them in the refrigerator. Grated mozzarella or cheddar can also enhance the flavor profile dramatically.

Marinara sauce ties the layers together, providing a tangy bite that complements the earthy mushrooms. You can use store-bought versions for ease, but homemade sauces allow for personalized flavor adjustments. Always check the ingredients for added sugars or preservatives, aiming for natural options when possible.

Herbs and spices elevate the dish, with fresh basil and oregano adding aroma and flavor. Purchasing these fresh or dried ensures they pack a punch. When selecting herbs, look for vibrant greens with no wilting and store them accordingly.

Common Mistakes to Avoid

  • Overcooking the noodles: Lasagna noodles should be cooked al dente to prevent a mushy final product. Cooking them just before layering ensures they hold up well against moisture.
  • Skipping the rest period: Allow the lasagna to sit for at least 15 minutes after baking before cutting. This helps the layers set, making it much easier to serve neat portions.
  • Too much sauce: While it’s essential to layer ample sauce for flavor, too much can make the dish soggy. Strive for a balance to ensure firm layers.
  • Inadequate seasoning: Proper seasoning is key to enhancing the overall flavor of the lasagna. Taste your fillings and sauce as you prepare to ensure a well-rounded profile.
  • Neglecting cheese layers: Cheese is essential for that creamy, indulgent texture. Don’t skimp on cheese between layers; ensure a generous spread to achieve the desired richness.
  • Not using enough mushrooms: If you’re making a mushroom lasagna, ensure you have enough! Underusing mushrooms means missing out on flavor and texture.
  • Forgetting to cover while baking: Cover your lasagna with foil for at least the first part of cooking to avoid excessive browning of the top while allowing all components to cook through.
  • Ignoring ingredient freshness: Fresh ingredients enhance the flavors and textures of your dish. Always choose the freshest mushrooms, herbs, and cheeses for the best results.
  • Layering too thickly: Aim for even layers in your lasagna to prevent parts from being undercooked or overdone. Thin layers create a well-balanced dish.
  • Rushing the prep: Take your time when preparing each component. Rushed ingredient prep can lead to uneven cooking and a less flavorful final dish.

Essential Techniques

Proper layering is crucial for the success of your mushroom lasagna. To master this technique, ensure a balanced distribution of sauces, noodles, and fillings in each layer. Begin with a sauce base to prevent sticking, and alternate ingredients systematically for even cooking and flavor distribution. A common pitfall is uneven layering, leading to soggy bottoms or improperly cooked noodles.

Sautéing mushrooms before adding them to the lasagna enhances their flavor and reduces excess moisture. This technique allows the mushrooms to develop a rich, deep flavor and firm up in texture. Make sure to cook on medium heat until they are golden brown, as this caramelization plays a significant role in delivering a delicious taste.

Making homemade marinara sauce can elevate your dish substantially. By simmering fresh tomatoes, garlic, and herbs, you bring out the ingredients’ natural flavors, enhancing the overall quality. Look for signs of good sauce, such as a harmonious balance of sweetness and acidity.

Proper cheese filling preparation is important. Mixing ricotta with egg can help maintain the structure of the cheese layer, ensuring creamy results that solidify after baking. Keep an eye on how each component interacts during cooking, and adjust the seasoning accordingly for perfect balance.

Pro Tips for Perfect Mushroom Lasagna

Choose seasonal mushrooms for the best flavor. Varieties like shiitake, cremini, or portobello can offer different textures and enhancing the overall flavor depth. Mixing types can lead to a gourmet taste profile.

Experiment with herbs beyond essential Italian seasoning. Feel free to incorporate fresh thyme or rosemary to elevate the aromatic profile for an unforgettable dish. These herbs complement the fungi beautifully and lend complexity.

Don’t forget to liberally season your ricotta mixture with salt and pepper. Ensuring that every component is well-seasoned will lead to a layered dish that sings. Taste as you go to avoid ending up with bland layers.

Use high-quality cheese. The melt and stretch of the cheese can make a huge difference in the final outcome. Stick with fresh mozzarella or a blend that suits your flavor preferences.

For extra flavor, layer some sautéed garlic and onions into the mushroom mix. That extra touch can drastically enhance the depth of flavor in your lasagna, making it memorable.

Consider using a mix of fresh and dried herbs. Fresh basil can work wonders, but adding a pinch of dried versions like oregano can enhance the overall flavor complexity in the dish.

Allow your lasagna to rest for proper layering and ease of serving. A 15-minute rest period will make slicing ideal while keeping the layers intact.

Don’t hesitate to make lasagna ahead of time. Preparing it the day before and letting it sit in the fridge overnight can deepen the flavors, resulting in a fantastic dish ready to go for your gathering.

Variations and Adaptations

Regional variations can often inspire new twists on traditional mushroom lasagna. For example, a Mediterranean style might incorporate eggplant and zucchini, celebrating seasonal produce and providing different textures. If you’re aiming for a heartier dish, consider adding ground turkey or beef for a meatier lasagna while still featuring mushrooms.

When seasonal produce is available, adapt your lasagna to incorporate vegetables like spinach or roasted butternut squash. These additions not only enhance flavor but also boost nutritional value, making it more wholesome.

For those with dietary restrictions, mushroom lasagna can easily adapt. For a gluten-free option, use zucchini noodles or gluten-free lasagna sheets, allowing everyone to enjoy this dish without concern.

Experiment with different cheeses in the mixture. Try using goat cheese or feta for a tangy twist. If you’re looking for a dairy-free option, nut-based cheeses can offer surprising richness alongside your star ingredient.

Texture modifications can elevate the experience. Add crispy spinach or breadcrumbs on top for extra crunch. This contrast between soft and crispy can create a delightful mouthfeel.

To enhance presentation, consider layering mushrooms in eye-catching patterns or using firmer noodles for added structure. Glistening with cheeses and perfectly baked, your dish will stand out on the table.

Serving and Presentation Guide

Plating is essential for an inviting presentation, especially with lasagna. Use a large spatula to carefully lift portions, showcasing the beautiful layers as you transfer them to plates. Serve alongside a simple green salad for a balanced meal to complement the richness of the lasagna.

Garnishing ideas can make your dish pop. Fresh herbs, such as basil or parsley, sprinkled on top can provide vibrant color and freshness on each plate. You could also drizzle some high-quality olive oil before serving for extra flavor.

Traditionally, lasagna pairs well with aromatic garlic bread or a crisp Caesar salad. Modern interpretations often include lighter options like roasted vegetables, which enhance the meal without additional heaviness.

Temperature considerations are vital in optimal enjoyment. Serve mushroom lasagna warm, straight from the oven, for the best flavors and textures. The bubbling cheese and aromas will be more inviting when freshly baked.

For portion control, consider slicing into equal pieces before serving. This approach not only elevates presentation but also ensures everyone gets a fair share, right down to the last bite!

Wine and Beverage Pairing

Pair your mushroom lasagna with a medium-bodied red wine, such as Chianti or Pinot Noir. The full flavors of these wines complement the richness of the dish and enhance the earthy tones of the mushrooms.

For non-alcoholic alternatives, consider sparkling water with a slice of lemon or a rich, herbal iced tea. These refreshing options cleanse the palate while matching the flavors of the lasagna beautifully.

If coffee or tea is on the table, the earthy notes of a dark roast coffee can provide a fabulous contrast to the flavors in the lasagna. For tea lovers, a robust black tea blends well with the dish’s richness, creating a balanced dining experience.

When serving wine, keep it chilled to highlight refreshing notes alongside the hearty lasagna. Serve red wine at room temperature to enhance its flavors.

Storage and Shelf Life

When storing mushroom lasagna, cover it tightly with plastic wrap or aluminum foil to maintain freshness. Keep leftovers in the refrigerator for up to 3-5 days. Ensure the dish cools to room temperature before storing to maintain optimal texture.

Reheating should be done gently to prevent drying out. Use an oven set to approximately 350°F (175°C), covering with foil to preserve moisture while warming it through. Reheating in the microwave is also an option, but be cautious to not overcook.

For longer storage, freeze portions of lasagna in airtight containers. Freeze immediately to preserve its flavors, and it can last up to 2-3 months. Allow thawing overnight in the fridge before reheating for the best results.

Signs of spoilage include sour smells, discoloration, or changed texture. When in doubt, it’s best to err on the side of caution and discard any questionable leftovers.

Make Ahead Strategies

Planning ahead can greatly enhance your mushroom lasagna experience. Prepare the lasagna a day or two in advance and store it in the refrigerator until you’re ready to bake. This method allows flavors to meld beautifully, making each bite more delicious.

For optimal results, consider preparing components ahead of time. Sauté mushrooms and prepare cheese mixtures in advance to streamline the assembly process when you’re ready to layer.

If you bake the lasagna ahead, letting it sit and cool overnight helps develop the flavors before serving. Reheat when ready, ensuring the taste is just as rich as when it was freshly made.

For quality during storage, avoid adding too much sauce if you’re layering ahead of time, as that can lead to excess moisture. Keep sauces separate until it’s time to serve.

Adding fresh herbs right before serving adds a touch of brightness to the reheated dish. These herbs will capture the flavor better when added fresh, enhancing presentation and flavor.

Scaling Instructions

Consider halving the recipe for a smaller gathering or doubling it for a large crowd. Adjust cooking time accordingly, as larger pans may require additional baking time to ensure even cooking throughout.

When doubling or tripling, be cautious of your baking dish size. Investing in larger casseroles may be necessary to accommodate the increased quantities, which helps maintain even cooking.

Timing modifications are essential. Depending on the size of your dish, check for doneness a little earlier than the original recipe suggests. The structure may require more time, so keeping a close eye ensures optimal results.

For ingredient adjustments, maintain the ratios to ensure complex recipes, like lasagna, keep their integrity during scaling. Too much or too little of any ingredient can disrupt the overall balance of flavors.

Proper storage is also crucial in scaling up or down. Ensure airtight, separate containers for larger batches and clearly label them to help manage meal planning and prevent waste.

Nutritional Deep Dive

Examining the nutritional profile of mushroom lasagna reveals a well-rounded blend of macros. With a mix of carbohydrates from the noodles, protein from the cheese, and fiber from the mushrooms, it presents an energetic meal suitable for many lifestyles.

Mushrooms contribute unique health benefits, including immune-boosting properties and heart-healthy nutrients. The inclusion of whole grains increases the fiber content, aiding digestion and promoting satiety, making it suitable for balanced diets.

Calculating portion sizes is critical for weight management strategies. Aim for a standard-sized piece that allows you to enjoy this rich dish without overindulging. Proper portioning assists in maintaining mindful eating habits.

Lastly, consider dietary restrictions when discussing meals. With simple adaptations like using gluten-free noodles or plant-based cheese, mushroom lasagna can fit into various lifestyle choices while still being enjoyable.

Dietary Adaptations

For a gluten-free adaptation, use zucchini slices or gluten-free pasta sheets instead of traditional lasagna noodles. These alternatives maintain structure while catering to dietary requirements.

A dairy-free version can be achieved by using cashew cream or vegan cheese alternatives. These substitutions can provide a delightful creamy texture without the use of animal products, making it accessible for vegan diets.

For low-carb enthusiasts, courgette (zucchini) or eggplant can replace noodles. This adaptation reduces carb counts significantly while providing a unique flavor profile.

If you are following a keto diet, keep an eye on your sauces and cheese. Opt for lower-carb vegetables and rich cheeses to keep the meal within macro-friendly limits.

For paleo-friendly versions, focus on whole foods without grains or dairy. Almond flour for noodles or mushroom caps as layers can make for a deliciously satisfying dish that fits within paleo guidelines.

Troubleshooting Guide

If your lasagna turns out too watery, consider baking uncovered for the final 15 minutes to allow excess moisture to evaporate. Ensuring proper ingredient measurement and cooking methods can additionally counteract this common issue.

For uneven flavors, increase seasoning gradually. Tasting as you go allows you to find the right balance and integrate deeper flavors, creating a more satisfying meal overall.

Temperature problems can arise if your oven is not preheated adequately. Always ensure your oven reaches the desired temperature before placing your dish inside to guarantee even cooking and optimal tasting.

Ingredient substitutions can lead to unexpected results. Test new components in smaller batches first to identify how their flavors and textures will work in the dish overall.

If browning occurs too rapidly, cover the dish with aluminum foil. This method allows the dish to cook through while preventing the top from browning excessively.

Recipe Success Stories

Community feedback around this mushroom lasagna has proven overwhelmingly positive, with countless home cooks sharing their variations and successes. Substitutions with seasonal vegetables or additional cheeses have enriched their personal recipes, reminding everyone of the dish’s versatility.

Photographic showcases on social media reveal mouthwatering servings that bring to life the beauty of mushroom lasagna. Culinary creatives often share tips and ideas, inspiring new interpretations of the classic dish.

Readers have praised this recipe for its approachable nature, with many sharing their own adaptations for personal dietary choices. Each version highlights the adaptability, proving that lasagna can cater to diverse tastes and preferences.

The ease with which individuals can experiment with their variations speaks volumes about the original recipe’s success. It’s a reminder of how cooking can bring families and friends together in delightful celebrations of flavor.

Frequently Asked Questions

Can I prepare mushroom lasagna in advance?

Absolutely! You can prepare it the day before and store it in the refrigerator. Just reheat before serving for the best flavor.

What types of mushrooms work best in this recipe?

Common varieties like cremini and shiitake mushrooms are fantastic choices. Feel free to mix different types for a gourmet touch.

Can I freeze mushroom lasagna?

Yes, mushroom lasagna freezes well. Just ensure that it is tightly sealed and it can last for 2-3 months. Thaw in the fridge before reheating.

What can I substitute for ricotta cheese?

If you’re looking for alternatives, cottage cheese works well. For a dairy-free option, consider using cashew cream.

How can I enhance the flavor of my lasagna?

Adding sautéed garlic and herbs to your mushroom filling enhances flavor tremendously. Seasoning each component is key to great taste!

Is there a gluten-free option for this lasagna?

Absolutely! You can substitute zucchini slices or gluten-free lasagna noodles for a compliant option without compromising on flavor.

How can I avoid soggy layers?

Don’t over-saturate your layers with sauce, and cook your noodles al dente to maintain the proper structure and avoid moisture issues.

Can I add other veggies to the lasagna?

Yes! Additional vegetables like spinach, zucchini, or roasted red peppers can complement the mushrooms beautifully.

What’s the best way to reheat leftover mushroom lasagna?

Reheat in the oven at 350°F (175°C), covering with foil to keep moisture in. This method ensures even warming without drying out.

How long does mushroom lasagna last in the fridge?

Leftovers can be stored in the fridge for 3-5 days. Make sure to cover it to maintain freshness and prevent absorption of other flavors.

Additional Resources

For those interested in more culinary creations, check out our other delicious recipes featuring pasta and sauces. Engage with technique guides to refine your skills in layering and flavor balancing.

Learn more about mushroom varieties and their uses in various cuisines to broaden your culinary horizons. Our seasonal variation section also provides ideas to utilize the best of nature’s offerings throughout the year.

Equipping your kitchen with the right tools is essential for cooking success. Explore our recommended equipment for lasagna making, designed to enhance your experience and help you create flawless dishes every time.

Join the Conversation

We invite you to share your own mushroom lasagna creations on social media with us. Share your photography tips, variations, and any adaptations you’ve made with the original recipe!

Connect with our community to exchange ideas on cooking methods, ingredient substitutions, and experiences in the kitchen. The more we share, the more we can learn together!

The Recipe

Mushroom Lasagna

Serves: 6 servings

Prep Time: 30 mins

Cook Time: 1 hour

Total Time: 1 hour 30 mins

Kitchen Equipment Needed

  • Large baking dish or lasagna pan
  • Sauté pan
  • Spatula
  • Mixing bowl
  • Measuring cups and spoons

Ingredients

  • 12 lasagna noodles
  • 2 cups ricotta cheese
  • 2 cups mozzarella cheese, shredded
  • 1 cup parmesan cheese, grated
  • 4 cups mushrooms, sliced (cremini and shiitake work well)
  • 2 cups marinara sauce
  • 2 tablespoons olive oil
  • 3 cloves garlic, minced
  • 1 teaspoon dried oregano
  • 1 teaspoon fresh basil, chopped
  • Salt and pepper to taste

Directions

  1. Preheat the oven to 375°F (190°C).
  2. In a sauté pan, heat olive oil over medium heat. Add garlic and mushrooms, sauté until mushrooms are tender and golden, about 5-7 minutes.
  3. In a mixing bowl, combine ricotta cheese, oregano, salt, and pepper. Mix well.
  4. Spread a thin layer of marinara sauce on the bottom of a large baking dish.
  5. Layer 4 lasagna noodles on top, followed by half the ricotta mixture, half the sautéed mushrooms, and a third of the mozzarella cheese.
  6. Add another layer of marinara sauce and repeat the layering process two more times.
  7. Add the final layer of noodles and cover with the remaining marinara sauce. Top with remaining mozzarella and parmesan cheese.
  8. Cover with foil and bake for 30 minutes. Remove foil and bake for an additional 15 minutes, or until the cheese is bubbly and golden brown.
  9. Let sit for 15 minutes before slicing and serving.

Recipe Notes

  • Feel free to use any type of cheese you prefer, like goat cheese or feta for a unique twist.
  • Vegetables such as spinach or bell peppers can be added for extra nutrients.
  • For a richer flavor, consider adding roasted garlic to the ricotta mixture.
  • To reduce calories, consider using low-fat cheese options or substituting with nut-based cheese for a dairy-free alternative.