Perfectly Juicy Oven-Baked Chicken Breast: A Simple Recipe Guide

Juicy Oven-Baked Chicken Breast Recipe: Perfectly Tender Every Time!

⚖️
Difficulty
Easy

⏲️
Prep Time
10 mins

🕒
Cook Time
30 mins

⏱️
Total Time
40 mins

🍽️
Servings
4

When it comes to easy, flavorful dinners, a juicy oven-baked chicken breast recipe is a go-to favorite. Not only is this dish incredibly simple to prepare, but it also promises a wonderfully moist and tender chicken experience that simply melts in your mouth. Imagine sinking your teeth into perfectly seasoned chicken, cooked to juicy perfection. Whether you are serving it on a weeknight or preparing it for a weekend gathering, this recipe is sure to delight your family and guests alike.

As the inviting aroma fills your kitchen, you’ll be tempted to dive straight into the deliciousness of this oven-baked chicken. The combination of herbs and spices harmonizes beautifully with the chicken, enhancing its natural flavors. Paired with your favorite sides, such as roasted vegetables or fluffy rice, this dish becomes a flavorful centerpiece that brings everyone together around the table. Let’s break down the highlights of this juicy oven-baked chicken breast recipe, ensuring your cooking adventure is as delightful as the meal itself.

Quick Recipe Highlights

  • Flavor Profile: This juicy oven-baked chicken breast is infused with a blend of savory herbs and spices that enhance its natural flavors while adding a touch of warmth and depth.
  • Texture: The chicken is tender, juicy, and incredibly succulent thanks to the baking method, which seals in moisture and flavors.
  • Aroma: As it cooks, your kitchen will be filled with mouthwatering notes of garlic, paprika, and rosemary that create a comforting and inviting atmosphere.
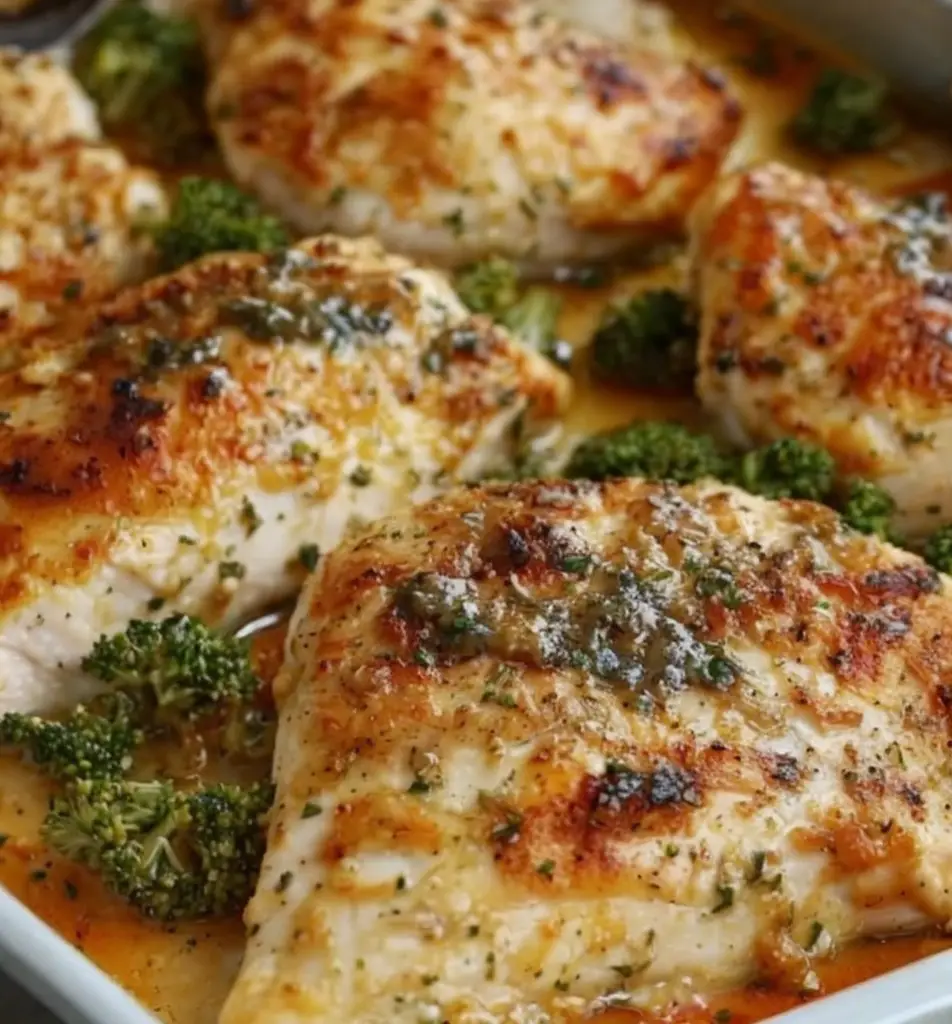
  • Visual Appeal: Golden brown on the outside with a juicy interior makes this chicken dish not only delicious but also aesthetically pleasing on the plate.
  • Skill Level Needed: Perfect for beginner cooks, this dish requires minimal preparation and straightforward cooking techniques.
  • Special Equipment: All you need is an oven, a baking dish, and basic kitchen tools to achieve this classic recipe.

Recipe Overview

  • Difficulty Level: This recipe is designed for those new to cooking and is easy to follow, making it perfect for busy weeknights or novice chefs looking to impress their guests.
  • Category: As a main dish, this juicy oven-baked chicken breast can easily fit into any meal plan, whether it’s a casual family dinner or a festive gathering.
  • Cuisine: Rooted in American culinary traditions, this recipe showcases accessible ingredients and flavors loved by all, highlighting the comfort of home-cooked meals.
  • Cost: With a focus on affordable ingredients, this recipe exemplifies budget-friendly nutrition that doesn’t compromise on taste.
  • Season: This chicken dish is perfect for any season, providing a hearty and satisfying meal year-round.
  • Occasion: Ideal for dinner parties, family gatherings, or meal prep, this recipe is versatile enough to suit any occasion.

Why You’ll Love This Recipe

The taste and texture of this juicy oven-baked chicken breast make each bite a delightful experience. The seasoning blend seeps deeply into the meat, offering an irresistible combination of flavors that complement the chicken’s natural juiciness. The tender texture invites you to savor each piece, creating a satisfying meal that leaves you wanting more.

In terms of convenience, this recipe is a breeze to prepare. With minimal prep work involved, you can quickly assemble the ingredients and let the oven do the rest. This hands-off approach allows you to focus on other tasks, whether attending to guests or preparing a side dish, making it an excellent choice for busy chefs.

From a nutritional standpoint, chicken breast is an excellent source of lean protein, offering health benefits without excess calories. Pairing it with colorful vegetables enhances the nutritional profile further, making it a balanced and wholesome option for any meal plan.

On a social level, sharing this dish with friends and family creates lasting memories. The inviting aroma and presentation are sure to spark conversations at the dining table, bringing everyone together to enjoy a delicious home-cooked meal.

Finally, with its accessibility and affordability, this juicy oven-baked chicken breast allows everyone to enjoy a high-quality dining experience at home. The ingredients are easy to find, making it simple to whip up a flavorful dinner on a budget.

Historical Background and Cultural Significance

The history of cooking chicken can be traced back centuries, with various cultures developing their own unique methods and flavors. In American cuisine, baking chicken in the oven has gained popularity for its simplicity and ability to yield juicy results. This method preserves the meat’s natural flavors while allowing for an array of seasoning combinations.

Culturally, chicken has held a significant role in both celebrations and everyday meals. It serves as a symbol of comfort and sustenance across various communities. This recipe represents how home cooking can unite families and enhance traditions through shared meals.

Over the years, the evolution of chicken preparation has showcased diverse influences and techniques. From Southern fried chicken to rotisserie preparations, baked chicken recipes have branched into many styles while maintaining their core appeal. This particular oven-baked approach highlights the ease and efficiency that appeals to time-crunched cooks.

Regionally, variations of this dish can be found everywhere, often adapted with local spices and ingredients. The versatility of chicken allows it to absorb unique tastes from different culinary backgrounds, making each version special and reflective of its origin.

Ingredient Deep Dive

Chicken Breast
Chicken breast is a staple in many cuisines due to its high protein content and low fat levels. Historically, it has been a favored choice among health-conscious individuals and families seeking nutritious meals. The meat’s versatility allows for numerous preparations, from grilling to roasting.

Nutritionally, chicken breast is packed with essential vitamins and minerals. It is an excellent source of niacin, which supports energy metabolism, and selenium, which plays a key role in immune function. When selecting chicken breasts, look for plump, firm pieces without any discoloration. Proper storage involves keeping chicken in the fridge for fresh use or freezing for extended shelf life. Substituting chicken breast can be done with turkey breast or other lean poultry options.

Olive Oil
Olive oil has been celebrated for its health benefits and rich flavor. Its significant role dates back to ancient civilizations, where it was used not only for cooking but also in religious rituals. Today, olive oil is widely recognized for its heart-healthy properties and is integral to the Mediterranean diet.

In terms of nutrition, it is high in monounsaturated fats, which help lower bad cholesterol levels while increasing good cholesterol. When selecting olive oil, look for extra virgin varieties that offer robust flavor and health benefits. Storage in a cool, dark place preserves its quality, while substituting with avocado oil can provide similar health advantages.

Common Mistakes to Avoid

  • Not preheating the oven: Always preheat your oven to ensure even cooking and proper browning of the chicken.
  • Overcooking the chicken: Use a meat thermometer to check for doneness. Chicken should reach an internal temperature of 165°F (75°C).
  • Skipping marination: Allowing the chicken to marinate enhances the flavor and moisture, so don’t skip this crucial step.
  • Using cold chicken from the fridge: Letting the chicken rest at room temperature for about 20-30 minutes before cooking helps it cook evenly.
  • Not using enough seasoning: Don’t be shy with herbs and spices; generous seasoning is key for flavor.
  • Overcrowding the baking dish: Ensure there is enough space between chicken pieces to allow for even cooking and browning.
  • Relying solely on time for cooking: Monitor your chicken’s internal temperature instead of relying on cooking time alone.
  • Neglecting to cover the chicken: Covering with foil during the first part of baking can retain moisture, preventing dryness.
  • Failing to rest the meat: Letting the chicken rest after cooking allows juices to redistribute, resulting in juicier meat.
  • Not preparing sides ahead of time: If you plan to serve sides, prep them while the chicken is cooking to minimize wait time.

Essential Techniques

Marination
Marinating chicken is an essential technique that infuses flavors deeply. It’s crucial because it enhances the overall taste and tenderizes the meat. To master marination, combine your favorite herbs, spices, and oils in a bag or bowl with the chicken. Be mindful of marinating times; while longer isn’t always better, 30 minutes to a few hours can significantly enhance flavor.

Baking
Baking chicken is a straightforward yet impactful technique. It’s important to maintain a consistent oven temperature for even cooking and browning. To master baking, place the chicken on a rack over a baking sheet to allow air circulation around the food. Look for visual cues like a golden-brown exterior and juices running clear, which indicate doneness.

Pro Tips for Perfect Juicy Oven-Baked Chicken Breast

1. Always allow the chicken to come to room temperature before cooking for even results.
2. Invest in a good meat thermometer to avoid overcooking.
3. Experiment with different marinades to keep the dish exciting.
4. Use a mix of spices; don’t hesitate to add your favorites for a personalized touch.
5. Rest the chicken for at least 5-10 minutes after baking to lock in moisture.
6. For an extra crispy skin, broil the chicken during the last few minutes of cooking.
7. Play with herbs and rubs to enhance flavor profiles fitting to the season.
8. Pair with a flavorful sauce or sprinkle fresh herbs just before serving for an appealing finish.

Variations and Adaptations

When it comes to regional variations, swapping in local spices or marinades can bring exciting flavors. For example, using a Cajun spice blend adds heat and complexity that invigorates this classic dish. In the fall, try marinating your chicken with apple cider vinegar and thyme for seasonal warmth.

Seasonal adaptations can also highlight fresh ingredients. Adding citrus zest during marination brightens the flavors in summer, while roasted garlic and rosemary add warmth ideal for colder months. Exploring dietary modifications, such as using gluten-free breadcrumbs for a crust, can cater to those with dietary restrictions.

Flavor variations are endless; consider adding smoked paprika for a deep, smoky flavor, or a spicy harissa paste for a modern twist. For texture modifications, try poultry tenderizers to enhance the chicken’s juiciness further. Lastly, presentation alternatives such as serving over a vibrant salad can elevate the meal’s visual appeal.

Serving and Presentation Guide

A well-plated meal can make all the difference. For plating, consider a simple presentation that highlights the chicken’s golden crust. Serve atop a bed of colorful sautéed vegetables or offer a sprinkle of fresh parsley for added color. Garnishing with a wedge of lemon not only adds brightness but provides a flavor boost for guests who enjoy a citrusy finish.

Pair your chicken with traditional sides, such as buttered rice or mashed potatoes, for a classic comfort meal. If you want modern serving options, consider presenting the chicken on individual plates with a colorful salad for a fresh, vibrant look. Be mindful of temperature; serving the chicken warm and allowing sides to come to room temperature enhances the dining experience.

Portion control becomes important as well; aim for balanced servings that don’t overwhelm the plate, encouraging guests to enjoy multiple courses without feeling stuffed.

Wine and Beverage Pairing

For wine pairings, a chilled glass of Chardonnay complements this juicy oven-baked chicken breast beautifully, highlighting its flavors without overpowering. A light Pinot Noir also works well for those who prefer red wine, bringing fruit notes to the meal.

For non-alcoholic options, herbal iced tea or a sparkling water with lemon adds a refreshing touch that doesn’t distract from the dish. If you enjoy coffee or tea, a lighter brew can cleanse the palate without overshadowing the meal’s flavors.

Temperature is key with drinks; serve whites chilled and reds slightly below room temperature for the best tasting experience. Always consider guest preferences and offer a selection to ensure everyone has something delightful to enjoy.

Storage and Shelf Life

After enjoying your juicy oven-baked chicken, proper storage is essential. Store any leftovers in airtight containers in the refrigerator for up to four days. If you plan to keep them longer, consider freezing, which can extend their shelf life to about three months.

Temperature regulations are crucial; ensure the chicken is cooled to room temperature before storing to prevent condensation and potential spoilage. Choosing glass containers can help avoid plastic chemicals and keep your food fresh.

Keep an eye out for signs of spoilage, such as an off smell or unusual texture, before consuming leftovers. When reheating, use an oven or microwave until the internal temperature reaches 165°F (75°C), ensuring it’s safe and thoroughly warmed. Freezing guidelines should include labeling containers with dates for easy tracking.

Make Ahead Strategies

For planning ahead, you can marinate the chicken up to 24 hours in advance, enhancing flavors while saving time on cooking day. Prepare your sides earlier in the day to allow for a streamlined cooking process in the evening.

If you’re preparing multiple meals, consider cutting and pre-portioning chicken breasts for easy access later. This allows for quick meals throughout the week. Regarding quality, avoiding prolonged marinating prevents degradation while still amplifying taste.

Lastly, during reheating, feel free to add new elements such as fresh herbs or sauces to revive flavors and ensure a delicious dining experience.

Scaling Instructions

Scaling your recipe for larger gatherings or smaller servings is straightforward with this juicy oven-baked chicken breast recipe. To halve the recipe, simply reduce the number of chicken breasts and other ingredients by 50%.

When doubling or tripling the recipe, adjust your cooking times as larger batches may require additional baking time. Ensure your oven can accommodate larger pans while still allowing for air circulation.

Equipment adjustments like using multiple baking sheets may be necessary to prevent overcrowding, impacting cooking efficiency. For timing modifications, monitor each batch closely for doneness, as each oven may vary.

Finally, consider storage considerations for larger portions; use appropriately sized containers to maintain freshness during leftovers.

Nutritional Deep Dive

When analyzing the nutrition of this juicy oven-baked chicken breast, focus on macronutrients like protein, carbohydrates, and fats. Chicken breast is primarily composed of high-quality lean protein, averaging about 31 grams per 3-ounce serving with minimal fat content.

Micronutrient analysis highlights essential vitamins such as B6 and niacin, which support metabolism and promote energy production. Additionally, selenium, found in chicken, aids in antioxidant defenses within the body.

This dish offers numerous health benefits; the high protein content supports muscle maintenance and repair, particularly valuable for those pursuing active lifestyles. Pair it with nutrient-rich vegetables to enhance dietary considerations further.

Controlling portion sizes plays a critical role in weight management. A single serving of baked chicken can fit seamlessly into various diets while providing satiation without excessive calorie intake.

Dietary Adaptations

For those needing gluten-free options, ensure that any marinades or coatings used do not contain wheat products. You can easily substitute with gluten-free seasonings or flours.

Dairy-free adaptations also work well; if a recipe calls for butter, consider using olive oil or a dairy-free spread as alternatives to maintain moistness without burdening dietary needs.

Vegetarians can still capture the flavors of this dish using roasted tofu or tempeh marinated similarly to the chicken. Low-carb and keto enthusiasts can focus on reducing sugar in marinades while replacing starch-heavy sides with leafy greens.

Understanding individual dietary needs can enhance recipe adaptations; whether following paleo or low-FODMAP lifestyles, modifications can align with health goals while remaining delicious.

Troubleshooting Guide

For texture issues, overcooked chicken can result in dryness. To address this, ensure you are using a meat thermometer to avoid cooking beyond 165°F.

Flavor balance can be tricky; if your chicken turns out bland, consider adjusting your seasoning amounts and experimenting with different herbs.

Temperature problems may arise from uneven cooking; use a rotated baking method to ensure even heat distribution.

Equipment challenges, like not having the correct size pans, can impede your results; invest in quality bakeware to facilitate proper cooking.

Timing concerns can lead to undercooked chicken; always allow for adequate resting and marinating times to maximize flavors.

Recipe Success Stories

Community feedback on this juicy oven-baked chicken breast recipe showcases its universal appeal. Many have shared adaptation stories, illustrating the ease of adding different flavors to fit personal tastes.

Successes in the kitchen have inspired readers to post their variations, leading to a vibrant exchange of ideas and creativity in cooking.

Photography tips shared by the community emphasize the importance of natural lighting and garnishes to enhance visual presentation.

Engagement around this recipe helps in building connections, encouraging readers to share their culinary journeys and inspiring others to try the recipe at home.

Frequently Asked Questions

How do I prevent chicken from drying out in the oven?

To prevent chicken from drying out, ensure you do not overcook it. Use a meat thermometer to check for doneness and consider marinating the chicken to keep moisture locked in.

Can I freeze leftover cooked chicken?

Yes! Leftover cooked chicken can be frozen for about three months. Store it in airtight containers and ensure to label them with dates for easy tracking.

What can I do if my chicken breasts are really thick?

If your chicken breasts are particularly thick, consider pounding them to an even thickness for more uniform cooking. Alternatively, you can butterfly them for faster cooking.

Is it better to sear chicken before baking?

Searing chicken before baking can enhance the flavor and add a crispy exterior. However, it’s not necessary; baking alone can still yield juicy, delicious results.

Can I use frozen chicken breasts?

It’s best to thaw chicken breasts before cooking to ensure even cooking. However, if using frozen, increase the cooking time accordingly.

What sides pair well with this chicken recipe?

Great sides include roasted vegetables, mashed potatoes, or a fresh salad. Each of these adds a colorful, nutritious complement to the distinct flavors of baked chicken.

How long should I let chicken rest after baking?

Let chicken rest for at least 5-10 minutes after removing it from the oven. This allows the juices to redistribute, ensuring a tender, juicy bite.

Can I marinate the chicken overnight?

Yes, marinating overnight can enhance the flavors significantly. Just ensure you do not exceed more than 24 hours as it may change the chicken’s texture.

What if I don’t have all the spices listed?

You can be flexible with spices; substitute with what you have on hand, and don’t be afraid to get creative based on your taste preferences!

What is the best way to reheat leftover chicken?

The best way to reheat chicken is in the oven at a low temperature, around 350°F (175°C), to help retain its juiciness. Alternatively, a microwave can be used but may dry out the chicken.

Additional Resources

Explore related recipes on our blog, which offer delightful meal options for any occasion—from hearty casseroles to bright, fresh salads. For deeper insights into culinary techniques, check out our detailed guides on marinating and baking tips.

Additionally, find ingredient information to broaden your understanding and appreciation of the food you cook. When it comes to equipment recommendations, learn about the must-have tools for every kitchen, ensuring you can tackle any recipe with confidence.

Seasonal variations are also covered in our guides, helping you embrace fresh ingredients while updating favorite recipes for seasonal celebrations.

Join the Conversation

We invite you to share your experience with this juicy oven-baked chicken breast recipe! Post your photos and feedback on social media platforms, and don’t forget to tag us so your story can inspire other home chefs.

Photography tips for capturing food in its best light are welcomed—let’s help each other showcase the beauty of home cooking!

Your recipe reviews are invaluable, helping others find joy in cooking while opening avenues for community engagement. Please share your creative variations as you experiment, and let’s build a vibrant community centered around delicious meals together!

The Recipe

Juicy Oven-Baked Chicken Breast

Serves: 4

Prep Time: 10 mins

Cook Time: 30 mins

Total Time: 40 mins

Kitchen Equipment Needed

  • Baking dish
  • Meat thermometer
  • Plastic wrap or zip-top bags for marinating
  • Oven mitts
  • Cutting board
  • Knife

Ingredients

  • 4 boneless, skinless chicken breasts
  • 1/4 cup olive oil
  • 2 teaspoon garlic powder
  • 1 teaspoon paprika
  • 1 teaspoon onion powder
  • 1 teaspoon salt
  • 1/2 teaspoon pepper
  • 1 teaspoon dried rosemary

Directions

  1. Preheat the oven to 400°F (200°C).
  2. In a bowl, mix olive oil, garlic powder, paprika, onion powder, salt, pepper, and dried rosemary.
  3. Place the chicken breasts in a plastic bag or bowl, and pour the marinade over them. Seal the bag or cover the bowl, and refrigerate for at least 30 minutes (up to overnight).
  4. Remove the chicken breasts from the marinade and place them in a baking dish.
  5. Bake in the preheated oven for 25-30 minutes, or until the internal temperature reaches 165°F (75°C).
  6. Let the chicken rest for 5-10 minutes before slicing or serving.

Recipe Notes

  • Feel free to adjust the seasoning based on your preferences.
  • This chicken pairs incredibly well with roasted vegetables or a fresh salad.
  • For a different flavor profile, try adding lemon juice or zest to the marinade.

Indulge in This Gooey Chocolate Pecan Dream Cake Recipe

Gooey Chocolate Pecan Dream Cake Recipe: A Chocolate Lover’s Paradise

⚖️
Difficulty
Intermediate

⏲️
Prep Time
20 mins

🕒
Cook Time
40 mins

⏱️
Total Time
60 mins

🍽️
Servings
12 servings

Indulge your senses with this Gooey Chocolate Pecan Dream Cake Recipe, where rich chocolate combines with buttery pecans creating a symphony of flavors that will leave every chocolate lover breathless. This cake is not just a dessert; it’s an experience to savor. The melt-in-your-mouth chocolate ganache contrasts beautifully with the crunchy pecans, elevating this cake beyond the ordinary into the realm of the extraordinary. Perfect for special occasions or simply to treat yourself, this cake is guaranteed to impress your friends and family.

The texture of this Gooey Chocolate Pecan Dream Cake is what dreams are made of; it boasts a dense yet moist crumb that offers a rich chocolatey foundation. As you take your first bite, the fudgy layer gives way to the delightful crunch of toasted pecans, creating a balance that’s satisfying and indulgent. The sweet, nutty aroma that wafts through your kitchen while this cake is baking sets the stage for a mouthwatering dessert experience.

Quick Recipe Highlights

  • Flavor Profile: Rich chocolate with a hint of nuttiness from pecans creates a deep, satisfying taste.
  • Texture: Fudgy interior with a delightful crunch from the pecans offers a perfect bite.
  • Aroma: The combination of baking chocolate and toasted nuts fills your kitchen with warmth.
  • Visual Appeal: A glossy chocolate ganache drapes the cake, garnished with pecan halves for presentation.
  • Skill Level Needed: Intermediate level, with essential baking skills required for a perfect outcome.
  • Special Equipment: A springform pan helps achieve the desired texture and presentation.

Recipe Overview

  • Difficulty Level: This Gooey Chocolate Pecan Dream Cake requires intermediate baking skills, including mixing techniques and oven management to achieve the gooey center.
  • Category: This dessert fits perfectly into any gathering or special occasion, making it an excellent choice for potlucks or birthdays.
  • Cuisine: While primarily a Western dessert, it draws inspiration from classic Southern pecan pie, blending two beloved treats into one decadent dessert.
  • Cost: The main ingredients—chocolate, pecans, and pantry staples—come together to create a reasonably priced yet elegant dessert.
  • Season: Perfect for the cooler months when rich flavors come to life, though timeless enough to enjoy any time of year.
  • Occasion: Ideal for birthdays, holidays, or any celebration where you want to delight your guests with something unforgettable.

Why You’ll Love This Recipe

This Gooey Chocolate Pecan Dream Cake is a perfect blend of chocolate and nuts that creates a harmonious flavor experience that will leave your taste buds yearning for more. The intense chocolate pairs seamlessly with the buttery, toasted pecans, making it a crowd-pleasing dessert for gatherings. No matter what the occasion, this cake will be the star of the dessert table.

Convenience is another aspect of this recipe. With just a handful of ingredients and straightforward steps, you can whip up this dessert without spending hours in the kitchen. The aroma of baking chocolate combined with the toasty scent of pecans fills your home with warmth, allowing you to enjoy the process of baking as much as the final product.

Nutritionally, while indulgent, this cake does offer some benefits due to the presence of pecans. These nuts are rich in healthy fats and contain antioxidants, which helps to balance out the sweetness of the cake. Moreover, serving this cake can help promote social interactions as people gather around to enjoy a slice together.

Hosting a party or event? This cake is an excellent choice for entertaining. It not only tastes great but also looks beautiful, making it a visually stunning centerpiece on your dessert table. Your guests will talk about this cake long after they’ve left.

Finally, it’s worth mentioning that this Gooey Chocolate Pecan Dream Cake is cost-effective. Given that the ingredients are easily accessible and the serving yield is generous, it provides excellent value for the satisfaction it delivers, making it a smart choice for anyone looking to impress without breaking the bank.

Historical Background and Cultural Significance

The origins of chocolate cake can be traced back to the 18th century when chocolate was first introduced into European desserts. However, the fusion of chocolate with pecans reflects the Southern culinary tradition of using local ingredients. Pecan trees flourish in the Southern United States, making them a staple in desserts like pies and cakes.

Culturally, pecans are not just a ingredient; they embody the hospitality of Southern cuisine. They’re often used in gatherings and celebrations, reinforcing the idea that food brings people together. Pecan pie has been a hallmark dish of American Thanksgiving dinners, and this cake draws on that tradition, blending two beloved desserts into a single, impactful experience.

Over the years, this cake has evolved to cater to contemporary tastes, with various adaptations emerging, such as gluten-free versions and different chocolate bases. This evolution not only demonstrates the versatility of the recipe but also its enduring popularity among dessert enthusiasts.

Regional variations exist, with some using different types of nuts or adding unique spices, but the essence of the cake—being a rich, chocolatey delight—remains constant. This reflects a lovely adaptability that ensures everyone can enjoy a slice of this decadent dream.

Ingredient Deep Dive

– **Chocolate**: Chocolate brings its deep flavor and rich history, dating back to ancient Mesoamerican cultures where cacao was revered. Nutritionally, it is packed with antioxidants. When selecting chocolate for baking, opt for high-quality dark chocolate for richer flavor, and store it in a cool, dark place.

– **Pecans**: Pecan trees are native to North America and have significant cultural importance in Southern cuisine. They’re rich in monounsaturated fats and beneficial nutrients. When buying pecans, look for fresh, plump nuts, and store them in the refrigerator to maintain their crispness. If unavailable, walnuts can serve as a substitute.

Common Mistakes to Avoid

  • Not measuring ingredients accurately can lead to a dense or overly dry cake. Use the correct measuring tools for both wet and dry ingredients.
  • Overmixing the batter can introduce too much air, leading to a less fudgy texture; mix just until combined.
  • Skipping the cooling time before serving can result in a messy slice; let the cake cool adequately to set.
  • Using low-quality chocolate can significantly affect flavor; always choose quality chocolate for baking.
  • Not greasing the pan well enough can cause the cake to stick; ensure to use butter or parchment paper for easy removal.
  • Substituting ingredients without understanding their role can lead to unexpected results; stick to the recipe for best outcomes.
  • Opening the oven door too often can affect baking time; only open when necessary to check on your cake.
  • Serving the cake too warm can mask the flavors; wait until it has cooled before slicing and serving.

Essential Techniques

To achieve a perfect Gooey Chocolate Pecan Dream Cake, it’s essential to master the art of melting chocolate. This technique not only unlocks flavor but also ensures a smooth texture. Use a double boiler or microwave, stirring frequently, and take care to prevent any water from touching the chocolate, which will seize it up.

Proper mixing techniques are crucial for a consistent batter. Begin by creaming your sugar and butter until light and fluffy. This step helps incorporate air, resulting in a light cake. Add eggs one at a time, and be careful not to overmix once you add the dry ingredients. Look for visual cues such as a smooth, thick batter before pouring it into the pan.

Pro Tips for Perfect Gooey Chocolate Pecan Dream Cake

1. For added flavor, toast the pecans before adding them to the batter. This will enhance their nuttiness and bring out their natural oils.
2. Consider adding a splash of vanilla extract to the batter to elevate the cake’s flavor profile.
3. Use a kitchen thermometer to ensure you don’t overbake your cake; it should be gooey in the center, around 200°F.
4. If using store-bought chocolate, opt for semi-sweet for a balanced taste that adults and children will enjoy.
5. Experiment with adding a layer of caramel sauce between the cake and the ganache for an extra layer of richness.
6. Let the cake set in the fridge for a few hours after baking for easy slicing and a more defined texture.
7. Pair with fresh berries to contrast the rich chocolate flavor when serving.
8. Use a serrated knife to slice the cake; this will give you clean edges.

Variations and Adaptations

This Gooey Chocolate Pecan Dream Cake is versatile and can be adapted for various tastes and dietary needs. For a regional twist, try substituting pecans with hazelnuts or macadamia nuts, both of which render a unique flavor profile that’s equally decadent.

Seasonally, adjust your recipe by incorporating pumpkin puree for a fall-inspired version, bringing a warm spice to the cake alongside the chocolate. You can also enhance the texture by folding in some chocolate chips or differing nut varieties directly into the batter for added crunch.

Dietary modifications are easy; replace regular flour with almond flour for a gluten-free version or dairy-free chocolate for lactose-intolerant guests. For a healthier twist, use applesauce in place of some of the butter in your recipe.

Experiment with flavor variations such as adding orange zest for a citrusy zing or a splash of espresso for a mocha-flavored cake. Each addition accommodates different taste preferences while maintaining the essence of the original recipe.

Serving and Presentation Guide

The presentation of your Gooey Chocolate Pecan Dream Cake can elevate the entire dessert experience. For plating, consider using a cake stand that showcases the glossy ganache atop the cake. Garnish with a dusting of cocoa powder or powdered sugar for an elegant touch, and scatter some toasted pecans around the base for visual allure.

Drizzling chocolate sauce or caramel over each slice just before serving complements the presentation while enhancing taste. If desired, top with whipped cream or a scoop of vanilla ice cream alongside each slice for a delightful contrast in temperature and texture.

Serve at room temperature for the best taste; this allows the fudgy center to shine through. In terms of portion control, aim for slices that are sizable yet manageable, encouraging everyone to savor the flavor without overwhelming their palate.

Presenting the cake with seasonal fruits such as fresh raspberries or strawberries will not only enhance the visual appeal but also add a tart balance to the rich chocolate and pecan flavors in each bite.

Wine and Beverage Pairing

When selecting the perfect beverage to accompany your Gooey Chocolate Pecan Dream Cake, opt for a rich red wine like Cabernet Sauvignon or a sweet dessert wine such as Port. These wines bring out the deep chocolate flavors beautifully.

Non-alcoholic alternatives like rich hot chocolate or a creamy chai latte can enhance the cozy vibe when serving this cake. Consider pairing with a dark roast coffee, which balances the sweetness and complements the nuttiness of the pecans superbly.

Ensure that beverages are served at appropriate temperatures; wines chilled slightly and coffees served hot add an inviting touch to the overall experience. Creating a small beverage station alongside your dessert table can further enhance guest engagement and enjoyment.

Storage and Shelf Life

To preserve your Gooey Chocolate Pecan Dream Cake, store it in an airtight container at room temperature for up to three days. If you need to keep it longer, it can be refrigerated for up to a week.

For best results, wrap slices in plastic wrap to prevent drying, or consider freezing the cake. When freezing, ensure it is completely cool, slice it if preferred, and store in a freezer-safe container. The cake can be frozen for up to three months; simply thaw in the refrigerator when ready to serve.

Be mindful of signs of spoilage, including any off smells or changes in texture, particularly when left at room temperature for an extended time. Reheat individual slices in the microwave for about 15 seconds to bring back some of that gooey goodness before serving.

Make Ahead Strategies

If planning a gathering, consider making your Gooey Chocolate Pecan Dream Cake a day in advance. This will enhance the flavors while allowing you to relax on the day of the event. Make the cake and store it properly as described above; it can even taste better after resting as the flavors meld over time.

To streamline your baking process, you can prepare the ganache a day ahead and store it in the refrigerator. You’ll need to warm it slightly before using. If making the cake ahead, store it un-frosted until the day of serving to maintain texture and prevent drying.

When assembling, wait to garnish until just before serving to ensure freshness and aesthetic appeal. Adding fresh elements like whipped cream or edible flowers will significantly enhance the time you spend preparing for your event.

Scaling Instructions

If you plan on serving a larger crowd, doubling or tripling this Gooey Chocolate Pecan Dream Cake recipe is simple. Just ensure to adjust your baking time accordingly, as larger cakes may require extra time to set. Use larger baking pans and ensure the batter remains well-mixed for an even consistency.

When halving the recipe, use smaller pans to achieve similar results, and reduce baking time accordingly. Keep an eye on the cake as it bakes to avoid overcooking.

For best results, utilize a kitchen scale to ensure accurate ingredient measurements, particularly when scaling recipes up or down. Adjust any baking sheets or pans you use according to your adjustments to maintain effective cooking times.

Nutritional Deep Dive

In a single slice of Gooey Chocolate Pecan Dream Cake, you receive a balanced mix that can provide energy through carbohydrates while being rich in healthy fats from pecans. This cake typically contains several grams of protein per serving, depending on the specific ingredients used, making it a more filling dessert option.

A closer examination of micronutrients reveals valuable minerals such as magnesium, potassium, and iron predominantly from the chocolate and nuts. Each ingredient contributes to a better overall health profile, promoting heart health and digestion when enjoyed in moderation.

Weight management can be effectively managed by being conscious of portion sizes, as decadent desserts can easily lead to calorie overload. By serving smaller slices alongside fresh fruit or lighter accompaniments, you can maintain a balance between indulgence and dietary restraint.

Ultimately, while this treat should be savored, understanding its nutritional aspects can contribute to a more mindful dessert experience.

Dietary Adaptations

For those following a gluten-free diet, substituting all-purpose flour with almond flour or gluten-free flour blends will allow you to enjoy this cake without any issue. Ensure all other ingredients, like chocolate, are certified gluten-free.

Dairy-free variations can be easily achieved by using plant-based butter and dairy-free chocolate. This adaptation allows those with lactose intolerance or vegan preferences to indulge in this incredible dessert without compromising flavor.

For a low-carb or keto variation, consider using almond flour or coconut flour and a low-carb sweetener like erythritol or stevia, producing a cake that’s satisfying without the added sugars.

Paleo enthusiasts can enjoy this chocolate cake by swapping traditional chocolate with unsweetened cocoa and using honey or maple syrup for sweetness while still delivering on that rich chocolate essence everyone loves.

This cake can also accommodate vegan diets by substituting eggs with flaxseed meal or applesauce, maintaining a moist and gooey texture while remaining entirely plant-based.

Troubleshooting Guide

If you find that your cake is too dry, it may have been baked too long. Use a toothpick to check for doneness; it should come out slightly sticky, indicating that gooeyness you want.

For overly gooey centers that don’t set, try lowering your oven temperature and extending the cooking time. This adjustment allows the cake to cook through without burning the edges.

If the flavor isn’t as rich as expected, consider increasing the quality of chocolate used or adding an extra pinch of salt to balance the sweetness.

Common equipment challenges such as the springform pan leaking can be avoided by wrapping the base in aluminum foil or placing it on a baking sheet to catch drips.

Ingredient substitutions can alter the desired outcome; ensure substitutes have similar characteristics in flavor and consistency to maintain the integrity of the recipe.

Timing concerns are significant; always set a timer to avoid checking prematurely or leaving for too long, which can affect the final texture.

Recipe Success Stories

Community feedback on this recipe often highlights the delightful balance of flavors and the perfect gooeyness that leaves them craving more. Many readers have shared their adaptations, creating variations that suit different dietary restrictions while maintaining the essence of the cake.

Variations shared by the community include adding bananas or peanut butter for a fun twist; these adaptations illustrate the versatility of this recipe while fostering creativity in the kitchen.

Photography tips also frequently circulate, encouraging home bakers to capture the melty ganache and beautifully arranged slices, enticing others to try their hand at recreating this cake.

Readers also rave about the presentation, encouraging new bakers to include whipped cream and fruit garnishes that add color and contrast, enhancing the dining experience for their guests.

Overall, the stories of how this cake has brought families and friends together during celebrations further emphasize its irresistible charm and community significance.

Frequently Asked Questions

Can I make this cake gluten-free?

Absolutely! Use gluten-free all-purpose flour as a substitute for regular flour to ensure a delicious outcome without the gluten.

How do I store leftovers?

Store any leftover cake in an airtight container at room temperature for up to three days or refrigerate for a week.

Can I freeze this cake?

Yes, you can freeze the cake. Wrap it tightly in plastic wrap and foil and store in the freezer for up to three months. Thaw in the refrigerator before serving.

What can I use instead of pecans?

You may substitute pecans with walnuts or almonds if you prefer, though the flavor profile will change slightly.

How can I enhance the chocolate flavor?

Add a teaspoon of instant coffee granules to the batter, as it intensifies the chocolate flavor beautifully.

Is there a vegan version of this recipe?

Yes, you can easily create a vegan version by using plant-based butter, dairy-free chocolate, and flaxseed meal or applesauce as an egg substitute.

Can I add frosting on top?

While a ganache is already used, you can also top it with whipped cream or additional chocolate frosting if you’d like an extra indulgent layer.

How do I know when the cake is done?

Perform the toothpick test; insert a toothpick in the center and it should come out slightly sticky to indicate a gooey center, but not wet.

What temperature should I bake the cake at?

The recommended baking temperature is 350°F (175°C) for optimal results.

How long can it sit out after baking?

Once baked, the cake can sit out at room temperature for a few hours before needing to be stored; however, always consider refrigerating leftovers after serving.

Additional Resources

If you enjoyed this Gooey Chocolate Pecan Dream Cake recipe, consider exploring related recipes like classic chocolate cake or pecan pie. Additionally, dive into our technique guides for tips on mastering the perfect ganache or achieving fluffy cupcakes.

Understanding ingredient information can also enhance your baking adventures; familiarize yourself with various types of chocolate or how to select quality nuts.

For seasonal variations, check out our autumn-inspired desserts that incorporate flavors like pumpkin or apple to diversify your baking repertoire throughout the year.

Lastly, discover equipment recommendations that can elevate your kitchen game, ensuring you have everything you need for the best baking experiences.

Join the Conversation

We would love to hear from you! Share your experiences with this Gooey Chocolate Pecan Dream Cake on our social media channels. Post your pictures and tell us about your personal adaptations in the comments.

Photography tips can help elevate your dessert game, and we encourage you to show off the finished product in all its delectable glory.

Your feedback is invaluable in creating a vibrant community of baking enthusiasts, so don’t hesitate to leave recipe reviews and suggestions. Your insight may help another baker discover their new favorite dessert.

Don’t forget to try your hand at variation ideas you dream up, and share those with us as well. Together, we can create a culinary space full of inspiration and creativity!

The Recipe

Gooey Chocolate Pecan Dream Cake

Serves: 12 servings

Prep Time: 20 mins

Cook Time: 40 mins

Total Time: 60 mins

Kitchen Equipment Needed

  • Springform pan
  • Mixing bowls
  • Electric mixer
  • Rubber spatula
  • Double boiler or microwave-safe bowl
  • Cooling rack

Ingredients

  • 1 cup unsalted butter
  • 1 ½ cup granulated sugar
  • 4 large eggs
  • 1 cup all-purpose flour
  • ½ cup unsweetened cocoa powder
  • 1 cup chopped pecans
  • 8 oz semi-sweet chocolate, melted
  • 1 tsp vanilla extract
  • ½ tsp salt

Directions

  1. Preheat the oven to 350°F (175°C) and grease your springform pan.
  2. In a mixing bowl, cream the butter and sugar until light and fluffy.
  3. Add eggs one at a time, mixing well after each addition.
  4. Sift together flour, cocoa, and salt. Add this mixture gradually to the wet ingredients.
  5. Fold in melted chocolate and vanilla extract, stirring until combined.
  6. Gently fold in chopped pecans, ensuring they are evenly distributed.
  7. Pour the batter into the prepared springform pan and smooth the top.
  8. Bake for 40-45 minutes, or until the center is set but still gooey.
  9. Let the cake cool in the pan for 10 minutes, then remove the sides and cool completely on a rack.
  10. Prepare a ganache with 6 oz chocolate and ½ cup cream; top the cooled cake with it.

Recipe Notes

  • Feel free to substitute pecans with other nuts to suit your taste.
  • Store leftovers in an airtight container for up to 3 days.
  • Consider adding a drizzle of caramel sauce on top for extra sweetness.

Easy One-Pan Chicken with Buttered Noodles for Dinner

Delicious One-Pan Chicken with Buttered Noodles: A Comfort Food Classic

⚖️
Difficulty
Easy

⏲️
Prep Time
15 mins

🕒
Cook Time
30 mins

⏱️
Total Time
45 mins

🍽️
Servings
4

One-Pan Chicken with Buttered Noodles is a delightful dish that combines tender chicken with perfectly cooked noodles, all prepared in a single skillet. This comforting recipe is not only easy to make but also brings unparalleled flavors to your dining table. As you savor each bite, the buttery richness of the noodles perfectly complements the savory sautéed chicken, creating a harmonious blend of taste and texture.

The beauty of this one-pan dish lies in its simplicity and the minimal cleanup required afterward. It’s an ideal weeknight dinner, bringing together wholesome ingredients you likely have on hand. If you’re looking to enjoy a meal that feels indulgent without being overly complicated, this recipe is the answer. Perfectly seasoned and enhanced with a few aromatic herbs, this dish is guaranteed to become a family favorite.

Quick Recipe Highlights

  • Flavor Profile: With a buttery and garlic-infused taste, this dish is savory yet comforting, making it perfect for any occasion.
  • Texture: The combination of tender chicken and silky noodles creates a satisfying mouthfeel that is hard to resist.
  • Aroma: The aromatic garlic and herbs wafting from the pan will instantly draw you in and whet your appetite.
  • Visual Appeal: This dish presents beautifully with golden-brown chicken alongside glistening noodles, garnished with fresh herbs for that pop of color.
  • Skill Level Needed: The recipe is beginner-friendly, ideal for anyone looking to build their kitchen confidence while cooking.
  • Special Equipment: A large skillet or frying pan is the only equipment needed, making it super accessible to anyone.

Recipe Overview

  • Difficulty Level: This One-Pan Chicken with Buttered Noodles is designed to be easy, making it perfect for novice cooks.
  • Category: This recipe fits in the comfort food category, ideal for cozy family dinners.
  • Cuisine: Rooted in American cuisine, this dish reflects home-cooked, hearty flavors that evoke nostalgia.
  • Cost: The ingredients needed are budget-friendly, ensuring that you can enjoy a delicious meal without breaking the bank.
  • Season: While delicious year-round, this comforting meal is especially delightful in the cooler months, perfect for warming up from the inside out.
  • Occasion: Whether it’s a casual weeknight or a family gathering, this meal makes every moment special.

Why You’ll Love This Recipe

One-Pan Chicken with Buttered Noodles is truly a treat for your taste buds, combining rich buttery flavors with succulent chicken. The noodles soak up the savory juices from the chicken, resulting in a deliciously comforting experience with every bite. You’ll enjoy the balance between the crunch of lightly seared chicken and the tender texture of noodles that melt in your mouth.

This recipe also offers convenience, as it requires minimal prep but delivers maximum flavor. Everything cooks together, allowing the ingredients to meld seamlessly while saving you from having to wash several pots and pans. This means you can enjoy more time with your loved ones instead of being stuck in the kitchen.

Furthermore, this dish offers nutritional advantages. Chicken is a great source of lean protein, while the noodles provide necessary carbohydrates to fuel your day. By utilizing colorful vegetables, you can boost the vitamin content, making this dish not only delicious but also nourishing.

Socially, One-Pan Chicken with Buttered Noodles is perfect for entertaining guests. Its delightful presentation and wonderful aroma make it an impressive meal that will have everyone asking for seconds. Sharing this comforting dish during family gatherings can also evoke sentiments of warmth and connection.

Not to mention, this recipe is quite cost-effective! With its simple list of ingredients which are mostly pantry staples, you can whip up a satisfying meal without overspending, making it accessible for everyone.

Historical Background and Cultural Significance

The roots of One-Pan Chicken with Buttered Noodles can be traced back to immigrant families who sought simple yet hearty meals to nourish their families. This dish embodies the spirit of home cooking, utilizing affordable ingredients to create a filling meal that brings people together.

In American culture, comfort food plays an essential role, often associated with childhood memories and family gatherings. Dishes like this have been passed down through generations, each adding their own twist while maintaining the nostalgic flavors that define them. As we navigate busy lifestyles, this kind of meal holds even more significance, offering a taste of tradition in modern kitchens.

Over the years, we’ve seen the evolution of this recipe, with chefs adapting it to meet various dietary preferences. Some opt for whole wheat noodles or gluten-free alternatives, while others enhance the flavors with spices or vegetables specific to certain regions, showcasing its versatility.

Regional variations have also emerged, with different cultures putting their own spin on the classic. As this dish travels through generations and kitchens, it continues to remain a staple, reminding us of the comfort and joy a simple meal can bring.

Ingredient Deep Dive

– **Chicken**: A cornerstone of many diets worldwide, chicken is not only versatile but packed with protein. Select fresh, organic chicken when possible for the best flavor and nutrition. Store it in the coldest part of your refrigerator and utilize it within a couple of days or freeze for later use.

– **Noodles**: Noodles offer endless possibilities, from egg noodles to whole grain varieties. These carbs serve as the perfect vessel for capturing flavors. When choosing noodles, look for high-quality options that will hold their shape during cooking. Store them in a cool, dry place, and remember that cooking time varies by type.

– **Butter**: Butter adds richness and enhances savory flavors. Opt for unsalted butter for better control over seasoning. Store butter in the refrigerator and keep it in an airtight container for freshness. Common substitutes include olive oil or margarine, depending on dietary preferences.

Common Mistakes to Avoid

  • Overcooking Chicken: Prevent dry chicken by using a meat thermometer; the internal temperature should reach 165°F.
  • Sticky Noodles: Avoid sticking by stirring noodles occasionally and ensuring ample boiling water is used.
  • Not Seasoning Enough: Don’t skip on seasoning throughout the cooking process. Layer flavors for optimal taste.
  • Using Cold Ingredients: Allow ingredients to come to room temperature for better cooking consistency.
  • Skipping the Resting Period: Rest cooked chicken for about five minutes to retain its juices.
  • Overcrowding the Pan: Cook in batches if necessary to ensure even browning and avoid steaming.
  • Not Tasting as You Cook: Regular tasting during the cooking process helps you adjust flavors as necessary.
  • Ignoring Sauce Reduction: Allow the sauce to reduce to enhance flavors and add depth to the dish.
  • Neglecting Fresh Ingredients: Fresh herbs can elevate the taste; add them just before serving for the best flavor.
  • Improper Storage: Store leftovers properly in airtight containers to maintain freshness and avoid spoilage.

Essential Techniques

To master cooking One-Pan Chicken with Buttered Noodles, understanding sautéing and proper seasoning is vital. Sautéing involves cooking food quickly over high heat, creating a delightful browning effect while sealing in natural flavors. Ensure the pan is hot enough before adding ingredients to achieve that desired golden crust.

Additionally, seasoning is key to elevating your dish. Start by salting your chicken before cooking, and don’t forget to season the water for your noodles. Taste as you go to ensure a well-balanced flavor. A pinch of salt combined with layers of herbs will enrich the overall profile of your meal.

Pro Tips for Perfect One-Pan Chicken with Buttered Noodles

1. Use high-quality chicken broth for added flavor in your noodles—this makes a significant difference.
2. Experiment with different herbs like thyme or rosemary to find your preferred flavor profile.
3. Adjust the thickness of your sauce by adding pasta water as needed.
4. For a fresher taste, finish with a squeeze of lemon juice before serving.
5. Consider marinating your chicken beforehand for deeper flavor absorption.
6. If you like a little heat, a sprinkle of red pepper flakes can add a nice kick.

Variations and Adaptations

For a regional twist, try adding sautéed mushrooms or spinach to your dish for a more hearty meal. These vegetables not only add nutritional benefits but also enhance flavors significantly.

Seasonally, consider using autumn vegetables such as squash or asparagus in the spring to play with seasonal produce. For dietary modifications, this dish can easily be made gluten-free by swapping traditional noodles for a gluten-free option.

Flavors can be adapted; try adding a splash of white wine to the pan before serving, or caramelized onions for a richer base. You might also consider presenting it in a decorative bowl with fresh parsley or grated parmesan on top.

Serving and Presentation Guide

When serving One-Pan Chicken with Buttered Noodles, opt for a large, shallow bowl to allow the dish to spread out, highlighting the textural contrast between the chicken and noodles. Use fresh herbs as a garnish for a vibrant touch.

Consider adding a light salad or garlic bread as accompaniments to enhance the overall meal experience. For a modern touch, try serving in cast iron skillets to maintain warmth.

Temperature is crucial; serve this dish piping hot for the best flavor. For portion control, consider using a measuring cup to ensure even servings.

Wine and Beverage Pairing

For a lovely pairing, consider a crisp white wine like Chardonnay or Sauvignon Blanc that complements the richness of the butter without overwhelming it. These wines’ freshness can enhance the overall dining experience, balancing the savory flavors of the dish.

If you prefer non-alcoholic options, a sparkling apple cider or flavored sparkling water can also elevate the meal without adding heaviness. For coffee lovers, consider a light roast coffee served warm as a delightful end to your meal.

Storage and Shelf Life

To store leftovers of your One-Pan Chicken with Buttered Noodles, let the dish cool before transferring it into airtight containers. Properly stored, it can last in the refrigerator for up to three days.

Ensure to reheat thoroughly in the microwave or on the stovetop, adding a little broth or water to keep the noodles from drying out. For longer storage, consider freezing the dish in appropriate containers, where it can last for up to three months.

Check for spoilage signs like off-smell or change in color before consuming. Always label the containers with the date for better tracking.

Make-Ahead Strategies

For those who wish to make this dish ahead of time, prep your chicken by marinating it a day prior to cooking. You can also pre-cook the noodles until just tender and store them separately in the fridge to streamline preparation time.

Consider chopping vegetables like onions, garlic, and herbs ahead of time and storing them in airtight containers. On cooking day, simply combine all ingredients in the skillet, warm up your prepped noodles, and enjoy a freshly cooked meal without the fuss.

For the best quality, avoid freezing assembled dishes; instead, freeze components separately. Reheat and assemble right before serving for optimal taste.

Scaling Instructions

To scale your One-Pan Chicken with Buttered Noodles recipe, consider halving or doubling the ingredients as needed. For half the recipe, keep the cooking times similar, but remain attentive to temperature and texture to avoid dry chicken.

When doubling or tripling, ensure your pan is large enough to accommodate all ingredients without overcrowding. Adjust cooking times as necessary; larger quantities may take a minute or two longer to cook through completely.

Properly store any leftovers in sealed containers, labeling them accordingly. This ensures you can enjoy this comforting dish again at a later date without compromise.

Nutritional Deep Dive

In terms of macros, each serving of One-Pan Chicken with Buttered Noodles typically delivers a balanced intake of protein from chicken, carbohydrates from noodles, and fats from butter. The protein content is crucial for muscle growth and repair, while carbohydrates provide energy.

Micronutrientwise, incorporating vegetables enhances vitamins and minerals, contributing to better overall health. Consider adding leafy greens or colorful peppers to further boost nutrient density.

For those monitoring calorie intake, it’s worth considering portion sizes and adjusting the amount of butter used to meet dietary goals without sacrificing flavor.

Dietary Adaptations

To adapt this recipe for various dietary needs, consider these modifications. For gluten-free options, substitute traditional noodles with rice noodles or quinoa, ensuring a similar texture.

If you’re looking for a dairy-free alternative, use olive oil in place of butter or coconut milk for a unique twist. Vegan variations can also be created by using tofu or a plant-based meat substitute along with vegan butter.

For weight-conscious individuals, low-carb adaptations like using zucchini noodles can provide the comfort of the original dish without the added carbs. Each of these modifications contributes to the versatility of this delicious meal.

Troubleshooting Guide

In the event of texture issues with the chicken being too dry, consider brining it beforehand for juiciness or cooking it at lower temperatures to preserve moisture.

If the noodles are soggy, ensure they are cooked al dente to keep a slight bite and tossed in oil right after cooking to prevent sticking.

For flavor balance, it’s vital to taste as you go—if the dish feels bland, adjust seasoning after tasting rather than waiting until serving.

Equipment challenges might arise from inadequate pan size; if you notice overcrowding, split the cooking process into batches for best results.

Finally, timing concerns can be mitigated by preparing all ingredients beforehand, ensuring efficient cooking and minimal waiting times for even cooking.

Recipe Success Stories

Our readers have shared numerous success stories about their One-Pan Chicken with Buttered Noodles experiences. Many have praised its simplicity and flavor, with several commenting on how their families request this dish on a weekly basis.

Variations including vegetables have also been popular, allowing readers to customize the recipe according to seasonal produce availability, enhancing both the flavor and nutritional value.

Photography tips have surfaced, with many noting how beautifully this dish presents, making it a recurrent feature in family meal photos that are shared across social media.

Frequently Asked Questions

1. Can I use frozen chicken for this recipe? Yes, frozen chicken can be used; however, thaw it properly to ensure even cooking. Consider cooking it in advance if planning to use frozen chicken to achieve the best texture.

2. What kind of noodles can I use? You can use any noodle type you prefer—egg noodles, spaghetti, or even gluten-free alternatives can work well in this recipe.

3. How do I know when the chicken is cooked? The chicken is done when it reaches an internal temperature of 165°F. Using a meat thermometer is the best way to ensure doneness.

4. Can I make this recipe in advance? Absolutely! Prep components the night before and combine them for a quick and easy dinner.

5. Is it possible to make this dish vegetarian? Certainly! Substitute chicken for plant-based protein like tofu and use vegetable broth to achieve a delicious vegetarian meal.

6. How do I store leftovers? Store leftovers in airtight containers in the refrigerator for up to three days, ensuring to reheat thoroughly before consuming.

7. Can I add vegetables to the recipe? Yes! Feel free to add some sautéed vegetables such as bell peppers or broccoli for additional flavor and nutrition.

8. What herbs work best with this recipe? Fresh thyme, parsley, or rosemary work wonderfully with chicken. Consider using dried herbs as well if fresh ones are not available.

9. How spicy is this recipe? This recipe is not spicy, but you can add red pepper flakes or fresh chilies if you prefer a heat kick.

10. Can I use a different fat besides butter? Yes, you can use olive oil or margarine for a healthier or dairy-free option.

Additional Resources

If you loved this dish, check out our related recipes featuring comforting pasta dishes, hearty one-pot meals, and family-friendly favorites that will surely please any palate. Enhance your skills with our technique guides on sautéing and braising for more flavorful outcomes.

For ingredient information, browse through our resources on chicken selections, noodle varieties, and the nutritional benefits of different vegetables to further enrich your cooking experience.

Lastly, keep an eye out for seasonal variations, adapting your recipes to incorporate fresh produce for heightened flavors!

Join the Conversation

We encourage you to share your experiences with One-Pan Chicken with Buttered Noodles! Post your photos, modifications, and any helpful tips you might have discovered along your cooking journey. Engaging with our community helps everyone learn and inspires others to try this scrumptious recipe.

Consider following us on social media for even more recipe ideas and culinary inspiration. Your feedback is invaluable to us, and we can’t wait to hear your success stories!

The Recipe

One-Pan Chicken with Buttered Noodles

Serves: 4

Prep Time: 15 mins

Cook Time: 30 mins

Total Time: 45 mins

Kitchen Equipment Needed

  • Large skillet or frying pan
  • Wooden spoon or spatula
  • Meat thermometer

Ingredients

  • 4 chicken breasts
  • 8 oz egg noodles
  • 4 tbsp butter
  • 2 cloves garlic, minced
  • 1 tsp dried parsley
  • Salt and pepper to taste
  • 2 cups chicken broth
  • Optional: fresh parsley for garnish

Directions

  1. Heat 2 tablespoons of butter in the skillet over medium heat. Season the chicken breasts with salt and pepper, then add to the skillet.
  2. Sauté chicken for about 6-7 minutes per side until cooked through and golden brown. Remove chicken and set aside.
  3. In the same skillet, add remaining butter and minced garlic, cooking for 1-2 minutes until fragrant.
  4. Add chicken broth to the pan, scraping up any browned bits. Bring to a simmer.
  5. Add the egg noodles, cooking until just tender, about 6-8 minutes. Stir occasionally to prevent sticking.
  6. Return the chicken to the skillet, nestling it among the noodles. Allow flavors to meld for another 3-4 minutes.
  7. Sprinkle with parsley before serving and enjoy!

Recipe Notes

  • Feel free to substitute chicken broth with vegetable broth for a lighter taste.
  • Add vegetables like spinach or peas for a nutritional boost.
  • This dish pairs beautifully with a fresh green salad on the side.

Pineapple-Infused Chicken Recipe for Savory Rice Delights

Pineapple-Infused Chicken with Savory Rice: A Tropical Delight

⚖️
Difficulty
Medium

⏲️
Prep Time
20 mins

🕒
Cook Time
40 mins

⏱️
Total Time
60 mins

🍽️
Servings
4

Pineapple-Infused Chicken with Savory Rice is a vibrant dish that embodies the joy of tropical flavors. The combination of tender chicken marinated in fresh pineapple juice and the aromatic notes of savory rice creates an explosion of taste in every bite. This dish doesn’t just please the palate; it invites diners into a culinary journey that is rich in flavor and infused with the essence of the tropics.

Imagine cooking chicken to perfection, marinated with the sweetness of ripe pineapple, while the rice absorbs the savory essence of the pan drippings. The contrasting textures of the succulent chicken and fluffy rice, coupled with the freshness of accompanying vegetables, create a delightful experience that is both satisfying and enjoyable. This recipe is perfect for family dinners or entertaining guests, offering a taste of paradise right at your table.

Quick Recipe Highlights

  • Flavor Profile: This dish showcases a delightful combination of sweet, tangy, and umami flavors, as the pineapple complements the savory elements of the rice and chicken.
  • Texture: The succulent chicken contrasts beautifully with the light, fluffy rice, providing a satisfying mouthfeel that makes every bite a pleasure.
  • Aroma: The dish is enriched with aromatic herbs and spices that enhance the overall flavor, filling your kitchen with an irresistible scent.
  • Visual Appeal: Bright yellow pineapple chunks and the golden-brown chicken create a visually enticing plate, perfect for impressing your guests.
  • Skill Level Needed: While the recipe requires some basic techniques, it is accessible for cooks of all skill levels, making it an excellent choice for beginners and seasoned chefs alike.
  • Special Equipment: A skillet or frying pan is essential for perfecting the chicken, along with a rice cooker or pot to prepare the savory rice.

Recipe Overview

  • Difficulty Level: This recipe is of medium difficulty, requiring marination and careful cooking but is straightforward to follow, making it enjoyable for home cooks.
  • Category: This dish fits within the dinner category, ideal for family meals or entertaining guests with something special.
  • Cuisine: This recipe draws from a fusion of Polynesian and Asian culinary traditions, celebrating the harmony of fresh ingredients and aromatic spices.
  • Cost: The ingredients are generally affordable, with chicken and rice being budget-friendly staples complemented by pineapple, which adds a tropical flair without a high price tag.
  • Season: This dish shines in warmer months when fresh pineapples are in season, enhancing flavor and adding a refreshing touch to your meal.
  • Occasion: Perfect for summer barbecues, weekday dinners, or holiday gatherings, this dish is sure to bring a taste of sunshine to any occasion.

Why You’ll Love This Recipe

The taste and texture of Pineapple-Infused Chicken with Savory Rice will sweep you off your feet. The chicken’s sweetness, inflected by pineapple, marries beautifully with the savory undertones of the rice, creating an unforgettably delicious harmony. The textures are equally striking, with the juicy chicken providing a contrast to the light and fluffy rice, making each mouthful a delightful experience.

Convenience is another reason this dish stands out. Preparing the marinade is quick and easy, and the dish comes together in just an hour. Simply allow the chicken to soak in the pineapple juice, then cook it alongside the savory rice for a meal that feels like a treat without spending hours in the kitchen.

Nutritionally, this dish is packed with protein and essential vitamins. The chicken serves as a healthy source of lean protein, while the pineapple adds a dose of vitamin C and antioxidants. Combined with fiber-rich rice, this meal is both satisfying and nutritious.

Socially, this recipe is perfect for entertaining. The colorful presentation of the dish is sure to impress guests, encouraging conversation and camaraderie during the meal. It’s a dish that invites sharing and enhances gatherings, making it a go-to for celebrations.

Cost-effectiveness is another benefit, as this recipe utilizes ingredients that are both budget-friendly and readily available. The combination of chicken, rice, and pineapple creates a wholesome yet gourmet meal that doesn’t break the bank, making it accessible to everyone.

Historical Background and Cultural Significance

The origins of pineapple-infused dishes trace back to tropical regions where pineapples are native. The introduction of pineapple into culinary practices has a rich history; it is believed that the fruit was historically a symbol of wealth and hospitality. Modern adaptations have made pineapple more accessible, leading to its use in various savory dishes, especially in Polynesian cuisine.

Culturally, pineapple is significant in many culinary traditions. It is often associated with festive celebrations and is frequently used in local dishes across the Pacific Islands, where its sweetness balances out savory and spicy flavors. The dish reflects a blending of cultures, showcasing how ingredients can unite different culinary practices.

The evolution of this recipe speaks to the increasing popularity of fusion cuisine. As global travel and trade open doors to diverse ingredients, recipes like Pineapple-Infused Chicken have adapted to include various culinary styles. Ingredients once isolated to specific regions now coexist, allowing for the creation of vibrant dishes enjoyed around the world.

Regional variations of this dish can be seen in various tropical countries, where local spices and cooking techniques enhance the original recipe. From adding coconut milk in the Caribbean to infusing the dish with Thai flavors using lemongrass and ginger, culinary creativity continually expands the possibilities for this delicious meal.

Ingredient Deep Dive

Pineapple: This tropical fruit is not only a delightful addition to dishes but is also rich in essential nutrients. Pineapples contain bromelain, an enzyme that aids digestion and has anti-inflammatory properties. When selecting pineapples, look for ones that are fragrant, with a firm yet slightly yielding texture. Store uncut pineapples at room temperature for a few days or refrigerate cut pieces in an airtight container. If fresh pineapple isn’t available, canned versions can be used, but choose those packed in water or natural juice for healthier options.

Chicken: A protein powerhouse, chicken is highly favored for its versatility and health benefits, such as being low in fat and high in vitamins B6 and B12. When selecting chicken, opt for organic, free-range varieties when possible, and always check for a firm texture and no foul odors. Store chicken in the refrigerator for up to two days or freeze for longer preservation. It can be replaced with turkey or tofu for a vegetarian option, offering flexibility in dietary preferences.

Rice: As a staple food across the globe, rice provides a foundational base for many cuisines. Brown rice is often touted for its health benefits, as it retains the bran and germ, providing dietary fiber and nutrients. When cooking rice, rinse it under cold water to remove excess starch, which can lead to stickiness. Store uncooked rice in a cool, dry place, whereas cooked rice should be refrigerated and consumed within a few days to ensure freshness.

Common Mistakes to Avoid

  • Using overripe pineapple can result in an overly sweet and mushy consistency, ensuring to use fresh, ripe fruit for optimal flavor.
  • Not allowing chicken to marinate long enough can lead to bland results; aim for at least 30 minutes but ideally a few hours if time allows.
  • Cooking rice at too high of a temperature can scorch it; always maintain a gentle simmer to achieve fluffy results.
  • Skipping the resting period of the chicken after cooking can cause juices to run out, leading to dry meat.
  • Using a dull knife when cutting pineapple makes the task harder; a sharp knife will allow for cleaner cuts and safer handling.
  • Forgetting to season each component separately can lead to a lack of flavor in the final dish; ensure to season both chicken and rice appropriately.
  • Not paying attention to cooking times can result in undercooked chicken or overdone rice; stay attentive to each cooking stage.
  • Ignoring the importance of using quality rice can affect the overall dish; choose a high-grade rice for the best texture.
  • Neglecting to balance flavors can make the dish one-dimensional; taste and adjust seasonings during the cooking process.
  • Failing to add fresh herbs at the right time can lessen their potency; incorporate them towards the end of cooking for maximum flavor.

Essential Techniques

Marinating: Marinating is critical for infusing chicken with flavor and ensuring it remains succulent. Choose a marinade that incorporates acid and fat, which helps to tenderize the meat. A good rule of thumb is to marinate for at least 30 minutes but overnight is ideal for deep flavor penetration. Look for a slightly tacky surface on the chicken to ensure it has absorbed the marinade.

Cooking Rice: Achieving perfectly cooked rice requires attention to detail. Rinse it thoroughly before cooking to remove excess starch, which can lead to stickiness. Use a ratio of water to rice that suits the type of rice you are using; a general rule for white rice is 2:1. Once the water is boiling, reduce the heat and cover to create steam for cooking. The rice should be fluffy and tender—use the fork test to check.

Pro Tips for Perfect Pineapple-Infused Chicken

1. For more intense flavor, consider grilling the chicken after marinating. Charred edges add a delicious depth to the taste profile.
2. To prevent sticking, use a non-stick skillet or plenty of cooking oil when searing the chicken to achieve that perfectly golden crust.
3. Always taste the marinade and adjust to your preference before applying it to the chicken, striking a balance between sweet and savory.
4. When serving, allow the chicken to rest for a few minutes after cooking; this helps retain its juices for a more succulent result.
5. For an added layer of flavor, consider adding chopped onions or garlic to the rice during cooking for an aromatic base.
6. Fresh herbs like cilantro or parsley can elevate the dish and provide a fresh contrast to the rich flavors of the chicken and rice.
7. If you’re short on time, using a pressure cooker can drastically reduce the cooking time for both chicken and rice while keeping them flavorful.
8. Experiment with different rice varieties, such as jasmine or basmati, to find one that pairs uniquely with the dish’s flavor profile.

Variations and Adaptations

Pineapple-Infused Chicken lends itself well to various regional adaptations. For a Hawaiian twist, add diced ham along with the chicken for a classic Hawaiian combo, or use teriyaki sauce to complement the overall sweetness. Seasonal adaptations are also possible; consider using fall produce such as butternut squash as a substitute for pineapple for a comfort-focused meal.

In terms of dietary modifications, those following a gluten-free diet can ensure all sauces and marinades are certified gluten-free. For a low-carb version, swap chicken for zucchini noodles tossed in a pineapple sauce to keep flavors while reducing carbs. Flavor variations can include using mango in place of pineapple or adding chili paste for a spicy kick, enhancing the dish’s complexity.

When it comes to presentation alternatives, consider serving the dish in hollowed-out pineapples for a festive touch or garnishing with edible flowers for an elegant affair. The options are limitless, allowing you to customize this dish while maintaining its core essence.

Serving and Presentation Guide

When it comes to plating, consider using a shallow bowl or plate to showcase the colorful components of Pineapple-Infused Chicken with Savory Rice. Start by spooning the rice onto the plate, then arrange slices of chicken on top, allowing the juices to flow over the rice for a beautiful effect. Garnish with fresh herbs, such as cilantro or parsley, to add bursts of color.

Garnishing with pineapple slices or fresh cilantro can elevate the dish aesthetically and enhance its tropical theme. For traditional accompaniments, pair the dish with coleslaw or a fresh garden salad to provide balance and a refreshing contrast to the rich flavors. When it comes to modern serving suggestions, consider using small individual servings in ramekins, which adds elegance and portion control.

Temperature considerations are vital; serve the dish warm, allowing the flavors to be at their peak while still enticing guests. For portion control, serving sizes should not exceed a cup of rice and a piece of chicken to ensure that guests enjoy multiple courses without feeling overly full.

Wine and Beverage Pairing

Pairing wine with Pineapple-Infused Chicken can elevate the meal significantly. A chilled Riesling is an excellent match, as its sweetness complements the pineapple effectively while balancing out the savory notes of the chicken. For those preferring red, a light Pinot Noir adds depth without overpowering the dish’s flavors.

For non-alcoholic alternatives, consider serving iced tea with a splash of fruit juice for a refreshing accompaniment, perfectly aligning with the dish’s tropical essence. When it comes to coffee or tea pairings, a light herbal tea may be a delightful way to conclude the meal without overwhelming other flavors.

Temperature is also key when serving these beverages; ensure wines are properly chilled and teas are served at the right warmth for optimal enjoyment. The right beverage pairings enhance the overall experience, allowing each component of the meal to shine alongside your culinary masterpiece.

Storage and Shelf Life

Storing Pineapple-Infused Chicken with Savory Rice is simple yet requires care to maintain freshness. Store leftovers in an airtight container in the refrigerator; they can stay fresh for up to three days. Ensure that the chicken and rice are cooled down before sealing them to prevent condensation, which can lead to spoilage.

For longer storage, consider freezing portions of the dish. Pack it in freezer-safe bags or containers, and it can last up to three months. To reheat, thaw in the refrigerator overnight and heat in the microwave or on the stovetop, ensuring to bring it to the correct temperature for safety.

Signs of spoilage include unusual odors, changes in texture, or discoloration, which indicate the food is no longer safe to eat. Following proper storage guidelines will allow you to enjoy this delightful dish for multiple meals.

Make Ahead Strategies

To make Pineapple-Infused Chicken with Savory Rice ahead of time, begin by marinating the chicken. You can marinate it up to a day in advance, allowing the flavors to deeply penetrate the meat. Cooking the rice can also be done in advance; simply reheat before serving, adding a splash of water to restore moisture.

Between steps, refrigerate any prepped components, such as the marinated chicken and cooked rice, ensuring they are stored separately to avoid any texture changes. Quality is crucial; therefore, assess the freshness of ingredients and use them within recommended time frames.

Assembling the dish is the last step; combine the chicken and rice just before serving, maintaining their individual textures. Reheating tips include ensuring even heating throughout the dish to prevent cold spots. Fresh elements like chopped herbs can be added before serving to enhance flavor and presentation.

Scaling Instructions

If you wish to halve the recipe for a smaller gathering, simply divide all ingredient amounts by two, ensuring that cooking times remain largely unchanged. For those desiring larger quantities, doubling or tripling the recipe can easily be accomplished; just remember to adjust the cooking equipment to accommodate extra portions, using larger pans or multiple cooking appliances as needed.

In scaling up, timing modifications may be necessary since large batches may require additional cooking time. Be attentive to cooking temperatures and ensure that all chicken pieces reach the proper internal temperature for safety.

Storage considerations for scaled recipes are critical. Ensure to distribute cooked food into meal-sized portions for freezing, allowing for easy reheat options in the future while maintaining the quality of the dish.

Nutritional Deep Dive

When it comes to the macro breakdown of Pineapple-Infused Chicken with Savory Rice, each serving offers a protein-rich profile thanks to the chicken, alongside carbohydrates from the rice, making it a balanced meal option. The addition of pineapple introduces natural sugars along with vitamins and minerals, contributing to its overall nutritional value.

For micronutrient analysis, pineapple is loaded with vitamin C, aiding in immune function and skin health. The chicken is a source of essential B vitamins that play a role in energy metabolism. Rice, especially brown rice, provides dietary fiber, which assists in digestion and promotes satiety.

Health benefits extend beyond basic nutrition; this dish is perfect for an active lifestyle, offering a balanced combination of nutrients while being versatile for various dietary needs. Maintaining portion control is advisable as it provides satiety without excess, allowing individuals to enjoy the meal without overeating.

Weight management tips include monitoring portion sizes and choosing healthy sides to accompany this dish, enhancing the nutritional landscape of meals prepared around Pineapple-Infused Chicken.

Dietary Adaptations

For those on a gluten-free diet, Pineapple-Infused Chicken works beautifully. Ensure that any added sauces or marinades are gluten-free, opting for tamari instead of traditional soy sauce.

Dairy-free modifications can be effortlessly integrated without any substitutions, as this dish does not inherently contain dairy products. Additionally, for those following a vegan lifestyle, substituting chicken for tofu or seitan can maintain the dish’s essence while providing essential protein.

Low-carb adaptations can replace rice with cauliflower rice for a lighter alternative while maintaining the same flavor profile. For keto dieters, eliminating additional sugars from the marinade is simple yet effective, allowing flexibility.

Paleo enthusiasts can enjoy this dish as is, focusing on whole, unrefined ingredients without extra additives. Lastly, ensuring options align with low-FODMAP diets can allow enjoyment without digestive distress.

Troubleshooting Guide

If you face texture issues, such as dry chicken, ensure that you don’t overcook it and allow it to marinate for enough time. For rice that’s gummy, consider rinsing it thoroughly before cooking and maintaining a proper water-to-rice ratio.

Flavor balance problems can often be corrected by adding a splash of acid, such as vinegar or fresh lime juice, which can brighten the dish. If you find the meal too salty, serving it with plain rice can help absorb excess seasoning.

Temperature problems may arise if equipment is not functioning for the dish requirements; ensure your stovetop or oven settings are calibrated correctly for consistent heating.

Ingredient substitutions can often lead to unexpected results; sticking with recommended ingredients is key to preserving the dish’s integrity. Timing concerns can be mitigated by prepping ingredients ahead, allowing for an easier cooking process.

Recipe Success Stories

The feedback from the community surrounding Pineapple-Infused Chicken has been overwhelmingly positive. Readers frequently share stories of how the dish became a favorite at family gatherings, often altering the recipe slightly to reflect personal preferences while maintaining its core flavors.

Variation successes highlight the creativity of home cooks, with adaptations ranging from spice levels to ingredient substitutions that have excited palates across the board. Many have taken to social media to showcase their vibrant dishes, inspiring others to try their hands at this flavorful culinary creation.

Photography tips shared by readers emphasize plating techniques; even the simplest presentation can be elevated by playing with colors and garnishes, making it visually appealing. This connection with the audience not only strengthens community bonds but encourages ongoing culinary experimentation.

The success stories underline how a single recipe can become a platform for personal expression and interaction, fostering a vibrant online community centered around delicious food experiences.

Frequently Asked Questions

1. Can I prepare the chicken a day in advance?

Yes, marinating the chicken a day in advance allows the flavors to penetrate more deeply, making for a tastier dish. Just be sure to store it in the refrigerator and cook it the next day for best results.

2. Is there a way to make this dish spicier?

Absolutely! You can incorporate chili flakes, sriracha, or even fresh chopped jalapeños into the marinade to give your dish a spicy kick that complements the sweetness of the pineapple.

3. Can I use frozen pineapple for this recipe?

Yes, you can use frozen pineapple as long as you allow it to thaw first. The flavor will still be delicious, but using fresh pineapple will provide a better texture.

4. What is the best way to reheat leftovers?

The best way to reheat leftovers is in the microwave or on the stovetop. If using a microwave, heat in short intervals to avoid overheating. Add a splash of water to the rice to prevent it from drying out.

5. Can I substitute brown rice for white rice?

Yes, you can definitely substitute brown rice for white rice. Brown rice will add more fiber and nutrients, though it requires a slightly longer cooking time, so adjust your water accordingly.

6. How do I store leftovers properly?

Store leftovers in an airtight container in the refrigerator for up to three days. Ensure they are cooled down before sealing to prevent condensation.

7. Can this dish be frozen?

Yes, it can! Portion the chicken and rice into freezer-safe containers, and it will last up to three months in the freezer. Thaw overnight in the refrigerator before reheating.

8. What would happen if I don’t marinate the chicken?

If you skip the marinating step, the chicken may not have the same depth of flavor and could end up being less tender. Ideally, marinating is crucial for achieving the best results.

9. How can I make this dish more nutritious?

For enhanced nutrition, consider adding veggies like bell peppers or carrots to the rice or serving a side salad with the meal for added vitamins and fiber.

10. What’s the best way to cut a pineapple?

To cut a pineapple, start by slicing off the top and bottom. Stand the pineapple upright and slice down the sides to remove the skin effectively. Cut the fruit into rings or chunks, depending on your recipe needs.

Additional Resources

If you enjoyed this recipe, consider exploring related dishes that celebrate tropical flavors, such as Coconut Curry Shrimp or Tropical Fruit Salad. Technique guides on marinating and cooking rice can enhance your culinary skills, providing a deeper understanding of meal preparation.

Ingredient information on chicken and rice varieties can expand your repertoire, allowing you to experiment with different textures and flavors. Equipment recommendations for kitchen tools can simplify meal prep, making it easier to achieve restaurant-quality results in your home kitchen.

Seasonal variations, such as using summer fruits or root vegetables during the colder months, will encourage versatility in your menu planning while ensuring you make the most out of available produce.

Join the Conversation

We invite you to share your experiences and variations of Pineapple-Infused Chicken with Savory Rice! Follow us on social media and post your culinary creations, tagging us to connect with fellow food enthusiasts. Photography of your dish not only encourages others but provides inspiration for presentation ideas that truly showcase the beauty of your cooking.

Please leave a comment with your thoughts on the recipe, and consider providing feedback or suggestions. Your input enriches our community, fostering a shared passion for culinary exploration and the enjoyment of flavorful recipes.

The Recipe

Pineapple-Infused Chicken with Savory Rice

Serves: 4

Prep Time: 20 mins

Cook Time: 40 mins

Total Time: 60 mins

Kitchen Equipment Needed

  • Skillet or frying pan
  • Rice cooker or pot
  • Cutting board and knife
  • Measuring cups and spoons
  • Airtight container for marinating

Ingredients

  • 1 pound boneless, skinless chicken thighs
  • 1 cup fresh pineapple chunks
  • 1/2 cup pineapple juice
  • 2 cups long-grain rice
  • 4 cups chicken broth
  • 2 tablespoons soy sauce
  • 1 teaspoon ginger, minced
  • 2 cloves garlic, minced
  • Salt and pepper to taste
  • Chopped green onions for garnish

Directions

  1. In a mixing bowl, combine chicken, pineapple juice, minced garlic, ginger, soy sauce, salt, and pepper. Allow it to marinate for at least 30 minutes in the refrigerator.
  2. In a skillet over medium-high heat, add the chicken and cook until browned and cooked through, approximately 6-7 minutes on each side. Set aside.
  3. In the same skillet, add chicken broth and bring to a boil. Stir in rice, cover, and reduce heat to low, cooking for about 18-20 minutes until all liquid is absorbed.
  4. Add pineapple chunks to the rice during the last five minutes of cooking, mixing to incorporate evenly.
  5. Slice the chicken and serve over the savory rice, garnished with chopped green onions. Enjoy!

Recipe Notes

  • Feel free to substitute chicken thighs with chicken breasts or tofu for a vegetarian option.
  • Leftover pineapple juice can be used as a base for smoothies or cocktails.
  • Adjust seasoning according to taste; feel free to add more spices for a bolder flavor.
  • This dish pairs well with a side of stir-fried vegetables or a fresh salad.

Steak and Shrimp Scampi: Quick Garlic Butter Delight Recipe

Steak and Shrimp Scampi Recipe: An Easy Garlic Butter Dish

⚖️
Difficulty
Easy

⏲️
Prep Time
15 mins

🕒
Cook Time
20 mins

⏱️
Total Time
35 mins

🍽️
Servings
4 servings

Introducing the delightful Steak and Shrimp Scampi Recipe, a sumptuous combination that will tantalize your taste buds and produce a dish worthy of any occasion. This easy garlic butter dish combines the rich, savory flavor of perfectly seared steak with succulent shrimp, all enveloped in a fragrant garlic butter sauce. Imagine the aroma wafting from your kitchen as you prepare this dish, making it the centerpiece of your dining experience.

This recipe is not only quick to prepare but also incredibly versatile, perfect for a romantic dinner or a casual gathering with friends. With its balance of textures, from the tender steak to the plump shrimp, each bite is a celebration of flavor. Garnish with fresh parsley and serve alongside crusty bread or over a bed of pasta for a complete meal that is bound to impress.

Quick Recipe Highlights

  • Flavor Profile: A harmonious blend of garlic, butter, and savory steak complemented by the sweetness of shrimp.
  • Texture: Tender steak bites paired with juicy, succulent shrimp create an enticing mouthfeel.
  • Aroma: The rich, buttery garlic aroma fills your kitchen, inviting everyone to the table.
  • Visual Appeal: Vibrant parsley and the golden hue of the garlic butter sauce make this dish visually stunning.
  • Skill Level Needed: This easy recipe is perfect for beginners, requiring only basic cooking techniques.
  • Special Equipment: A heavy skillet or frying pan is essential for searing the steak and shrimp effectively.

Recipe Overview

  • Difficulty Level: This steak and shrimp recipe is rated easy, making it suitable for novice cooks and busy home chefs alike.
  • Category: This dish fits perfectly within the main course category, particularly for meat and seafood lovers.
  • Cuisine: Influenced by Italian-American culinary traditions, scampi dishes often feature simples ingredients that enhance the natural flavors.
  • Cost: The cost of ingredients is reasonable, especially considering the elegant result and the ability to serve multiple people.
  • Season: Ideal for any season, this dish brings warmth to chilly nights and freshness to summer gatherings.
  • Occasion: Perfect for date nights, family dinners, or entertaining guests, it can elevate any dining experience.

Why You’ll Love This Recipe

First and foremost, the taste and texture appeal of this dish is unparalleled. The juicy steak harmonizes beautifully with the tender shrimp, creating a satisfying mouthfeel that keeps you coming back for more. The richness of the garlic butter sauce elevates the overall experience, tying together the various elements of the dish with a savory depth.

Convenience is another excellent reason to love this recipe. With a preparation time of just 15 minutes and a cook time that follows closely, you can whip up this elegant dish without spending hours in the kitchen. This makes it perfect for last-minute dinner parties or a quick weeknight meal that still feels indulgent.

The nutritional content is also noteworthy. Both steak and shrimp are packed with proteins that support muscle health and offer essential nutrients. Moreover, the use of garlic provides numerous health benefits, including boosting the immune system and enhancing heart health, making this dish not only delicious but also wholesome.

Socializing becomes a highlight when you serve Steak and Shrimp Scampi. The dish is visually appealing and aromatic, sparking conversation and excitement. Guests will appreciate the effort you put into crafting this delightful meal, and it encourages sharing stories and laughter around the table.

Finally, consider the cost-effectiveness of this dish. Despite its gourmet appearance, the ingredients are affordable and accessible, allowing you to enjoy fine dining at home without breaking the bank. This recipe is an investment in both your culinary repertoire and your dining pleasure.

Historical Background and Cultural Significance

Historically, shrimp scampi originates from Italian cuisine, particularly the coastal regions where seafood is abundant. However, the dish evolved in America, melding local tastes with traditional Italian flavors. The use of garlic and butter has become a hallmark of this culinary genre, enhancing the natural sweetness of the shrimp and adding a luxurious touch.

The cultural importance of Steak and Shrimp Scampi lies in its ability to bring people together. Meals that incorporate a variety of textures and flavors are central to social gatherings, and this dish fits that mold perfectly. Families and friends can savor good food while enjoying each other’s company, creating lasting memories around the dinner table.

As the recipe evolved, variations began to emerge across different regions, often adapted to local tastes and available ingredients. For example, in some versions, the addition of white wine or lemon juice brings an added layer of flavor, enhancing its popularity beyond traditional settings.

Today, Steak and Shrimp Scampi has found its place richly in the culinary landscape, often featured in restaurants and home kitchens alike. Its versatility and appeal ensure that it remains a favorite among those who appreciate a good meal.

Ingredient Deep Dive

Steak: The cultural significance of steak in many cuisines is undeniable, often representing indulgence and celebration. Steak is rich in protein, B vitamins, and iron, making it an excellent addition to a balanced diet. When selecting steak, look for well-marbled cuts for tenderness and flavor, and store it properly by wrapping in butcher paper and keeping it in the coldest part of the fridge. Substitutions can include pork or chicken if needed.

Shrimp: Shrimp is celebrated globally, particularly in coastal regions where seafood is a staple. Rich in protein and low in calories, shrimp provide essential nutrients like omega-3 fatty acids and selenium. When choosing shrimp, opt for wild-caught varieties for better flavor and sustainability. Store shrimp in the fridge and use within a few days or freeze for longer preservation. Variations could include scallops or seasonal fish for a unique twist.

Common Mistakes to Avoid

  • Overcooking the shrimp: Shrimp should be cooked quickly to retain moisture and prevent rubberiness; aim for 2-3 minutes per side.
  • Choosing the wrong cut of steak: Opt for cuts like ribeye or sirloin which maintain flavor and tenderness during cooking.
  • Using too much heat: Cooking at too high a temperature may cause the butter to burn. Medium heat is usually optimal.
  • Neglecting to season: Ensure to season the steak and shrimp adequately before cooking to bring out their natural flavors.
  • Skipping the resting time: Allowing cooked steak to rest for a few minutes ensures juiciness; cutting it too soon leads to dryness.
  • Using frozen shrimp without thawing: Always thaw shrimp properly before cooking to ensure even cooking.
  • Rushing the garlic: Garlic should be added after the proteins are nearly finished cooking to avoid bitter flavors from burning.
  • Ignoring portion sizes: Measure out serving portions accurately to avoid overeating and ensure everyone enjoys a fair share.

Essential Techniques

Mastering the technique of searing steak is crucial for achieving a perfect crust and full flavor. It involves cooking the steak on high heat without flipping too soon, allowing it to develop a deep color. To master this, let the pan preheat for a few minutes before adding the steak and only flip it once, about halfway through cooking.

When it comes to cooking shrimp, familiarity with its quick cooking time is essential. This seafood cooks in mere minutes and can quickly overcook, leading to a rubbery texture. Look for visual cues, such as the shrimp turning pink and curling to a ‘C’ shape, indicating they’re ready to be removed from the heat.

Pro Tips for Perfect Steak and Shrimp Scampi

1. Use fresh ingredients whenever possible for the best flavor; fresh herbs, garlic, and seafood make a significant difference.

2. For an added kick, consider incorporating a pinch of red chili flakes into the garlic butter sauce for a hint of heat.

3. Let the steak sit at room temperature for 30 minutes before cooking to promote even cooking and a better sear.

4. Always have your ingredients prepped and ready before starting; fast-paced cooking can lead to mistakes if you’re not prepared.

5. Taste as you go to adjust seasoning appropriately, ensuring a perfectly balanced dish.

6. Experiment with different herbs, such as thyme or rosemary, for varied flavor profiles.

7. A squeeze of fresh lemon juice at the end brightens the entire dish, balancing the richness of the butter.

8. Pair with a side of sautéed vegetables or mixed greens for a well-rounded meal.

Variations and Adaptations

Regional variations of Scampi might incorporate different seafood options, such as crab or scallops, reflecting local availability and tastes. Seasonal adaptations could include fresh vegetables such as asparagus or zucchini, enhancing the dish’s nutritional profile while taking advantage of seasonal freshness.

For dietary modifications, consider swapping the steak for a plant-based protein such as portobello mushrooms for a vegan take. Flavor variations, such as adding ginger or cilantro, can also give this dish an exciting twist.

Texture modifications can be achieved by serving the dish over different bases, such as creamy polenta or fluffy rice. Presentation alternatives, like using elegant dishes or even individual serving bowls, elevate the experience for special occasions.

Serving and Presentation Guide

To plate Steak and Shrimp Scampi beautifully, start by layering the base, whether it’s pasta or rice. Arrange the steak and shrimp artfully on top and drizzle with garlic butter sauce. For garnishing, consider sprinkling chopped fresh parsley or chives to add color and freshness.

Accompaniments like a light salad or roasted vegetables can balance the richness of the dish. Serve warm, ideally right after cooking, but also keep in mind the ideal temperature for serving; dishes like this are best enjoyed fresh and hot.

Lastly, control portion sizes to encourage a satisfying dining experience without overwhelming guests. Smaller portions allow for seconds, enabling a leisurely meal and conversation.

Wine and Beverage Pairing

Wine pairings for this dish work well with crisp white wines like Sauvignon Blanc or a light Chardonnay that won’t overpower the flavors. These wines complement the garlic and buttery notes beautifully while providing a refreshing contrast to the rich steak.

For non-alcoholic alternatives, consider sparkling water with a slice of lemon or homemade lemonade for a fresh, bright flavor that complements the dish.

If coffee or tea is preferred, a light herbal tea can be a pleasant finish to the meal, offering warmth and tranquility after a wonderful culinary experience.

Storage and Shelf Life

When storing leftover Steak and Shrimp Scampi, ensure it’s cooled down before transferring it to an airtight container. Store in the fridge for up to 3 days. If you wish to freeze, separate the shrimp and steak in the container to maintain the best texture.

Reheating should be done gently in a skillet over low heat to prevent the shrimp from becoming rubbery. Adding a splash of water or broth can help steam the dish back to life. Avoid reheating frequently to maintain its quality.

Signs of spoilage include off-smells and a slimy texture; discard any food that looks or smells questionable to be safe.

Make Ahead Strategies

To make this recipe ahead of time, you can marinate the steak a day in advance, allowing the flavors to penetrate deeply. Store it wrapped in the fridge until you are ready to cook, which saves time on preparation day.

Chopping garlic and measuring out seasoning can also be done early in the day; just store them in airtight containers. When it comes to reheating the shrimp, cook it quickly just before serving to ensure it’s tender and fresh.

For fresh elements like herbs, chop and store them in a small container. Add them at the last moment for the highest flavor impact on your finished dish.

Scaling Instructions

When halving the recipe, adjust the seasonings proportionately while keeping the cook times similar. Doubling or tripling the ingredients should maintain the same cooking techniques; however, consider cooking in batches to manage heat and ensure an even sear.

Equipment adjustments may be necessary depending on the scaling; larger skillets or multiple pans might be required. Watch the timing closely when increasing quantities, as larger amounts might need extra cooking time without overcrowding the pan.

Be mindful of storage considerations, as doubling the recipe will mean you may have more leftovers; use larger containers for easy storage.

Nutritional Deep Dive

Examining the macro breakdown, the dish is rich in protein from both steak and shrimp, providing crucial amino acids for muscle repair and overall health. Each serving balances fat content from the butter with carbohydrates if served over pasta.

For a micronutrient analysis, steak offers iron and B vitamins while shrimp boast selenium and iodine, vital for thyroid function and metabolic health. Together, they create a nutrient-dense meal.

Health benefits extend into boosts to satiety, given the protein content, which could assist in weight management efforts. The dish can be balanced with vegetables to enhance fiber and nutrient profiles further.

Portion analysis indicates that controlling serving sizes can prevent overconsumption. Pairing with fiber-rich sides not only fosters fullness but also encourages mindful eating practices.

Dietary Adaptations

For a gluten-free version, ensure that all sauces and sides used are free from gluten. The main components of this recipe are naturally gluten-free, making it easily adaptable.

A dairy-free variation can be achieved by replacing butter with olive oil or a dairy-free butter substitute, allowing those with dairy sensitivities to enjoy the dish.

For a vegan adaptation, replace steak with portobello mushrooms and omit shrimp, using different plant proteins as a replacement. Nutritional yeast can give a cheesy flavor that mimics butter’s richness.

Low-carb and keto variations can skip pasta and serve the dish over zucchini noodles or cauliflower mash instead, keeping carbs minimal while enhancing vegetable intake.

Likewise, this dish can accommodate paleo diets by simply omitting grains and replacing butter with coconut oil for a compliant fat source.

Troubleshooting Guide

If you encounter texture issues with overcooked shrimp, adjustments in cooking times can remedy future attempts—always pay attention to the color and shape of the shrimp. For flavor balance, consider adding a splash of lemon juice or a teaspoon of salt to enhance overall taste.

Temperature problems often arise when cooking steak; ensure your skillet is adequately preheated before adding proteins to achieve the best sear. If using a thicker cut, adjust timing and consider using an internal thermometer to check doneness.

Dealing with equipment challenges can arise from poor heat conduction; using a heavy-bottomed pan can improve even cooking. Should you not have access to certain tools, adapting by using alternatives like a non-stick skillet can suffice.

Recipe Success Stories

Community feedback for this dish showcases a range of satisfied diners. Many note the ease of preparation, making it a go-to for gatherings and special occasions. Variations have flourished from user experimentation, such as varying the protein or adding seasonal veggies.

Adaptation stories highlight how amateur cooks have transformed this dish into their signature meal, sharing their personalized takes with family and friends. Photography tips shared among readers emphasize capturing the vibrant colors and glossy sauce that make this dish visually appealing.

Frequently Asked Questions

Can I use frozen shrimp?

Yes, but remember to thaw them properly. The best way is to leave them in the fridge overnight or run them under cold water until thawed before cooking.

What type of steak works best?

Ribeye or sirloin cuts are excellent choices as they are flavorful and tender, perfect for searing.

Is this dish suitable for meal prep?

Yes, you can prepare elements ahead of time, though the shrimp is best fresh. Store each component separately to maintain quality.

Can I make it without butter?

Yes, olive oil or a dairy-free butter substitute can work well while keeping the dish flavorful.

How should I store leftovers?

Cool the dish and transfer it to an airtight container. It can be stored in the fridge for up to 3 days or frozen for longer shelf life.

What can I serve with Steak and Shrimp Scampi?

This dish pairs well with pasta, rice, or a fresh garden salad for a complete meal.

Can I use a different seafood?

Absolutely! Scallops or crab can also be great additions or substitutes for shrimp, depending on your preference.

What if I can’t find fresh garlic?

Garlic powder can be used in a pinch, but fresh garlic will provide a more vibrant flavor in your dish.

Is this recipe spicy?

The original recipe is not spicy, but you can add red pepper flakes to the sauce for an extra kick if desired.

What’s the best way to reheat leftovers?

Gently heat in a skillet over low heat, adding a splash of water or broth to keep the dish moist.

Additional Resources

Explore related recipes that pair well with Steak and Shrimp Scampi, such as garlic bread, fresh salads, or classic Italian pasta dishes. Technique guides can help you refine your cooking skills further, especially on perfecting searing and flavor balancing.

Ingredient information on selecting fresh seafood or the best cuts of steak can enhance your cooking experience. Equipment recommendations are also available for those looking to invest in high-quality pans or tools for their kitchen.

Investigate seasonal variations of ingredients used in this dish to adapt it throughout the year, ensuring fresh and vibrant flavors every time you prepare it.

Join the Conversation

We encourage you to share your thoughts on this recipe on social media; post pictures or tips from your attempts. Photography enthusiasts can gather tips on lighting and styling to showcase their culinary creations beautifully.

Your reviews and ideas are invaluable to the community. Engage with others by commenting on what worked in your cooking or the variations you tried. Let’s celebrate this delicious dish together!

The Recipe

Steak and Shrimp Scampi

Serves: 4 servings

Prep Time: 15 mins

Cook Time: 20 mins

Total Time: 35 mins

Kitchen Equipment Needed

  • Heavy skillet or frying pan
  • Sharp knife
  • Cutting board
  • Measuring cups and spoons

Ingredients

  • 1 lb steak (ribeye or sirloin)
  • 1 lb shrimp (peeled and deveined)
  • 4 cloves garlic (minced)
  • 1/2 cup unsalted butter
  • 2 tbsp olive oil
  • Salt and pepper to taste
  • Fresh parsley for garnish
  • Optional: red pepper flakes for heat

Directions

  1. Season the steak with salt and pepper. Heat olive oil in a skillet over medium-high heat.
  2. Add the steak to the skillet, searing for 4-5 minutes on each side until medium-rare. Remove and let it rest.
  3. In the same skillet, add butter and minced garlic, cooking until fragrant (about 1 minute).
  4. Add the shrimp, cooking for 2-3 minutes until they turn pink. Season with salt, pepper, and optional red pepper flakes.
  5. Slice the rested steak and add it back to the skillet with the shrimp, tossing to coat in the garlic butter.
  6. Garnish with fresh parsley and serve immediately.

Recipe Notes

  • For extra flavor, marinate the steak for a few hours before cooking.
  • Leftovers can be stored in an airtight container for up to 3 days.
  • This dish is best served fresh but can be reheated gently.