Ultimate Hot Fudge Brownie Bread: The Perfect Chocolate Indulgence

Hot Fudge Brownie Bread Recipe: The Ultimate Chocolate Treat

⚖️
Difficulty
Intermediate

⏲️
Prep Time
15 mins

🕒
Cook Time
30 mins

⏱️
Total Time
45 mins

🍽️
Servings
8 servings

Welcome to the world of decadent desserts, where our Hot Fudge Brownie Bread Recipe stands out as the ultimate chocolate treat! Imagine biting into a luscious, moist brownie that has taken the shape of an inviting loaf. This recipe combines the rich flavor of chocolate with gooey fudge, creating a delightful experience with every slice. Perfect for satisfying your sweet cravings, this brownie bread is not just a dessert; it’s a heartfelt indulgence you can enjoy anytime.

With its intense chocolate flavor and fudgy texture, this brownie bread is an explosion of taste and tenderness. The aroma it releases while baking fills your kitchen with a wonderful warmth, enticing everyone around. Whether you’re hosting a gathering or simply treating yourself, this Hot Fudge Brownie Bread is sure to be a crowd-pleaser!

Quick Recipe Highlights

  • Flavor Profile: Rich chocolate flavor with notes of warm fudge that melt in your mouth.
  • Texture: Moist and dense like a brownie yet soft enough for slicing.
  • Aroma: Inviting chocolate scent with hints of vanilla that waft through the kitchen.
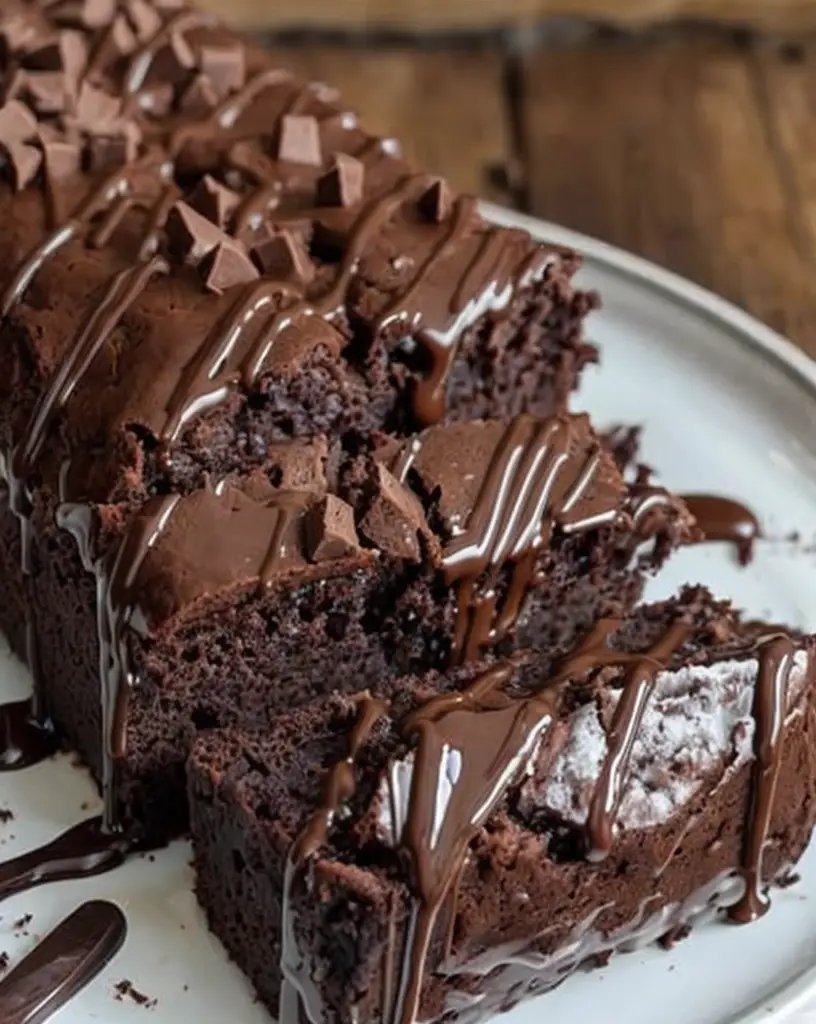
  • Visual Appeal: Dark, chocolatey bread with a glossy fudge layer on top, perfect for presentation.
  • Skill Level Needed: Intermediate; requires attention to detail for texture and baking time.
  • Special Equipment: Loaf pan and mixing bowls are essential for crafting this treat.

Recipe Overview

  • Difficulty Level: While this recipe is classified as intermediate due to the need for precise measurements and timing, it’s achievable for those with a little experience in baking.
  • Category: Perfect as a dessert, snack, or even as a sweet breakfast item, making it versatile for any occasion.
  • Cuisine: This recipe is a modern twist on classic American baking traditions that celebrate chocolate desserts.
  • Cost: Generally budget-friendly, using everyday pantry items to create a brunch-worthy treat.
  • Season: Great year-round, but especially appealing in fall and winter during holidays or cozy gatherings.
  • Occasion: A delightful addition to birthdays, holiday celebrations, or even a cozy homemade gift for friends!

Why You’ll Love This Recipe

This Hot Fudge Brownie Bread is not just about the taste; it’s a symphony of flavors and textures that come together in each slice. The luscious velvety chocolate is complemented by a rich fudgy topping, making it a treat for chocolate lovers. Each bite provides a satisfying gooeyness, reminding you of the best brownies you’ve ever tasted, while its bread-like structure makes it perfect for those who enjoy a comforting, hearty dessert.

Convenience is another reason to love this recipe. With simple preparation steps and a straightforward baking process, you can whip this up quickly. It’s an ideal solution for last-minute gatherings or as a delightful treat anytime you crave something sweet. The delightful smell that fills your kitchen while it bakes adds to the experience, luring everyone to the table before it’s even ready!

Not only is this brownie bread delectable, but it also has some nutritional advantages. While it’s certainly a dessert, it features familiar ingredients like eggs and cocoa that contribute to its nutritional profile. It can offer a welcome balance of energy and indulgence, particularly when served in moderation as part of a well-rounded diet.

Sharing is caring, and this Hot Fudge Brownie Bread is perfect for social gatherings. Whether you’re hosting a brunch, a dinner party, or a simple get-together, everyone will appreciate the delicious offering. It’s definitely a conversation starter, as guests marvel at its rich texture and flavor while passing around the loaf for second helpings!

Finally, this recipe is cost-effective. The ingredients are typically found in any kitchen, making it easy to bake even on a budget. The outcome, a rich and satisfying dessert, is sure to please everyone without breaking the bank. With minimal investment, you get a maximum return on enjoyment!

Historical Background and Cultural Significance

The origin of brownie bread is rooted in the deep love for chocolate-based desserts in American culinary history. Traditionally, brownies evolved from the desire to mix the qualities of a cake and a cookie. Over the years, bakers have tinkered with the delightful dessert, giving rise to variations like brownie bread. Such developments celebrate the shared love for chocolate across various cultures, particularly in America where dessert creativity knows no bounds.

Culturally, bread and baking have brought families together for generations. This Hot Fudge Brownie Bread reflects the idea of comfort food, offering warmth and joy. Sharing such treats at family gatherings or festive events highlights the integral role that desserts play in creating cherished memories with loved ones.

The evolution of the recipe over the years boasts numerous iterations, introducing healthier alternatives and creative blends with fruits and nuts. These adaptations show how the core love for chocolate treats remains strong, yet flexible to accommodate varying dietary preferences and innovations in cooking.

Regional variations within the United States have also showcased different interpretations of brownie bread. From variations that include nuts to those with a cream cheese swirl, each version tells a story unique to its region, celebrating local flavors and ingredients that elevate the traditional recipe.

Ingredient Deep Dive

Chocolate: Without question, chocolate is the star here. It has a deep-rooted history, originating from cacao plants, revered for their rich and bold flavor. Nutritionally, it is high in antioxidants, providing benefits such as improved heart health. When selecting chocolate for this recipe, opt for high-quality dark chocolate for depth of flavor. Store chocolate in a cool, dark place and consider substitutions like cocoa powder if needed.

Sugar: Essential in balancing the bitterness of chocolate and enriching the bread’s sweetness, sugar also adds to its moistness. Historically, sugar has played a significant role in dessert-making, transforming flavors through its ability to caramelize and provide depth. For healthier alternatives, consider coconut sugar or honey, but be mindful of the liquid ratios. Always store sugar in a sealed container to keep it fresh and free from moisture.

Common Mistakes to Avoid

  • Overmixing the batter: This can lead to dense bread. Mix until just combined.
  • Using low-quality chocolate: The flavor greatly depends on the quality of chocolate used. Choose high-quality chocolate for the best results.
  • Not measuring ingredients accurately: Baking is a science, so weigh and measure for success.
  • Opening the oven door too soon: This can cause the bread to deflate. Wait until the minimum baking time has passed.
  • Not letting it cool before slicing: Cutting too soon can lead to messy servings; let it set for at least 10 minutes.
  • Baking at the wrong temperature: Ensure your oven is calibrated accurately as too high or low can affect baking times.
  • Using a non-stick pan without greasing: This can lead to sticking. Always prep your pan accordingly.
  • Skipping the ganache topping: The fudge layer is what makes this bread truly special; don’t skip it!
  • Not giving the bread enough time to bake: If it still seems wet, it likely needs more time in the oven. Check with a skewer.
  • Using expired ingredients: Always check the expiration dates, especially for baking powder and baking soda.

Essential Techniques

Mixing the Batter: This is crucial for achieving the perfect texture. Mixing too much activates gluten, leading to a chewy result instead of delightful fudgy bread. To master this, mix your dry ingredients first before combining with wet, and stir until just combined. Look for a few lumps remaining in the batter for the best outcome.

Temperature Control: Understanding your oven’s temperature is vital. Baking at the right temperature ensures even cooking and a good rise. Use an oven thermometer to check accuracy and avoid cool or hot spots, which can lead to uneven baking and undesirable textures.

Pro Tips for Perfect Hot Fudge Brownie Bread

1. Invest in high-quality chocolate for a deeply satisfying flavor.

2. Experiment with different add-ins like nuts or chocolate chips for texture variety.

3. Allow the bread to cool completely before slicing to maintain structure.

4. Enhance flavors with a pinch of espresso powder, elevating chocolate intensity.

5. Serve warm, with a scoop of ice cream on the side for an unforgettable dessert experience.

6. Use a serrated knife to slice the bread cleanly without tearing.

7. Wrap leftovers tightly to retain moisture and flavor for days.

8. Get creative with toppings; consider drizzling caramel or dusting powdered sugar for added flair.

Variations and Adaptations

Regional variations of brownie bread can include different nuts like walnuts or pecans for added crunch. Seasonal adaptations could incorporate spices like pumpkin spice in the fall, shifting the flavor profile appropriately. For dietary modifications, consider making the recipe gluten-free using almond flour and dairy-free chocolate to cater to those with allergies. Experimenting with texture modifications, such as incorporating a swirl of peanut butter or cheesecake, can bring new layers of flavor to this classic treat.

Serving and Presentation Guide

Presenting your Hot Fudge Brownie Bread can be as delightful as eating it! Utilize a wooden cutting board as your backdrop and slice the bread neatly. Sprinkle with powdered sugar or arrange dark chocolate shavings on top for a professional touch. Serve with a scoop of vanilla ice cream or a drizzle of chocolate syrup to enhance its irresistible appeal. Consider serving it warm, as the fudge topping will slightly melt, creating a gooey experience that’s hard to resist!

Wine and Beverage Pairing

For a delightful pairing, rich red wines, such as Cabernet Sauvignon or Merlot, complement the chocolate flavors beautifully. If you desire non-alcoholic options, consider serving it with a bold coffee or a decadent hot chocolate for an indulgent experience. For tea lovers, a strong chai or peppermint tea creates a flavor contrast that balances the sweetness of the bread, making for a perfect afternoon treat.

Storage and Shelf Life

This Hot Fudge Brownie Bread can be stored in an airtight container for up to five days at room temperature. For longer shelf life, consider freezing slices individually wrapped in plastic wrap, followed by aluminum foil, for up to 3 months. When reheating, simply warm it in the oven or microwave for a few seconds to regain that soft texture. Always check for signs of spoilage, such as sour smells or visible mold, before consuming.

Make Ahead Strategies

To save time, prepare the batter and store it in the refrigerator for up to 24 hours; just remember to bring it to room temperature before baking. You can also bake it ahead of time and freeze the entire loaf — simply slice it before freezing for easy access. This allows for fresh-baked treats any time of the week, especially when entertaining guests unexpectedly, ensuring you always have a delicious offering on hand!

Scaling Instructions

If you need to halve or double this Hot Fudge Brownie Bread recipe, adjust your ingredient amounts accordingly while keeping an eye on baking times. For a smaller loaf, use a smaller pan, which will speed up the cooking time. Conversely, if tripling the recipe, consider using multiple loaf pans or a larger oven-safe dish to ensure even baking. Maintain the cooking temperature but make sure to test for doneness, adjusting times as needed.

Nutritional Deep Dive

This Hot Fudge Brownie Bread, while a treat, can still be appreciated for its nutritional content. Each slice contains essential nutrients from chocolate and eggs. With a higher caloric count due to sugar and chocolate, it’s suited for a moderate indulgence rather than excess. Understanding the macro breakdown of fats, carbohydrates, and proteins in chocolate can help you make informed choices regarding portion sizes, especially for those watching dietary intake.

Dietary Adaptations

To make this treat gluten-free, substituting regular flour for almond flour or coconut flour can yield a delightful result. For a dairy-free version, use plant-based butter and dark chocolate with no dairy. Vegan adaptations can be achieved by replacing eggs with flax eggs and ensuring all other ingredients are plant-based. With these simple modifications, anyone can enjoy this decadent chocolate delight regardless of dietary needs!

Troubleshooting Guide

Texture issues like overly dry bread can stem from overbaking, while too gooey bread indicates underbaking. Ensure you’re using the correct baking time and an accurate oven temperature for the best results. If there are flavor imbalances, revisiting sugar levels and chocolate quality can help; those elements define the bread’s core taste. Timing concerns, about baking or cooling, can easily be fixed with practice and patience, learning the visual cues that indicate doneness.

Recipe Success Stories

Community feedback highlights how this Hot Fudge Brownie Bread has been a crowd-pleaser with many praising its rich chocolate flavor. Some readers have shared their adaptations, including variations with peanut butter or crunchy hazelnuts, presenting incredible results. The combination of traditional recipes with personal touches showcases the versatility of this bread, keeping it exciting. Sharing cooking photography tips also offers inspiration for presenting this bread beautifully, making it an eye-catching addition to any dessert table.

Frequently Asked Questions

Can I make this recipe gluten-free? Yes, simply substitute regular all-purpose flour with a gluten-free flour blend or almond flour to enjoy this treat without gluten.

How should I store leftover brownie bread? Keep it in an airtight container at room temperature for up to five days, or freeze it for longer storage.

Can I freeze brownie bread? Absolutely! Wrap individual slices in plastic wrap and foil, then place them in a freezer bag for up to three months.

What if my brownie bread is undercooked? If it seems too wet in the center, return it to the oven for a few additional minutes and keep checking for doneness.

How do I know when my brownie bread is done baking? Insert a toothpick in the center; it should come out with a few moist crumbs but not wet batter.

Can I add nuts to the brownie bread? Yes! Add in chopped nuts like walnuts or pecans for added texture and flavor.

Is it necessary to add the ganache topping? While the brownie bread is delicious on its own, the ganache adds an extra layer of fudgy richness that makes it irresistible!

How can I make this recipe vegan? Substitute the eggs with flaxseed meal mixed with water, and ensure you use plant-based butter and vegan chocolate.

Can I use cocoa powder instead of chocolate? While using cocoa powder is an option, the taste and texture will differ; consider using a combination of cocoa powder and vegetable oil.

What beverage pairs well with brownie bread? A rich red wine or a cup of coffee enhances the chocolate flavors beautifully.

How long does it take to make this brownie bread? The total time from start to finish is about 45 minutes, including preparation and baking!

Additional Resources

For those interested in expanding their baking repertoire, consider exploring related recipes such as chocolate chip cookies or fudge brownies. It’s also useful to review technique guides on melting chocolate or baking essentials to enhance your skills. Dive deeper into ingredient information to better understand chocolate’s various forms and how they influence flavor. Lastly, equipping your kitchen with the right baking equipment will streamline your process, contributing to better baking outcomes!

Join the Conversation

We love hearing about your baking experiences! Share your Hot Fudge Brownie Bread creations on social media with us. Photography tips, variations you’ve tried, and recipe reviews add to our community’s knowledge and joy. Engage with fellow bakers to discover new ideas or share your thoughts on this delightful recipe, fostering an environment where everyone is encouraged to experiment and have fun in the kitchen.

The Recipe

Hot Fudge Brownie Bread

Serves: 8

Prep Time: 15 mins

Cook Time: 30 mins

Total Time: 45 mins

Kitchen Equipment Needed

  • Loaf Pan
  • Mixing Bowl
  • Measuring Cups and Spoons
  • Spatula
  • Offset Knife for Frosting

Ingredients

  • 1 cup dark chocolate chips
  • 1/2 cup unsalted butter
  • 1 cup all-purpose flour
  • 1 cup granulated sugar
  • 1/2 cup brown sugar
  • 3 large eggs
  • 1/2 cup unsweetened cocoa powder
  • 1 teaspoon vanilla extract
  • 1/4 teaspoon salt
  • 1/2 cup hot fudge sauce for topping

Directions

  1. Preheat your oven to 350°F (175°C) and grease a loaf pan.
  2. Melt the butter and dark chocolate together in a mixing bowl over simmering water.
  3. Remove from heat and stir in granulated sugar and brown sugar until fully combined.
  4. Add eggs one at a time, mixing well after each addition, followed by the vanilla extract.
  5. In another bowl, whisk flour, cocoa powder, and salt together. Gradually fold into the wet mixture.
  6. Pour the batter into the prepared loaf pan and spread evenly.
  7. Bake for 25-30 minutes. Use a toothpick to check for doneness.
  8. Once baked, let it cool for 10 minutes before removing from the pan.
  9. Drizzle hot fudge sauce on top before serving.

Recipe Notes

  • You can store leftover brownie bread tightly wrapped at room temperature for up to five days.
  • If you wish, you may incorporate chopped nuts or chocolate chips into the batter.
  • For a richer chocolate flavor, increase the amount of cocoa powder slightly.

Delicious Million Dollar Ravioli Casserole Recipe for Families

Million Dollar Ravioli Casserole: A Comforting Culinary Delight

⚖️
Difficulty
Easy

⏲️
Prep Time
15 mins

🕒
Cook Time
30 mins

⏱️
Total Time
45 mins

🍽️
Servings
8 servings

Experience the delightful ease of preparing Million Dollar Ravioli Casserole, a dish that promises to elevate your mealtime with minimal fuss. This comforting casserole manages to combine the delightful taste of creamy cheese-filled ravioli, zesty marinara sauce, and a crunchy topping, making it a dish that appeals to both children and adults alike. Imagine the aroma wafting through your kitchen as it bakes to perfection, ready to warm the hearts and bellies of your loved ones.

Each bite of this casserole bursts with flavors that remind you of your favorite Italian restaurant or a cozy family gathering. The rich layers of cheese and savory sauce blend harmoniously, offering a texture that is both creamy and crunchy. This versatility allows it to be not just a weeknight meal but a go-to recipe for entertaining guests or celebrating special occasions.

Quick Recipe Highlights

  • Flavor Profile: Classic Italian flavors with a delightful mix of cheese, pasta, and marinara sauce.
  • Texture: A creamy and rich base topped with a golden, crunchy layer of breadcrumbs.
  • Aroma: The warm, inviting scent of marinara sauce and melting cheese creates an irresistible atmosphere.
  • Visual Appeal: Bright red sauce contrasts beautifully with golden cheese and a crispy topping.
  • Skill Level Needed: Beginner-friendly, requiring simple preparation steps and minimal cooking techniques.
  • Special Equipment: Just a baking dish and a stovetop for reheating the sauce.

Recipe Overview

  • Difficulty Level: This casserole is easy to prepare, making it suitable for novice cooks and busy families.
  • Category: Perfect as a dinner main course or a potluck contribution.
  • Cuisine: Hailing from Italian-American cooking, it combines traditional pasta flavors with modern convenience.
  • Cost: An economical option that can feed a crowd without breaking the bank.
  • Season: Great any time of year; topping with seasonal vegetables can enhance freshness.
  • Occasion: Ideal for family dinners, holiday gatherings, or casual get-togethers with friends.

Why You’ll Love This Recipe

The taste and texture of Million Dollar Ravioli Casserole are simply irresistible. The creamy filling of the ravioli pairs perfectly with the tangy marinara sauce, creating a comforting dish that will have everyone coming back for seconds. As it bakes, the mixture melds together beautifully, yielding a cheesy, decadent bite that’s comforting without being heavy.

Convenience is key with this recipe, as it’s quick to assemble, allowing you to spend more time with your family. You can prepare it ahead of time and simply pop it in the oven when you’re ready to eat. This makes it an excellent choice for busy weeknights or unexpected guests, offering stress-free meal planning.

Not only is this dish delicious, but it also packs in nutrients. Filled with cheese and pasta, it provides a satisfying source of carbohydrates and protein, making it a more balanced option than takeout. Adding vegetables to the casserole can further enhance its nutritional profile, allowing you to sneak in some extra vitamins and minerals.

When it comes to social gatherings, the Million Dollar Ravioli Casserole shines. Its generous size makes it perfect for sharing, and the delightful melty cheese and bubbling sauce are sure to impress guests. Whether serving at a potluck or just inviting friends over, this casserole creates a warm and inviting atmosphere.

Economically, it’s a win-win. The cost per serving is low, especially compared to dining out, making it an accessible dish for families and individuals alike. You can enjoy a restaurant-quality meal at home without the hefty price tag, making it a staple in your recipe rotation.

Historical Background and Cultural Significance

The origins of ravioli can be traced back to Italy, where various forms of stuffed pasta have been part of the culinary tradition for centuries. The ravioli we know today evolved from these ancient recipes, as families passed down techniques and fillings through generations. Ravioli became a staple in many households, cherished for their versatility and the ability to be filled with an array of ingredients.

Culturally, ravioli represents more than just food; it’s a communal dish meant to be shared. In Italian culture, preparing meals together—particularly stuffed pastas—brings families and friends together, creating a sense of community and belonging. This casserole exemplifies that philosophy by combining beloved ingredients in a cohesive dish perfect for gatherings.

Over time, recipes like the Million Dollar Ravioli Casserole evolved to adapt to modern lifestyles. Convenience became paramount, leading to the creation of shortcut recipes that manage to retain the essence of traditional dishes. This casserole captures that spirit, merging classic Italian flavors with practicality.

Regions of Italy also offer variations on ravioli, showcasing local ingredients and preferences. In some areas, ravioli may be filled with vegetables or meat, while others focus on cheese. These diverse influences enrich the dish, offering countless adaptations that continue to thrive in kitchens across the globe.

Ingredient Deep Dive

Ravioli
Ravioli has a rich history in Italian cuisine, traditionally filled with meats, cheeses, or vegetables. This stuffed pasta can vary widely depending on regional specialties. Nutritionally, ravioli made from whole wheat flour can provide additional fiber, making it a healthier choice. When selecting ravioli, look for fresh or homemade ones at the market; frozen varieties can also be convenient. Store unused ravioli in a cool, dry place, and remember to keep cooked leftovers refrigerated.

Marinara Sauce
The signature marinara sauce works beautifully with ravioli, adding depth and acidity that balances the richness of the dish. Originating from Naples, this simple sauce is made from tomatoes, garlic, and herbs, and can be enriched with onions or olive oil. The nutritional benefits are vast, including vitamins A and C from tomatoes. For optimal freshness, make your marinara sauce from scratch, or choose a quality jarred option. Leftover sauce can be frozen for later use.

Cheese
Cheese is the star ingredient in this casserole, providing flavor and creaminess. Varieties like mozzarella and ricotta are commonly used in Italian dishes. These cheeses contribute calcium and protein to your meal. When selecting cheese, opt for fresh, high-quality products for the best flavor. Store cheese in the refrigerator, wrapped tightly to prevent drying. You can also substitute dairy-free alternatives for a lighter version of the dish.

Common Mistakes to Avoid

  • Overcooking the ravioli: Ensure to cook the ravioli until they are al dente before baking, as they will cook further in the oven.
  • Using low-quality marinara: Best results come from high-quality sauce; don’t skimp on this essential flavor.
  • Not letting the casserole rest after baking: Allow it to sit for a few minutes before serving for easier slicing and serving.
  • Skimping on seasoning: Adjust your seasoning to taste; fresh herbs can enhance the entire dish.
  • Not covering the casserole initially: Cover with foil for the first part of cooking to retain moisture before browning.
  • Inconsistent layering: Layer ingredients evenly for uniform cooking and flavor distribution throughout the dish.
  • Skipping the cheese topping: A cheesy topping is crucial for that satisfying, golden finish.
  • Using cold ingredients: Ensure all ingredients are at room temperature before assembling to aid even cooking.

Essential Techniques

Layering
Layering your casserole correctly ensures even flavor distribution. Begin with a base of sauce, add ravioli, then more sauce and cheese, repeating the layers until you reach the top. The visual cue for success is the contrasting layers visible through the baking dish, promising a hot and bubbly delight.

Baking
Baking the casserole at the right temperature is crucial. Start at a high temperature to create an initial crust, then reduce it to cook thoroughly. Watch for bubbling edges and a golden top, serving as cues to remove from the oven. Baking helps meld the flavors while creating that beloved crispy cheese topping.

Resting
Always let your casserole rest after baking. This allows the ingredients to settle and makes it easier to serve. Look for the cheese to set slightly—if it’s too loose, it’ll be messy when serving.

Pro Tips for Perfect Million Dollar Ravioli Casserole

Use fresh herbs to brighten up your casserole, adding fresh basil or parsley as a garnish before serving. Add seasonal vegetables like spinach or zucchini for added nutrition and flavor. Bake in a well-prepared dish to prevent sticking; a non-stick spray or a bit of olive oil works wonders. For a gourmet touch, sprinkle some parmesan cheese on top before the final bake for extra flavor. Adjust cooking time based on your oven’s characteristics; ovens can vary significantly in heat distribution. Lastly, always preheat your oven to ensure even cooking.

Variations and Adaptations

For regional variations, consider using local cheeses or sauces that reflect your culinary heritage. Seasonal adaptations can include adding roasted squash or fresh spinach in the fall. Dietary modifications are simple; try a gluten-free ravioli for those avoiding gluten, or substitute mozzarella for a dairy-free cheese for lactose-intolerant guests. Experiment with flavor variations by incorporating pesto or sun-dried tomatoes into the layers. Change the texture by using crunchy toppings like crushed nuts or seeds next to breadcrumbs. Present the casserole in individual ramekins for a modern take on serving.

Serving and Presentation Guide

Plating techniques can greatly enhance the dish’s appeal; use a spatula to serve square portions, ensuring a neat slice. Garnish with fresh basil or a sprinkle of red pepper flakes for visual appeal. Complement the casserole with a light green salad or garlic bread to round out the meal. For modern serving suggestions, consider individual portions in small cast-iron skillets. Always serve it hot, ideally just after resting for a few minutes for the best texture. Portion control tips suggest providing smaller servings if served with multiple sides to avoid overwhelming guests.

Wine and Beverage Pairing

For a classic experience, pair the dish with a medium-bodied red wine like Chianti, which complements the tomato sauce beautifully. Non-alcoholic alternatives such as sparkling water with lemon can cleanse the palate while in the meal. If coffee is served after dinner, opt for a smooth roast to enhance the dining experience. Ensure all beverages are served at their ideal temperatures, with red wines slightly below room temperature and sparkling drinks chilled.

Storage and Shelf Life

To store leftovers, allow the casserole to cool completely before transferring it to an airtight container for refrigeration, where it can last for up to three days. For longer storage, consider freezing the casserole before baking; wrap it well to prevent freezer burn. Signs of spoilage include off odors or a change in color. When reheating, ensure the casserole is heated thoroughly in the oven at a low temperature until warm throughout.

Make Ahead Strategies

To make ahead, assemble the casserole a day in advance and store it in the refrigerator; add cheese just before baking. For a more extended prep timeline, consider freezing the assembled casserole, allowing it to thaw overnight before baking. Quality considerations include using fresher ingredients during assembly to maintain flavor even after storing. Reheating can easily be done by baking from frozen; just add more time to ensure proper cooking.

Scaling Instructions

When halving the recipe, ensure to adjust the baking time for smaller portions. Doubling or tripling the amount allows for larger gatherings, but be conscious of oven space and use multiple dishes if needed. Equipment adjustments mean considering larger pans as the batch increases, and timing modifications will likely lead to longer baking times. Always keep an eye on cooking cues like bubbling sauce to determine doneness as batch sizes vary.

Nutritional Deep Dive

The macro breakdown of the Million Dollar Ravioli Casserole includes substantial carbohydrates from the pasta, protein from the cheese, and fats from both cheese and sauce. This combination contributes to a balanced meal that can fuel your body effectively. Micronutrient analysis reveals vitamins A and C from the marinara sauce, along with calcium from the cheese. Nutritionally, this casserole allows for inclusion of vegetables for added fiber and nutrients, making it adaptable to various dietary needs. Maintaining portion control is vital, especially when indulging in rich, cheesy meals such as this.

Dietary Adaptations

For gluten-free guests, try utilizing gluten-free ravioli or zoodles. Dairy-free adaptations can easily be made, swapping traditional cheese for plant-based versions. Vegan adaptations are achievable by using vegan ravioli and omitting cheese or opting for cashew-based substitutes. For low-carb options, cauliflower-based ‘ravioli’ can modify this dish for a keto-friendly twist. Consider low-FODMAP ingredients for sensitive stomachs, ensuring that meals remain enjoyable for everyone at the table.

Troubleshooting Guide

Texture issues often arise from overcooking. If notes of rubberiness are detected, ensure ravioli are cooked perfectly before layering. Flavor balance can be adjusted with seasoning; taste before baking to enhance final flavors. Temperature problems, such as uneven cooking, can often be resolved by stirring the casserole halfway through cooking or adjusting oven racks. Equipment challenges, such as baking dishes causing sticking, can be alleviated with proper greasing. When dealing with ingredient substitutions, always ensure flavors balance well; for example, a different cheese may alter the overall taste profile.

Recipe Success Stories

Community feedback often praises the Million Dollar Ravioli Casserole for its flavor and ease of preparation. Many readers have shared their successful variations, incorporating different cheeses or adding sautéed vegetables to enhance the dish further. Adaptation stories highlight the versatility of the casserole, with families making it a tradition for holiday dinners, showcasing its beloved status in many kitchens. Social media channels buzz with photography tips focusing on beautifying the dish before sharing with friends, encouraging even more creativity.

Frequently Asked Questions

Can I prepare the casserole ahead of time?

Yes! You can prepare it up to a day in advance. Just assemble the casserole, cover it tightly, and store it in the refrigerator. You can add the cheese topping before baking.

What can I serve with Million Dollar Ravioli Casserole?

This casserole pairs beautifully with a green salad, garlic bread, or steamed vegetables, creating a more balanced meal.

Can this recipe be scaled for larger gatherings?

Absolutely! You can easily double or triple the recipe, just be mindful of oven space or bake in multiple dishes.

How do I freeze leftovers?

After cooling completely, store leftover casserole in an airtight container. It can last in the freezer for about three months. Remember to thaw before baking.

Can I substitute the ravioli for fresh pasta?

Yes, fresh pasta can work, but be cautious with cooking times, as they may vary between fresh and frozen ravioli.

How can I make this dish vegetarian?

This casserole is vegetarian by default. Feel free to enhance it by adding more vegetables between layers for added nutrition.

Is there a way to make this dish lighter?

You can reduce the cheese quantity or opt for reduced-fat versions without compromising flavor, or add more vegetables to the casserole.

What if I don’t have marinara sauce?

If marinara sauce is unavailable, you can use any tomato-based sauce or even homemade tomato sauce for similar results.

Can I add meat to this recipe?

Definitely! Incorporating cooked ground beef, turkey, or Italian sausage can add robust flavor and texture to the casserole.

What’s the best way to reheat the casserole?

The best way to reheat is to cover it in foil and bake at a low temperature until heated through, ensuring it stays moist.

Additional Resources

If you enjoyed this recipe, you might love our guides on making homemade marinara sauce and various ravioli fillings. Check out more pasta-related recipes for different ideas that can complement the Million Dollar Ravioli Casserole, such as garlic bread recipes or seasonal salads. Equipment recommendations include the best baking dishes for even cooking and pasta makers for homemade ravioli variation. Lastly, don’t miss our seasonal variations that focus on incorporating fresh, vibrant ingredients for delightful seasonal dishes.

Join the Conversation

We love hearing from you! Share your experiences of making the Million Dollar Ravioli Casserole on social media and tag us in your photos. Join our community by leaving a note about your adaptations or variations. Share tips for photographing your dishes for social media—the best shots get featured! Engage with fellow food lovers who share their unique takes on this comforting dish, creating a wonderful space for culinary creativity.

The Recipe

Million Dollar Ravioli Casserole

Serves: 8 servings

Prep Time: 15 mins

Cook Time: 30 mins

Total Time: 45 mins

Kitchen Equipment Needed

  • Baking dish
  • Stovetop for warming sauce
  • Mixing bowl
  • Measuring cups and spoons

Ingredients

  • 1 package frozen ravioli (cheese-filled)
  • 2 cups marinara sauce
  • 2 cups shredded mozzarella cheese
  • 1/2 cup grated Parmesan cheese
  • 1/2 cup breadcrumbs

Directions

  1. Preheat your oven to 350°F (175°C).
  2. In a baking dish, spread a thin layer of marinara sauce on the bottom.
  3. Layer half the frozen ravioli over the sauce.
  4. Pour half of the remaining marinara sauce over the ravioli, followed by half of the mozzarella cheese.
  5. Repeat the layers, ending with marinara sauce topped with breadcrumbs and the remaining mozzarella and Parmesan cheese.
  6. Cover the dish with foil and bake for 25 minutes.
  7. Remove the foil and bake for an additional 5 minutes, or until the cheese is bubbly and golden.
  8. Let the casserole cool for a few minutes before serving.

Recipe Notes

  • Feel free to add your favorite vegetables like spinach or mushrooms to the layers.
  • Substitute the cheese for lower-fat variations if desired.
  • This dish can be frozen before baking for meal prep.

Delicious One-Pan Creamy Parmesan Chicken and Rice Recipe

One-Pan Creamy Parmesan Chicken & Rice: A Deliciously Simple Dinner

⚖️
Difficulty
Easy

⏲️
Prep Time
10 mins

🕒
Cook Time
30 mins

⏱️
Total Time
40 mins

🍽️
Servings
4

One-Pan Creamy Parmesan Chicken & Rice is a delightful dish that combines tender chicken, perfectly cooked rice, and a rich, creamy sauce, all prepared in just one pan. This recipe ensures that dinner is not only simple to make but also bursting with flavors that the whole family will love. Each bite of chicken is enhanced with the cheesy, aromatic essence of parmesan cheese, mixed with the savory notes that make a comforting meal. The added bonus? Clean-up is a breeze thanks to this one-pan wonder.

As you prepare this dish, imagine the irresistible aroma wafting through your kitchen as the chicken simmers with garlic and herbs. The creamy sauce, enveloping each grain of rice, creates a luscious texture that pulls you in with every mouthful. Not only does this meal provide a satisfying flavor profile, but it also brings warmth and joy, making it perfect for family dinners or casual gatherings.

Quick Recipe Highlights

  • Flavor Profile: A delicious blend of creamy parmesan, garlic, and savory chicken flavors.
  • Texture: Creamy, silky sauce with tender chicken and fluffy rice.
  • Aroma: Inviting notes of garlic and parmesan that fill your kitchen.
  • Visual Appeal: A beautiful, creamy dish adorned with parsley and melted cheese.
  • Skill Level Needed: This recipe is easy enough for beginner cooks and satisfying for seasoned chefs.
  • Special Equipment: All you need is a large skillet or frying pan to bring this meal to life.

Recipe Overview

  • Difficulty Level: This dish is categorized as easy, making it a great option for novice cooks looking to expand their culinary skills.
  • Category: This can be served as a main course, ideal for weeknight dinners.
  • Cuisine: An American comfort food classic that combines elements of Italian cuisine through its use of parmesan cheese.
  • Cost: The ingredients are budget-friendly, making it an economical choice for feeding a family.
  • Season: Perfect for any season, it provides comfort during cold months and can be enjoyed year-round.
  • Occasion: Great for family dinners, potlucks, or casual entertaining with friends.

Why You’ll Love This Recipe

The incredible taste and texture of One-Pan Creamy Parmesan Chicken & Rice make it an instant favorite. The combination of tender, juicy chicken with creamy rice creates a comforting balance that satisfies hunger and warms the soul. The rich parmesan flavor, along with the hint of garlic, elevates the dish to new levels of deliciousness, making it perfect for any occasion.

Convenience is a major benefit of this recipe. With everything cooked in one pan, you can spend less time cleaning and more time enjoying your meal. This recipe is also flexible—it’s easy to adapt based on what you have in your pantry, whether you want to add vegetables or substitute proteins.

From a nutritional standpoint, this dish provides a well-rounded meal. You can incorporate lean protein, whole grains, and flavorful herbs, ensuring that you’re nurturing your body while indulging in hearty flavors.

Socially, One-Pan Creamy Parmesan Chicken & Rice is a dish you’ll want to share. Its comforting, creamy essence creates the perfect setting for gatherings, and guests will appreciate the home-cooked meal that feels both special and effortless.

Finally, the cost-effectiveness of this recipe makes it appealing for anyone looking to serve a delicious meal without breaking the bank. The simple and accessible ingredients mean that you can whip up a delightful dinner any night of the week.

Historical Background and Cultural Significance

The origins of creamy chicken and rice dishes can be traced back to various cultures that have celebrated the hearty combination of poultry and grains. The introduction of parmesan cheese adds an Italian flair to this comforting American recipe, making it a fusion dish steeped in delicious tradition.

Culturally, this meal represents the importance of resourcefulness in the kitchen. Families have created one-pot meals for generations, focusing on simplicity and flavor while minimizing waste. Meals like this are often a staple during gatherings, showcasing the beloved tradition of cooking for loved ones.

Over time, the recipe for One-Pan Creamy Parmesan Chicken & Rice has evolved, incorporating various herbs and spices and adapting to regional tastes. Today, home cooks have embraced the dish, making it a popular choice for families all over the world.

Additionally, variations of this dish can be found in different cuisines, showcasing the adaptability and universal appeal of chicken and rice. From Spanish paella to Asian fried rice, the combination has remained a favorite throughout history.

Ingredient Deep Dive

Chicken breast is a staple in many households around the world. Its versatility allows it to pair beautifully with various flavors. Chicken provides lean protein essential for a balanced diet, and when selecting chicken, look for pieces that are firm and without blemishes. For storage, keep it in the fridge or freeze it if you don’t plan to use it within a couple of days.

Parmesan cheese adds depth and richness to dishes. Originating from Italy, this cheese has a long history, cherished for its intense flavor. Nutritionally, it is a good source of calcium and protein. Opt for freshly grated parmesan if possible, as it melts beautifully and enhances the dish. Keep it refrigerated in an airtight container for optimal freshness.

Rice is the backbone of this recipe and provides a filling base. It’s been a staple in various cuisines globally for centuries. Whole grain varieties, such as brown rice, can be used for added fiber. Store rice in a cool, dry place, and be mindful of expiration dates. If you’re looking to swap it out, quinoa and cauliflower rice can serve as great alternatives.

Common Mistakes to Avoid

  • Not allowing the chicken to brown properly can lead to a lack of flavor.
  • Overcooking the rice can result in a mushy texture; it should be fluffy and tender.
  • Using pre-grated cheese may not melt as smoothly as fresh cheese, leading to a grainy sauce.
  • Neglecting to season adequately throughout the cooking process can make the dish bland.
  • Cooking at too high of a temperature could cause uneven cooking or potential burning.
  • Forgetting to let the dish sit for a few minutes after cooking can ruin the creaminess of the sauce.
  • Not incorporating herbs can lead to a lack of aromatic complexity.
  • Skipping the measuring of ingredients may lead to unbalanced flavors.
  • Rushing the sautéing process can result in undercooked vegetables, if added.
  • Failing to taste before serving can miss opportunities for further seasoning adjustments.

Essential Techniques

Browning the chicken is essential for developing deep flavors. To master this technique, you should ensure your pan is hot enough before adding the chicken, allowing it to sear properly. The visual cue to look for is a golden-brown crust forming on the outside.

Cooking the rice properly requires attention to liquid ratios and timing. For perfect rice, aim to simmer until all liquid is absorbed, and avoid lifting the lid too often. The ideal visual cue is fluffy grains that do not stick together.

Making the creamy sauce requires patience. Adding the cheese slowly ensures it incorporates smoothly, enhancing the dish’s overall texture. If it looks clumpy at any point, stirring vigorously will help.

Pro Tips for Perfect One-Pan Creamy Parmesan Chicken & Rice

Use chicken thighs for even richer flavor, as they remain juicy after cooking. Incorporate seasonal vegetables like spinach or peas for added nutrition and color. If you want a bit of heat, add red pepper flakes to the sauce. For a deeper flavor, use low-sodium chicken broth instead of water when cooking the rice. Allow the dish to rest before serving, enhancing the creaminess of the sauce. Finally, sprinkle fresh herbs on top just before serving for a pop of color and flavor.

Variations and Adaptations

Regional variations often focus on different herbs and spices. For example, a southern twist can include cajun seasoning, while an Italian version could integrate sun-dried tomatoes. Seasonal adaptations might incorporate zucchini in summer or root vegetables in the winter for added nutrients.

Dietary modifications can also be made, like using cauliflower rice for a low-carb version or substituting dairy ingredients with their plant-based counterparts for a dairy-free option.

For a flavor variation, consider adding citrus like lemon zest to brighten the dish or using smoked paprika for a depth of flavor. Texture modifications may include topping the dish with toasted breadcrumbs for crunch or finishing with a drizzle of good olive oil.

Presentation can be enhanced by serving the dish in a stylish bowl, topped with freshly grated cheese and a sprinkle of parsley.

Serving and Presentation Guide

For plating, consider using shallow bowls to display the creamy sauce and chicken beautifully. Garnish with freshly chopped parsley or basil for a pop of color. Traditional accompaniments could include crusty garlic bread or a side salad for freshness. For modern serving suggestions, consider individual servings in ramekins for an elegant touch. Ensure the dish is served warm to maintain its creamy texture, and serve portions that are satisfying yet reasonable to avoid waste.

Wine and Beverage Pairing

A crisp white wine such as Chardonnay complements One-Pan Creamy Parmesan Chicken & Rice beautifully, enhancing the richness of the dish. If you prefer non-alcoholic options, consider sparkling water with a slice of lemon to refresh the palate. Additionally, pairing with a light herbal tea can provide a soothing contrast to the dish’s savory flavors.

Storage and Shelf Life

Store leftovers in an airtight container in the fridge for up to 3 days, or freeze for up to a month. Ensure the dish is cooled before sealing to prevent condensation. For best results, reheat thoroughly on the stovetop or in the microwave. To identify signs of spoilage, look for changes in smell or texture before consuming.

Make Ahead Strategies

You can prep ingredients like chopping vegetables and marinating chicken a day in advance. Storing these in the fridge keeps them fresh and cuts down on the final cooking time. Assemble the dish the day you plan to serve and follow cooking instructions for best quality. If you opt to make it ahead, simply reheat it gently before serving.

Scaling Instructions

To halve the recipe, adjust all ingredient quantities accordingly, which works well for smaller households. If doubling or tripling, ensure you have ample space in the pan or consider cooking in batches to maintain even cooking. Pay attention to timing modifications, as larger quantities may require additional cooking time. When storing, ensure your containers are appropriately sized to prevent unnecessary air exposure.

Nutritional Deep Dive

This dish offers a great macro balance, featuring protein from the chicken, carbohydrates from the rice, and fats from the cheese. Analysis reveals it is rich in vital minerals like calcium and phosphorus from the cheese, along with essential B vitamins from the chicken and rice.

When considering health benefits, it serves as a perfect comfort food without sacrificing nutrition. Portions can be adjusted to suit personal dietary needs, ensuring it fits within diverse weight management goals.

Dietary Adaptations

For gluten-free versions, replace standard rice with quinoa or rice noodles. A dairy-free adaptation could include coconut milk and nutritional yeast for cheese flavor. If you’re interested in a vegan twist, substitute chicken with tofu or tempeh and use plant-based cream alternatives. For low-carb options, adhere to cauliflower rice and almond cheese. Each adjustment maintains the essence of the original recipe.

Troubleshooting Guide

If the sauce is too thick, gradually add more broth while stirring until it reaches your desired consistency. If the flavor seems off, remember to taste as you cook, and adjust seasoning accordingly. If the chicken cooks unevenly, ensure each piece is of similar size and thickness before cooking.

Equipment challenges can arise from using pans that don’t retain heat well; switching to a heavy-bottomed pan can help achieve better results. Lastly, timing concerns can easily be resolved by preparing all ingredients beforehand, ensuring a smooth cooking experience.

Recipe Success Stories

Community feedback highlights how One-Pan Creamy Parmesan Chicken & Rice has become a go-to weeknight meal. Many share their unique adaptations, such as adding seasonal produce or swapping proteins. Feedback often includes praise for the ease of clean-up and the satisfaction of using just one pot. Cooking tips, such as optimal browning and seasoning strategies, have been valuable for new cooks, leading to successful outcomes in their kitchens.

Frequently Asked Questions

Q1: Can I make this recipe ahead of time?

A1: Yes, you can prepare the ingredients and pre-cook the chicken a day ahead. Store in the fridge and cook the rice and sauce fresh the next day.

Q2: What is the best way to store leftovers?

A2: Leftovers should be stored in an airtight container in the refrigerator and can last for up to 3 days. They can also be frozen for up to a month.

Q3: Can I use brown rice instead of white rice?

A3: Yes, brown rice can be used as a healthier alternative, but you will need to adjust the cooking time as it takes longer to cook.

Q4: Is it necessary to use fresh parmesan cheese?

A4: For the best texture and flavor, it is recommended to use freshly grated parmesan cheese, as pre-grated cheese can be grainy.

Q5: Can I add vegetables to this recipe?

A5: Absolutely! Feel free to add vegetables like spinach, peas, or bell peppers for added nutrition and color.

Q6: What can I use as a substitute for chicken?

A6: You can substitute chicken with tofu or tempeh for a plant-based option, or use turkey for a different flavor.

Q7: How can I spice it up?

A7: For an extra kick, add red pepper flakes or your favorite hot sauce to the cream sauce.

Q8: Is this dish suitable for meal prep?

A8: Yes, this dish is perfect for meal prep! You can divide portions into containers and refrigerate them for easy access throughout the week.

Q9: Can I use a different type of cheese?

A9: While parmesan is recommended for the best flavor, you can use pecorino romano or mozzarella for a different taste.

Q10: Will this recipe work in a slow cooker?

A10: Yes, you can adapt this recipe for a slow cooker; cook the chicken on low and add the rice near the end for best results.

Additional Resources

For more delicious recipes that complement One-Pan Creamy Parmesan Chicken & Rice, check out our collection of quick dinner ideas and one-pot meals. Explore technique guides on perfecting your searing and cooking rice flawlessly. For ingredient-specific information, we have thorough guides on selecting fresh chicken and the benefits of parmesan cheese. Don’t forget to check our seasonal variations that are perfect for every type of gathering!

Join the Conversation

We love hearing from our readers! Share your experiences on social media with photos and reviews of your One-Pan Creamy Parmesan Chicken & Rice. Your feedback and photography tips help create a vibrant community of food lovers and home cooks. Let’s continue the conversation about creating diverse adaptations of this recipe and share your delicious variations with us!

The Recipe

One-Pan Creamy Parmesan Chicken & Rice

Serves: 4

Prep Time: 10 mins

Cook Time: 30 mins

Total Time: 40 mins

Kitchen Equipment Needed

  • Large skillet or frying pan
  • Wooden spoon or spatula
  • Measuring cups and spoons
  • Cutting board and knife

Ingredients

  • 4 boneless, skinless chicken breasts
  • 2 cups of chicken broth
  • 1 cup of white rice (uncooked)
  • 1 cup of grated parmesan cheese
  • 1 tablespoon of olive oil
  • 2 cloves of garlic, minced
  • Salt and pepper to taste
  • Chopped parsley for garnish

Directions

  1. Heat olive oil in a large skillet over medium heat.
  2. Season chicken breasts with salt and pepper, then add to the skillet. Brown on both sides for about 6-7 minutes each.
  3. Add minced garlic and sauté for 1 minute until fragrant.
  4. Pour in chicken broth and bring to a simmer.
  5. Add rice, cover, and reduce heat to low. Cook for 18-20 minutes or until rice is tender and has absorbed liquid.
  6. Stir in parmesan cheese until melted and creamy.
  7. Garnish with chopped parsley and serve warm.

Recipe Notes

  • For best results, use freshly grated parmesan cheese.
  • Feel free to add vegetables like peas or spinach for added nutrition.
  • This dish can be made ahead; just reheat before serving.

Savor Mediterranean Delight: Greek Chicken Gyros with Tzatziki Sauce

Mediterranean Delight: Greek Chicken Gyros with Cucumber Tzatziki

⚖️
Difficulty
Medium

⏲️
Prep Time
15 mins

🕒
Cook Time
20 mins

⏱️
Total Time
35 mins

🍽️
Servings
4

Experience the vibrant flavors of the Mediterranean with our Greek Chicken Gyros accompanied by a refreshing cucumber tzatziki. This recipe combines succulent marinated chicken, grilled to perfection, wrapped in warm pita bread, and finished with a creamy, herb-infused tzatziki that bursts with flavor and freshness. The combination of spices and aromatic ingredients create an unforgettable dish that transports you straight to a sunny Greek taverna. Whether you’re hosting a casual gathering or simply want a delicious weeknight meal, these gyros are sure to impress family and friends alike.

The beauty of Greek Chicken Gyros lies not only in their impressive taste but also in their versatility. You can adjust the toppings and side dishes according to your preferences, making them a perfect fit for any occasion. Enjoy each bite filled with juicy chicken, crisp vegetables, and the zesty notes of lemon and dill, all wrapped up in a pillowy pita. Dive into this culinary journey and bring the taste of the Mediterranean directly to your table!

Quick Recipe Highlights

  • Flavor Profile: The gyros mix savory marinated chicken with cooling cucumber tzatziki. A touch of garlic, fresh herbs, and a hint of lemon zest create a delightful balance.
  • Texture: Tender chicken provides a juicy texture, while the fresh vegetables add a crisp contrast along with the creamy tzatziki.
  • Aroma: The aromatic blend of garlic, oregano, and lemon from the chicken combined with the fresh scent of mint and cucumber makes this dish incredibly inviting.
  • Visual Appeal: Vibrant greens from the vegetables alongside golden-brown chicken and white tzatziki create an appetizing and colorful presentation.
  • Skill Level Needed: Ideal for home cooks with basic grilling or cooking experience, this recipe offers a straightforward approach without complex techniques.
  • Special Equipment: You’ll need a grill or grill pan for the chicken as well as a food processor for making the tzatziki, along with basic kitchen tools.

Recipe Overview

  • Difficulty Level: The preparation of Greek Chicken Gyros is categorized as medium, requiring you to marinate the chicken and perfect the cooking methods, making it accessible for most home cooks.
  • Category: This dish is perfect for lunch or dinner, serving as a filling yet healthy option that is both fun to eat and pleasing to the palate.
  • Cuisine: Inspired by traditional Greek cuisine, these gyros highlight the Mediterranean’s emphasis on fresh ingredients and bold flavors, bringing the essence of Greek cooking to your kitchen.
  • Cost: This recipe is budget-friendly, as the main ingredients—chicken, pita, and fresh vegetables—are relatively inexpensive and can feed a family of four.
  • Season: Enjoy these gyros year-round, but they are especially refreshing during the warmer months when fresh herbs and cucumbers are at their peak.
  • Occasion: Greek Chicken Gyros are versatile for various occasions, from casual weekday dinners to summer barbecues or gatherings with friends.

Why You’ll Love This Recipe

The taste and texture of Greek Chicken Gyros are truly appealing. The marinated chicken is grilled to achieve a smoky flavor and tender consistency, providing a delightful contrast to the crunchy, fresh vegetables and creamy tzatziki sauce. This combination creates a mouthwatering experience with every bite.

Convenience and preparation benefits make this recipe a favorite. The marinating process can be done ahead of time, allowing the flavors to develop while you focus on other meal preparations. Additionally, assembly is quick, making it ideal for meal prep or weeknight dinners without the stress of extensive cooking.

From a nutritional perspective, Greek Chicken Gyros offer a range of benefits. The lean protein from chicken, combined with the fresh vegetables and yogurt-rich tzatziki, contribute to a satisfying and balanced meal. This dish is packed with vitamins and minerals, promoting overall health while still tasting indulgent.

Socially, this recipe is perfect for entertaining. The hand-held nature of gyros makes them a fun finger food, ideal for gatherings. Guests can customize their own gyros, fostering interaction and enjoyment while sharing a meal together.

Finally, the cost-effectiveness and accessibility of the ingredients make this recipe a smart choice. Fresh vegetables and spices are readily available, and the simplicity of the dish ensures you can prepare it without breaking the bank, all while impressing your guests and family with a delicious meal.

Historical Background and Cultural Significance

Greek gyros have a rich history that traces back to ancient civilizations, drawing influence from Middle Eastern traditions of cooking meat on vertical rotisseries. The term “gyros” translates to “turn” in Greek, referring to the spinning method of roasting meat, which has become synonymous with this popular dish.

Culturally, gyros are an integral part of Greek cuisine, often enjoyed as street food that promotes social interaction. They encapsulate the essence of Mediterranean dining, where fresh ingredients and simple preparations celebrate regional flavors. Sharing a meal of gyros can evoke a sense of community and tradition among friends and family.

Over the years, the recipe for gyros has evolved, adapting to various tastes and preferences. While traditionally made with pork or lamb, chicken variations have gained popularity due to their accessibility and health benefits. In modern times, gyro shops can be found around the world, showcasing the global appeal of this iconic dish.

Regional variations highlight the diversity of the gyro, with different countries adding their unique twist. For instance, in Turkey, döner kebabs bear resemblance to gyros but use different spices, while in the United States, gyros may be served with a wider array of toppings, enhancing the overall experience.

Ingredient Deep Dive

Chicken: Chicken is a staple protein in Greek cuisine, symbolizing the Mediterranean diet’s focus on lean meats. Rich in essential amino acids, chicken is not only nutritious but also versatile in preparation methods. When selecting chicken, look for organic or free-range options for enhanced flavor and welfare considerations. Store raw chicken in the refrigerator and consume within a few days or freeze for longer preservation. For substitutions, turkey or tofu can be good alternatives for varied dietary preferences.

Pita Bread: A key component of gyros, pita bread has ancient roots in Mediterranean cooking that serve as a base for various fillings. It’s a great source of carbohydrates and provides energy for the body. When choosing pita, opt for whole grain versions for an extra boost of fiber. Pita should be stored in an airtight container to retain freshness or frozen if not consumed quickly. If unavailable, flatbreads or wraps can be used as substitutes.

Tzatziki Sauce: Tzatziki holds historical significance in Greek culture, commonly served as a dip or sauce alongside various dishes. Made primarily from yogurt and cucumbers, it’s packed with probiotics, aiding digestion, while cucumber provides hydration and essential vitamins. Always select fresh cucumbers and high-quality Greek yogurt for the best flavor. To create homemade tzatziki, feel free to experiment with herbs like dill or mint, ensuring an authentic taste.

Vegetables: Fresh vegetables, including tomatoes, lettuce, and red onions, not only intensify the flavors of gyros but also add nutritional value. They offer a range of vitamins, minerals, and antioxidants that support health. When shopping for vegetables, prioritize those that are in-season for optimal flavor and sustainability. Store them in the refrigerator to keep them crisp. For variation, consider adding bell peppers or cucumbers to enhance the crunch.

Common Mistakes to Avoid

  • Over-marinating the chicken: Too long in the marinade can lead to mushy texture due to acid breakdown. Aim for 1-4 hours for best results.
  • Using low-quality pita: Using subpar pita can ruin the overall experience. Always opt for fresh, fluffy pita for a satisfying wrap.
  • Skipping the resting step: Failing to rest the grilled chicken can result in dry meat. Allow it to rest for 5-10 minutes post-cooking to maintain juiciness.
  • Piling too much filling: Overstuffing can lead to tearing. Keep a balanced amount of fillings for an easier, cleaner wrap.
  • Neglecting seasoning: Lack of seasoning in chicken can make the gyros bland. Don’t skip on spices and herbs for maximum flavor.
  • Not using fresh herbs: Dried herbs lack the brightness of fresh ones. Incorporate fresh herbs into your tzatziki for enhanced flavor.
  • Grilling on high heat: Cooking on too high heat may result in charred exterior and undercooked interior. A medium heat is optimal for even cooking.
  • Skipping the tzatziki: Tzatziki is essential for the gyro experience. Always serve it alongside for that classic Greek flavor.
  • Neglecting the freshness of vegetables: Using wilted vegetables can detract from the dish’s appeal. Ensure vegetables are fresh and vibrant.
  • Not cleaning the grill: A dirty grill may impart unwanted flavors to the chicken. Always clean the grill properly before use.

Essential Techniques

Marinating the Chicken: Marinating is crucial as it infuses flavors into the meat. To master this technique, ensure you’re using the right balance of acids, oils, and seasonings. Avoid using too much acid, which can make the meat tough. Aim for a time between 1-4 hours for optimal results. Visual cues include a change in color and slight tenderness of the meat.

Grilling: Achieving the perfect grill marks and sear is an art. Preheat your grill to medium-high heat before placing the chicken on it. Avoid moving the chicken too much; let it develop a nice crust before flipping. A common pitfall is cooking on too high heat, which may char the outside without cooking through. Look for clear juices and an internal temperature of 165°F as indicators of doneness.

Pro Tips for Perfect Greek Chicken Gyros

1. Choose the right chicken cut. Boneless thighs offer juiciness, while breasts work for a leaner option.

2. Prepare the tzatziki a few hours in advance to enhance flavor development; it can even be made the day before.

3. Warm the pita just before serving for an inviting touch. This can be done on the grill or in the oven.

4. Elevate the gyros by adding pickled vegetables for a tangy crunch that complements the freshness.

5. Consider using herbs like parsley or cilantro in the tzatziki for a unique twist.

6. Layer the fillings strategically, placing heavier items like meat at the bottom to avoid soggy pitas.

7. Don’t forget to adjust your seasoning to taste during various stages of preparation.

8. Lastly, feel free to experiment with spices in your marinade to create variations of flavor preferences.

Variations and Adaptations

Regional variations of gyros showcase a range of flavors, where Mediterranean countries might add unique spices or sauces, enhancing the experience. For instance, try adding tzatziki flavored with smoked paprika for a hint of smokiness. Seasonal adaptations can also be made by utilizing seasonal vegetables, like eggplant in the summer or roasted roots in the fall for added depth of flavor. For dietary modifications, consider using grilled eggplant or mushrooms as meat alternatives to cater to vegetarian options.

Flavors can be tweaked by incorporating different herbs like basil or cilantro for an unexpected twist. Experimenting with the textures such as grilled or roasted veggies can create delightful variations as well. For a modern presentation, try deconstructing the gyro and serve the components separately on a platter, allowing guests to build their own gyros at the table – an interactive and enjoyable experience!

Serving and Presentation Guide

For plating the Greek Chicken Gyros, opt for a rustic wooden board or a simple white plate for a clean look. Start by layering the pita in the center and carefully add the filling, allowing the ingredients to spill slightly over the pita for an enticing look. Garnish with sprigs of fresh herbs like dill or parsley for a pop of color.

For an added touch, serve with a side of freshly cut lemon wedges that guests can squeeze over their gyros, enhancing the flavors. Consider pairing with a simple salad for a refreshing balance, while presenting tzatziki in small bowls for dipping or drizzling. Keep the presentation minimal yet inviting, emphasizing freshness and simplicity.

Wine and Beverage Pairing

For the perfect wine pairing, opt for a crisp white wine like Sauvignon Blanc or a light-bodied red, such as Pinot Noir, which complements the flavors of grilled chicken and fresh herbs. For a more traditional choice, a Greek wine like Assyrtiko works beautifully alongside gyros.

If you’re seeking non-alcoholic alternatives, consider fresh mint lemonade or sparkling water with citrus for a refreshing pairing. Additionally, a traditional Greek coffee can round off the meal nicely, providing a satisfying end to the dining experience.

Storage and Shelf Life

To store your Greek Chicken Gyros, separate the chicken fillings from the pita and vegetables to maintain freshness. The grilled chicken can be kept in an airtight container in the refrigerator for up to 4 days, while the pita and tzatziki can be stored for about 2 days. When reheating the chicken, consider using the oven or stovetop to preserve its moisture.

Signs of spoilage include an off smell or any discoloration in the chicken. Should any components be left over, know that tzatziki can be frozen for future use, enabling you to enjoy this flavorful sauce at a later date. For best texture, aim to use it within 3 months when frozen.

Make Ahead Strategies

Making this dish ahead of time can heighten your meal prep efficiency. Consider marinating the chicken up to 24 hours prior to grilling, allowing the flavors to deepen. Tzatziki can also be prepared earlier, with a one-day head start recommended for optimal taste.

Store the chicken and tzatziki separately in the fridge until you are ready to grill and assemble. When reheating, be careful not to dry out the chicken; warming gradually will help maintain its juicy texture. Adding fresh toppings just before serving ensures they retain their crunch and brightness.

Scaling Instructions

Scaling this recipe is straightforward. If halving the ingredients, make sure to adjust the marinating time for the chicken since smaller pieces may cook faster. When doubling or tripling the recipe, ensure your cooking surface has ample space, possibly cooking in batches if quantities exceed the grill capacity.

Keep in mind that prepping larger amounts may require additional time for chopping vegetables and making tzatziki. Always taste and adjust seasoning in larger batches to ensure balanced flavors throughout. Storage considerations are similar, so plan to keep leftovers properly sealed to maintain quality.

Nutritional Deep Dive

This Mediterranean delight provides a macro breakdown that includes a good balance of protein, carbs, and healthy fats. With chicken being high in protein and yogurt providing beneficial probiotics, you’ll find this meal to be incredibly fulfilling.

Additionally, the nutritional value of fresh vegetables does wonders for adding fiber and crucial vitamins. Consider portion analysis to keep servings in check; a standard gyro serving includes roughly 400-500 calories, depending on the fillings and sauces used. This meal fits well into weight management plans by offering nourishing ingredients without added fillers or unwanted calories.

Dietary Adaptations

If you need gluten-free options, replace traditional pita with gluten-free wraps or lettuce leaves for a fresh twist. For dairy-free alternatives, utilize plant-based yogurt in the tzatziki while ensuring other ingredients remain compliant according to personal dietary preferences.

Vegans can swap out chicken for marinated tofu or chickpeas, offering a hearty and satisfying substitute without compromising flavor. For keto diets, focus on limiting carbs by eliminating the pita and enjoying the fillings served over salad greens instead, maintaining satisfying flavors while aligning with dietary needs.

Troubleshooting Guide

For texture issues, ensure that marinating time is balanced to achieve ideal tenderness without overcooking. If flavor balance seems off, consider adjusting spice levels in the marinade or adding more fresh ingredients to the tzatziki. Temperature problems often arise from undercooking; investing in a meat thermometer can help maintain proper doneness.

Address equipment challenges by understanding functionality—if using a grill that tends to be uneven, rotate the pieces for even cooking. Ingredient substitutions should be approached with caution; test smaller amounts first to ensure flavors meld well. Lastly, timing concerns can be resolved by preparing ahead, routing challenges down to prep efficiency.

Recipe Success Stories

Community feedback has highlighted how this Greek Chicken Gyros recipe has become a family favorite, appealing to both adults and children alike. Readers have shared their variations, such as adding different vegetables, showcasing individual creativity and adaptations.

Adaptation stories often include success in introducing new flavors—such as smokey spices or tangy marinades—that have taken their gyros to the next level. Encouraged by the recipe’s accessibility, home cooks have taken to experimenting more often, resulting in exciting cuisine variations.

Photography tips have also surfaced, where readers have documented their colorful presentations on social media platforms, creating buzz and promoting friendly competition among followers on who can plate the gyros the best.

Frequently Asked Questions

Can I make the tzatziki without yogurt? Yes, you can substitute Greek yogurt with dairy-free options like cashew yogurt for a similar creamy texture while maintaining flavors.

How can I store leftover gyros? Store leftover components separately in airtight containers and keep them refrigerated for up to 3-4 days for optimal freshness.

Can I use other meats besides chicken? Absolutely! You can also use beef, lamb, or turkey, ensuring that you adjust cooking times according to the type of meat used.

Is this recipe suitable for meal prep? Yes, the components can be made in advance, with marinated chicken and tzatziki storing well to allow easy assembly on busy nights.

What’s the best way to make sure the chicken stays juicy? Avoid overcooking and allow the chicken to rest after grilling; these steps will help retain moisture.

How spicy is this recipe? This recipe is not inherently spicy, but you can add red pepper flakes or cayenne to the marinade for a kick.

Is this dish kid-friendly? Yes, the flavors are mild and customizable, making it a perfect option for children who can help assemble their own gyros.

Can I grill the chicken indoors? Absolutely! Use a grill pan on the stovetop or broil in the oven when outdoor grilling isn’t an option.

How can I enhance the flavor of the tzatziki? Adding a teaspoon of lemon juice or a sprinkle of fresh mint can boost the freshness and complexity of your tzatziki.

What type of pita should I use? Opt for fresh, soft pita bread, ideally whole-wheat varieties for a healthier choice.

Additional Resources

If you enjoyed these Greek Chicken Gyros, consider trying other Mediterranean recipes like a classic Greek Salad or Chicken Souvlaki. Delve into technique guides about grilling meats, or discover ingredient information that can elevate your cooking skills further.

Additionally, check out equipment recommendations, such as grill pans or quality knives that are beneficial for meal preparations. Seasonal variations can also inspire future meals using fresh, local produce in alignment with the changing seasons.

Join the Conversation

Share your experience preparing our Greek Chicken Gyros on social media! Include photos of your culinary creations and variations. We encourage you to leave reviews and feedback to foster a community of enthusiastic home cooks as we gather around the joy of good food and shared experiences. Engage and connect with others while igniting creativity in the kitchen!

The Recipe

Greek Chicken Gyros with Cucumber Tzatziki

Serves: 4

Prep Time: 15 mins

Cook Time: 20 mins

Total Time: 35 mins

Kitchen Equipment Needed

  • Grill or grill pan
  • Food processor
  • Mixing bowls
  • Sharp knife
  • Cutting board

Ingredients

  • 1 lb boneless, skinless chicken thighs
  • 4 pita pockets
  • 1 cucumber, grated
  • 1 cup Greek yogurt
  • 2 cloves garlic, minced
  • 2 tbsp fresh dill, chopped
  • 2 tbsp olive oil
  • 2 tbsp red wine vinegar
  • 1 tsp dried oregano
  • Salt and pepper to taste
  • 1 tomato, sliced
  • 1 small red onion, thinly sliced
  • Lemon wedges for serving

Directions

  1. In a mixing bowl, combine olive oil, red wine vinegar, minced garlic, oregano, salt, and pepper to create the marinade. Add chicken and coat evenly. Marinate for at least 1 hour.
  2. While the chicken marinates, prepare the tzatziki by mixing Greek yogurt, grated cucumber, dill, and a pinch of salt in a food processor until well combined. Refrigerate until ready to use.
  3. Heat the grill or grill pan to medium heat. Remove chicken from marinade and grill each side for about 5-7 minutes until cooked through.
  4. Once cooked, let the chicken rest for a few minutes before slicing it into strips.
  5. Warm the pita pockets briefly on the grill. Assemble by layering grilled chicken, tzatziki, tomatoes, and onions inside the pita.
  6. Serve with lemon wedges on the side for an extra burst of flavor.

Recipe Notes

  • Chicken can be substituted with beef or lamb if desired.
  • Feel free to add additional toppings such as olives or feta cheese.
  • For a spicier twist, consider adding red pepper flakes to the chicken marinade.

Savory Honey Pepper Chicken with Lo Mein and Steamed Rice

Honey Pepper Chicken: A Flavorsome Delight with Lo Mein & Steamed Rice

⚖️
Difficulty
Medium

⏲️
Prep Time
20 mins

🕒
Cook Time
30 mins

⏱️
Total Time
50 mins

🍽️
Servings
4

Indulge in the sweet and spicy flavors of Honey Pepper Chicken combined with perfectly cooked lo mein and steamed rice. This dish is not just a meal; it’s an experience that brings together the essence of Asian cuisine, creating a symphony of flavors. The honey lends a delightful sweetness that contrasts beautifully with the pepper’s heat, while the tender chicken soaks in all the flavors, making every bite irresistible. Accompanied by lo mein, known for its chewy texture, and steamed rice, this meal is sure to satisfy cravings for delicious comfort food.

As you prepare your Honey Pepper Chicken, the aromatic notes of ginger and garlic will fill your kitchen, igniting excitement for the feast to come. Whether it’s a cozy family dinner or a gathering with friends, this dish stands out with its vibrant colors and inviting aromas. Each component of this recipe brings something special, harmonizing into a satisfying meal that pleases both the palate and the eye.

Quick Recipe Highlights

  • Flavor Profile: A perfect balance between sweet honey and spicy pepper, with a hint of garlic adds depth.
  • Texture: Juicy chicken, chewy lo mein, and fluffy steamed rice create a delightful mouthfeel.
  • Aroma: The combined scents of ginger, garlic, and honey will make your home inviting and irresistible.
  • Visual Appeal: Bright colors from the chicken glaze and vibrant vegetables make this dish visually stunning.
  • Skill Level Needed: Ideal for those comfortable with basic cooking techniques; perfect for home cooks.
  • Special Equipment: A non-stick pan and a wok or large skillet are recommended for optimal results.

Recipe Overview

  • Difficulty Level: This recipe is medium in difficulty, making it accessible for both novice and experienced cooks. The key involves mastering the timing to ensure all components are cooked to perfection concurrently.
  • Category: A delightful fusion of main dish and pasta, this recipe is perfect for lunch or dinner.
  • Cuisine: Drawing influences from Asian cooking, particularly Chinese cuisine, this dish reflects the bold flavors loved around the world.
  • Cost: The ingredients are affordable, with approximate costs for each item being reasonable for a quality homemade meal.
  • Season: This meal can be enjoyed year-round, with its comforting flavors fitting for every season.
  • Occasion: Excellent for weeknight dinners, family gatherings, or special occasions that call for a lovely yet simple meal.

Why You’ll Love This Recipe

This Honey Pepper Chicken is a culinary delight that tantalizes your taste buds with each bite. The unique flavor blend, featuring the perfect harmony of sweet and spicy, makes it a stand-out choice at any meal. The chicken, marinated in honey and pepper, offers an explosion of flavors, while the lo mein provides a satisfying chewy texture, enhancing the overall experience. The addition of bright, vibrant vegetables elevates the dish, making it both colorful and nutritious.

In terms of convenience, this recipe is designed to be straightforward, allowing home cooks to create a delicious meal without a fuss. The preparation and cook times are manageable, making it an ideal option for busy weeknights or unexpected guests. The quick cooking process maximizes flavor while minimizing time in the kitchen, granting you more moments to enjoy with loved ones.

From a nutritional standpoint, this dish includes lean protein from the chicken, ample vegetables for essential vitamins, and carbohydrates from the rice and lo mein. It’s not only a treat for your taste buds but also a well-rounded meal option that fuels your body.

Sharing meals like this Honey Pepper Chicken can foster social connections and create lasting memories. Whether you’re hosting a dinner party or enjoying a family meal, this dish is bound to spark joy around the table. You’ll find your guests raving about the flavors and asking for seconds, which only adds to the delightful experience of serving this dish.

Lastly, the cost-effectiveness of this Honey Pepper Chicken recipe cannot be overlooked. With just a few easily accessible ingredients, you can create a gourmet experience at home without straining your budget. It’s a prime example of how something simple can bring immense satisfaction and joy.

Historical Background and Cultural Significance

The origins of dishes like Honey Pepper Chicken can be traced back to the rich diversity of Asian cuisine, particularly Chinese culinary traditions where a balance of sweet and savory flavors is celebrated. Honey has been used for centuries, not only for sweetness but also for its preservative properties, making it a staple ingredient in many Asian dishes, including marinades and stir-fries.

Culturally, honey represents prosperity and sweetness in various societies. In Chinese culture, it is often associated with health benefits and traditional medicine, contributing to dishes that nurture both body and spirit. As culinary practices evolved, the integration of ingredients like pepper became popular, emphasizing heat and flavor.

Over time, recipes like Honey Pepper Chicken have adapted, incorporating modern techniques and tastes while keeping their traditional roots. Various regional interpretations have also emerged, showcasing unique spices and cooking methods, which enrich the culinary landscape.

Today, this dish is celebrated not only in Asian restaurants worldwide but also in home kitchens, where families gather to enjoy its signature flavors. The continued popularity of Honey Pepper Chicken highlights the adaptability and timeless appeal of classic Asian fusion cuisine.

Ingredient Deep Dive

Chicken
Chicken is the star of this recipe, providing a rich source of protein that is essential for muscle development and overall health. Depending on the cut chosen, chicken offers varying degrees of flavor and tenderness. Selecting fresh chicken is crucial, with skinless breasts or thighs being popular choices for this dish. When storing, keep chicken in the refrigerator if using within a day or two, or opt for freezing to preserve freshness longer.

Honey
Honey not only adds sweetness to the dish but also offers natural antioxidants and anti-inflammatory properties. When selecting honey, look for raw or organic varieties for maximum health benefits. Store it in a cool, dry place to maintain its quality; its longevity is outstanding thanks to its natural preservative qualities. Honey can be substituted with other sweeteners if desired, but may alter the final flavor profile.

Lo Mein
Lo mein noodles are a delightful addition, providing a chewy texture that complements the chicken well. Traditionally made from wheat flour and egg, selecting fresh or egg lo mein enhances the dish’s authentic taste. When purchasing, check for expiration dates for the best quality. Lo mein should be stored refrigerated and can last several days if properly kept. For gluten-free diets, alternatives like rice noodles can be substituted.

Pepper
Black pepper is often used for its spicy kick, enhancing the overall flavor of the chicken. Its health benefits include aiding digestion and having anti-inflammatory properties. Choosing whole peppercorns and grinding them fresh enhances taste significantly. Store it in a cool, dry place and avoid exposure to moisture. When looking for substitutes, consider chili flakes or white pepper for a different taste.

Common Mistakes to Avoid

  • Overcooking the chicken can lead to dryness. Ensure the chicken is cooked just until tender.
  • Not marinating long enough may result in a less flavorful dish. Aim for at least 30 minutes to maximize flavor.
  • Using cold oil can cause sticking. Always preheat your pan to achieve a nice sear.
  • Using too much honey can overload the dish with sweetness, strike a balance between honey and pepper.
  • Not cooking the lo mein properly can result in a mushy texture. Follow package directions for best results.
  • Neglecting to taste as you go may lead to an unbalanced flavor. Adjust seasoning during the cooking process.
  • Skipping the vegetable additions can make the dish one-dimensional; colorful vegetables enhance both flavor and nutrition.
  • Using non-stick pans incorrectly can lead to sticking. Make sure to use the right heat and oil for best results.
  • Not allowing the chicken to rest before slicing may lead to loss of juices. Let it sit for a few minutes post-cooking.
  • Rushing the assembly can compromise flavor; take time to ensure all components are well-integrated.

Essential Techniques

Marinating
Marinating is vital as it infuses flavors into the chicken. To master this, combine your marinade ingredients and allow the chicken to soak for sufficient time—at least 30 minutes. Avoid marinating too long, as the acidity can break down the meat too much. The ideal marinade should balance oil, acid, and flavors for optimal results.

Stir-frying
Stir-frying is an essential cooking technique for achieving that perfect texture in this dish. Use high heat and ensure your ingredients are cut uniformly. It’s important to work quickly. Visual cues for success include a sizzling sound and the vegetables’ vibrant colors remaining intact, signifying they are cooked yet crisp.

Pro Tips for Perfect Honey Pepper Chicken

– Always use fresh ingredients for the best flavors; freshness makes a significant difference in taste.
– Adjust the sweetness and spice levels according to your preference; taste as you cook.
– Consider adding a splash of soy sauce for a unique umami flavor boost.
– Balance the dish’s textures by including a variety of vegetables, like bell peppers and snap peas.
– Ensure your pan is hot enough to quickly sear the chicken, which locks in moisture.
– Add the lo mein at the end of the cooking process to prevent it from getting overcooked.
– Make sure to serve immediately for the best flavors and textures; this dish is best enjoyed fresh.
– Use garnishes like sliced scallions or sesame seeds for a beautiful presentation.

Variations and Adaptations

For regional variations, consider adding local ingredients such as kimchi for a Korean twist or pickled vegetables for a tangy contrast. Seasonal adaptations can also be made by using vegetables in peak season—for example, snow peas in spring or squash in fall.

For dietary modifications, this recipe can easily be made vegan by substituting chicken with tofu or tempeh. For flavor variations, consider incorporating a range of spices, like sriracha, for more heat. You can also experiment with texture by adding crushed nuts for crunch or a sprinkle of sesame seeds for added flavor. Presentation alternatives such as serving in lettuce cups instead of rice can also create an appealing dish.

Serving and Presentation Guide

Plating is important to showcase this dish. Use a large, shallow bowl to present the lo mein neatly at the bottom, with the honey pepper chicken layered on top. Garnish with sliced scallions and sesame seeds for a fresh touch. Consider serving additional vegetables on the side for a balanced meal.

For garnishing, fresh herbs like cilantro or parsley can add vibrancy. Traditional accompaniments like egg rolls or spring rolls meld beautifully with the meal. Modern serving suggestions include rice paper wraps alongside the dish for a creative twist. Temperature considerations are crucial; serve the dish hot for the best flavor experience. Portion control can be achieved by measuring out servings with a ladle or bowl to avoid over-serving.

Wine and Beverage Pairing

When pairing beverages, consider a chilled Riesling or Sauvignon Blanc, both complementing the dish’s spicy and sweet tones. Additionally, light-pint beers can enhance the flavors without overpowering them. For non-alcoholic alternatives, sparkling water with a slice of lemon or iced tea can refresh the palate.

If you prefer coffee or tea pairings, a light green tea or a mildly roasted coffee can enhance the meal’s overall flavors. Temperature considerations are key; serve beverages at the appropriate temperatures to maintain taste profiles and ensure an enjoyable dining experience.

Storage and Shelf Life

Storing your Honey Pepper Chicken properly ensures longevity and freshness. It should be kept in an airtight container and can last up to 3-4 days in the refrigerator. The rice and lo mein should be stored separately to maintain texture.

For freezing, ensure that the dish is cooled completely before transferring it to a freezer-safe container. Properly frozen, it can last for up to three months. Signs of spoilage include an off smell or changes in texture. When reheating, aim for gentle heat to preserve moisture, and for the best results, add a splash of water to create steam and prevent dryness.

Make Ahead Strategies

To make this recipe ahead of time, marinate the chicken the night before for enhanced flavor. You can also pre-cook the rice and lo mein, storing them separately in the refrigerator. The chicken can be sautéed and kept in the fridge for a quick meal assembly.

Quality impact is minimal with proper reheating. Ensure to use gentle heat when warming leftovers, and consider adding fresh herbs or a squeeze of citrus upon serving to rejuvenate flavors. Finally, premium ingredients like fresh veggies can be added just before serving for enhanced freshness.

Scaling Instructions

If you wish to halve or double this recipe, adjust the ingredient quantities proportionately while keeping the cooking times the same. For larger batches, ensure your cooking equipment has enough capacity without overcrowding to avoid uneven cooking.

Timing modifications may be necessary—larger quantities may need additional cooking time, particularly when sautéing chicken to ensure it’s thoroughly cooked. Storage considerations should also be accounted for, with ample airtight containers required for effective refrigeration or freezing.

Nutritional Deep Dive

The macro breakdown of Honey Pepper Chicken includes essential proteins from chicken, carbohydrates from lo mein and rice, while providing valuable fats. Each serving offers a nutrient-dense balance, promoting muscle maintenance and overall health.

Micronutrient analysis reveals vitamins from vegetables, enhancing the meal’s nutritional profile. Health benefits include lean protein sources and fiber from vegetables, supporting digestion. It’s crucial to monitor portion sizes as well; a balanced approach ensures you enjoy this meal without overwhelming caloric intake.

Dietary Adaptations

For gluten-free variations of Honey Pepper Chicken, substitute lo mein with rice noodles or gluten-free pasta. Dairy-free adjustments can easily be achieved as there are no dairy ingredients in the recipe.

For vegan options, swap chicken for tofu, marinated similarly in honey (consider agave for strict vegans) and sautéed until golden. Low-carb and keto adaptations can also be made by omitting rice and opting for cauliflower rice instead, while paleo participants can enjoy it by using natural sweeteners and avoiding grains.

Troubleshooting Guide

If you encounter texture issues, overcooked ingredients can be remedied by cooking on lower heat from the beginning. For flavor balance, consider adding acid like vinegar or citrus if the dish is too sweet.

Temperature problems can arise if the cooking surface is not adequately heated—make sure to allow the pan to reach a satisfactory temperature before adding ingredients. If you need ingredient substitutions, keep a list handy of alternatives that can maintain the flavor and texture profiles.

Timing concerns can be mitigated by preparing ingredients in advance, such as chopping vegetables early, to streamline the cooking process.

Recipe Success Stories

Community feedback on this Honey Pepper Chicken recipe has been overwhelmingly positive, highlighting its versatility and flavor. Readers have shared their successful adaptations, with variations ranging from spice adjustments to ingredient replacements.

Many report that this recipe has become a family favorite, leading to requests for dinner parties and special occasions. Photography tips from readers emphasize the importance of using natural light to accentuate the dish’s vibrant colors, thus making it more appetizing.

Frequently Asked Questions

1. Can I make this dish ahead of time?
Yes, you can marinate the chicken and pre-cook the noodles, storing them separately in the fridge.

2. What vegetables can I add to this recipe?
Consider adding bell peppers, snap peas, or broccoli for additional flavor and nutrition.

3. Can I use other proteins instead of chicken?
Absolutely! Tofu, shrimp, or beef can be excellent alternatives.

4. How can I make this recipe spicier?
Incorporate additional black pepper or add sriracha during cooking for a heat boost.

5. Is this recipe gluten-free?
You can make it gluten-free by using rice noodles instead of lo mein and ensuring the sauce is also gluten-free.

6. What can I serve with Honey Pepper Chicken?
Besides lo mein and rice, serve with egg rolls or fresh salad.

7. How do I store leftovers?
Store leftovers in airtight containers, refrigerated, for up to 3-4 days.

8. Can I freeze this dish?
Yes, it freezes well for up to three months; just ensure it’s cooled before storing.

9. How do I reheat the chicken?
Gently reheat on the stovetop or microwave, adding a little water for moisture.

10. What is the best way to present this dish?
Use a shallow bowl for plating, layering the lo mein first and topping it with chicken, garnishing with scallions.

Additional Resources

If you enjoyed this Honey Pepper Chicken recipe, you might also like related recipes like Sweet and Sour Chicken or Spicy Szechuan Noodles. Technique guides covering stir-frying can enhance your cooking skills for similar dishes, while ingredient information can help you explore new flavors. For culinary equipment, consider investing in a quality non-stick pan for better results. Seasonal variations could include using autumn vegetables, adding squash for a unique touch during the colder months.

Join the Conversation

We’d love to see your iterations of this Honey Pepper Chicken! Share your photos and comments on social media, and engage in recipe reviews. Your feedback not only enriches our community but inspires others to explore their creativity in the kitchen. If you have your own variations or suggestions, let’s connect and share our culinary adventures!

The Recipe

Honey Pepper Chicken with Lo Mein & Steamed Rice

Serves: 4

Prep Time: 20 mins

Cook Time: 30 mins

Total Time: 50 mins

Kitchen Equipment Needed

  • Non-stick pan
  • Wok or large skillet
  • Cutting board
  • Sharp knife
  • Airtight containers for storage

Ingredients

  • 1 lb chicken breast, sliced into strips
  • 1/4 cup honey
  • 1-2 teaspoons black pepper (or to taste)
  • 2 tablespoons soy sauce
  • 2 cups lo mein noodles
  • 1 cup mixed vegetables (bell pepper, broccoli, etc.)
  • 2 tablespoons vegetable oil
  • Cooked rice, for serving
  • 2 green onions, sliced, for garnish
  • Sesame seeds, for garnish

Directions

  1. In a bowl, combine sliced chicken, honey, black pepper, and soy sauce. Marinate for at least 30 minutes.
  2. Cook lo mein noodles according to package instructions; drain and set aside.
  3. In a large non-stick pan, heat vegetable oil over medium-high heat; add marinated chicken and cook until browned.
  4. Add mixed vegetables to the pan and stir-fry till tender.
  5. Incorporate cooked lo mein noodles, mixing all ingredients well.
  6. Serve over steamed rice, garnished with green onions and sesame seeds.

Recipe Notes

  • Feel free to substitute chicken with another protein, such as tofu or shrimp.
  • Customize the vegetables based on seasonal availability for freshest flavors.