Irresistible Sticky Beef Noodles Recipe for Quick Dinner Delight

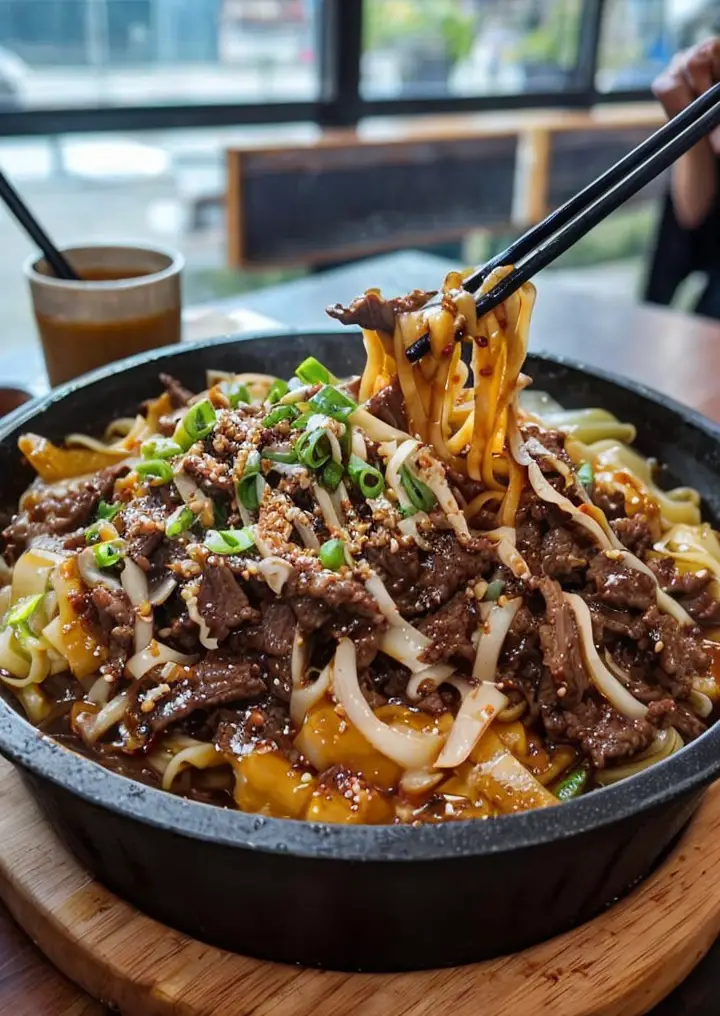
Sticky Beef Noodles: A Delicious Asian-Inspired Delight

⚖️
Difficulty
Medium

⏲️
Prep Time
20 mins

🕒
Cook Time
30 mins

⏱️
Total Time
50 mins

🍽️
Servings
4 servings

Sticky Beef Noodles is a culinary adventure that will transport your taste buds straight to the vibrant streets of Asia. This dish expertly combines tender beef with the chewy texture of noodles, all enveloped in a beautifully rich and sticky sauce. The harmony of sweet, savory, and umami flavors will capture your heart and palate from the very first bite, leaving you longing for more. Whether you’re looking for a delightful weeknight meal or a dish to impress guests at your dinner table, Sticky Beef Noodles is sure to satisfy.

The preparation of Sticky Beef Noodles creates a delightful aroma that wafts through your kitchen, promising comfort food at its finest. As you stir fry the marinated beef, the savory notes blend with garlic and ginger, creating a fragrant base that enhances the dish’s overall appeal. Coupled with colorful vegetables, each element not only adds to the flavor but contributes visually, resulting in a feast for the eyes as well as the stomach.

Quick Recipe Highlights

  • Flavor Profile: A perfect blend of sweet soy sauce, savory beef, and the kick of garlic creates a complex flavor that is truly addictive.
  • Texture: The beef is tender and juicy, while the noodles provide a delightful chewiness, offering a satisfying mouthfeel.
  • Aroma: Notes of garlic, ginger, and soy sauce fill the air, providing a warm and inviting atmosphere as you cook.
  • Visual Appeal: The dish boasts vibrant colors with fresh vegetables and glossy noodles, creating an inviting plate that is hard to resist.
  • Skill Level Needed: This dish requires some cutting and stir-frying skills but is relatively easy for a confident home cook.
  • Special Equipment: A large wok or a non-stick skillet is essential for ensuring even cooking and achieving that signature stir-fry finish.

Recipe Overview

  • Difficulty Level: Sticky Beef Noodles is classified as medium difficulty, balancing between straightforward techniques and potential culinary finesse.
  • Category: This dish serves as an excellent main course and is perfect for either casual or formal dining occasions.
  • Cuisine: Drawing from Asian culinary traditions, this recipe reflects the global love for stir-fried dishes with rich flavors.
  • Cost: The cost of preparing Sticky Beef Noodles is economical, relying on budget-friendly ingredients such as beef, noodles, and seasonal vegetables.
  • Season: This dish can be enjoyed at any time of year, but its warm and hearty nature makes it particularly appealing during the cooler months.
  • Occasion: Perfect for family dinners, casual gatherings, or even meal prepping for a busy week ahead, Sticky Beef Noodles shines on any occasion.

Why You’ll Love This Recipe

The rich flavors and textures of Sticky Beef Noodles create a dish that is both satisfying and delightful. The tender beef, perfectly cooked noodles, and vibrant vegetables combine to form an unforgettable flavor experience. Each forkful brings together the sweetness of the sauce with the umami richness of the beef, complemented by the crunch of fresh vegetables, making every bite a taste sensation.

This recipe offers convenience in its preparation. With everything cooked in one pan, you’re not only saving on cleanup but also maximizing flavor through the layering of ingredients in the same cooking vessel. Plus, the quick cooking time makes it a perfect choice for busy weeknights when you want something delicious without the hassle.

Nutritionally speaking, Sticky Beef Noodles incorporates protein-rich beef alongside colorful veggies, ensuring each serving packs a punch of essential vitamins and minerals. This balance of nutrients supports a healthy diet while satisfying your cravings.

Socially, this dish is ideal for entertaining friends and family, ensuring that everyone leaves the table happy and full. It’s a dish that encourages sharing, with everyone wanting to dig into the sticky, savory noodles together.

Finally, the affordability of this recipe makes it accessible for everyone. With common pantry staples and fresh produce, you can create a sensational meal without breaking the bank, proving that delicious food doesn’t have to be expensive.

Historical Background and Cultural Significance

Sticky Beef Noodles finds its roots in Asian culinary traditions, celebrated for their bold flavors and communal eating styles. Originating from various regions, this dish showcases how similar recipes can evolve into unique interpretations based on local ingredients and flavors—from Chinese lo mein to Thai pad see ew, each version has its delightful characteristics.

In many Asian cultures, noodles symbolize longevity and good fortune, making them a staple in celebratory meals. This cultural significance extends to everyday dining, reflecting harmony in cooking and sharing among families and communities.

Over time, Sticky Beef Noodles has evolved, adapting to modern cooking styles and preferences. Contemporary recipes may introduce new ingredients or health-conscious alternatives, showcasing the adaptability of traditional dishes to fit current culinary trends.

Regionally, variations abound, with different countries lending their flair to the dish. From spicy renditions found in Sichuan cuisine to sweeter versions popular in Southeast Asia, the flexibility of Sticky Beef Noodles has made it a beloved choice in diverse culinary landscapes.

Ingredient Deep Dive

The beef used in Sticky Beef Noodles plays a pivotal role in creating its rich flavor profile. Traditionally, cuts like flank or sirloin are preferred for their tenderness, making them easy to marinate and cook quickly. Beef has been a central protein in many cultures, providing essential nutrients and serving as a source of energy to those who partake in labor-intensive lifestyles. When selecting beef for this dish, look for bright red color and firm texture. Proper storage in a refrigerator helps maintain freshness, while marinating not only enhances flavor but also tenderizes the meat.

Noodles are the backbone of the dish, typically made from wheat flour, offering chewiness that contrasts beautifully with the tenderness of the beef. The history of noodles stretches back thousands of years, reflecting the agricultural practices of countries across Asia. Nutritionally, they provide carbohydrates essential for energy. Selecting fresh noodles can notably enhance the dish’s texture, while dried noodles are a convenient substitute that should be cooked according to package instructions. Storage is straightforward; keep them in a cool, dry place, with fresh noodles being best when used promptly.

Vegetables such as bell peppers and bok choy not only brighten the dish with color but also add vital nutrients. Rich in vitamins A and C, they play essential roles in maintaining health and boosting the immune system. When choosing vegetables, opt for those that are firm with vibrant colors and ideally sourced from local farmers’ markets. Store them in a cool, dry place and wash them just before use to ensure maximum freshness. For substitutions, consider seasonal vegetables or those you have on hand, offering flexibility in preparation.

Common Mistakes to Avoid

  • Using Tough Cuts of Meat: Opting for a tougher cut of beef can lead to a chewy final product. Always choose tender cuts like flank or sirloin for the best results.
  • Overcooking the Noodles: Overcooked noodles become mushy and lose their desirable texture. Cook them just until al dente before adding them to the sauce.
  • Using Too Much Sauce: An overly saucy dish can overwhelm the flavors. Start with a smaller amount and adjust to taste to avoid drowning the noodles.
  • Neglecting to Marinate: Skipping the marinade step means missing out on enhanced flavor. Even a short marination can significantly impact taste.
  • Too Many Vegetables: While adding veggies is excellent, overloading can make the dish soggy. Balance is key for optimal texture.
  • Not Prepping Ingredients First: A common mistake is failing to have all ingredients ready before starting. Prepping ahead ensures smooth cooking.
  • Ignoring Temperature Control: Cooking at too low a temperature can lead to steaming rather than stir-frying. High heat creates a better sear and flavor.
  • Inadequate Stir-Frying: Stir-frying requires constant motion. Neglecting to stir can lead to uneven cooking and burning your ingredients.
  • Using Old Ingredients: Fresh ingredients are crucial for the best flavor. Always check the expiry dates or freshness of produce.
  • Not Tasting Along the Way: Failing to taste and adjust seasoning throughout the cooking process can result in imbalance.

Essential Techniques

Marinating:** Marinating not only infuses the beef with flavor but also helps in tenderizing it, making for a juicy bite. To master this technique, choose a balanced marinade of acid, sweetness, and seasonings. Be cautious of salt content, as excessive salt can dry out the meat. Visually, perfectly marinated beef will have absorbed the marinade color while remaining moist on the exterior.

Stir-Frying:** Stir-frying is essential for achieving the right texture and flavor profile. Start with a hot pan and add a little oil, then introduce your ingredients in batches to maintain high heat. Mastering this technique means constantly moving the ingredients to prevent burning and ensure even cooking. Look for a nice sear on the beef and vibrant colors on the vegetables as signs of success.

Cooking Noodles:** Cooking noodles perfectly is crucial for this dish. Follow package instructions for timing, and taste them before draining. Rinse cooked noodles quickly in cold water to stop further cooking. They should be firm but not hard, providing an ideal texture to complement the sticky sauce.

Pro Tips for Perfect Sticky Beef Noodles

1. Always slice the beef against the grain for maximum tenderness.
2. Use a high-smoke-point oil like vegetable or peanut oil for better searing.
3. Allow the beef to rest after cooking for an even juicier bite.
4. Customize the sauce to include your favorite spicy elements, like chili paste or fresh chili.
5. Keep all your ingredients prepped and chopped before you begin cooking to streamline the process.
6. Use a combination of fresh and dried noodles for an interesting texture contrast.
7. When adding vegetables, consider their cooking time and add them accordingly to ensure they’re crisp-tender.
8. For a touch of freshness, garnish the dish with sliced green onions or sesame seeds just before serving.

Variations and Adaptations

One popular variation of Sticky Beef Noodles is the addition of spicy elements such as sriracha or chili oil, which can elevate the dish to a new level of flavor. Vegetarians can adapt this recipe by replacing beef with tofu or seitan, offering a plant-based alternative that is equally satisfying.

Seasonal adaptations might include using winter vegetables like carrots and snow peas when available, providing a sweet crunch that pairs beautifully with the noodles. During summer, consider incorporating local vegetables such as zucchini or bell peppers for freshness.

For those following dietary restrictions, the dish can easily be modified to be gluten-free by swapping wheat noodles for rice noodles or zucchini noodles. Combining flavors through various sauces allows you to create unique variations tailored to your palate.

Texture modifications can include using different types of noodles like udon for a chewier option or glass noodles for a lighter approach. Presentation alternatives might feature arranging the noodles in a nest shape topped with the beef and vegetables for a visually stunning effect sure to impress diners.

Serving and Presentation Guide

Serving Sticky Beef Noodles is an opportunity for creativity and elegance. Opt for large, shallow bowls to layer the sticky noodles attractively and create a pretty visual display of the arranged vegetables and beef. Garnishing with finely sliced green onions or toasted sesame seeds can add vibrancy to the dish.

You can accompany your noodles with classic Asian side dishes like spring rolls or a light cucumber salad, offering a refreshing contrast to the hearty main. When serving, remember that Sticky Beef Noodles taste best when served hot, so have everything ready for immediate enjoyment.

Temperature is key; ensure the dish is served warm but not boiling to avoid overcooking the delicate noodles. Using individual portions not only enhances presentation but also helps in portion control, providing guests with a generous helping while ensuring an aesthetic arrangement.

For casual settings, consider serving family-style in a large bowl, allowing everyone to help themselves. This approach encourages a communal dining experience, typical of many Asian cultures.

Wine and Beverage Pairing

When it comes to pairing wine with Sticky Beef Noodles, a fruity red wine such as Pinot Noir or a full-bodied Merlot complements its robust flavors beautifully. These wines can enhance the sweetness from the sauce while contrasting nicely with the savory elements of the beef.

Alternatively, for those who prefer non-alcoholic options, iced green tea or a refreshing ginger ale can balance the savory richness of the dish, making excellent companions. Both drinks offer a palate-cleansing effect that enhances your dining experience.

If you’re looking for coffee or tea pairings, a robust dark roast coffee can add warmth to the meal, while jasmine green tea offers a fragrant and gentle counterpoint to the strong flavors of the beef.

Keep temperature considerations in mind; serve wine slightly chilled to enhance its refreshing qualities, while maintaining the warmth of the dish ensures an enjoyable experience.

Storage and Shelf Life

Proper storage of Sticky Beef Noodles ensures that you can savor leftovers safely and enjoyably. After preparing the dish, let it cool to room temperature before transferring it to an airtight container. This prevents the growth of bacteria and keeps your meal fresh.

Refrigerate for up to 3 days, and when you’re ready to eat it again, simply reheat it on the stovetop or in the microwave until it’s thoroughly warmed. Ensure that it reaches an internal temperature of 165°F for safety.

If you intend to store leftovers longer, consider freezing them in a suitable container. When doing so, consume within 2-3 months for the best flavor and texture. To reheat, thaw in the refrigerator overnight and then warm slowly, incorporating a small splash of broth or water to rehydrate the noodles if needed.

Signs of spoilage include off smells or visible mold; if you suspect spoilage, it’s always best to err on the side of caution and dispose of the food.

Make Ahead Strategies

For busy nights, preparing Sticky Beef Noodles ahead of time can save you invaluable cooking time. You can marinate the beef several hours or even a day in advance, allowing the flavors to penetrate deeper into the meat.

Pre-chop all vegetables and store them in airtight containers, keeping them fresh in the fridge. This prep work can be done the day before, allowing for quick assembly and cooking, reducing stress during mealtime.

Cook the noodles separately and mix them with a little oil to prevent sticking, storing them in the refrigerator until you’re ready to add them to the dish. This can be done a few hours in advance without sacrificing texture.

When reheating, consider adding a splash of water to prevent the noodles from drying out during the initial cooking process. Adding fresh herbs or greens just before serving can help elevate the dish, making it feel freshly prepared.

Scaling Instructions

Scaling Sticky Beef Noodles for larger gatherings or meal prep is easy. For halving the recipe, simply reduce all ingredients accordingly, while keeping the cooking techniques the same; this ensures you maintain that signature flavor.

When doubling or tripling the recipe, be mindful of your equipment size. Opt for larger pans or woks to accommodate the increased volume, ensuring even cooking. Cooking in batches can be effective too; if you find your pan too full, it’s best to stir-fry portions separately.

Timing may need adjustments when scaling up, as larger quantities can take longer to heat through. Always check for doneness, especially with the noodles, to achieve the optimal texture.

For storage considerations, ensure there’s enough container space to allow for expansion if freezing, and label your containers with dates to keep track of freshness.

Nutritional Deep Dive

Understanding nutrition in Sticky Beef Noodles allows for more conscious eating. The macro breakdown showcases high protein content from the beef, essential for muscle repair and energy. Paired with carbohydrates from the noodles, this dish offers a balanced meal option.

Micronutrient analysis reveals that the vegetables included add significant vitamins and minerals, such as vitamin C from bell peppers and iron from beef. Both elements are crucial for immune function and overall health.

Health benefits of this dish extend beyond macronutrients; the incorporation of vegetables aids digestion and enhances micronutrient intake, offering a more holistic approach to dining. The use of fresh ingredients further supports a nutrient-rich profile, making this dish an excellent choice for a weeknight meal.

Managing portions is important; this dish can be high in calories if oversized servings are consumed, so aim for reasonable portions to maintain your weight goals. Providing balanced meals with a variety of foods is essential for sustaining energy throughout the day.

Dietary Adaptations

For those following a gluten-free lifestyle, Sticky Beef Noodles can be easily adapted by using rice noodles or zucchini noodles. Both alternatives provide the same satisfying texture while being safe for gluten-sensitive diners.

To cater to a dairy-free audience, ensure that all ingredients, including sauces, are free of dairy. Substituting standard sauces with alternatives like tamari can maintain similar flavors without compromising dietary needs.

Vegans can enjoy a plant-based version by replacing beef with marinated tofu or tempeh, ensuring they’re adequately flavored and cooked to perfection. This can result in a dish that’s equally delightful and filling.

Low-carb adaptations can be made by omitting the noodles and using spiralized vegetables like zucchini or cauliflower rice, allowing for a lighter, healthier meal option.

Keto and paleo followers can easily modify the dish by sticking to lean meats, avoiding high-carb sauces, and incorporating non-starchy vegetables, ensuring they enjoy the flavor without straying from their dietary requirements.

Troubleshooting Guide

Encountering texture issues in Sticky Beef Noodles can often be addressed by adjusting cooking times. If your noodles are mushy, reduce cooking time and rinse them in cold water after cooking to stop the cooking process.

For flavor balance concerns, consider adding brightness with fresh herbs or a squeeze of lime just before serving to cut through richness. If overly salty, a drizzle of extra oil can help balance strong flavors.

Temperature problems can arise if the pan isn’t hot enough during cooking. Always preheat your wok or skillet before adding oil to ensure even cooking and prevent steaming.

When facing equipment challenges, utilizing alternative cooking vessels may be necessary. A cast-iron skillet or even a Dutch oven can serve as substitutes if a wok is unavailable.

Ingredient substitutions can lead to unexpected results; if you’re trading one component for another, be mindful of the moisture and cooking times associated with each ingredient to avoid discrepancies in the final dish.

Timing concerns may lead to undercooked ingredients; always taste before finishing cooking, ensuring all elements are perfectly done by the time the dish is plated.

Recipe Success Stories

The beauty of Sticky Beef Noodles is seen through the countless stories shared by our community of home cooks. Many have embraced this recipe for family gatherings, stating how it became a standout option that everyone loves.

Readers have noted successful spins on the recipe, experimenting with different proteins like shrimp or chicken, and sharing their delicious results, emphasizing the adaptability of the dish to various preferences. The joy of customizing the ingredients has turned this recipe into a personal expression of flavor, showcasing individual creativity.

Adaptation stories highlight how this dish fits into various dietary preferences without losing its core identity. From low-carb to vegan versions, people have found ways to make Sticky Beef Noodles work for their needs, proving that food can bridge dietary divides.

Photography tips from readers illustrate beautiful plating techniques, encouraging others to present their dishes with flair. Enthusiasts share images of their unique creations, inspiring fellow cooks to elevate their home dining experiences.

As this recipe takes its place in your kitchen, it becomes part of your food journey, adding not just flavor to the table but also heartwarming community connections based on shared culinary experiences.

Frequently Asked Questions

What kind of noodles can I use for Sticky Beef Noodles?

You can use various types of noodles, such as egg noodles, udon, or rice noodles. Each type offers a different texture, so feel free to experiment based on your preference.

Can I substitute beef for another protein?

Absolutely! Chicken, pork, or tofu are excellent alternatives. Just adjust cooking times accordingly based on the protein you choose.

How do I make the sauce thicker?

To thicken the sauce, consider adding a cornstarch slurry. Mix cornstarch with water, then stir it into the sauce while it simmers until you achieve your desired consistency.

Can Sticky Beef Noodles be frozen?

Yes, you can freeze leftovers in an airtight container. For the best quality, consume within 2-3 months and reheat thoroughly before eating.

How can I make this dish spicier?

For added heat, mix in chili garlic sauce or sprinkle red pepper flakes when cooking. Fresh sliced chili peppers can also be a great addition at serving.

What should I serve with Sticky Beef Noodles?

This dish pairs wonderfully with a light cucumber salad or spring rolls. Both add a refreshing contrast to the rich noodles.

How do I store leftovers?

Place leftovers in an airtight container, and refrigerate for up to 3 days. Reheat before serving to ensure it’s warm throughout.

What variations can I try with this recipe?

You might try adding different vegetables like snap peas or carrots, or switch the beef for a vegetarian option like tempeh or mushrooms for a unique twist.

Can I make this dish ahead of time?

Yes! You can marinate the beef and prep vegetables in advance to save time on cooking day. Just store them properly in the refrigerator.

How do I ensure my noodles don’t stick together?

To prevent sticking, rinse the cooked noodles in cold water and toss them with a little oil. Stir frequently once added to the dish.

Additional Resources

If you’re interested in exploring more recipes like Sticky Beef Noodles, consider trying other Asian-inspired dishes such as Sweet and Sour Pork or Spicy Pad Thai. These offer similar flavors and cooking techniques, perfect for expanding your culinary repertoire.

For those wanting to learn more about noodle types and their uses, several online guides can help you select the best variety for your meals, enhancing your knowledge and comfort in the kitchen.

Equipment recommendations can help streamline your cooking process. Invest in a good-quality wok or large skillet to maximize heat distribution and cooking efficiency in your dishes.

Ingredient information can also support your cooking ventures should you wish to dive deeper into the nutritional value of each component within Sticky Beef Noodles. Knowing the health benefits of each ingredient will help you make informed dietary choices.

Lastly, exploring seasonal variations can inspire fresh takes on this dish. Utilizing seasonal produce can change the profile while keeping the ingredients vibrant and rich in flavor.

Join the Conversation

We would love to hear how you’ve made Sticky Beef Noodles your own! Share your photos, tips, and variations with our community on social media. Don’t forget to use our hashtag to connect with other cooking enthusiasts who appreciate this delicious dish.

Photography tips can help you capture the beauty of your culinary creations. Natural light works wonders for food photography, so snap those shots during the day to highlight the dish’s vibrant colors and textures.

Recipe reviews are integral to our community; your feedback helps others decide if this Sticky Beef Noodles recipe is something they want to try. Engage with us and make your cooking journey more exciting by sharing your thoughts!

Community engagement brings us all together. Join our forums to discuss your experiences, ask questions, and share advice with fellow food lovers. Authentic connections through food enhance the joy of cooking and feasting together.

Be creative with your recipe variations, and let your imagination guide the way you interpret this dish. There are no bounds to your culinary skills—explore flavors and techniques and enjoy the process of cooking!

The Recipe

Sticky Beef Noodles

Serves: 4

Prep Time: 20 mins

Cook Time: 30 mins

Total Time: 50 mins

Kitchen Equipment Needed

  • Wok or large non-stick skillet
  • Cutting board
  • Sharp knife
  • Measuring cups and spoons
  • Mixing bowl

Ingredients

  • 500g beef (flank or sirloin), thinly sliced
  • 300g noodles (egg or rice noodles)
  • 2 tablespoons soy sauce
  • 2 tablespoons oyster sauce
  • 1 tablespoon sugar
  • 1 tablespoon cornstarch
  • 3 cloves garlic, minced
  • 1 inch ginger, grated
  • 2 cups mixed vegetables (bell pepper, bok choy, carrots)
  • 2 tablespoons vegetable oil
  • Salt and pepper, to taste
  • Green onions, for garnish
  • Sesame seeds, for garnish

Directions

  1. In a mixing bowl, combine soy sauce, oyster sauce, sugar, cornstarch, garlic, ginger, and a pinch of salt. Add the sliced beef, coating well. Marinate for at least 15 minutes.
  2. Cook the noodles according to package instructions. Drain and toss with a bit of oil to prevent sticking. Set aside.
  3. Heat vegetable oil in a wok over high heat. Add the marinated beef, stir-frying until browned and cooked through, about 3-4 minutes. Remove from the pan and set aside.
  4. Add the mixed vegetables to the same wok, stir-frying until tender yet crisp, about 2-3 minutes.
  5. Add the cooked noodles and beef back to the wok. Toss everything together, adding additional soy sauce if desired.
  6. Serve hot, garnished with green onions and sesame seeds.

Recipe Notes

  • Feel free to substitute the beef with chicken, shrimp, or tofu for variations.
  • Adapt the vegetables based on seasonality or personal preference.
  • For added heat, consider incorporating sliced chili or chili garlic sauce.
  • Ensure not to overcrowd the pan while stir-frying; cook in batches if necessary for optimal results.

Sizzling Beef with Green Peppercorns and Caramelized Onions Recipe

Sizzling Beef with Green Peppercorns and Caramelized Onions: A Flavor Explosion

⚖️
Difficulty
Medium

⏲️
Prep Time
15 mins

🕒
Cook Time
25 mins

⏱️
Total Time
40 mins

🍽️
Servings
4 servings

If you’re looking for an enticing recipe that brings robust flavors and comforting textures to your dinner table, look no further than Sizzling Beef with Green Peppercorns and Caramelized Onions. This dish combines tender slices of beef with the unique zestiness of green peppercorns and the sweetness of caramelized onions—creating a culinary delight that’s sure to impress anyone who tries it. Perfect for a cozy night in or for special gatherings, this recipe will surely awaken your taste buds and satisfy your hunger.

The beauty of this dish lies in its balance. The beef is seared to perfection, allowing it to retain its juicy goodness, while the caramelized onions add a mellow sweetness that contrasts beautifully with the spicy kick from the green peppercorns. Together, these elements create a flavor profile that’s complex yet comforting, making it perfect for followers of both traditional and modern cuisines.

Quick Recipe Highlights

  • Flavor Profile: A harmonious blend of spicy, sweet, and savory elements.
  • Texture: Juicy beef paired with tender, caramelized onions for a delightful mouthfeel.
  • Aroma: The intoxicating aroma of sautéed onions mixed with a hint of pepper spice.
  • Visual Appeal: Vibrant colors of golden-brown onions against rich slices of beef.
  • Skill Level Needed: Suitable for cooks with some experience, but still manageable for beginners.
  • Special Equipment: A sturdy skillet or cast-iron pan for optimal searing.

Recipe Overview

  • Difficulty Level: This recipe is categorized as medium difficulty due to the timing required for caramelizing the onions and the precision needed for cooking the beef just right.
  • Category: This dish fits comfortably into the dinner category, perfect for a hearty main course.
  • Cuisine: Drawing influence from Asian and European flavors, it incorporates unique ingredients that highlight global culinary traditions.
  • Cost: The approximate cost per serving is budget-friendly, making it accessible for most home cooks.
  • Season: Ideal for any season, the warmth of the dish is especially comforting during the colder months.
  • Occasion: A fantastic option for family dinners, and it makes an excellent dish to serve during gatherings or celebrations.

Why You’ll Love This Recipe

The taste and texture appeal of Sizzling Beef with Green Peppercorns and Caramelized Onions is undeniable. Each bite of tender beef brings a satisfying chew that’s complemented perfectly by the velvety caramelized onions, creating a delightful contrast in texture that elevates the overall experience of the dish. The invigorating kick of the green peppercorns excites the palate, making it a dish that’s packed with flavor and depth.

One of the main benefits is its convenience and preparation ease. With a prep time of just 15 minutes and a cook time of 25 minutes, you can whip up this satisfying meal even on a busy weeknight. The simplicity of the cooking steps means that even those with limited cooking experience can achieve fantastic results, making it a great choice for novice cooks and seasoned chefs alike.

Nutritionally speaking, this dish is also advantageous. Beef is a great source of protein, essential for muscle building and repair, while the onions offer numerous health benefits, including vitamins and antioxidants. Additionally, green peppercorns are known for their antimicrobial properties, creating a wholesome dish that supports a healthy lifestyle.

When it comes to social gatherings, this dish shines. It’s a great centerpiece for a dinner table, effortlessly captivating your guests with its striking presentation and inviting aroma. The communal aspect of sharing a delicious meal fosters connection and conversation, making it an excellent recipe choice for entertaining.

Furthermore, Sizzling Beef with Green Peppercorns and Caramelized Onions is cost-effective and accessible. With straightforward ingredients that are available in most grocery stores, this dish aligns well with budgets without compromising on flavor or satisfaction.

Historical Background and Cultural Significance

The origins of Sizzling Beef with Green Peppercorns can be traced back to various cultures that celebrate beef as a nutritious and delicious protein source. Throughout history, different cultures have used similar ingredients to create flavors that reflect their unique identities. Green peppercorns, for instance, have been used in Eastern cuisine for centuries, adding a distinctive taste that cannot be replicated.

Culturally, dishes centered on beef often hold significant importance, symbolizing celebration and community. In many cultures, sharing a beef dish marks an occasion of unity and joy, allowing families to come together to enjoy delicious food and create lasting memories.

This recipe has evolved over time as culinary practices change and adapt to modern tastes. With roots in traditional cooking methods, contemporary chefs now reinterpret it to introduce variations that can cater to various dietary preferences and seasonal ingredients.

Regional variations exist for this dish, showcasing how different cultures incorporate their culinary techniques. Some variations may utilize a different protein source or serve the dish with regional accompaniments that illustrate the influences of the area it represents.

Ingredient Deep Dive

Beef is the star of this dish, and its cultural significance cannot be overstated. Commonly regarded as a staple in many diets worldwide, it provides a rich source of protein and essential nutrients. When selecting beef, look for well-marbled cuts, which will result in a tastier end product. Choosing high-quality meat can significantly enhance the dish’s flavor and tenderness.

When it comes to storage, beef should be refrigerated and used by its ‘use-by’ date for optimal safety. If you need to store it longer, freezing is a great option. Additionally, substitutions for beef may include chicken or tofu for a different take on the dish.

Green peppercorns, while less common than their black counterparts, provide a unique flavor profile that brightens up the dish. They have been used historically in various cuisines and are prized for their aromatic qualities. When selecting green peppercorns, you can find them fresh, dried, or packed in brine, which offers varied flavor intensity.

To store green peppercorns, keep them in a cool, dark place to ensure they retain their flavor. If you’re unable to find fresh green peppercorns, consider using black peppercorns for a sharper taste, or omit them entirely for a milder flavor.

Lastly, onions are a vital ingredient for this recipe, providing a natural sweetness that forms the backbone of the dish. Onions have been cultivated for thousands of years across various cultures, making them a universal component in countless cuisines. Their nutritional benefits support overall health, including heart-healthy properties rooted in their antioxidant content.

Common Mistakes to Avoid

  • Overcooking the beef, which can lead to a tough texture. Aim for medium-rare to retain juiciness.
  • Not allowing onions to caramelize properly; patience is key for achieving the right sweetness and depth of flavor.
  • Skipping the seasoning step can lead to bland results. Always season your meat before and during cooking.
  • Using low-quality meat can result in diminished flavor; opt for better cuts for superior taste.
  • Adding too many ingredients too quickly can overwhelm the flavors. Stick to the recipe for best results.
  • Not letting the ingredients come to room temperature before cooking can affect cooking times.
  • Failing to preheat your pan adequately could result in unfavorable cooking conditions for both meat and onions.
  • Ignoring resting time for the beef after cooking may cause serious juiciness loss.

Essential Techniques

Caramelizing onions is an essential technique that significantly enhances the flavor of the dish. It’s important to cook them over low to medium heat, allowing the sugars to develop naturally. Master this by frequently stirring to prevent burning, and look for a golden-brown color as an indicator of readiness.

Properly searing the beef is crucial for developing its rich flavor. To achieve this, start with high heat and ensure your pan is preheated. Place the beef in the pan without overcrowding to allow for an even sear, and don’t move it until a crust has formed. This technique will lock in moisture and enhance flavor through the Maillard reaction.

Pro Tips for Perfect Sizzling Beef with Green Peppercorns

Choose the right cut of beef, such as flank or sirloin, for optimal tenderness and flavor. Always ensure your meat is at room temperature before cooking to achieve even doneness.

Use fresh green peppercorns whenever possible to maximize their flavor impact; if using dried ones, incorporate them early in the cooking process for the best flavor release.

Let the caramelized onions cool slightly before incorporating them back into the dish to maintain their texture while ensuring they integrate smoothly with the beef.

Consider adding a splash of soy sauce or Worcestershire sauce to the pan during cooking for an additional umami kick that enhances the overall flavor of the dish.

Finish the dish with fresh herbs, such as cilantro or parsley, to add a refreshing contrast and visual appeal.

Use a meat thermometer to check for doneness; for medium-rare, aim for an internal temperature of 135°F (57°C).

Variations and Adaptations

Regional variations for Sizzling Beef with Green Peppercorns can include adding local spices or herbs to reflect the culinary culture of the area. For example, incorporating ginger or lemongrass can provide a unique twist reminiscent of Southeast Asian flavors.

Seasonal adaptations may involve the inclusion of vegetables that are locally available, such as bell peppers in summer or root vegetables in autumn, adding different textures and flavors to the dish.

Dietary modifications could adapt this recipe for gluten-free diets by ensuring all sauces are gluten-free and using alternative marinades for flavor enhancement.

Flavor variations could explore other peppercorns, like white or pink, for unique tastes; the substitution will cater to different flavor preferences.

Texture modifications might include adding a crunchy topping, such as toasted nuts or crispy shallots, to contrast with the dish’s overall tenderness.

Presentation alternatives can enhance dining experiences, such as serving the dish in lettuce wraps for a fresh and interactive meal option.

Serving and Presentation Guide

Plating techniques can elevate the dining experience; consider using large, shallow bowls to display this vibrant dish beautifully. Arrange the beef and onions artfully, allowing the colors to showcase the freshness of the ingredients.

Garnishing with freshly chopped herbs or citrus zest can add a pop of color and invigorate your dish’s overall appearance while enhancing the aroma.

Traditional accompaniments like steamed rice or crusty bread can round out the meal, providing a satisfying starch for soaking up the savory sauce.

For modern serving suggestions, consider creating a platter where guests can serve themselves, enhancing the comforting and communal eating experience.

Temperature considerations are essential; the dish is best enjoyed warm rather than hot. Allow it to rest for a few minutes after cooking before serving to ensure optimal enjoyment.

Portion control tips include serving small amounts to encourage seconds, making the gathering feel abundant without overwhelming guests.

Wine and Beverage Pairing

For wine pairings, consider a bold red wine such as Malbec or Cabernet Sauvignon, which complements the richness of the beef and balances the dish’s spicy elements. A lighter red, like Pinot Noir, works well if you prefer something less robust.

For non-alcoholic alternatives, sparkling water with a hint of lime can refresh and cleanse the palate, enhancing the dish without overpowering the flavors.

Coffee or tea pairings, such as a full-bodied dark roast or a robust black tea, can provide a lovely finish to the meal if enjoyed afterward.

Be mindful of temperature considerations; serve red wines slightly above room temperature for optimal flavor and enjoy non-alcoholic beverages chilled for a refreshing experience.

Serving suggestions could include creating a mini tasting bar where guests can explore various beverages alongside the dish, making for an engaging dining experience.

Storage and Shelf Life

Storage methods for leftovers should involve placing them in airtight containers to maintain freshness. Keep in the refrigerator for up to 3 days or freeze for longer preservation.

Temperature requirements are crucial; ensure the dish cools to room temperature before sealing it to avoid condensation, which can affect quality.

Container recommendations include glass or BPA-free plastic, both of which are excellent for preserving tastes while being microwave-safe for reheating.

Signs of spoilage to look out for include changes in smell, excessive moisture buildup, or discoloration of the beef and onions.

Reheating instructions should involve gentle heat on the stovetop or microwave, ensuring not to overcook the beef, which can dry it out.

Freezing guidelines empower you to portion out the dish before freezing. Use freezer-safe bags or containers, removing excess air to prevent freezer burn.

Make Ahead Strategies

For make-ahead strategies, consider prepping the ingredients the night before; slicing the beef and onions ahead of time will save valuable cooking time.

Storage between steps is wise; caramelized onions can be prepared early and refrigerated, allowing for convenient assembly while retaining their flavor.

Quality impact assessment involves ensuring that freshly made components maintain their flavors when stored, so opt for short periods between preparation and cooking.

Assembly tips could involve cooking the beef separately and adding it to the onions just before serving, preserving the intended texture of both components.

Reheating guidelines will focus on maintaining moisture; consider adding a splash of broth to help revive the beef as it reheats.

Fresh element additions can involve tossing in fresh herbs just before serving, elevating the dish with bright flavors without additional prep work.

Scaling Instructions

When halving the recipe, ensure that timing is adjusted accordingly, particularly for caramelizing the onions, which may take less time with fewer ingredients.

Doubling or tripling the recipe will require larger cooking equipment. Consider using a larger skillet or batch cooking in stages for even results.

Equipment adjustments will include having sufficient space for the ingredients to maintain proper cooking temperatures—overcrowding can affect the caramelization process.

Timing modifications should take into account that larger amounts of meat may need slight adjustments so be mindful of checking for doneness regularly.

Storage considerations for larger batches are crucial; use appropriate containers to ensure that leftovers are stored compactly and efficiently.

Nutritional Deep Dive

The macro breakdown of Sizzling Beef with Green Peppercorns includes a rish protein content from the beef, with essential fats and carbohydrates contributing to a well-balanced meal.

Micronutrient analysis reveals that beef delivers key vitamins such as B12 and minerals like iron, which are necessary for maintaining energy levels and overall health.

Health benefits span boosting muscle recovery due to its protein content and supporting red blood cell production from the iron, enhancing athletes’ diets.

Dietary considerations suggest moderation for those watching fats and cholesterol, but lean cuts provide a beneficial option for incorporating beef into a balanced diet.

Portion analysis should inform servings, especially in social settings—consider smaller servings that encourage mindful eating without compromising satisfaction.

Weight management tips include being conscious of portion sizes and balancing meals with whole grains or vegetables to create a nutritious, satisfying plate.

Dietary Adaptations

For a gluten-free version of this recipe, simply ensure that any sauces or condiments used are gluten-free, adjusting as necessary for flavor maintenance.

Adapting the dish to be dairy-free can be accomplished by omitting any dairy-based ingredients and sticking with the core flavors of the beef and onions.

Vegan adaptations may involve using plant-based proteins, such as soy products, while keeping the flavor profile with similar spices and cooking methods.

Low-carb enthusiasts can focus on reducing or eliminating the carbs typically found in side dishes, opting for additional non-starchy vegetables to accompany the meal.

The keto diet can embrace this dish by incorporating fatty cuts of beef and minimizing sugars typically added during preparation.

Paleo adaptations can maintain the core ingredients while avoiding processed sauces that don’t align with the dietary guidelines.

Low-FODMAP adaptations may require selecting specific onions and adjusting portion sizes of green peppercorns, targeting those sensitive to garlic and onion.

Troubleshooting Guide

Texture issues can arise if the beef is overcooked, resulting in a chewy product. Ensure proper cooking times and utilize a thermometer for optimal doneness.

Flavor balance problems may occur without adequate seasoning; taste as you cook and adjust seasonings to achieve the desired harmony between sweetness and spice.

Temperature problems, such as lukewarm servings, can arise if the dish isn’t served immediately; consider reheating gently if necessary.

Equipment challenges often include inadequate pans; use the right tools to ensure even cooking and caramelization, enhancing quality.

Ingredient substitutions may alter the taste profile; test variations in small batches to understand how changes impact the overall dish.

Timing concerns during cooking can affect quality; prepare components in advance and assemble quickly to ensure a cohesive flavor experience.

Recipe Success Stories

Community feedback highlights the joy of how this recipe resonates with families, often becoming a repeat favorite on dinner menus.

Variation successes have emerged as home cooks experiment with different meats, yielding equally delightful, savory results that expand the versatility.

Adaptation stories reveal how each chef has found unique ways to personalize the dish, making it truly their own based on taste preferences.

Reader suggestions often emphasize the enjoyment of additional ingredients or sides they’ve historically paired with the dish, enriching the culinary conversation.

Photography tips from readers often encourage showing contrasts between textures and colors in the dish for visual delight, creating beautiful presentations.

Frequently Asked Questions

1. Can I use a different type of meat for this recipe?
Yes, you can use chicken, pork, or even a plant-based alternative if preferred. Each will provide a different flavor profile but can still be delicious when paired with the same sauce.

2. Are green peppercorns essential?
While they add distinctive flavor, you can omit them or substitute them with black peppercorns, noting that this will alter the spiciness level.

3. How can I achieve the best caramelization of onions?
Cooking them slowly over low heat allows their natural sugars to develop and caramelize. Stir frequently to avoid burning.

4. Can I make this recipe ahead of time?
Yes, you can prepare the components in advance and reassemble them before serving to maintain quality and flavor.

5. What can I serve with this dish?
It pairs beautifully with rice, crusty bread, or a side salad, offering a contrast in texture and freshness.

6. How do I store leftovers?
Allow the dish to cool completely before transferring it to airtight containers. It can be refrigerated for up to 3 days or frozen for longer storage.

7. What should I do if my beef comes out tough?
Tough beef can indicate overcooking; using a meat thermometer can help ensure you achieve the desired doneness.

8. Can I add vegetables to this dish?
Yes! Adding vegetables such as bell peppers or snap peas can enhance the flavor and nutrients of the meal, offering a delightful crunch.

9. Is this dish suitable for meal prep?
Absolutely! This recipe stores well and can easily be divvied up for quick lunches or dinners throughout the week.

10. How can I make this dish spicier?
Consider adding fresh chili slices or more green peppercorns to ramp up the heat according to your taste preference.

Additional Resources

If you’re interested in related recipes that highlight similar flavors, consider exploring dishes such as Thai Beef Stir-Fry or Beef with Black Bean Sauce. These recipes embody exciting flavors similar to Sizzling Beef with Green Peppercorns and can provide variety to your meal plans.

For technique guides, consider resources that delve into caramelization and searing, providing essential tips for perfecting these core skills that enhance any dish.

Ingredient information about beef cuts or herbs can offer deeper insights into how to select the best items for your culinary adventures, enhancing the quality of your meals.

Equipment recommendations can include must-have kitchen tools suited for creating this recipe, ensuring you have the best equipment for success in your cooking endeavors.

For seasonal variations, embrace fresh, local produce that complements the dish, such as seasonal greens or herbs for a fun twist that celebrates what’s available in your region.

Join the Conversation

We invite you to share your experiences with Sizzling Beef with Green Peppercorns and Caramelized Onions on social media! Feel free to snap photos of your cooking process or finished product, using designated hashtags to connect with fellow culinary enthusiasts.

Photography tips are encouraged with your posts; showcasing vibrant dishes can inspire others to try this recipe themselves, enhancing food creativity in the community.

Recipe reviews are always appreciated, so share how this dish fits into your cooking repertoire and any adaptations you made to personalize it.

Your engagement in the culinary conversation builds a richer experience for all, expanding the flavors and stories we exchange through food.

The Recipe

Sizzling Beef with Green Peppercorns and Caramelized Onions

Serves: 4 servings

Prep Time: 15 mins

Cook Time: 25 mins

Total Time: 40 mins

Kitchen Equipment Needed

  • Sturdy skillet or cast-iron pan
  • Knife and cutting board
  • Meat thermometer (optional)
  • Spatula or tongs
  • Airtight containers for storage

Ingredients

  • 1 pound beef flank or sirloin, thinly sliced
  • 1 large onion, thinly sliced
  • 2 tablespoons green peppercorns, rinsed
  • 2 tablespoons olive oil
  • Salt and pepper, to taste
  • 1 tablespoon soy sauce (optional)
  • Chopped fresh herbs for garnish (optional)

Directions

  1. Heat 1 tablespoon of olive oil in a skillet over medium heat.
  2. Add the sliced onions and a pinch of salt; sauté until caramelized, about 15 minutes.
  3. Remove the onions from the skillet and set aside.
  4. Add the remaining olive oil to the pan and increase heat to medium-high.
  5. Season the beef with salt and pepper, then add it to the skillet in a single layer for searing.
  6. Cook the beef for about 2-3 minutes per side, until browned and cooked to desired doneness.
  7. Stir in caramelized onions and green peppercorns. If desired, add soy sauce for extra flavor.
  8. Cook for an additional minute, stirring to combine everything well.
  9. Serve hot, garnished with fresh herbs if desired.

Recipe Notes

  • Feel free to adjust the amount of green peppercorns based on your flavor preference.
  • Substitutions can include chicken or pork for a different protein option.
  • This dish pairs wonderfully with rice or crusty bread!

Delicious Baked Chicken Ricotta Meatballs Recipe for Dinner

Baked Chicken Ricotta Meatballs: A Flavorful Twist on a Classic

⚖️
Difficulty
Easy

⏲️
Prep Time
20 mins

🕒
Cook Time
30 mins

⏱️
Total Time
50 mins

🍽️
Servings
4

Baked Chicken Ricotta Meatballs are a delicious and wholesome twist on traditional meatballs, offering a delightful combination of flavors and textures. Imagine tender, juicy meatballs infused with creamy ricotta cheese, paired perfectly with a robust tomato sauce. This dish not only satisfies your hunger but also warms your soul with each bite. Whether you’re serving it for a family dinner or a gathering with friends, these meatballs make for an impressive yet simple dish that everyone will love.

The beauty of Baked Chicken Ricotta Meatballs lies in their versatility. They can be enjoyed over pasta, in a meatball sub, or even on their own as an appetizer. The combination of tender ground chicken and ricotta cheese creates a moist texture, while fresh herbs introduce vibrant flavors that will have your guests asking for more. With a crisp exterior and a soft, cheesy center, these meatballs elevate everyday meals into something extraordinary.

Quick Recipe Highlights

  • Flavor Profile: These meatballs boast a savory and rich flavor profile, enhanced by the creamy richness of ricotta and aromatic herbs.
  • Texture: Each meatball offers a delightful contrast between the crispy exterior and the soft, cheesy interior that melts in your mouth.
  • Aroma: The scent of garlic, herbs, and roasting chicken fills the kitchen, creating an inviting atmosphere.
  • Visual Appeal: The dish is beautifully presented with golden-brown meatballs topped with a vibrant tomato sauce and fresh basil.
  • Skill Level Needed: This recipe is perfect for beginner cooks, requiring only simple techniques and easy-to-follow steps.
  • Special Equipment: Just a baking sheet, mixing bowl, and measuring cups are needed, making this a hassle-free cooking experience.

Recipe Overview

  • Difficulty Level: The Baked Chicken Ricotta Meatballs are easy to prepare, making them a great choice for beginners and busy weeknight meals.
  • Category: These meatballs can serve as a main dish, appetizer, or even party food, making them versatile for various meals.
  • Cuisine: Rooted in Italian cuisine, these meatballs pay homage to traditional flavors while introducing a modern twist with ricotta cheese.
  • Cost: The ingredients are budget-friendly, averaging around $10-15 for a meal that serves four.
  • Season: Ideal for any season, the warmth of these meatballs is especially comforting during the colder months.
  • Occasion: Perfect for casual family dinners, weekend gatherings, or even festive occasions with friends.

Why You’ll Love This Recipe

Baked Chicken Ricotta Meatballs present an irresistible taste and texture that will delight your palate. The combination of ground chicken and ricotta creates a dish that is both tender and hearty, ensuring every bite is satisfying. Enhanced by fresh herbs, garlic, and onion, this meal is packed with flavor and nutrition. You can enjoy these meatballs with pasta or on their own, making them a versatile addition to your culinary repertoire.

Convenience is a key factor; this recipe requires just a few simple steps and minimal preparation time. Once the meatballs are formed, they are baked in the oven, allowing you to focus on preparing a side dish or enjoying some quality time with family. Perfect for busy weeknights, these meatballs can easily be made ahead and stored for later use.

In terms of nutrition, chicken is a lean protein source that contributes to a healthy diet. Ricotta cheese enriches the meal with calcium and protein, and the inclusion of herbs adds essential vitamins. These meatballs not only taste good but are also a smart choice for health-conscious individuals.

Hosting a gathering? Baked Chicken Ricotta Meatballs are an impressive dish that is sure to please your guests. They can be served as an appetizer or as part of a larger meal, allowing for a variety of serving options. The interactive nature of meatballs encourages sharing and conversation, making them a great fit for social occasions.

Finally, these meatballs are cost-effective. Made with common ingredients, the recipe keeps you within budget while providing a satisfying meal. The flavorful outcome makes this dish a worthy investment for any home cook.

Historical Background and Cultural Significance

The origins of meatballs date back centuries, with variations found in numerous cultures. In Italy, meatballs are a staple, often enjoyed with pasta or in savory sauces. The introduction of ricotta cheese into meatballs represents a regional twist that embodies the creativity of Italian cuisine. Traditionally, ricotta was made from whey left over from cheese production, leading to its widespread use among Italian families for economical and delicious meals.

Cultural significance is evident in how meatballs play a central role in Italian family gatherings. These dishes are often associated with love and comfort, passed down through generations. People gather around the table, sharing food and stories, with meatballs often taking center stage as a beloved family recipe.

The evolution of this dish is exciting to explore, especially with the rise of healthier cooking methods. Today’s cooks are keen on using lean meats, such as chicken or turkey, combined with ingredients like ricotta for nutritional benefits. This adaptation ensures that the traditional enjoyment of meatballs continues while catering to modern dietary preferences.

Regional variations of meatballs abound in Italy, from tiny Sicilian meatballs served in broth to larger versions smothered in marinara sauce. Each area showcases its ingredients and flavors, allowing for endless creativity in meatball recipes. Baked Chicken Ricotta Meatballs celebrate this diversity while bringing a contemporary twist to a classic dish.

Ingredient Deep Dive

Ground Chicken: Ground chicken has become popular due to its lean profile, making it a healthier option than traditional beef or pork. Rich in protein, it supports muscle growth and overall health. When selecting ground chicken, look for options labeled as “organic” or “free-range” for a quality difference. Store it in the refrigerator for up to two days or freeze for longer storage. If you prefer, ground turkey is a great substitute in this recipe.

Ricotta Cheese: Ricotta is a fresh cheese originating from southern Italy, highly regarded for its creamy texture and mild flavor. It provides essential nutrients such as calcium and potassium, contributing to bone health. When selecting ricotta, opt for whole milk versions for creaminess; however, lower-fat options are available for those watching their calorie intake. Keep ricotta refrigerated and use it within a week of opening. Cream cheese or cottage cheese can serve as substitutes if needed.

Fresh Herbs (Basil and Parsley): Fresh herbs infuse vibrant flavors and aroma into meatballs. Basil and parsley are commonly used in Italian cooking for their aromatic properties and health benefits. Fresh herbs should be bright green and crisp; avoid wilted leaves for optimal flavor. Store washed herbs in the refrigerator wrapped in a damp paper towel or in a jar with water. If necessary, dried herbs can be used, but fresh offers superior flavor.

Garlic: Garlic is a staple ingredient that adds depth to any recipe. Renowned for its potential health benefits, including immune support and anti-inflammatory properties, fresh garlic cloves should be firm and free of blemishes. Store garlic in a cool, dry place, and avoid refrigeration which can cause sprouting. Garlic powder or garlic salt may serve as substitutes, but fresh garlic delivers the best flavor.

Common Mistakes to Avoid

  • Overmixing the Meatball Mixture: One common mistake is overmixing the ground chicken and other ingredients, which can result in tough meatballs. Mix gently until just combined for optimal texture.
  • Neglecting to Chill the Mixture: Failing to chill the meatball mixture before baking can lead to them falling apart. Chill for at least 15 minutes to help them hold their shape.
  • Using Excessively Lean Meat: While using lean ground chicken is healthier, excessively lean meat can dry out the meatballs. Aim for a mixture that includes some fat for flavor and moisture.
  • Overcrowding the Baking Sheet: When baking meatballs, overcrowding them can cause uneven cooking. Ensure they are spaced out to promote even browning.
  • Skipping Flavor Enhancers: Skipping garlic, herbs, or spices can lead to bland meatballs. Remember to season properly for delicious results.
  • Incorrect Cooking Temperature: Cooking meatballs at too low a temperature might result in soggy textures. Bake them at the correct temperature to achieve a golden crust.
  • Not Letting Meatballs Rest: Skipping the resting period after baking may result in a loss of juices. Allow them to rest for a few minutes to enhance juiciness when served.
  • Ignoring Sauce Pairing: Overlooking the sauce can mean a missed opportunity for enhanced flavor. Choose a complementary sauce for serving, such as marinara or pesto.
  • Inadequate Baking Time: Undercooking meatballs can pose safety risks, so ensure they reach an internal temperature of 165°F (75°C) for safety.
  • Not Tasting the Mixture: Not tasting the raw mixture before baking can lead to unbalanced flavors. Always adjust seasoning to your preference.

Essential Techniques

Forming Meatballs: Properly forming meatballs is essential for consistent cooking. Wet your hands to prevent sticking and gently roll portions of the mixture into balls. Avoid compacting the meat, as that can result in dense meatballs. Aim for uniform size for even cooking.

Baking Meatballs: Baking meatballs rather than frying offers a healthier option with less mess. Preheat the oven to the proper temperature and place the meatballs on a lined baking sheet. Bake until they are golden brown and cooked through, using a thermometer to check the internal temperature.

Making a Tomato Sauce: Making a simple yet flavorful sauce is integral to the meatball experience. Sautéing garlic and onion, followed by adding canned tomatoes and herbs creates a robust sauce. Allow it to simmer for a rich flavor, and add the meatballs once cooked for a delicious coating.

Pro Tips for Perfect Baked Chicken Ricotta Meatballs

1. **Use fresh ingredients**: Always use fresh herbs, garlic, and quality meat to enhance flavors in your meatballs.
2. **Experiment with flavors**: Add a pinch of red pepper flakes for heat or some parmesan cheese for extra richness in the mixture.
3. **Chill before baking**: Allow the meat mixture to chill in the fridge for 30 minutes to help them hold their shape while baking.
4. **Don’t overcrowd the pan**: Give each meatball space on the baking sheet to allow for even cooking and browning.
5. **Baste with sauce**: For added moisture and flavor, baste the meatballs with tomato sauce halfway through baking.
6. **Let them rest**: Allow meatballs to rest for about 5 minutes after baking to lock in the juices.
7. **Make a double batch**: Prepare extra meatballs and freeze them for an easy meal solution in the future.
8. **Play with spices**: Experiment with different herbs and spices based on your preference to personalize the flavor.

Variations and Adaptations

Baked Chicken Ricotta Meatballs can easily adapt to various dietary needs and flavor preferences. For a regional variation, consider adding chopped spinach and feta cheese for a Mediterranean twist. This adds nutrients while giving the meatballs a unique flavor profile.

If you’re looking to go seasonal, incorporate pumpkin puree or grated zucchini into the mixture during the fall months for moisture and flavor. This not only changes the flavor but also enhances the nutritional value of the dish.

For those with dietary restrictions, these meatballs can be made gluten-free by substituting breadcrumbs with almond flour or ground oats. Additionally, substituting the ricotta with dairy-free cheese can accommodate dairy intolerances.

Flavor variations can be exciting to explore; consider adding BBQ sauce instead of marinara for a smoky, sweet alternative. You could also try using spicy salsa or pesto for a different twist on these baked meatballs.

If you’re focusing on presentation, serve the meatballs individually in small dishes, garnished with fresh basil or parsley for a beautiful display. This simple change elevates the dish while allowing your guests to enjoy the flavors in their own portion.

Serving and Presentation Guide

Plating Baked Chicken Ricotta Meatballs can enhance their overall appeal. Consider using a large serving platter filled with sauce, topped with the meatballs and garnished with fresh basil leaves. This provides an inviting presentation that encourages your guests to serve themselves.

For garnishing, sprinkle grated parmesan and a drizzle of olive oil to add richness and flavor. This simple touch can transform your dish and makes it visually stunning. Additionally, freshly cracked black pepper adds a nice touch, enhancing both taste and aesthetics.

Traditional accompaniments include spaghetti, polenta, or crusty bread for sopping up sauce. For dinner parties, consider serving mini meatballs on skewers for easy eating.

Temperature is crucial when serving these meatballs; enjoy them warm for the best experience. If made ahead, gently reheat in the oven to preserve texture without overcooking.

Portion control is essential for gatherings. Consider serving smaller meatballs for appetizers or larger versions as a main dish, allowing guests to choose their preferred size and style.

Wine and Beverage Pairing

Pairing the right wine can elevate the enjoyment of your Baked Chicken Ricotta Meatballs. A medium-bodied red like Chianti or Sangiovese complements the Italian flavors of the dish beautifully. The wine’s acidity can cut through the richness of the ricotta and enhance the overall experience.

For those who prefer white wine, a crisp Pinot Grigio works well too. Its bright citrus notes contrast with the savory elements of the meatballs and sauce, offering a refreshing balance.

If alcohol isn’t preferred, consider non-alcoholic options like sparkling water infused with lemon or ginger for a refreshing palate cleanser. A flavorful herbal tea may also enhance the meal without adding heaviness.

Temperature is a key factor; serve red wines slightly below room temperature and keep white wines chilled for optimal enjoyment. Ensure your guests have a variety of options to enjoy where they can choose their preferred beverage for the meal.

Storage and Shelf Life

Proper storage of Baked Chicken Ricotta Meatballs is essential for maintaining quality and freshness. Store any leftover meatballs in an airtight container in the refrigerator for up to 3-4 days. Make sure they are fully cooled before sealing to prevent condensation.

For longer storage, consider freezing the meatballs. Place them on a baking sheet to freeze individually before transferring to a freezer-safe bag. Frozen meatballs can last for up to 3 months. To reheat, either bake directly from frozen or thaw in the refrigerator overnight.

Always check for signs of spoilage, such as an off smell or unusual texture. To reheat, place the meatballs in the oven at a low temperature or simmer in a sauce to maintain moisture.

For maximum flavor, reheat in a sauce where they can absorb additional moisture and flavor. When reheating frozen meatballs, allow for a bit more time in the oven to ensure they are heated through completely.

Make Ahead Strategies

Preparing Baked Chicken Ricotta Meatballs ahead of time can significantly ease your cooking schedule. You can prepare the meatball mixture a day in advance and store it in the refrigerator until you’re ready to cook. This will help the flavors meld and deepen.

For freezing, shape the meatballs and freeze them uncooked. This step allows for quick cooking later; simply bake them from frozen, adjusting the cooking time as needed.

Consider prepping the sauce as well, which can be made ahead and stored in the fridge. Assemble the dish just before serving for a fresh, home-cooked feel.

When reheating, consider adding freshly cooked pasta or greens to elevate your dish and reintroduce freshness. This approach allows you to streamline your cooking process while offering a delicious meal later on.

Scaling Instructions

When scaling the Baked Chicken Ricotta Meatballs recipe, halving ingredients is straightforward. Simply divide the required amounts by two to adjust for a smaller batch.

Doubling or tripling the recipe is equally simple, but be mindful of your mixing and baking equipment. Use larger mixing bowls and sheets, ensuring meatballs have enough room to bake evenly.

Timing may differ; baked goods may require additional time the larger the batch is. Keep a close eye on the meatballs while cooking and use a meat thermometer for accurate cooking.

When storing leftovers from larger batches, ensure proper classification. Label containers with dates and portion sizes for easy access and utilization. This organization makes it easier to navigate your stored food.

Nutritional Deep Dive

Nutritional analysis of Baked Chicken Ricotta Meatballs reveals several health benefits. Each serving offers a balance of macronutrients including protein from chicken, fats from ricotta, and carbohydrates from any accompanying sauces or sides. The high protein content supports muscle maintenance and repair.

Micronutrient analysis shows the presence of essential vitamins and minerals, thanks to ingredients like garlic, fresh herbs, and ricotta. This contributes to overall health, supporting functions such as immune response and calcium levels.

Health benefits include being lower in fat than traditional beef meatballs, allowing for a heart-healthy approach while still being satisfying. Additionally, incorporating fresh herbs adds antioxidants to your meal.

Dietary considerations should be taken into account. With simple modifications, these meatballs can accommodate a range of diets, from gluten-free to lower carbohydrate options. Adjust portion sizes to suit your specific health goals, making these meatballs a versatile dish.

Dietary Adaptations

For a gluten-free version of Baked Chicken Ricotta Meatballs, replace breadcrumbs with almond flour or ground oats. These substitutions maintain texture without compromising taste, appealing to those with gluten sensitivities.

If you need a dairy-free alternative, substitute ricotta with cashew cream or a plant-based cheese. This adaptation ensures a creamy texture is preserved while making the dish accessible to individuals avoiding dairy.

Vegans can create a meatball alternative by using lentils or chickpeas as the base and incorporating nutritional yeast for a cheesy flavor without animal products. Adding ground flaxseed can help bind the ingredients together in place of eggs.

A low-carb adaptation may involve using grated vegetables, such as zucchini or cauliflower rice, in place of traditional breadcrumbs. Not only does this option reduce carbohydrates but also increases the nutritional profile.

For those following a keto or paleo diet, focus on minimizing starchy ingredients like breadcrumbs and use protein-rich ingredients alongside healthy fats. This style caters to these specific dietary needs while still delivering a delicious outcome.

Troubleshooting Guide

Common texture issues with Baked Chicken Ricotta Meatballs can arise due to overmixing or not chilling the mixture beforehand. If meatballs turn out too firm, reduce mixing next time and ensure they rest in the refrigerator to allow for better binding.

Flavor balance is crucial; if meatballs taste bland, remember to season the mixture adequately before baking. Adjusting herbs and spices can make a significant difference in the final taste.

Temperature problems may arise if the oven isn’t calibrated correctly. Use an oven thermometer to ensure accurate baking temperatures for the best results.

If you encounter equipment challenges, consider adjusting your baking sheets and ensuring they fit properly in your oven. Utilizing parchment paper can prevent sticking and simplify clean-up.

Ingredient substitutions may lead to different flavor profiles. If an ingredient is unavailable, don’t hesitate to experiment, but remain mindful of how each unique addition can alter the overall dish.

Timing concerns, especially undercooked meatballs, can be avoided with the use of a meat thermometer. Always check that meatballs reach an appropriate internal temperature, ensuring safe consumption.

Recipe Success Stories

The community response to Baked Chicken Ricotta Meatballs has been overwhelmingly positive, with many sharing their adaptations and tweaks. Readers appreciate the flexibility of the recipe, allowing them to customize flavors and ingredient ratios according to their preferences.

Variations such as adding sun-dried tomatoes or different spices have contributed to countless success stories. From recipe reviews, others highlight how easy and straightforward the dish is, making it a go-to in their weeknight meal roster.

Photographers within the community have shared beautiful images showcasing their meatballs, often garnished elegantly, inspiring others to present the dish in creative ways that enhance the overall dining experience.

Feedback also reveals that families have successfully incorporated the recipe into regular meal rotations. Many parents appreciate its healthful ingredients and ease, making it a family favorite that both adults and children enjoy.

Overall, the endless possibilities and variations, along with the recipe’s heartwarming success stories from our readers, make Baked Chicken Ricotta Meatballs a cherished dish in many households.

Frequently Asked Questions

Q: Can I freeze Baked Chicken Ricotta Meatballs?

A: Yes, you can freeze these meatballs! After cooking, allow them to cool completely, then store in an airtight container or freezer-safe zip bag for up to 3 months. Reheat directly from frozen or thaw overnight in the fridge.

Q: How long can leftovers be stored in the fridge?

A: Leftovers can be stored in the refrigerator for 3-4 days. Make sure they are in an airtight container to maintain freshness.

Q: Can I use other meats besides chicken?

A: Absolutely! You can substitute ground turkey, beef, or pork for chicken in this recipe. Adjust cooking times slightly based on the type of meat used.

Q: What can I serve with Baked Chicken Ricotta Meatballs?

A: These meatballs pair wonderfully with pasta, polenta, or crusty bread. You can also serve them in a sub sandwich or alongside a fresh salad.

Q: How can I add more flavor to the meatballs?

A: To amplify flavor, consider incorporating ingredients like grated parmesan, red pepper flakes, or crushed garlic into the mixture. Fresh herbs greatly enhance the taste as well.

Q: Can I make these meatballs in advance?

A: Yes! You can prepare the mixture ahead of time and refrigerate it for a couple of hours or prepare and freeze the meatballs for quick future meals.

Q: Are these meatballs gluten-free?

A: To make these meatballs gluten-free, simply replace breadcrumbs with almond flour or gluten-free breadcrumbs for a similar texture.

Q: Do I need to brown the meatballs before baking?

A: No, browning is not necessary. Baking alone will provide a deliciously roasted flavor without the additional step of pan-frying.

Q: How do I know when the meatballs are done?

A: Meatballs are done when they reach an internal temperature of 165°F (75°C). Using a meat thermometer ensures they are cooked thoroughly for safe consumption.

Q: Can I use low-fat ricotta cheese?

A: Yes, low-fat ricotta cheese can be used; however, it may yield a slightly drier texture. Using whole-milk ricotta generally produces a richer and creamier meatball.

Additional Resources

Explore related recipes that complement Baked Chicken Ricotta Meatballs, such as homemade marinara sauce or garlic bread. These pairings can create a well-rounded meal that enhances your dining experience.

Technique guides like mastering meatball forming and perfect sauce making will further elevate your culinary skills. Check out instructional videos to make the cooking process even easier.

Learn more about the ingredients used, including the benefits of ricotta cheese and protein options, to deepen your understanding of the dish’s components and their roles in nutrition.

For equipment recommendations, consider tools that make preparation easier. A good quality baking sheet and mixing bowls are essential for seamless cooking.

Finally, explore seasonal variations that showcase what is freshest in the market. Adapt your recipes based on the time of year for maximum flavor and nutrition.

Join the Conversation

Engage with us on social media by sharing your experience with Baked Chicken Ricotta Meatballs! We love to see your variations and how you plate your dishes. Join our community discussions and share your favorite tips for enhancing the recipe.

Photography enthusiasts can contribute beautiful images of the finished dish, which might be featured on our platforms. Don’t hesitate to share reviews and insights for the benefit of fellow home cooks, keeping our community inspired.

Feel free to suggest your own twists on the recipe too, and let us know if you’ve made any unique adaptations. Your input fosters a creative atmosphere where everyone can explore delicious possibilities together.

The Recipe

Baked Chicken Ricotta Meatballs

Serves: 4

Prep Time: 20 mins

Cook Time: 30 mins

Total Time: 50 mins

Kitchen Equipment Needed

  • Baking sheet
  • Mixing bowl
  • Measuring cups and spoons
  • Oven thermometer (optional)

Ingredients

  • 1 pound ground chicken
  • 1 cup ricotta cheese
  • 1/2 cup breadcrumbs
  • 1/4 cup grated parmesan cheese
  • 1 egg, beaten
  • 2 cloves garlic, minced
  • 1 tablespoon fresh basil, chopped
  • 1 tablespoon fresh parsley, chopped
  • 1 teaspoon salt
  • 1/2 teaspoon black pepper
  • 1/2 teaspoon red pepper flakes (optional)
  • 3 cups marinara sauce for serving

Directions

  1. Preheat your oven to 375°F (190°C) and line a baking sheet with parchment paper.
  2. In a large mixing bowl, combine the ground chicken, ricotta cheese, breadcrumbs, parmesan cheese, beaten egg, garlic, herbs, salt, pepper, and red pepper flakes.
  3. Using your hands, gently mix until combined but do not overmix the mixture.
  4. Chill the mixture in the refrigerator for 15 minutes for better shaping.
  5. Form the mixture into meatballs, approximately 1-1.5 inches in diameter and place them on the prepared baking sheet.
  6. Bake in the preheated oven for 25-30 minutes or until golden brown and cooked through (165°F / 75°C internally).
  7. While the meatballs are baking, warm the marinara sauce in a saucepan over medium heat.
  8. Serve the meatballs with the sauce poured over them and garnish with additional parsley or grated cheese if desired.

Recipe Notes

  • These meatballs can be made ahead of time and stored in the refrigerator or freezer.
  • Feel free to adjust the herbs based on your preference—oregano and thyme also work well.
  • For a low-carb version, use almond flour instead of breadcrumbs and serve with zucchini noodles.
  • Experiment with different sauces like pesto or BBQ for a flavorful twist.

Delicious Turkey Stuffing Balls Recipe Perfect for Holiday Feasts

Turkey Stuffing Balls Recipe: A Delicious Twist on Traditional Flavors

⚖️
Difficulty
Easy

⏲️
Prep Time
15 mins

🕒
Cook Time
25 mins

⏱️
Total Time
40 mins

🍽️
Servings
4

Turkey Stuffing Balls are a delightful addition to any holiday table or a hearty family meal. This recipe combines the savory flavors of ground turkey, fresh herbs, and breadcrumbs into perfectly seasoned balls that are easy to make and even easier to devour. The aroma of these stuffing balls will fill your kitchen with the comforting scents of Thanksgiving, making them a hit with family and friends. Perfectly crispy on the outside and tender on the inside, these stuffing balls redefine comfort food.

These Turkey Stuffing Balls not only elevate standard stuffing but also provide a unique alternative for those who prefer bite-sized delights. Imagine serving these golden-brown morsels at your next gathering, where they can shine as a main dish or a savory side. Filled with traditional flavors and textures, they promise to be a crowd-pleaser that can be enjoyed any time of year, especially during festive occasions.

Quick Recipe Highlights

  • Flavor Profile: These Turkey Stuffing Balls bring together savory turkey, sage, and thyme, creating a harmonious flavor burst with every bite.
  • Texture: The crispy exterior contrasts beautifully with the soft, moist stuffing inside, providing a delightful mouthfeel.
  • Aroma: Expect your kitchen to be filled with the warm, inviting scent of rosemary and garlic as they bake.
  • Visual Appeal: Golden brown and perfectly round, these Turkey Stuffing Balls are as pleasing to the eye as they are to the palate.
  • Skill Level Needed: This recipe is ideal for beginner cooks, requiring no advanced cooking skills, just basic mixing and baking techniques.
  • Special Equipment: All you need is a baking sheet, mixing bowl, and an oven to create these delicious bites.

Recipe Overview

  • Difficulty Level: This dish is classified as easy, perfect for novices and experts alike, making it a perfect family cooking project.
  • Category: These stuffing balls fall under the category of appetizers or side dishes, but they can easily star as a main feature at your meal.
  • Cuisine: Drawing from traditional American comfort food, these stuffing balls embody the spirit of Thanksgiving-inspired dishes.
  • Cost: This recipe is budget-friendly, with ingredients typically costing around $10-$15, depending on your location.
  • Season: While they can be enjoyed year-round, the fall and winter seasons are particularly well-suited for this cozy, flavorful dish.
  • Occasion: Great for family gatherings, potlucks, and holiday celebrations, these stuffing balls cater to any occasion with ease.

Why You’ll Love This Recipe

These Turkey Stuffing Balls provide an exceptional combination of taste and texture, thanks to the use of finely ground turkey and a medley of fresh herbs. The savory, herbaceous flavors meld perfectly, tantalizing taste buds and transforming a classic side into a standout dish. The crispy exterior gives way to the soft and flavorful stuffing within, ensuring a satisfying bite every time. Perfect for those who enjoy the essence of stuffing without the mess and fuss of traditional methods, these balls offer a revamped version of holiday fare.

Convenience is another reason to love this recipe. Preparation takes just 15 minutes, and they cook rapidly in the oven, making them an accessible option for busy weeknights or spontaneous get-togethers. Additionally, these stuffing balls are great for meal prep; they can be made ahead of time and stored until needed. Simply reheat them, and they taste just as delicious as when fresh.

From a nutritional standpoint, turkey is a fantastic source of lean protein, and when paired with whole grain breadcrumbs and fresh vegetables, these Turkey Stuffing Balls provide vitamins and minerals essential for a balanced diet. Lower in calories than traditional meat dishes, they are a guilt-free indulgence. The inclusion of herbs not only enhances flavor but also offers additional health benefits, making these an excellent choice for health-conscious eaters.

Socially, these stuffing balls are perfect for entertaining. They encourage sharing and conversation, as guests delight in popping these delicious bites into their mouths. Whether served as an appetizer or as part of a main meal, they elevate any gathering with their delightful presentation and comforting flavors. Plus, they can easily be transported to parties or gatherings without losing their quality.

Cost-effectiveness is another highlight of this recipe. Utilizing affordable ingredients that can be found in any grocery store, you can create an impressive dish without breaking the bank. These Turkey Stuffing Balls offer a high return on investment in terms of flavor and satisfaction, making them an excellent choice for families on a budget or those looking to feed a crowd without overspending.

Historical Background and Cultural Significance

The origins of stuffing date back to Roman times when cooks would fill the cavities of birds with a mixture of herbs and bread. This technique evolved over the years, especially in American culinary practices, where Thanksgiving and holiday traditions established stuffing as a staple dish. The incorporation of turkey became synonymous with celebratory meals, leading to the development of various stuffing recipes that utilized seasonal ingredients.

In American cuisine, particularly, stuffing symbolizes warmth, family, and togetherness. It has evolved into various forms across regions, with every family having their interpretation that reflects personal traditions and heritage. The flexibility of stuffing recipes allows for variations that permit seasonal ingredients to shine, reflecting the changing agricultural landscape of the country.

The recipe for Turkey Stuffing Balls itself has seen adaptations over the years, transitioning from a side served solely at festive meals to a more versatile dish that can be enjoyed year-round. This evolution highlights how beloved flavors can be reinterpreted for modern eating habits while maintaining a connection to cultural roots.

Regional variations are also notable, with southern styles possibly including cornbread while northeastern approaches emphasize breadcrumbs and herbs. These differences highlight how local ingredients and tastes influence classic recipes, resulting in a rich tapestry of culinary traditions that bring people together around the dinner table.

Ingredient Deep Dive

Turkey is the star of this stuffing balls recipe. As a lean source of protein, it offers numerous health benefits, including being low in fat and high in essential nutrients like selenium and B vitamins. When selecting turkey for this recipe, opt for ground turkey with higher meat content for a better texture.

The breadcrumbs serve as a binding agent and are a canvas for flavor. Whole grain options are recommended for added texture and nutritional value. When making these stuffing balls, it’s essential to ensure that breadcrumbs are fresh to help retain moisture during cooking. They can be stored in an airtight container to maintain their crunch and flavor.

Fresh herbs like sage and thyme are critical in enhancing the flavor profile of these stuffing balls. Herbs not only add a fresh brightness and aroma, but they are also rich in antioxidants and have been used in traditional medicine. When choosing herbs, always prefer fresh over dried varieties to achieve the best flavor.

Onions and garlic provide a savory element to the stuffing balls. They should be finely chopped to ensure even distribution of flavor throughout the mixture. When preparing them, sautéing just until translucent enhances their sweetness, making them a perfect complement to the turkey.

Eggs are included in the mixture to act as a binder, helping the balls maintain their shape while cooking. When selecting eggs, look for organic or free-range options to ensure the best quality. Always ensure eggs are fresh by checking their expiration date prior to use.

Common Mistakes to Avoid

  • Overmixing the Ingredients: When combining the turkey and breadcrumbs, be careful not to overmix, as this can lead to dense stuffing balls. Mix just until incorporated to keep them light.
  • Not Using Fresh Herbs: Fresh herbs elevate the flavor of the stuffing balls significantly. Using dried herbs may result in a less complex flavor profile.
  • Incorrect Baking Temperature: Ensure that the oven is preheated properly. Baking at the right temperature is crucial for achieving a crispy exterior while maintaining moisture inside.
  • Skipping the Sauté Step: Sautéing onions and garlic before mixing them into the stuffing is key. This step enhances their sweetness and flavor, leading to a more delicious end result.
  • Adding Too Much Liquid: Be cautious with the amount of liquid added to the mixture. Excess moisture can lead to soggy stuffing balls, ruining their texture.
  • Not Allowing to Rest: After baking, it’s important to let the stuffing balls rest for a few minutes. This helps them firm up and makes serving easier.
  • Not Tasting as You Go: Always taste the mixture before baking, adding more seasonings if necessary. This ensures the flavors are balanced.
  • Using Low-Quality Ingredients: For the best flavor, use high-quality turkey and fresh herbs. Low-quality ingredients can negatively affect the overall taste.
  • Improperly Measuring Ingredients: Accurate measuring is key to a successful recipe. Use standard measuring cups and spoons to ensure consistency.
  • Ignoring Cooking Time: Keep an eye on the baking time; overcooked stuffing balls can dry out, leading to less desirable texture and taste.

Essential Techniques

– Mixing: Proper mixing is crucial to ensure all ingredients are evenly distributed throughout the stuffing ball. Use a gentle folding motion to maintain the light texture. Avoid excessive handling, as this can lead to a dense final product.
– Baking: Preheating the oven to the right temperature ensures that the stuffing balls cook evenly and develop a golden-brown crust. A hot oven directs heat into the balls, allowing them to set properly.
– Sautéing: This technique brings out the sweetness and depth of flavor in garlic and onions. Sauté just until translucent; this enhances their appeal in the stuffing mixture.
– Shaping: When rolling out the stuffing balls, use slightly wet hands to prevent sticking. Aim for uniform sizes to ensure even cooking.
– Cooling: Allowing the stuffing balls to cool slightly before serving helps them maintain their shape and enhances the texture when biting in.

Pro Tips for Perfect Turkey Stuffing Balls

– Mix ingredients in a large bowl to maintain the right airiness. This avoids overworking the mixture which can compromise texture.
– Switch up the herbs according to preference or availability. Experimenting with rosemary or parsley adds a different flavor interest.
– For a spicy kick, add a pinch of crushed red pepper flakes to the mixture.
– Pre-cook a small portion of the mixture and taste it to adjust the seasoning before baking the full batch.
– Consider serving with a dip or sauce, such as cranberry sauce or a yogurt-based dip, to enhance the overall experience.
– If making ahead of time, chill the balls before baking; this helps maintain shape during baking.
– Test doneness with a meat thermometer; the internal temperature should reach 165°F (75°C) for safety.
– Consider adding cheese to the mixture, such as grated Parmesan, for an extra layer of richness.

Variations and Adaptations

– For a southwestern twist, consider incorporating diced jalapeños and cumin, giving the stuffing balls an exciting kick.
– Seasonal adaptation can include adding shredded zucchini during the summer, providing moisture and nutritional boost during warmer months.
– Dietary modifications can easily be made by using gluten-free breadcrumbs for guests with gluten sensitivities, ensuring everyone can enjoy this dish.
– Flavor variations can see the addition of different meats; ground chicken or beef can be substituted based on preference.
– Texture modifications like adding chopped nuts or seeds can provide a crunchy contrast to the soft stuffing.
– Presenting the stuffing balls on a bed of fresh greens with a drizzle of balsamic reduction adds a colorful and appealing touch.

Serving and Presentation Guide

When serving Turkey Stuffing Balls, use decorative platters to enhance visual appeal. A simple white plate can showcase the golden-brown hue of the balls beautifully. Consider garnishing the platter with fresh herbs for added color and fragrance.

For an elegant touch, serve alongside dipping sauces that complement the flavors, such as apple cider reduction or a spiced yogurt dip. This not only enhances taste but encourages a shared dining experience.

Temperature plays a crucial role; serve stuffing balls warm to maintain their texture and flavor. Ensure they are heated through to provide the best eating experience. For portion control, consider serving them as a single bite appetizer or allowing guests to choose their own portions for a buffet-style setup.

Wine and Beverage Pairing

Pair these Turkey Stuffing Balls with a crisp, fruity white wine such as Sauvignon Blanc, which complements the savory flavors without overpowering them. Additionally, a light red, like Pinot Noir, can harmonize with the depths of flavor present in the turkey.

For non-alcoholic options, consider serving sparkling apple cider, which provides a refreshing, bright contrast against the spiced stuffing balls. If coffee or tea is more appealing, a mild herbal tea made with chamomile or mint can balance the meal’s richness.

Temperature considerations are essential; make sure wine is well-chilled, while the hot beverages are served warm to enhance the drinking experience.

Storage and Shelf Life

To store leftover Turkey Stuffing Balls, place them in an airtight container and store in the refrigerator for up to three days. For longer storage, consider freezing them after they have cooled completely. Freezing will help retain their method of preparation and flavors.

When reheating, it is best to do so in the oven rather than a microwave to maintain their texture. Preheat the oven to 350°F (175°C), place the balls on a baking sheet, and heat for about 10-15 minutes, or until heated through.

Signs of spoilage include an off smell, unusual colors, or unwanted textures, and it’s best to discard any leftovers that show these indicators to avoid foodborne illnesses.

Make Ahead Strategies

To make Turkey Stuffing Balls in advance, prepare the mixture the day before and store it in the refrigerator. Form the balls just before cooking to preserve freshness. Chilling the mixture enhances flavor melding but is also key for achieving a better texture.

Do not bake them until the day you plan to serve to ensure they are enjoyed fresh. Assemble and shape them, then place the formed balls on a baking sheet lined with parchment for easy transfer.

You can then pull them out to bake at your convenience, still warm and ready to impress your guests. If desired, add fresh herbs or a light drizzle of olive oil before baking to brighten the flavor as they cook.

Scaling Instructions

To halve the recipe, simply divide each ingredient measurement by two, ensuring that it meets the same flavor profile as the original. This method maintains the original balance of flavors while yielding fewer servings.

Doubling or tripling the recipe is feasible and can be accomplished by multiplying ingredient amounts accordingly. This is especially useful for entertaining large groups. Just be cautious with the baking time as larger batches may require slightly adjusted cooking times.

Equipment adjustments for varying quantities may include using larger mixing bowls and baking sheets. Ensure that the balls are spaced adequately to enable them to cook evenly without steaming.

Timing modifications might involve checking smaller batches earlier to avoid overcooking while larger portions may need more time in the oven.

Nutritional Deep Dive

These Turkey Stuffing Balls are a healthy source of macronutrients, primarily providing about 20 grams of protein per serving. The use of ground turkey and whole grain breadcrumbs contribute to a solid protein foundation while maintaining a reasonable carbohydrate profile.

Additionally, micronutrient analysis shows that these stuffing balls contain essential vitamins like B6 and niacin from turkey. The herbs and vegetables included also add significant levels of antioxidants and fiber, promoting a healthy digestive system.

Health benefits extend to weight management, as the lean protein in turkey can help in satiety and reducing overall calorie consumption. Including these stuffing balls in a balanced diet allows for delicious meals that support a nutritious lifestyle.

Proper portion analysis is essential; a serving size of approximately three balls offers a satisfying bite while keeping calorie intake moderate. Adjust portion sizes based on personal dietary needs.

Dietary Adaptations

– Gluten-free: Use gluten-free breadcrumbs or ground nuts as a substitute to maintain texture and flavor while accommodating dietary restrictions.
– Dairy-free: Ensure that any binding agents are dairy-free, using alternatives like flaxseed or applesauce if necessary.
– Vegan: Substitute ground turkey with a textured vegetable protein or vegan meat alternative, adjusting seasonings for flavor.
– Low-carb: Consider using crushed pork rinds or almond flour as a base instead of breadcrumbs for a low-carb alternative.
– Keto: Maintain a high-fat, low-carb profile by utilizing cheese and additional fat-based ingredients instead of traditional breadcrumbs.
– Paleo: Focus on whole ingredients such as nuts and herbs while avoiding processed foods and adhering to a meat-based diet.
– Low-FODMAP: Avoid high-FODMAP ingredients like onion and garlic. Opt for chives and green onion tops instead to stay within dietary guidelines.
– Other specific diets can be addressed by tailoring the ingredients based on personal or cultural preferences, adjusting as needed.

Troubleshooting Guide

– Texture issues: Should the stuffing balls turn out too dry or dense, consider adding a little more liquid or fat to the mixture next time, allowing for better moisture retention.
– Flavor balance: If your stuffing balls lack flavor, the addition of salt and pepper at key steps can enhance taste; also consider adding more fresh herbs to the mixture.
– Temperature problems can occur if the oven isn’t calibrated correctly; invest in an oven thermometer to ensure accuracy and consistency.
– Equipment challenges may arise during shaping; if the mixture isn’t sticking, adding an additional egg can help bond the ingredients together.
– Ingredient substitutions: If a flavor or texture is missing due to substitutions, experiment until achieving the desired outcome.
– Timing concerns: Always double-check the baking time; if the stuffing balls are undercooked or overcooked, adjust accordingly for future batches.

Recipe Success Stories

Community feedback often highlights how these Turkey Stuffing Balls have transformed family gatherings, showcasing their ability to unite diverse palates and dietary preferences. Many have shared their personal adaptations, illustrating the dish’s versatility and appeal across different cultures.

Readers often express delight at discovering the ease with which this recipe comes together, encouraging novice cooks to take the plunge and try their hand at this modern classic. Additionally, those who have tried variations report back with favorable reviews, reinforcing the ingenuity and flexibility of the base recipe.

Photography tips often revolve around capturing those golden-fried edges and perfectly rounded shapes, encouraging cooks to share their creations online and engage with a wider community of food lovers.

Overall, the inclusivity and adjustability of the recipe mean that it continues to adapt and resonate, making it a favorite among many home cooks.

Frequently Asked Questions

Can I freeze Turkey Stuffing Balls?

Yes, you can freeze these stuffing balls. After they have cooled, place them in an airtight container or freezer bags for up to three months.

How do I reheat frozen stuffing balls?

To reheat, place the frozen stuffing balls in a preheated oven at 350°F (175°C) for about 15-20 minutes or until heated through. Avoid using a microwave to maintain their texture.

Can I substitute ground turkey with another meat?

Absolutely, you can substitute ground turkey with ground chicken, beef, or even a meat alternative for those looking for a vegetarian option.

What can I serve with Turkey Stuffing Balls?

They pair wonderfully with cranberry sauce, mashed potatoes, or a simple green salad. Their versatility allows them to complement any main course.

How long do these stuffing balls last in the fridge?

When stored in an airtight container, leftovers can last up to three days in the refrigerator. Be sure to check for freshness before consuming.

Can I make these stuffing balls ahead of time?

Yes, you can prepare the mixture ahead of time, shape the balls, and refrigerate them until you’re ready to bake.

What herbs work best for flavoring?

Sage and thyme are traditional and work beautifully, but feel free to experiment with rosemary, parsley, or even basil based on your preferences.

Are these stuffing balls gluten-free?

To make them gluten-free, simply use gluten-free breadcrumbs instead of regular ones, and ensure all other ingredients are gluten-free as well.

What’s the best way to serve them?

Plating them on a beautiful serving platter garnished with fresh herbs or drizzled with a complementary sauce makes for a lovely presentation.

Can I bake the stuffing balls in an air fryer?

Yes, you can! Air frying at about 320°F (160°C) for about 10-12 minutes can yield a perfectly crispy exterior while keeping the insides moist.

Additional Resources

Looking to expand your culinary repertoire? Explore related recipes that incorporate the same delectable flavors, such as traditional turkey and stuffing casserole or baked turkey meatballs with a savory herb sauce.

Additionally, technique guides detailing how to properly sauté, bake, or mix different ingredients can bolster your cooking skills and bring out the best in your Turkey Stuffing Balls.

Consider researching ingredient information for turkey and breadcrumbs to learn about their origin and variations. Knowledge about equipment recommendations ensures you have the best tools available, enhancing your cooking experience.

Finally, keep an eye out for seasonal variations in recipes; as different herbs and vegetables come into season, they can enhance your stuffing balls with fresh flavors and colors.

Join the Conversation

We invite you to share your thoughts and experiences regarding Turkey Stuffing Balls on social media or in the comments below! Your photographic captures or reviews help build a vibrant cooking community eager to share their tips and variations.

Engagement with fellow cooks can inspire new adaptations or methods that enrich the original recipe. By sharing your personal twists or holiday experiences, you contribute to a growing exchange of delicious ideas.

Recipe reviews can also aid future cooks in deciding whether to try this delicious adaptation of a classic dish. Let’s explore, create, and celebrate good food together!

The Recipe

Turkey Stuffing Balls

Serves: 4

Prep Time: 15 mins

Cook Time: 25 mins

Total Time: 40 mins

Kitchen Equipment Needed

  • Baking sheet
  • Mixing bowl
  • Sauté pan
  • Measuring cups and spoons
  • Oven mitts

Ingredients

  • 1 pound ground turkey
  • 1 cup breadcrumbs
  • 1/2 cup onion, finely chopped
  • 2 cloves garlic, minced
  • 1 large egg
  • 2 tablespoons fresh sage, chopped
  • 2 tablespoons fresh thyme, chopped
  • Salt and pepper to taste
  • Olive oil for baking

Directions

  1. Preheat your oven to 375°F (190°C).
  2. In a sauté pan, heat a little olive oil over medium heat, add onions and garlic, and sauté until translucent. Remove and let cool.
  3. In a mixing bowl, combine ground turkey, breadcrumbs, sautéed onions and garlic, egg, sage, thyme, salt, and pepper.
  4. Mix until just incorporated, being careful not to overmix.
  5. Form the mixture into balls, about 1.5 inches in size, and place them on a baking sheet lined with parchment paper.
  6. Drizzle with olive oil and bake for 20-25 minutes until golden brown and cooked through.
  7. Serve warm with your choice of sauces and enjoy!

Recipe Notes

  • For added moisture, consider incorporating a splash of chicken broth into the mixture.
  • Feel free to use different herbs based on your taste preferences.
  • Leftovers can be stored in an airtight container in the fridge for up to three days.
  • Freezing the balls ahead of time allows you to quickly reheat them for unexpected guests.

Quick and Cheesy Garlic Chicken Wraps for Your Busy Weeknights

Quick and Cheesy Garlic Chicken Wraps: A Deliciously Easy Meal

⚖️
Difficulty
Easy

⏲️
Prep Time
10 mins

🕒
Cook Time
15 mins

⏱️
Total Time
25 mins

🍽️
Servings
4

Quick and Cheesy Garlic Chicken Wraps are your go-to solution for a flavorful and satisfying meal that comes together in just 25 minutes. Perfect for busy weeknights or as a comfortable lunch, these wraps are loaded with tender chicken, melted cheese, and the irresistible aroma of garlic that wafts through your kitchen. Not only do these wraps deliver on flavor, but they are also easy to customize, making them a family favorite for all ages.

Imagine biting into a warm, soft tortilla filled with juicy chicken, a blend of gooey cheese, and fresh veggies, all finished with a zesty garlic sauce. Each bite is an explosion of flavors and textures that will have your taste buds dancing. Whether you’re looking for a quick meal to whip up after work or a filling dish to share with friends, these Quick and Cheesy Garlic Chicken Wraps are sure to impress!

Quick Recipe Highlights

  • Flavor Profile: Rich and savory with a garlic kick.
  • Texture: Creamy cheese, tender chicken, and crunchy veggies create a delightful contrast.
  • Aroma: The garlic and cheese meld together to create an irresistible scent that fills your home.
  • Visual Appeal: Vibrant colors from the fresh veggies make these wraps as beautiful as they are delicious.
  • Skill Level Needed: Suitable for beginners and experienced cooks alike.
  • Special Equipment: A stovetop skillet for cooking and a cutting board for prep.

Recipe Overview

  • Difficulty Level: Easy—This recipe requires minimal chopping and straightforward cooking techniques that make it accessible for everyone.
  • Category: Ideal for lunch, dinner, or meal prep options.
  • Cuisine: A delightful fusion influenced by classic American and Mexican flavors, creating a unique wrap experience.
  • Cost: Budget-friendly, with approximate costs under $20 for the entire meal.
  • Season: Perfect for any season, but especially appealing during the warmer months for lightweight and fresh eating.
  • Occasion: Great for casual family dinners, picnics, or as a party appetizer.

Why You’ll Love This Recipe

Quick and Cheesy Garlic Chicken Wraps balance flavor, convenience, and nutrition, making them a standout in any weeknight meal rotation. The delicious combination of tender chicken and garlic-infused cheese will certainly become a weeknight staple for families seeking both flavor and ease. From the moment the garlic hits the pan, you’ll be greeted by a mouth-watering aroma that builds anticipation.

Furthermore, the wrap format allows for versatility—feel free to add your favorite vegetables like bell peppers, spinach, or even a hint of hot sauce for a spicy kick. It’s a great way to sneak in some veggies while still keeping the meal comforting and satisfying.

Nutritionally, these wraps suit a variety of dietary preferences. You can easily substitute with grilled veggies for a vegetarian version or opt for gluten-free tortillas, making it approachable for those with dietary restrictions.

Whether you’re entertaining guests or cooking for a small family, these wraps are as fun to prepare as they are to eat. Their simple ingredients and quick assembly make these wraps perfect for social gatherings, ensuring that both you and your guests remain satisfied.

Finally, the cost-effectiveness of the Quick and Cheesy Garlic Chicken Wraps adds to their charm. Utilizing everyday ingredients and quick cooking methods, this dish proves you don’t have to overspend to enjoy a delicious meal.

Historical Background and Cultural Significance

The roots of wraps can be traced back to various culinary traditions worldwide, where flatbreads have long been used to encase meats and vegetables. The concept of a wrap combines the simplicity of traditional ingredients with contemporary flair, making it a beloved choice in modern cuisine.

Culturally, wraps are versatile and have evolved to accommodate various flavors from different cuisines, showcasing a blend of global culinary practices. This recipe, focusing on the popular combination of garlic and cheese, reflects the American love for rich flavors while incorporating elements from Mexican cooking.

Over time, wraps have transformed from simple sandwiches to gourmet experiences, allowing chefs and home cooks alike to experiment with fillings and sauces. Today, they remain a staple in many households, especially for those who value quick preparation without sacrificing flavor.

Regional variations of wraps continue to flourish, from Mediterranean shawarma to Asian-inspired burritos, demonstrating how adaptable this meal format is across cultures. The Quick and Cheesy Garlic Chicken Wraps stand as a testament to that adaptability while retaining an unmistakable comfort food appeal.

Ingredient Deep Dive

Chicken: Chicken is a staple protein in many cuisines, known for its versatility and mild flavor. It offers numerous nutritional benefits, such as being low in fat and high in protein. When selecting chicken, look for fresh, high-quality cuts without added preservatives. Store raw chicken in the fridge for up to two days, or freeze for longer preservation. If you’re out of chicken, turkey or tofu can serve as excellent substitutes.

Garlic: Garlic has been used for centuries, not only for its flavor but also for its health benefits, including anti-inflammatory and immune-boosting properties. Fresh garlic bulbs should feel firm, while pre-peeled cloves or garlic paste can be convenient alternatives. To enhance the flavor of your dish, store garlic in a cool, dry place, but avoid exposing it to moisture. If you’re in a pinch, garlic powder can also provide a decent flavor, although with less freshness.

Common Mistakes to Avoid

  • Overcooking the chicken can lead to dry wraps; always cook just until tender.
  • Using too much garlic can overpower the other flavors; balance is key.
  • Skipping the resting time after cooking can make the chicken chewy.
  • Choosing the wrong type of wrap can affect texture; opt for soft flour tortillas for the best experience.
  • Crowding the cooking pan leads to uneven cooking; work in batches if necessary.
  • Not warming the wraps can make them stiff; gently heat for better pliability.
  • Forgetting to season your vegetables can lead to blandness; sprinkle salt and pepper for better flavor.
  • Using pre-shredded cheese can lead to a less creamy melt; fresh is best.
  • Skipping the garnish can miss out on vibrant color and extra flavor from herbs.
  • Rushing the assembly can result in falling apart wraps; take your time to ensure a tight roll.

Essential Techniques

Grilling Chicken: Proper grilling technique is crucial for achieving juicy chicken. Preheat your grill or skillet to medium-high, and ensure the chicken pieces are about the same size for even cooking. Avoid constant flipping, allowing the chicken to develop a beautiful sear. Look for visual cues like juices running clear and golden-brown color to know it’s done.

Wrap Assembly: Mastering the wrap technique ensures all ingredients are nicely enclosed. Start by placing fillings in the center, fold in the sides, and roll tightly from the bottom up. Practice makes perfect—check the tightness and adjust as necessary to avoid spills.

Pro Tips for Perfect Quick and Cheesy Garlic Chicken Wraps

Add a splash of lemon juice for a refreshing zing and to brighten the overall flavor of your wraps.

Consider marinating the chicken beforehand for at least 30 minutes to infuse deeper flavors.

Experiment with different cheese types like pepper jack or mozzarella for varied textures and tastes.

Enhance the dressing by adding herbs like cilantro or parsley to incorporate freshness.

For a colorful presentation, layer in a variety of vegetables such as shredded lettuce, diced tomatoes, or avocado.

You can quickly double or triple the recipe for larger gatherings or meal prep for the week ahead.

Include a drizzle of your favorite hot sauce if you enjoy a bit of heat.

Don’t be afraid to let the children help with assembly for a family-friendly cooking experience.

Variations and Adaptations

Consider regional variations by incorporating local ingredients; try using feta cheese and olives for a Mediterranean twist or BBQ sauce and cheddar for a Southern-style wrap.

Incorporate seasonal adaptations by adding fall vegetables like roasted butternut squash in autumn or fresh greens during spring for a light, refreshing wrap.

For dietary modifications, opt for gluten-free tortillas or use lettuce leaves for a low-carb version.

If you’re eager for flavor variations, experiment with different spices like smoked paprika or chili powder in your seasoning mix.

Texture modifications can play a huge role; try adding crunchy ingredients like tortilla chips or nuts for an unexpected crunch.

Presentation alternatives can enhance appeal; try stacking wraps vertically and securing them with a skewer for a fun party platter.

Serving and Presentation Guide

Plating techniques can significantly enhance your dining experience; try cutting the wraps in half on a diagonal for an attractive presentation that showcases their contents.

Add garnishing ideas such as a sprinkle of fresh herbs or a drizzle of ranch dressing to bring out colors and flavors.

Classic accompaniments include a side of crispy chips or a fresh salad for an all-in-one meal.

For a modern serving suggestion, consider serving wraps with a selection of dipping sauces, such as salsa, guacamole, or garlic aioli.

Temperature considerations are essential; serve these wraps warm for the best flavor profile.

Portion control tips can help manage servings; aim for about one and a half wraps per person depending on appetite.

Wine and Beverage Pairing

Consider white wines like a chilled Sauvignon Blanc or a light Chardonnay to complement the garlic flavors without overwhelming them.

If you prefer non-alcoholic alternatives, a refreshing sparkling water with a slice of lime can cleanse your palate beautifully.

For a warmer beverage selection, an herbal tea can provide a soothing balance post-meal.

Temperature considerations are key; serve whites well-chilled to enhance the overall dining experience.

Creative serving suggestions might include offering unique infusions such as a homemade lemonade for a refreshing day-time pairing.

Storage and Shelf Life

Storage methods for your wraps are straightforward; store them wrapped in plastic in the refrigerator for up to three days.

Temperature requirements are vital; always ensure leftovers cool before refrigeration to avoid spoilage.

Container recommendations include airtight containers to maintain optimal freshness. For longer storage, consider freezing individual wraps.

Signs of spoilage include off-smells, discoloration, or mold; trust your senses!

Reheating instructions are simple; microwave briefly to reheat but avoid overcooking which can dry them out.

Freezing guidelines suggest placing wraps in freezer-safe bags for up to two months, ensuring keeping them flat to avoid freezer burn.

Make Ahead Strategies

A recommended prep timeline includes marinating chicken the night before for maximum flavor.

Storage between steps is advantageous; prep veggies in advance and store separately to maintain freshness.

Quality impact assessment indicates prepped ingredients can be assembled right before serving for the best result.

For assembly tips, consider rolling wraps ahead of time and storing in the refrigerator for an easy grab-and-go lunch.

Reheating guidelines suggest wrapping them in a damp paper towel to prevent drying out.

Fresh elements like avocados should be added just before serving to avoid browning.

Scaling Instructions

Halving the recipe is easy; simply use half the amount of all ingredients while keeping the cooking method the same.

For doubling or tripling, consider using a larger cooking surface like a grill or griddle to maintain cooking efficiency.

Equipment adjustments may be necessary; larger pans for increased ingredients can also help with cooking time efficiency.

Timing modifications will likely require a bit more patience due to increased quantity, so check doneness thoroughly.

Storage considerations are crucial with larger batches; ensure proper containers are used for freezing to avoid excess air exposure.

Nutritional Deep Dive

Macro breakdown reveals balanced protein from chicken, healthy fats from cheese, and carbohydrates from tortillas.

Micronutrient analysis indicates these wraps provide valuable vitamins and minerals depending on vegetable additions.

Health benefits include a good source of lean protein while being low in saturated fats compared to traditional fried meals.

Dietary considerations can help manage health needs; consider these wraps versatile for various dietary preferences.

Portion analysis suggests moderation with extras like sauces for a balanced meal.

Weight management tips indicate opting for smaller wraps if portion control is a priority.

Dietary Adaptations

For gluten-free versions, utilize corn or similar gluten-free tortillas, ensuring an accessible meal for all.

Dairy-free adaptations can swap cheese for plant-based options while ensuring flavor remains primary.

For vegan preferences, replace chicken with hearty vegetables or a plant-based protein option.

Low-carb adaptations using lettuce wraps instead of tortillas can help adhere to specific dietary needs without sacrificing flavors.

Following keto specifications may involve adjusting ingredient ratios to emphasize fat content while minimizing carbohydrates.

Paleo modifications suggest swapping conventional ingredients for whole foods, focusing on fresh vegetables and meats.

Low-FODMAP ingredients can be streamlined by avoiding garlic and opting for infused oils instead.

Lastly, accommodating other specific diets allows for adjustments to meet diverse nutritional requirements while retaining joy in cooking.

Troubleshooting Guide

Texture issues may arise if chicken is overcooked, resulting in a dry bite; ensure perfect cook time to retain moisture.

Flavor balance can be affected by improper seasoning; always taste and adjust as you cook, incorporating spices gradually.

Temperature problems often occur in reheating; a gentle approach with medium heat retains quality without drying out.

Equipment challenges, like uneven heating on the stovetop, can be solved by monitoring pans closely for even cooking.

Ingredient substitutions should be methodical; always assess how changes might impact overall flavor and texture.

Timing concerns arise when juggling multiple ingredients; prep as much ahead of time to streamline the cooking process and avoid last-minute stress.

Recipe Success Stories

Community feedback from family gatherings often highlights these wraps as the standout dish of any event, with requests for more.

Variation successes are frequently reported; many readers love swapping chicken for roasted vegetables or shredded beef for added excitement.

Adaptation stories reveal how easy it can be to cater to dietary needs without losing flavor, making them a family favorite.

Reader suggestions often include fun additions like jalapeños for a spicy twist, adding a personal touch to each meal.

Photography tips encourage showcasing vibrant veggies and oozing cheese to entice viewers to these delicious wraps.

Frequently Asked Questions

Q1: Can I make the wraps ahead of time?
A1: Absolutely! You can assemble the wraps a few hours in advance and store them in the fridge. Just add any fresh ingredients like avocado just before serving to keep their texture.

Q2: What type of cheese works best?
A2: For a gooey, melty texture, mild cheddar or mozzarella are great choices. Feel free to experiment with your favorites!

Q3: Are these wraps freezer-friendly?
A3: Yes, they are freezer-friendly! Just wrap them in plastic and place them in a freezer-safe container, and they’ll last for up to two months.

Q4: Can I use turkey instead of chicken?
A4: Definitely! Ground turkey or sliced turkey breast can make a delicious alternative while keeping the dish flavorful.

Q5: What’s the best way to cook the chicken?
A5: You can grill, bake, or sauté the chicken. Grilling or sautéing gives the best flavor and texture.

Q6: Is this dish suitable for kids?
A6: Yes, the flavors are mild and very appealing to kids. You can also let them customize their own wraps for extra fun!

Q7: How can I make it vegetarian?
A7: Replace the chicken with a variety of vegetables or beans for a hearty vegetarian option.

Q8: What’s the cooking time if I double the recipe?
A8: The cook time remains mostly the same, but you might need to cook in batches to ensure everything is evenly cooked.

Q9: Can I use leftover chicken?
A9: Leftover chicken works great! Just warm it before assembling the wraps to save time and maximize flavor.

Q10: What other veggies work in this recipe?
A10: Feel free to incorporate diced bell peppers, shredded carrots, or spinach for extra nutrition and color.

Additional Resources

For those looking to expand their culinary repertoire, consider checking out related recipes like Chicken Fajitas or Veggie Quesadillas that utilize similar ingredients and flavors.

Technique guides are also beneficial, particularly for mastering cooking chicken, which is essential for many dishes.

Ingredient information on spices or sauces can help elevate your cooking game; explore how herbs can enhance your meal.

Equipment recommendations include the best skillet or grill pan for achieving perfectly cooked chicken and wraps.

Seasonal variations can inspire creativity; consider fresh summer veggies or fall spices to vary your meals throughout the year.

Join the Conversation

We’d love for you to share your recipes on social media! Tag us to showcase your photos of Quick and Cheesy Garlic Chicken Wraps and inspire others. Engaging in recipe reviews below can provide feedback for improvement and encouragement to fellow home cooks.

Consider sharing your unique variations or personal touches in the comments, as they can ignite new ideas for all readers! Let’s build a community centered around delicious food and fun cooking experiences together. Dishing out your successes or challenges can help others perfect their own cooking skills.

The Recipe

Quick and Cheesy Garlic Chicken Wraps

Serves: 4

Prep Time: 10 mins

Cook Time: 15 mins

Total Time: 25 mins

Kitchen Equipment Needed

  • Skillet or grill pan
  • Cutting board
  • Knife
  • Measuring cups and spoons

Ingredients

  • 2 chicken breasts, diced
  • 1 cup shredded cheese (cheddar or mozzarella)
  • 4 large flour tortillas
  • 2 cloves garlic, minced
  • 1 tablespoon olive oil
  • Salt and pepper to taste
  • Optional: diced vegetables (such as bell peppers or onions)

Directions

  1. In a skillet, heat olive oil over medium heat. Add diced chicken and garlic, seasoning with salt and pepper.
  2. Cook for 5-7 minutes until the chicken is cooked through and no longer pink.
  3. If using, add the diced vegetables and cook for another 2-3 minutes until tender.
  4. Reduce heat and sprinkle cheese over the chicken mixture; cover until cheese melts.
  5. Remove from heat and let cool slightly before assembling the wraps.
  6. Place cheese and chicken mixture in the center of each tortilla, then fold over the sides and roll tightly.
  7. Toast the wraps in the skillet for an additional 2 minutes on each side until golden brown.
  8. Slice in half and serve warm with your favorite toppings.

Recipe Notes

  • Feel free to swap chicken for shrimp or beef to change up the protein.
  • Add different spices such as cumin or paprika to give a unique twist.
  • These wraps can be enjoyed with a side salad or chips for a complete meal.