Delicious Taco Soup Recipe for Ultimate Comfort Food Experience

The Best Taco Soup: A Hearty and Flavorful Delight

⚖️
Difficulty
Easy

⏲️
Prep Time
15 mins

🕒
Cook Time
30 mins

⏱️
Total Time
45 mins

🍽️
Servings
6 servings

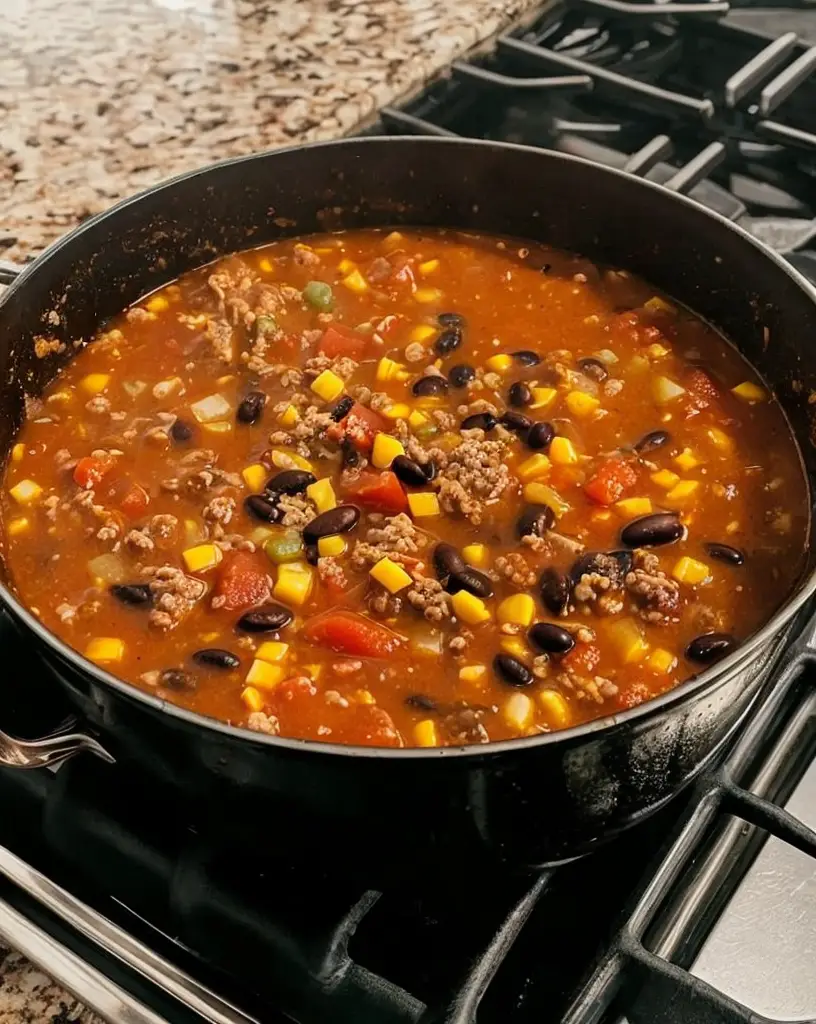
Taco soup is the ultimate comfort food that brings a fiesta right to your kitchen. It’s a perfect blend of hearty ingredients such as ground beef, beans, and whole tomatoes, creating a soul-warming dish filled with flavors that will make your taste buds dance. Each spoonful of taco soup brings the bold and zesty notes of taco seasoning, balanced with the freshness of vegetables, making it a satisfying meal for family gatherings or a cozy night in. The inviting aroma of spices wafting through your home will undoubtedly create an atmosphere of comfort and excitement.

Not only is taco soup delicious, but it also allows for creativity in your kitchen. You can easily modify the ingredients or toppings to personalize it to your favorite tastes. Whether you prefer extra spice from jalapeños or a dollop of smooth sour cream to cool things down, each variation is sure to delight. This recipe is perfect for busy weeknights, as it comes together quickly and can be ready in under an hour. Taco soup is not just food; it’s a feeling of home, shared laughter, and cherished memories, served in a bowl.

Quick Recipe Highlights

  • Flavor Profile: A delightful balance of savory and spicy flavors, brought together with classic taco seasoning.
  • Texture: Rich and hearty, the soup features a combination of tender meats, creamy beans, and crisp vegetables.
  • Aroma: The enticing scent of spices like cumin, chili powder, and garlic fills the air, inviting everyone to the table.
  • Visual Appeal: The vibrant colors of tomatoes, peppers, and toppings make this soup irresistibly appealing.
  • Skill Level Needed: This recipe is ideal for beginners and seasoned cooks alike, with simple steps to follow.
  • Special Equipment: A large pot or dutch oven is all that’s needed to whip up this delicious meal.

Recipe Overview

  • Difficulty Level: This taco soup is easy to prepare, making it a great choice for novice cooks or weeknight meals.
  • Category: This dish falls under the soup category, ideal for lunch or dinner any day of the week.
  • Cuisine: Influenced by Mexican cuisine, taco soup celebrates the rich flavors of traditional tacos.
  • Cost: Ingredients are budget-friendly, typically costing less than $20 to serve a family of six.
  • Season: Enjoy taco soup year-round; its hearty nature makes it perfect for chilly fall and winter days.
  • Occasion: Perfect for family dinners, game day parties, or as a make-ahead meal for your busy week.

Why You’ll Love This Recipe

Taco soup is a delightful symphony of flavors and textures, making each bite a culinary adventure. The combination of seasoned ground beef and creamy beans creates a comforting mouthfeel, while the fresh vegetables add morning crunch and brightness. You can jazz it up with various toppings, such as shredded cheese, diced tomatoes, or even avocado, which can elevate the soup’s taste further. This versatility allows you to adjust the recipe according to your family’s preferences, ensuring that everyone will enjoy it.

Convenience is another reason why taco soup is a favorite. It comes together in less than an hour, making it perfect for busy weeknights or unexpected guests. Simply throw all the ingredients into one large pot, let them simmer together, and you have a flavorful meal that barely required any effort on your part. Its one-pot nature also means fewer dishes to wash, which is a significant bonus when you’re enjoying a meal with family or friends.

Another aspect that makes taco soup appealing is its nutritional value. Packed with protein from the meat and beans, along with vitamins from the added vegetables, this recipe can help nourish your body and keep you full longer. You can also customize the ingredients to increase fiber or reduce fat content, turning this dish into a health-friendly option without sacrificing flavor.

Taco soup has a wonderful social aspect to it as well. Serving it at gatherings encourages sharing, whether there are tortilla chips for dipping or toppings spread across the table. It’s a conversational piece at any event, sparking discussions and allowing everyone to customize their bowls to their liking. This communal approach to dining can elevate your social experiences while enjoying a delightful meal.

Lastly, taco soup is an affordable and accessible recipe, making it an ideal choice for families on a budget. The ingredients are easy to find in any grocery store, and leftovers make for tasty lunches the next day. This cost-effectiveness, without compromising taste and quality, makes taco soup a favorite for many households.

Historical Background and Cultural Significance

The origins of taco soup trace back to Mexican cuisine, where ingredients like beans and tortilla strips are staple elements. As Tex-Mex cuisine evolved, it combined various elements from both cultures, creating dishes like taco soup that celebrate their rich culinary heritage. The blending of flavors from different regions showcases how food can unite diverse communities, reflecting shared traditions and modern lifestyles.

Taco soup holds a special place in many family gatherings, particularly in the Southwest United States, where it is often enjoyed during celebrations, game days, and potlucks. Its warm, hearty nature provides comfort during colder months while also being a filling dish that caters to a crowd. The cultural importance of shared meals resonates deeply, highlighting how food strengthens bonds and creates lasting memories among friends and family.

Over the years, the recipe has evolved from simple traditional ingredients to more elaborate variations, with cooks experimenting with different proteins and vegetables. This evolution showcases the adaptability of taco soup, allowing it to remain a popular choice that continues to grow with culinary trends while preserving its comforting roots.

Regional differences in taco soup have also emerged, with variations reflecting local tastes and ingredient availability. For instance, some skip the meat altogether for vegetarian versions or swap in unique proteins like chicken or chorizo. These adaptations enrich the taco soup experience, bringing different flavors and culinary techniques from around the country into each bowl.

Ingredient Deep Dive

Ground Beef: Ground beef is often the base of taco soup, adding a hearty protein that fills you up. It also carries the rich, savory flavors of the seasonings incredibly well. When selecting ground beef, opt for a lean option for a healthier meal. Store with care to ensure freshness, and consider alternatives like turkey or plant-based proteins for a lighter take.

Canned Beans: Canned beans are an essential ingredient in taco soup, bringing creaminess and added nutrition. Beans provide valuable fiber and protein while enhancing the soup’s texture. When selecting, check labels for sodium content to choose a healthier option. Store opened beans in airtight containers, and they can be easily substituted with dried beans if you prefer cooking from scratch.

Tomatoes: Canned diced tomatoes add depth and moisture to the soup, creating a juicy and flavorful base that ties everything together. Look for varieties packed in juice instead of syrup for healthier choices. Storage should be in a cool, dark place, and consider fresh tomatoes in summer for a delightful twist.

Bell Peppers: Bell peppers provide a splash of color and a crisp texture to the soup. Rich in vitamins and antioxidants, they’re a fantastic addition for both health and flavor. Choose firm, brightly colored peppers and store them in the fridge. You can also try different varieties, such as poblanos for a spicier kick.

Common Mistakes to Avoid

  • Not draining canned beans: Always drain and rinse canned beans to remove excess sodium and unwanted flavors.
  • Overcooking meat: Make sure not to brown the ground beef too much to avoid a dry texture in the final soup.
  • Using too much liquid: Adjust the broth or water according to your desired soup consistency; too much will make it watery.
  • Forgetting to season: Each ingredient needs seasoning; don’t skip adding salt and pepper or other spices to enhance the flavors.
  • Skipping toppings: Don’t underestimate the impact of toppings; they add texture and flavor balance to your bowl of taco soup.
  • Cooking vegetables too long: Slightly undercook the vegetables to maintain their crunch and prevent a mushy texture.
  • Ignoring the simmer: Allow the soup to simmer long enough for flavors to meld; a rush will lead to bland results.
  • Not tasting as you go: Regularly taste your soup during cooking to find the right balance of flavors significantly enhance your final dish.
  • Overloading on beans: While nutritious, too many beans can overshadow other flavors; use a balanced amount according to your taste.
  • Serving too cold: Ensure your taco soup is served hot to fully enjoy its comforting and hearty flavors.

Essential Techniques

Browning Meat: Browning is crucial for enhancing flavor. Use high heat and let meat sit undisturbed for a few minutes. Avoid the temptation to stir too soon; that caramelization adds depth. Look for a rich brown color indicating it’s ready to mix.

Sautéing Vegetables: Sautéing bell peppers and onions helps to soften them, releasing natural sweetness. Use medium heat and make sure to stir occasionally to prevent sticking. They’ll transition from bright and crunchy to tender, adding aromatic depth to your soup.

Simmering: Simmering allows the flavors to blend beautifully. Ensure the heat is low enough to bubble gently without boiling aggressively, which can break down ingredients. Visual cues include tiny bubbles and steam—perfect signs of deliciousness developing.

Tasting and Adjusting Seasoning: Tasting as you go is essential for the best taco soup. Adjust spice levels while cooking; just a pinch of salt or a dash of lime juice can bring out hidden flavors. This iterative approach results in a well-balanced dish.

Pro Tips for Perfect Taco Soup

– Always brown your meat before adding it to the pot for fuller flavors.
– Balance acidity with a squeeze of lime juice right before serving for a bright finish.
– Experiment with different beans, like black or pinto, for added texture and taste.
– Allow the soup to sit for a while before serving, as it will taste even better reheated.
– If spice isn’t your thing, add pepper jack cheese as a milder topping for creamy heat.
– Use high-quality taco seasoning or make your own for a fresh flavor that exceeds store-bought packets.
– Consider using a slow cooker—brown the meat, add it to the slow cooker with other ingredients, and let it simmer for hours to deepen flavor.
– Use corn tortillas as a crunchy topping instead of chips for a unique twist.

Variations and Adaptations

Taco soup is incredibly adaptable, allowing for various flavor profiles and ingredients. You can introduce regional variations by adding local ingredients such as spicy chorizo or fresh corn. Seasonal adaptations might involve including summer produce like zucchini and fresh herbs for a light, refreshing touch. If you’re looking for dietary modification, the recipe can easily become vegan by replacing the ground beef with lentils and using vegetable broth instead of chicken broth.

For unique flavor variations, experiment with spices like smoked paprika for depth or fresh cilantro for a burst of freshness. Additionally, if you desire different textures, consider incorporating creamy avocado, crunchy tortilla strips, or even cheese to contrast with the hearty soup. Lastly, presentation can be enhanced by garnishing with lime wedges and chopped green onions, elevating this comforting dish visually.

Serving and Presentation Guide

Plating your taco soup can turn a simple meal into a culinary experience. Use deep bowls to hold the hearty soup generously. Consider using colorful bowls that contrast the rich tones of the soup to make it visually appealing. A sprinkle of cilantro, a wedge of lime, and a dollop of sour cream on top can create an artful presentation that tempts everyone at the table.

Garnishing with bright toppings adds not just visual appeal but enhances the eating experience with extra flavor. Pair your soup with crispy tortilla chips arranged on the side for a delightful texture contrast. Consider serving with a fresh salad or cornbread to create a complete meal. Serve the soup piping hot, as temperature elevates the flavors significantly; warm bowls can help maintain heat during the meal.

Wine and Beverage Pairing

Pairing your taco soup with the right beverage can further enhance the flavors. A zesty Sauvignon Blanc complements the spices in the soup, while a light-bodied red like Grenache brings out the richness of the meat. Consider serving chilled cocktails like margaritas or a citrusy mojito to harmonize well with the spiciness.

For non-alcoholic alternatives, a refreshing limeade or iced tea flavored with mint can provide a cool contrast to the dish’s warmth. If you’re serving taco soup for brunch, consider a spicy bloody mary to elevate this casual meal. Serving the wine chilled on warmer days can balance the hearty nature of the soup, while hot beverages like Mexican hot chocolate would be a delightful accompaniment during the colder months.

Storage and Shelf Life

Store any leftover taco soup in an airtight container in the fridge, where it can last for up to three to four days. When storing, allow the soup to cool completely before sealing to prevent condensation, which may cause spoilage. For longer storage, taco soup can be frozen; ensure it is stored in freezer-safe containers or bags with the air removed to maintain quality.

Signs of spoilage include off-smells, discoloration, or an unusual texture. When reheating, warm it thoroughly on the stove over medium heat or in the microwave until it’s steaming hot. If frozen, it’s best to thaw overnight in the fridge before reheating. Always stir well before serving, as ingredients may settle during storage.

Make Ahead Strategies

Preparing taco soup ahead of time is easy and convenient. You can brown the meat a day in advance and store it separately, which saves time on busy nights. Chop vegetables ahead of time and store them in airtight containers for quick access. Assemble the rest of the ingredients ahead, keeping the broth and spices ready to go for when you’re ready to cook.

If you’re making a larger batch, consider freezing portions. Taco soup holds its flavor well, and reheating will not detract from its taste. Additional toppings like sour cream or fresh herbs can be added shortly before serving to maintain freshness. This proactive planning means you can enjoy a hearty, home-cooked meal without the last-minute rush in the kitchen.

Scaling Instructions

Scaling taco soup is simple and allows for flexibility in serving sizes. For halving the recipe, adjust the ingredient quantities, keeping the spice levels balanced to maintain flavor. If doubling or tripling the recipe, be mindful of your pot’s capacity while ensuring the proportions of spices remain consistent.

Equipment adjustments might be necessary if you’re scaling significantly; using a larger pot or batch cooking in multiple pots can help maintain even cooking. During timing modifications, expect a slight increase when cooking on larger volumes; check regularly to ensure doneness. Store any extras appropriately for future meals, maximizing your efforts in the kitchen.

Nutritional Deep Dive

The nutritional breakdown of taco soup showcases its balance of macronutrients. Each serving typically contains a healthy dose of protein from the ground beef and beans, while fiber from vegetables and beans promotes digestion and satiety. Carb content can vary based on ingredient choices, particularly with more beans or added corn.

Micronutrient analysis highlights important vitamins like Vitamin C and fiber, which come from fresh vegetables & legumes. Taco soup can be a heart-healthy dish when prepared with lean meats and low-sodium options. Pay attention to portion sizes, especially with richer toppings, to maintain a balanced meal that aligns with dietary goals while enjoying a hearty, comforting dish.

Dietary Adaptations

For those needing dietary modifications, taco soup can easily adapt to various needs. A gluten-free version can be made by ensuring broth and seasonings are certified gluten-free. Swap sour cream with dairy-free yogurt for a dairy-free take, and use jackfruit or lentils for a vegan adaptation full of nutrition.

For low-carb diets, focus on reducing the amount of beans or serving in a lettuce wrap instead of traditional tortilla chips. Efforts can be made to make it keto-friendly by using cauliflower rice in place of beans. Using whole food ingredients not only satisfies dietary needs but adds a wholesome element to the soup.

Troubleshooting Guide

If your taco soup turns out too watery, consider cooking it down uncovered for a few minutes to thicken. For flavor balance issues, gradually adding salt or lime juice can help; add these small amounts until the desired taste is achieved. If the soup is too spicy, a touch of sugar or cream can tone down the heat.

Temperature problems, like serving cold soup, can be resolved by thorough reheating. Should ingredients not be cooking evenly, ensure stirring regularly and adjusting heat helps maintain consistency across the pot. When using substitutions, be mindful of varying cook times which can affect the final outcome of your dish.

Recipe Success Stories

Community feedback for this taco soup recipe has been overwhelmingly positive. Many home cooks have shared their variations, highlighting the ease and versatility of the dish. Some have embraced it at family gatherings, raving about how it became a crowd favorite, and others have successfully used it as the base for creative adaptations that highlight seasonal ingredients.

Readers have engaged by sharing tips on topping combinations that elevated the flavor profile, such as unique salsa or fresh, seasonal vegetables. Those new to cooking have reported newfound confidence in making this satisfying soup, often returning to it as a go-to staple for easy weeknight meals.

Frequently Asked Questions

1. Can I make taco soup in my slow cooker?
Yes! Brown the meat first, then add all ingredients to your slow cooker. Cook on low for 6-8 hours for a deep flavor infusion.

2. Is taco soup gluten-free?
It can be gluten-free! Just choose gluten-free broth and check that your seasoning is free from gluten.

3. How long does taco soup last in the refrigerator?
Taco soup can be stored in the refrigerator for up to 4 days in an airtight container.

4. Can I freeze taco soup?
Absolutely! Freeze leftovers in a sealed container for up to 3 months. Thaw overnight in the fridge before reheating.

5. What toppings can I use for taco soup?
Popular toppings include shredded cheese, crushed tortilla chips, avocado, sour cream, and fresh cilantro.

6. Is taco soup healthy?
Taco soup can be healthy, especially when made with lean meats and loaded with vegetables. Adjust ingredients based on your nutritional needs.

7. Can I use different meats in taco soup?
Yes! Ground turkey, chicken, or even vegetarian protein like lentils work well in taco soup.

8. What kind of beans should I use?
Common options include black beans, pinto beans, or kidney beans, all of which add great flavor and texture.

9. Is there a vegetarian option for taco soup?
Yes! Simply replace meat with a plant-based protein or beans and use vegetable broth for a delicious vegetarian version.

10. What’s the best way to reheat taco soup?
Reheat on the stove over medium heat, stirring occasionally, or in the microwave until steaming hot.

11. Can I customize the spice level?
Absolutely! Adjust the amount of taco seasoning or add fresh chilies to suit your heat preference.

12. How can I make taco soup spicier?
Add jalapeños or cayenne pepper to introduce extra heat into your soup.

Additional Resources

If you enjoyed this recipe, consider checking out other comforting soups like chicken noodle or minestrone that offer a similar hearty experience. Explore technique guides for effective browning or sautéing tips to elevate any soup or dish. Get acquainted with various ingredient information, focusing on the benefits of beans or seasonal produce that can be incorporated into your cooking.

For those looking to invest in kitchenware, recommendations for essential equipment, like a high-quality knife set or heavy-bottomed pots, can make cooking even more enjoyable. Lastly, check out seasonal variations that provide fresh, flavorful ingredients to inspire your next taco soup.

Join the Conversation

We want to hear your thoughts! Share your experience with taco soup on social media using our hashtag. Consider posting your culinary creations or photos of your dish to inspire others in the community. Encourage friends and family to try this recipe and share their versions or adaptations, spreading the joy of cooking and savoring delicious meals together.

Join our cooking community for exchanges of tips, ideas, and recipe variations. Share any unique secrets you’ve uncovered or offer insights that could enhance this already delightful meal. Let’s cultivate a lively conversation around this family favorite, making home cooking more enjoyable for everyone!

The Recipe

The Best Taco Soup

Serves: 6 servings

Prep Time: 15 mins

Cook Time: 30 mins

Total Time: 45 mins

Kitchen Equipment Needed

  • Large pot or Dutch oven
  • Wooden spoon
  • Cutting board
  • Chef’s knife
  • Measuring cups and spoons

Ingredients

  • 1 lb ground beef
  • 1 can (15 oz) black beans, drained and rinsed
  • 1 can (15 oz) kidney beans, drained and rinsed
  • 1 can (14.5 oz) diced tomatoes
  • 1 can (15 oz) corn, drained
  • 1 onion, chopped
  • 1 bell pepper, chopped
  • 2 cups beef broth
  • 2 tablespoons taco seasoning
  • Salt and pepper to taste
  • Optional toppings: shredded cheese, sour cream, cilantro, tortilla chips

Directions

  1. In a large pot, brown the ground beef over medium heat until fully cooked; drain excess grease.
  2. Add chopped onion and bell pepper; sauté until tender.
  3. Stir in black beans, kidney beans, diced tomatoes, corn, beef broth, and taco seasoning.
  4. Bring to a boil, then reduce heat and simmer for 20-30 minutes, allowing flavors to meld.
  5. Taste and adjust seasoning with salt and pepper as needed.
  6. Serve hot, garnished with desired toppings.

Recipe Notes

  • Feel free to add or substitute your favorite veggies, such as zucchini or corn.
  • Can be prepared ahead of time and stored in the fridge for quick weeknight meals.
  • Leftovers can be frozen for future meals—just ensure you reheat thoroughly.

Irresistible Strawberry Cream Cheese Crumble Cookies You Must Try

Heavenly Strawberry Cream Cheese Crumble Cookies Recipe: A Delightful Treat for Any Occasion

⚖️
Difficulty
Medium

⏲️
Prep Time
20 mins

🕒
Cook Time
15 mins

⏱️
Total Time
35 mins

🍽️
Servings
24 cookies

Indulge your senses with these Heavenly Strawberry Cream Cheese Crumble Cookies! The combination of sweet strawberries, creamy cheese, and a buttery crumble will leave you craving more after just one bite. As you sink your teeth into these cookies, the luscious strawberry filling bursts forth, complemented perfectly by the cream cheese layer that adds a delightful tang. The textured crumble topping adds a sweet crunch that contrasts beautifully with the soft cookie base, making these cookies not only a treat for your taste buds but also a feast for your eyes.

These cookies are perfect for any occasion, whether you’re hosting a gathering, enjoying a cozy night in, or just want to treat yourself and your loved ones. The vibrant red hue from the strawberries against the light golden cookie creates an inviting visual appeal, making them a showstopper on any dessert table. As you navigate through the recipe, you’ll discover how simple it is to bring this bakery-style delicacy into your own kitchen, ensuring that you can whip up a batch whenever the craving strikes!

Quick Recipe Highlights

  • Flavor Profile: Fresh strawberry sweetness melded with creamy cheese and buttery crumble.
  • Texture: Soft and chewy cookies topped with a crunchy crumble, creating a delightful mouthfeel.
  • Aroma: The enticing scent of baked strawberries and rich cream cheese wafts through your kitchen.
  • Visual Appeal: Beautifully presented cookies with vibrant colors and textured layers that catch the eye.
  • Skill Level Needed: A moderate skill level is required, perfect for both novice and experienced bakers.
  • Special Equipment: Just a mixing bowl, baking sheet, and a hand mixer are all you need.

Recipe Overview

  • Difficulty Level: The recipe strikes a balance between simple steps and flavorful outcomes; perfect for those looking to expand their baking skills without feeling overwhelmed.
  • Category: These cookies can be categorized as a dessert or snack, ideal for any time of day.
  • Cuisine: This recipe is influenced by American baking traditions, bringing a modern twist to classic flavors.
  • Cost: Making these cookies is relatively affordable, with common ingredients that won’t break the bank.
  • Season: Strawberry season enhances the flavor, but these cookies can be enjoyed year-round.
  • Occasion: They are perfect for picnics, tea parties, and as sweet treats for celebrations or holidays.

Why You’ll Love This Recipe

These Heavenly Strawberry Cream Cheese Crumble Cookies are a delight for anyone who loves the sweet balance of flavors. The refreshing taste of ripe strawberries pairs perfectly with the creamy tang of the cream cheese, resulting in a delicious treat that stands out. Each bite offers a remarkable texture experience, from the tender cookie to the crunchy topping, making them addictive and satisfying.

Convenience is key with this cookie recipe, as it requires simple ingredients and straightforward steps. The ease of combining the components means you can whip up a batch with minimal effort, perfect for unexpected guests or when you need a quick dessert. You’ll be amazed at how quickly these cookies come together and how quickly they disappear!

From a nutritional standpoint, strawberries are packed with vitamins and antioxidants, while cream cheese offers a source of calcium and protein. You can enjoy these cookies as a treat while appreciating the healthier elements of fresh fruit. The balance of indulging while nourishing your body makes these cookies an ideal option for mindful bakers.

When it comes to serving, these cookies are great for sharing. They are a stunning addition to any dessert table and can be paired with coffee or tea for a delightful afternoon treat. Prepare to impress your friends and family with your baking prowess as you serve these delicious cookies that everyone will rave about.

Lastly, cost-effectiveness is always a bonus in the kitchen. Most of the ingredients are pantry staples that are easy to source, making this recipe accessible for all. Whether you’re baking for a crowd or simply enjoy baking for pleasure, you’ll find that these cookies are worth every ounce of effort.

Historical Background and Cultural Significance

The origin of crumble cookies can be traced back to various cultures that celebrate baked goods, each bringing their distinct twist. While it might be difficult to pinpoint a singular origin, the combination of sweet fillings in desserts has roots in many traditions worldwide. The use of berries aligns with North American culinary practices where community gatherings celebrate seasonal fruits.

Within American cuisine, the evolution of cookies has seen many flavor adaptations, incorporating fruits, nuts, and different types of cheese. The addition of cream cheese in desserts became more popular in the late 19th century, reflecting a blend of flavors that enhance texture and richness in baked goods.

Regional variations of cookie recipes often incorporate local fruits or ingredients, celebrating the diversity of each area. For instance, regions that pride themselves on berry farms may produce cookies featuring fresh, juicy berries all year long, highlighting their local produce.

Today, crumble cookies, like the Heavenly Strawberry Cream Cheese version, echo creativity and nostalgia, providing a modern twist on traditional recipes. They serve as a reminder of home baking and shared moments that foster community around a table filled with treats.

Ingredient Deep Dive

Strawberries: The star of this recipe, strawberries are not only delicious but also rich in vitamin C, manganese, and antioxidants. When selecting strawberries, look for bright red ones with a fresh smell. Store them in the refrigerator and wash them just before consumption to maintain freshness. Frozen strawberries can also be substituted, though fresh ones yield a better flavor.

Cream Cheese: Cream cheese adds a luscious texture and creamy flavor to these cookies. It is a versatile ingredient used in both savory and sweet dishes. When buying cream cheese, opt for full-fat for the best results, and store it in the refrigerator. You may substitute with mascarpone or a dairy-free cream cheese for a vegan option, but results will vary.

Butter: Essential for adding richness and flavor, butter helps create a tender cookie. Using unsalted butter allows you to control the saltiness of your baking. Make sure it’s softened at room temperature for best results when creaming with sugar. Storing butter in the fridge maintains freshness, and it can be frozen for long-term storage.

Flour: All-purpose flour is the foundation of many baking recipes. When measuring flour, always spoon it into the measuring cup and level it off for accuracy. Store it in a cool, dry place in an airtight container to prevent spoilage. If looking for alternatives, almond or coconut flour can be used, but adjustments in ratios may be necessary for texture.

Common Mistakes to Avoid

  • Not softening butter: Using cold butter can lead to poor mixing, resulting in dense cookies. Always let butter sit at room temperature.
  • Overmixing dough: Mixing too long can develop gluten, leading to tough cookies. Mix just until ingredients are combined.
  • Using stale ingredients: Check expiration dates on baking powder, flour, and baking soda to ensure optimal results.
  • Skipping chilling: Chilling the cookie dough helps the cookies maintain their shape and enhances flavor, so don’t skip this step.
  • Not measuring carefully: Baking is a science, and precise measurements are crucial for successful outcomes. Use a kitchen scale for accuracy.
  • Ignoring oven temperature: Always preheat your oven. Baking at the wrong temperature can yield cookies that are too dry or undercooked.
  • Not testing for doneness: Cookies should be golden brown around the edges but may seem soft in the middle; they will continue to firm as they cool.
  • Using a warm baking sheet: Cold dough placed on a hot pan can cause spreading. Ensure your baking sheets cool down between batches.
  • Choosing flavor over balance: While experimenting is fun, make sure to maintain a balance in flavors; less can be more.
  • Storing improperly: Baked cookies should be stored in airtight containers at room temperature; otherwise, they may become stale or dry.

Essential Techniques

Creaming butter and sugar: This technique incorporates air into the mixture, creating light and fluffy cookies. Beat at medium speed until the mixture is pale and fluffy; this usually takes about 3-5 minutes. Watch for a light texture as a cue that you are on the right track.

Measuring flour accurately: Accurate measurement is critical for achieving the desired texture in cookies. Use the spoon and level method; spoon the flour lightly into your measuring cup and level it off with a knife. This prevents compacted flour, which can lead to dry cookies.

Chilling cookie dough: Chilling allows flavors to meld and prevents excessive spreading while baking. Each recipe might require different chilling times, but typically 30 minutes to 2 hours achieves great results. Look for a firm texture that is easy to scoop.

Baking in batches: Bake cookies in batches by giving sufficient space between them on the baking sheet to allow for even baking and spreading. Use parchment paper or silicone mats to prevent sticking and ensure easy removal after baking.

Pro Tips for Perfect Heavenly Strawberry Cream Cheese Crumble Cookies

1. Use room temperature ingredients for better incorporation, which leads to a uniform dough.

2. Add a pinch of salt to enhance flavors even if using salted butter—it elevates sweetness!

3. For a decadent touch, consider drizzling melted dark chocolate over cooled cookies before serving.

4. Use fresh strawberries when in season for optimal flavor; frozen ones may alter texture slightly.

5. Mix in some finely chopped nuts for an added crunch if you’re looking for extra texture.

6. If you want larger cookies, use a muffin scoop when portioning dough for consistent size.

7. Store uncooked dough in the fridge for a couple of days or freeze for a future baking session.

8. Experiment with different fruit combinations; blueberries or raspberries are delightful alternatives!

Variations and Adaptations

Consider experimenting with seasonal variations such as using peaches in the summer or apple cinnamon in the fall. Both fruits pair beautifully with the cream cheese and crumble components. Alternatively, for those with dietary restrictions, a gluten-free flour blend can easily replace the all-purpose flour while maintaining a similar taste profile.

If you’d like to reduce sugar, substitutes such as stevia or erythritol can offer a lower-calorie option and still provide sweetness without significantly altering the flavor. Additionally, for a vegan adaptation, opt for plant-based cream cheese and replace eggs with flaxseed or applesauce.

Serving and Presentation Guide

To present your Heavenly Strawberry Cream Cheese Crumble Cookies elegantly, use a simple white platter that allows the vibrant colors of the cookies to shine. Consider dusting them lightly with powdered sugar before serving or presenting them on a decorative cake stand for added height.

Garnishing with fresh mint leaves not only enhances the visual appeal but also adds a refreshing element. Serve with a side of fresh strawberries or a dollop of whipped cream for an extra indulgent treat. Pay attention to portion sizes for an upscale feel; small servings allow guests to savor each sweet bite without overwhelming them.

Wine and Beverage Pairing

For an elegant touch, pair these cookies with a light sparkling wine, such as Prosecco or Champagne. The effervescence balances the sweetness of the cookies, while the fruity notes complement the strawberry flavor. Alternatively, a sweet rosé wine also pairs beautifully, enhancing the berry notes.

For non-alcoholic options, consider serving with a refreshing iced tea or lemonade, both of which cleanse the palate between bites. Hot beverages like coffee or chai tea can also create a cozy pairing, especially during cooler months.

Storage and Shelf Life

To maintain the freshness and softness of your cookies, store them in an airtight container at room temperature for up to a week. If you’d like to extend their shelf life, consider freezing them. Place the cooled cookies in a freezer-safe bag or container, ensuring they are separated to prevent sticking, and they can last for up to three months.

If you notice a slight stiffness in the cookies after storage, a quick 10-second blast in the microwave will revive their softness. Always check for signs of spoilage, such as off odors or significant texture changes, before consuming.

Make Ahead Strategies

To streamline your baking process, you can make the dough ahead of time and keep it refrigerated for up to 48 hours. This allows flavors to deepen and also speeds up baking day prep. Another option is to freeze the dough in pre-portioned mounds; simply let them thaw in the fridge overnight before baking.

For events, consider preparing a double batch and gifting them to friends or storing them for future indulgence. You can also mix and bake only half, keeping the remaining dough for later, making hosting stress-free.

Scaling Instructions

If you’re looking to halve the recipe, reduce all ingredient amounts by 50%, and you’ll have enough dough for about a dozen cookies. For larger gatherings, doubling or tripling the recipe is straightforward; just make sure your mixing bowl and baking sheets are large enough to accommodate larger batches.

Adjust baking times as necessary; larger cookies may require a few extra minutes in the oven, while smaller cookies may bake faster. Keep an eye on them and use visual cues for doneness.

Nutritional Deep Dive

Each Heavenly Strawberry Cream Cheese Crumble Cookie provides a delightful blend of macronutrients, including carbohydrates, protein, and fat. With the strawberries, you gain notable micronutrients like vitamin C and fiber, enhancing the cookies’ nutritional value.

Each serving can align with a balanced diet when enjoyed in moderation. Consider the sugar content and adjust as needed if you’re mindful of caloric intake. Offering a smaller portion size can aid in satisfying your sweet tooth while keeping your overall diet in check.

Dietary Adaptations

For gluten-sensitive individuals, using a certified gluten-free flour blend ensures that everyone can enjoy these cookies without concern. Additionally, those who are dairy-free can substitute standard cream cheese with a plant-based alternative to achieve similar results.

Vegans can easily adapt this recipe by using plant-based butter and cream cheese, and replacing eggs with flaxseed meal or applesauce for binding. It’s a great way to make beloved recipes inclusive while maintaining taste and texture.

Troubleshooting Guide

If your cookies turn out too dry, it may be a sign of overbaking or using too much flour. Consider measuring flour with precision and always watch the timer closely. On the other hand, if they spread too much, the dough may need chilling longer before baking.

Don’t hesitate to adjust flavors based on personal preference; if cookies taste too sweet, reducing added sugars on subsequent attempts will balance outcomes better. If texture issues arise, checking for precise mixing can help avoid dense cookies.

Recipe Success Stories

Many bakers have shared their success stories with these Heavenly Strawberry Cream Cheese Crumble Cookies. One community baker noted how they adapted the recipe for a birthday party and received rave reviews from guests. Customization options, such as experimenting with nuts or different fruit fillings, opened the door for unique variations!

Visual appeal has also been a highlight, with readers sharing stunning photos of their cookies decorated with mint leaves or delicate powdered sugar. A few bakers even created a mini dessert bar with various toppings, taking these cookies to the next level.

Frequently Asked Questions

Can I use frozen strawberries? Yes, frozen strawberries work, but for best results, thaw and drain excess liquid to avoid soggy cookies.

How should I store the cookies? Keep cookies in an airtight container at room temperature for 5-7 days. Refrigeration can lead to dryness.

Can I make the dough ahead of time? Absolutely! The dough can be refrigerated for up to 48 hours or frozen for up to three months.

What other fruits can I use in this recipe? You can use a variety of fruits like blueberries, raspberries, or even peaches for delightful alternatives.

How do I prevent overbaking? Keep a close eye on the cookies as they approach the suggested bake time; they should be lightly golden at the edges, but soft in the middle.

Can I reduce the sugar in the recipe? Yes, feel free to adjust the sugar to your taste; using natural sweeteners can also be effective.

Is there a vegan alternative? Yes, use plant-based cream cheese and butter along with a flaxseed replacement for eggs.

What can I serve these cookies with? These cookies pair wonderfully with tea, coffee, or a glass of milk for a comforting treat.

Can I add nuts to the cookie dough? Certainly! Chopped nuts like pecans or walnuts can add delicious crunch and flavor.

Do I need to chill the dough? Chilling the dough helps improve texture and flavor; it’s recommended for the best results.

Additional Resources

For those excited to explore more, check out related recipes for berry desserts or classic cookies that can offer similar enjoyment. Technique guides on creaming butter or measuring dry ingredients can further develop your baking skills.

Ingredient information such as the health benefits of strawberries or various substitutes for cream cheese will enrich your understanding and ability to adapt recipes. Recommendations on equipment will help ensure you have the right tools for creating perfect cookies every time!

Join the Conversation

We’d love to hear your feedback on this Heavenly Strawberry Cream Cheese Crumble Cookies recipe! Join the discussion by sharing your photos and experiences on social media. Tips, variations, and community reviews will inspire newcomers and seasoned bakers alike.

Engaging with fellow baking enthusiasts fosters creativity and opens the discussion for adaptations and personal flair. Your input may also help others looking to refine their recipes or discover new dessert ideas!

The Recipe

Heavenly Strawberry Cream Cheese Crumble Cookies

Serves: 24 cookies

Prep Time

Deliciously Simple Easy Apple Turnovers Recipe to Try Today

Easy Apple Turnovers: Quick and Delicious Dessert Recipe

⚖️
Difficulty
Easy

⏲️
Prep Time
15 mins

🕒
Cook Time
20 mins

⏱️
Total Time
35 mins

🍽️
Servings
8 turnovers

Are you looking for a delightful dessert that’s both easy and quick to prepare? Look no further than these Easy Apple Turnovers! Bursting with sweet, gooey apple filling and wrapped in a flaky pastry, these turnovers are perfect for a family gathering or a cozy evening treat. The aroma of baked apples, sugar, and cinnamon will fill your kitchen, creating an inviting atmosphere that will have everyone eagerly awaiting the first bite. Whether you’re an experienced baker or just starting out, this recipe offers a simple method to create a deliciously satisfying dessert.

These Easy Apple Turnovers are not just about taste; they also offer a wonderful texture combination. The crispy, golden-brown exterior gives way to a soft, sweet apple filling, ensuring every bite is a harmonious blend of flavors and textures. Serve them warm with a scoop of vanilla ice cream, and they transform from a comforting dessert into a show-stopping dish that delights guests of all ages!

Quick Recipe Highlights

  • Flavor Profile: The turnovers feature a delightful combination of tart and sweet flavors, thanks to the apples and cinnamon that meld beautifully during baking.
  • Texture: Enjoy a perfect contrast between the flaky pastry and the soft, tender filling, creating a satisfying mouthfeel.
  • Aroma: The scent of warm cinnamon and baked apples is irresistible, evoking feelings of home and comfort.
  • Visual Appeal: These turnovers are golden-brown, with a glossy finish that makes them look as good as they taste.
  • Skill Level Needed: This recipe is beginner-friendly, requiring only basic baking skills and a few simple ingredients.
  • Special Equipment: A rolling pin and baking sheet are all that’s needed to create these delightful turnovers.

Recipe Overview

  • Difficulty Level: This easy recipe is perfect even for novice bakers, featuring straightforward steps that lead to impressive results.
  • Category: These turnovers make a fantastic dessert or snack at any time of day, ideal for brunch or tea time.
  • Cuisine: While they have a classic American touch, apple turnovers are also influenced by various European pastry traditions.
  • Cost: With ingredients typically under $10, this recipe is budget-friendly and accessible to everyone.
  • Season: Perfect for autumn, when apples are in full harvest, but delightful year-round!
  • Occasion: Great for casual family dinners, festive holidays, or even as a sweet addition to a bake sale.

Why You’ll Love This Recipe

These Easy Apple Turnovers are a treat for the taste buds, delivering an ideal balance of sweetness and spice. The combination of seasonal apples with warm cinnamon creates a nostalgic flavor reminiscent of homemade pies, inviting both comfort and joy. The flaky pastry adds a delightful crunch, while the gooey filling offers a warm, inviting texture that makes these turnovers irresistible.

Convenience is another reason to love this recipe. With simple ingredients and a quick preparation time, you can whip up a batch of turnovers in no time. This makes them perfect for unexpected guests or a spontaneous dessert craving. Plus, they can be made ahead of time and simply popped into the oven when you’re ready to serve.

Nutritional benefits come from the apples, which are a great source of dietary fiber and essential vitamins. They help promote digestive health while providing the sweetness that makes these turnovers a guilt-free treat.

Social and entertaining value is high with this recipe. Serving these delicious turnovers can impress your friends and family, creating a sense of warmth and hospitality that everyone will appreciate. They make for a great conversation starter as everyone shares their love for apple desserts.

Finally, this recipe is cost-effective. The ingredients are humble yet satisfyingly delicious, ensuring that you can indulge in this sweet treat without breaking the bank. With just a few pantry staples, you can create something extraordinary that everyone will enjoy.

Historical Background and Cultural Significance

Apple turnovers have a rich history that traces back to various cultures that have embraced the combination of pastry and fruit. Traditionally, desserts highlighting the apple have been a staple in many households, especially in the fall when fresh apples are plentiful. The concept of wrapping baked goods around sweet fillings likely originated in Europe, with pastries making their way into various cuisines over the centuries.

In the American context, the apple turnover became popular in the 19th century, paralleling the rise of the apple industry in the United States. Spanning across numerous regions, they became a beloved dessert choice, showcasing local apple varietals in different seasonal pies and pastries. They evolved to represent not just flavor but also a connection to nature and the harvest.

The recipe for apple turnovers has evolved through various iterations, inspiring countless adaptations and variations. From different filling options to unique spices and toppings, there’s an applied creativity that allows families to make them their own. This evolution reflects the changing tastes of society and the influence of global cuisines.

Regional variations have emerged, with some areas opting for additional spices or different types of fruit. This adaptability is part of what makes the apple turnover a timeless and cherished dessert across the globe, uniting different cultures through a shared love for apples and pastries.

Ingredient Deep Dive

  • Apples: Apples are central to the flavor profile of this recipe. With a history dating back to ancient civilizations, they hold significant cultural importance as symbols of knowledge and temptation. Nutritionally, apples offer dietary fiber, vitamin C, and a variety of antioxidants. When selecting apples for turnovers, opt for firm varieties like Granny Smith, Honeycrisp, or Braeburn for a perfect balance of tartness and sweetness. Store apples in a cool, dark place to prolong their freshness. If you’re out of apples, consider substitutions such as pears or berries for different, yet tasty, fillings.
  • Puff Pastry: Puff pastry is the star ingredient, essential for achieving that flaky, golden texture. The origins of puff pastry trace back to ancient Egypt and have been refined over centuries, featuring layers of dough alternated with butter. This technique creates a light, flaky result that’s sought after in many pastries. Nutritionally, it does contain fats, hence moderation is key. When buying, seek high-quality, all-butter puff pastry for the best results. If allergies prevent consumption, consider alternatives like gluten-free pastry or even homemade pie dough for a denser option.

Common Mistakes to Avoid

  • Not chilling the dough: Ensure that puff pastry is properly chilled before rolling out, as this will help maintain its flakiness.
  • Overfilling the turnovers: Too much filling can cause leakage during baking. Stick to the recommended quantity for optimal results.
  • Skipping the egg wash: An egg wash creates a beautiful golden finish on your pastries. Don’t skip this simple but essential step!
  • Not preheating the oven: A properly preheated oven is crucial for baking crispy and evenly baked turnovers.
  • Using the wrong apple type: Certain apples are better for baking than others. Choose firmer, tart varieties that hold their shape during baking.
  • Ignoring sealing techniques: Properly sealing the edges of the turnovers is vital to prevent them from bursting during baking.
  • Lack of ventilation: Make sure to cut small slits in the top before baking to allow steam to escape, maintaining the crispiness of the pastry.
  • Baking at the wrong temperature: Make sure to follow the recommended temperature for the best texture and color.
  • Not allowing them to cool: Letting the turnovers cool on a wire rack helps maintain their crisp texture instead of allowing moisture to build up.
  • Serving too warm: The filling will be very hot right out of the oven. Allow them to cool slightly before serving to prevent burns.

Essential Techniques

Chilling the Dough: Chilling puff pastry is vital for creating a flaky texture. When the dough is cold, the fat remains solid and creates the steam that lifts the layers during baking. To master this technique, allow at least 30 minutes of chilling after rolling out the pastry. A common pitfall is to skip this step; the result will be a dense turnover instead of a light and airy one. Aim to see a slight puff when they come out of the oven as a visual cue of success.

Sealing the Turnovers: Properly sealing your turnovers prevents filling from leaking during baking. To master this, press the edges tightly and crimp with a fork for a decorative look. A common mistake is using too much filling, which can compromise the seal. For visual cues, ensure edges are fully closed and no filling is visible before baking.

Pro Tips for Perfect Easy Apple Turnovers

  • Choose the right apple variety for optimal sweetness and texture—Granny Smith is a top choice for its tartness that balances the sweetness.
  • Allow the filled turnovers to rest for a few minutes before baking; this helps to enhance the flavor melds.
  • Experiment with spices like nutmeg or cardamom for a unique flavor twist on traditional apple turnovers.
  • When using frozen puff pastry, thaw them overnight in the refrigerator for the best results.
  • Brush the turnovers with a milk wash before baking for a glossy, attractive finish.
  • Consider sprinkling sugar on top before baking for an extra sweet crunch.
  • If you want added crunch, mix in some chopped nuts or even granola with the apple filling.
  • For a flavorful twist, add a tablespoon of lemon juice to the apple filling to brighten the flavor.

Variations and Adaptations

While the classic Easy Apple Turnovers are always a favorite, there are plenty of delicious variations to explore. For a regional twist, consider incorporating spices like ginger or allspice for a different depth of flavor. Additionally, during holidays, using cranberries or dried fruit as a filling can create a festive touch that changes the flavor profile while celebrating seasonal ingredients.

Make seasonal adaptations by replacing apples with seasonal fruits such as pears in the spring or peaches in the summer. These fruits retain their flavor and texture beautifully, providing a delightful alternative to the traditional recipe.

Dietary modifications are also easily attainable: use gluten-free puff pastry or create a vegan version by replacing butter with coconut oil and milk with a plant-based milk. These alterations ensure that everyone can enjoy these sweet pastries without any dietary restrictions.

Exploring flavor variations is an exciting and creative way to enjoy this recipe. Try adding chocolate chips or caramel to the apple filling for a rich twist, or infuse the apple mixture with bourbon or rum for an adult-oriented dessert. The possibilities are endless!

When it comes to texture modifications, try drizzling a sweet glaze over the baked turnovers for an appealing finish. Alternatively, bake them with a streusel topping made from oats, flour, and butter for an extra crunch.

Finally, consider presentation alternatives: cutting the turnovers into fun shapes or serving them with a drizzle of warm caramel sauce can elevate their appearance and make them truly special for any occasion.

Serving and Presentation Guide

For an eye-catching presentation, plate your Easy Apple Turnovers while they are still warm. A simple white plate will allow the golden-brown color of the pastry to stand out beautifully. For extra flair, dust the turnovers with powdered sugar or drizzle a vanilla glaze over the top for added sweetness and visual appeal.

Garnish the plate with fresh apple slices or sprigs of mint to enhance the visual presentation and add a fresh element. Serve them alongside a scoop of vanilla ice cream or a dollop of whipped cream for a decadent touch. The contrast of warm turnovers and cold ice cream creates a delightful sensory experience.

Temperature considerations are important; serve these pastries warm to enjoy the gooiness of the apple filling while maximizing flavor. To maintain their crispiness, avoid covering the turnovers after baking.

For portion control tips, consider serving each turnover whole or cutting them in half for smaller portions. This allows guests to enjoy sweet bites without overindulging. You can also offer a variety of dips, like caramel sauce or dulce de leche, for an interactive dessert experience!

Wine and Beverage Pairing

When it comes to wine pairings, a chilled Riesling or a light Pinot Grigio complements the sweetness of the apple turnovers beautifully. The fruity notes of these wines enhance the flavor while refreshing the palate. For a richer experience, consider serving a late harvest Sauvignon Blanc or an aromatic Moscato.

If you’re looking for non-alcoholic alternatives, a spiced apple cider or sparkling apple juice will enhance the apple experience while being family-friendly. The warmth and spice of such beverages perfectly match the flavors of the turnovers.

If coffee or tea is more appealing, consider pairing these pastries with a medium roast coffee or a chai latte. The spices in chai will harmonize with the cinnamon in the turnovers, creating a delightful pairing.

For temperature considerations, ensure that beverages are served at the appropriate temperature, as a warm drink alongside a freshly baked turnover can highlight its comforting nature and bring warmth to your gathering.

Storage and Shelf Life

To store your Easy Apple Turnovers, keep them in an airtight container at room temperature for 1-2 days. If you want to extend their shelf life, consider refrigerating them for up to a week. Make sure they are fully cooled before storing to prevent condensation and sogginess.

For longer storage, freezing is an excellent option. Place the turnovers in a single layer on a baking sheet until frozen solid, then transfer them to a freezer bag or airtight container. They can be stored this way for up to 2 months.

When it comes to reheating, rewarm frozen turnovers in an oven preheated to 350°F (175°C) for about 15-20 minutes, or until heated through. If you have refrigerated turnovers, they only need about 8-10 minutes in the oven to regain their crispness.

Always check for signs of spoilage; if they develop an off smell or mold, it’s best to discard them. Proper storage will help maintain their quality and ensure you can enjoy these treats later!

Make Ahead Strategies

If you want to prepare your Easy Apple Turnovers ahead of time, make the filling and pastry in advance and store them separately. The apple filling can be made up to 4 days ahead—simply refrigerate it in an airtight container. The puff pastry can also be rolled out and cut into squares for easy assembly when you’re ready to bake.

When assembling, you can prepare the Turnovers up to the point of baking, cover them with plastic wrap, and keep them in the refrigerator for up to 24 hours. This convenience means you can simply pop them in the oven when you’re ready to serve, eliminating the stress of last-minute preparations.

Quality can be affected by how long you store the filling, so always check for freshness in terms of flavor and texture before using. If freezing turnovers, remember to assemble and freeze them before baking for the best results. This allows you to enjoy freshly baked pastries whenever you crave them!

Another tip is to prepare the turnovers but allow them to cool completely before they are stored in the freezer to prevent sogginess when reheating. Adding fresh elements like a scoop of ice cream or a dusting of cinnamon sugar after reheating will enhance their flavor when it’s time to serve!

Scaling Instructions

Scaling this Easy Apple Turnovers recipe is straightforward. If you want to halve the recipe, simply divide all the ingredients by two, which is perfect for smaller gatherings or personal servings. This recipe is quite forgiving, so halving it won’t affect the texture or flavor significantly.

Doubling or tripling the recipe is equally easy, especially when you have apple lovers in the house! Just make sure to have sufficient oven space to bake them in batches if necessary. Adjusting the baking time may be required, so keep an eye on them to ensure they don’t overbake.

For equipment adjustments, use larger baking sheets or multiple sheets to accommodate the increased quantity. Timing modifications may also be necessary if you need to rotate the pans in the oven for even baking.

Storage considerations remain crucial regardless of how much you make; be sure to label and date your containers if making more than one batch, as freshness can vary depending on quantity and storage methods.

Nutritional Deep Dive

Each Easy Apple Turnover provides a delightful mix of macros, with moderate amounts of carbohydrates from the puff pastry and sugars from the apples. Depending on your filling choices, the turnovers can also deliver fiber, especially when whole apples are used, enhancing digestive health.

Micronutrient analysis shows that apple turnovers offer essential vitamins such as vitamin C, particularly when fresh apples are used. Some varieties may contain antioxidants, while the dietary fiber helps in blood sugar regulation and contributes to heart health.

This treat does come with its health considerations, particularly from the pastry aspect, which can be higher in fats and sugars. Enjoy them in moderation, especially for those concerned with caloric intake, but rest assured that occasionally indulging is perfectly fine!

When considering portion analysis, one turnover may range from 200-300 calories depending on size and specific ingredients used; mindful eating is encouraged to help manage overall intake effectively. Pairing them with fruits or lighter options can make it a balanced treat.

Dietary Adaptations

For gluten-free adaptations, use gluten-free puff pastry options available in many grocery stores, ensuring everyone can enjoy these delightful treats regardless of dietary restrictions.

Dairy-free adaptations can be achieved by replacing butter in the pastry with a dairy-free alternative like coconut oil or margarine and selecting a plant-based milk for egg washes.

For a vegan version, ensure the pastry is egg-free, and consider replacing apple filling with seasonal fruits or vegan alternatives like nuts and berries.

Low-carb or keto dieters can make turnovers with almond flour or coconut flour-based pastry recipes, reducing carbs significantly while still enjoying a satisfying dessert.

Paleo diets can also enjoy this recipe, substituting traditional ingredients with more natural, whole food options like almond flour for the pastry and lesser sweetener varieties.

For low-FODMAP diets, limit the use of apples and consider creating turnovers with permitted fruits like strawberries or oranges, ensuring a suitable substitute.


Troubleshooting Guide

If your turnovers come out soggy, it could be due to excessive filling or insufficient baking time. Ensure you’re not overstuffing and that they are thoroughly baked until golden brown. A common issue is undercooked apples; precook the filling slightly to ensure they soften adequately.

If your turnovers are burnt on the outside but uncooked inside, your oven temperature might be set too high. Lower the temperature slightly and give them extra baking time to ensure a properly cooked center.

For flavor balance issues, if your turnovers taste flat, consider adding a pinch of salt or a squeeze of lemon juice to brighten the flavors of the filling.

Equipment challenges such as difficulty rolling out the dough can stem from it being too warm or overworked. Ensure it’s chilled adequately and handle it minimally while forming your shapes for best results.

If you find dough cracks while cutting, it may be too cold. Let it sit at room temperature for a few minutes to soften slightly before using it.

Timing concerns can arise if your turnovers don’t puff up during baking; this could indicate your pastry was too warm or the oven wasn’t properly preheated. Always check puff pastry packaging for specific baking instructions.

Recipe Success Stories

Our community has enthusiastically shared numerous success stories about the Easy Apple Turnovers. Many have reported receiving rave reviews from family and friends, making them the highlight of gatherings! One reader noted that substituting different fruits led to an unexpected yet delicious outcome, showcasing the versatility of the recipe.

Another passionate home baker shared their triumph in adapting the recipe for a gluten-free audience, using almond flour for the pastry—everyone loved them! Photography tips by our followers reveal beautifully styled turnovers accompanied by vibrant dips and garnishes that entice anyone who views their culinary creations.

These turnovers also found a spot in many school bake sales, where families raised money and shared the joy of baking with the local community. The achievable nature of this recipe has empowered many novice bakers to explore their talents, resulting in numerous adaptations and variations that truly celebrate culinary creativity!

Frequently Asked Questions

Can I use frozen apples for the filling?
Yes, frozen apples can be used, but be sure to thaw them completely and drain excess moisture before adding them to your filling to avoid sogginess.

How do I know when my turnovers are done baking?
Look for a golden-brown color and toasty aroma. Use an instant-read thermometer; it should read around 200°F (93°C) inside the turnover.

Can I make these turnovers with different fruits?
Absolutely! You can use pears, plums, or berries – just adjust the sugar content based on the sweetness of the fruit.

What can I serve these turnovers with?
They pair beautifully with vanilla ice cream, whipped cream, or a drizzle of caramel sauce, enhancing their indulgent nature.

Can I freeze the turnovers before baking?
Yes! Assemble the turnovers, freeze them, and bake from frozen as instructed, adding a few extra minutes to the baking time.

Do I need to pre-bake the filling?
Not typically, but if you’re using very moist fruit, a brief sauté can help avoid a soggy pastry.

Can I add nuts to the filling?
Definitely! Chopped walnuts or pecans add a delightful crunch to the filling.

What is the best way to reheat turnover leftovers?
Reheat in a preheated oven at 350°F (175°C) for about 10 minutes to retain crispiness.

How long can I store these turnovers?
They can be stored at room temperature for 1-2 days or refrigerated for up to a week. Freezing extends their shelf life to 2 months.

What type of puff pastry is best?
Look for pre-rolled, all-butter puff pastry for the best flavor and texture.

Additional Resources

Explore related recipes such as homemade apple pie or cinnamon rolls that utilize similar flavor profiles. For technical assistance, our technique guides on making puff pastry and pie crusts provide helpful tips for success. Enjoy a seasonal apple cider alongside your turnovers, enhancing the overall apple experience. Look for equipment recommendations to simplify the pastry-making process, from good-quality pastry brushes to rolling pins that make the task a breeze. Various seasonal variations can also be explored, allowing you to keep the apple turnovers exciting throughout the year.

Join the Conversation

We’d love to see your creations! Share your culinary successes on social media, mentioning our blog, and use our unique hashtag #EasyAppleTurnoverChallenge. Share photos of your turnovers, describe your variations or adaptations, and let us know what you loved most about them. Your feedback not only helps others but enhances our community’s engagement. Try different garnishing ideas, and be innovative with plating to inspire fellow bakers! Let’s celebrate the joy of baking together!

The Recipe

Easy Apple Turnovers

Serves: 8 turnovers

Prep Time: 15 mins

Cook Time: 20 mins

Total Time: 35 mins

Kitchen Equipment Needed

  • Rolling pin
  • Baking sheet
  • Parchment paper
  • Mixing bowls
  • Sharp knife
  • Brush for egg wash

Ingredients

  • 2 large apples, peeled and diced
  • 1/4 cup granulated sugar
  • 1 tsp cinnamon
  • 1 tbsp lemon juice
  • 1 sheet puff pastry (thawed if frozen)
  • 1 egg (beaten for egg wash)
  • Powdered sugar, for dusting (optional)

Directions

  1. Preheat your oven to 400°F (200°C) and line a baking sheet with parchment paper.
  2. In a bowl, combine diced apples, granulated sugar, cinnamon, and lemon juice. Set aside.
  3. Roll out the puff pastry on a lightly floured surface and cut it into 4 squares.
  4. Add a heaping tablespoon of the apple filling to the center of each square.
  5. Fold the pastry over to create a triangle and seal the edges by pressing with a fork.
  6. Brush the tops of the turnovers with the beaten egg for a golden finish.
  7. Cut small slits in the top of each turnover to allow steam to escape.
  8. Bake for 20 minutes or until golden brown and puffed up.
  9. Allow to cool slightly before dusting with powdered sugar and serving warm.

Recipe Notes

  • Feel free to adjust the sugar based on the sweetness of your apples.
  • Try adding nuts or dried fruit to the filling for additional flavor.
  • These turnovers are best enjoyed fresh but can be kept in an airtight container for a couple of days.
  • For a gluten-free option, look for gluten-free puff pastry alternatives.

Irresistible Honey Bacon Roasted Potatoes Recipe for Everyone

Honey Bacon Roasted Potatoes: A Sweet and Savory Delight

⚖️
Difficulty
Easy

⏲️
Prep Time
10 mins

🕒
Cook Time
40 mins

⏱️
Total Time
50 mins

🍽️
Servings
4 servings

Welcome to your new favorite side dish: Honey Bacon Roasted Potatoes! This delightful recipe marries the savory taste of crispy bacon with the sweet, sticky goodness of honey, creating a flavor explosion that will elevate any meal. Whether you’re serving them at dinner parties, weekend barbecues, or just as a cozy evening treat, these potatoes promise to be a crowd-pleaser to the highest degree. Imagine sinking your teeth into perfectly roasted potatoes, each bite infused with the rich essence of bacon and sweet honey—simply irresistible!

Roasting potatoes to a golden brown transforms them into a delectable side, while the addition of honey and bacon gives a unique twist to this classic dish. The balance of sweetness and saltiness in every bite makes these Honey Bacon Roasted Potatoes an unforgettable experience. Prepare to bring everyone together as you serve these beauties; they are the ultimate comfort food that feels as comforting as a warm hug!

Quick Recipe Highlights

  • Flavor Profile: Experience the perfect balance of sweet and salty with a touch of richness from the bacon.
  • Texture: Crispy on the outside with a fluffy interior, these roasted potatoes deliver the ultimate mouthfeel.
  • Aroma: The tantalizing aroma of crispy bacon mingling with honey will have everyone gathering in the kitchen.
  • Visual Appeal: Golden brown potatoes glistening with honey and bits of crispy bacon create a stunning presentation.
  • Skill Level Needed: This easy recipe requires minimal cooking expertise, perfect for any home chef.
  • Special Equipment: A baking sheet and parchment paper ensure an easy cleanup and evenly roasted potatoes.

Recipe Overview

  • Difficulty Level: Simple yet satisfying; this dish is perfect for all skill levels.
  • Category: Ideal as a side dish for any main course—from grilled meats to vegetarian meals.
  • Cuisine: Blending traditional American flavors with a unique twist, this recipe embraces comfort food at its best.
  • Cost: An economical choice, utilizing affordable ingredients without sacrificing flavor or satisfaction.
  • Season: Perfect for year-round enjoyment, especially during gatherings and holidays.
  • Occasion: Ideal for potlucks, family gatherings, and festive celebrations, bringing joy to any table.

Why You’ll Love This Recipe

This recipe harmonizes taste and texture, making it a standout addition to any meal. The crispy texture of roasted potatoes, paired with the smokiness of bacon and the sweetness of honey, offers a culinary symphony that dances on the palate. Each bite delivers an explosion of flavor, ensuring satisfaction whether enjoyed alone or alongside other dishes.

Convenience and preparation are key advantages of this recipe. With only a handful of ingredients and minimal prep time, Honey Bacon Roasted Potatoes can be whipped up in no time. Simply chop, toss, and roast while you focus on other meal components or relax—ideal for busy weeknights or spontaneous gatherings.

Nutritionally, potatoes are a versatile ingredient rich in vitamins and minerals, and when paired with bacon and honey, they turn into a comfort food that’s both delightful and fulfilling. Offering carbohydrates for energy and protein from bacon, this dish provides a perfect balance of sustenance and enjoyment.

This recipe shines in social settings, offering a flavorful side that encourages sharing and conversation. Picture gathering around the dining table as warm, roasted potatoes are passed among friends and family, igniting joy and connection in every serving.

When it comes to cost-effectiveness, Honey Bacon Roasted Potatoes are an economical choice. Using simple, readily available ingredients, this dish brings gourmet flair without breaking the bank, making it accessible for all home cooks and occasions.

Historical Background and Cultural Significance

The comfort food duo of potatoes and bacon has deep historical roots, serving as staples in households around the world. Originating from the Americas, potatoes have become a beloved vegetable that easily adapts to countless recipes and flavor profiles. Their versatility allows for creativity in the kitchen, and they have been embraced in various culinary traditions.

Bacon, often referred to as the “meat of celebration,” carries its own significance, particularly in American cuisine. The history of bacon dates back centuries, where curing techniques were developed to preserve pork. It’s been celebrated not just for its flavor but for its ability to bring people together around shared meals.

Over time, recipes utilizing these ingredients evolved, reflecting regional flavors and preferences. The marriage of honey with bacon on roasted potatoes is an innovative adaptation that showcases how traditional foods can be reinvented to suit modern palates.

While similar recipes exist worldwide, the specific combination of honey, bacon, and roasted potatoes has carved its niche as a favorite comfort food in many households. This dish symbolizes warmth and nostalgia, making it a cherished recipe that many families hold dear.

Ingredient Deep Dive

Potatoes are the cornerstone of this dish, celebrated for their versatility. Diverse in variety, potatoes provide essential nutrients like potassium and vitamin C, making them a wholesome choice. When selecting potatoes, look for firm, unblemished skins and avoid any sprouting or softness.

Once you’ve got your potatoes, storage is simple: keep them in a cool, dark place to maintain freshness over time. If you want to switch garlic powder for fresh garlic, consider increasing the quantity slightly to account for flavor intensity, which is particularly vital in enhancing the overall taste of this dish.

Bacon, the second star of this recipe, brings savory depth and smokiness that pairs beautifully with the sweetness of honey. This cured meat has a storied history in various cuisines around the world. It’s full of protein and fat, making it delicious yet indulgent.

When purchasing bacon, opt for quality over quantity; thick-cut bacon adds a delightful texture. Additionally, ensure you store opened packages in the refrigerator, while unopened bacon can be frozen for extended shelf life. If dietary restrictions come into play, turkey or vegan bacon can serve as suitable substitutions without sacrificing flavor.

Common Mistakes to Avoid

  • Overcrowding the baking sheet: This leads to steaming instead of roasting; always provide ample space between each potato piece for optimal crispness.
  • Using the wrong potato type: Waxy varieties can become mushy; opt for starchy potatoes likeRusset to achieve the ideal texture.
  • Skipping pre-heating the oven: It may seem insignificant, but starting with a hot oven is crucial for achieving a perfect crust.
  • Not adequately seasoning: A sprinkle of salt ensures a flavorful bite; don’t forget to season the potatoes before roasting.
  • Overlooking the honey measurement: Too much honey can make the dish overly sweet; always measure it carefully for balance.
  • Cutting potatoes unevenly: Uniform size ensures even cooking; keep your potato pieces consistent in size so they roast properly.
  • Using cold ingredients: Allow honey and bacon to come to room temperature before combining them; this allows for a thorough distribution of flavor.
  • Neglecting to flip: Don’t forget to give the potatoes a turn halfway through cooking; this promotes even browning and texture.
  • Not tasting before serving: Always give your dish a final taste check before serving to ensure seasoning is on point.
  • Skipping the rest time: Let the potatoes cool slightly before serving; this allows flavors to meld and enhances the eating experience.

Essential Techniques

Mastering the art of roasting is key to achieving the perfect Honey Bacon Roasted Potatoes. This technique enhances flavors through caramelization and browning, providing the rich, crispy exterior everyone loves. To master roasting, ensure your oven is preheated, use high heat, and air circulation is optimized by not overcrowding the baking sheet.

Crisp bacon adds an essential flavor element. The secret to crispy bacon lies in rendering the fat slowly over medium heat, allowing the slices to brown evenly without burning. Avoid high heat, as it could lead to uneven cooking. Look for deep golden color as a visual cue for perfect crispiness.

Pro Tips for Perfect Honey Bacon Roasted Potatoes

1. Choose small to medium-sized potatoes for even cooking; they roast better and maintain their shape.

2. For enhanced flavor, use fresh herbs like rosemary or thyme; add them halfway through the cooking process so they don’t burn.

3. Introduce garlic cloves alongside the potatoes for an aromatic touch; roast them until golden for a delightful addition.

4. For an extra kick, sprinkle red pepper flakes or smoked paprika for a hint of heat.

5. Ensure to use enough honey to glaze the potatoes thoroughly but not overpower the dish; balance is essential.

6. Don’t rush the cooking time; allowing the potatoes and bacon to roast thoroughly ensures maximum flavor.

7. Experiment by adding different vegetables for color and variety; bell peppers or carrots pair well with the potatoes.

8. Let the dish rest before serving; this allows flavors to meld beautifully, enhancing the overall enjoyment.

Variations and Adaptations

Regional variations abound with Honey Bacon Roasted Potatoes. Southern-inspired recipes incorporate spices like Cajun seasoning for a robust twist. During holidays, consider adding cranberries or pecans to achieve a festive flavor profile. For a Fall touch, try substituting sweet potatoes to highlight seasonal ingredients and flavors.

Seasonal adaptations enhance the recipe with whatever vegetables are in season. In the summer, ripe cherry tomatoes or zucchini can lend freshness, while winter brings root vegetables like carrots or parsnips into play. Each addition introduces a new flavor dimension to the classic potato base.

Dietary modifications allow this dish to cater to various preferences. For a healthier option, consider an air fryer instead of the oven to cut down on fat and calories. To create a vegetarian alternative, simply skip the bacon or use smoked tempeh for that satisfying umami punch.

Adjusting flavors can create a personalized experience, such as trying maple syrup instead of honey for a deeper, richer sweetness. Toss in spices like cumin or coriander to elevate the dish with an exotic twist.

Finally, presenting Honey Bacon Roasted Potatoes can be exciting! Use a colorful platter and garnish with fresh herbs like parsley or chives, ensuring visual appeal that matches the delicious flavors packed within.

Serving and Presentation Guide

When plating Honey Bacon Roasted Potatoes, use a large serving bowl to showcase their golden color and crispy texture. For an elegant touch, sprinkle fresh herbs on top right before serving. This not only adds color but vibrancy as well!

Garnishing ideas include crumbled feta or goat cheese for creamy contrast, alongside a drizzle of balsamic reduction for a gourmet flair. Accompany the dish with traditional elements like sour cream or yogurt for dipping. Furthermore, consider temperature: serve warm but not piping hot to allow the flavors to shine and the enjoyment of each bite.

When it comes to portion control, serve individual portions in smaller bowls, creating an inviting, buffet-style presentation. This encourages personalization and sharing, cultivating a communal dining experience, ideal for gatherings.

Wine and Beverage Pairing

Pairing wine with Honey Bacon Roasted Potatoes can elevate your dining experience. A crisp Chardonnay complements the dish beautifully, balancing the sweet and savory elements. For a red option, consider a Pinot Noir; its earthy notes harmonize well with the bacon’s richness.

If you prefer non-alcoholic alternatives, consider a sparkling apple cider for a refreshing contrast that matches the sweetness of the honey. Similarly, a lightly brewed iced tea with lemon can provide a pleasant balance to the dish.

For those who enjoy coffee or tea, a robust French press coffee can bring depth, particularly if served with cream to mirror the dish’s richness. If pairing tea, a smoky Lapsang Souchong provides a wonderful flavor alignment with the roasted component of the potatoes.

Storage and Shelf Life

Storing your Honey Bacon Roasted Potatoes is straightforward. The best method is to place them in an airtight container in the fridge, where they will last for up to three days. For optimal freshness, it’s important to refrigerate leftovers within two hours of cooking.

When reheating, aim for even warmth; the oven is ideal to restore some crispiness, while microwaving can make them a bit soft. Sufficiently heat them until they reach an internal temperature of 165°F. Freezing is possible for longer storage; ensure they are cooled completely, then store in an airtight container or freezer-safe bag for up to three months.

Make Ahead Strategies

Preparing Honey Bacon Roasted Potatoes ahead of time allows for effortless entertaining and meal planning. You can chop the potatoes and mix them with honey and seasoning up to a day in advance. Store them in the refrigerator until you’re ready to roast.

Consider pre-cooking the bacon slightly to render some fat without fully cooking; this way, it infuses flavor during the potato roasting process when you’re ready to cook. Be mindful of the freshness of ingredients, as pre-prepared foods will retain the best quality when combined shortly before cooking.

To maintain quality, consider reheating strategies; once baked, allow the potatoes to come to room temperature before refrigerating. Upon reheating, add a splash of fresh honey for that freshly-roasted taste. Additionally, save final touches like garnishing with herbs for serving time to maintain flavor integrity.

Scaling Instructions

Scaling Honey Bacon Roasted Potatoes is easy for gatherings of various sizes. If you plan to halve the recipe, adjust seasoning and cooking time accordingly—consider smaller batches will require slightly less roasting time to ensure even cooking.

Doubling or tripling the recipe is also achievable; just ensure your baking sheet can accommodate all the potatoes without overcrowding to prevent steaming. Always monitor the cooking time, as larger batches may need adjusting due to variations in oven temperature.

In terms of storage, consider the additional containers required and ensure all leftovers are appropriately stored. Adjust your serving sizes and portion control for keeping waste to a minimum during large gatherings.

Nutritional Deep Dive

Nutritionally, Honey Bacon Roasted Potatoes provide a wealth of benefits. Potatoes are rich in carbohydrates, offering energy, while bacon contributes protein along with fat for satiety. This dish can fit easily into various dietary plans when portioned appropriately.

A macronutrient breakdown reveals a balanced ratio of fats, carbohydrates, and protein; focus on controlling portion sizes if you’re mindful of weight management. The micronutrient profile is also impressive—potatoes are a good source of potassium and vitamin C, while honey is known for its antioxidant properties.

Dietary Adaptations

For gluten-free adaptations, this recipe naturally fits without any modifications, making it suitable for those with dietary restrictions. Additionally, to accommodate the dairy-free lifestyle, simply eliminate any creamy garnish during serving.

If you are following a vegan diet, replace bacon with plant-based bacon and ensure honey is swapped with agave syrup. For low-carb diets, substitute potatoes with cauliflower for a similar texture while lowering the carbohydrate content significantly.

Keto enthusiasts can also glean benefits from this dish by utilizing keto-friendly sweeteners instead of honey and pairing the potatoes with bacon for healthy fats. Finally, options such as paleo or low-FODMAP can be achieved simply by adjusting ingredient selections accordingly.

Troubleshooting Guide

For texture issues in your Honey Bacon Roasted Potatoes, consider the size of your cuts; uneven sizing can lead to uneven cooking. Always opt for even quarter-sized pieces for optimal roasting.

If the flavor balance feels off, reassess your seasoning and sweet ingredient—too much honey can overpower. Adjust by adding a little salt or an acid like lemon juice to bring out a harmonious flavor.

Temperature problems can arise if your oven temperature isn’t calibrated; utilize an oven thermometer to ensure accuracy. If the bacon isn’t getting crispy, ensure it is laid out evenly and that the oven is preheated properly beforehand.

Recipe Success Stories

Community feedback on Honey Bacon Roasted Potatoes continues to be overwhelmingly positive. Home cooks rave about how simple and satisfying this dish is, with many sharing their variations and personal touches that enhance the overall recipe.

Success stories abound as home cooks have adapted the recipe for dietary needs, sharing photos and suggesting exciting flavor combinations that highlight the adaptability of the dish. From adding caramelized onions to mixing in seasonal vegetables, readers have found joy in customizing this beloved recipe.

Many have also shared tips on photography and presentation, offering suggestions for making the dish visually appealing to perfectly complement its delicious flavor.

Frequently Asked Questions

Can I prep the potatoes ahead of time?

Yes, you can chop and soak the potatoes in water to prevent browning. Store them in the refrigerator until ready to roast.

What’s the best type of potato for this recipe?

Starchy potatoes, like Russets or Yukon Golds, work best as they create a fluffy interior while developing a crispy exterior when roasted.

Can I use turkey bacon instead of regular bacon?

Absolutely! Turkey bacon can be substituted for regular bacon, though it may yield a slightly different flavor and texture.

How can I make this dish spicy?

Add some crushed red pepper flakes or a dash of cayenne pepper to infuse it with heat, complementing the sweet and savory components.

What can I serve with Honey Bacon Roasted Potatoes?

This dish pairs beautifully with grilled meats, salads, or even as a brunch side with eggs for a delightful and hearty meal.

Can I freeze leftovers?

Yes, you can freeze leftovers in an airtight container for up to three months. Ensure to cool them completely before freezing to maintain texture.

Are there any substitutions for honey?

Maple syrup works well as a substitute for honey, providing similar sweetness with a unique flavor profile.

What herbs pair well with this dish?

Fresh herbs like rosemary, thyme, or parsley enhance the flavor, adding freshness and depth, so feel free to get creative!

What’s the best way to reheat leftovers?

The oven is the best method for reheating, as it helps restore crispiness. Preheat the oven to 350°F and heat until warmed through.

Can I make this dish in an air fryer?

Yes! An air fryer is a fantastic alternative, yielding crispy potatoes while using less oil. Cook at 400°F for about 20-25 minutes, shaking halfway through.

Additional Resources

Enhance your dining experience with related recipes like Sweet Potato Casserole or Garlic Parmesan Roasted Vegetables for more flavorful sides. Explore kitchen techniques to refine your cutting skills for uniform pieces or learn more about ingredient selection to always choose the best quality.

For those interested in kitchen equipment, essential tools like premium baking sheets or air fryers can elevate your cooking game. Check out our seasonal variations for fresh ideas on how to incorporate seasonal vegetables or herbs into your next meal.

Join the Conversation

We love to hear from you! Share your Honey Bacon Roasted Potatoes photos or variations on social media using our hashtag. Join our community for feedback, tips, and discussions about recipe modifications that better suit your taste!

The Recipe

Honey Bacon Roasted Potatoes

Serves: 4 servings

Prep Time: 10 mins

Cook Time: 40 mins

Total Time: 50 mins

Kitchen Equipment Needed

  • Baking Sheet
  • Parchment Paper
  • Mixing Bowl
  • Chef’s Knife
  • Cutting Board

Ingredients

  • 2 lbs potatoes (Russet or Yukon Gold)
  • 6 slices of bacon, chopped
  • 1/4 cup honey
  • Salt and pepper to taste
  • Optional: fresh thyme or rosemary for garnish

Directions

  1. Preheat the oven to 400°F (200°C).
  2. Scrub the potatoes clean, then cut them into bite-sized pieces.
  3. In a large mixing bowl, toss the potatoes with chopped bacon, honey, salt, and pepper to coat them evenly.
  4. Line a baking sheet with parchment paper and spread the potato mixture in a single layer.
  5. Roast in the preheated oven for 20 minutes, then flip the potatoes for even browning.
  6. Continue roasting for an additional 20 minutes, or until potatoes are golden brown and crispy.
  7. Remove from the oven and garnish with fresh herbs if desired; serve warm and enjoy!

Recipe Notes

  • Feel free to adjust the sweetness by modifying the amount of honey used.
  • Store leftovers in an airtight container in the refrigerator for up to three days.
  • For a twist, try adding garlic or a splash of vinegar for extra flavor.

Delicious Garlic Herb Chicken with Creamy Broccoli Penne Recipe

Garlic Herb Chicken with Creamy Broccoli Penne: A Deliciously Satisfying Meal

⚖️
Difficulty
Medium

⏲️
Prep Time
15 mins

🕒
Cook Time
25 mins

⏱️
Total Time
40 mins

🍽️
Servings
4

This Garlic Herb Chicken with Creamy Broccoli Penne recipe offers a delightful blend of flavors that capture the essence of home-cooked comfort food. The tender, juicy chicken is infused with aromatic garlic and a bouquet of fresh herbs, providing a savory taste that pairs beautifully with the creamy penne pasta. Each bite brings together the robust flavor of the chicken, the freshness of the herbs, and the rich creaminess of the broccoli-infused sauce, making it a satisfying dish for any occasion.

Imagine a warm, inviting dinner with family and friends where every mouthful bursts with flavor. This dish is not only delicious but also quick to prepare, making it perfect for weeknight dinners or special gatherings. The vibrant green of the broccoli adds a stunning visual contrast to the creamy pasta, elevating its appeal on the plate. Whether you’re hosting guests or simply treating yourself, this Garlic Herb Chicken with Creamy Broccoli Penne is sure to impress.

Quick Recipe Highlights

  • Flavor Profile: The recipe combines garlic’s pungent bite with fresh herbs’ aromatic notes and creamy, buttery textures. The rich sauce envelops the penne, creating a harmonious blend of savory and creamy flavors.
  • Texture: The tender chicken contrasts with the al dente penne and the are crispy broccoli florets, creating a delightful medley of textures that pleases the palate.
  • Aroma: A mouthwatering aroma of roasting garlic and fresh herbs fills the air, making this dish irresistible even before the first bite.
  • Visual Appeal: Serve this dish garnished with a sprinkle of fresh herbs to enhance its beautiful presentation, featuring vibrant green broccoli and golden, herb-seasoned chicken.
  • Skill Level Needed: While the dish requires some familiarity with cooking techniques, it is approachable for home cooks of most skill levels.
  • Special Equipment: Basic kitchen tools like a pot for boiling pasta, a skillet for cooking chicken, and a mixing bowl for combining ingredients are all you will need.

Recipe Overview

  • Difficulty Level: This recipe is rated medium difficulty due to the need to coordinate cooking chicken while boiling pasta and preparing the sauce simultaneously, requiring some multitasking.
  • Category: As a main course, this meal is ideal for lunch or dinner, fitting perfectly into family meal planning or casual entertaining.
  • Cuisine: The dish takes inspiration from Italian cuisine, playing off traditional flavors seen in creamy pasta dishes while incorporating aromatic herbs and tender proteins.
  • Cost: The recipe is budget-friendly, utilizing affordable ingredients such as chicken breast, broccoli, and pasta, making it accessible for most households.
  • Season: This dish is versatile enough to be enjoyed year-round, but it shines especially in spring when fresh herbs and broccoli are at their peak.
  • Occasion: Perfect for family dinners, potlucks, or even as a comforting weeknight meal, this recipe suits a variety of occasions.

Why You’ll Love This Recipe

Garlic Herb Chicken with Creamy Broccoli Penne beautifully balances taste and texture, ensuring every bite is satisfying. The combination of succulent chicken marinated in garlic and herbs brings depth to the dish, while the creamy broccoli sauce provides richness. This symphony of flavors makes it a meal that will leave your taste buds wanting more.

In addition, the convenience of this recipe cannot be overstated. With a preparation time of just 15 minutes, followed by 25 minutes of cooking, you have a hearty meal on the table in under an hour. This quick turnaround is perfect for busy individuals and families looking to enjoy a wholesome dinner without extensive planning.

Nutritionally, this dish packs a punch with lean protein from the chicken and essential vitamins from the broccoli. Broccoli is not only rich in vitamins A, C, and K, but it also contributes dietary fiber, aiding digestion. Combining these ingredients makes this recipe a healthy choice in any meal plan.

Moreover, Garlic Herb Chicken with Creamy Broccoli Penne is fantastic for social occasions. As you share this meal with others, it fosters a sense of community and warmth, making it perfect for gatherings. Its eye-catching presentation also adds to the enjoyment, as everyone will appreciate the vibrant colors and appealing aroma.

Finally, the recipe stands out as an affordable option, leveraging elements from your pantry and fridge. This accessibility means that elevated meals don’t have to break the bank, encouraging you to explore and experiment in the kitchen without financial stress.

Historical Background and Cultural Significance

Garlic Herb Chicken with Creamy Broccoli Penne draws on the rich culinary traditions of Italian cuisine, where pasta is often the central element of meals. The incorporation of garlic highlights the Italian love for bold flavors, and using herbs showcases the region’s reliance on garden-fresh ingredients. This dish symbolizes the heart of family cooking, prevalent in Italian households where meals are created with love and shared among loved ones.

Culturally, pasta has been a staple in Italy for centuries, with its variations reflecting regional diversity. The use of creamy sauces in southern Italian recipes honors the traditions of combining local dairy products with fresh produce, leading to the creation of delicious pasta dishes. This recipe retains that spirit while incorporating elements like broccoli that have transcended the borders of Italian cuisine.

Over the years, Garlic Herb Chicken with Creamy Broccoli Penne has evolved, gaining popularity around the globe. Modern adaptations often include healthier ingredients or substitutions to cater to dietary preferences while maintaining the essence of traditional recipes. This evolution reinforces how food adapts to cultural influences, allowing everyone to enjoy a taste of Italian heritage.

Regionally, variations of this dish can be found worldwide, from creamy pasta varieties popular in the United States to lighter options in Mediterranean diets. This adaptability ensures its continued relevance in contemporary kitchens, celebrating traditional flavors while embracing innovation.

Ingredient Deep Dive

Chicken Breast:
Chicken breast is a lean cut of meat that has significant importance in various culinary cultures around the world. It provides an excellent source of protein, making it vital for building and repairing tissues. Additionally, chicken is versatile and can absorb various flavors, enhancing any dish it accompanies. Always choose firm, pink chicken for the best quality, and store it in the coldest part of your refrigerator. If you’re looking for alternatives, turkey or plant-based proteins can provide similar nutritional benefits.

Broccoli:
Broccoli is a cruciferous vegetable linked to numerous health benefits, including cancer prevention due to its high antioxidant content. With roots tracing back to ancient Italy, broccoli symbolizes health and wellness in many diets. When selecting broccoli, look for firm, dark green florets; avoid yellowing or wilting. Store in a breathable bag in the fridge to maintain freshness. If you need to substitute, kale or spinach can work well, although they will alter the dish’s texture slightly.

Penne Pasta:
Penne pasta is a tubular shape that excels in retaining sauces, making it a popular choice for creamy dishes. Originating from Italy, it is designed to mimic the edge of a quill, embodying the artistry of Italian cooking. Penne is usually made from durum wheat, providing a good amount of fiber and carbohydrates to fuel your day. When selecting pasta, opt for whole grain for added nutritional benefits, and store in a cool, dry place. Alternative shapes like rigatoni or farfalle can easily replace penne without drastically changing the recipe.

Garlic:
Garlic is a staple in cuisines worldwide, celebrated for its robust flavor and numerous health benefits, including anti-inflammatory properties. Its origin can be traced back to Central Asia, and over the years, it has become indispensable in many culinary traditions, particularly in Mediterranean cooking. When purchasing garlic, choose firm, unblemished bulbs for the best flavor. Store in a cool, dark place away from moisture. If fresh garlic isn’t available, garlic powder can be used as a substitute, although this will alter the dish slightly.

Common Mistakes to Avoid

  • Using Overcooked Chicken: Overcooking chicken can lead to dry meat. Always use a meat thermometer to check the internal temperature for optimal juiciness.
  • Burning Garlic: Garlic burns quickly; therefore, it should be added last or sautéed briefly to ensure it remains golden, not bitter.
  • Using Soggy Broccoli: When cooking broccoli, aim for crisp-tender. Overcooked broccoli loses its vibrant color and nutrients.
  • Overcrowding the Pan: When sautéing chicken, ensure it’s not overcrowded in the pan, which prevents proper browning and cooking.
  • Skipping Taste Testing: Always taste and adjust seasoning while cooking, as flavors develop, ensuring it meets your flavor profile.
  • Cooking Pasta Too Long: Pasta should be cooked al dente as it will continue cooking when mixed with the sauce, avoiding mushy noodles.
  • Neglecting Pasta Water: Reserve some pasta water when draining; this starchy liquid can help thicken the sauce to the desired consistency.
  • Ignoring Texture: Pay attention to the thickness of your sauce; it should cling to the pasta and not be overly watery or too thick.
  • Not Letting Ingredients Rest: Allow cooked chicken to rest before slicing to retain juices. This makes for more flavorful pieces.
  • Disregarding Presentation: Take a moment to plate properly; garnishing with fresh herbs or cheese can elevate the dish’s appeal.

Essential Techniques

Sautéing Garlic:
Sautéing garlic is crucial for releasing its flavor and aroma. To master this technique, melt butter or heat olive oil over medium heat. Add minced garlic and stir constantly. Watch carefully, as garlic can burn and turn bitter if cooked too long. A visual cue for success is golden, fragrant garlic, which will bring depth to your dish.

Cooking Chicken Properly:
Properly cooking chicken involves ensuring it reaches an internal temperature of 165°F. Start with a preheated pan to achieve a nice sear. Avoid flipping the chicken too soon to develop a golden crust. Common pitfalls include overcrowding the pan, which prevents browning, and using insufficient heat. Look for clear juices and firm texture signals that the chicken is cooked.

Cooking Pasta al Dente:
To cook pasta al dente, boil plenty of salted water and add your pasta when it reaches a rolling boil. Follow package instructions for timing but start testing a minute early. The pasta is ready when it’s firm to the bite but not crunchy. Avoid overcooking, which can lead to mushy pasta; it should retain a light chewiness.

Making a Creamy Sauce:
Creating creamy sauces involves combining ingredients like broth, cream, and cheese. Start by making a roux with butter and flour, then gradually whisk in liquids while stirring. Common pitfalls include adding liquids too quickly or not stirring enough, leading to clumping. The sauce should have a smooth, silky consistency that coats the back of a spoon when done.

Pro Tips for Perfect Garlic Herb Chicken with Creamy Broccoli Penne

1. Marinate your chicken for at least 30 minutes with garlic and herbs to enhance the flavor deeply.
2. Use a mix of fresh herbs for a more nuanced flavor—basil, parsley, or thyme are excellent choices.
3. Always reserve some pasta water before draining. This starchy water helps bring everything together.
4. For a healthier version, substitute some of the creamy component with Greek yogurt for a tangy kick.
5. Consider adding red pepper flakes for a touch of heat in the creamy sauce.
6. Pairing with a fresh lemon squeeze can brighten the dish, balancing the creaminess beautifully.
7. Experiment with seasonal vegetables like spinach or asparagus to diversify flavors and nutrition.
8. Allow the pasta to sit for a couple of minutes after mixing with the sauce; it absorbs the flavors better that way.

Variations and Adaptations

Regional variations of Garlic Herb Chicken with Creamy Broccoli Penne can include swapping the penne for gluten-free pasta, easily catering to dietary preferences. You can also incorporate seasonal ingredients such as zucchini or bell peppers. Conversely, you can switch up the sauce by using a tomato-based option for a lighter version.

For dietary modifications, consider making the recipe vegan by using plant-based chicken alternatives and coconut milk for creaminess. Adjust the herbs to fit your taste preferences, experimenting with fresh or dried varieties to make it your own.

Additionally, play with the spices: add lemon zest for brightness or smoked paprika for depth. Mixing textures can be achieved by roasting the broccoli for a crispy finish or garnishing with toasted breadcrumbs for added crunch. Let your creativity guide interpretation!

Serving and Presentation Guide

To plate Garlic Herb Chicken with Creamy Broccoli Penne attractively, start by layering a generous portion of pasta in the center of the plate. Arrange sliced chicken artfully over the pasta, then spoon the creamy sauce generously onto the chicken and pasta, allowing it to cascade down.

Enhance visual appeal by garnishing with finely chopped fresh parsley or a sprinkle of Parmesan cheese. Consider serving this dish with a slice of warm garlic bread and a simple side salad for a complete meal.

Temperature considerations are fundamental to serving; the dish should be hot to enhance flavor and texture. Use heated plates to keep food warm longer. Finally, portion control can help maintain a balanced meal—all while preventing excess food waste.

Wine and Beverage Pairing

For this delectable Garlic Herb Chicken with Creamy Broccoli Penne, a glass of Chardonnay pairs beautifully. Its crisp acidity complements the creaminess of the dish while balancing the savory flavors of the chicken. Alternatively, Pinot Grigio offers a light, refreshing contrast that pairs well with pasta.

If you prefer non-alcoholic options, serve a sparkling lemon-lime soda or herbal iced tea, providing a refreshing palate cleanser alongside the rich meal. Consider serving the drinks chilled to enhance the dining experience, ensuring they are ready upon plating.

For coffee or tea lovers, a lightly brewed green tea can enhance the meal, offering a subtle earthy flavor that won’t overpower. Always serve your beverages in appropriate glassware for a more sophisticated presentation.

Storage and Shelf Life

Garlic Herb Chicken with Creamy Broccoli Penne should be stored in airtight containers to maximize freshness. Refrigerated, it typically lasts up to 3-4 days. When reheating, ensure the dish reaches a temperature of 165°F to ensure safety.

For longer storage, consider freezing portions. Use freezer-safe containers and store them for up to three months. To prevent freezer burn, press as much air as possible from the bag before sealing.

Signs of spoilage include a sour smell or change in texture. If reheating, add a splash of cream or a bit of reserved pasta water to revive the sauce’s creaminess.

Make Ahead Strategies

To streamline your dinner plans, consider pre-prepping components of Garlic Herb Chicken with Creamy Broccoli Penne. You can marinate the chicken up to a day in advance, allowing for deep flavor penetration while also ensuring crisp-textured meat.

Cook the pasta al dente, then toss it lightly with olive oil to prevent sticking before storing it in the fridge, where it will stay fresh for several days. Make the creamy sauce ahead of time, but add fresh ingredients like broccoli just before serving to maintain their vibrant color and crunch.

Assembly of the dish can be done within minutes; simply reheat parts as needed and mix, ensuring freshness while saving time on busier nights.

Scaling Instructions

Scaling Garlic Herb Chicken with Creamy Broccoli Penne is relatively straightforward. To halve the recipe, simply divide all ingredients and cooking times accordingly. For doubling or tripling, ensure your cooking equipment can handle the increased volume without overcrowding, especially in the skillet.

Monitoring timing modifications is essential as well; larger quantities can require additional cooking time, especially for the chicken. Use meat thermometers to ensure each piece is cooked correctly, maintaining food safety.

When it comes to storage, ensure you have appropriately sized containers for the increased portions. Store smaller sections in individual servings, making reheating easier and more convenient.

Nutritional Deep Dive

Garlic Herb Chicken with Creamy Broccoli Penne offers a balanced macro breakdown, with each serving providing a healthy dose of protein, carbohydrates, and fats. A typical serving includes lean chicken for protein, pasta for carbohydrates, and creamy sauce for fats, catering to energy needs throughout the day.

On the micronutrient front, broccoli serves as an excellent source of vitamins K and C, alongside its fiber content, promoting digestive health and immunity. The addition of herbs contributes essential minerals while also enhancing the flavors without adding calories.

For those mindful of dietary considerations, the dish can be adjusted to incorporate whole grain pasta for fiber and healthier fats in the sauce by using lighter dairy alternatives. Also, portion analysis can help manage overall caloric intake while enjoying the rich flavors without guilt.

Dietary Adaptations

For gluten-free needs, use gluten-free pasta varieties, swapping traditional penne with alternatives made from rice or quinoa. Be sure to check labels to ensure they meet gluten-free packaging standards.

Dairy-free adaptations can involve substituting traditional cream with coconut cream or a nut-based alternative, creating a similar creamy texture while catering to lactose intolerance.

For a vegan twist, replace chicken with plant-based proteins, such as tempeh or chickpeas, and use non-dairy cheese options for creamy richness. For those following low-carb diets, consider zoodles (zucchini noodles) as a pasta substitute, reducing carb count while maintaining freshness.

Keto adaptations could include increasing healthy fats in the sauce and using protein-rich ingredients, while Paleo diets focus on whole, unprocessed foods, simplifying the recipe by removing dairy and traditional pasta for compliant alternatives.

Troubleshooting Guide

If you experience texture issues with your sauce, simply adjust by adding reserved pasta water to reach your desired consistency. For flavor balance, always taste and season in stages, making necessary adjustments as cooking progresses.

Temperature problems can often arise when reheating. Be vigilant and use thermometers to ensure chicken reaches safe eating temperatures. For ingredient substitutions, keep in mind the flavors of your replacements, as stronger substitutes can affect the overall taste.

Timing concerns, especially with the chicken, can be mitigated by checking for doneness early and adjusting as necessary rather than adhering strictly to times. A common mistake is to rush through cooking; take your time to achieve the best result.

Recipe Success Stories

Our community loves sharing their successes with Garlic Herb Chicken with Creamy Broccoli Penne. Home cooks rave about the unique flavor profiles they’ve achieved by experimenting with different herbs, leading to delightful variations suitable for their family’s tastes.

Many readers have showcased their adaptations, including using gluten-free pasta or adding seasonal vegetables based on availability—showing that this recipe can be tailored to any palate or dietary need. The feedback helps others find creative ideas for zesty twists and unexpected textures.

Photography enthusiasts have provided tips on plating techniques, showing how to present the dish beautifully while capturing the rich colors and creamy sauce for social sharing. The community interaction demonstrates the recipe’s versatility and draws inspiration from one another’s culinary experimentation.

Frequently Asked Questions

1. Can I use frozen broccoli for this recipe?
Yes, while fresh broccoli is recommended for texture and flavor, frozen broccoli can be used if thawed and drained properly. It’s also essential to adjust the cooking time slightly for best results.

2. How can I make this dish dairy-free?
To make Garlic Herb Chicken with Creamy Broccoli Penne dairy-free, substitute traditional cream with coconut milk or almond milk. A plant-based cheese can also enhance creaminess without dairy.

3. Is this recipe suitable for meal prep?
Absolutely! This dish stores well, allowing for delicious reheatable meals throughout the week. Just be sure to store each component separately to maintain freshness.

4. Can I use chicken thighs instead of breasts?
Yes, chicken thighs offer a richer flavor and can be used in place of breasts. Just adjust cooking times, as thighs may take slightly longer to cook through.

5. What should I serve with this dish?
Garlic Herb Chicken with Creamy Broccoli Penne pairs wonderfully with a light salad or garlic bread, complementing the creamy richness of the main dish without overwhelming it.

6. Can I add more vegetables to the recipe?
Certainly! Feel free to add seasonal vegetables such as spinach, bell peppers, or zucchini to enhance the nutritional profile while adding color and texture.

7. How do I ensure the chicken stays juicy?
To keep chicken juicy, avoid overcooking and let it rest after cooking for a few minutes before slicing. This allows juices to redistribute, enhancing overall flavor.

8. Can leftovers be frozen?
Yes, you can freeze leftovers. Make sure they’re stored in airtight containers and consumed within three months for optimal texture and flavor.

9. Is this recipe customizable based on dietary needs?
Very much so! This recipe is versatile and can be modified for gluten-free, dairy-free, and vegan diets with suitable ingredient substitutions.

10. What is the best way to reheat this dish?
For best results, reheat Garlic Herb Chicken with Creamy Broccoli Penne in a skillet over low heat with a splash of cream or pasta water to retain moisture.

11. How much garlic should I use for this recipe?
You can use 4-6 cloves of garlic depending on your preference. Adjust to your taste for milder or stronger garlic flavor.

12. Can I use different pasta types?
Yes! While penne is recommended, feel free to use any pasta shape you prefer. Just remember to adjust cooking times accordingly based on the type you choose.

Additional Resources

To enhance your culinary skills, consider exploring related recipes that complement Garlic Herb Chicken with Creamy Broccoli Penne. Ideas include light salads, flavorful garlic breads, or creamy soups that can serve as delicious starters.

For technique guides, check out resources focusing on sautéing and sauce-making to refine essential cooking methods that will benefit this dish. Ingredient information is also invaluable; understanding their properties can help with timely cooking adjustments and substitutions.

If you’re looking for equipment recommendations, silicone spatulas and heavy-bottomed pots can elevate your cooking experience. Seasonal variations can adapt this recipe to utilize fresh ingredients available in your local markets, inspiring you to embrace what’s in season.

Join the Conversation

We would love for you to share your experiences with Garlic Herb Chicken with Creamy Broccoli Penne! Engage with us on social media, posting pictures of your culinary creations and feedback on the recipe.

Consider photography tips to enhance your food styling skills, capturing the rich colors and textures of this dish on camera. Your community feedback, suggestions, and creative variations inspire others to try and enjoy this fantastic recipe!

The Recipe

Garlic Herb Chicken with Creamy Broccoli Penne

Serves: 4

Prep Time: 15 mins

Cook Time: 25 mins

Total Time: 40 mins

Kitchen Equipment Needed

  • Large pot for boiling pasta
  • Skillet for cooking chicken
  • Mixing bowl
  • Meat thermometer
  • Colander for draining pasta

Ingredients

  • 4 chicken breasts
  • 2 cups penne pasta
  • 2 cups fresh broccoli florets
  • 4 cloves garlic, minced
  • 1 cup heavy cream
  • 1/2 cup grated Parmesan cheese
  • 2 tablespoons olive oil
  • Salt and pepper to taste
  • Fresh herbs (basil, parsley, or thyme) for garnish

Directions

  1. In a pot of boiling salted water, cook the penne pasta according to package instructions until al dente. Add the broccoli florets for the last 3 minutes of cooking.
  2. Meanwhile, season the chicken breasts with salt, pepper, and minced garlic. Heat olive oil in a skillet over medium heat, then add the chicken and cook until browned and cooked through, about 6-7 minutes per side.
  3. Remove the chicken from the skillet and allow it to rest before slicing.
  4. In the same skillet, reduce the heat to low and stir in heavy cream and Parmesan cheese, stirring until the cheese is melted and combined. Add reserved pasta water if needed for desired thickness.
  5. Once the pasta and broccoli are drained, add them to the skillet and toss to combine thoroughly with the cream sauce.
  6. Slice the chicken and serve it over the creamy broccoli penne, garnishing with freshly chopped herbs and additional Parmesan if desired.

Recipe Notes

  • Feel free to adjust herbs based on personal preferences or seasonal availability.
  • For a touch of heat, consider adding red pepper flakes to the sauce.
  • This recipe can easily be customized with any favorite vegetables.
  • Store leftovers in an airtight container for up to four days in the refrigerator.