Delightful Hawaiian Pineapple Cake Recipe for Tropical Taste Lovers

Hawaiian Pineapple Cake: A Tropical Delight for Every Occasion

⚖️
Difficulty
Easy

⏲️
Prep Time
20 mins

🕒
Cook Time
30 mins

⏱️
Total Time
50 mins

🍽️
Servings
8

Welcome to the tropics with our delightful Hawaiian Pineapple Cake! This lovingly crafted dessert is not only a feast for the taste buds but also a visual delight. Combining the sweetness of ripe pineapples with a moist and tender cake, every slice transports you to a sunny Hawaiian beach, making it perfect for any occasion. Whether it’s a birthday party or a casual family gathering, this cake stands out with its vibrant flavors and inviting aroma.

Indulging in this Hawaiian Pineapple Cake is all about the layers of flavor. The irresistible blend of fresh pineapple, creamy coconut, and a hint of vanilla creates a flavor explosion that’s both refreshing and satisfying. Each bite is enhanced by the cake’s fluffy texture, resulting in a dessert that feels light yet indulgent at the same time. Topped with a luscious cream cheese frosting, this cake is sure to impress anyone who takes a piece!

Quick Recipe Highlights

  • Flavor Profile: Sweet and tangy with a hint of coconut and vanilla.
  • Texture: Moist, fluffy cake with a creamy frosting.
  • Aroma: Tropical fragrances of pineapple paired with rich vanilla.
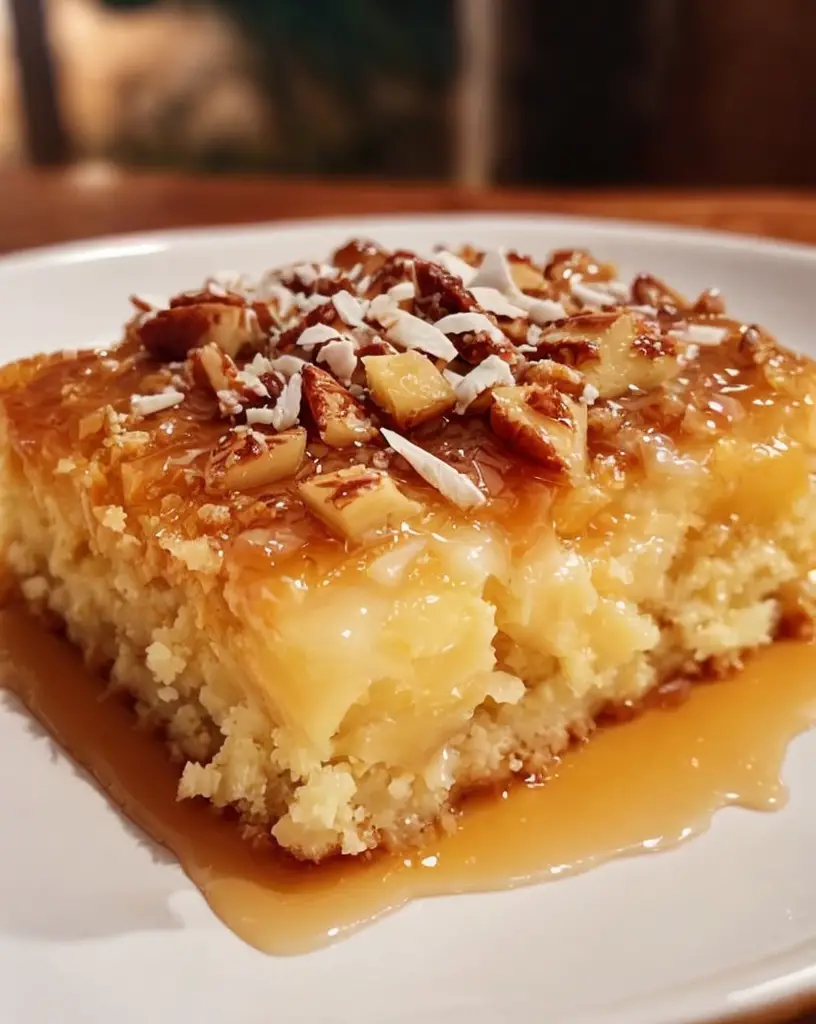
  • Visual Appeal: A golden cake layered with rich cream cheese frosting and pineapple garnish.
  • Skill Level Needed: Perfect for beginner bakers looking to impress.
  • Special Equipment: A round cake pan and mixing bowls are all you need!

Recipe Overview

  • Difficulty Level: This Hawaiian Pineapple Cake is designed for amateur bakers and requires basic mixing and baking skills.
  • Category: A delightful dessert that works perfectly for brunch, parties, or simply as a sweet treat.
  • Cuisine: Inspired by the vibrant flavors of Hawaiian cuisine, this cake is a true representation of tropical desserts.
  • Cost: With approachable ingredients, this cake can be made without breaking the bank.
  • Season: Best enjoyed in warmer months, this cake brings tropical vibes year-round.
  • Occasion: Ideal for birthdays, beach parties, or any gathering where celebration is on the menu.

Why You’ll Love This Recipe

This Hawaiian Pineapple Cake brings delight with every bite, highlighting the perfect balance of sweet and tangy. The delightful notes of fresh pineapple mingle beautifully with a moist cake, creating a dessert that is not only tasty but also satisfying. The texture is sensational; it boasts a fluffy crumb that melts in your mouth, complemented perfectly by the creamy frosting.

In terms of convenience, this cake is simple to prepare and can be made ahead, which takes the pressure off entertaining guests. Plus, the baking time is modest, allowing you to focus on other meal preparations without stress. With easily accessible ingredients, this recipe does not require any specialized skills or tools, making it perfect for bakers of all levels.

Nutritionally, this cake incorporates fresh pineapple, which is rich in vitamins and antioxidants. It offers a lightness that can make indulgence feel a little less guilty. Plus, being a crowd-pleaser, it’s a fantastic way to introduce vegetables or fruits into the dessert spectrum.

This Hawaiian Pineapple Cake is fabulous for social gatherings, promoting conversation and connection around the dining table. It’s a dessert that not only satisfies a sweet craving but could also spark joy and laughter among friends and family as they enjoy their slice of paradise together.

Last but not least, the cost-effectiveness of this cake is notable. With minimal ingredients, you can create a dessert that looks and tastes exquisite, offering great value for any budgeting chef without compromising on taste or presentation.

Historical Background and Cultural Significance

The origins of Hawaiian Pineapple Cake trace back to the rich agricultural heritage of Hawaii, where pineapples were cultivated extensively. As the pineapple industry flourished, cakes incorporating this tropical fruit became a beloved dessert among locals and visitors alike.

Culturally, pineapple symbolizes hospitality in Hawaiian tradition. Thus, this cake serves as a delightful centerpiece during gatherings, embodying the spirit of ohana (family) and the warmth of Hawaiian hospitality.

Over the years, the recipe has evolved from vintage family favorites to modern variations, showcasing diverse baking styles and flavors while honoring its roots. Newer adaptations have introduced unique twists like coconut cream or macadamia nuts, reflecting the vibrant nature of Hawaiian cuisine.

Today, Hawaiian Pineapple Cake is not just a dessert; it represents a joyful celebration and appreciation for the culinary influences that Hawaii has imparted to the world, making every bite a nod to paradise.

Ingredient Deep Dive

Pineapple: This tropical fruit brings both flavor and moisture to the cake. Nutritionally, pineapple is rich in vitamin C and bromelain, an enzyme that aids digestion. When selecting pineapples, look for ones that are firm and slightly soft at the stem end. Store fresh pineapple in the fridge and consume within a week for the best flavor. If fresh is unavailable, canned or frozen can be substituted, ensuring it’s well-drained to maintain cake integrity.

Coconut: Coconut adds a creamy richness that transforms the texture of the cake while enriching its flavor. Nutritional benefits include healthy fats and fiber. It’s best to use unsweetened coconut flakes for balance. Store in a cool, dry place, and if you have a sweetened version, adjust sugar accordingly in the recipe.

Common Mistakes to Avoid

  • Overmixing the batter can lead to a dense cake. Mix just until the ingredients are combined.
  • Forgetting to sift the flour may result in clumps and uneven texture.
  • Not preparing the cake pan properly could lead to sticking. Grease and flour the pan adequately.
  • Using canned pineapple without proper draining can make the cake soggy; always ensure excess liquid is removed.
  • Ignoring the oven’s temperature can lead to overcooking; always preheat your oven.
  • Not testing the cake for doneness can result in an undercooked center; use a toothpick to check.
  • Neglecting to cool the cake before frosting can cause the frosting to melt and run.
  • Not allowing the cake layers to cool completely can lead to structural issues when stacking.

Essential Techniques

Mixing the Batter: Proper mixing is crucial for incorporating air into the batter for a fluffy cake. Use the creaming method to beat sugar and butter until light and fluffy, then add eggs one at a time. Be cautious not to overmix, as this can affect the crumb. A light hand at this stage leads to a tender crumb.

Frosting Application: Applying frosting can be an art! Start with a crumb coat to lock in the crumbs, then proceed to frost the top and sides. A cake scraper can help achieve smooth edges. This ensures a polished, professional finish that enhances the cake’s presentation.

Pro Tips for Perfect Hawaiian Pineapple Cake

1. Use room temperature ingredients for a smoother batter and better rise.

2. Experiment with different types of pineapples—fresh, canned, or dried—to discover your favorite flavor profile.

3. Add a splash of rum for an adult twist that pairs wonderfully with the flavors.

4. Incorporate shredded coconut into the batter for extra flavor and texture.

5. Chill your frosting slightly before spreading to achieve a thicker consistency and prevent melting.

6. Garnish with toasted coconut flakes on top for an appealing finish and added crunch.

7. Allow the cake to rest overnight for flavors to meld and deepen.

8. Consider using cream cheese with a hint of lime for a tangy twist in the frosting.

Variations and Adaptations

For those seeking unique takes on the Hawaiian Pineapple Cake, consider experimenting with different fruit additions, like mango or passionfruit, to embellish the tropical flavor.

Seasonally, you can incorporate spices like cinnamon and nutmeg in the batter for a warm autumn twist, transforming it into a delightful fall dessert.

For dietary modifications, using gluten-free flour or dairy-free cream cheese can make this cake accessible to those with dietary restrictions.

If you crave varied textures, incorporating chopped nuts or using a layer of pineapple upside-down cake as a base can add a new dimension.

Serving and Presentation Guide

For an inviting presentation, serve slices on white plates to highlight the colorful frosting and garnishes. Add fresh pineapple slices or mint leaves as garnishes to complement the tropical theme.

When plating, consider cutting the cake into triangles for a decorative presentation. Serve chilled for an energizing dessert that’s refreshing, especially during warm weather.

Temperature-wise, allowing the cake to reach room temperature before serving enhances flavors. This way, each bite is a perfect balance of sweetness and tanginess.

Wine and Beverage Pairing

A light, fruity white wine, such as Moscato, pairs perfectly with the sweetness of the Hawaiian Pineapple Cake, enhancing the overall experience.

If you prefer non-alcoholic options, a refreshing iced tea infused with lime can complement the tropical flavors, helping to cleanse the palate.

For coffee lovers, a smooth, mildly roasted coffee enhances the flavor profiles, offering a delightful contrast to the sweetness of the cake.

Storage and Shelf Life

Store the Hawaiian Pineapple Cake in an airtight container at room temperature for up to three days. If you want to keep it longer, refrigerate for up to a week, ensuring it stays moist.

For those looking to freeze the cake, wrap it tightly in plastic wrap and then in aluminum foil. It can last up to three months in the freezer. To enjoy, thaw overnight in the fridge before serving.

Make Ahead Strategies

You can bake the cake layers in advance and store them wrapped tightly. Preparing the frosting a day ahead makes assembly a breeze!

Consider chilling the layers before frosting to stabilize the cake, allowing for easier assembly without slipping or sliding.

Scaling Instructions

Scaling this recipe for larger gatherings is simple! When doubling or tripling the recipe, remember to increase baking time slightly, keeping an eye on doneness.

For smaller gatherings, halving the recipe works perfectly, but adjust pan sizes accordingly to maintain the structure and baking consistency.

Nutritional Deep Dive

This Hawaiian Pineapple Cake offers a moderate dose of carbohydrates and sugars, thanks to its pineapple content. Each slice provides essential vitamins and minerals while being relatively low in saturated fat.

For those mindful of their diet, the addition of fresh fruit provides natural sugars, increasing fullness and satisfaction with a lighter indulgence.

Dietary Adaptations

The Hawaiian Pineapple Cake can easily be made vegan by substituting eggs with flaxseed meal and using non-dairy milk for moisture.

For gluten-free needs, replace regular flour with a 1:1 gluten-free baking blend to maintain the cake’s fluffy texture.

Troubleshooting Guide

If your cake is dry, ensure you measure flour properly by scooping it directly from the bag with a spoon rather than packing it down in the measuring cup.

For overly dense cake, check your oven temperature with an oven thermometer to avoid underbaking or overbaking.

Recipe Success Stories

Frequently Asked Questions

Can I use fresh pineapple instead of canned?

Absolutely! Fresh pineapple will add a delightful and vibrant flavor to the cake. Just ensure to chop it into small pieces and drain any excess juice before adding it to the batter.

How can I make this a healthier option?

You can replace the sugar with honey or agave in moderation and use whole wheat flour for added fiber. Incorporating Greek yogurt into the frosting also increases the nutritional value without compromising on taste.

Can I freeze the cake?

Yes! Make sure to wrap it tightly in plastic wrap followed by aluminum foil to prevent freezer burn. It keeps well for about three months; just thaw it overnight in the fridge before enjoying.

What frosting pairs best with this cake?

A classic cream cheese frosting perfectly complements the flavors of the Hawaiian Pineapple Cake. However, you can also opt for whipped cream or coconut frosting for a tropical twist.

Is this cake suitable for kids?

Definitely! The sweet, fruity flavors make it appealing to children. Just be mindful of any allergies or dietary restrictions before serving.

How do I know when the cake is done?

Insert a toothpick into the center of the cake. If it comes out clean or with a few moist crumbs attached, the cake is ready. Be cautious, as overbaking can lead to dryness.

Can I substitute eggs in the recipe?

Yes, you can use unsweetened applesauce (1/4 cup per egg) or flaxseed meal mixed with water as an egg substitute, which works wonderfully in keeping the cake moist.

What should I do if my frosting is too runny?

To thicken the frosting, simply add more powdered sugar until you reach the desired consistency. Chilling the frosting can also help it firm up.

Can I add other fruits to this cake?

Certainly! Consider adding diced mango or shredded coconut for added texture and flavor. Just be sure to adjust the liquid proportions accordingly to avoid a soggy batter.

What’s the best way to store leftovers?

Store leftover cake in an airtight container in the refrigerator for up to a week. It can also be frozen for long-term storage, ensuring every slice stays fabulous for future enjoyment.

Additional Resources

For those who enjoy tropical desserts, check out recipes for coconut macaroons or passionfruit mousse to accompany your Hawaiian Pineapple Cake. Techniques in cream frosting application can be found in our frosting guides for those looking to enhance their baking arsenal.

Join the Conversation

We’d love to hear how your Hawaiian Pineapple Cake turned out! Share your photos and reviews on social media, and don’t hesitate to try variations or suggestions from our community. Your creativity inspires others in their baking journeys!

The Recipe

Hawaiian Pineapple Cake

Serves: 8

Prep Time: 20 mins

Cook Time: 30 mins

Total Time: 50 mins

Kitchen Equipment Needed

  • Mixing bowls
  • Round cake pans
  • Electric mixer
  • Spatula
  • Toothpick (for testing doneness)

Ingredients

  • 2 cups all-purpose flour
  • 1 1/2 cups sugar
  • 1 cup crushed pineapple, drained
  • 1/2 cup unsweetened coconut flakes
  • 1/2 cup softened butter
  • 3 large eggs
  • 1 teaspoon baking soda
  • 1 teaspoon vanilla extract
  • 1/2 teaspoon salt

Directions

  1. Preheat your oven to 350°F (175°C) and grease the cake pans.
  2. In a large bowl, cream together sugar and butter until light and fluffy.
  3. Add eggs one at a time, mixing well after each addition.
  4. Stir in the crushed pineapple, coconut flakes, and vanilla extract.
  5. In another bowl, mix flour, baking soda, and salt together.
  6. Gradually add the dry ingredients to the wet mixture, stirring until just combined.
  7. Divide the batter evenly between prepared cake pans and smooth the tops.
  8. Bake for 25-30 minutes, or until a toothpick inserted into the center comes out clean.
  9. Allow cakes to cool in pans for 10 minutes, then transfer to wire racks to cool completely.
  10. Prepare your favorite frosting and frost the cooled cakes before serving.

Recipe Notes

  • For a richer flavor, consider adding a teaspoon of coconut extract to the batter.
  • This cake can be made a day in advance; just store it properly to maintain moisture.
  • Feel free to decorate with fresh pineapple slices or maraschino cherries for a festive look.

Delicious Avocado Toast with Cherry Tomatoes, Feta, and Walnuts

Avocado Toast with Cherry Tomatoes, Feta, and Walnuts: A Flavorful Breakfast Delight

⚖️
Difficulty
Easy

⏲️
Prep Time
10 mins

🕒
Cook Time
5 mins

⏱️
Total Time
15 mins

🍽️
Servings
2

Avocado toast has taken the culinary world by storm, and for good reason! This Avocado Toast with Cherry Tomatoes, Feta, and Walnuts is not only visually appealing but also a delightful explosion of flavors. The creamy richness of ripe avocado pairs exceptionally well with the burst of sweetness from juicy cherry tomatoes, tangy feta cheese, and crunchy walnuts, creating a symphony of taste in every bite. Whether you’re kickstarting your day with breakfast or enjoying a light lunch, this recipe delivers satisfaction and nutrition.

Imagine the aroma of toasted bread caramelizing in the oven as you prepare your toppings. The colors on this dish are vibrant and inviting: the lush green of the avocado, bright red tomatoes, and white feta crumbles create a feast for the eyes. Not only is this recipe quick to whip up, but it’s also packed with healthy fats, proteins, and essential nutrients, making it a well-rounded meal to fuel your day.

Quick Recipe Highlights

  • Flavor Profile: The interplay of creamy avocado, zesty tomatoes, and salty feta creates a balanced flavor that is both refreshing and satisfying.
  • Texture: Each bite offers a combination of creamy avocado, crispy bread, juicy tomatoes, and crunchy walnuts, enhancing the overall experience.
  • Aroma: The dish emits an enticing aroma of toasted bread coupled with fresh, earthy notes from the nuts and herbs.
  • Visual Appeal: The colorful ingredients layered on toasted bread make this dish a stunning centerpiece for any meal.
  • Skill Level Needed: This recipe requires minimal cooking skills, perfect for beginners and experienced cooks alike.
  • Special Equipment: You will need a toaster or oven for the bread, a cutting board, and a sharp knife for preparation.

Recipe Overview

  • Difficulty Level: This easy recipe is suitable for any cooking skill level, making it an accessible option for everyone.
  • Category: This recipe falls under breakfast or brunch, but it makes an excellent light lunch option as well.
  • Cuisine: Inspired by Mediterranean flavors, this dish highlights healthy, fresh ingredients commonly found in that region.
  • Cost: The ingredients are affordable and sourced easily, making this a budget-friendly meal.
  • Season: Fresh tomatoes are abundant during summer, but this recipe can be enjoyed year-round with proper ingredient selection.
  • Occasion: Ideal for casual weekends, brunch gatherings, or when you need a quick meal after a busy day.

Why You’ll Love This Recipe

Every bite of this avocado toast brings an exciting adventure of taste and texture. The creamy avocado acts as the perfect base, providing a satisfying mouthfeel that is complemented by the crunch of walnuts and freshness of tomatoes. This hearty, yet light dish caters to both simplicity and indulgence, making it a versatile option any time of the day.

Furthermore, preparation is a breeze! With just a few simple steps, you can enjoy a meal in under 15 minutes. This convenience makes it ideal for busy mornings when you need a nutritious breakfast without toiling in the kitchen. Mix and match ingredients to suit your palate, and enjoy personalized versions tailored to your taste preference.

Nutritionally, this avocado toast is a powerhouse meal. Avocados are rich in healthy monounsaturated fats, fiber, and essential vitamins like E and K. Pairing them with calcium-rich feta, and proteins from walnuts ensures this dish supports a balanced diet, likely contributing positively to heart health and weight management.

Socially, this dish offers great value, especially during brunch with friends. Its vibrant colors and pleasing presentation are bound to impress, encouraging lively conversation around the table. This recipe not only nourishes the body but also enriches social connections while enjoying a healthy meal.

Cost-effectiveness is another reason you will love this recipe! Using affordable, fresh ingredients, you can make this gourmet-style meal at home without breaking the bank. The simplicity of the dish, combined with its accessibility, makes it a great option for anyone looking to incorporate healthy eating habits into their lifestyle.

Historical Background and Cultural Significance

Avocado toast has its roots in the culinary traditions of various cultures that feature bread and spreads or toppings. The original essence stems from the Mediterranean, where the combination of bread with fresh produce is commonplace. Over the years, this simple pairing has evolved into a staple in many breakfast venues worldwide.

Culturally, avocado toast embodies a celebration of health and simplicity. Its rise to popularity has coincided with the global shift towards healthier eating habits. As people look for ways to incorporate more fresh ingredients into their diets, avocado toast stands as a symbol of wholesome, guilt-free eating and has fostered a large following on social media platforms, with countless variations celebrated.

The evolution of avocado toast is fascinating, moving from a simple breakfast item to a trendy dish that can be found in high-end cafes. Its journey has led it to the tables of food lovers, setting a trend that encourages the use of fresh, local ingredients, and sustainable food practices.

Regional variations of avocado toast are not uncommon. In various parts of the world, different toppings have surfaced, such as poached eggs in Australia or smoked salmon in Nordic countries. Each regional spin not only enhances the dish but celebrates local flavors and traditions.

Ingredient Deep Dive

Avocado

Avocados are celebrated not just for their rich, creamy texture but also for their nutritional value. They are a source of healthy monounsaturated fats, vitamins E, C, B6, and K. When selecting avocados, look for ones that yield slightly to pressure yet still have some firmness. Proper storage involves keeping them at room temperature until ripe, and once cut, they should be kept in an airtight container to prevent browning.

Cherry Tomatoes

Cherry tomatoes are often praised for their sweetness and are a versatile ingredient in many dishes. Nutritionally, they are low in calories but high in vitamins A, C, and K. When choosing cherry tomatoes, opt for those with vibrant colors and a firm texture. Store them at room temperature for optimal flavor, and if you have leftovers, keep them in the refrigerator, but consume them quickly to maintain freshness.

Feta Cheese

Feta cheese adds a salty tang and creamy texture to dishes, anchoring the flavor profile of this avocado toast. Its origins stem from Greek culinary traditions. Nutritionally, feta is lower in fat compared to many cheeses and provides a good source of calcium and protein. When selecting feta, look for fresh cheese with a clean taste. Store it in brine to maintain moisture and flavor. If you’re looking for alternatives, consider goat cheese or ricotta for similar textures and flavors.

Walnuts

Walnuts are not only essential for adding crunch to your toast but also boast a plethora of health benefits, including omega-3 fatty acids and antioxidants. When purchasing walnuts, select pieces that are plump and free of any rancid odor. To store, keep them in a cool, dry place, and consider refrigerating or freezing them for long-term use. If walnuts are not available, pecans or almonds serve as great substitutes in this recipe.

Common Mistakes to Avoid

  • Using overripe avocados: Ensure your avocado is ripe but not too mushy to maintain the perfect texture on your toast.
  • Under-seasoning: Don’t skip seasoning your avocado with salt and pepper to enhance its natural flavor.
  • Not toasting bread properly: Aim for a golden-brown toast; it adds a necessary crunch to balance the creaminess of the toppings.
  • Skipping the acid: A sprinkle of lemon juicebrightens the flavors, so don’t overlook this step.
  • Choosing stale bread: Fresh bread makes a significant difference in taste and texture—opt for a good quality loaf.
  • Piling on too many toppings: Keep the balance right; don’t overwhelm the avocado’s delicate flavor with excess ingredients.
  • Forgetting about presentation: Take the time to arrange the toppings thoughtfully for an appealing visual look.
  • Using generic oils: Invest in a good quality olive oil to drizzle on top for added richness and flavor.
  • Not adjusting texture: If you find the avocado too dense, consider mashing it with a fork or blending it for a smoother spread.
  • Serving at the wrong temperature: Enjoy your avocado toast immediately after preparation for optimal taste and texture.

Essential Techniques

Mashing Avocado

Mashing avocado is a crucial step if you prefer a creamy spread on your toast. To master this technique, use a fork to mash until smooth, adding a touch of lemon juice to prevent browning and enhance flavor. Avoid over-mashing to keep some chunks intact for texture. Visual cues for perfect mashed avocado include a vibrant green color without browning and a smooth, spreadable consistency.

Toasting Bread

Toasting is vital as it provides a crunchy base for the toppings. Use a toaster or oven, and aim for that perfect golden brown without burning. Keep an eye on it as toasting times can vary based on the thickness of the bread. The right toast should be crisp and able to hold up the toppings without becoming soggy.

Balancing Flavors

Creating a balance of flavors will elevate your avocado toast. Always season the avocado and be mindful of the saltiness from feta. Incorporate acidity with lemon juice or balsamic glaze for extra brightness. Taste as you go to ensure each component complements the others harmoniously.

Layering Ingredients

The order of layering can affect the final experience of your dish. Start with the avocado spread, follow with your toppings like feta and tomatoes, and finish with walnuts for a textural contrast. Visually appealing layers make the dish inviting while ensuring flavor distribution in every bite.

Pro Tips for Perfect Avocado Toast

– Choose the right bread: Sourdough or whole grain always yields the best texture and flavor.
– Season generously: Don’t shy away from salt and pepper; they enhance the taste of avocado tremendously.
– Experiment with spices: Adding a pinch of smoked paprika or chili flakes can elevate the flavor profile further.
– Use fresh herbs: Chopped basil or cilantro can give a fresh aroma that complements the other ingredients.
– Add a touch of sweetness: Drizzling honey can create a delightful contrast with the feta’s saltiness.
– Use quality olive oil: A sprinkle of high-quality olive oil right before serving enriches flavor and adds a luxurious touch.
– Serve immediately: Enjoying your avocado toast fresh ensures the best taste and texture experience.
– Try different nut toppings: Swapping walnuts for almonds or pecans can add varied flavors and textures to the dish.

Variations and Adaptations

For a regional twist, consider using diced red onion or jalapeños for a Southeast Asian influence, or try adding an egg on top for extra protein. Seasonal adaptations are easy too; in autumn, top with roasted pumpkin seeds or cranberries for a festive touch. Dietary modifications cater to specific needs—vegan options can exclude cheese or replace it with a dairy-free alternative. Flavor adaptations might mean adding local spices or a splash of hot sauce for those who love heat. Textural modifications can be achieved by using different bread types, such as rye or gluten-free options, while presentation can be enhanced with colorful garnishes or additional herb sprigs.

Serving and Presentation Guide

For a polished presentation, serve your avocado toast on a rustic wooden board, showcasing its colors. Drizzle with olive oil and sprinkle with sesame seeds for an added touch. Garnish with microgreens or edible flowers for sophistication, or serve it alongside a bright salad for a contrast in textures. Temperature is key; serve toasted bread warm, and consider pairing it with a chilled beverage for a refreshing combination. To control portions, cut the toast into halves or quarters, making it more shareable during gatherings.

Wine and Beverage Pairing

A crisp Sauvignon Blanc pairs wonderfully with the fresh flavors of your avocado toast, accentuating the dish’s brightness. For those who prefer non-alcoholic options, a bright iced tea or sparkling water with lemon can balance out the dish’s richness. If coffee is your drink of choice, consider a smooth cold brew that complements rather than overwhelms the flavors, making for a refreshing brunch experience. Ensure the wine is chilled, enhancing the enjoyment of the meal.

Storage and Shelf Life

To store leftover avocado toast properly, keep all elements separately when possible. The bread can be stored in an airtight container at room temperature, while toppings should be kept in the fridge. Avocados will brown quickly, so consider wrapping any leftover spread tightly in plastic wrap, pressing out air to minimize oxidation. When reheating toast, use a toaster to restore crispiness, rather than a microwave which can make it soggy. Enjoy leftover toppings within a day or two for optimal freshness.

Make Ahead Strategies

Prepping elements of this dish in advance can save time. Mash your avocado and store it in the fridge with a layer of plastic wrap pressed against the surface. You can also pre-chop your tomatoes and walnuts, storing them in airtight containers. Assemble everything right before serving to maintain freshness. If you plan to reheat, toast the bread fresh and layer right away for the best texture. Consider adding any fresh herbs just before serving to maximize flavor impact.

Scaling Instructions

Halving the recipe is as simple as cutting ingredients in half, ideal for those cooking for one. Doubling or tripling may require using larger baking sheets or pans for batching, particularly when toasting bread. Timing may slightly vary, so check for doneness of bread and the freshness of toppings. For storage, ensure airtight containers are used for any leftovers, and make adjustments to ingredient proportions as needed to maintain balance.

Nutritional Deep Dive

This avocado toast provides a balanced macro breakdown with healthy fats from avocado and walnuts contributing to heart health. High in fiber, it supports digestion while offering essential vitamins and minerals from tomatoes and feta. Micronutrient analysis highlights a good source of vitamin K, folate, and potassium, contributing to overall wellness. For weight management, adjust portions according to your dietary goals, ensuring to savor the rich flavors while maintaining balance.

Dietary Adaptations

For a gluten-free option, use gluten-free bread or lettuce wraps. Switching to dairy-free cheese alternatives makes this recipe suitable for those avoiding dairy. A vegan version can be achieved by omitting feta entirely or using a plant-based feta option. Low-carb dieters may enjoy the dish with a thicker slice of eggplant or zucchini instead of bread. Meanwhile, paleo enthusiasts can skip the cheese for a clean-eating approach.

Troubleshooting Guide

If your avocado toast turns out bland, revisit the seasoning and incorporate more salt, pepper, or spices. For texture issues, any over-mashing should be avoided to keep that lovely creaminess. If burning is a concern, adjust your toasting time or lower the heat. Mistakes with ingredient substitutes may lead to unbalanced flavors—always test proportions and cooking methods beforehand to prevent disastrous combinations. Lastly, timing is crucial; if the dish gets soggy, serve promptly and avoid pre-assembling all ingredients beforehand.

Recipe Success Stories

Community feedback has highlighted how versatile this recipe is, with numerous readers sharing personal twists. One user showcased their smoked salmon variation, elevating the simple toast into a gourmet dish. Others have mentioned how this dish has become their go-to for easy brunch gatherings, successfully impressing guests with minimal effort. Photography tips shared within the community suggest utilizing natural light for stunning results, showcasing the vibrant colors of the toast.

Frequently Asked Questions

Can I prepare the toast in advance?

It’s best to assemble the avocado toast just before serving to keep the bread crisp and the toppings fresh. However, you can prep your toppings and avocado spread a few hours in advance.

How do I choose a ripe avocado?

Look for avocados that yield slightly to gentle pressure but are not overly soft. A dark green skin often indicates ripeness.

What’s the best way to store leftover avocado?

To store leftover mashed avocado, place it in an airtight container and press plastic wrap directly on the surface to minimize air exposure and browning.

Can I use other types of cheese?

Absolutely! Goat cheese or dairy-free varieties can be used as alternatives to feta if desired.

What bread works best for this recipe?

For the best taste and texture, consider using sourdough or whole-grain bread. However, any bread you enjoy can work.

How can I make it more filling?

Adding a poached egg on top will not only make it more filling but also add a delicious richness.

Is this recipe suitable for meal prepping?

While the assembled toast is best enjoyed fresh, you can prepare the components ahead of time for easier assembly later.

What herbs can I add for more flavor?

Fresh herbs like cilantro, basil, or even dill can enhance the freshness and flavor profile of your avocado toast.

Can I freeze this dish?

Freezing is not recommended due to the texture changes in avocado. However, you can freeze the bread and layer fresh toppings when ready to eat.

What should I pair with my avocado toast?

This dish pairs wonderfully with a side salad, fresh fruit, or enjoy it alongside a refreshing beverage like mint lemonade or iced coffee.

Additional Resources

If you’re inspired by this Avocado Toast recipe, check out our related recipes like Classic Hummus, Greek Salad, and open-faced sandwiches. These dishes not only align with the healthy theme but also offer versatility in preparation methods. Explore our technique guides on selecting the best avocados or mastering the perfect poached egg for added culinary skills. Seasonal variations can bring fresh surprises, so keep an eye on local produce for exciting ingredient swaps!

Join the Conversation

We want to hear from you! Share your photos and versions of your avocado toast creations on social media using our hashtag. Join our community for recipe reviews and suggestions, allowing others to experience your unique twists! Engage in discussions on our blogs to help each other improve cooking techniques and inspire creativity around this beloved dish.

The Recipe

Avocado Toast with Cherry Tomatoes, Feta, and Walnuts

Serves: 2

Prep Time: 10 mins

Cook Time: 5 mins

Total Time: 15 mins

Kitchen Equipment Needed

  • Toaster or oven
  • Cutting board
  • Sharp knife
  • Fork for mashing

Ingredients

  • 2 slices of whole grain or sourdough bread
  • 1 ripe avocado
  • 1 cup cherry tomatoes, halved
  • 1/4 cup crumbled feta cheese
  • 1/4 cup walnuts, chopped
  • Salt and pepper to taste
  • Juice of half a lemon
  • Olive oil for drizzling

Directions

  1. Toast the slices of bread until golden brown and crisp.
  2. While the bread is toasting, mash the avocado in a bowl with a fork, adding lemon juice, salt, and pepper.
  3. Spread the mashed avocado generously over each slice of toast.
  4. Top with halved cherry tomatoes and sprinkle crumbled feta cheese evenly.
  5. Add chopped walnuts on top and finish with a drizzle of olive oil.
  6. Serve immediately and enjoy your delicious avocado toast!

Recipe Notes

  • Feel free to customize with your favorite seeds or herbs!
  • This recipe can easily be doubled for larger servings.
  • Store any leftover toppings in the refrigerator for up to two days.

Indulge in Irresistible Luxurious German Chocolate Poke Cake Recipe

Luxurious German Chocolate Poke Cake: A Decadent Sweet Delight

⚖️
Difficulty
Moderate

⏲️
Prep Time
30 mins

🕒
Cook Time
30 mins

⏱️
Total Time
3 hours

🍽️
Servings
12 servings

Immerse yourself in the rich flavors of our Luxurious German Chocolate Poke Cake, a dessert that’s sure to impress all chocolate lovers. Picture velvety chocolate cake infused with a smooth and luscious coconut and pecan frosting. Each slice is an invitation to indulge, bringing memories of festive gatherings and sweet celebrations. This cake is not just a treat; it’s an experience, combining texture, flavor, and simplicity into a showstopper dessert perfect for any occasion.

As you prepare this cake, you will find that the poke cake technique creates an irresistible, syrup-soaked texture, ensuring that every bite is moist and bursting with flavor. Topped with a generous layer of creamy frosting and chunky pecans adds earthy notes that perfectly balance the sweetness. The dessert’s elegant layers and mouthwatering aroma fill the kitchen, welcoming your guests with warmth and delight.

Quick Recipe Highlights

  • Flavor Profile: Rich chocolate cake harmonizes seamlessly with a sweet coconut and pecan frosting, creating a flavor explosion that dances on your palate.
  • Texture: The cake is delightfully moist, while the frosting adds a creamy, slightly crunchy layer that enhances each mouthful.
  • Aroma: The aroma of chocolate mingles with nutty pecans and coconut, creating an inviting scent that captivates and entices.
  • Visual Appeal: A beautiful contrast of deep chocolate and creamy frosting dotted with toasted pecans make this cake visually stunning.
  • Skill Level Needed: Ideal for home bakers with moderate skills, this recipe blends straightforward techniques with an impressive finish.
  • Special Equipment: Basic baking tools such as mixing bowls, a whisk, a measuring cup, and a standard cake pan are all you need.

Recipe Overview

  • Difficulty Level: The moderate difficulty makes this cake accessible for most bakers while still offering room to impress family and friends.
  • Category: This German Chocolate Poke Cake falls under the dessert category, perfect for satisfying sweet cravings at any time of day.
  • Cuisine: German chocolate roots celebrate the combination of rich ingredients—originally founded as a recipe by a Texan named Sam German.
  • Cost: The overall cost of the ingredients is quite reasonable, making this luxurious cake an affordable indulgence.
  • Season: Ideal for celebrations throughout the year, particularly during holidays where festive baked goods take center stage.
  • Occasion: Perfect for birthdays, potlucks, or holiday gatherings, this cake is a true crowd-pleaser.

Why You’ll Love This Recipe

This Luxurious German Chocolate Poke Cake is not just a dessert; it’s an adventure for your taste buds. The combination of rich chocolate and sweet, gooey frosting offers a delightful contrast that makes each bite delectable. The poke method allows the frosting to seep into the cake, enhancing its flavor and moistness, ensuring that your guests will be asking for seconds.

Moreover, the convenience in preparing this recipe makes it ideal for home bakers. The steps are straightforward, requiring minimal effort while producing stunning results. It offers the perfect balance between ease and elegance, making it suitable for both casual and formal occasions.

From a nutritional perspective, while this cake is an indulgent treat, it contains wholesome ingredients such as pecans and coconut, providing vital nutrients. Pecans are rich in healthy fats and antioxidants, making this dessert a bit more wholesome compared to traditional sweets.

Socially, this cake serves as a showstopper at gatherings. Sharing a slice of Luxurious German Chocolate Poke Cake fosters connection and conversation, turning every meal into a memorable experience. As you serve it alongside beverages or coffee, you create a warm and inviting atmosphere that encourages bonding.

Lastly, the cost-effectiveness of this recipe cannot be overlooked. With ingredients like flour, sugar, eggs, and chocolate—all pantry staples—this luxurious cake can be made without breaking the bank. It pairs beautifully with seasonal fruit or ice cream for an added touch of indulgence.

Historical Background and Cultural Significance

The origins of German chocolate cake date back to the 19th century, highlighted by the use of German’s chocolate, a dark-baking chocolate developed by an American named Samuel German. Despite the name, the cake has roots deep within Texas, making it a classic American dessert often enjoyed at family gatherings.

In German culture, the combination of chocolate and nuts carries a significant tradition, representing celebration and comfort. Cakes are an integral part of the culinary fabric of many cultures, often featured at special occasions. This recipe, with its poke method, has evolved over the years, becoming a standardized favorite in the dessert category across the country.

The technique of poking holes in the cake was originally intended to allow the chocolate syrup to soak into the cake, enhancing flavor and moisture. As the recipe evolved, variations began to incorporate a pecan and coconut frosting, adding a unique twist reminiscent of tropical flavors that resonate with many palates.

Regional variations exist, with some incorporating different nut types or additional flavorings such as coffee or caramel. While variations abound, the Luxurious German Chocolate Poke Cake remains a beloved staple for both casual gatherings and festive celebrations, its roots grounding it in joyful experiences shared among friends and family.

Ingredient Deep Dive

Cocoa powder, a key ingredient, is essential for achieving the cake’s rich flavor. The unique process of fermenting and drying cocoa beans lends it the iconic chocolate essence that’s deeply satisfying. Nutritionally, cocoa powder is high in antioxidants, making it a beneficial ingredient when consumed in moderation. Selecting high-quality cocoa will ensure depth of flavor, enhancing your cake significantly. Store it in a cool, dry place to maintain its freshness.

Pecans play an important role in the cake’s texture and flavor, adding distinct crunchiness and earthiness. These nuts are not only delicious but also contain healthy fats and protein, contributing nutritional value. When selecting pecans, look for fresh, plump nuts without a rancid odor. For storage, keep them in an airtight container in the refrigerator or freezer to prolong their shelf life. If desired, substitutions can include walnuts, which provide a different flavor profile yet maintain the crunch factor.

Common Mistakes to Avoid

  • Overmixing the batter can lead to a dense cake. Mix until just combined to keep it light and airy.
  • Not allowing the cake to cool before frosting will melt the frosting, creating a soggy mess. Always ensure complete cooling.
  • Using the wrong type of cocoa can alter the flavor. Stick to Dutch-processed cocoa for a deeper taste.
  • Failing to poke the holes deep enough means the frosting won’t soak in. Use a skewer or handle of a wooden spoon to achieve deep holes.
  • Neglecting to toast pecans first can diminish the nutty flavor. Toasting adds enhanced taste and aroma.
  • Not measuring ingredients accurately can lead to inconsistent results. Invest in a good set of measuring cups and spoons.
  • Using cold eggs will not incorporate well into the batter. Always use room temperature eggs for best results.
  • Not checking for doneness is a common issue. Use the toothpick method; it should come out with a few moist crumbs.

Essential Techniques

When preparing a poke cake, the technique of poking holes is crucial. It allows the frosting to seep into the cake, creating an incredibly moist and flavorful dessert. To master this technique, use a skewer or the handle of a wooden spoon to gently create holes throughout the cake once it’s baked and cooled slightly. Avoid excessive pressure, which can cause the cake to crumble.

Properly combining ingredients is equally important. Creaming butter and sugar until fluffy introduces air, which gives your cake its lift. This step should take about 3-5 minutes at medium speed. If this step is rushed, the cake may turn out flat and dense. Look for a pale-color texture before proceeding to the next step.

Pro Tips for Perfect Luxurious German Chocolate Poke Cake

– To achieve a richer flavor, consider adding a touch of brewed coffee to the cake batter. Coffee enhances the chocolate flavor without being detectable.
– Use parchment paper in your cake pan for easy removal post-baking. This will prevent the cake from sticking and crumbling upon lifting.
– Let the cake cool in the pan for about 10-15 minutes before transferring it to a wire rack. This helps prevent breakage.
– For extra moistness, brush the cake with simple syrup prior to frosting. This locks in moisture and adds sweetness.
– Top with extra toasted pecans for added crunch on the frosting layer; it elevates the presentation and flavor.
– Allow the complete cake to chill in the fridge for a bit after frosting. This allows the flavors to meld beautifully.
– Use high-quality, bittersweet chocolate for the frosting for a richer, more sophisticated palette.
– Experiment with different fillings, like salted caramel, to add another layer of flavor to the cake.

Variations and Adaptations

There are numerous regional and seasonal variations to this German chocolate cake, perfect for adapting it to different tastes and occasions. For a spring twist, consider incorporating fresh berries between the layers for a colorful and fruity surprise. Seasonal adjustments, like pumpkin spice variations in the fall, can provide a festive update as well.

For dietary modifications, experimenting with gluten-free flour can make this treat accessible for those with gluten sensitivities. Vegan adaptations can also be achieved by swapping eggs for flaxseed meal and using a dairy-free frosting option, such as coconut cream.

Flavor variations abound; for instance, adding almond extract into the frosting or the cake batter can introduce an enticing nutty note. Additionally, you can change the texture by mixing in chocolate chips or using a different nut type to diversify the crunch level. Presentation can also vary by using a different styling technique when serving; dramatic sauces or edible flowers can elevate it visually.

Serving and Presentation Guide

When it comes to serving your Luxurious German Chocolate Poke Cake, presentation matters! For an elegant plate, use a large serrated knife to cut uniform slices that hold together beautifully. Consider garnishing each slice with a dollop of whipped cream and a sprinkle of toasted coconut and pecans for added flair.

Traditional accompaniments like vanilla ice cream or a drizzle of chocolate sauce can elevate the dessert. For modern suggestions, try serving it in individual mason jars for a rustic flair, making it easy to serve and enjoyable. When it comes to temperature, serving the cake chilled allows the flavors to shine while adding a refreshing element, particularly on warmer days.

Finally, for portion control, consider serving smaller slices, as the richness of the cake means a little goes a long way. This can make it more accessible, especially for larger gatherings.

Wine and Beverage Pairing

Pairing your Luxurious German Chocolate Poke Cake with the right beverages can elevate the entire dessert experience. A full-bodied red wine like Cabernet Sauvignon complements the rich chocolate flavors, providing a harmonious balance. Alternatively, a port wine with its natural sweetness offers a decadent match.

For those seeking non-alcoholic alternatives, consider serving a robust tea, such as a spiced chai, which brings warmth and complimentary flavors. A rich and creamy coffee, like an espresso, can further enhance the cake’s chocolate notes.

Temperature considerations are essential: serve chill beverages to contrast the cake’s richness, highlighting its indulgent elements and providing a well-rounded palate experience.

Storage and Shelf Life

Proper storage of your Luxurious German Chocolate Poke Cake is crucial for maintaining its flavor and freshness. Keep it in an airtight container in the refrigerator, where it can last for up to 5 days. If you anticipate longer storage, consider freezing portions wrapped in plastic wrap and foil to maintain moisture.

Signs of spoilage include dryness or an off smell, indicating it’s time to discard the dessert. If reheating is necessary, do so in the microwave for short bursts, ensuring it doesn’t dry out. Refresh the frosting with a touch of cream for optimal texture upon serving.

For longer preservation, you can freeze the unfrosted cake layers, allowing you to assemble once needed and keep the dessert feeling fresh each time it’s served.

Make Ahead Strategies

Preparing your Luxurious German Chocolate Poke Cake in advance can save time while ensuring a delicious dessert is on hand when needed. The cake itself can be made a day or two ahead, stored in airtight containers to prevent drying.

Poke the holes just before frosting to maintain the cake’s structure, allowing it to retain moisture until served. Store the frosting separately until closer to serving to keep it fresh and fluffy.

If desired, prepare the cake layers and freeze them, then layer and frost just before serving. This preparation method brings convenience while ensuring fantastic flavors and moisture, even after a freeze.

Lastly, consider assembling last-minute garnishes or sauces that can easily complement your cake, adding a fresh element without requiring extra time the day of the gathering.

Scaling Instructions

Scaling your Luxurious German Chocolate Poke Cake recipe up or down can be straightforward. Halve the ingredients for smaller gatherings or events. Conversely, for larger crowds, doubling or tripling is possible while ensuring you have sufficient mixing capacity and appropriately sized baking pans.

Equipment adjustments may include batch-baking using multiple pans when increasing the recipe size. Timing modifications should also be factored in, as larger cakes may require additional baking time and monitoring.

Storage considerations come into play when scaling, as larger quantities will likely require more extensive refrigerating or freezing space, making strategic planning essential.

Nutritional Deep Dive

Examining the nutritional aspects of your Luxurious German Chocolate Poke Cake offers insight into its components. The macro breakdown reveals a delightful balance of carbohydrates, fats, and sugars inherent in cake recipes. For those counting macros, consider the cake’s rich cocoa and nut content for healthier fat sources.

From a micronutrient viewpoint, this cake contains beneficial vitamins and minerals found in pecans, such as Vitamin E, essential for overall health. Notably, coconut in the frosting provides fiber as well, giving a slight nutritional boost.

Portion size is key; consider smaller slices, utilizing the richness of the cake to manage weight effectively. Enjoying desserts in moderation fosters a balanced approach, allowing the indulgence of sweet treats without sacrificing dietary goals.

Dietary Adaptations

Flexibility in preparing your Luxurious German Chocolate Poke Cake allows for numerous dietary adaptations. For gluten-free variations, using almond flour or gluten-free all-purpose flour can yield delicious results.

Dairy-free options can be achieved by utilizing coconut milk or almond milk and substituting non-dairy butter for easy replacements. For a vegan alternative, flaxseed meal works well as an egg replacer alongside non-dairy cream for the frosting.

Low-carb or Keto adaptations can be accomplished with sugar substitutes, while maintaining rich flavor options. For those on lower FODMAP diets, certain nuts and lactose-free ingredients can easily be swapped.

Each modification allows everyone to indulge in the luxurious flavors without sacrificing dietary restrictions, making the cake a versatile option for diverse gatherings.

Troubleshooting Guide

Texture issues can arise if the cake is overbaked or improperly stored. To avoid dryness, monitor your baking time closely and store leftovers as noted for optimal freshness.

Flavor balance can be achieved by adjusting sweetness with optional salt components, enhancing the chocolate flavors. If your cake becomes too sweet, adding a bit of bittersweet cocoa can help balance the flavors.

Temperature problems may manifest if the cake is not allowed to fully cool before frosting, potentially leading to melted frosting. Always allow cooling time to avoid this common pitfall.

Ingredient substitutions can sometimes lead to unexpected results; it’s wise to test modifications in smaller batches before serving at large events. Lastly, maintaining consistent timing in preparing components will streamline the baking process.

Recipe Success Stories

Many bakers have shared their success stories with this Luxurious German Chocolate Poke Cake, enjoying the ease of preparation and delicious output. Enthusiastic feedback highlights the moist texture and rich flavor that have dazzled both family and friends.

Variations suggested by the community, like adding different fillings or toppings, have inspired creativity in the kitchen. Feedback also emphasizes the benefits of employing the poke technique, with many enthusiastic about how it enhances moisture retention perfectly during baking.

Photography tips suggested by readers showcase how beautifully this dessert presents; people love to share their own adaptations and plating ideas on social media, creating a delightful tapestry of inspiration around this beloved recipe.

Frequently Asked Questions

1. Can I make the cake ahead of time?
Yes, you can make the cake a day or two ahead. Store it in an airtight container to maintain moisture until you are ready to frost and serve.

2. How should I store leftovers?
Leftover cake should be stored in an airtight container in the refrigerator and can last for up to 5 days.

3. Can I freeze this cake?
Yes, you can freeze both the unfrosted cake layers and the frosted cake. Just ensure proper wrapping to prevent freezer burn.

4. Is there a substitute for pecans?
If preferred, walnuts or almonds can be used in place of pecans. The flavor profile will change slightly, but it will still be delicious.

5. What if I don’t have coconut?
If you don’t have coconut, consider using cream cheese frosting or simply topping with more pecans for a different flavor profile.

6. Can I make this recipe vegan?
Yes, you can substitute the eggs with flaxseed meal and use non-dairy milk and cream to create a vegan version of this cake.

7. How do I know when the cake is done?
You can check for doneness by inserting a toothpick; it should come out clean or with a few moist crumbs attached.

8. What can I serve this cake with?
This decadent cake pairs beautifully with vanilla ice cream, whipped cream, or a cup of coffee or tea.

9. Can I add extra flavors to the frosting?
Certainly! Adding extracts like vanilla or almond can elevate the frosting’s flavor profile.

10. What’s the best way to cut the cake?
Use a serrated knife to cut the cake, ensuring clean edges, especially around the frosting areas.

Additional Resources

For those inspired by this Luxurious German Chocolate Poke Cake, explore related recipes that highlight chocolate in delightful ways, such as decadent brownies and rich chocolate mousse.

Technique guides can help refine your baking skills, offering tips on mixing methods and ingredient substitutions that enhance your culinary prowess. Information on ingredients will assist in making informed choices, particularly when sourcing organic versus conventional products.

Equipment recommendations, from mixers to baking pans, can further assist in ensuring your baking adventures are successful. Lastly, seasonal variations encourage creativity, allowing you to adapt this recipe to suit different celebrations throughout the year.

Join the Conversation

We encourage you to share your baking journeys with us! Engage on social media by using the hashtag associated with this recipe, showcasing your beautiful cakes and any adaptations you’ve tried. Photography tips can help share the beauty of your desserts, making it easier for others to get inspired.

Recipe reviews allow others to discover the excitement around this dish, fostering community engagement alongside delicious desserts. We’d love to hear your experience and any variations you might have experimented with; your creative touches may inspire others to try something new.

The Recipe

Luxurious German Chocolate Poke Cake

Serves: 12 servings

Prep Time: 30 mins

Cook Time: 30 mins

Total Time: 3 hours

Kitchen Equipment Needed

  • Mixing bowls
  • Electric mixer or whisk
  • Cake pans
  • Measuring cups and spoons
  • Spatula
  • Cooling rack

Ingredients

  • 1 box German chocolate cake mix
  • 1 cup water
  • 1/2 cup vegetable oil
  • 3 eggs
  • 1 can (12 oz) evaporated milk
  • 1 cup coconut flakes
  • 1 cup chopped pecans
  • 1/2 cup sugar
  • 1/4 cup butter
  • 1 tsp vanilla extract

Directions

  1. Preheat the oven to 350°F (175°C) and prepare your cake pans.
  2. In a bowl, mix the cake mix, water, vegetable oil, and eggs until well combined. Pour into prepared pans.
  3. Bake for 30 minutes or until a toothpick comes out clean. Let cool for 10 minutes.
  4. Using the handle of a wooden spoon, poke holes all over the warm cake.
  5. In a saucepan, combine evaporated milk, sugar, butter, and vanilla; bring to a boil, then pour over the cake, letting it soak in.
  6. In a separate bowl, mix coconut and pecans. Spread over the cake and let cool completely.
  7. Once cooled, frost with your choice of chocolate frosting or ganache.
  8. Chill before serving for enhanced flavor.

Recipe Notes

  • For added flavor, consider using brewed coffee instead of water.
  • You may substitute pecans with walnuts if desired.
  • Store leftovers in an airtight container in the refrigerator for up to 5 days.

Delicious Chicken Taquitos Recipe for a Perfect Family Meal

Delicious Chicken Taquitos: A Quick and Flavorful Snack

⚖️
Difficulty
Easy

⏲️
Prep Time
20 mins

🕒
Cook Time
15 mins

⏱️
Total Time
35 mins

🍽️
Servings
4 servings

Chicken Taquitos are a delightful fusion of flavors wrapped in crispy tortillas, perfect for sharing or enjoying as a solo snack. The tender chicken seasoned to perfection offers a taste that will excite your palate, while the golden, crunchy exterior provides that satisfying crunch with every bite. They’re great for quick meals, parties, or family gatherings, making them a go-to recipe for any occasion.

The beauty of Chicken Taquitos lies in their versatility. You can customize the filling with your favorite ingredients such as cheese, beans, or vegetables, allowing you to cater to various dietary preferences. As they bake, the aroma wafts through your home, making everyone’s mouth water in anticipation of the deliciousness to come!

Quick Recipe Highlights

  • Flavor Profile: The flavor of chicken is heightened with spices such as cumin, garlic, and onion, resulting in a savory taste that pairs wonderfully with fresh toppings.
  • Texture: Expect a delightful contrast between the crunchy corn tortilla and the juicy, tender chicken filling.
  • Aroma: The fragrant aroma of toasted tortillas combined with seasoned chicken fills the air, enticing everyone around.
  • Visual Appeal: The golden brown taquitos offer an inviting appearance, especially when served with vibrant dips and fresh garnishes.
  • Skill Level Needed: This recipe is beginner-friendly, requiring just a few simple techniques that anyone can master.
  • Special Equipment: All you need is an oven and a baking sheet, making this recipe accessible for all home cooks.

Recipe Overview

  • Difficulty Level: The Chicken Taquitos are easy to prepare, demanding minimal culinary skills but providing impressive results.
  • Category: They fit perfectly as snacks, appetizers, or even a light dinner option, making them incredibly versatile.
  • Cuisine: These taquitos are rooted in Mexican culinary traditions, celebrating the rich flavors associated with Mexican food culture.
  • Cost: The ingredients are budget-friendly, with the total cost averaging about $10 for a family meal.
  • Season: Chicken Taquitos are ideal for any season, whether served warm in winter or fresh with toppings in summer.
  • Occasion: Great for casual get-togethers, game nights, or even as a fun family dinner, these taquitos will satisfy a crowd.

Why You’ll Love This Recipe

If you’re on the lookout for a recipe that tantalizes your taste buds, Chicken Taquitos have an unbeatable flavor and texture combination. The mild spices beautifully complement the tender shredded chicken, resulting in a satisfying explosion of flavors. Topped with fresh salsa, guacamole, or sour cream, they become a culinary treat that can impress anyone.

These taquitos shine in convenience and preparation. They can be made in under an hour, providing a quick solution for busy weeknight dinners or unexpected guests. With minimal effort and kitchen mess, you’ll enjoy the delicious results with less fuss, making this recipe a staple in your recipe repertory.

On the nutritional front, Chicken Taquitos offer a good balance of protein and carbs, making them a filling meal. You can sneak in extra veggies for a nutrient boost, making them perfect for both adults and kids. Plus, using lean chicken makes them healthier than many fried snack options.

Socially, they are perfect for gatherings, allowing guests to grab and go. Serve them on a platter with various dips, turning your party into a fun, interactive dining experience. Everyone loves a good taco-style snack, making them a hit at any gathering.

From a budgetary perspective, Chicken Taquitos are incredibly cost-effective. Affordable ingredients yield a large batch, suitable for family meals or leftovers for lunch. You can make a lot of taquitos without breaking the bank, presenting a hearty meal that everyone loves.

Historical Background and Cultural Significance

Chicken Taquitos trace their origins back to Mexico, where they evolved from traditional tacos. The word “taquito” translates to “little taco”, referring to the small rolled shape that makes them easily portable and perfect for snacking. This delightful dish represents the essence of Mexican cuisine: vibrant flavors, fresh ingredients, and shared meals.

Culturally, taquitos hold significant importance as a beloved street food and party dish across Mexico and the United States. They often symbolize home cooking and are commonly featured at social gatherings and celebrations, bringing people together over a shared love of good food.

Over time, taquitos have evolved, with many contemporary takes incorporating different fillings and cooking methods. While traditionally made with beef or chicken, they can now include various proteins and even be made vegetarian or vegan, showcasing their versatility and adaptability in modern cuisine.

Regional variations also add a layer of cultural significance, with ingredients and techniques changing throughout Mexico. From crispy to soft, and simple to gourmet, these adaptations reflect local flavors and preferences, showcasing the rich culinary diversity found within Mexican cooking.

Ingredient Deep Dive

Chicken: Chicken is not only a staple in countless cuisines but also a source of lean protein that supports muscle development. When selecting chicken, opt for organic or free-range options if available. Store uncooked chicken in the refrigerator for up to two days and freeze it for longer storage. Substitute with turkey or lentils for a different flavor profile.

Tortillas: Corn tortillas are essential for authentic taquitos, providing that signature flavor and texture. Tortillas have deep roots in Mexican culture, symbolizing the importance of maize. When buying tortillas, choose those that are fresh and free of additives. For storage, keep them wrapped in a cloth to maintain moisture. Flour tortillas can be used for a softer alternative, though they are less traditional.

Common Mistakes to Avoid

  • Overfilling the taquitos can lead to bursting during cooking. Aim for a balance to ensure they cook evenly.
  • Using cold tortillas may cause them to crack when rolling. Warm them slightly to enhance flexibility.
  • Not sealing the tortilla properly can result in filling leakage. Ensure edges are tightly secured before baking.
  • Cooking at too high a temperature can lead to uneven cooking. Follow the recipe for optimal results.
  • Using frozen ingredients without proper thawing can affect texture. Ensure meats are fully thawed for best results.
  • Forgetting to preheat the oven can delay cooking times and affect texture. Always preheat as directed.
  • Not adjusting seasoning based on personal taste can lead to bland taquitos. Taste as you go and modify accordingly.
  • Baking instead of frying them for a crispy exterior can make them soggy. If frying, control oil temperature closely.
  • Skipping the garnish can lead to a less appealing dish. Fresh toppings enhance both flavor and presentation.
  • Rushing the resting time after cooking can lead to serving hot filling. Let them cool slightly for a better eating experience.

Essential Techniques

Rolling Taquitos: The technique for rolling taquitos is crucial to keep the filling secure. Warm tortillas are easier to work with; place your filling at one end and roll tightly, securing the edges with a toothpick if necessary. Avoid tearing the tortilla by using gentle pressure and ensuring even filling distribution. A successful roll leads to delightful texture and flavor in every bite.

Baking to Perfection: Baking taquitos instead of frying can offer a healthy alternative without sacrificing crunchiness. For best results, preheat your oven and use a light coating of oil on the baking sheet. Bake until golden brown, turning halfway through for even cooking. Keeping a close eye will help prevent burning while ensuring that delicious crispiness is achieved.

Pro Tips for Perfect Chicken Taquitos

1. Use leftover rotisserie chicken for convenience and additional flavor, saving you time in preparation.

2. Experiment with different spices or herbs in your filling to customize flavors and add variety.

3. Keep a close eye on baking time to avoid overcooking. The taquitos should be golden without being burnt.

4. Pair with a variety of dips, such as avocado or salsa, for an elevated eating experience.

5. For a vegetarian option, replace chicken with black beans or seasonal vegetables.

6. Ensure your tortillas are fresh—stale tortillas are more difficult to roll and may tear.

7. A quick fry in hot oil after baking can add an extra crispy finish to your taquitos.

8. Allow your taquitos to rest for a few minutes after cooking for better flavor melding.

Variations and Adaptations

Regional variations of taquitos can include different fillings, such as beef or pork, providing a new flavor twist. Additionally, you can switch up the base ingredient with seasonal vegetables for a health-oriented version. Vegan adaptations can also be made using plant-based proteins and dairy-free cheese, ensuring that everyone can enjoy this delightful dish. For varied textures, you can opt for crunchy toppings like slaw or crispy onions, enhancing the overall experience.

Serving and Presentation Guide

For plating, consider arranging taquitos on a beautiful platter with colorful dips. Garnish with chopped cilantro, slices of lime, or avocado for a vibrant presentation. Traditional accompaniments include fresh salsa, sour cream, and guacamole, which can elevate the dining experience. Additionally, serving at slightly warm temperatures enhances flavor enjoyment, so plan accordingly with timing for serving.

Wine and Beverage Pairing

Pairing white wine, such as Sauvignon Blanc, complements the lightness of the chicken in your taquitos effectively. Alternatively, a light-bodied red like Pinot Noir can work well if you prefer red wine options. For non-alcoholic drinks, consider refreshing options like sparkling water with lime or a citrusy mocktail to match the dish’s flavor profile.

Storage and Shelf Life

Cooked taquitos can be stored in an airtight container in the refrigerator for up to three days. Ensure they’re cool before closing the container to avoid moisture buildup that can lead to sogginess. When reheating, place in the oven at 350°F until warmed through, which helps retain crispiness. For longer storage, taquitos can be frozen for up to two months; just wrap individually for best results.

Make Ahead Strategies

Preparing taquitos in advance can save you time during busy moments. You can prepare the filling ahead and store it in the fridge for up to two days. Assemble the taquitos right before baking to maintain their crispiness. If freezing, wrap each taquito tightly in plastic wrap and store in a freezer-safe bag to keep them fresh.

Scaling Instructions

If you want to halve or double the recipe, simply adjust the ingredient measurements accordingly. Timing may need adjustments, especially for baking; keep an eye on color and crispiness. Ensure your baking sheets can accommodate the additional taquitos, and spread them out for even cooking.

Nutritional Deep Dive

Chicken Taquitos provide a balanced mix of macros, with approximately 25 grams of protein per serving and noteworthy fiber from the tortillas. Additionally, they contain important vitamins and minerals from any added vegetables. Moderating portion size can assist those managing their calories while still enjoying this delicious dish.

Dietary Adaptations

For gluten-free versions, opt for corn tortillas or gluten-free wraps. Vegan adaptations can replace chicken with seasoned jackfruit or tofu, while using dairy-free cheese or toppings maintains the flavor profile. Low-carb diets can take advantage of lettuce wraps as a fresh, low-carb substitute, allowing everyone to enjoy the taste of taquitos based on their dietary needs.

Troubleshooting Guide

If your taquitos turn out chewy, this may indicate overbaking or that the tortillas were too cold. Ensure they are warm and pliable before rolling. If flavors fall flat, consider adjusting your spices or contributing toppings to boost freshness and taste. For crispy taquitos that didn’t quite turn out, try adjusting cooking time or temperature during future batches.

Recipe Success Stories

Many home cooks have shared their adaptations, emphasizing the ease and deliciousness of these taquitos. From gluten-free flour options to new spicy fillings, readers enjoy experimenting while remaining true to the core recipe. Moreover, countless have documented their cooking journey through social media, showcasing their beautiful Chicken Taquitos with pride.

Frequently Asked Questions

Can I prepare these taquitos in advance?

Yes! The filling can be made a day ahead and stored in the refrigerator. Assemble the taquitos just before baking for the best texture.

Can I use frozen vegetables in the filling?

Absolutely! Frozen vegetables can be a great addition to your taquitos as long as they are thawed and drained well before mixing. This helps avoid excess moisture that can make your taquitos soggy.

What toppings are best for taquitos?

Common and delicious toppings include guacamole, salsa, sour cream, and shredded cheese. Feel free to get creative with additional toppings like pico de gallo or cilantro.

Are Chicken Taquitos healthy?

When made with lean chicken and served with fresh vegetables, they can be a healthy meal option. Balance your portion and consider adding more vegetables to increase their nutritional value.

Can I bake instead of frying?

Yes! Baking your taquitos is a healthier alternative to frying and yields a crispy texture when done right. Brush lightly with oil before baking for added crunch.

What type of tortillas are best to use?

Traditional corn tortillas are preferred for authentic flavor, although flour tortillas can also be used if you prefer a softer option. Just ensure they’re fresh for the best rolling results.

How do I prevent soggy taquitos?

Make sure to drain any wet ingredients thoroughly and use fresh, warm tortillas. Also, allow baked taquitos to cool for a few minutes before serving.

How can I spice them up?

Adding jalapeños, spicy cheese, or hot sauce into the filling can amp up the heat. You may also season with chili powder or cayenne for extra kick.

Can I use leftovers in my filling?

Yes, leftover meats and vegetables work wonderfully. Just shred or chop them and incorporate your favorite spices to make it flavorful and unique.

What’s the best way to store leftovers?

Store leftovers in an airtight container in the fridge or freeze them for longer shelf life. Be sure to cool them completely before sealing to avoid sogginess from condensation.

Additional Resources

Check out our collection of related recipes that highlight similar flavors, techniques, or Mexican cuisine! Explore our guides on essential cooking techniques for chicken and tasty sauces that pair well with taquitos. Discover ingredient information to enhance your cooking skills further, and browse our equipment recommendations for best results.

Join the Conversation

We love hearing from our readers! Share your experiences with Chicken Taquitos on social media, post your variations, and don’t forget to tag us. If you have tips or photography suggestions from your cooking journey, share them, too! Engage with our community and let’s celebrate the joy of cooking together.

The Recipe

Chicken Taquitos

Serves: 4 servings

Prep Time: 20 mins

Cook Time: 15 mins

Total Time: 35 mins

Kitchen Equipment Needed

  • Oven
  • Baking Sheet
  • Parchment Paper (optional)
  • Mixing Bowl
  • Cooking Spray or Oil
  • Measuring Cups and Spoons
  • Shredding Fork or Food Processor

Ingredients

  • 2 cups cooked, shredded chicken
  • 1 cup shredded cheese (cheddar or Monterey Jack)
  • 1 teaspoon cumin
  • 1 teaspoon garlic powder
  • 1 tablespoon lime juice
  • 12 corn tortillas
  • Oil for brushing
  • Salt to taste
  • Fresh toppings (salsa, sour cream, avocado, etc.)

Directions

  1. Preheat your oven to 400°F (200°C) and line a baking sheet with parchment paper.
  2. In a bowl, combine shredded chicken, cheese, cumin, garlic powder, lime juice, and salt.
  3. Warm the tortillas in a skillet or microwave to make them flexible.
  4. Place a few tablespoons of filling in the center of each tortilla and roll tightly, securing as needed.
  5. Arrange taquitos on the baking sheet and brush lightly with oil.
  6. Bake in the preheated oven for 15-20 minutes or until golden brown and crispy.
  7. Serve hot with your favorite toppings and enjoy!

Recipe Notes

  • Feel free to adjust the spices according to your taste preferences.
  • You can use chicken breasts, thighs, or even leftover rotisserie chicken.
  • For a vegetarian version, try black beans mixed with spices.

Delicious Heavenly Banana Cream Cheese Cupcakes You Must Try

Heavenly Banana Cream Cheese Cupcakes Recipe: A Delightful Treat for Every Occasion!

⚖️
Difficulty
Easy

⏲️
Prep Time
15 mins

🕒
Cook Time
20 mins

⏱️
Total Time
35 mins

🍽️
Servings
12 servings

Enjoy the sweet, comforting taste of homemade Heavenly Banana Cream Cheese Cupcakes Recipe, perfect for any celebration or simply as a delightful snack. These cupcakes are a sublime combination of ripe bananas and luscious cream cheese, creating a treat that’s not only delicious but also brings back fond memories of home baking. The fluffy texture, paired with a sweet, creamy frosting, makes every bite a moment to savor.

From birthday parties to family gatherings, these cupcakes bring a smile to everyone’s face. Imagine the scent of bananas warming in the oven, tickling your senses as it fills your kitchen. Each cupcake is a tiny celebration waiting to happen, the perfect balance of savory and sweet that makes them irresistible.

Quick Recipe Highlights

  • Flavor Profile: A perfect combination of sweet ripe bananas and tangy cream cheese creates a balanced flavor that everyone loves.
  • Texture: Light and fluffy cupcakes topped with rich, creamy frosting create a delightful contrast in textures.
  • Aroma: The warm, inviting aroma of baked bananas with hints of creamy vanilla make these cupcakes a must-try.
  • Visual Appeal: Beautifully frosted with a smooth, creamy texture and a sprinkle of crushed nuts add an inviting touch.
  • Skill Level Needed: Easy—perfect for beginners and experienced bakers alike.
  • Special Equipment: Standard cupcake pan and mixer for ease of preparation.

Recipe Overview

  • Difficulty Level: This recipe is classified as easy, making it ideal for beginner bakers. The steps are straightforward, allowing you to create delightful treats without overwhelming complexity.
  • Category: These cupcakes fall under the dessert category, perfect for sweet tooth satisfactions or special occasions.
  • Cuisine: The recipe draws inspiration from classic American baking traditions, where bananas frequently are incorporated into desserts.
  • Cost: This budget-friendly recipe utilizes common ingredients, making it accessible for anyone looking to whip up a delicious treat.
  • Season: Best enjoyed throughout the year, particularly during the spring and summer when bananas are forecasted to be at their sweetest.
  • Occasion: These cupcakes are excellent for birthdays, tea parties, or simply a cozy evening treat with family.

Why You’ll Love This Recipe

Heavenly Banana Cream Cheese Cupcakes Recipe offers an incredible taste experience that balances sweet and creamy flavors. The bananas provide natural sweetness while the cream cheese adds a delightful tang, making each cupcake explode with flavor. With every bite, you’re welcomed by a moist, fluffy texture that melts in your mouth, supported by a creamy frosting that mirrors the lusciousness of each delightful bite.

The convenience of this recipe is another reason to love it. With a preparation time of just 15 minutes, you can easily whip these cupcakes together and pop them in the oven. Even as a novice baker, the simple steps ensure you’ll feel confident in creating these delightful desserts. They are perfect for last-minute gatherings or whenever the craving strikes.

Nutritionally, this recipe is versatile. Bananas are a great source of potassium and fiber, making this treat a slightly healthier indulgence. Incorporating bananas not only enhances the flavor but also provides natural moisture, resulting in tender cupcakes that everyone will adore.

Socially, these cupcakes are perfect for sharing. They are the ideal treat to bring to parties, family events, or casual get-togethers, sparking conversations around flavors and fond memories. Sharing homemade goodies is a way to connect with others, showcasing love and care through culinary creations.

Cost-effectiveness makes this recipe even more appealing. Using ingredients you may already have in your pantry means you can create something special without splurging. Whether you’re baking for a special occasion or as a little surprise for yourself, this recipe is accessible and delightful.

Historical Background and Cultural Significance

The origins of banana desserts can be traced back to various culinary practices around the world. Bananas have been a staple fruit in many cultures, appreciated for their naturally sweet flavor and versatility in cooking. The banana cupcake represents a fusion of traditional American baking techniques combined with the globally available banana, making it a universally loved treat.

In American culture, bananas became famous during the 20th century, particularly after WWII when canned products became popular. The ease of using ripe bananas in baking contributed significantly to the rise of banana-based recipes, solidifying their place in American home baking kitchens. The beloved banana bread also shares this history, making banana desserts a comforting reminder of home.

Over the years, the banana cupcake has evolved from a simple sweet treat to a gourmet dessert. Today, variations abound, featuring different frostings, fillings, and even gluten-free options. The flexibility of this recipe allows bakers to adapt it to current trends while retaining the classic elements that make it beloved.

Regional variations of banana desserts also add to their cultural significance. In many tropical nations, raw bananas are used in savory dishes as well as desserts, highlighting their versatility. The heavenly banana cream cheese cupcake stands as a testament to how one ingredient can transcend culinary boundaries and unite flavors from different cultures.

Ingredient Deep Dive

  • Bananas: Bananas are tropical fruits with rich potassium content. Selecting ripe bananas improves sweetness; slightly overripe ones work best for baking. Store them at room temperature and use them within a week, or freeze for future use.
  • Cream Cheese: This creamy cheese provides a tangy flavor and smooth texture. Opt for full-fat cream cheese for best results. It’s best stored in the refrigerator and can be softened at room temperature before use.
  • Flour: All-purpose flour creates a tender cupcake base. Look for flour with protein content around 10-12%. Store in a cool, dry place to maintain freshness, and protect it from moisture.
  • Sugar: Granulated sugar sweetens the batter and enhances texture. Adjust the amount according to personal taste. Keep sugar in an airtight container to prevent clumping.
  • Baking Powder: This leavening agent is essential for fluffy cupcakes. Ensure it is fresh to avoid dense results. Store in a cool, dry place, and check the expiration date regularly.
  • Eggs: Eggs provide moisture and richness, binding all ingredients together. Use large eggs for best results, and allow them to come to room temperature before baking for even mixing.

Common Mistakes to Avoid

  • Using unripe bananas: Ensure your bananas are ripe for maximum sweetness overall. Unripe bananas may not provide the balanced flavor needed.
  • Overmixing the batter: Mixing just until combined helps keep your cupcakes light and fluffy. Overmixing activates the gluten in the flour, leading to dense cupcakes.
  • Not measuring ingredients correctly: Baking is a science, so accurate measurements are crucial. Use a kitchen scale for precise measuring.
  • Skipping the frosting: Skimping out on cream cheese frosting can lead to a less enjoyable taste. Don’t miss out on this delicious addition!
  • Using cold eggs: Cold eggs can affect the batter consistency, resulting in uneven baking. Always let eggs adjust to room temperature before using.
  • Opening the oven door too soon: Opening the oven during baking can cause the cupcakes to sink. Wait until they are close to being done before checking.
  • Overbaking: Pay attention to baking time; overbaked cupcakes can dry out. Test for doneness with a toothpick in the center.
  • Ignoring storage tips: Properly store leftover cupcakes in an airtight container to maintain moisture and freshness.

Essential Techniques

Baking is all about technique, and understanding a few key practices can elevate your Heavenly Banana Cream Cheese Cupcakes Recipe to the next level. One essential skill is the creaming method, which involves mixing the sugars and cream cheese until fluffy; this step helps to incorporate air, ensuring a light structure. Watch for a pale, fluffy mixture before adding in other ingredients to ensure success.

Another vital technique is proper folding. This careful method of integrating dry ingredients into a wet mixture is crucial to avoid overmixing. Use a spatula to gently bring together the mixtures without deflating the batter, allowing your cupcakes to rise beautifully in the oven.

Learn to test for doneness, the best way to check if your cupcakes are fully baked is by inserting a toothpick in the center. If it comes out clean or with a few crumbs, they are good to go!

Also, mastering the art of frosting is key with the cream cheese topping. Ensure cream cheese is at room temperature for smooth spreading. Use an offset spatula to create decorative swirls for visual appeal.

Lastly, understanding variance in oven temperature can significantly affect results. Invest in an oven thermometer to ensure an accurate reading, which can prevent surprises when it comes time to enjoy your baked masterpieces.

Pro Tips for Perfect Heavenly Banana Cream Cheese Cupcakes

– Use overly ripe bananas for optimal natural sweetness and moisture in your cupcakes. Aim for bananas with brown spots for rich flavor.
– Allow all ingredients to reach room temperature before mixing; this can streamline the blending process and ensure you have a consistent batter.
– Do not skimp on the frosting! Cream cheese frosting adds a delicious contrast that is the highlight of the cupcake. Consider flavors like vanilla bean for a unique twist.
– When frosting, opt for a piping bag for easy and decorative application, creating beautiful effects without added stress.
– Store any leftovers properly and enjoy them within a few days to maintain freshness. Meanwhile, feel free to freeze cupcakes for longer storage and to have on-hand treats.
– Experiment with mix-ins like chocolate chips or nuts for added flavor and texture variations in your next batch!
– Consider lightly dusting the frosted cupcakes with crushed nuts or a sprinkle of cinnamon for additional flair.
– Start with a clean kitchen, as this promotes organization and aids in a seamless baking process.

Variations and Adaptations

For those looking to explore variations, there are many delightful options to personalize your Heavenly Banana Cream Cheese Cupcakes. Consider adding a seasonal twist by incorporating pumpkin puree or spices to create a fall-inspired cupcake. Nutritional modifications can also be made by switching to gluten-free flour for those with dietary restrictions; this maintains texture while accommodating different needs.

In terms of flavor variations, adding a layer of caramel or a dollop of peanut butter in the center of each cupcake provides an unexpected delight. For a refreshing summer twist, consider using coconut milk in place of the cream cheese for a lighter version with a tropical flavor.

Incorporating seasonal fruits like strawberries or cherries atop the frosting makes for a stunning visual presentation and adds a burst of flavor. For those who need dairy-free options, use a vegan cream cheese, which provides a similar taste and texture without compromising on taste.

Lastly, consider texture adaptations by turning these cupcakes into a means for creative experimentation, such as using half the flour and substituting with oatmeal or almond flour for additional nutrients and depth.

Serving and Presentation Guide

Serving your Heavenly Banana Cream Cheese Cupcakes can be just as delightful as baking them. To enhance presentation, consider using decorative cupcake liners that match your occasion, whether it’s a festive holiday or a casual gathering. For a touch of elegance, affix a piece of fresh fruit or mint on top of each frosted cupcake just before serving.

Plating techniques can also play a role; present cupcakes on a tiered stand to create a visually stunning display that captures attention at parties and gatherings. Garnish with a sprinkle of powdered sugar or crushed nuts for a beautiful finish.

Temperature considerations are also essential; serve cupcakes slightly chilled or at room temperature, as this enhances the cream cheese frosting experience. For portion control, consider cutting the cupcakes in half for sharing, allowing guests to sample more than one flavor at your next gathering.

Finally, elevate the experience with traditional accompaniments like a scoop of vanilla ice cream or a dollop of whipped cream. These additions complement the flavors perfectly and provide guests a delightful experience they won’t forget!

Wine and Beverage Pairing

Pairing beverages with your Heavenly Banana Cream Cheese Cupcakes can enhance the flavors and overall experience. For a delightful complement, consider a sparkling wine like Prosecco, which offers a lightness that pairs beautifully with the rich frosting. Its fruity notes also echo the bananas nicely.

If you prefer non-alcoholic options, consider serving these cupcakes with a chilled glass of fresh lemonade or iced tea, providing a refreshing contrast to the sweetness. The acidity of citrus beverages can elevate the creamy frosting without overwhelming palates.

For coffee lovers, a rich cappuccino or mocha could work wonders, providing a deep, hearty balance to the sweet notes of the cupcake, ensuring each bite is accented.

Additionally, consider herbal teas infused with vanilla or fruit flavors. These can enhance the overall dining experience while offering lovely aroma profiles that change with every sip, making the treat even more enjoyable.

Storage and Shelf Life

Proper storage is crucial to maintaining the freshness of your Heavenly Banana Cream Cheese Cupcakes. Keep them in an airtight container to avoid drying out and ensure they stay moist. Stored in the refrigerator, they can last up to a week, but for optimal taste, enjoy them within 3 to 5 days.

If you want to extend their shelf life, consider freezing them. Wrap each cupcake individually in plastic wrap and place them in a freezer-safe bag. They can last for up to three months in the freezer, and when it’s time to enjoy, simply allow them to thaw in the refrigerator overnight.

Look for signs of spoilage, such as unusual smells or a changed texture; if there’s any doubt, it’s safer to discard them. If reheating is needed, warm cupcakes slightly in the microwave for 10-15 seconds to retain their moisture.

Lastly, avoiding adding frosting before freezing is best, as fresh frosting can sometimes lose its texture when thawed. Instead, frost after thawing to ensure the best flavor and appearance.

Make Ahead Strategies

When planning for an event, making your Heavenly Banana Cream Cheese Cupcakes ahead of time is a savvy strategy. Bake the cupcakes a day in advance and store them in an airtight container at room temperature, preventing any last-minute stress.

Consider preparing the frosting the night before, kept in the refrigerator until you’re ready to frost the cupcakes; this can streamline your baking process and ensure optimal flavor. Just be sure to let the frosting come to room temperature for smooth spreading.

If you’re preparing for a larger gathering, make a double batch and freeze half for later use. They can maintain their flavor and texture remarkably well, saving time for future occasions.

You can also assemble a timeline for preparation, breaking down the process into manageable steps to maximize your baking success. The day of the event, simply frost the cupcakes and add any garnishes for presentation, making sure they look as good as they taste!

Scaling Instructions

If you wish to scale your Heavenly Banana Cream Cheese Cupcakes Recipe, adjusting the quantities for larger gatherings is simple. For halving the recipe, reduce all ingredients accordingly, ensuring an equal balance of flavors to maintain quality.

Doubling or tripling the recipe is straightforward too. Make sure to account for larger mixing bowls and baking equipment; a stand mixer can be very helpful in speeding up the process for larger batches.

Timing may differ slightly, especially if you’re baking multiple trays at once. You might need to rotate cupcakes halfway through baking for even cooking. Use an oven thermometer to check temperature accurately for best results.

When scaling, also consider storage methods. Larger batches can mean more cupcakes to store, so ensure to have adequate containers to prevent spoilage and maintain quality.

Nutritional Deep Dive

A complete nutritional analysis of your Heavenly Banana Cream Cheese Cupcakes can help you appreciate their benefits further. Each cupcake typically provides carbohydrates from sugar and flour, alongside dietary fiber from bananas. Bananas are also a good source of potassium, which supports heart health.

Examining the macro breakdown reveals a balance between carbohydrates, fats from cream cheese frosting, and proteins from eggs. For those looking to manage weight, paying attention to portion sizes can be helpful since cupcakes can be quite calorie-dense when frosting is included.

The micronutrient analysis indicates that these cupcakes include essential vitamins such as vitamin C and B6 from bananas. With slight modifications like reducing sugar or using lower-fat cream cheese, nutritional enhancements can be made to make them even healthier.

Furthermore, dietary considerations can also be adjusted through thoughtful substitutions, making this recipe accessible for various dietary needs. Analyzing the health benefits helps highlight their place in a balanced diet when enjoyed in moderation.

Dietary Adaptations

Heavenly Banana Cream Cheese Cupcakes can be easily adapted for various dietary needs. For gluten-free options, substitute with a gluten-free flour blend, ensuring a similar texture without compromising flavor.

Dairy-free variations can replace cream cheese with vegan cream cheese made from nuts or soy. This retains the base flavor while catering to those who are lactose intolerant.

For those following a low-carb or keto diet, consider using almond flour and a sugar substitute like erythritol to create a low-carb version that still satisfies cravings without the extra carbs.

Vegans can enjoy these cupcakes by replacing eggs with flaxseed meal or applesauce and using plant-based cream cheese. Adapting the recipe provides inclusivity for all, ensuring everyone can indulge!

Low-FODMAP options can be achieved by avoiding added sugars or considering fructose-free bananas, catering to those with digestive sensitivities.

Troubleshooting Guide

Texture issues can arise if cupcakes come out too dense; this can typically result from overmixing or using cold ingredients. Ensure ingredients, especially eggs, are at room temperature and avoid overmixing for best results.

Flavor balance can be key. If cupcakes are too sweet, consider reducing the sugar in the frosting. On the other hand, if they are bland, add a pinch of salt or increase the vanilla extract for depth.

If there are temperature problems, make sure your oven is properly calibrated. Underbaking can lead to raw centers, while overbaking creates dry cupcakes; investing in an oven thermometer can prevent this issue.

For equipment challenges, ensure you have appropriately sized pans. Using the wrong size can affect baking time and the final result; consistency is vital!

Ingredient substitutions can sometimes lead to unexpected results. If substituting flour, be cautious of the type used, as this can significantly affect both texture and taste.

Timing concerns can also affect outcomes. It is vital to set timers for both prep and baking stages to avoid over or undercooking, leading to unfavorable results.

Recipe Success Stories

Our community of bakers continues to share stories of success with the Heavenly Banana Cream Cheese Cupcakes. Readers rave about how easy this recipe is to customize, with many opting to add chocolate chips or nuts, creating unique variations everyone can enjoy.

Notably, several families have incorporated these cupcakes into their holiday traditions, favoring their nostalgia-inducing banana flavor. Many reflect on fond memories of baking with loved ones, often passing down the recipe, showcasing its timelessness.

Photography tips have also arisen, encouraging bakers to share their creations on social media platforms. Beautiful plating and close-ups of the luscious frosting have led to a surge in engagement, with stories of community connections forged through these baking experiences.

Sharing adaptations has inspired others to try new flavors or cater to unique dietary needs—encouraging collaboration and creativity among bakers. The success stories fuel excitement, making this recipe a staple in many kitchens, ensuring it continues to evolve with each new batch baked.

Frequently Asked Questions

1. Can I use frozen bananas?

Yes, frozen bananas work perfectly for this recipe! Just make sure to thaw them and drain any excess moisture before mashing to ensure the right consistency.

2. How should I store leftover cupcakes?

Leftover cupcakes can be stored in an airtight container at room temperature for about 1-2 days. For longer freshness, refrigerate them or freeze them for later enjoyment.

3. Can I make these cupcakes dairy-free?

Absolutely! You can substitute cream cheese with plant-based varieties and replace eggs with flaxseed meal to create a delicious dairy-free version of these cupcakes.

4. How long do these cupcakes last in the fridge?

These cupcakes can last in the refrigerator for about 5-7 days. Make sure they are sealed well to keep moisture intact.

5. What can I use instead of eggs in this recipe?

Flaxseed meal mixed with water, applesauce, or silken tofu are great substitutes for eggs in this recipe, providing the binding you’ll need for the cupcakes.

6. Can I add chocolate chips to this recipe?

Yes! Feel free to fold in chocolate chips for an extra touch of sweetness and flavor. They pair wonderfully with the banana and cream cheese.

7. Is it necessary to frost the cupcakes?

While the cupcakes are delicious on their own, the cream cheese frosting adds richness that enhances flavor. However, you can skip frosting for a lighter treat.

8. How do I prevent my cupcakes from sinking?

To prevent sinking, avoid overmixing your batter, and ensure your leavening agents (like baking powder) are fresh. Also, do not open the oven too early.

9. Can I use whole wheat flour instead of all-purpose flour?

Yes, you can substitute half of the all-purpose flour with whole wheat flour for more fiber. This will give a slightly different texture but still tastes great!

10. How can I heighten the banana flavor in the cupcakes?

To intensify the banana flavor, consider using banana extract in addition to the mashed bananas or incorporate a layer of sliced ripe bananas inside the batter itself.

Additional Resources

If you’re looking for more delicious recipes, check out related posts featuring variations of cream cheese desserts or banana treats. Technique guides on frosting and baking can also support your baking journey with tips and tricks.

For ingredient information, our section on baking staples can help you understand common alternatives or organic choices. Need equipment recommendations? We provide insights on the best mixers, pans, and tools to streamline the baking process, assisting you in achieving perfect results every time.

Join the Conversation

We’d love to hear from you! Share your experiences with the Heavenly Banana Cream Cheese Cupcakes on social media. Include your special adaptations or variations and connect with fellow baking enthusiasts.

Don’t forget to share your stunning photographs of the final product, as we love seeing how you make this recipe your own. Engage with our community by providing feedback and suggestions, and let’s continue to inspire each other with creative baking ideas!

The Recipe

Heavenly Banana Cream Cheese Cupcakes

Serves: 12 servings

Prep Time: 15 mins

Cook Time: 20 mins

Total Time: 35 mins

Kitchen Equipment Needed

  • Cupcake pan
  • Mixing bowls
  • Electric mixer or whisk
  • Measuring cups and spoons
  • Offset spatula for frosting

Ingredients

  • 1 ½ cups mashed ripe bananas (about 3 medium bananas)
  • 1 cup sugar
  • ½ cup unsalted butter, softened
  • 4 oz cream cheese, softened
  • 2 large eggs
  • 1 ½ cups all-purpose flour
  • 1 tsp baking powder
  • 1 tsp vanilla extract
  • Pinch of salt

Directions

  1. Preheat the oven to 350°F (175°C) and line cupcake pan with liners.
  2. In a large bowl, cream together the butter, sugar, and cream cheese until light and fluffy.
  3. Add in the eggs, one at a time, mixing until well incorporated.
  4. Stir in mashed bananas and vanilla extract until blended.
  5. In another bowl, whisk the flour, baking powder, and salt together.
  6. Gradually mix the dry ingredients into the wet batter until just combined.
  7. Fill each cupcake liner about 2/3 full with batter.
  8. Bake for 18-20 minutes or until a toothpick inserted comes out clean.
  9. Allow cupcakes to cool before frosting with cream cheese frosting.

Recipe Notes

  • Additional flavors can be added by incorporating chocolate chips or nuts.
  • Frosting options include classic cream cheese or flavored variations like chocolate or vanilla.
  • These cupcakes can be frozen without frosting for later enjoyment. Just thaw and frost before serving.