Delicious Blueberry Cottage Cheese Muffins for a Healthy Breakfast

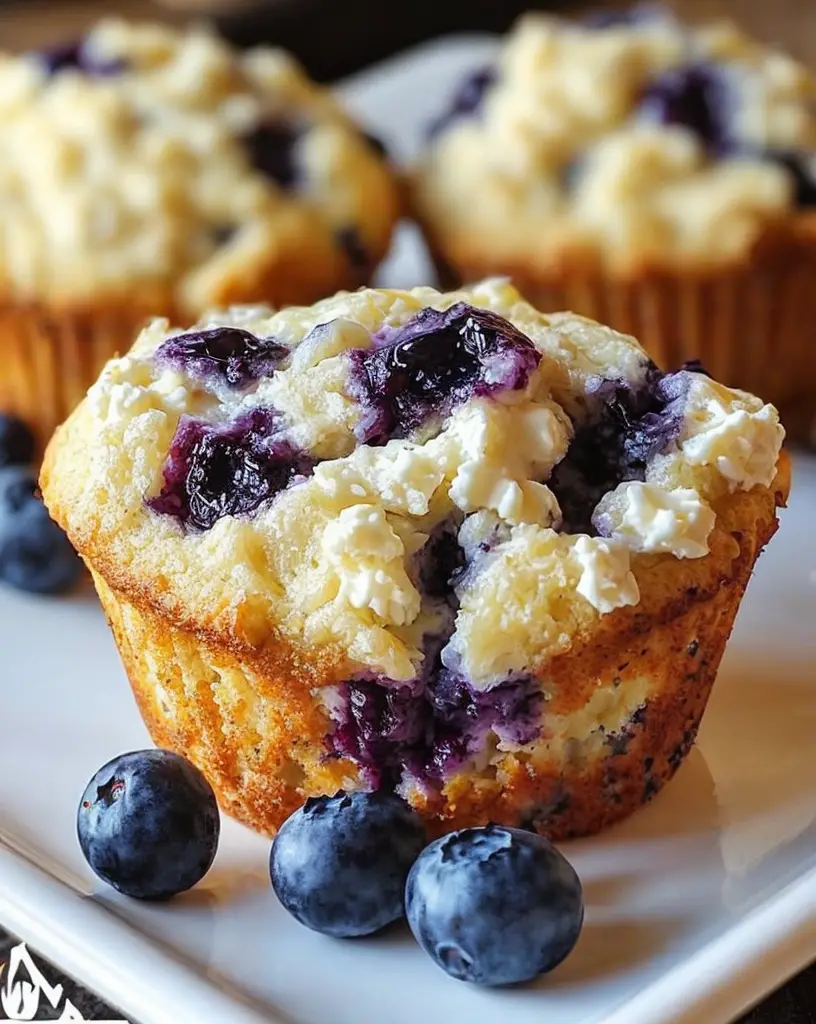
Blueberry Cottage Cheese Muffins: A Healthy Breakfast Delight

⚖️
Difficulty
Easy

⏲️
Prep Time
10 mins

🕒
Cook Time
20 mins

⏱️
Total Time
30 mins

🍽️
Servings
12

Blueberry Cottage Cheese Muffins are the perfect way to kickstart your day with a nutritious and delicious breakfast. These muffins combine the rich, creamy texture of cottage cheese with the tart sweetness of fresh blueberries, creating a delightful balance that your taste buds will love. Every bite is fluffy and moist, making these muffins not only satisfying but also incredibly fulfilling, keeping you energized throughout your morning.

Imagine biting into a warm muffin, with the flavors of juicy blueberries bursting in your mouth, complemented by the mild tang of cottage cheese. This healthy take on a classic breakfast treat is not only nutritious but also quick and easy to prepare, making it a fantastic choice for busy mornings or leisurely brunch gatherings. Say goodbye to ordinary breakfasts and indulge in this delightful recipe that offers both taste and health benefits.

Quick Recipe Highlights

  • Flavor Profile: These muffins strike the perfect balance between sweet and savory, with fresh blueberries providing natural sweetness against the creamy backdrop of cottage cheese.
  • Texture: Enjoy a light and fluffy texture, enhanced by the addition of cottage cheese, which keeps the muffins moist without adding unnecessary fats.
  • Aroma: Baking these muffins fills your kitchen with a warm and inviting aroma, combining hints of baked goods and fresh fruit
  • Visual Appeal: With their beautiful indigo berry flecks and golden-brown tops, these muffins are pleasing to the eye and will entice anyone who sees them.
  • Skill Level Needed: This is an easy recipe that requires minimal baking skills, making it perfect for novice bakers and seasoned chefs alike.
  • Special Equipment: All you need is a muffin tin and a mixing bowl, making this a hassle-free recipe to tackle with everyday kitchen tools.

Recipe Overview

  • Difficulty Level: This recipe is straightforward and easy to follow, making it accessible for all skill levels. The clear and concise steps guide you through the muffin-making process without any confusion.
  • Category: Perfect for breakfast or a snack, these muffins can be enjoyed on-the-go, at a brunch gathering, or as a healthy treat any time of the day.
  • Cuisine: Blending traditional American baking with a modern twist on healthy ingredients, this recipe embodies the best of both worlds.
  • Cost: The ingredients for these muffins are budget-friendly, with costs typically around $10-$15 for a batch, depending on seasonal prices of blueberries.
  • Season: Blueberries are in season during the summer months, making it the perfect fruity addition as they are fresh, sweet, and juicy; however, frozen blueberries work perfectly year-round.
  • Occasion: These muffins are versatile for any occasion, whether it’s a casual morning at home, a picnic, or a brunch celebration.

Why You’ll Love This Recipe

These Blueberry Cottage Cheese Muffins stand out not only for their taste but also for their texture. The combination of cottage cheese ensures a moist crumb, while the blueberries add bursts of flavor that contrast beautifully with the tender muffin base. It’s the kind of breakfast treat that feels indulgent but is actually healthy, allowing you to enjoy each bite without guilt.

Convenience is another reason you’ll love this recipe. With just ten minutes of prep time, you can easily whip up these muffins while you tackle other morning routines. Pop them in the oven, and in no time, you’ll have a tray of freshly baked goodies ready to enjoy. This makes them a perfect choice for meal prep; make a batch on the weekend, and you’ll have easy grab-and-go breakfasts for the week ahead.

From a nutritional standpoint, these muffins are a powerhouse. Cottage cheese is a source of high-quality protein and calcium, while blueberries are packed with antioxidants and vitamins. Together, they create a well-balanced breakfast option that provides energy and supports overall health. It’s a delightful way to start your day, ensuring you stay fuller for longer.

Socially, these muffins become an instant hit among friends and family. Whether you serve them at a brunch gathering or share them with colleagues, they are sure to impress and spark conversations about healthier baking options, thus giving you a chance to engage and connect over food.

Cost-effectiveness is an additional plus. With readily available ingredients, you can create a delicious and healthy breakfast without breaking the bank. This makes these muffins not just a food choice but a smart economic one as well.

Historical Background and Cultural Significance

Blueberry muffins have roots in American cuisine, particularly linked to New England, where blueberries thrive in the wild. Historically, Native Americans would use blueberries in their cooking, a practice adopted and evolved over the centuries by European settlers. The inclusion of cottage cheese represents a modern adaptation as health trends shifted towards higher protein content in everyday baking.

The cultural significance of these muffins extends beyond their flavor; they symbolize the American spirit of innovation in the kitchen. Each recipe variation reflects regional ingredients and preferences, showcasing how traditional dishes can evolve while still honoring their roots.

Over time, the muffin has transformed from a simple baked good to a versatile accompaniment for various meals. With added ingredients like cottage cheese, it embraces the modern trend of healthy eating with a focus on nutritious components, fostering a culinary evolution that is both practical and appealing.

Regional variations of blueberry muffins can be found across the United States, often incorporating local flavors or ingredients. For instance, some versions may add lemon zest for brightness, while others might include spices like cinnamon or nutmeg, reflecting the diverse culinary landscape of the country.

Ingredient Deep Dive

Cottage cheese is a standout ingredient in this recipe. Its creamy texture serves as a binding agent while providing significant nutritional benefits, including a high protein content essential for muscle repair and growth. When selecting cottage cheese, opt for low-fat versions for a healthier choice. Store it in the fridge and consume it within a week for the best quality.

Blueberries are celebrated not just for their flavor but also for their impressive antioxidant profile. These berries help combat oxidative stress in the body and are a good source of vitamin C and fiber. When shopping for blueberries, look for firm, plump berries with a deep color. Store them in the refrigerator and wash them just before use to prolong freshness.

Flour is a foundational ingredient in muffins. Using whole wheat flour can enhance the nutritional value and texture, making the muffins even heartier. Always check for freshness by checking the expiration date on the packaging and store it in a cool, dry place. If whole wheat flour isn’t available, all-purpose flour can easily be substituted in this recipe.

Eggs act as a leavening agent, providing structure and moisture to the muffins. They are a source of protein and essential nutrients, contributing to the overall health benefits of this breakfast option. When selecting eggs, choose organic or free-range varieties for better quality. Store eggs in their original carton in the refrigerator for longer shelf life.

Common Mistakes to Avoid

  • Overmixing the batter can lead to dense muffins. Mix until just incorporated to keep them light and fluffy.
  • Not measuring the flour properly can alter the muffin’s texture. Use the spoon and level method for accuracy.
  • Using frozen blueberries without thawing can tint the batter and create streaks. Toss them lightly in flour before mixing to prevent this.
  • Baking muffins at the wrong temperature can result in undercooked centers or burnt tops. Always preheat the oven before baking.
  • Skipping the cooling time can cause the muffins to become soggy. Allow them to cool in the pan for a few minutes before transferring them to a wire rack.
  • Not using paper liners or greasing the muffin tin properly can lead to sticking. Always prepare the tin to make removal easy.
  • Using too many ripe berries can make the muffins soggy. Keep to the measured amount for best results.
  • Forgetting to check for doneness with a toothpick can result in underbaked muffins. Test them before removing from the oven.
  • Leaving the batter to sit can cause it to lose its leavening power. Bake immediately for best texture.
  • Using old ingredients, especially baking powder, can hinder rising. Always check the expiration date.

Essential Techniques

Mixing the batter properly is crucial for achieving the perfect texture. It’s vital to combine wet and dry ingredients without overmixing to maintain a light, airy muffin. Use a spatula to gently fold rather than a whisk to mix thoroughly while preserving the recipe’s integrity.

Properly measuring flour will greatly affect your muffin’s outcome. Flour can compact in its container, leading to using too much if scooped directly. Instead, use the spoon and level method: spoon flour into your measuring cup and level it off to ensure accuracy.

Baking at the right temperature is key to achieving a golden-brown exterior and moist interior. Preheating your oven ensures that your muffins rise and cook evenly, preventing dry or burnt bottoms.

Cooling muffins on a wire rack allows steam to escape, preventing sogginess. If left in the pan, moisture can accumulate and make your muffins lose their intended texture.

Using quality ingredients can significantly enhance flavor and health benefits. Fresh, high-quality blueberries and low-fat cottage cheese provide the taste and nutrients necessary for satisfying muffins.

Pro Tips for Perfect Blueberry Cottage Cheese Muffins

1. For extra flavor, add a sprinkle of cinnamon or nutmeg to the batter, which can enhance the bakery-like aroma while baking.
2. Make sure to use room-temperature ingredients; it helps the batter combine better and produces a more uniform texture in the muffins.
3. Experiment with different fruits, such as raspberries or strawberries, for a unique twist on the classic blueberry muffin.
4. Drizzle some honey or maple syrup on top before serving for an added touch of sweetness.
5. Consider adding a crunchy topping made from oats and a bit of brown sugar to give your muffins a delightful texture contrast.
6. Store leftover muffins in an airtight container to maintain their freshness, and enjoy them within three days for best taste.
7. To keep muffins moist, try including a splash of vanilla or almond extract in the batter for added depth of flavor.
8. If you’re a chocolate lover, fold in some mini chocolate chips along with the blueberries for a decadent treat.

Variations and Adaptations

For a regional twist, consider incorporating seasonal fruits like cranberries during the winter months. You can also add pumpkin puree to the batter in the fall for an autumn-inspired muffin that pairs wonderfully with warm spices.

If you’d like to make these muffins dairy-free, substitute cottage cheese with silken tofu or a dairy-free yogurt alternative. Doing this maintains the muffin’s moistness while aligning with dietary needs.

For those who prefer a low-carb option, consider using almond flour instead of regular flour. Adjusting the baking time may be necessary, but almond flour can create a delicious, nutty flavor profile.

Switching up the texture can enhance your muffin experience; try adding chopped nuts or seeds for an added crunch. Walnuts or pecans would pair excellently with the flavors in these muffins.

If you’re looking for a visually appealing presentation, consider icing the muffins with a light glaze made from powdered sugar and lemon juice, giving them a shiny and sweet finish.

Serving and Presentation Guide

When serving your Blueberry Cottage Cheese Muffins, consider using a tiered cake stand for an elegant display during brunches or get-togethers. This height variation not only presents the muffins beautifully but also makes it easy for guests to grab one.

Garnishing the muffins with a dusting of powdered sugar or a sprinkle of additional blueberries can enhance their appeal. Fresh mint leaves also serve as a vibrant, aesthetic addition that brings a touch of freshness to the presentation.

For traditional accompaniments, serve these muffins with a dollop of Greek yogurt or low-sugar jam to complement their flavor. Pairing with a side of fresh fruit creates a well-rounded breakfast plate.

Temperature plays a significant role in enjoyment, so serve the muffins warm or at room temperature to maximize both flavor and texture. Freshly baked muffins will always impress, so sharing them shortly after they come out of the oven can elevate the experience.

Lastly, portion control is essential. These muffins are perfect for individual servings, but if presenting on a platter, consider cutting larger muffins in half to allow guests to sample different flavors or enjoy them alongside other dishes.

Wine and Beverage Pairing

Pairing these Blueberry Cottage Cheese Muffins with beverages can elevate your breakfast table. For a touch of sophistication, consider a chilled sparkling wine or Prosecco that complements the sweetness of the muffins without being overly sweet.

For non-alcoholic options, a refreshing glass of freshly squeezed orange juice or berry smoothie can balance the flavor profile, creating a fruity symphony on your palate. Coffee is another classic option; a smooth medium roast with hints of chocolate can beautifully enhance the muffin experience.

When considering temperature, serving chilled beverages with warm muffins creates a delightful contrast. Alternately, if you prefer hot drinks, a spiced chai or herbal tea can offer a warming note that complements the muffins’ dynamic flavors and aromas.

Storage and Shelf Life

To preserve the freshness of your Blueberry Cottage Cheese Muffins, store them in an airtight container at room temperature for up to three days. If you want to keep them longer, consider refrigerating them, where they can last up to a week.

For freezing, place the muffins in a freezer-safe bag or container, separating layers with wax paper to avoid sticking. They can be stored in the freezer for up to three months. When ready to enjoy, thaw them in the refrigerator overnight or warm them in the microwave for a quick snack.

Signs of spoilage include an off smell or visible mold spots. If you notice any of these, it’s best to discard the muffins to ensure safety.

Reheating instructions involve placing the muffins in a microwave for 10-second increments until warmed through, or you can reheat them in a preheated oven set to 350°F for 5-10 minutes, allowing the muffins to regain their fresh-baked texture.

Make Ahead Strategies

For busy mornings, consider prepping the batter a day in advance. Combine the dry ingredients and wet ingredients separately, store them in the fridge, and mix them just before baking. This quick strategy saves valuable time without sacrificing flavor.

You can also prepare the muffins and store them raw in the muffin tin, covered tightly with plastic wrap, allowing you to bake them fresh the next morning. This gives you the pleasure of freshly baked muffins with minimal effort.

Assessing quality impact is vital; muffins can be made two days ahead without significantly affecting flavor or texture. For the best results, ensure that they are stored properly in an airtight container.

When it comes to assembly tips, pre-measuring ingredients simplifies the process. Organizing your items and tools beforehand can streamline your baking experience, especially during busy weekends.

Incorporating fresh elements such as butter or fresh fruits adds a delightful touch. If serving muffins later, add toppings or spreads just before serving to maintain their attractive appearance.

Scaling Instructions

Scaling your Blueberry Cottage Cheese Muffins recipe is simple. To halve the recipe, it’s most important to adjust your baking time down slightly, as smaller batches often cook faster.

If doubling or tripling, consider using multiple muffin tins or baking in batches, monitoring the times closely, as adding more heat may impact even cooking. Ensure you have enough oven space to accommodate any new kitchenware as needed.

Equipment adjustments may be necessary, and using a mixer can save time when preparing batter in larger quantities. Just ensure that your mixer bowl is large enough to avoid spills.

Timing modifications should account for increased volume; larger batches could take a few minutes longer in the oven. It’s essential to check for doneness with a toothpick before removing from the oven.

When storing larger quantities, utilize larger containers or bags designed for bulk storage, allowing for easy access without compromising freshness.

Nutritional Deep Dive

These Blueberry Cottage Cheese Muffins offer a balanced nutritional profile. A single muffin typically contains around 150 calories, with a good portion attributed to protein from the cottage cheese. This makes them not only a satisfying treat but also aids muscle recovery and overall well-being.

Micronutrient analysis reveals that every muffin is a good source of calcium and vitamin C, contributing to your daily nutritional needs. Blueberries are particularly rich in antioxidants, which support heart health and cognitive function, enhancing the muffins’ health profile.

Enjoying these muffins can lead to various health benefits, including sustained energy release thanks to the combination of carbohydrates, protein, and fiber. This trio promotes satiety, indirectly assisting with weight management.

When considering dietary needs, these muffins can easily fit into a variety of nutrition plans. Adjusting ingredients can find a place not just in health-conscious diets but for those seeking tasty, guilt-free indulgences.

Portion analysis can help maintain weight management goals; enjoying one or two muffins alongside yogurt or fruit can create a satisfying breakfast without feeling deprived.

Dietary Adaptations

For those needing gluten-free options, substitute all-purpose flour with almond flour or a gluten-free baking mix. This adaptation maintains the muffins’ integrity while catering to specific dietary needs.

Dairy-free enthusiasts can swap cottage cheese with plant-based cheese or a dairy-free yogurt alternative, allowing everyone to enjoy these muffins without concern for lactose issues.

Vegan diners can create a plant-based version by substituting the eggs with flax eggs (1 tablespoon of flaxseed meal mixed with 2.5 tablespoons of water). This provides the binding needed for the muffins while remaining completely cruelty-free.

Low-carb dieters can leverage coconut flour or a low-carb flour blend while adjusting the liquid ratios slightly to achieve the desired texture. Always ensure to account for different absorption rates in flour substitution.

For a keto adaptation, reduce the amount of fruit or opt for berries lower in carbohydrates. Adjustments in sweetness may also be necessary, using keto-approved sweeteners for flavor without the carbs.

Paleo dieters may adapt the muffins by swapping flour for almond meal while omitting refined sugars and incorporating natural sweeteners like honey or maple syrup in moderation.

Low-FODMAP dieters should keep track of fruit inclusions, avoiding excess amounts, and substituting cottage cheese with lactose-free options while ensuring that other ingredients meet dietary standards.

Troubleshooting Guide

If you encounter texture issues, such as muffins being too dense, this could be due to overmixing or excess liquid. Ensure you mix until just combined and measure flour accurately using the spoon and level method.

Flavor balance may occasionally lean towards blandness if insufficient sweetener is used. Adjust sugar or consider incorporating spices or extracts to enhance flavors without overwhelming the muffin’s primary taste.

Temperature problems, such as burnt tops or raw centers, can result from oven calibration discrepancies. Check your oven accuracy and adjust baking times based on visual cues for even cooking.

Equipment challenges might arise if your muffin tins are old or poorly coated. If stuck, consider switching to silicone muffin liners or greasing thoroughly to ensure easy release.

Ingredient substitutions can change expected results dramatically. Familiarize yourself with how each ingredient impacts texture and flavor if experimenting with alternatives.

Timing concerns are common when adjustments are made to batch sizes. Monitor smaller or larger batches closely as baking times may differ, impacting the muffin outcome.

Recipe Success Stories

Feedback from the community surrounding Blueberry Cottage Cheese Muffins has been overwhelmingly positive. Readers have attested to their moist texture and delightful flavor, often sharing stories of how they prepared them for family gatherings or weekend brunches.

Many individuals have successfully adapted the recipe. They experiment with different fruits, nuts, or spices, sharing their modifications and how these new takes have delighted their friends and family.

Readers often highlight the health benefits associated with these muffins, particularly how they help in maintaining a balanced diet while indulging in something enjoyable. Many have expressed excitement in finding a breakfast that feels indulgent but is incredibly nutritious.

Photography tips shared by readers reveal that taking bright, natural light pictures of these muffins enhances their appeal on social media, encouraging more people to try the recipe themselves.

Adaptation stories are common, with families enjoying these muffins so much they became a staple at home. Creative variations include adding chocolate chips or seasonal ingredients, making the joy of baking continuous.

Frequently Asked Questions

Can I use frozen blueberries in this recipe?

Yes, you can use frozen blueberries, but make sure to toss them with a bit of flour before mixing them into the batter. This helps prevent them from sinking to the bottom while baking.

How do I make the muffins fluffier?

Ensure that you avoid overmixing the batter, as this can lead to dense muffins. Also, make sure all your ingredients are at room temperature to promote a lighter texture.

Can I substitute the cottage cheese?

Yes, you can substitute cottage cheese with Greek yogurt or a plant-based yogurt alternative if you want a dairy-free option. Just be aware that this might slightly alter the flavor and texture.

How do I store leftover muffins?

Store them in an airtight container at room temperature for up to three days. For a longer shelf life, you can refrigerate or freeze them as described in the storage section.

Can I sweeten these muffins more?

Absolutely! You can add more sugar or substitute it with honey or maple syrup according to your sweetness preference. Just be mindful of the consistency of your batter when making adjustments.

Can I use whole wheat flour instead?

Yes, using whole wheat flour is a great way to add extra nutrients and fiber. Just note that this may result in a denser muffin, and you may want to adjust the liquid slightly.

How long do they take to bake?

Baking time for these muffins is approximately 20-25 minutes, but always check for doneness with a toothpick inserted in the center; it should come out clean.

Can I add nuts or seeds to the muffins?

Certainly! Adding nuts or seeds not only enhances the flavor but also introduces additional texture and nutritional value. Just ensure they are evenly distributed in the batter.

How do I prevent the muffins from sticking to the pan?

Grease your muffin tin well or use paper liners for easy removal. If using a nonstick pan, this can help reduce sticking issues.

Can I double this recipe?

Yes, this recipe can easily be doubled. Just ensure you have enough mixing space and muffin tins, and consider checking for doneness a few minutes earlier in case of larger batches.

Can kids help with this recipe?

This is a fun recipe for kids to get involved in! They can help mix the ingredients, fill the muffin cups, and, most importantly, enjoy eating the final product.

Additional Resources

If you’re looking to enhance your baking skills, consider checking out related recipes that leverage similar healthy ingredients or techniques. Look into technique guides for muffin-making, which can provide additional tips for improving your baked goods.

Learning more about the nutritional properties of cottage cheese or blueberries will help deepen your understanding of how these ingredients benefit your health and wellness.

For those interested in equipment recommendations, exploring high-quality muffin tins can significantly impact your baking results. Finding seasonal variations with fruits or spices can help you adapt this muffin recipe throughout the year.

Join the Conversation

Sharing your experience on social media can create a dialogue within the cooking community. Snap a photo of your baked Blueberry Cottage Cheese Muffins and share the love by tagging friends and family.

Photography tips can help other readers appreciate your unique touch; consider highlighting any variations or special techniques you used in your baking process.

Encouraging recipe reviews adds to community engagement, allowing others to feel more connected to the recipe and each other. Sharing feedback fosters a warm, interactive atmosphere where everyone can learn and grow as bakers.

Try to create a space for sharing recipe variations, as many people love to put their twist on classics. Engaging with others around baking ideas can inspire new creations and enhance everyone’s culinary journey.

The Recipe

Blueberry Cottage Cheese Muffins

Serves: 12

Prep Time: 10 mins

Cook Time: 20 mins

Total Time: 30 mins

Kitchen Equipment Needed

  • Muffin tin
  • Mixing bowls
  • Measuring cups and spoons
  • Whisk or spatula
  • Toothpick (for testing doneness)

Ingredients

  • 1 cup cottage cheese
  • 1/2 cup sugar
  • 1/4 cup vegetable oil
  • 2 large eggs
  • 1 teaspoon vanilla extract
  • 1 cup all-purpose flour
  • 1/2 cup whole wheat flour
  • 1 tablespoon baking powder
  • 1/2 teaspoon salt
  • 1 cup fresh blueberries

Directions

  1. Preheat your oven to 350°F (175°C) and grease a muffin tin or line with muffin liners.
  2. In a mixing bowl, combine the cottage cheese, sugar, vegetable oil, eggs, and vanilla extract. Mix well until combined.
  3. In another bowl, whisk together the all-purpose flour, whole wheat flour, baking powder, and salt.
  4. Gradually add the dry ingredients to the wet ingredients, mixing until just combined. Be careful not to overmix.
  5. Gently fold in the blueberries.
  6. Evenly distribute the batter into the prepared muffin tin, filling each cup about two-thirds full.
  7. Bake for 20-25 minutes, or until a toothpick inserted into the center comes out clean.
  8. Allow the muffins to cool in the pan for a few minutes before transferring to a wire rack to cool completely.

Recipe Notes

  • For extra sweetness, you can add a tablespoon of honey to the batter if desired.
  • Feel free to substitute other berries depending on what you have on hand.
  • Storage: Keep muffins in an airtight container in the fridge for up to a week, or freeze them for up to three months.
  • Reheat in the microwave or oven for best results.

Delicious Chicken Noodle Soup Recipe for Comforting Meals

Hearty Chicken Noodle Soup: A Comforting Classic

⚖️
Difficulty
Easy

⏲️
Prep Time
15 mins

🕒
Cook Time
30 mins

⏱️
Total Time
45 mins

🍽️
Servings
4

When the temperature drops and the days get shorter, nothing compares to a warm bowl of chicken noodle soup. This classic recipe is the ultimate comfort food, nourishing the body and soul with its hearty broth, tender chicken, and perfectly cooked noodles. The flavors meld beautifully, creating a symphony of taste that’s both satisfying and refreshing. Made with wholesome ingredients, this soup not only tastes fantastic but is also packed with nutrients that make you feel great.

Every spoonful of this chicken noodle soup invites you to savor its rich broth, where chunks of juicy chicken mingle with fresh vegetables. The delightful aroma of simmering herbs fills your kitchen, bringing warmth and comfort that can brighten even the coldest days. Whether served on a rainy afternoon or during a family gathering, this soup brings a sense of nostalgia, reminding us all of the love and care that goes into homemade meals.

Quick Recipe Highlights

  • Flavor Profile: Savory, with tender chicken and aromatic herbs.
  • Texture: Creamy broth paired with soft chicken and hearty noodles.
  • Aroma: Inviting herbal notes with hints of garlic and onion.
  • Visual Appeal: Bright vegetables and golden broth create a colorful presentation.
  • Skill Level Needed: This recipe is straightforward and perfect for beginners.
  • Special Equipment: A large pot and a ladle are essential for this recipe.

Recipe Overview

  • Difficulty Level: This soup is easy to make, making it great for cooks of any skill level. The steps are simple, and even those new to cooking can impress their family and friends.
  • Category: Suitable for lunch, dinner, or as a warming snack, this chicken noodle soup fits perfectly in any meal plan.
  • Cuisine: Rooted in traditional comfort food, this soup is a staple in many cultures around the world, each adding their unique twist.
  • Cost: With accessible ingredients, this recipe is wallet-friendly, costing approximately $10-$15 for a family-sized serving.
  • Season: Ideal for fall and winter, the warmth of the soup makes it perfect for cold days.
  • Occasion: Perfect for family dinners, cozy nights in, and even parties where you want to serve something heartwarming.

Why You’ll Love This Recipe

This chicken noodle soup is a comforting staple that combines the best of comfort and nourishment. The balanced flavors from savory chicken and fresh vegetables create a delightful dish that everyone will enjoy. With every bite, the tender chicken provides a satisfying taste, while the noodles offer a comforting texture that warms your belly. It’s a feel-good meal that wraps you in its embrace.

Not only is this soup delicious, but it’s also incredibly convenient to prepare. With minimal prep work and quick cooking times, you can enjoy a homemade meal in under an hour. This makes it ideal for busy weeknights when you need to put a wholesome dinner on the table without stress. It’s a great recipe to teach friends or family who are new to cooking, allowing them to experience the joy of homemade food.

Nutritionally, this chicken noodle soup is a powerhouse packed with vitamins and minerals. Fresh vegetables like carrots and celery bring essential nutrients, while the chicken adds lean protein to keep you satisfied. This soup is an excellent option for families looking to nourish their bodies without compromising on flavor. It’s also a delightful remedy for colds and flu, providing comfort when you might need it most.

Serving this soup can be a beautiful experience. It’s perfect for gatherings, creating a warm and inviting atmosphere around the table. As friends and family gather to share a meal, the act of serving chicken noodle soup inspires conversation and connection. Add a slice of warm bread for dipping, and you have an experience that leaves everyone feeling fulfilled.

Finally, this recipe is cost-effective, providing a satisfying meal at a fraction of diner prices. Most ingredients are pantry staples, so you can whip it up even on a budget. This approach to cooking ensures that everyone can enjoy a nutritious meal without breaking the bank, making it a fantastic option for any home cook.

Historical Background and Cultural Significance

The origins of chicken noodle soup can be traced back centuries, with roots in many different cultures. Traditionally regarded as a remedy for illness, it’s thought that the combination of chicken, broth, and noodles has a soothing effect that helps individuals recover from colds and flu. Chicken noodle soup has become a symbol of comfort, showcasing the love and care put into home-cooked meals.

This soup varies widely across different regions, with each culture adding its touch. In Asia, for example, rice noodles replace egg noodles, and ginger might be included for an extra kick. In Eastern European countries, dumplings are sometimes featured, showing how versatile this dish can be. An ever-evolving recipe, chicken noodle soup transcends borders and generations, inviting everyone to experiment and enjoy.

Over the years, this dish has transitioned from traditional kitchens to restaurant menus worldwide, often recognized as a classic comfort meal. Its significance during family gatherings and celebrations highlights the way food fosters togetherness and connection among people. When served, this soup brings warmth and nostalgia into homes, reminding us of the memories rooted in family recipes.

Ingredient Deep Dive

Chicken: The star of the dish, chicken adds protein that is vital in cooking. Selecting the right cut, such as thighs for juiciness or breasts for leanness, depends on personal preference. Nutritionally, chicken is low in fat and high in essential vitamins and minerals. When storing chicken, always keep it refrigerated and consume it within a few days or freeze it for longer shelf life.

Carrots: Carrots bring a natural sweetness and beautiful color to the soup. They are packed with vitamins A and C, contributing to overall health. When selecting carrots, choose firm, brightly colored ones, and store them in the refrigerator. For recipes that require longer cooking times, larger cuts are preferable to prevent the veggies from becoming mushy.

Celery: Celery complements the chicken with its fresh crunch and flavor. It is a good source of vitamins K and C. To select the optimal celery, look for crisp, green stalks. Store celery in the fridge to maintain its freshness and crisp texture. If you’re looking for substitutions, fennel or bell peppers can complement the flavors well.

Noodles: The noodles provide the current dish its character. Choosing egg noodles, whole grain, or even gluten-free options can cater to all dietary needs. Each variation offers unique taste profiles and nutrition. Noodles can be stored in a cool, dry place, and remain fresh for long periods. Be sure to follow the package instructions for cooking.

Common Mistakes to Avoid

  • Overcooking the chicken: This can lead to dry, tough meat. Always cook just until tender and shred it before returning it to the soup.
  • Skipping the sauté step: Sautéing onions and garlic before adding broth enhances flavors significantly. Don’t skip this essential step for maximum flavor.
  • Using overcooked noodles: If added too early, noodles can become soggy. Use timing to add them a few minutes before serving for the best texture.
  • Ignoring seasoning: Always taste your broth and adjust seasoning levels throughout the cooking process for the best results.
  • Not letting it simmer: Skipping the lengthy simmering can cause a lack of depth in the flavor. Allow the ingredients to meld for a richer soup.
  • Using insufficient broth: Broth is the heart of the soup; if skimpy, it may lack flavor. Always use enough broth or stock for the best taste.
  • Making a bland soup: Fresh herbs and spices elevate the dish. Be adventurous with seasonings like thyme, pepper, and adding a splash of lemon.
  • Cutting veggies unevenly: Consistency in vegetable size ensures even cooking. Make sure to cut similar-sized pieces for optimal results.

Essential Techniques

Sautéing: This technique is crucial for building flavor in your soup. Begin by heating oil or butter, then add your aromatics. The goal is to soften them while releasing essential oils. Watch for a golden color, but avoid burning for the best aroma and taste.

Simmering: After adding your broth, bring it to a gentle boil and then reduce the heat to simmer. This process allows flavors to deepen. The visual cue for success is gentle bubbling; maintain this throughout cooking without boiling too hard.

Pro Tips for Perfect Chicken Noodle Soup

1. For extra flavor, use homemade stock. It enriches the broth and provides a personalized touch.

2. Experiment with different noodles; consider whole wheat or gluten-free options based on dietary needs.

3. Incorporate seasonal vegetables like peas or corn for a fresh twist, enhancing both flavor and nutrition.

4. Add a splash of soy sauce or Worcestershire sauce for umami richness in the soup.

5. Fresh herbs like parsley or dill added just before serving brighten the flavors beautifully.

6. Let the soup cool before storing, as this maintains quality and avoids soggy noodles.

7. If you have time, let the soup sit for a while before serving; the flavors develop further over time.

8. Turn leftovers into a casserole by adding some cooked rice and cheese, baking until bubbly for a new meal.

Variations and Adaptations

Regional variations of chicken noodle soup can spice things up—southern versions with okra or chili add a southern flair. For seasonal adaptations, incorporating butternut squash in fall or peas in spring will complement the dish nicely. If you’re looking for dietary modifications, opting for gluten-free noodles or vegan chicken can cater to various dietary preferences.

If you’re craving something with a deeper flavor, consider adding spices like paprika or curry powder for a trendy twist. For textural modifications, adding dumplings instead of noodles creates a different bite entirely, while garnishing with croutons offers a lovely crunch.

Don’t forget about presentation alternatives! Serve in mason jars for a rustic look or sprinkle fresh herbs right before serving for an appealing visual touch that elevates your dish.

Serving and Presentation Guide

When plating chicken noodle soup, consider the bowl’s appeal. A wide, shallow bowl showcases colorful ingredients beautifully. Garnishing with fresh parsley or dill adds vibrancy. Traditional accompaniments include crusty bread or crackers for dipping—bring a balance to the meal’s warmth and texture.

Modern serving suggestions might involve pairing with a side salad featuring bright flavors to complement the rich broth. Ensure the soup is served hot, ideally just off the stove for the best experience, and consider portion control to avoid overstuffing guests while allowing for second servings.

Wine and Beverage Pairing

White wines like Sauvignon Blanc or Pinot Grigio make excellent companions for chicken noodle soup, providing a crisp contrast to the richness. If you prefer non-alcoholic options, pairing with sparkling water with lemon or herbal teas can cleanse the palate effectively.

Consider serving chai tea or chamomile for a soothing experience, particularly when comfort is your goal. These complementary beverages elevate the dining experience and can harmonize with the soup’s flavors and warmth.

Storage and Shelf Life

Store leftover chicken noodle soup in an airtight container in the refrigerator for up to three days. Ensure the soup is cooled before sealing to maintain quality. Freezing is another option; allow the soup to cool completely, then transfer to freezer-safe bags.

To reheat, thaw first in the refrigerator overnight. Reheat on stovetop over medium heat, stirring occasionally. Keep an eye on the temperature; avoid boiling as it can change the noodle’s texture. Signs of spoilage include sour smells or discoloration; when in doubt, throw it out!

Make Ahead Strategies

Preparing chicken noodle soup ahead of time can save time during busy weeknights. Chop vegetables and store them in the refrigerator up to a day before. You can also cook and shred the chicken in advance. Combine all ingredients right before serving to ensure the noodles don’t get soggy.

To maintain freshness, store separate components—broth in one container and noodles in another. Assemble just before serving for the best flavor and texture. For quality impact assessment, consider whether the freshness of herbs changes; add them just before serving to maintain the vibrant taste.

Scaling Instructions

Halving the recipe is straightforward by reducing each ingredient by half; ensure enough broth remains for cooking time. If doubling or tripling, use a larger pot to accommodate everything comfortably without overflowing.

Monitor cooking times, as larger quantities may require slight modifications to ensure even cooking. When storing larger quantities, ventilate properly to ensure air circulation within containers for prolonged freshness.

Nutritional Deep Dive

This chicken noodle soup offers impressive nutritional benefits, with a macro breakdown rich in protein from the chicken while providing ample carbohydrates from the noodles. Each bowl contains numerous micronutrients, predominantly from vegetables that enhance immune responses and overall health.

With the balance of macros and micros, it’s an excellent choice for those looking for a wholesome meal. For portion analysis, a serving of one bowl is approximately 300-400 calories, ensuring satisfying yet light nourishment ideal for any diet.

Dietary Adaptations

For those following a gluten-free diet, substituting traditional egg noodles for brown rice or gluten-free pasta ensures everyone can enjoy this comforting dish. Dairy-free variations can replace any creams with coconut milk for a flavorful twist.

If you’re vegan, consider replacing chicken with chickpeas or tofu, and vegetable broth instead of chicken broth to keep the heartiness without animal products. Adjustments for low-carb or keto diets can include zucchini noodles as a healthier alternative.

Paleo enthusiasts can make this soup compliant by skipping the noodles altogether and filling it with additional veggies like mushrooms and asparagus for texture.

Troubleshooting Guide

If your soup is too salty, add a splash of water or low-sodium broth to dilute it. Balancing flavor can also involve adding a pinch of sugar or acidity, such as lemon juice, to enhance the broth.

For texture issues with the noodles, if they’ve become mushy, prepared a fresh batch separately and add them only to individual bowls right before serving. If the soup lacks flavor, consider enhancing it by using fresh herbs or a splash of vinegar before serving.

Recipe Success Stories

Community feedback on this chicken noodle soup has been overwhelmingly positive. Families rave about how the dish has become a staple in their households, bringing children and parents together for nourishing meals.

Variation successes elevate the dish; readers have shared flavors ranging from adding green chilies for heat to experimenting with various side dishes, showing how versatile the soup can become.

Ingredient substitutions have been embraced by those with dietary restrictions. Stories of adapting the soup to fit vegan lifestyles or gluten-free diets highlight the recipe’s flexibility and allow it to be enjoyed by all.

Lastly, crafty readers have suggested photography tips for beautifully styled bowls of soup, showcasing the recipe in a visually appealing way to inspire others to cook.

Frequently Asked Questions

How long can chicken noodle soup be stored? Chicken noodle soup can be stored in the refrigerator for up to three days. If you wish to keep it longer, consider freezing it in airtight containers for up to three months.

Can I make chicken noodle soup in a slow cooker? Absolutely! Just add all the ingredients to the slow cooker and cook on low for about 6-8 hours or on high for 3-4 hours until the chicken is cooked through.

Is chicken noodle soup healthy? Yes! Chicken noodle soup is packed with nutrients from its wholesome ingredients. It contains lean protein from chicken, vitamins from vegetables, and carbohydrates from noodles, making it a well-rounded meal.

Can I add other vegetables to the recipe? Definitely! Feel free to add vegetables like peas, corn, or even leafy greens like spinach to boost nutrition and flavor.

How do I reheat leftover chicken noodle soup? To reheat, place the soup in a pot over low-medium heat, stirring occasionally until warmed through. Avoid boiling it as this can alter the texture of the noodles.

Can I use rotisserie chicken for this recipe? Yes, rotisserie chicken is a great time-saver! Just shred the cooked chicken and add it towards the end of the cooking process.

What’s the best type of noodle to use? Egg noodles are traditional and offer a great texture, but feel free to experiment with whole grain or gluten-free options based on your preferences.

Can I freeze chicken noodle soup? Yes, you can freeze it! Just be sure to let it cool completely before transferring to freezer-safe containers. Remember to avoid freezing the noodles if possible; they often become mushy after thawing.

What herbs can I use for extra flavor? Fresh thyme, parsley, and dill are excellent choices that can enhance the flavor of your soup significantly.

How can I make this soup spicier? If you enjoy a kick, consider adding red pepper flakes, diced jalapeños, or a splash of hot sauce to the soup for that extra heat.

Can I make this soup vegetarian? Yes! Substitute chicken with chickpeas and use vegetable broth to maintain the hearty flavor without using meat.

Additional Resources

If you enjoyed this chicken noodle soup recipe, consider checking out related recipes like creamy tomato soup or hearty vegetable soup for additional comfort meals. Technique guides on proper broth-making and noodle-cooking can take your cooking skills to the next level.

Explore ingredient guides for chicken, noodles, and spices for everything you need to deepen your culinary knowledge. Equipment recommendations will help you find the best pots and utensils to create similar delicious recipes at home.

Join the Conversation

We’d love to hear your chicken noodle soup stories! Share your thoughts, variations, and recipe experiences on social media using hashtag #ComfortInABowl. Don’t forget to take mouthwatering photos to showcase your dish and inspire fellow cooks in our community.

The Recipe

Hearty Chicken Noodle Soup

Serves: 4

Prep Time: 15 mins

Cook Time: 30 mins

Total Time: 45 mins

Kitchen Equipment Needed

  • Large pot
  • Ladle
  • Cutting board
  • Sharp knife

Ingredients

  • 1 lb chicken breast, diced
  • 2 carrots, sliced
  • 2 stalks of celery, diced
  • 1 onion, chopped
  • 3 cloves garlic, minced
  • 6 cups chicken broth
  • 2 cups egg noodles
  • Salt and pepper to taste
  • Fresh herbs for garnish (optional)

Directions

  1. In a large pot, heat a tablespoon of oil over medium heat and add the onions and garlic. Sauté until fragrant.
  2. Add the diced chicken and cook until no longer pink, about 5-7 minutes.
  3. Stir in the carrots and celery, cooking for another 5 minutes.
  4. Pour in the chicken broth and bring the mixture to a boil.
  5. Once boiling, reduce heat and add egg noodles. Simmer until the noodles are cooked, about 8-10 minutes.
  6. Taste and adjust seasoning with salt and pepper as needed.
  7. Serve hot, garnished with fresh herbs if desired.

Recipe Notes

  • For extra richness, you can cook the chicken in the broth for enhanced flavor.
  • Feel free to swap in your favorite vegetables!
  • This soup can be easily adapted for leftovers; consider adding more broth if reheating for the next day.

Irresistible Gooey Mozzarella Biscuit Bombs Recipe to Impress Everyone

Gooey Mozzarella Biscuit Bombs: A Scrumptious Delight

⚖️
Difficulty
Easy

⏲️
Prep Time
15 mins

🕒
Cook Time
20 mins

⏱️
Total Time
35 mins

🍽️
Servings
12 servings

Imagine biting into a warm, flaky biscuit that bursts open to reveal a gooey, melted mozzarella center. These Gooey Mozzarella Biscuit Bombs are not just a delight for your tastebuds but also a feast for the eyes. Perfectly golden on the outside and oozing with cheesy goodness on the inside, these biscuits will have your guests swooning at first bite. Whether you’re hosting a game day or just enjoying a cozy night in, these biscuit bombs are the ultimate comfort food that pairs beautifully with your favorite dipping sauce.

In addition to their incredible flavor, Gooey Mozzarella Biscuit Bombs are straightforward to whip up, making them an excellent choice for cooks of all skill levels. The combination of crispy exterior and stretchy mozzarella creates a mouthwatering texture that is hard to resist. Plus, they are incredibly versatile; toss in some herbs, spices, or your favorite ingredients to customize them to your preference. Get ready to impress your loved ones with this friendly, delicious treat that is sure to become a favorite in your household.

Quick Recipe Highlights

  • Flavor Profile: These biscuits boast a savory flavor with a cheesy surprise that pairs well with marinara or ranch dressing.
  • Texture: The contrast between the flaky outer layer and the gooey melted cheese provides a satisfying mouthfeel.
  • Aroma: They release a wonderful aroma of baked bread and melted cheese, filling your kitchen with irresistible scents.
  • Visual Appeal: Golden, puffy biscuits with visible ooze of molten mozzarella are visually enticing for any gathering.
  • Skill Level Needed: With their easy preparation and minimal steps, even novice cooks can achieve perfect results.
  • Special Equipment: Just a baking sheet and parchment paper are needed, making the cleanup a breeze.

Recipe Overview

  • Difficulty Level: This recipe is classified as easy, making it accessible for beginners and fun for seasoned bakers.
  • Category: Gooey Mozzarella Biscuit Bombs are a perfect appetizer or snack suitable for parties and movie nights.
  • Cuisine: This dish draws inspiration from Italian cuisine where cheese is a star ingredient, enhanced by a Southern biscuit tradition.
  • Cost: Affordably made with common pantry staples, this dish comes together without breaking the bank.
  • Season: Enjoy these cheesy delights year-round; they are particularly popular in fall and winter during gatherings.
  • Occasion: Ideal for game nights, family gatherings, or casual get-togethers with friends.

Why You’ll Love This Recipe

Indulging in Gooey Mozzarella Biscuit Bombs means experiencing a satisfying blend of taste and texture. The crispy exterior gives way to stretchy cheese that oozes out when you take a bite, creating an irresistible combination that satisfies cravings for both bread and cheese. This recipe not only delivers on flavor but also comfort, encapsulating that warm, homey feeling we all love associated with good food.

The convenience of this recipe shines through as it takes merely 15 minutes to prepare and 20 minutes to bake. The simplicity of the steps allows anyone, regardless of culinary skill, to whip up these bombshells on short notice. Whether you’re treating your family to a special snack or preparing to impress guests, these biscuit bombs bring familiarity and flair with minimal fuss.

Nutritionally, these biscuit bombs offer a hearty bite that includes dairy from the mozzarella, providing calcium and protein benefits. While they are indulgent, you can modify the recipe to include vegetables or lean meats, making them not just a delicious treat but also a filling option for snacking or as a light meal.

Socially, Gooey Mozzarella Biscuit Bombs serve as a perfect party food. Their bite-sized nature encourages sharing and conversation, making them a hit at gatherings where guests enjoy mingling. Create an inviting atmosphere with these biscuits served alongside various dipping sauces, letting each person customize their experience.

Lastly, the cost-effectiveness of this recipe cannot be understated. Made from simple ingredients like mozzarella, biscuits, and spices, you can serve a crowd without spending a fortune. Giving you an opportunity to enjoy delicious snacks while maximizing your budget makes this recipe an even more attractive option for your kitchen.

Historical Background and Cultural Significance

The origin of biscuit bombs lies in the Southern United States, where biscuits have been a staple comfort food for generations. Traditionally made with simple ingredients like flour, baking powder, and butter, biscuits have been a versatile dish that can be served with numerous fillings. The indulgent addition of gooey mozzarella cheese into the mix adds a modern twist, reflecting our evolving food culture where textures and flavors blend harmoniously.

Culturally, cheese has always held a cherished place in cuisine around the globe. From Italian mozzarella to Southern biscuits, this recipe beautifully melds culinary traditions that celebrate both simplicity and taste. As a popular appetizer or snack, it exemplifies communal eating traditions where friends and family gather around delicious shared food experiences.

As recipes evolve, variations of our Gooey Mozzarella Biscuit Bombs can be found across different regions. Some might include local spices, while others may introduce different types of cheese or additional fillings to accommodate local taste preferences. This evolution speaks to the adaptability of home-cooked meals that can be personalized to fit individual palates.

Regional variations make these biscuit bombs even more exciting. Influences from Tex-Mex cuisine could introduce spices like jalapeño or cilantro, or you might consider an Italian twist with herbs like basil or oregano. These adaptations highlight how food connects people across cultures, showcasing how everyone’s unique touch can add depth to a shared dish.

Ingredient Deep Dive

– **Mozzarella Cheese:** This semi-soft cheese, originating from Italy, is beloved for its versatility and stringy texture when melted. Mozzarella boasts health advantages such as being high in protein and calcium. When selecting mozzarella, look for fresh varieties for superior meltability; store it in its brine in the refrigerator for optimal freshness. Substitutes like cheddar or gouda can provide similar melting qualities but will alter the flavor profile of your biscuit bombs.

– **Biscuits:** Flour, baking powder, butter, and milk come together to create the soft, flaky body of our biscuit bombs. The choice of flour can influence texture, while cold butter helps achieve flakiness. Biscuits can be stored in a cool place prior to baking, but once baked, they are best enjoyed fresh. For a makeover, consider using whole wheat flour for a healthier twist.

Common Mistakes to Avoid

  • Using room temperature butter instead of cold butter can result in dense biscuits instead of flakey layers. Always ensure the butter is chilled for best results.
  • Overworking the biscuit dough will lead to tough biscuits instead of tender ones. Mix until just combined for perfect texture.
  • Not preheating the oven can cause unevenly cooked biscuit bombs. Ensure your oven is at the correct temperature before placing them inside.
  • Cutting the biscuits too large may prevent them from cooking through. Stick to the specified size in the recipe for even baking.
  • Skipping the baking sheet’s parchment paper can result in a mess. Use it to avoid sticking and for easy cleanup.
  • Not letting the biscuits rest allows for flavor development and flakiness. Allow resting time as specified in the recipe.
  • Filling biscuits too full can lead to bursting during baking. Aim for the recommended amount for optimal ooze without the mess.
  • Not allowing the cheese to come to room temperature before use can result in uneven melting. Ensure you take it out ahead of time.
  • Baking at the wrong temperature can alter texture; make sure your oven thermometer is accurate.
  • Forgetting to check for doneness can lead to raw centers; employ the toothpick method for checking.

Essential Techniques

Understanding the art of biscuit making is critical for this recipe. The **cutting in** technique, where cold butter is incorporated into dry ingredients, creates the site for steam during baking, leading to flakiness. To master this, use a pastry cutter or two forks to break the butter into pea-sized pieces without melting it.

Additionally, **folding the dough** when mixing ensures air pockets are preserved, allowing for a lighter biscuit. Always fold gently – over-mixing will eliminate these beneficial air pockets, leading to dense bombs instead of light, airy delights.

Pro Tips for Perfect Gooey Mozzarella Biscuit Bombs

1. Always use cold ingredients to achieve a flaky texture; frozen butter can also work wonders when grated into the dough.
2. Rest the biscuit dough in the fridge for 30 minutes before baking for softer centers.
3. Brush the tops with melted butter right before baking to enhance browning and add flavor.
4. Experiment with filling flavors; herbs, pepperoni, or garlic can elevate the flavor profile.
5. Serve immediately for the best gooey experience, as these are best enjoyed fresh out of the oven.
6. Consider adding a pinch of garlic or onion powder to the biscuit mix for extra flavor depth.
7. Use a combination of cheese for more complex flavors – mozzarella can be paired with havarti or gouda.
8. For a crispy exterior, bake on a hot baking sheet that’s been preheated in the oven.

Variations and Adaptations

Gooey Mozzarella Biscuit Bombs invite creativity. In terms of **regional variations**, a Southern twist might add BBQ sauce inside, marrying the flavors of classic biscuits with smoked meats. Conversely, an Italian adaptation could introduce dried herbs like rosemary or oregano for a Mediterranean flair.

For **seasonal adaptations**, consider stuffing the bombs with pumpkin puree and feta for a delightful fall-inspired treat. Engage with **dietary modifications** by replacing regular biscuits with gluten-free options or using almond flour for a low-carb variant.

To explore **flavor variations**, incorporate spices like cayenne for heat or sundried tomatoes for a tangy profile. On the other hand, you can customize **texture modifications** by using a mixture of shredded and cubed cheese for varied melting experiences.

Lastly, consider **presentation alternatives** by serving the bombs in a cast-iron skillet, garnished with fresh parsley or chives for a rustic look.

Serving and Presentation Guide

Plating is key to enhancing your culinary creation. Serve Gooey Mozzarella Biscuit Bombs on a large platter, allowing guests to see the delightful ooze of cheese. For garnishing, sprinkle fresh herbs such as basil or parsley on top to add a pop of color. Consider accompanying these biscuits with a small bowl of marinara sauce for dipping or a zesty ranch dressing for a new spin.

To ensure the biscuits remain warm during service, plate them in a low-heat oven. Keepportion control in mind; serve a few per person but encourage seconds to let guests indulge. Using minimalistic white plates will help emphasize the vibrant golden color of the biscuits.

Wine and Beverage Pairing

Pair Gooey Mozzarella Biscuit Bombs with a light white wine, such as a Pinot Grigio, that complements the cheese without overpowering it. For a more robust option, a light red like Grenache will offer a beautifully balanced contrast to the savory bombs.

If you’re looking for non-alcoholic alternatives, sparkling water with lemon adds a refreshing touch that cleanses the palate. For coffee lovers, a medium roast paired with a hint of cream can create a delightful contrast to the savory snack.

Ensure beverages are served at the right temperature, with whites chilled and reds slightly below room temperature for optimal enjoyment.

Storage and Shelf Life

To maintain the freshness of your Gooey Mozzarella Biscuit Bombs, store them in an airtight container at room temperature for up to two days. For longer storage, refrigerate them for up to a week. If you want to keep them for an extended period, these bombs freeze well; seal them tightly in freezer-safe bags for up to three months.

When reheating, place the biscuits back in a 350°F oven for about 10-15 minutes until heated through, ensuring they regain their crisp exterior. Always inspect them for any signs of spoilage, such as a sour smell or visible mold.

Make Ahead Strategies

If you’re planning to serve Gooey Mozzarella Biscuit Bombs at a gathering, they can be prepared ahead of time. You can make the dough and fill the biscuits, placing them in the fridge up to 24 hours before baking. This allows the flavors to meld beautifully without compromising texture.

For assembly, keep the cheese and other fillings separate until just before you’re ready to bake to prevent sogginess. If you prepare them the night before, an extra 5-10 minutes in the oven may be necessary for a perfect bake.

When serving, add fresh ingredients such as herbs or dipping sauces just before serving for a burst of freshness.

Scaling Instructions

Scaling up or down is simple with this recipe. For halving the batch, keep the baking time similar, but monitor the biscuits closely for doneness. Doubling or tripling the recipe is also feasible, although you may need to bake in batches based on your oven size or use multiple sheets.

If using larger baking sheets, adjust the spacing between biscuits as they need room to expand as they bake. Ensure to keep an eye on the biscuit bombs in the oven; larger quantities might require a bit more time, while smaller batches should be checked earlier to avoid overbaking.

For storing larger quantities, ensure airtight containers are adequately sized to fit all biscuits without squishing them.

Nutritional Deep Dive

Gooey Mozzarella Biscuit Bombs provide a delightful balance of macronutrients with carbohydrates coming mostly from the biscuits, and protein from the mozzarella. Each bomb generally contains around 150-200 calories, influenced by your filling choices.

In terms of micronutrients, calcium and phosphorus from the cheese contribute to strong bones, while the vitamins in herbs or spices can offer additional health benefits. During portion analysis, keep in mind that moderation is key to enjoying these delicious snacks within a balanced diet.

If you’re focusing on weight management, consider serving these biscuit bombs with a side salad to add volume and fiber to your meal, allowing you to enjoy the richness without compromising on dietary goals.

Dietary Adaptations

For those following a **gluten-free diet**, use gluten-free biscuit mix alongside tapioca or almond flour for a crispy biscuit bomb without the gluten.

**Dairy-free** alternatives can involve substituting mozzarella with cashew or almond cheese, which maintains creamy textures while satisfying those with lactose sensitivities.

For a **vegan option**, replace butter with coconut oil or a vegan substitute along with a plant-based cheese.

Those on a **low-carb** or **keto diet** can utilize cheese-based doughs or almond flour biscuits for an indulgent yet compliant treat.

The recipe can also adapt minimally to fit **paleo** guidelines using almond flour and avoiding processed items while maintaining taste and texture.

Troubleshooting Guide

If you encounter **texture issues**, such as a dense biscuit, review your butter incorporation technique; remember to cut in the butter well. If the shells seem too dry or difficult to chew, consider adjusting moisture levels by adding a little more milk gradually during mixing.

For **flavor balance problems**, always taste your fillings before closing up the biscuits. If you find the flavor too bland, add spices or salt carefully until you reach the desired taste.

If there are **temperature problems** after baking, ensure your oven is properly calibrated. Misleading temperatures can lead to undercooking or overcooking.

Should you experience **ingredient substitution issues**, keep in mind the balance between wet and dry ingredients to prevent compromising the texture; this is particularly pertinent when trying alternatives in baking.

And if you run into **timing concerns**, adapt your baking time by checking doneness at intervals to avoid overbaking or underbaking, as ovens can vary widely in temperature consistency.

Recipe Success Stories

Readers have shared delightful feedback after trying our Gooey Mozzarella Biscuit Bombs, often mentioning how easy and satisfying the process was. Many have reported their families inhaling these bombs at gatherings, with the oozy cheese stealing the show every time.

Variation successes are commonly shared, with people experimenting with different fillings based on their preferences—ranging from spicy jalapeños to sweet caramelized onions—and passing on tips about their favorite combinations.

Some readers even provided photography tips, emphasizing that the key to capturing those golden biscuit colors lies in natural lighting and a good background, like dark wood or marble, to enhance the visual appeal of the gooey cheese-filled center.

Engagement within our cooking community continues to grow as fans of this recipe explore and share their personalized twists, fostering a delicious cycle of creativity.

Frequently Asked Questions

Can I freeze the biscuit bombs?

Yes! You can freeze the unbaked biscuit bombs. Assemble them, then freeze on a baking sheet. Once solid, transfer to an airtight container or freezer bag for up to three months. Bake from frozen, adding a bit of extra baking time.

What type of cheese works best?

While mozzarella is traditional due to its melting quality, feel free to experiment with other cheeses like cheddar, gouda, or a mix for a more complex flavor. Your selections depend on personal taste or desired intensity.

How long will leftover bombs stay fresh?

Leftovers can be stored in an airtight container at room temperature for about two days or in the refrigerator for up to a week. For longer storage, freezing is highly recommended.

Can I make these biscuits ahead of time?

Absolutely! You can prepare and fill the biscuit bombs ahead of time, storing them in the fridge before baking. They can also be assembled and frozen, allowing for quick baking when you’re ready.

How can I make them spicier?

Add spices like crushed red pepper flakes into the cheese filling or mix in diced jalapeños for added heat! Alternatively, serve with spicy dipping sauces.

What dipping sauces work best with these biscuit bombs?

Classic marinara, honey mustard, ranch dressing, or a spicy aioli will complement these biscuits perfectly. Feel free to explore your favorites and create a dipping sauce bar!

Can I use low-fat cheese?

Yes, low-fat cheese can be used, but keep in mind that this may alter the melting quality and flavor slightly. If going low-fat, seek a cheese designed for baking.

Should I let the dough rest before baking?

Letting the dough rest is not mandatory, but allowing it to chill slightly can help achieve better texture by minimizing shrinkage and increasing flakiness.

Can I add protein to these bombs?

Definitely! Feel free to incorporate cooked meats like pepperoni, ham, or shredded chicken for a more filling snack. Just be careful not to overstuff!

Are there vegan options available?

Yes! You can use plant-based cheese and substitute butter with vegan margarine or coconut oil to create enjoyable vegan mozzarella biscuit bombs.

Additional Resources

For those interested in more delicious treats, try our related recipes such as **Cheesy Garlic Breadsticks** or **Stuffed Crescent Rolls**. Dive deeper into baking techniques with guides on biscuit making or explore different **cheese selections** needed for the best results.

Don’t forget to choose your kitchen equipment wisely. A reliable baking sheet or pastry cutter can significantly impact the baking process. As you unlock more of these flavors, consider seasonal variations, like adding pumpkin for fall or sprinkles for fun variations for kids.

Join the Conversation

We’d love to hear your thoughts on these Gooey Mozzarella Biscuit Bombs! Share your experiences, photos, and adaptations with us through social media. Engage with fellow food lovers in our community as we explore diverse variations of our recipe and bring everyone together through shared culinary experiences. Your feedback not only helps others but inspires creativity in our cooking journey, ensuring that every kitchen feels at home with these delightful treats.

The Recipe

Gooey Mozzarella Biscuit Bombs

Serves: 12 servings

Prep Time: 15 mins

Cook Time: 20 mins

Total Time: 35 mins

Kitchen Equipment Needed

  • Baking sheet
  • Parchment paper
  • Mixing bowls
  • Pastry cutter (optional)

Ingredients

  • 2 cups all-purpose flour
  • 2 teaspoons baking powder
  • 1/2 teaspoon salt
  • 1/2 cup cold butter, cubed
  • 3/4 cup milk
  • 1 cup shredded mozzarella cheese

Directions

  1. Preheat your oven to 400°F (200°C) and line a baking sheet with parchment paper.
  2. In a large mixing bowl, combine the flour, baking powder, and salt.
  3. Add the cold butter and use a pastry cutter or your fingers to work it into the flour until the mixture resembles coarse crumbs.
  4. Stir in the milk until just combined, being careful not to overmix.
  5. Dust your work surface with flour and roll the dough out until about 1/2 inch thick.
  6. Cut out rounds using a biscuit cutter and place a spoonful of mozzarella cheese in the center of each round.
  7. Fold the biscuit over the cheese, sealing the edges and placing them seam side down on the baking sheet.
  8. Bake for 15-20 minutes, or until golden brown and the cheese is bubbly.
  9. Allow to cool slightly before serving with your favorite dipping sauce.

Recipe Notes

  • Feel free to experiment with different cheeses or add herbs for flavor.
  • For a spicier version, add diced jalapeños or crushed red pepper to the cheese filling.
  • Make sure to keep the butter cold for the best texture.

Delicious Steak Avocado and Roasted Corn Bowl Recipe to Try

Steak, Avocado, and Roasted Corn Bowl with Cilantro Cream Sauce: A Flavor Explosion

⚖️
Difficulty
Moderate

⏲️
Prep Time
20 mins

🕒
Cook Time
15 mins

⏱️
Total Time
35 mins

🍽️
Servings
4

As I prepared this Steak, Avocado, and Roasted Corn Bowl with Cilantro Cream Sauce, the vibrant colors and enticing aromas filled my kitchen. The juicy, perfectly grilled steak pairs beautifully with creamy avocado and sweet roasted corn, making this dish an irresistible weeknight meal or a show-stopping weekend dinner. Each bite bursts with flavor, thanks to the fresh cilantro cream sauce that ties all the components together, enhancing their natural flavors.

Imagine a comforting bowl brimming with tender steak, smooth avocado slices, and caramelized roasted corn. The cilantro cream sauce serves not only as a delicious finishing touch, but it also adds a refreshing herbaceous note that balances the richness of the steak and the creaminess of the avocado. This bowl is not just a meal; it’s an experience that engages all your senses and leaves you wanting more.

Quick Recipe Highlights

  • Flavor Profile: Savory steak, creamy avocado, and sweet roasted corn create a delightful harmony of flavors.
  • Texture: The contrast of tender beef and smooth avocado with the crunch of roasted corn adds a satisfying mouthfeel.
  • Aroma: The fresh cilantro combined with grilled meat and sweet corn creates an inviting aroma that beckons from the kitchen.
  • Visual Appeal: The colorful ingredients create a stunning presentation that is both appetizing and Instagram-worthy.
  • Skill Level Needed: This recipe requires moderate skills, perfect for home cooks looking to elevate their culinary repertoire.
  • Special Equipment: A grill or grill pan is essential for cooking the steak and corn evenly and achieving that delicious char flavor.

Recipe Overview

  • Difficulty Level: The moderate difficulty is due to the grilling process and timing of each ingredient to ensure everything is perfectly cooked.
  • Category: This dish falls under the dinner category, serving as a hearty, satisfying meal that can impress guests or satisfy your family.
  • Cuisine: Inspired by Mexican flavors, this bowl captures the essence of fresh ingredients typically found in traditional Latin dishes.
  • Cost: Expect a moderate cost as steak and avocados can be pricier, but they are worthwhile investments for delicious flavors.
  • Season: This recipe is perfect for summer and fall, when corn is at its peak sweetness and barbecues are in full swing.
  • Occasion: Ideal for casual family dinners or festive gatherings with friends, this bowl can be a centerpiece for any meal.

Why You’ll Love This Recipe

This Steak, Avocado, and Roasted Corn Bowl is a culinary delight that combines taste and texture in every spoonful. The juicy, tender steak is complemented by the freshness of avocado and the hint of sweetness from roasted corn. The creamy cilantro sauce amps up the dish and transforms it from simple to extraordinary. Beyond its incredible taste, this meal is convenient to prepare, making it a great option for busy weeknights.

Nutritionally, this dish is a powerhouse, rich in protein from the steak and healthy fats from the avocado. It provides essential vitamins and minerals while satisfying your hunger without compromising flavor. Additionally, this recipe is a perfect way to show off your cooking skills at social gatherings. Friends and family will be impressed by your ability to create such vibrant flavors and beautiful presentations. Plus, it delivers great value, as you can easily double the recipe to serve a crowd without breaking the bank.

Historical Background and Cultural Significance

The roots of this Steak, Avocado, and Roasted Corn Bowl stem from the culinary traditions of Latin America, where fresh ingredients and bold flavors reign supreme. Avocados, known as a staple in many Latin cuisines, carry cultural importance, symbolizing fertility and prosperity. The incorporation of corn, considered the “staff of life” in Mesoamerica, adds to the authenticity of this dish, reflecting the region’s agricultural heritage.

Over the centuries, this bowl has evolved, with variations inspired by different regions. For instance, while this recipe is influenced by Mexican traditions, similar ingredients are found in other Latin cultures, showcasing the universal appeal of steak, avocados, and corn. Today, modern culinary adaptations, including fresh sauces and grilling techniques, breathe new life into classic recipes, making them a favorite among food enthusiasts worldwide.

Ingredient Deep Dive

Steak

Steak is not only a flavorful source of protein but also rich in essential nutrients like iron and vitamin B12, which are vital for energy and overall health. When selecting steak, look for cuts with good marbling to ensure tenderness and taste. Proper storage in the refrigerator can keep steak fresh for several days, while freezing is an excellent option for longer-term preservation. If you’re in a pinch, flank or skirt steak can be fantastic substitutes that offer great flavor and texture.

Avocado

Avocados are packed with healthy fats, fiber, and a variety of vitamins and minerals, promoting heart health and aiding digestion. When choosing avocados, opt for those that yield slightly to gentle pressure, indicating ripeness. Store ripe avocados in the refrigerator to extend their shelf life, while unrefrigerated ones can be kept at room temperature to ripen. If you need an alternative, consider using a creamy hummus or Greek yogurt for a similar mouthfeel.

Roasted Corn

Corn adds sweetness and crunch to the bowl, making it an essential component. Rich in fiber and antioxidants, corn is great for digestion and overall health. When selecting corn, choose ears that are plump and golden. Fresh corn can be easily roasted on the grill or in the oven to bring out its natural sweetness. For alternatives, canned or frozen corn can work in a pinch, but be sure to adjust cooking times and flavors accordingly.

Common Mistakes to Avoid

  • Overcooking the steak can lead to a tough texture. Use a meat thermometer to ensure the steak reaches your desired doneness.
  • Not allowing the steak to rest after cooking can result in dry meat. Let it rest for at least 5 minutes to retain juices.
  • Using unripe or overly ripe avocados can affect the dish’s texture. Choose avocados that yield to gentle pressure for optimal creaminess.
  • Forgetting to season ingredients before cooking can leave the bowl flavorless. Always season each component to enhance overall taste.
  • Neglecting to properly roast corn can make it rubbery. Aim for a caramelized exterior for the best flavor and texture.
  • Underestimating preparation time can cause chaos. Plan out your steps and prep ingredients in advance.
  • Not incorporating the cilantro sauce evenly can lead to inconsistent flavor. Drizzle generously across all ingredients.
  • Using too many competing flavors can overwhelm the palate. Keep focus on the fresh and simple profile of this dish.

Essential Techniques

Grilling steak properly is crucial for delivering the best flavor and tenderness. Start by preheating your grill and ensuring grates are clean for perfect sear marks. Always let your steak rest after grilling to retain juices, ensuring every bite is juicy and flavorful.

Roasting corn elevates its natural sweetness and adds a nice char. Use high heat to ensure the kernels caramelize, giving the corn a delightful texture. Keep an eye on the kernels to prevent burning; rotating them enhances even cooking.

Making the cilantro cream sauce is an essential technique, as it brings the dish together. Blend ingredients until smooth, tasting to adjust seasoning. This sauce should balance the creaminess of the avocado with the sharpness of fresh herbs for a flavorful finish.

Pro Tips for Perfect Steak, Avocado, and Roasted Corn Bowl

To elevate your Steak, Avocado, and Roasted Corn Bowl, start by marinating the steak for at least an hour to infuse flavor. Simple marinades with lime juice, garlic, and olive oil work wonders.

Use fresh ingredients for the cilantro cream sauce. Experimenting with Greek yogurt adds tanginess while keeping it healthy.

For optimal cooking, let steak come to room temperature before grilling. This ensures even cooking and better texture.

Ensure your grill is well-heated for ideal searing. Achieving grill marks enhances visual appeal and flavor.

Consider adding extra toppings like crumbled feta or fresh lime juice for a zesty kick.

If pressed for time, utilize pre-cooked corn or canned options to save on preparation without sacrificing flavor.

Pair the bowl with a refreshing salad or slaw for added crunch and freshness.

Lastly, always taste and adjust your seasonings as you go. A pinch of salt or a squeeze of lemon can create significant flavor enhancements.

Variations and Adaptations

Explore regional variations by incorporating different proteins, like shrimp or chicken, for alternative flavor profiles. This allows you to customize based on preferences and what you have on hand.

Seasonal adaptations could include adding roasted vegetables like bell peppers or zucchini during summer, taking advantage of their freshness and flavor.

For dietary modifications, consider a vegan version by using grilled jackfruit or tofu in place of steak while maintaining the delicious corn and avocado.

Experiment with flavor variations such as spicy salsa or chipotle crema instead of cilantro sauce, adding smoky heat for a kick.

Texture modifications can include crispy fried onions on top for crunch. Presentation variations could involve serving the components deconstructed for a modern twist.

Serving and Presentation Guide

When plating your Steak, Avocado, and Roasted Corn Bowl, create a colorful base by starting with leafy greens or rice at the bottom, adding layers of sliced steak, corn, and avocado.

Garnish with fresh cilantro or chives for a pop of color. A drizzle of the cilantro cream sauce on top not only adds flavor but enhances visual appeal.

Serve with lime wedges on the side to allow guests to add a zesty squeeze to their preference.

Consider using shallow bowls or wooden boards for a rustic look, elevating the dish’s presentation.

Temperature is essential; serving the bowl warm ensures the steak remains juicy.

For portion control, aim for even distribution of toppings across bowls to ensure every guest enjoys a well-balanced meal.

Wine and Beverage Pairing

When it comes to pairing drinks with your Steak, Avocado, and Roasted Corn Bowl, a full-bodied red wine like a Malbec complements the rich flavors of the steak nicely.

If looking for a white option, a crisp Sauvignon Blanc echoes the freshness of the avocado and cilantro, enhancing the meal.

For non-alcoholic alternatives, consider sparkling water with fresh lime or a refreshing iced tea with mint.

If coffee or tea is more your style, a lightly brewed herbal tea can act as a palate cleanser.

Always serve these beverages chilled to keep the dining experience refreshing.

Storage and Shelf Life

To store your Steak, Avocado, and Roasted Corn Bowl, keep components separate where possible. Steak can be refrigerated in an airtight container for up to 3-4 days.

Avocados should ideally be consumed fresh, but if you must store leftovers, keep slices in an airtight container with lemon juice to slow browning.

Roasted corn can be stored for a few days in the fridge; ensure it is cooled before sealing to maintain texture.

Signs of spoilage include off smells and mushy texture in avocados. Reheat steak gently to avoid drying it out; reheating on low in the microwave or in a skillet with a splash of broth works best.

For longer storage, consider freezing pre-cooked steak, though the texture may vary post-thaw.

Make Ahead Strategies

To save time, prep your Steak, Avocado, and Roasted Corn Bowl ingredients a day ahead. Marinade the steak, chop vegetables, and prepare the cilantro cream sauce, storing each in the fridge.

Consider roasting corn in advance and keeping it sealed in the refrigerator to preserve freshness and texture. This reduces assembly time when it’s time to serve dinner.

Evaluate the impact of prep on quality; while steak benefits from marinating, other components like avocado should be cut fresh to prevent browning.

For assembly, simply mix components as you go and focus on presentation to impress guests.

Don’t forget to reheat sauces briefly to enhance their flavors before drizzling.

Scaling Instructions

If you want to halve the recipe for a smaller gathering, simply cut the ingredient quantities in half while maintaining cooking times as needed.

Doubling or tripling the recipe accommodates larger crowds; however, adjust cooking times and make sure to batch grill the steak to avoid overcrowding, which can result in uneven cooking.

When scaling, be aware that adjusting timing is often necessary; larger amounts may take longer to cook or reheat.

If your equipment size is limited, consider cooking in batches or utilizing multiple cookware pieces.

Always ensure stored leftovers are adequately portioned to maintain quality and flavor for future meals.

Nutritional Deep Dive

The macro breakdown of your dish showcases a hearty balance of proteins, carbohydrates, and fats. Each serving typically contains a generous helping of protein from the steak, with healthy fats from the avocado contributing to a nutrient-dense meal.

Micronutrient analysis reveals that ingredients contribute essential vitamins such as vitamin A from avocado and dietary fiber from corn, promoting digestive health.

The health benefits are significant; integrating colorful vegetables and lean meat makes this bowl a wholesome choice for most diets.

Be mindful of calorie content; while satisfying, ensuring portion sizes align with personal health goals is crucial.

This meal lends itself well to weight management—protein and fiber contribute to feelings of fullness, helping to prevent overeating.

Dietary Adaptations

For gluten-free adaptations, this dish already suits that need. Just ensure all packaged products are certified gluten-free.

Dairy-free options can be achieved by substituting traditional cream with coconut yogurt in the cilantro sauce for similar creaminess without lactose.

For a vegan alternative, use marinated tempeh or mushrooms in place of steak, maintaining the core flavors without animal products.

Low-carb dieters can reduce or replace corn with zucchini or cauliflower rice to keep the same flavor profile while minimizing carbs.

Each adaptation maintains the dish’s essence, making it versatile across dietary palettes and preferences.

Troubleshooting Guide

If you encounter texture issues with the steak, ensure you’re using the right cut and cooking to the correct temperature. Resting the steak before slicing also aids this.

Flavor balance concerns can stem from inadequate seasoning; a taste test before serving helps calibrate salt, acid, and sweetness across components.

Temperature problems, such as cold ingredients, can make the dish less appealing. Reheating items gently ensures a warm serving experience.

Equipment challenges can arise if grills are too hot or too cold; have a reliable grill thermometer to maintain optimal cooking conditions.

Ingredient substitutions may alter flavor; adjust sauces and spices accordingly to maintain balanced results.

For timing concerns, prep and assembly should be organized to prevent delays during meal service.

Recipe Success Stories

Community feedback highlights how this Steak, Avocado, and Roasted Corn Bowl has become a family favorite, with many sharing adjustments that made delightful variations.

Readers have reported success with grilling techniques, noting that charcoal grilling brings an extra depth of flavor.

Adaptation stories reveal how others have replaced steak with grilled tofu, maintaining the spirit of the dish while making it plant-based.

Photography tips from the community recommend focusing on close-up shots of the ingredients to showcase their vibrant colors.

Overall, this recipe fosters connection and creativity, inspiring cooks to share their experiences and ideas.

Frequently Asked Questions

Can I use a different protein instead of steak?

Absolutely! You can substitute steak with chicken, shrimp, or even a plant-based protein like jackfruit for a delicious twist on this recipe.

How do I keep my avocado from browning?

To prevent browning, store cut avocado with a lemon or lime juice coating, or keep the pit in until ready to serve. Using airtight containers can help too.

What type of corn should I use?

Fresh summer corn is ideal for roasting, but canned or frozen corn can also work in a pinch—just make sure to heat them thoroughly and season well.

Can I make the cilantro cream sauce ahead of time?

Yes! The cilantro cream sauce can be made in advance; just store it in an airtight container in the refrigerator to keep it fresh.

What sides pair well with this bowl?

Simple side dishes like a green salad or rice can complement the bowl beautifully without overshadowing the main ingredients.

Is this recipe suitable for meal prep?

Yes! All components can be cooked ahead of time, allowing you to assemble fresh bowls throughout the week.

What options do I have for leftovers?

Leftovers can be mixed into wraps or salads for a fresh take or simply reheated and enjoyed again as is!

How spicy is the cilantro cream sauce?

The base recipe is mild, but you can add jalapeños or cayenne for an extra kick if desired. Adjust to your taste preference!

Can I freeze this dish?

While the steak can be frozen, it’s best to consume the avocado fresh. Consider freezing only the steak and corn for later use.

How do I ensure even cooking of the steak?

Let the steak come to room temperature before grilling, and make sure your grill is preheated. Use a meat thermometer for best results.

Additional Resources

If you loved this recipe, you might enjoy related recipes that incorporate similar fresh ingredients, such as a Grilled Chicken Salad or Quinoa Bowl.

For technique guides, explore grilling tips to perfect your skills further or creating vibrant sauces that elevate everyday dishes.

Ingredient information can also help you understand the health benefits tied to choices in your cuisine, enhancing your cooking experience.

Equipment recommendations can aid in selecting the best tools for optimal cooking results, such as grill pans or food processors for sauces.

Seasonal variations on similar recipes can inspire new creations, keeping your meal planning exciting year-round.

Join the Conversation

We’d love for you to share your experience with the Steak, Avocado, and Roasted Corn Bowl! Tag us on social media with your creations and tips.

Photography tips can help aspiring cooks improve their dish presentation when taking pictures to share with friends and family or post online.

Leave recipe reviews or comments below to engage with our cooking community and share your suggestions for variations you’ve tried.

Let’s connect over our love for cooking as we exchange recipe ideas and creative twists to make traditional dishes unique and innovative.

Bringing together your voices will continue to enrich our discussions and inspire new flavors in the kitchen.

The Recipe

Steak, Avocado, and Roasted Corn Bowl with Cilantro Cream Sauce

Serves: 4

Prep Time: 20 mins

Cook Time: 15 mins

Total Time: 35 mins

Kitchen Equipment Needed

  • Grill or Grill Pan
  • Cutting Board
  • Knife
  • Blender or Food Processor
  • Mixing Bowl

Ingredients

  • 1 lb flank steak
  • 2 ripe avocados, sliced
  • 2 ears of corn, husked and cleaned
  • 1 cup cilantro leaves, packed
  • ½ cup sour cream or Greek yogurt
  • Juice of 1 lime
  • Salt and pepper to taste
  • Olive oil for grilling

Directions

  1. Preheat the grill to medium-high heat.
  2. Season the flank steak with salt, pepper, and a drizzle of olive oil.
  3. Grill the steak for about 5-7 minutes on each side, depending on thickness, until desired doneness.
  4. While the steak is grilling, grill the corn until slightly charred, about 10-15 minutes.
  5. In a blender, combine cilantro, sour cream, lime juice, a pinch of salt, and blend until smooth.
  6. Once cooked, let the steak rest for 5 minutes before slicing it against the grain.
  7. Assemble the bowl by placing a base of your choice, topped with sliced steak, avocado, and roasted corn.
  8. Drizzle with cilantro cream sauce and serve immediately.

Recipe Notes

  • For an extra kick, add some diced jalapeños to the cilantro sauce.
  • You can swap steak for grilled chicken or tofu for a different protein.
  • This recipe can be easily multiplied for larger gatherings.

Indulge in Heavenly Raspberry Cheesecake Bars for Dessert Bliss

Heavenly Raspberry Cheesecake Bars: Indulge in Creamy Delight

⚖️
Difficulty
Moderate

⏲️
Prep Time
20 mins

🕒
Cook Time
40 mins

⏱️
Total Time
1 hour

🍽️
Servings
12 bars

These Heavenly Raspberry Cheesecake Bars are the ultimate dessert offering a luscious blend of creamy cheese and tart raspberries that sets your taste buds on a joyous adventure. The buttery graham cracker crust beautifully underpins the rich cheesecake layer, while the vibrant raspberry swirl not only adds a pop of color but also a delightful tang that perfectly balances the richness of the cheesecake. Imagine indulging in these bars at a family gathering or enjoying an after-dinner treat, and you’ll quickly see why this dessert has become a beloved mainstay in kitchens everywhere.

Whether you’re hosting a party or simply craving something sweet, these cheesecake bars promise to impress. Their melt-in-your-mouth texture combined with the bright, fruity notes captures the essence of summer in every bite. Plus, they are just as appealing visually, making them a perfect addition to any dessert table. With every slice, you’re guaranteed compliments that will keep you making this recipe for years to come.

Quick Recipe Highlights

  • Flavor Profile: The cheesecake is rich and creamy, complemented by the fresh tang of raspberries, creating a delightful contrast that is hard to resist.
  • Texture: Each bar offers a smooth, creamy filling on a crunchy, buttery crust, with bursts of raspberries providing a juicy contrast.
  • Aroma: The sweet scent of baked cheesecake blends perfectly with the fruity aroma of fresh raspberries, awakening the senses.
  • Visual Appeal: The vibrant pink swirls atop the creamy white filling create an eye-catching presentation that draws everyone in.
  • Skill Level Needed: This recipe is moderately easy, perfect for those familiar with basic baking techniques and willing to try something new.
  • Special Equipment: You’ll need a rectangular baking pan, a mixing bowl, and a hand mixer or stand mixer to achieve that smooth, creamy texture.

Recipe Overview

  • Difficulty Level: While not overly complicated, these bars do require attention to detail in both mixing and baking, making it a moderate challenge.
  • Category: These bars fit perfectly as desserts, ideal for parties, gatherings, or a special treat at home.
  • Cuisine: Rooted in American desserts, these raspberry cheesecake bars showcase the classic cheesecake with a fruity twist.
  • Cost: The ingredients are relatively inexpensive, making them accessible while delivering an elegant finish.
  • Season: Enjoy these bars year-round, but they shine during warmer months when fresh raspberries are in season.
  • Occasion: Perfect for birthdays, holiday celebrations, or casual family dinners, these bars add a touch of decadent indulgence.

Why You’ll Love This Recipe

These Heavenly Raspberry Cheesecake Bars boast a flavor that perfectly balances creamy sweetness with tangy berry goodness, making for an irresistible treat. The smooth, melt-in-your-mouth texture of the cheesecake harmonizes beautifully with the crunchy graham cracker crust, delivering the ideal contrast of textures that everyone loves. Not only do they look gorgeous with their bright raspberry swirls, but they also satisfy any sweet tooth, all while inviting a sense of nostalgia reminiscent of summertime desserts.

Preparation is a breeze with this recipe. Most of the process involves mixing simple ingredients, pouring, and baking. The time it takes to prepare is well worth the delicious outcome, and once baked, the cheesecake bars can chill while you prepare for your event, freeing up your time while still ensuring fresh dessert.

Nutritionally, the main ingredients support both energy and satisfaction without overwhelming you with guilt. Raspberries are high in antioxidants, while cream cheese and eggs provide richness. Enjoying one of these bars feels indulgent, but you can also savor them knowing they are made with wholesome ingredients.

These bars can elevate any gathering, bringing friends and family together over a shared love of desserts. They make a stunning centerpiece on dessert tables and are easily cut into squares, making serving straightforward and stress-free at your next party or dinner.

Economically, preparing desserts at home is generally more cost-effective than buying them from bakeries. This recipe offers a chic dessert that looks and tastes like a high-end treat without the associated price tag, making it a win-win for both your wallet and your guests’ taste buds.

Historical Background and Cultural Significance

The origins of cheesecake can be traced back to ancient Greece, where it was served to athletes at the first Olympic Games. Over time, cheesecake evolved, with each culture contributing its unique spin, leading to today’s beloved American variety. The incorporation of fresh fruits like raspberries reflects local farming traditions and the desire to enhance existing flavors, creating a dessert that is both historical and contemporary.

Raspberry cheesecake, in particular, showcases the adaptability of this dessert to regional tastes and available ingredients. As raspberries are a popular fruit in many areas, they often find their way into cheesecake recipes. The use of seasonal produce not only honors local bounties but also emphasizes sustainability in cooking.

Through the years, cheesecake recipes have been passed down as family traditions, often filling homes with delightful memories of baking and sharing. Special occasions were celebrated with this delicious dessert, solidifying its place in culinary heritage and marking important milestones in family histories.

Modern variations keep this dessert vibrant, with many bakers experimenting with flavors, ingredients, and techniques, thereby celebrating the cultural significance and evolution of raspberry cheesecake bars in contemporary cuisine.

Ingredient Deep Dive

Raspberries: Raspberries hold a prominent place in culinary history, often symbolizing sweetness and summer abundance. These berries are not only flavorful but also packed with vitamins and minerals like Vitamin C, manganese, and dietary fiber, making them a nutritious choice. When selecting raspberries, look for bright, plump berries with a fragrant aroma and avoid any that are mushy or dull. Store them in the refrigerator and consume them quickly for the best quality; consider freezing them if you won’t be using them soon, and they can also be used in smoothies or sauces later.

Cream Cheese: The decadent cream cheese used in cheesecake recipes has a beloved spot in dessert-making history. Known for its creamy texture and tangy flavor, cream cheese pairs beautifully with sweet ingredients. It contributes to the rich taste of the cheesecake while offering a level of versatility for other recipes. Choose full-fat cream cheese for the best results in terms of creaminess and flavor. It can be stored in the refrigerator for several weeks, but be sure to use it within the guideline expiration date. Low-fat alternatives might work but could alter the texture and taste.

Common Mistakes to Avoid

  • Overmixing the cream cheese can lead to a tough texture; mix just until smooth.
  • Not allowing the cream cheese to come to room temperature can result in lumps; always soften the cheese first.
  • Baking at too high a temperature may cause cracks; aim for a steady temperature to ensure even baking.
  • Skimping on the cooling time can lead to a soggy crust; allow adequate cooling before slicing.
  • Using insufficient crust ingredients can result in a flimsy base; ensure proper measurements for a strong foundation.
  • Neglecting to line the baking pan can make removal difficult; always use parchment paper for easy lifting.
  • Skipping the chilling stage after baking can affect consistency; always refrigerate for optimal texture.
  • Cutting bars too soon can lead to crumbling; let them set thoroughly before slicing.
  • Using frozen raspberries without thawing can release too much moisture; ensure they’re drained before mixing in.
  • Assuming all ovens bake the same can lead to inconsistency; test for doneness with a toothpick to be certain.

Essential Techniques

Mixing Cream Cheese: Properly mixing cream cheese is crucial for achieving a smooth, creamy texture. Start by allowing the cream cheese to soften at room temperature to prevent lumps. Use a hand mixer or stand mixer at medium speed until the cream cheese is smooth before incorporating other ingredients. Avoid overmixing once the eggs are added to prevent excess air, which can lead to cracks during baking.

Creaming the Sugar: Creaming sugar with butter or cream cheese introduces air into the mixture, creating a light texture. Use a mixer on medium to high speed until the mixture is fluffy and pale in color. This aeration is key in achieving the perfect cheesecake bars. Pay close attention to the visual cues, like the mixture turning light and fluffy, before moving on to the next steps.

Pro Tips for Perfect Heavenly Raspberry Cheesecake Bars

1. Always let the cream cheese soften fully at room temperature before mixing to avoid a lumpy batter.

2. Use fresh raspberries for the best flavor and appearance; frozen can work, but drain them well beforehand.

3. Line your pan with parchment paper or use a non-stick spray for easy removal of the bars.

4. Allow the bars to cool fully in the pan before cutting to maintain their structure.

5. For an extra tang, add a touch of lemon juice or zest to the cheesecake mix.

6. If you want a firmer texture, consider freezing the bars for about an hour before slicing.

7. Experiment with adding a layer of chocolate ganache over the top for a decadent twist.

8. Garnish with additional raspberries or mint for a beautiful presentation that will wow your guests.

Variations and Adaptations

Consider adding different fruits to the cheesecake mix such as strawberries or blueberries for seasonal variations that celebrate the bounty of summer. During autumn, swapping the raspberries for pumpkin or pecans can transform the bars into a delightful fall treat. For dietary modifications, use coconut cream in place of cream cheese for a vegan option that’s equally creamy and satisfying. Flavors can also be adjusted by incorporating vanilla or almond extracts for richer undertones, while texture can be tweaked by mixing in chocolate chips or nuts.

Serving and Presentation Guide

When serving Heaven Raspberry Cheesecake Bars, opt for a clean, elegant presentation. Use a sharp knife to cut bars into uniform pieces, and consider placing them on a decorative platter for visual impact. Garnishing with fresh raspberries, a dusting of powdered sugar, or a drizzle of chocolate sauce enhances appeal. Serving the bars chilled or at room temperature is ideal, and pairing with a scoop of whipped cream adds a luxurious touch. For portion control, plan to cut smaller bars as they are rich and satisfying, which helps in serving guests without overwhelming them.

Wine and Beverage Pairing

To balance the richness of the cheesecake bars, consider pairing them with a glass of Moscato or a fruity Riesling, which complement the raspberry flavor beautifully. If you prefer non-alcoholic options, a refreshing sparkling water with lime or a berry-infused iced tea works wonderfully. For coffee lovers, a light roast coffee can enhance the dessert experience, while avoiding heavy blends that may overpower the delicate flavors of the bars. Serve each beverage chilled or at a slightly cool temperature to enhance the fruity notes of the cheesecake.

Storage and Shelf Life

Store any leftover Heavenly Raspberry Cheesecake Bars in an airtight container in the refrigerator for optimal freshness. They should keep well for about 5-7 days, allowing you to enjoy them throughout the week. Always check for signs of spoilage, such as off odors or changes in texture, before indulging. For longer storage, consider freezing the bars. Cut them into individual portions, wrap tightly in plastic wrap, and place them in a freezer-friendly container to safeguard against freezer burn. Thawing can be done in the refrigerator overnight for the best results.

Make Ahead Strategies

To enjoy these heavenly cheesecake bars without the rush, consider making them a day in advance. Prepare the bars as directed, allowing them to cool then refrigerate them overnight to enhance flavors and set their texture perfectly. If you prefer, you can make the crust ahead of time and simply assemble the filling when you’re ready to bake. Another option is to prepare the filling separately and store it in the fridge until you’re ready to bake, ensuring minimal last-minute hustle and maximum flavor.

Scaling Instructions

If you aim to halve this recipe, ensure to divide all ingredients accurately and adjust your baking time accordingly. Use a smaller baking dish to avoid spreading the mixture too thin, which could result in overbaking. Conversely, if doubling or tripling the recipe, choose a larger pan and keep an eye on the baking time as it will vary. Always check for doneness with a toothpick in the center, looking for a slightly firm texture. Adjust storage methods based on the increased yield to maintain freshness.

Nutritional Deep Dive

One serving of Heavenly Raspberry Cheesecake Bars provides a rich source of nutrients, including healthy fats from cream cheese and antioxidants from fresh raspberries. Each bar contains a balanced mix of macro and micronutrients, making it a delightful indulgence that allows for weight management when consumed mindfully. Pay attention to portion sizes, as the rich ingredients can lead to larger calorie intakes with excessive consumption. For an in-depth analysis, consider the overall balance of fats, sugars, and vitamins in each serving to better align with your dietary needs.

Dietary Adaptations

For those following a gluten-free lifestyle, use gluten-free graham crackers or a nut-based crust to create a delicious base without traditional flour. Dairy-free alternatives can be found in the form of vegan cream cheese, providing a similar creamy consistency without using animal products. Individuals on low-carb or keto diets may substitute creamy cheese with alternatives high in protein but low in carbs. Additionally, you can adjust sugar content with stevia or monk fruit sweetener for those pursuing sugar-free options without compromising flavor.

Troubleshooting Guide

If you encounter texture issues with your cheesecake bars, ensure all cream cheese has softened properly before starting. If they don’t set properly, it may have been due to underbaking, so always check for firmness before cooling. Flavor imbalance can be resolved by incorporating fresh lemon juice for brightness; taste as you mix to ensure the perfect flavor balance. If you notice cracks on top, they could be a result of overmixing air into the batter. Keep an eye on mixing speed to avoid this common pitfall.

Recipe Success Stories

Many bakers have shared delightful variations of the Heavenly Raspberry Cheesecake Bars, often incorporating different fruits or flavorings based on personal tastes. Community feedback showcases adaptations that have led to successful new combinations, proving the versatility of this recipe. Readers also provide helpful tips regarding presentation, suggesting unique garnishing ideas that elevate the visual appeal of the bars. For those unsure about their baking skills, sharing successes and failures leads to learning and improvements over time, fostering a sense of camaraderie in the baking community.

Frequently Asked Questions

What can I substitute if I don’t have raspberries? While raspberries are a favorite, you can replace them with fresh strawberries, blueberries, or even cherries. Each of these fruits brings a unique flavor and can change the color profile of your cheesecake bars, allowing for a fun variation while still capturing fruitiness.

Can I use low-fat cream cheese? Yes, low-fat cream cheese can be used, but it may slightly alter the texture and richness of the bars. If you want the traditional creamy taste, opt for full-fat cream cheese for the best results.

How do I prevent my cheesecake from cracking? To avoid cracks, make sure to mix your batter gently to prevent air bubbles from forming. Additionally, bake the cheesecake in a water bath to keep the temperature consistent and avoid rapid cooking.

How long will these bars keep in the fridge? These cheesecake bars can be stored in the refrigerator for about 5 to 7 days when stored in an airtight container, maintaining their deliciousness throughout the week.

Can these bars be frozen? Absolutely! They can be frozen for up to three months. Ensure they’re well-wrapped to prevent freezer burn, and thaw them in the fridge before serving for the best texture.

Why is chilling important after baking? Chilling allows the cheesecake to firm up properly and enhance flavors. By letting the bars rest, you achieve that perfect creamy consistency that is so loved in cheesecakes.

Can I add chocolate to this recipe? Of course! Adding chocolate chips to the batter or drizzling melted chocolate over the cooled bars can enhance flavor and create a delightful chocolate-berry combination.

What size baking dish should I use? This recipe works best in a 9×13 inch rectangular baking dish. Ensure that the batter is evenly distributed for even baking.

How do I know when the cheesecake is done? The cheesecake should be set around the edges but slightly jiggly center when done. It will continue to firm up as it cools.

Can I use a disposable pan for this recipe? Yes, disposable aluminum pans are great for this recipe, especially if you’re bringing these bars to a potluck or gathering.

Additional Resources

For more delicious raspberry recipes or variations of this cheesecake, check out our related recipes section, featuring desserts that utilize seasonal fruits. Additionally, explore ingredient guides to deepen your understanding of which ingredients work best for you. If you’re interested in similar techniques, our technique guides offer insights into perfecting other classic desserts. And if you’re keen to explore seasonal variations, join our community for ideas on how to adapt traditional recipes into year-round favorites.

Join the Conversation

We love hearing from our community! Share your own experiences with baking Heavenly Raspberry Cheesecake Bars on social media, using our hashtag for a chance to be featured. Don’t forget to snap a few pictures of your creations, as they provide inspiration for fellow bakers. Engage with others by sharing your recipe reviews and suggestions for variations. By participating in our community, you also have the opportunity to learn new tips and tricks that enhance your baking adventures.

The Recipe

Heavenly Raspberry Cheesecake Bars

Serves: 12 bars

Prep Time: 20 mins

Cook Time: 40 mins

Total Time: 1 hour

Kitchen Equipment Needed

  • 9×13 inch rectangular baking dish
  • Mixing bowls
  • Hand mixer or stand mixer
  • Parchment paper
  • Measuring cups and spoons

Ingredients

  • 1 ½ cups graham cracker crumbs
  • ½ cup unsalted butter, melted
  • 2 cups cream cheese, softened
  • 1 cup granulated sugar
  • 2 large eggs
  • 1 tsp vanilla extract
  • 1 cup fresh raspberries, pureed
  • ¼ cup fresh raspberries for garnish

Directions

  1. Preheat your oven to 350°F (175°C). Line a 9×13 inch baking dish with parchment paper.
  2. In a bowl, combine graham cracker crumbs and melted butter. Press the mixture into the bottom of the prepared baking dish to form an even crust.
  3. In another large bowl, beat cream cheese and sugar together until smooth and fluffy. Add eggs one at a time, mixing well after each addition. Stir in vanilla extract.
  4. Pour the cream cheese mixture over the crust in the baking dish. Swirl in the raspberry puree using a knife to create a marbled effect.
  5. Bake in the preheated oven for 40 minutes or until the center is set but still slightly jiggly.
  6. Remove from the oven and let cool to room temperature before refrigerating for at least 4 hours or overnight.
  7. Once set, cut into bars, garnish with fresh raspberries, and serve.

Recipe Notes

  • For added flavor, consider mixing a tablespoon of lemon juice into the cream cheese batter.
  • Try experimenting with other fruit purees like strawberry or blueberry for delicious variations.
  • These bars can be made ahead of time and stored in the refrigerator until ready to serve.