Indulge in Crispy Chicken Fried Chicken with Mushroom Cream Sauce

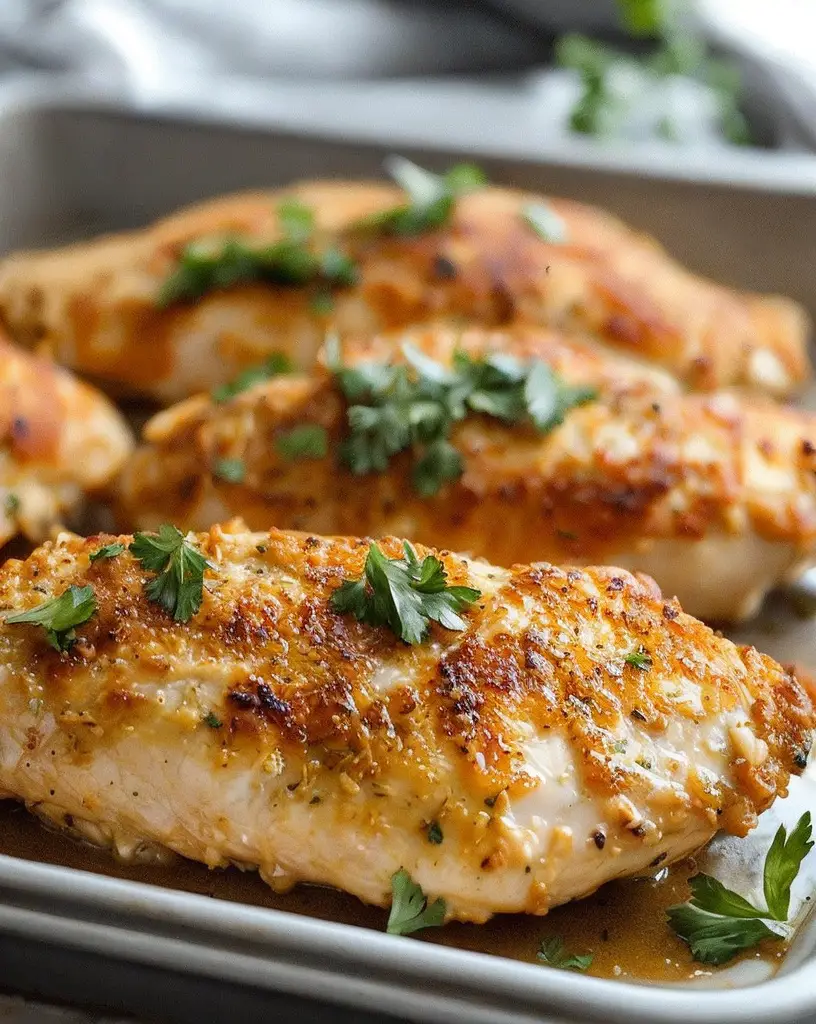
Chicken Fried Chicken with Mushroom Cream Sauce: A Comfort Food Classic

⚖️
Difficulty
Medium

⏲️
Prep Time
20 mins

🕒
Cook Time
30 mins

⏱️
Total Time
50 mins

🍽️
Servings
4 servings

Chicken Fried Chicken with Mushroom Cream Sauce is not just a meal; it’s an experience that brings comfort and warmth into any kitchen. This dish features juicy, breaded chicken breasts perfectly fried to a golden crisp, then smothered in a rich, creamy mushroom sauce. The combination of flavors and textures is enough to transport you to a cozy, rustic diner where the smell of fried chicken wafts through the air.

Imagine sitting down to a plate of this inviting dish. As you take your first bite, the crunch of the fried chicken gives way to tender meat, enhanced by the velvety mushroom sauce. The earthy flavor of mushrooms mixed with garlic and freshly cracked pepper creates a symphony of taste that dances on your palate. This is the kind of food that evokes nostalgia, reminding us of family gatherings and shared meals.

Quick Recipe Highlights

  • Flavor Profile: A delightful blend of savory, creamy, and buttery notes brought together by seasoned chicken and earthy mushrooms.
  • Texture: The dish showcases a satisfying crunch from the fried chicken paired with the smooth, velvety mushroom cream sauce.
  • Aroma: A tantalizing blend of frying chicken and the rich fragrance of sautéed garlic and mushrooms fill the kitchen.
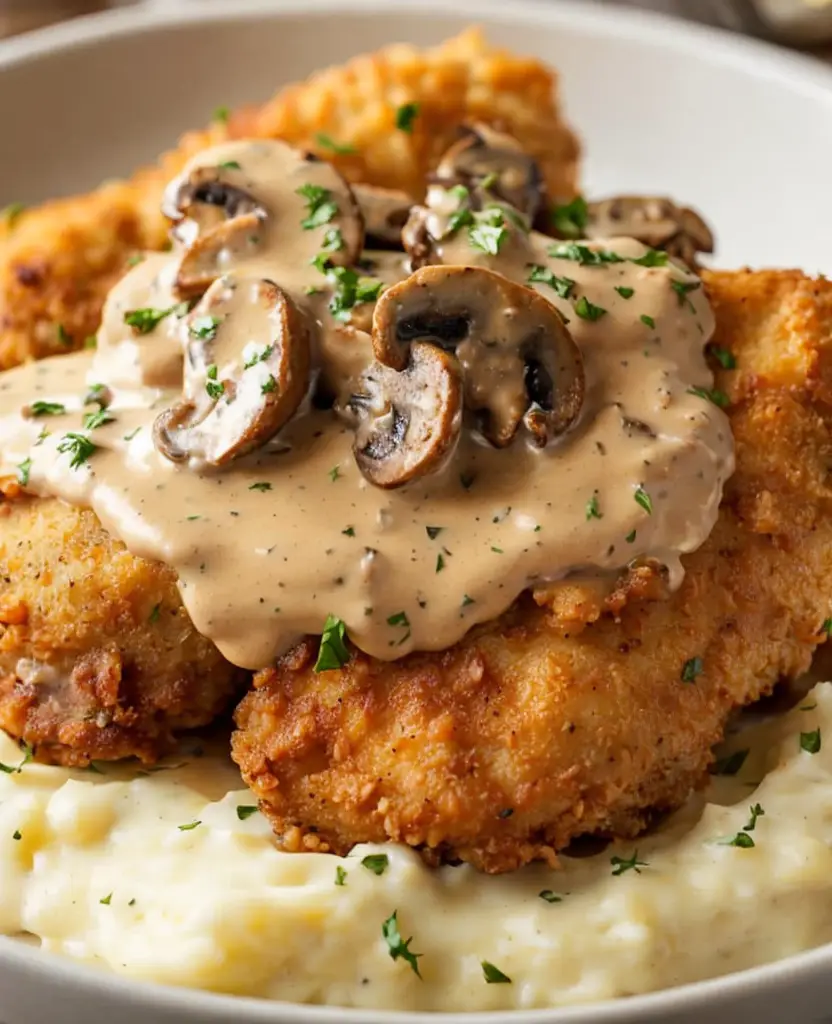
  • Visual Appeal: The contrasting golden brown chicken and creamy white sauce make for a visually enticing dish that’s perfect for impressing guests.
  • Skill Level Needed: While the process requires some attention, anyone with basic frying skills can master this classic recipe.
  • Special Equipment: You will need a frying pan, a meat mallet, and a sauce pan for the sauce preparation.

Recipe Overview

  • Difficulty Level: This recipe is classified as medium due to the frying technique and sauce preparation at play, both of which require attention to detail but are manageable with practice.
  • Category: Ideal for dinner, this dish combines protein and creamy sauce in one hearty entrée, perfect for family meals or date nights.
  • Cuisine: With Southern roots, Chicken Fried Chicken is a beloved dish that offers a taste of traditional comfort food, embodying warmth and hospitality.
  • Cost: The ingredients are generally affordable, making this recipe not just delicious but also economically viable for families.
  • Season: Enjoy this dish year-round, but it pairs exceptionally well with autumn flavors and gatherings during winter festivities.
  • Occasion: Perfect for casual family dinners, potluck parties, or cozy celebrations where hearty food is a must.

Why You’ll Love This Recipe

Indulging in Chicken Fried Chicken with Mushroom Cream Sauce is a culinary delight that brings both comfort and satisfaction. The harmonious combination of crispy chicken and luscious sauce creates a flavor profile that captivates any palette. It appeals to the craving for hearty, homestyle cooking, making it a favorite at family gatherings and special occasions.

One of the major benefits of this recipe is its convenience and ease of preparation. While it may seem like a restaurant-level dish, most of the steps are straightforward, allowing you to prepare a feast with minimal fuss. This makes it a fantastic option for weeknight dinners after a long day, ensuring you can serve something delicious without too much hassle.

Nutritionally, this dish offers protein from the chicken, while the mushroom cream sauce adds depth and flavor without excessive complexity. The use of fresh ingredients not only boosts the taste but also provides key vitamins and minerals, creating a well-rounded meal. With thoughtful plating and the right sides, it can cater to various dietary preferences.

Gathering around a family dinner table with someone serving this dish encourages connection and conversation. It’s not just about the food; it’s about the moments and memories created while sharing a heartfelt meal. Guests will rave about this dish, making it a showstopper for dinner parties or celebrations.

Lastly, Chicken Fried Chicken with Mushroom Cream Sauce is cost-effective and accessible. Most ingredients can be found in your pantry or local grocery store, allowing you to easily whip up this comforting favorite without breaking the bank. It’s a practical choice that doesn’t compromise on flavor or presentation.

Historical Background and Cultural Significance

Chicken Fried Chicken has its origins in Southern cuisine, where comfort food runs deep in tradition. This dish likely evolved from traditional fried chicken recipes, with influences from both African American cooking and European immigrant dishes. The method of frying chicken became popular in the South, where buttermilk marinated chicken is a staple.

Culturally, this recipe symbolizes the essence of Southern hospitality, capturing the spirit of community and gatherings. In many households, this dish is a centerpiece for family reunions and celebrations, showcasing the love and care of those who prepare it. It’s a dish that tells stories, preserving a legacy passed down through generations.

Over time, the recipe has evolved, incorporating various cooking styles and flavors. While the classic version features the basic elements of chicken and a simple cream sauce, regional variations often introduce spices, herbs, or even different types of mushrooms, contributing to a diverse culinary landscape.

Today, Chicken Fried Chicken with Mushroom Cream Sauce remains popular across the United States, adapted into various menus from home kitchens to fine dining establishments. Its enduring appeal lies in its comforting nature, reminding us of simpler times and highlighting the transformative power of good food.

Ingredient Deep Dive

Chicken

Chicken is a high-protein, versatile ingredient that forms the backbone of this dish. Historically, it has been a staple in various cuisines globally, celebrated for its ability to absorb flavors and complement a wide range of cooking styles. When selecting chicken for this recipe, choose fresh, organic options whenever possible for the best flavor and nutrition.

Nutritionally, chicken is rich in protein, which is essential for muscle repair and growth. It also contains B vitamins and other important nutrients. For purchase, look for breasts that are plump and have a consistent pink color. When storing, keep it in the coldest part of your refrigerator and use it within a couple of days.

If fresh chicken is not available, frozen chicken can be a great substitute, although it’s essential to thaw it properly before cooking. Other poultry such as turkey could also work as a protein alternative, although it will offer a difference in taste and texture.

Mushrooms

Mushrooms are the star of the creamy sauce that accompanies this dish. With a rich history in various cuisines, mushrooms have long been revered not only for their earthy flavor but also for their health benefits. When incorporating mushrooms into your dishes, it’s best to select varieties like cremini or button mushrooms, both of which hold up well in cooking.

These fungi are remarkably low in calories but packed with essential nutrients such as selenium, potassium, and vitamins B and D. When selecting mushrooms, choose ones that are firm and free from dark spots. Store them in a paper bag in the fridge to extend their shelf life and avoid using plastic, which can cause them to spoil faster.

If fresh mushrooms aren’t available, dried mushrooms can be rehydrated and used as a flavorful substitute. Alternatively, if you want to introduce different flavors, consider experimenting with varieties like shiitake or portobello, which provide unique tastes and textures in the sauce.

Common Mistakes to Avoid

  • Overcooking the chicken, which can lead to dryness; be sure to monitor the temperature.
  • Not using enough oil for frying, which can result in uneven cooking and soggy chicken.
  • Skipping the resting time after frying, which allows the juices to redistribute within the chicken.
  • Using cold chicken straight from the fridge; letting it sit at room temperature for about 15 minutes prior to cooking helps achieve even cooking.
  • Neglecting the seasoning; adding salt and pepper to both the chicken and the sauce enhances flavor dramatically.
  • Rushing the mushroom sauce preparation; let the mushrooms cook thoroughly to develop their flavor.
  • Not draining excess oil after frying, leading to greasy chicken; use paper towels to absorb any extra fat.
  • Overcrowding the frying pan, which causes temperature drops and uneven cooking.
  • Using old spices in the sauce; fresh spices lend much more flavor.
  • Forgetting to taste as you go; adjust the seasoning to your liking for the best results.

Essential Techniques

Frying Chicken

Frying chicken is an essential technique for achieving that golden, crispy exterior while keeping the meat tender. Start by properly heating the oil to the right temperature, as this is critical for ensuring the chicken crisps up beautifully without absorbing too much oil. To master this technique, it’s important to use a deep frying thermometer to monitor the oil temperature consistently.

Be aware of common pitfalls like overcrowding the pan, which can cause the oil temperature to drop, leading to soggy chicken. Visual cues for success include a consistent bubble action in the oil when chicken is added, as well as a golden brown crust indicating doneness.

Preparing a Cream Sauce

Creating a creamy mushroom sauce involves the culinary technique of creating a roux, which thickens the sauce. Start by sautéing the mushrooms in butter until they release their moisture and become tender, then add flour to create the roux. The key is to continuously whisk while adding liquid (such as chicken broth or cream) to ensure a smooth texture.

To master this technique, pay attention to the consistency of the sauce as you mix; it should be creamy without lumps. A common pitfall is allowing the sauce to boil too long, which can curdle the cream. Watch closely for achieving that perfect silky finish.

Pro Tips for Perfect Chicken Fried Chicken with Mushroom Cream Sauce

1. Marinate the chicken in buttermilk overnight for enhanced flavor and tenderness. This acid helps break down meat fibers, resulting in juicier chicken.
2. Always pat the chicken dry before breading to ensure the coating adheres properly.
3. For extra crunch, double-dip the chicken in egg wash and breadcrumbs or flour before frying.
4. Maintain a stable oil temperature during frying by adjusting the heat as required; this allows for even cooking and prevents sogginess.
5. Infuse your mushroom sauce with herbs like thyme or parsley for an elevated flavor profile.
6. Always taste and adjust seasonings in each component of the dish; flavor building is essential for a balanced final result.
7. Let the finished chicken rest on a wire rack to keep it crispy while you prepare the rest of your meal.
8. Consider garnishing with fresh herbs for a pop of color and freshness in presentation.

Variations and Adaptations

For a regional twist, consider using local mushrooms or adding Southern spices like Cajun seasoning to the flour mix for frying. During autumn, incorporating seasonal ingredients like pumpkin or sage can elevate the dish to reflect seasonal flavors.

If dietary modifications are needed, you can use gluten-free breadcrumbs or almond flour for those avoiding gluten. Additionally, for a lighter version, consider baking the chicken instead of frying, resulting in a healthier option without compromising too much on flavor.

Flavor variations can also be achieved by adding cheeses like parmesan to the mushroom sauce for richness. For an interesting twist, experiment with adding balsamic vinegar or white wine to the sauce to enhance its depth and flavor complexity.

Presentation can also be adapted to include unconventional sides, such as cauliflower puree or roasted seasonal vegetables, which lend a fresh contrast to the hearty chicken and sauce.

Serving and Presentation Guide

Plating is key to making any dish appealing. Serve Chicken Fried Chicken on a rustic wooden board or a simple white plate to highlight the vibrant colors. Drizzling the mushroom cream sauce over the chicken creates an inviting look, and a sprinkle of fresh chopped parsley adds a touch of color and freshness.

Garnishing with lemon wedges can provide a refreshing contrast and elevate the dish. Serve along traditional sides like mashed potatoes or collard greens to create a fully immersive Southern dining experience. For modern flair, consider placing the chicken atop a bed of creamy polenta or risotto, incorporating different textures while serving.

Temperature considerations are crucial; serve the dish hot for the best flavor and experience. Remember to control portions by cutting the chicken into manageable portions or offering a family-style serving that encourages sharing.

Wine and Beverage Pairing

Pair your Chicken Fried Chicken with a light-bodied red wine like Pinot Noir, which complements the savory flavors without overpowering them. Alternatively, a crisp white wine such as Chardonnay can enhance the buttery notes of the mushroom cream sauce beautifully.

For non-alcoholic options, consider serving iced tea or a citrus-infused sparkling water to cleanse the palate and add brightness. If coffee is more your style, a robust dark roast pairs seamlessly, enhancing the earthy elements of the dish.

Temperature plays an essential role; serve whites chilled and reds slightly below room temperature to enhance their character. Offer drinks in versatile glassware to maintain a relaxed yet refined atmosphere during dining.

Storage and Shelf Life

When storing leftovers of Chicken Fried Chicken with Mushroom Cream Sauce, allow it to cool down completely before placing it in airtight containers. Ideally, consume the dish within three to four days to ensure quality and safety.

Refrigerate the chicken and sauce separately if possible, as this helps maintain the crispy texture of the chicken. Signs of spoilage include off-odors, changes in texture, or an unusual film on the sauce.

For reheating, place chicken back in the oven at a low temperature to restore its crispness. Alternatively, the microwave can be used but may result in sogginess. Freezing the dish is possible but may alter the texture of the cream sauce; when thawing, ensure that it is thoroughly heated again before serving.

Make Ahead Strategies

To streamline your cooking process, consider preparing the mushroom cream sauce a day in advance. This strategy allows the flavors to meld beautifully, creating a more robust taste when served. Store the sauce separately and reheat it just before serving.

For the chicken, you can bread the pieces ahead of time and keep them in the refrigerator, ready for frying. This minimizes active cooking time and allows you to focus on bringing everything together smoothly.

For optimal quality, consider assembling a timeline for preparation. One effective strategy is to cook and slice the chicken ahead of time, then quickly re-warm the pieces and drizzle them with sauce right before serving. This approach results in fresher flavors and a delightful presentation.

Include fresh herbs or garnishes just prior to serving to maintain their vibrancy. This adds a bright pop of color and elevates the overall aesthetic of the dish.

Scaling Instructions

Scaling this Chicken Fried Chicken recipe is straightforward. For smaller portions, halve the ingredient quantities while ensuring the cooking times remain the same; just be cautious with the oil quantity.

If you’re looking to double or triple the recipe for a larger gathering, ensure you’re using adequately sized cookware. Fry in batches to keep oil temperatures consistent, thus maintaining the quality and texture of the chicken.

Adjusting cooking times may be necessary when scaling, especially with larger quantities of chicken, to ensure thorough cooking and food safety. Use a meat thermometer to confirm doneness while cooking larger batches.

For storage, plan for larger containers to accommodate the increased volume, ensuring the same method is used for refrigerating and freezing leftover portions.

Nutritional Deep Dive

When analyzing the nutritional content of Chicken Fried Chicken with Mushroom Cream Sauce, it’s beneficial to break it down into macronutrients. A single serving generally contains protein from the chicken, carbohydrates from any accompanying side dishes or breading, and fats mainly from frying oils and cream.

Micronutritionally, this dish includes valuable vitamins and minerals, particularly when incorporating mushrooms known for their vitamin D and B content. The addition of herbs not only enhances flavor but also provides added nutrients.

For health-conscious individuals, balancing portions of protein and carbohydrates can be essential. Moreover, intentional preparation methods like baking the chicken instead of frying can drastically reduce calorie counts while maintaining flavor.

When considering weight management tips, focus on controlling portion sizes and complementing the dish with an array of vegetables, which can provide volume and fiber without excessive calories.

Dietary Adaptations

For gluten-free versions of Chicken Fried Chicken, substitute traditional flour with gluten-free alternatives like almond flour or gluten-free breadcrumbs. This allows those following a gluten-free diet to enjoy the dish without sacrificing taste.

If you require a dairy-free version, consider using coconut cream instead of heavy cream in the sauce. Nutritional yeast can also be added for a cheesy flavor without dairy.

For a low-carb option, you can forego breading the chicken entirely and simply grill or bake it, pairing it with a homemade mushroom sauce made with low-carb thickeners, such as xanthan gum.

Vegan adaptations can replace chicken with firm tofu, preparing it in a similar breading style, and using cashew cream mixed with sautéed mushrooms for the sauce. This ensures a creamy, rich flavor that’s entirely plant-based.

Troubleshooting Guide

If the chicken texture isn’t crispy, ensure that the oil is hot enough before adding the chicken. A thermometer can help maintain the right cooking temperature, assisting in achieving that perfect crunch.

For flavor balance, always taste throughout the cooking process to adjust seasonings. If the sauce turns out too thick, slowly whisk in broth or cream until reaching the desired consistency.

If your ingredients are not cooperating or frying satisfactorily, introducing fresh oil or adjusting cooking batches can dramatically improve results. Always look out for over frying, which can burn breading without cooking the meat through.

Timing is crucial; ensure to follow suggested times closely and remember that chicken pieces vary in size; using a meat thermometer will guarantee proper cooking.

Recipe Success Stories

This Chicken Fried Chicken recipe has been popular among families and friends for years, with many sharing their own variations. Community feedback often highlights how the dish serves as a comforting reminder of family gatherings and celebrations.

Readers have shared adaptation success stories like using different spices or incorporating regional flavors that showcase their local culinary culture. These unique adjustments demonstrate how versatile the dish can be while still maintaining its classic essence.

Photographs shared by home cooks show the beautiful plating of the dish, illustrating the vibrant and inviting presentation that makes this dish a staple at dinner tables. Suggestions from readers continue to inspire improvements that keep the recipe fresh and engaging.

Frequently Asked Questions

How can I make the chicken less greasy?

To reduce greasiness, ensure you’re using enough oil at the right temperature during frying. Additionally, allow the fried chicken to drain on paper towels to absorb excess oil before serving.

Can I prepare the mushroom cream sauce in advance?

Yes! The mushroom cream sauce can be prepared a day ahead and stored in the refrigerator. Just reheat it gently on the stovetop while stirring to maintain creaminess before serving.

What sides pair well with Chicken Fried Chicken?

Classic sides include mashed potatoes, coleslaw, or green beans. You can also try serving it with a fresh garden salad for a balanced meal.

Can I freeze leftover Chicken Fried Chicken?

Yes, you can freeze leftover chicken, but the creamy sauce may not maintain its texture. It’s best to freeze chicken and sauce separately for optimal quality.

What type of oil is best for frying?

Choosing oils with high smoke points works best for frying. Vegetable oil, canola oil, or peanut oil are excellent options for achieving that golden-brown crust.

Is there a way to make it healthier?

For a healthier version, consider baking the chicken instead of frying or use whole grain breadcrumbs. You could also use low-fat dairy alternatives in the sauce.

Can I adapt this recipe for dietary restrictions?

Absolutely! Substitutions for gluten-free, dairy-free, vegan, and low-carb diets are all possible. Explore specific ingredient sways that cater to your unique dietary needs.

What kind of chicken works best?

Boneless, skinless chicken breasts are ideal for this recipe as they remain tender during frying. You can also use thighs for extra flavor if preferred.

How do I prevent the chicken from drying out?

Marinating chicken in buttermilk before cooking can help lock in moisture. It’s also essential not to overcook your chicken while frying.

What type of mushrooms should I use?

Creamy button or cremini mushrooms are preferred for this sauce as they provide a good flavor and texture. Feel free to experiment with other varieties to suit your taste.

What’s the best way to reheat leftovers?

The best way to reheat leftovers is to use the oven at a low temperature to maintain crispiness. Microwaving can cause the chicken to become soggy.

Additional Resources

If you enjoyed this Chicken Fried Chicken with Mushroom Cream Sauce recipe, explore similar dishes like creamy chicken casseroles and classic fried chicken recipes.

Check out technique guides for mastering frying at home, essential cooking tips for perfecting sauces, as well as ingredient information on selecting quality mushrooms and herbs to enhance other meals.

Also, consider kitchen equipment recommendations for frying and sautéing, ensuring you have everything you need for perfect preparation. Adapt your meals to seasonal variations by including fresh produce and herbs that complement the flavors of this delicious dish.

Join the Conversation

We want to hear from you! Share your own experiences making Chicken Fried Chicken with Mushroom Cream Sauce or any variations you’ve tried.

Don’t forget to share your cooking photos on social media and engage with our community to inspire others with your creativity in the kitchen.

Leave recipes reviews, provide suggestions, or ask questions to foster a vibrant community around this beloved comfort food. Your input helps everyone become better cooks and enhances the joy of sharing great meals!

The Recipe

Chicken Fried Chicken with Mushroom Cream Sauce

Serves: 4 servings

Prep Time: 20 mins

Cook Time: 30 mins

Total Time: 50 mins

Kitchen Equipment Needed

  • Frying pan
  • Meat mallet
  • Large mixing bowl
  • Measuring cups and spoons
  • Whisk
  • Spatula

Ingredients

  • 4 boneless, skinless chicken breasts
  • 1 cup buttermilk
  • 1 cup all-purpose flour
  • ½ teaspoon paprika
  • Salt and black pepper to taste
  • Vegetable oil, for frying
  • 8 ounces mushrooms, sliced
  • 2 tablespoons butter
  • 2 tablespoons all-purpose flour (for the sauce)
  • 1 cup chicken broth
  • ½ cup heavy cream

Directions

  1. In a large bowl, combine the chicken breasts with buttermilk, salt, and pepper. Let it marinate for at least 30 minutes.
  2. In another bowl, mix flour, paprika, salt, and pepper. Take the chicken out from the marinade and coat each piece with the flour mixture.
  3. Heat oil in a frying pan over medium heat. Once hot, fry the chicken pieces until golden brown on each side, about 5-7 minutes per side. Drain on paper towels.
  4. For the sauce, melt butter in another pan over medium heat. Add sliced mushrooms and sauté until tender.
  5. Sprinkle flour over the mushrooms and stir for a minute, then gradually add chicken broth while whisking to avoid lumps.
  6. Stir in heavy cream and simmer until thickened, seasoning with salt and pepper to taste.
  7. Serve the fried chicken hot, topped with mushroom cream sauce.

Recipe Notes

  • For added flavor, consider marinating the chicken overnight.
  • Leftover chicken can be stored in the refrigerator for up to 4 days.
  • Try adding fresh herbs to the sauce for different flavor notes.

Delicious Steak Bites and Rotini in Garlic Parmesan Sauce Recipe

Steak Bites and Rotini in Garlic Parmesan Sauce: A Quick and Flavorful Delight

⚖️
Difficulty
Easy

⏲️
Prep Time
10 mins

🕒
Cook Time
20 mins

⏱️
Total Time
30 mins

🍽️
Servings
4

Cooking a delicious meal can evoke feelings of warmth and satisfaction, and nothing hits the mark quite like tender Steak Bites tossed with perfectly cooked rotini in a creamy garlic parmesan sauce. This dish combines rich, savory flavors with a delightful texture, making it perfect for both weeknight dinners and special occasions. The bite-sized steak pieces are succulent and sear beautifully, while the rotini pasta captures all the creamy goodness of the sauce, creating a symphony of taste and satisfaction in every mouthful.

Imagine the aroma wafting through your kitchen as you prepare this delectable dish. The scent of garlic melds beautifully with the buttery tones of parmesan cheese, pulling everyone in for a taste. The vibrant colors of the dish, with golden steak bites against the creamy sauce and hints of green from fresh herbs, make this recipe as appealing to the eyes as it is to the palate. Easily adaptable and quick to prepare, this Steak Bites and Rotini in Garlic Parmesan Sauce is sure to become a favorite in your household.

Quick Recipe Highlights

  • Flavor Profile: Robust, savory flavors from garlic and parmesan meld perfectly with seared steak and pasta.
  • Texture: Tender steak bites combined with the satisfying chew of rotini create a delightful mouthfeel.
  • Aroma: A rich blend of garlic and parmesan fills the air, enticing your guests.
  • Visual Appeal: Beautifully plated with contrasting colors makes it an eye-catching dish.
  • Skill Level Needed: Simple enough for beginner cooks, yet impressive for seasoned chefs.
  • Special Equipment: All you need is a skillet for the steak and a pot for the pasta.

Recipe Overview

  • Difficulty Level: This recipe is easy to follow with straightforward steps, making it perfect for cooks of all skill levels.
  • Category: Ideal for dinner, lunch, or meal prep, making it highly versatile for any occasion.
  • Cuisine: Inspired by Italian-American cooking, it’s a comforting blend of familiar flavors.
  • Cost: Budget-friendly meal using easily accessible ingredients available at any grocery store.
  • Season: Perfect for year-round enjoyment, appealing in every season.
  • Occasion: Great for family dinners, casual gatherings, or even cozy date nights at home.

Why You’ll Love This Recipe

You’ll fall in love with the delectable combination of tastes and textures in our Steak Bites and Rotini in Garlic Parmesan Sauce. The juicy, well-seasoned steak bites provide a punch of umami flavor that pairs beautifully with the rich, creamy sauce. The rotini pasta not only serves to soak up the sauce but adds a pleasing twist with each bite. It’s a comforting, filling dish that satisfies without feeling heavy, making it a perfect contender for any weeknight meal.

Convenience is paramount in today’s fast-paced world, and this recipe shines in its ability to be prepared quickly without skimping on flavor. Preparation is straightforward, taking only about ten minutes, while cooking time remains at a mere twenty minutes. This ensures you can serve a homemade meal, even on a busy weeknight, without spending hours in the kitchen.

Nutritionally, this dish offers a great balance between protein from the steak and carbohydrates from the rotini, fueling your body while offering satisfaction. You can also incorporate vegetables like spinach or broccoli to elevate the nutritional value further. This dish not only tastes good but is designed with your dietary needs in mind.

Steak Bites and Rotini also present a wonderful opportunity for social and entertaining occasions. When friends or family gather, this dish brings everyone to the table, ensuring lively conversation and shared enjoyment. The pleasing aroma wafts through as it cooks, enticing everyone to savor what’s to come.

Moreover, enjoy the cost-effectiveness of this meal. With affordable steak cuts and basic pantry ingredients, you can create a gourmet meal without breaking the bank. Plus, it’s a versatile recipe that allows for ingredient swaps depending on what you have available, making it accessible and practical.

Historical Background and Cultural Significance

The origins of steak bites can be traced back to traditional methods of cooking meat, often grilled or seared for maximum flavor. This method has evolved, leading to numerous interpretations across various culinary styles. When paired with pasta, we find a delightful blend of hearty steak with the familiar comforting elements of Italian cuisine.

In many cultures, steak represents a special meal, often reserved for gatherings and celebrations. Combining steak with pasta not only reflects the adaptability of ingredients but also highlights the fusion of culinary traditions, paving the way for dishes that cater to diverse palates.

Over the years, recipes for steak and pasta have evolved, with chefs experimenting to find the perfect balance. From various sauces to cooking techniques, the dish has transformed into a household favorite, with each region in the world putting its unique spin on it.

Regional varieties often include various sauces and spice blends, showcasing local flavors while maintaining the essence of the original dish. This adaptability signifies the continual evolution of culinary traditions and the joy of sharing food across cultures.

Ingredient Deep Dive

Steak is not only a favorite protein for many, but it also carries significant cultural importance, often symbolizing celebration and camaraderie in gatherings. When selected correctly, steak, particularly cuts like sirloin or ribeye, offers rich flavors and tenderness, contributing to a well-rounded meal. Look for steaks that are bright red with good marbling, as this indicates flavor and juiciness. Proper storage involves keeping it refrigerated and using it within a few days for optimal freshness.

Rotini, a delightful spiral-shaped pasta, helps capture sauces beautifully, enhancing each bite. This pasta’s history traces back to Italian cuisine, where it has served as a staple in households for generations. It offers a great source of carbohydrates, which are essential for energy. When purchasing rotini, opt for whole grain or gluten-free alternatives for dietary restrictions, and store it in a cool, dry place.

Garlic, a quintessential ingredient in many culinary traditions, brings a robust flavor to this dish. A definite highlight, garlic is revered not just for its taste but also for its numerous health benefits, including anti-inflammatory properties. When selecting garlic, choose firm bulbs with tight skins. Store unpeeled cloves in a dark, cool place to prevent sprouting.

Parmesan cheese adds a nutty, salty richness that makes the sauce irresistible. Known for its long maturation process, true Parmigiano-Reggiano boasts deeper flavors as it ages. Look for blocks instead of pre-grated varieties to maximize freshness and flavor. Proper storage involves keeping it wrapped tightly and refrigerated to maintain its exceptional quality.

Common Mistakes to Avoid

  • Overcooking the Steak: Avoid cooking the steak pieces for too long; they should remain tender and juicy. Use a meat thermometer to check for doneness.
  • Not Salting Enough: Seasoning is key; ensure to generously season both the steak and pasta water for enhanced flavor throughout.
  • Skipping the Pasta Water: Don’t forget to save some pasta water before draining. It adds necessary starch that helps the sauce cling to the noodles.
  • Using Low-Quality Ingredients: Invest in high-quality steak and cheese for the best flavor outcome; it truly makes a difference.
  • Overcrowding the Pan: When searing the steak, make sure not to overcrowd the pan. This leads to steaming instead of searing.
  • Letting the Sauce Simmer Too Long: A quick simmer allows flavors to combine without losing freshness; simmer just until combined.
  • Not Tasting as You Cook: Taste the sauce and adjust seasoning as needed; this is crucial for balancing flavors.
  • Pasta Not Cooked Al Dente: Cooking the pasta all the way through can jeopardize texture. Aim for al dente for the best bite.
  • Forgetting to Let the Steak Rest: Allow the steak to rest for a few minutes after cooking to retain its juices.
  • Neglecting to Garnish: A simple garnish of fresh herbs can elevate both presentation and flavor.

Essential Techniques

Searing steak is an essential technique that impacts the flavor and texture of the dish. It’s important because it creates a delicious crust while locking in juices. To master this technique, ensure your pan is hot and dry before adding the meat to achieve that perfect sear. Look for a golden-brown color to confirm success, while avoiding overcrowding the pan to maintain high heat.

Creating the creamy garlic parmesan sauce requires attention to detail. Start by sautéing finely chopped garlic in butter until fragrant, then whisk in cream before adding parmesan. Maintain medium heat and stir continuously to avoid scorching or curdling. Visual cues for success include a smooth and thickened sauce. If it gets too thick, simply add reserved pasta water to loosen it up.

Pro Tips for Perfect Steak Bites and Rotini in Garlic Parmesan Sauce

1. Choose a high-quality steak cut for better flavor. Ribeye or New York strip cuts are perfect options for this recipe.
2. Allow steak to come to room temperature before cooking; this ensures even cooking and enhanced tenderness.
3. For a burst of flavor, marinate steak bites for 30 minutes prior to cooking with a mixture of olive oil, garlic, and herbs.
4. Incorporate fresh herbs like parsley or basil into the sauce or as a garnish to enhance the overall presentation.
5. Experiment with additional seasonings such as red pepper flakes for heat or lemon zest for brightness in the sauce.
6. For a gluten-free option, substitute rotini with gluten-free pasta or zucchini noodles.
7. Don’t rush the cooking process; take time to properly sear the steak for maximum flavor.
8. Store any leftovers properly and consume within a few days for the best taste and freshness.

Variations and Adaptations

Steak Bites and Rotini can easily be adapted to suit local flavors or dietary preferences. For instance, you can substitute traditional rotini with spiralized zucchini for a lower-carb option, offering a fresh alternative. Additionally, consider regional variations by incorporating local seasonings or sauces that reflect your taste or cultural background.

Vegetarian adaptations can be achieved by swapping steak with hearty vegetables like portobello mushrooms or eggplant. These can be prepared using the same seasonings to maintain that umami flavor while ensuring a satisfying meal for non-meat eaters.

Seasonal adaptations might include adding fresh vegetables like asparagus or tomatoes during their peak harvest seasons to incorporate vibrant colors and added nutrition into your dish. In autumn, consider adding squash for a unique flavor twist.

Another option is giving this recipe a spicy kick by adding diced jalapeños or a dash of hot sauce. Alternatively, adjust the texture by using a different pasta shape entirely—penne or fusilli can work beautifully and change the dish’s presentation.

Serving and Presentation Guide

Presenting your Steak Bites and Rotini beautifully will impress your family and guests alike. Start by plating the pasta in the center of a large bowl or plate, allowing it to form a hearty base. Top with the juicy steak bites, arranging them artfully to create visual interest.

Garnishing with freshly chopped parsley or chives not only adds a vibrant touch but also freshness to the dish. You can sprinkle some extra parmesan cheese on top for added flavor and an appealing look. Utilize colorful side dishes to elevate the overall presentation, such as cherry tomatoes or a green salad.

Consider serving this dish in individual ramekins or bowls for a more refined dining experience. Reheating in the oven at a low temperature can also help maintain the sauce’s creaminess while ensuring everything is warmed through before serving.

Control portions by using standard serving sizes based on dietary needs, ensuring that everyone has a fair share of both pasta and steak bites.

Wine and Beverage Pairing

When enjoying Steak Bites and Rotini, the right beverage can enhance the overall experience. A medium-bodied red wine, such as a Merlot or Chianti, pairs beautifully; the tannins complement the richness of the steak and the creamy sauce.

For those who prefer white wine, a crisp Chardonnay can also work well, providing a refreshing contrast to the heaviness of the dish. If you’re looking for non-alcoholic options, a sparkling water with a splash of lemon is delightful or serve it alongside a classic homemade iced tea.

If coffee or tea is your preference, consider Arabica coffee with nutty undertones, as it pairs well with savory flavors. Always serve these beverages at the appropriate temperatures to maximize their flavor.

Storage and Shelf Life

To store leftover Steak Bites and Rotini, transfer them to an airtight container once cooled. Refrigerate and consume within 3-4 days for optimal freshness. If you wish to freeze, allow the dish to cool completely before placing in a freezer-safe container, ensuring it’s well-sealed to prevent freezer burn.

For reheating, you can place the dish in a microwave-safe bowl and heat on medium power until warmed through, or reheat it in a saucepan over medium-low heat, adding a splash of milk or cream to reintroduce creaminess if the sauce thickens.

Signs of spoilage include off-smell or discoloration. Always prioritize safety and discard any food that doesn’t look or smell right.

Make Ahead Strategies

To make your Steak Bites and Rotini easier to prepare, consider marinating the steak bites the night before for enhanced flavor. You can also cook the pasta in advance and store it in the refrigerator until you are ready to use it.

Prepping the sauce a day ahead is beneficial; simply heat it up with freshly cooked steak and pasta for a quick meal. Alternatively, you can chop garlic and measure cheese ahead of time, streamlining the cooking process.

When assembling, add any fresh herbs or cheese just before serving to retain their flavor and freshness. These steps maintain the quality of the dish while saving preparation time on the day of serving.

Scaling Instructions

Scaling this recipe for larger gatherings is simple. To halve the recipe, adjust all ingredients and cooking times accordingly while maintaining flavor balance. If doubling or tripling the recipe, use a larger skillet for the steak and consider cooking in batches to ensure even cooking.

Timing adjustments include monitoring the cooking time, as larger quantities may require additional cooking time for the pasta. Ensure to check for doneness in both the steak and pasta to guarantee quality.

Storing larger quantities also requires adequate space; ensure containers are appropriately sized to avoid overcrowding and allow for safe and efficient storage after the meal.

Nutritional Deep Dive

This dish is designed to be nutritious while delivering delightful flavors. The macronutrient breakdown reveals a balanced meal combining proteins from the steak and carbohydrates from the rotini, making it an ideal post-workout meal.

Rich in vitamins and minerals from the garlic and herbs, it supports overall health benefits including immune function and inflammation reduction. Total calories can vary based on ingredient choices, but a typical serving offers a satisfying experience without excessive caloric intake.

For dietary considerations, adjusting portion size can be essential for those managing caloric intake. The nutritional profile can easily adapt to various healthy eating plans while remaining filling and enjoyable.

Dietary Adaptations

If you’re looking for gluten-free options, substitute rotini with gluten-free pasta varieties that maintain a similar texture. For dairy-free adaptations, use almond milk or coconut milk in the garlic parmesan sauce and opt for nutritional yeast as a cheese alternative.

To create a vegan version, replace steak with plant-based protein options like tofu or tempeh, marinating them as you would the steak bites. Similarly, alternative cream sauces can be made from cashews blended with garlic for creaminess.

For a low-carb option, spiralized vegetables can replace the pasta or considered cauliflower rice for a delightful twist. Each adaptation maintains the essence of the dish while catering to numerous dietary needs.

Troubleshooting Guide

If the texture of the steak bites becomes tough, ensure you are not overcooking them and let the meat rest after cooking. Overcooked pasta becomes mushy, so aim for al dente and monitor closely.

In case the garlic parmesan sauce appears too thick, whisk in reserved pasta water to reach the desired consistency without compromising flavor. Likewise, if you find the sauce lacking flavor, add more cheese or seasonings to elevate its profile.

Address temperature issues by ensuring that your cooking pan is adequately heated to achieve that perfect sear and prevented steaming. If substituting ingredients, be mindful of moisture content, as it can alter the cooking dynamics of the dish.

Recipe Success Stories

Community feedback has highlighted the versatility of this recipe. Many have tried variations, swapping out the steak for chicken or shrimp, discovering fabulous alternatives without sacrificing richness.

Adaptation stories often revolve around ingredient swaps; garlic powder replaces fresh garlic for those short on time, leading to successful outcomes, and various cheese choices inspire great interest.

Photographic tips have included suggestions for capturing vibrant colors and textures, particularly highlighting the sauce’s creaminess contrasting against the steak bites and pasta’s curls. Encouraging readers to share their experiences promotes positive community engagement.

Frequently Asked Questions

Can I use different pasta for this recipe?
Yes, while rotini works best for capturing sauce, you can substitute other pasta shapes like penne, fusilli, or even whole grain varieties based on your preference.

How can I make the sauce dairy-free?
To create a dairy-free version, use almond or coconut milk for the base and nutritional yeast for a cheesy flavor to maintain the essence of the original sauce.

How do I store leftovers?
Leftovers should be stored in an airtight container in the refrigerator and consumed within 3-4 days. Ensure to reheat thoroughly before serving.

Can I prepare the dish in advance?
Yes, the steak and sauce can be prepared a day ahead, refrigerated, and warmed when ready to serve, which can help save time during busy weeknights.

What can I serve with this dish?
Besides its hearty nature, consider serving with a light side salad or garlic bread, providing a delightful contrast to the richness of the pasta and steak.

Is it possible to make this dish vegetarian?
Absolutely! Substitute the steak with hearty vegetables such as mushrooms or eggplant, seasoned similarly to provide a robust flavor and texture.

What type of cheese is best for this recipe?
Parmesan cheese enhances the dish significantly, but grana padano or pecorino can also deliver fantastic results if you seek alternatives.

Can I use frozen steak for this recipe?
While you can use frozen steak, thaw it completely in the refrigerator before cooking to ensure even doneness.

What is the best way to reheat the leftovers?
Reheat in a skillet over low heat, adding a little cream or pasta water for the sauce to maintain its silky texture.

Can I make this dish gluten-free?
Certainly! Replace rotini with gluten-free pasta options available at most grocery stores for a similar mouthfeel without gluten.

Additional Resources

For readers looking to expand their culinary repertoire, consider exploring related recipes that offer similar hearty flavors or textures, such as creamy fettuccine Alfredo or a classic beef stroganoff. Techniques like sautéing and sauce-making are invaluable for any home cook, making these foundational skills crucial for creating memorable dishes.

If you’re interested in ingredient information, explore the nutritional benefits of pasta or find detailed guides about quality steak selection. Equipment recommendations for high-quality pans or graters can enhance your cooking experience, turning routine meal preparation into enjoyable artistry.

Join the Conversation

I invite you to join the community by sharing your successes and adaptations of this dish on social media. Snap a picture of your creation and tag us to help inspire others. Your variations bring life to this recipe, showcasing the wonderful ways it can be interpreted and enjoyed.

Consider posting reviews to help others in choosing to try this easy, delicious recipe. Engaging with fellow food lovers offers new ideas and encourages collaborative culinary creation, building a vibrant cooking community.

The Recipe

Steak Bites and Rotini in Garlic Parmesan Sauce

Serves: 4

Prep Time: 10 mins

Cook Time: 20 mins

Total Time: 30 mins

Kitchen Equipment Needed

  • Skillet
  • Pot for boiling pasta
  • Meat thermometer
  • Wooden spoon or spatula

Ingredients

  • 1 lb sirloin steak, cut into bite-sized pieces
  • 8 oz rotini pasta
  • 4 cloves garlic, minced
  • 1 cup heavy cream
  • 1 cup grated parmesan cheese
  • 2 tablespoons olive oil
  • Salt and pepper to taste
  • Fresh parsley for garnish

Directions

  1. Cook the rotini pasta according to package instructions in salted water until al dente. Drain and set aside.
  2. Heat olive oil in a skillet over medium-high heat. Season steak bites with salt and pepper, then sear them in the skillet for about 2-3 minutes until browned.
  3. Add minced garlic to the pan and sauté for another minute until fragrant.
  4. Reduce heat to medium and pour in the heavy cream, stirring to combine. Gradually add parmesan cheese and continue to stir until the sauce thickens.
  5. Add the cooked rotini to the sauce, tossing to coat evenly. Adjust seasoning if necessary.
  6. Serve hot, garnished with fresh parsley and additional parmesan if desired.

Recipe Notes

  • For extra flavor, marinate steak bites before cooking.
  • Substitute with gluten-free pasta if needed.
  • Feel free to add your favorite vegetables to the sauce for added nutrition.

Melt In Your Mouth Chicken Breast: Juicy and Delicious Recipe

Melt In Your Mouth Chicken Breast Recipe: A Tender Delight for Any Occasion

⚖️
Difficulty
Easy

⏲️
Prep Time
15 mins

🕒
Cook Time
30 mins

⏱️
Total Time
45 mins

🍽️
Servings
4 servings

There’s something truly irresistible about the Melt In Your Mouth Chicken Breast Recipe that makes it a staple in many households. This dish combines simplicity and flavor, ensuring every bite is succulent and juicy. Imagine tender chicken coated in a savory blend of spices, baked to perfection, and served with your favorite sides. This recipe is perfect for weeknight dinners, special occasions, or just when you’re craving something comforting yet impressive.

The beauty of this Melt In Your Mouth Chicken Breast Recipe lies in its versatility. It pairs beautifully with a variety of side dishes, from roasted vegetables to creamy mashed potatoes. The aroma that fills your kitchen while the chicken is cooking is enough to make your mouth water. Whether you’re hosting a dinner party or enjoying a cozy night in, this recipe will leave your guests asking for seconds.

Quick Recipe Highlights

  • Flavor Profile: This chicken is infused with rich, savory flavors that come from a perfect blend of herbs and spices, making every bite a taste sensation.
  • Texture: The chicken breast remains incredibly tender and juicy, with a delightful crispiness on the outside that adds an enjoyable contrast.
  • Aroma: As it bakes, the dish fills your kitchen with the welcoming scent of garlic and herbs, enticing everyone to the table.
  • Visual Appeal: The golden-brown exterior of the chicken paired with vibrant vegetables creates an eye-catching presentation.
  • Skill Level Needed: This recipe is easy enough for beginner cooks but can also be enjoyed by experienced chefs looking for a quick meal.
  • Special Equipment: No special equipment is needed; just a baking dish and parchment paper for easy cleanup.

Recipe Overview

  • Difficulty Level: This easy recipe is accessible for cooks of all levels, making it ideal for family dinners or when you’re short on time.
  • Category: This dish falls under the main course category, making it a perfect centerpiece for your meal.
  • Cuisine: Influenced by classic American cuisine, it has southern roots with herbs and spices that give it a unique flair.
  • Cost: The ingredients are budget-friendly, making this recipe an economical choice for the family.
  • Season: It’s a year-round dish, great for both summer BBQs and cozy winter dinners.
  • Occasion: Perfect for family dinners, meal prepping, or entertaining guests.

Why You’ll Love This Recipe

The combination of melt-in-your-mouth tenderness and flavor makes this chicken a standout dish. It’s moist inside, with a lightly crispy exterior that tantalizes your taste buds. Each bite releases an explosion of flavors, and the aroma while the chicken is baking will have everyone eagerly anticipating dinner. The blend of spices allows the natural flavor of the chicken to shine through while adding layers of complexity.

One of the greatest conveniences of this recipe is how quickly it comes together. With just a 15-minute prep time, you can have a delicious meal on the table in under an hour. This makes it ideal for busy weeknights when you want a homemade dinner without the hassle. Plus, it’s an excellent option for meal prepping, ensuring you have tasty options ready to go throughout the week.

Nutritionally, this chicken dish provides high-quality protein essential for muscle development and overall health. Additionally, when paired with vegetables, it becomes a well-rounded meal that’s satisfying and fulfilling. You can easily adjust the side dishes to cater to any dietary preferences, making it a flexible choice for various settings.

On the social front, serving the Melt In Your Mouth Chicken Breast fosters a sense of community and togetherness. Whether you’re hosting a family gathering or having friends over for dinner, the inviting flavors and delightful textures make this dish a conversation starter.

This recipe is not only delicious but also incredibly cost-effective. The ingredients are budget-friendly and accessible, making it easy to create a mouth-watering chicken dish without breaking the bank. Plus, the potential for leftovers means you can enjoy this meal more than once, further stretching your grocery dollars.

Historical Background and Cultural Significance

The Melt In Your Mouth Chicken Breast recipe draws on a long history of chicken dishes celebrated across cultures. Historically, chicken has been a staple protein for households worldwide due to its affordability and versatility. In American cuisine, the evolution of chicken dishes has seen numerous adaptations, from fried to baked, reflecting regional preferences and cooking techniques.

Culturally, chicken signifies comfort and home. Family recipes often feature chicken as the centerpiece, bringing together loved ones over shared meals. It’s a dish that can take on various flavors, allowing families to pass down traditions and modify them based on ingredients available in their regions.

The recipe’s evolution reflects modern tastes, adapting traditional methods to embrace quick preparation and robust flavors. Today, the Melt In Your Mouth Chicken Breast recipe is often prepared by both novice cooks and seasoned chefs alike, who appreciate the balance it strikes between ease and gourmet appeal.

Regional variations of chicken dishes can be found in cuisines worldwide, each with distinctive flavors and styles. For instance, southern cooking brings in spices and frying techniques, whereas other cultures might emphasize light marinades and grilling. This recipe encapsulates these influences into a delightful dish that honors its roots while remaining accessible to everyone.

Ingredient Deep Dive

For the main ingredient, chicken breast can be celebrated for its cultural significance as a primary source of protein in countless cuisines. It boasts a high protein content while remaining relatively low in fat, making it a popular choice for health-conscious eaters. When selecting chicken, look for breasts that are fresh and firm, avoiding any with discoloration. Proper storage includes refrigerating or freezing to maintain freshness, ensuring that you have quality ingredients for your recipe.

Another key ingredient, garlic, has been used in various recipes for centuries, particularly in Mediterranean and Asian dishes. Known for its potential health benefits, garlic adds not only a flavorful punch but also a depth of flavor to the dish. It’s essential to select firm, unblemished bulbs for cooking, and it should be stored in a cool, dry place. Substituting garlic powder or using fresh cloves in minced or sliced form can enhance the flavor profile of any meal.

Common Mistakes to Avoid

  • Overcooking: Cooking chicken breast beyond the recommended time will result in dry, tough meat. Always use a meat thermometer to check doneness.
  • Under-seasoning: Skimping on seasoning can leave your chicken bland. Ensure you generously coat the chicken with spices and herbs for optimal flavor.
  • Not resting the chicken: Allowing the chicken to rest after baking is crucial. It helps redistribute the juices, making for a juicier bite.
  • Using cold chicken: Starting with chicken at room temperature ensures even cooking and helps achieve a more tender outcome.
  • Piling chicken too close together: Leaving space between pieces allows for even cooking and proper browning.
  • Ignoring the marinade time: Allow chicken to marinate adequately; doing so will enhance flavor and tenderness.
  • Using the wrong type of chicken: Make sure to use boneless, skinless chicken breasts for this recipe. Other cuts may require different cooking times.
  • Skipping the preheat: Always preheat the oven to ensure your chicken cooks evenly and develops a good crust.
  • Not checking for seasoning: Taste your marinade or coating mix before applying it to ensure the flavor is balanced.
  • Forgetting to line the baking dish: Using parchment paper will facilitate easier cleanup and prevent sticking.

Essential Techniques

To ensure your chicken breasts turn out perfectly tender, mastery of proper marinating techniques is essential. Marinating adds flavor and must be timed just right; chicken can become mushy if left too long in acidic marinades. Aim for at least 30 minutes but no longer than 2 hours for an optimal tender texture. Visual cues for success include a slightly opaque exterior and improved aroma after marinating.

Another technique is searing the chicken before baking. This method caramelizes the surface, enhancing flavor through the Maillard reaction. To master this, use a hot skillet and avoid overcrowding. Visual cues include a deeply browned surface and sizzling sounds. Once one side is seared, flip it and transfer to the oven for optimal cooking.

Chamomile and Honey Sleepytime Latte Recipe for Ultimate Relaxation

Chamomile & Honey Sleepytime Latte: A Soothing Sip for Relaxation

⚖️
Difficulty
Easy

⏲️
Prep Time
5 mins

🕒
Cook Time
5 mins

⏱️
Total Time
10 mins

🍽️
Servings
2 cups

As evening falls and the day winds down, there’s nothing quite as comforting as a warm cup of Chamomile & Honey Sleepytime Latte. This delightful beverage, infused with the calming properties of chamomile and the natural sweetness of honey, beckons you to unwind and relax. Whether you’ve had a long day at work or simply need some alone time at the end of a busy day, this latte provides a soothing escape. With every sip, feel the warmth of the drink wrap around you like a cozy blanket, making it the perfect nightcap before bedtime.

The Chamomile & Honey Sleepytime Latte not only delights the palate but also fills your space with the enchanting aroma of chamomile blossoms and rich honey. Imagine a warm kitchen, the soft sounds of evening ahead, and the comforting fragrance enveloping you. This latte is more than just a drink; it’s an invitation to slow down, breathe deep, and nurture your well-being as you transition into a peaceful night.

Quick Recipe Highlights

  • Flavor Profile: This latte combines the gentle floral notes of chamomile with the rich sweetness of honey, creating a truly magical taste experience.
  • Texture: Creamy, velvety, and warm, the latte sits delicately on the tongue, making each sip an indulgent experience.
  • Aroma: The soothing scent of chamomile, paired with aromatic vanilla and a hint of honey, fills the air, enticing you to savor every drop.
  • Visual Appeal: A beautifully swirled latte topped with a sprinkle of cinnamon creates a visually stunning drink perfect for cozy evenings.
  • Skill Level Needed: Requires minimal cooking expertise, making it accessible for novice cooks looking to impress.
  • Special Equipment: All you need is a small pot and a whisk, making this an easy recipe to whip up any night of the week.

Recipe Overview

  • Difficulty Level: This Chamomile & Honey Sleepytime Latte is rated easy due to its uncomplicated steps and quick preparation time. It is perfect for anyone, from beginners to experienced chefs.
  • Category: This latte falls under beverages, specifically warm drinks designed for relaxation and comfort, often enjoyed during evening routines or special occasions.
  • Cuisine: Rooted in herbal traditions, particularly those of Western herbalism, chamomile has been used for centuries as a natural remedy for relaxation, making this latte a wonderful addition to any health-conscious culinary repertoire.
  • Cost: The ingredient costs are low, primarily featuring chamomile tea and honey, with little additional expense for the milk needed to create the latte.
  • Season: Ideal for any season, but particularly comforting during fall and winter evenings when you seek warmth and coziness.
  • Occasion: Perfect for unwinding after a long day, this latte is also great for hosting relaxed gatherings or quiet nights in.

Why You’ll Love This Recipe

This Chamomile & Honey Sleepytime Latte is a delightful blend of taste and texture that genuinely caters to your senses. The creamy consistency coupled with the floral chamomile makes every sip feel luxurious. The subtle sweetness from honey rounds out the flavors, offering a gentle reminder to slow down and enjoy life’s simple pleasures.

The convenience of this recipe cannot be overstated. Preparation is quick and requires minimal effort, allowing you to whip up a protective shield against a hectic day in mere minutes. This warm beverage promises to relieve stress and promote a restful evening without complicated steps.

Packed with nutritional advantages, chamomile is renowned for its serene properties, often used to alleviate insomnia and promote deeper sleep. Coupled with honey, which is rich in antioxidants, this latte offers a wholesome alternative to other sugary nightcaps that may disrupt your sleep cycle.

This recipe shines when it comes to social gatherings. Imagine serving this enchanting latte during a girls’ night in or family gathering. Sharing this experience fosters a warm, comforting environment, encouraging connections through shared moments of relaxation and joy.

Lastly, considering its cost-effectiveness and accessibility, this latte is a budget-friendly option that elevates your evening routine. With easy-to-find ingredients, anyone can indulge in this soothing drink without breaking the bank.

Historical Background and Cultural Significance

Chamomile has a storied past, often hailed for its calming effects since ancient times. Originating from Europe and Asia, this herb was prized by Egyptians, Greeks, and Romans alike for its medicinal properties. Over centuries, chamomile has transcended cultural boundaries, evolving into a global symbol of relaxation, thus paving the path for recipes like our Sleepytime Latte.

The cultural significance of chamomile is profound; frequently celebrated in herbal traditions, it represents peace and tranquility across various civilizations. In different cultures, chamomile has been utilized to treat ailments ranging from minor digestive issues to significant stress relief, affirming its role as a natural remedy.

As this beverage has evolved, modern adaptations have emerged, showcasing chamomile alongside honey in creative concoctions. Today, the Chamomile & Honey Sleepytime Latte honors the rich history of chamomile while offering a contemporary take that resonates with modern tastes.

Regional variations of chamomile drinks can include adding spices or other herbal elements, reflecting local preferences and the versatility of this calming flower. This adaptability speaks to its deep-rooted significance around the world, from soothing drinks enjoyed after a long day in Europe to herbal teas celebrated in Asian cultures.

Ingredient Deep Dive

Chamomile: Known for its calming effects, chamomile has been cherished for millennia. This delightful flower provides not only flavor but remarkable health benefits, such as reducing stress and aiding digestion. When selecting chamomile, look for dried flowers that exhibit a bright color and pleasant aroma. Store in a cool, dry place to retain freshness.

Honey: While sweetening our latte, honey also adds a multitude of health benefits, including antioxidants and antimicrobial properties. Its versatility is unparalleled, and it can be easily substituted with agave syrup or maple syrup if desired. To ensure quality, opt for raw or local honey, and keep it in a tightly sealed container to prevent crystallization.

Common Mistakes to Avoid

  • Using boiling water for chamomile: Overly hot water can scald the flowers, leading to a bitter flavor. Aim for a temperature just below boiling for optimal extraction.
  • Rushing the steeping time: Chamomile needs time to release its flavor; allowing it to steep for 5-10 minutes maximizes the herbal essence.
  • Using processed honey: Avoid overly processed honeys that contain additives; choose pure, raw honey for the best flavor and health benefits.
  • Skillfully foaming milk: Whether using a frother or whisk, ensure to carefully foam milk to avoid burning it, which can alter the taste.
  • Forgetting the vanilla: Vanilla enhances the soothing flavors; omitting it diminishes the latte’s complexity.
  • Using low-quality tea: Ensure to use high-quality chamomile tea or flowers to avoid a bland drink.
  • Neglecting to garnish: A sprinkle of cinnamon or a lemon twist can elevate the visual and flavor profile; it’s worth the extra step!
  • Ignoring allergies: Always check for potential allergies with chamomile or honey, particularly when serving to guests.
  • Skipping taste adjustments: Tailoring sweetness to your palate can help create a more enjoyable drink. Taste and adjust as you see fit!
  • Serving too hot: Allow the latte to cool slightly before serving, especially if it’s intended for children or sensitive drinkers.

Essential Techniques

Infusing Chamomile: Infusion is vital to bring out the flavor of chamomile. Use loose flower buds or high-quality tea bags and steep them in hot water for 5-10 minutes. Avoid extremes in temperature, which can lead to bitterness.

Milk Frothing: Frothing milk adds a velvety texture to your latte. Use a milk frother or whisk to create foam but be cautious not to heat it excessively. Look for tiny bubbles for perfect foam without burnt or scorched flavors.

Pro Tips for Perfect Chamomile & Honey Sleepytime Latte

1. Utilize fresh chamomile flowers if available; they provide a richer flavor than dried.

2. Experiment with sweeteners; maple syrup and coconut sugar can add unique flavors.

3. Warm the milk before frothing for a smoother integrate; this yields a better-textured latte.

4. Try adding spices like nutmeg or cardamom for an aromatic twist.

5. Use non-dairy milk alternatives if desired; oat milk or almond milk froth beautifully.

6. Serve with a side of biscuits or shortbread for a delightful treat.

7. Chill any leftover latte in the fridge for a refreshing iced version the next day.

8. Create a chamomile syrup for quick sweetening during long nights with friends.

Variations and Adaptations

This latte can be easily adapted to cater to various tastes and dietary needs. Consider a vanilla chamomile version by adding a splash of vanilla extract for extra flavor. Seasonal adaptations might include using pumpkin spice during fall or mint for a refreshing summer brew.

For dietary modifications, explore using almond or coconut milk for a dairy-free version. This not only makes the latte suitable for vegans but also provides unique flavor combinations that are equally delightful. Add a packet of flaxseed or chia seeds for a nutritional boost.

If you prefer a stronger chamomile essence, feel free to double the amount of chamomile used in the recipe while reducing honey to balance sweetness. Additionally, for a heartier texture, consider adding brewed chai tea into the mix.

Serving and Presentation Guide

For an aesthetically pleasing serving, consider using clear glass mugs that showcase the beautiful color of the latte. Plating techniques can be as simple as layering the frothed milk to create a swirl effect. For garnishing, a sprinkle of cinnamon or fresh chamomile flowers adds visual appeal.

Pair your latte with traditional accompaniments like homemade cookies or fruit tarts to enhance the experience. Additionally, serving it in a warm, cozy environment can amplify its comforting allure, making it a treat for both the eyes and taste buds.

Temperature is key; serve the latte warm but not too hot to ensure enjoyability for everyone. Portion control can be easily managed by serving in smaller cups, allowing guests to savor multiple sips rather than overwhelming them with one large drink.

Wine and Beverage Pairing

When it comes to pairing beverages like the Chamomile & Honey Sleepytime Latte, consider serving it with herbal wines or lightly flavored white wines, such as Sauvignon Blanc that won’t overpower the soft flavors of chamomile. For non-alcoholic alternatives, pair it with herbal teas that complement the chamomile, like lavender or peppermint.

If you’re planning a cozy night in, pairing the latte with a side of light champagne can offer an effervescent contrast, making the experience even more special. For iced variations, serve it alongside a refreshing lemonade to balance the creamy texture with citrus brightness.

Storage and Shelf Life

The Chamomile & Honey Sleepytime Latte is best enjoyed fresh; however, if you have leftovers, store them in an airtight container in the fridge for up to two days. To retain quality, ensure it’s cooled before refrigerating. When reheating, do so gently on the stovetop or in the microwave, watching out for any signs of spoilage such as an off smell or discoloration.

For optimal freshness of ingredients like chamomile and honey, store them in a dark, cool space away from moisture and direct sunlight. Honey naturally has a long shelf life, but if it crystallizes, gently heat it to restore its texture. Freezing prepared lattes isn’t advisable, but you can freeze chamomile tea bags for later use.

Make Ahead Strategies

Preparing your Chamomile & Honey Sleepytime Latte can be streamlined for busy evenings. Brew a larger batch of chamomile tea in advance, allowing you to speedily assemble the latte later. Store the brewed tea in the fridge so you can eliminate steeping time.

Consider prepping the honey syrup by combining honey with hot water in advance. This ensures it blends seamlessly into your drink without clumping. Additionally, froth your milk just before serving to maintain texture and temperature.

Quality will remain intact with these strategies, but remember to make the latte close to serving time for maximum freshness. Reheating whole batches should be avoided, as flavors can dull when reheated multiple times.

Scaling Instructions

Scaling this recipe is simple! If you’re interested in halving the recipe for a solo cup, simply adjust the quantities accordingly, focusing on maintaining the balance of flavors. For larger groups, double or even triple the ingredients, ensuring you have the necessary equipment to heat and froth larger amounts of milk.

Timing might change slightly with larger quantities; closely monitor the heating process to maintain your optimal flavors and textures. Store any additional latte in the fridge, following the storage guidelines above, to ensure freshness. Remember, the key is adjusting your proportions without sacrificing quality!

Nutritional Deep Dive

In analyzing the nutritional value of this Chamomile & Honey Sleepytime Latte, each serving holds a balance of essential macros. It offers a satisfying amount of carbohydrates primarily from honey, while the milk provides crucial proteins and fats, ensuring a well-rounded drink suitable for a soothing evening.

Micronutrient analysis indicates that chamomile is rich in antioxidants, while honey contributes vitamins like B6 and minerals such as calcium and magnesium. Together, these elements support overall health, aiding digestion and promoting relaxation, making this latte not just delicious, but beneficial too.

When considering health benefits, the calming effects of chamomile make it a popular choice for those suffering from insomnia or stress-related issues. With proper portions, this drink aligns well with many dietary considerations, but it’s still best enjoyed in moderation, especially with added sweeteners.

Dietary Adaptations

For those requiring gluten-free options, this recipe naturally fits the bill! Chamomile tea and honey are gluten-free; simply ensure that the milk alternative you choose also adheres to dietary restrictions.

Adapting this recipe for dairy-free diets can easily be done by using alternatives such as almond or oat milk, maintaining the flavor and texture. Vegans can replace honey with maple syrup or agave nectar to suit their dietary needs.

Low-carb and keto followers can modify by utilizing sugar-free sweeteners, keeping the richness of flavor while cutting down on carbs. Each dietary adaptation allows for variations while ensuring everyone can enjoy a warm mug of relaxation.

Troubleshooting Guide

If your latte turns out too bitter, re-evaluate the steeping time of your chamomile. Excessive brewing can impart unwanted flavors, so ensure it’s within the recommended time frame. If a soapy taste emerges, double-check your milk’s freshness, as old milk can affect the flavor quality.

For texture issues, if it’s too watery, reduce the amount of milk or increase the chamomile quantity. On the other hand, if it’s too thick, gently add more milk until the desired consistency is reached.

Common equipment challenges may arise when frothing milk; using chilled tools can help in creating better foam. Lastly, always taste your latte before serving and adjust sweetness as needed; this allows for a personalized drink tailored to individual preferences.

Recipe Success Stories

As community feedback has flowed in, many readers have fallen in love with this Chamomile & Honey Sleepytime Latte. The warmth that comes from sharing a soothing drink at the end of a long day has led to heartfelt success stories, enhancing connections among friends and family.

Variation successes have emerged as well, with many trying this recipe with an added hint of lavender or ginger for a spicy twist, proving just how flexible and enjoyable this latte can be.

Readers often share their adaptations, showcasing unique spellings or serving suggestions that align with personal preferences. Photos flooded on social media exhibit stunning latte art and creative presentations, encouraging a broader community engagement around evening rituals.

Frequently Asked Questions

Can I use fresh chamomile flowers?

Absolutely! Fresh chamomile flowers offer an even more robust flavor. Use about double the amount of fresh flowers compared to dried ones, and steep them as you would any herbal tea.

What if I don’t have honey?

No worries! You can substitute honey with agave syrup, maple syrup, or even stevia for a sugar-free option. Adjust quantities to taste, as sweetness levels can vary greatly.

How can I make this latte more frothy?

For a frothier latte, ensure your milk is heated properly, and use a frother or a whisk to aerate the milk vigorously until it forms a nice foam. You can use cold milk by frothing it first and then warming it gently.

Can I make this latte iced?

Yes! Prepare the latte as usual, let it cool down, and then pour it over ice. You may want to reduce the amount of milk slightly for a more concentrated flavor when serving it iced.

How long will leftovers last in the fridge?

Leftover latte can be stored in the refrigerator for about 2 days in a sealed container. However, be aware that flavors might alter slightly, so it’s best enjoyed fresh.

Can I add more spices to the latte?

Definitely! Adding spices like cinnamon, nutmeg, or even cardamom can enhance the flavor profile. Start with small amounts and adjust to your personal preference.

Is this recipe suitable for children?

Yes, this latte is a gentle option for children as it contains no caffeine. However, be mindful of the honey content, particularly for infants under one year.

What type of milk works best?

Any milk will work well, including dairy and alternatives like almond or oat milk. Choose your favorite or the one that aligns with your dietary preferences; they all froth differently but will taste great!

Can I use flavored chamomile tea bags?

Certainly! Flavored chamomile tea bags can add a unique twist to your latte, so feel free to experiment with flavors that you enjoy, such as vanilla or lavender chamomile.

Is it okay to keep the latte warm in a thermos?

Yes, a thermos can help maintain the warmth of your latte, making it a great option for enjoying it on the go or keeping it warm throughout your evening routine.

Additional Resources

For those looking to expand their beverage repertoire, explore related recipes like herbal teas or infused milks that can enhance your evening routines. Technique guides on milk frothing can help take your lattes to the next level, while ingredient information on chamomile can deepen your understanding of this calming flower.

Be sure to check out equipment recommendations for frothers or specialty mugs to elevate your experience. Seasonal variations can also inspire creativity in your drink selections, ensuring your evening rituals stay exciting throughout the year.

Join the Conversation

Engagement around this Chamomile & Honey Sleepytime Latte can flourish through social media sharing. As you enjoy your latte, snap a photo and tag your friends, inviting them to partake in the soothing experience. Photography tips can help elevate your food styling, leading to beautiful presentations that deserve to be shared.

Recipe reviews and community engagement help foster connections among fellow latte lovers. Encourage your readers to suggest their own adaptations and variations; after all, recipes evolve as they move through communities!

The Recipe

Chamomile & Honey Sleepytime Latte

Serves: 2 cups

Prep Time: 5 mins

Cook Time: 5 mins

Total Time: 10 mins

Kitchen Equipment Needed

  • Small pot
  • Whisk or frother
  • Measuring cups and spoons
  • Fine strainer (if using loose chamomile)

Ingredients

  • 2 cups of water
  • 2 tablespoons dried chamomile flowers or 2 chamomile tea bags
  • 1 cup milk (dairy or non-dairy)
  • 2 tablespoons honey (adjust to taste)
  • 1/2 teaspoon vanilla extract (optional)
  • Pinch of cinnamon for garnish

Directions

  1. Bring water to a boil in a small pot.
  2. Add chamomile flowers or tea bags to the boiling water and steep for about 5-10 minutes.
  3. While the tea is steeping, heat the milk in another small pot until warm but not boiling.
  4. If desired, froth the milk using a whisk or frother until a silky foam develops.
  5. Remove the chamomile from heat and strain (if using loose flowers) into a large mug.
  6. Stir in honey, adjusting sweetness to your liking, along with vanilla extract if using.
  7. Pour in the warm milk and gently mix.
  8. Top with a sprinkle of cinnamon and serve immediately.

Recipe Notes

  • Try adding a splash of almond or coconut milk for a different flavor profile.
  • Leftover latte can be stored in the fridge for up to two days; reheat gently prior to serving.
  • Feel free to experiment with other spices, such as nutmeg or ginger, for added depth.
  • This recipe can easily be multiplied for larger gatherings.

Delightful Southern Hummingbird Cake with Cream Cheese Frosting Recipe

Southern Hummingbird Cake with Cream Cheese Frosting: A Tropical Delight

⚖️
Difficulty
Moderate

⏲️
Prep Time
20 mins

🕒
Cook Time
30 mins

⏱️
Total Time
50 mins

🍽️
Servings
12 slices

Indulging in a slice of Southern Hummingbird Cake is like taking a bite of sunshine. This vibrant cake, infused with bananas, pineapple, and toasted pecans, is draped in a rich and creamy cream cheese frosting that beautifully complements its tropical flavors. Originating from the South, this cake isn’t just a dessert; it’s a celebration of the flavors that embody Southern hospitality and warmth. Imagine the sweet aroma of freshly baked cake wafting through your kitchen, beckoning loved ones to gather around and enjoy a slice of joy.

Whether you’re hosting a family gathering or simply treating yourself, this Southern Hummingbird Cake is versatile enough to shine in any setting. The unique combination of flavors, from the sweetness of ripe bananas to the tropical twist of crushed pineapple, creates a symphony that dances on your palate. Add in the moist texture and the delightful crunch of pecans, and you have a cake that not only looks stunning but also satisfies every sweet tooth.

Quick Recipe Highlights

  • Flavor Profile: A perfect balance of sweetness, with hints of tropical fruits and nutty pecans creating a delightful mix.
  • Texture: Moist and fluffy with a creamy frosting, this cake offers a delightful melt-in-your-mouth experience.
  • Aroma: Inviting tropical notes from bananas and pineapple complemented by the rich scent of vanilla and cream cheese.
  • Visual Appeal: Eye-catching layers topped with a fluffy frosting and adorned with pecans for a rustic look.
  • Skill Level Needed: Ideal for moderate bakers; requires basic mixing and baking techniques.
  • Special Equipment: Standard kitchen tools including mixing bowls, a whisk, and a cake pan are all you need.

Recipe Overview

  • Difficulty Level: This recipe strikes a balance between beginner-friendly and challenging, making it a great opportunity to enhance your baking skills.
  • Category: Dessert – perfect for birthdays, celebrations, or simply enjoying with a cup of coffee.
  • Cuisine: Deeply rooted in Southern culture, Hummingbird Cake represents the region’s love for bold flavors and rich traditions.
  • Cost: Ingredient costs are reasonable, especially for fresh fruits and pantry staples, making it an accessible choice.
  • Season: Best enjoyed in spring and summer, when fresh fruits are at their peak, but delicious year-round.
  • Occasion: Suitable for both casual and formal gatherings, making it a versatile choice for entertaining.

Why You’ll Love This Recipe

The Southern Hummingbird Cake is a perfect marriage of tropical flavors that sings of nostalgia and celebration. Each slice delivers a delightful combination of sweet bananas, juicy pineapple, and crunchy pecans, creating an irresistibly flavorful experience. Its moist and fluffy texture contrasts beautifully with the rich cream cheese frosting, leaving a lasting impression on every palate. This cake isn’t just food; it’s an experience that draws people together, inviting them to enjoy the sweetness of life.

In terms of preparation, this cake is manageable for both novice bakers and those looking to refine their skills. The straightforward instructions make it easy to follow along and enjoy the step-by-step process without feeling overwhelmed. Additionally, the ability to bake and frost the cake ahead of time adds convenience, ensuring that you can focus on your guests when it’s time to serve.

Another reason to adore this cake is its nutritional punch. Bananas and pineapple contribute essential vitamins and minerals, making it a slightly guilt-free treat. While it’s still a dessert, the use of fresh fruits enhances its nutritional profile. The pecans also provide healthy fats and protein, adding to the overall goodness of this delightful cake.

This Southern Hummingbird Cake shines at social gatherings, fostering warmth and connection among family and friends. Its inviting aroma and beautiful presentation create a lure that encourages sharing and celebrating togetherness. When served at parties, this cake becomes a centerpiece that sparks conversation and creates memories.

Lastly, the ingredients used in this recipe are both affordable and readily available in most grocery stores, ensuring that everyone can make this cake without breaking the bank. This accessibility allows more people to enjoy the wonders of Southern baking, solidifying the cake’s position as a beloved recipe passed down through generations.

Historical Background and Cultural Significance

The origins of the Southern Hummingbird Cake can be traced back to the southern United States, where it has been a popular dessert for many years. Its name is said to have been inspired by the Hummingbird, a bird that loves sweet nectar, metaphorically reflecting the cake’s irresistible sweetness. The cake embodies the essence of Southern hospitality, often served during gatherings to showcase the warmth and generosity of the region.

Culturally, the cake holds a special place in the hearts of many Southerners, symbolizing community and celebration. It is a common feature at weddings, birthdays, and other significant events, often eliciting nostalgia in those who grew up with it. The recipe has evolved over time, with families passing down their variations, adding personal twists to the classic cake that tell a story through every bite.

As the recipe traveled beyond its Southern roots, it gained popularity across the country, becoming a staple dessert in many households and cafes. Its transformation and adaptation have led to numerous variations, reflecting the diverse palates and techniques of bakers everywhere while still staying true to the essence of the original recipe.

You can find regional variations of the Hummingbird Cake, including adjustments such as adding coconut for a tropical twist or using different nuts, which showcases the creativity of home bakers. Each iteration offers a glimpse into the local ingredients and flavors while keeping the traditional spirit alive.

Ingredient Deep Dive

Bananas

Bananas are a key ingredient in Southern Hummingbird Cake, not only providing natural sweetness but also contributing moisture to the cake. Rich in potassium and vitamins B6 and C, bananas promote heart health and provide energy. When selecting bananas for baking, look for ones that are overripe with brown spots, as they will add more flavor to the cake. Store ripe bananas at room temperature or refrigerate them to prolong their freshness. An excellent substitute for bananas in recipes can be applesauce or even mashed avocado if you’re looking for alternatives.

Pineapple

Crushed pineapple adds a tropical flair that balances the richness of the cake. This ingredient is high in vitamin C and bromelain, an enzyme that aids in digestion. When selecting pineapple, fresh, in-season varieties will provide the best flavor, but canned crushed pineapple also works well. Ensure to drain the canned version to prevent excess moisture from affecting the cake’s texture. For a twist, consider using other tropical fruits such as mango or papaya which can provide similar moisture and sweetness.

Pecans

Pecans are a classic addition to Hummingbird Cake, adding crunch and a nutty flavor that complements the fruits. Packed with healthy fats, fiber, and antioxidants, pecans contribute to heart health and support overall well-being. When purchasing pecans, look for fresh, unbroken nuts, and store them in an airtight container to keep them from becoming rancid. You can substitute pecans with walnuts or almonds if preferred, though they will impart a different taste profile.

Cream Cheese

The cream cheese frosting is the crowning glory of this cake, lending a tangy flavor that balances the sweetness of the cake. Cream cheese provides calcium and protein, enhancing the nutritional value of the frosting. Choose block-style cream cheese for a thicker consistency that beats well into a creamy frosting. If aiming for a lower-fat version, consider using Neufchâtel cheese or Greek yogurt as healthier substitutes, although they may differ slightly in flavor and texture.

Common Mistakes to Avoid

  • Using Overripe Bananas: Ensure your bananas are overripe, but not rotten. Overripe bananas add sweetness and moisture, crucial for a successful Hummingbird Cake.
  • Incorrect Oven Temperature: Always preheat your oven properly. An oven that is too hot can cause the cake to rise unevenly, while a cool oven can leave it dense.
  • Skipping the Sifting Step: Sifting your flour helps to aerate it, preventing a dense cake. Always sift your flour before measuring for optimal results.
  • Not Draining Pineapple: Excess moisture from canned pineapple can lead to a soggy cake. Be sure to drain it well before using in the recipe.
  • Overmixing the Batter: Mix only until the ingredients are combined; overmixing can result in a tough cake texture.
  • Not Letting the Cake Cool: Allow the cake layers to cool completely before frosting. This prevents the frosting from melting and sliding off.
  • Incorrect Cream Cheese Consistency: Ensure your cream cheese is softened to room temperature for a smooth, spreadable frosting.
  • Neglecting to Taste: Always taste your batter before baking. Adjust sweetness as necessary, especially with added fruits.
  • Ignoring Storage Guidelines: Improper storage can lead to a dry cake. Make sure to store it in an airtight container.
  • Skipping the Nuts: While they can be optional for some, toasted pecans add essential flavor and texture to the cake, do not skip them unless there are allergies.

Essential Techniques

Mixing the Batter

Properly mixing the batter is crucial for achieving the desired texture of your cake. Start by creaming the sugar and butter until light and fluffy. This process introduces air into the mixture, ensuring a light cake. After incorporating the eggs, gently fold in the dry and wet ingredients until just combined to prevent overmixing. Watch for visual cues such as smooth texture and slight lumpiness—which is perfectly acceptable. Avoiding overmixing is key, as it can develop gluten and lead to a dense cake.

Cooling the Cake

Once baked, allow the cakes to cool in their pans for about 10-15 minutes before transferring them to wire racks. This cooling period allows the steam to escape, preventing sogginess while ensuring the cakes hold their shape. For a successful transfer, gently run a knife around the edges to loosen the cake before inverting it. Adequate cooling before frosting is essential; a warm cake can cause the frosting to melt, resulting in an unappealing finish.

Pro Tips for Perfect Southern Hummingbird Cake

– Use fresh, high-quality ingredients for the best flavor and texture; ripe bananas and fresh pineapple will elevate your cake.
– Toast your pecans before adding them to the batter for an extra layer of depth in flavor.
– Do not frost the cake until it is completely cool to prevent the frosting from melting and sliding off.
– Consider adding a touch of coconut for a tropical twist; it complements the other flavors beautifully.
– Use a serrated knife to level off the tops of your cake layers, ensuring a neat stacking when frosting.
– If you have leftovers, store them in the fridge to maintain moisture, though it’s best enjoyed fresh.
– For an easy serving option, slice the cake into smaller squares and present them on a platter for gatherings.
– Experiment with different cake pans, like bundt or square, to create various presentation styles.

Variations and Adaptations

When it comes to Southern Hummingbird Cake, the possibilities for variations and adaptations are endless. For a regional twist, consider adding shredded coconut alongside the banana and pineapple for a classic tropic flavor fusion. During the fall months, a seasonal adaptation might include incorporating spices like cinnamon or nutmeg to create a warm, comforting flavor profile.

If you’re seeking dietary modifications, this cake can be easily transformed into a gluten-free delight by using a gluten-free flour blend in place of all-purpose flour. For those following a dairy-free or vegan lifestyle, there are alternative recipes that use plant-based yogurts or cream cheese substitutes, enabling everyone to savor its wonderful flavors.

Flavor variations can also be explored by introducing different fruits such as mango, contributing a unique twist to the traditional recipe. Alternatively, adding a splash of rum to the frosting or the cake batter takes the flavor to new heights. For those who enjoy a crunch, consider swapping the pecans for walnuts or macadamias to switch up the texture.

Presentation alternatives can also elevate this dessert; try serving it as individual mini cakes or in a trifle dish layered with frosting and cake crumbs for an elegant touch.

Serving and Presentation Guide

Presentation is key when serving your Southern Hummingbird Cake. For an impressive display, consider using a cake stand to elevate the beauty of your creation and allow guests to admire it from all angles. Garnish with whole pecans on top of the frosting or sprinkle toasted coconut to enhance its visual appeal.

When it comes to traditional accompaniments, a scoop of vanilla ice cream or a dollop of whipped cream can complement the cake beautifully. For modern serving suggestions, pair each slice with a fruity sauce or coulis to enhance the flavor experience.

Temperature considerations are essential; serve your cake slightly chilled for a refreshing treat, especially on hot days. Regarding portion control, a standard slice can be generous, so consider cutting smaller portions for gatherings, allowing guests to enjoy multiple treats without feeling guilty.

Wine and Beverage Pairing

To elevate your dessert experience, consider pairing a slice of Southern Hummingbird Cake with a light dessert wine such as a Moscato or a sweet Riesling, both of which will complement the cake’s fruity flavors. For a non-alcoholic alternative, a refreshing mint tea or creamy chai latte makes for an excellent gardening companion, perfectly balancing the sweetness.

If you’d like a coffee pairing, a lightly brewed coffee or even a flavored espresso can beautifully contrast the richness of the cake’s cream cheese frosting. Serve these beverages at a slightly warm temperature, enhancing the overall indulgence and experience of savoring your Hummingbird Cake.

Storage and Shelf Life

To ensure the longevity of your Southern Hummingbird Cake, store it in an airtight container at room temperature for up to three days. If you’d like to keep it for a longer duration, refrigeration will help extend its shelf life, preserving it for up to a week.

When refrigerating, ensure the frosting doesn’t become damaged; consider covering it with plastic wrap. Look for signs of spoilage such as a change in texture or an off smell, as these indicate the cake may no longer be good to eat.

If you wish to freeze your cake, wrap it tightly in plastic wrap followed by aluminum foil, ensuring it’s airtight. This can preserve it for up to three months. When ready to serve, thaw in the refrigerator overnight and allow the cake to come back to room temperature before enjoying.

Make Ahead Strategies

Making your Southern Hummingbird Cake ahead of time can be a time-saver, especially for busy occasions. You can bake the cake layers up to a day in advance, allowing them to cool completely before wrapping and storing them in the refrigerator. This will keep your cake moist and fresh while you prepare for your event.

When it comes to assembling, frost the cake the day of serving to maintain maximum freshness and prevent any textural changes. Once assembled, store the cake in a cool area before serving to keep the frosting intact.

If you’re interested in adding fresh elements later, consider preparing the frosting ahead of time and refrigerating it. This makes assembly quick and convenient. Just be sure to re-whip the frosting slightly before application.

Scaling Instructions

Scaling your Southern Hummingbird Cake up or down is straightforward. If you need to halve the recipe, use smaller pans or adjust the baking time, checking for doneness earlier. Alternatively, to double or triple the recipe, use larger pans and potentially increase the baking time.

Keep in mind that larger cakes may require additional time to bake through, so be vigilant towards the end of the baking period to avoid overcooking. Additionally, when scaling up, consider the capacity of your mixer; working in batches might be necessary to meet your volume requirements.

Storage remains consistent based on whether you’re making one or multiple cakes; ensure they’re appropriately wrapped to minimize exposure to air and retain moisture.

Nutritional Deep Dive

A slice of Southern Hummingbird Cake offers a delightful balance of indulgence and nutrition. The macro breakdown of this cake includes healthy fats from pecans, carbohydrates from fruits, and a moderate amount of sugar, while the cream cheese frosting adds a touch of protein.

In terms of micronutrients, bananas provide potassium, while pineapple brings vitamin C to the table. The addition of pecans enriches the nutrient profile with healthy fats and antioxidants crucial for supporting overall wellbeing.

This cake can be enjoyed as part of a balanced diet, as the natural sweetness of the fruits reduces the need for excessive added sugars. However, mindful portion control is essential to align with dietary goals, as enjoying this delicious treat occasionally can fit seamlessly into a healthy lifestyle.

For weight management, consider smaller slices paired with fruits or nuts to create a satisfying dessert experience without overindulging.

Dietary Adaptations

Southern Hummingbird Cake can be easily tailored to suit a variety of dietary preferences. If gluten-free is a necessity, substituting regular flour with a gluten-free blend ensures that everyone can enjoy this beloved dessert without worry.

For those avoiding dairy, using vegan cream cheese and plant-based milk will allow for a delicious, dairy-free version without sacrificing flavor. Additionally, egg substitutes such as flax eggs or applesauce can seamlessly replace eggs for a vegan option.

If you’re following a low-carb diet, consider a sugar substitute in both the cake and frosting recipes, carefully selecting options that do not compromise the cake’s texture. Alternatively, using almond flour instead of regular flour can reduce the overall carb count while still providing a deliciously rich cake.

For those adhering to a paleo diet, focusing on whole, natural ingredients with substitutions for refined sugars will produce a cake that meets dietary standards while remaining delightful and indulgent.

Troubleshooting Guide

If you encounter texture issues with your Hummingbird Cake, consider checking your oven temperature; an oven that runs too hot can create dry layers while a too cool oven may lead to dense cakes. Additionally, ensure the correct measurements of ingredients to maintain the ideal moisture level.

Flavor balance can sometimes be off; if your cake is too sweet, consider reducing the sugar slightly in future batches. If it lacks sweetness, the addition of a simple syrup brushed onto the layers can enhance flavors without affecting texture.

Temperature problems, particularly with frosting melting after application, can often be remedied by ensuring your cake is completely cool before frosting. Additionally, ingredients like cream cheese should be at room temperature for the best results.

Equipment challenges, such as poor mixing or uneven baking, can often be solved by investing in quality bakeware that promotes even heating. Utilizing a kitchen scale for exact measurements can significantly improve results, making it easier to replicate the recipe.

Adapt your timings where necessary, especially when experimenting with altered recipes or larger servings; always test cakes with a toothpick to ensure thorough baking without dryness.

Recipe Success Stories

Community feedback about the Southern Hummingbird Cake often highlights its nostalgic flavors, transporting individuals back to family gatherings and celebrations. Readers frequently share their success stories of variations they’ve tried, such as adding chocolate chips or moister fruits that enhance the traditional recipe.

Throughout social media, home bakers enthusiastically document their experiences, noting how the cake quickly becomes a favorite among family members or friends at gatherings. Adaptation stories reveal the creativity of home bakers who add their unique twist, whether through ingredients or presentation.

Tips shared by readers often include frosting techniques or cake assembly strategies that transformed their cakes into stunning desserts worthy of any event. Many share heartfelt narratives about the joy and connections facilitated by sharing this cake.

Photography tips shared within the community capture these epic cakes in all their glory, with many recommending various angles or lighting setups to showcase the beauty of their creations.

Frequently Asked Questions

1. Can I freeze the Southern Hummingbird Cake?
Yes, you can freeze the cake! Wrap individual slices or the entire cake in plastic wrap and then aluminum foil. It can last for up to three months in the freezer. To serve, thaw in the refrigerator overnight before enjoying.

2. How do I substitute ingredients in the Hummingbird Cake?
You can substitute ripe bananas with applesauce for a different fruity flavor. If you need a gluten-free version, use a gluten-free flour blend instead of all-purpose flour.

3. Can I make this cake ahead of time?
Absolutely! You can bake the cake layers a day in advance and store them in the fridge. Frosting the cake on the day of serving will maintain its freshness.

4. What is the best way to store leftovers?
Store leftover cake in an airtight container at room temperature for 3-4 days or in the refrigerator for up to a week to maintain its moisture.

5. Can I make the cream cheese frosting vegan?
Yes, you can use a vegan cream cheese product alongside plant-based butter for a dairy-free frosting without sacrificing too much on flavor.

6. How do I know when the cake is done baking?
Insert a toothpick in the center of the cake; it should come out clean or with a few moist crumbs. This indicates the cake is fully baked.

7. What if my cake turns out too dry?
This could be due to overbaking. To avoid dryness in the future, start checking the cake for doneness earlier than the prescribed bake time.

8. Is there a gluten-free option for this cake?
Yes! Simply replace regular flour with a gluten-free flour blend to create a delicious version that everyone can enjoy.

9. What can I serve with Hummingbird Cake?
This delightful cake pairs well with a scoop of vanilla ice cream, whipped cream, or a light fruit sauce for an extra touch of flavor.

10. Can I use different nuts instead of pecans?
Certainly! While pecans add a unique flavor, walnuts or almonds can also work well as substitutes.

Additional Resources

If you enjoyed this Southern Hummingbird Cake, explore our related recipes for more exciting desserts, like classic Southern pecan pie or rich red velvet cake. Enhance your baking skills with our technique guides, covering everything from mastering the perfect frosting to tips for layering cakes.

For ingredient information, visit our detailed guides on choosing fresh fruits or selecting the best baking supplies for your kitchen. Additionally, keep an eye out for seasonal variations of our recipes featuring fresh summertime berries or holiday spices to keep your dessert game strong all year round.

To perfect your baking experience, check out our equipment recommendations that ensure success in your culinary endeavors.

Join the Conversation

Engaging with our community is a vital part of the experience. We encourage you to share your variations, tips, and tricks learned while making Southern Hummingbird Cake. Posting your beautiful photos on social media is a fantastic way to inspire other bakers.

We invite you to leave your feedback or review about your baking success with this cake, as it can help others explore its delights.

Your unique adaptations and story might just spark someone else’s creativity in the kitchen. Share your journey, and connect with fellow baking enthusiasts who cherish the same passion for food and community!

The Recipe

Southern Hummingbird Cake

Serves: 12 slices

Prep Time: 20 mins

Cook Time: 30 mins

Total Time: 50 mins

Kitchen Equipment Needed

  • Mixing bowls
  • Whisk and spatula
  • Cake pans
  • Cooling racks
  • Electric mixer

Ingredients

  • 3 ripe bananas, mashed
  • 1 cup crushed pineapple, drained
  • 1 cup vegetable oil
  • 2 cups sugar
  • 3 large eggs
  • 2 teaspoons vanilla extract
  • 2 cups all-purpose flour
  • 1 teaspoon baking soda
  • 1 teaspoon ground cinnamon
  • ½ teaspoon salt
  • 1 cup pecans, chopped
  • For the frosting: 8 oz cream cheese, softened, ½ cup butter, softened, 4 cups powdered sugar, 1 teaspoon vanilla extract

Directions

  1. Preheat the oven to 350°F (175°C). Grease and flour three 9-inch round cake pans.
  2. In a large bowl, combine the mashed bananas, crushed pineapple, oil, and sugar. Mix well.
  3. Add the eggs and vanilla extract to the mixture; stir until combined.
  4. In another bowl, whisk together the flour, baking soda, cinnamon, and salt.
  5. Gradually add the dry ingredients to the wet mixture while stirring gently until just combined.
  6. Fold in the chopped pecans.
  7. Divide the batter evenly among the prepared cake pans.
  8. Bake for 25-30 minutes or until a toothpick inserted in the center comes out clean.
  9. Cool the cakes in the pans for 10 minutes, then transfer to wire racks to cool completely.
  10. For the frosting, beat the cream cheese and butter together until smooth. Gradually add the powdered sugar and vanilla, mixing until fluffy.
  11. Once the cakes are completely cool, frost the top of one layer, add the next layer, and repeat, finishing with the top layer. Frost the top and sides of the cake.
  12. Garnish with additional pecans or coconut if desired. Serve and enjoy!

Recipe Notes

  • For extra fruit flavor, you can add shredded coconut.
  • Make sure all ingredients are at room temperature for better mixing.
  • Feel free to use walnuts instead of pecans if that’s your preference.