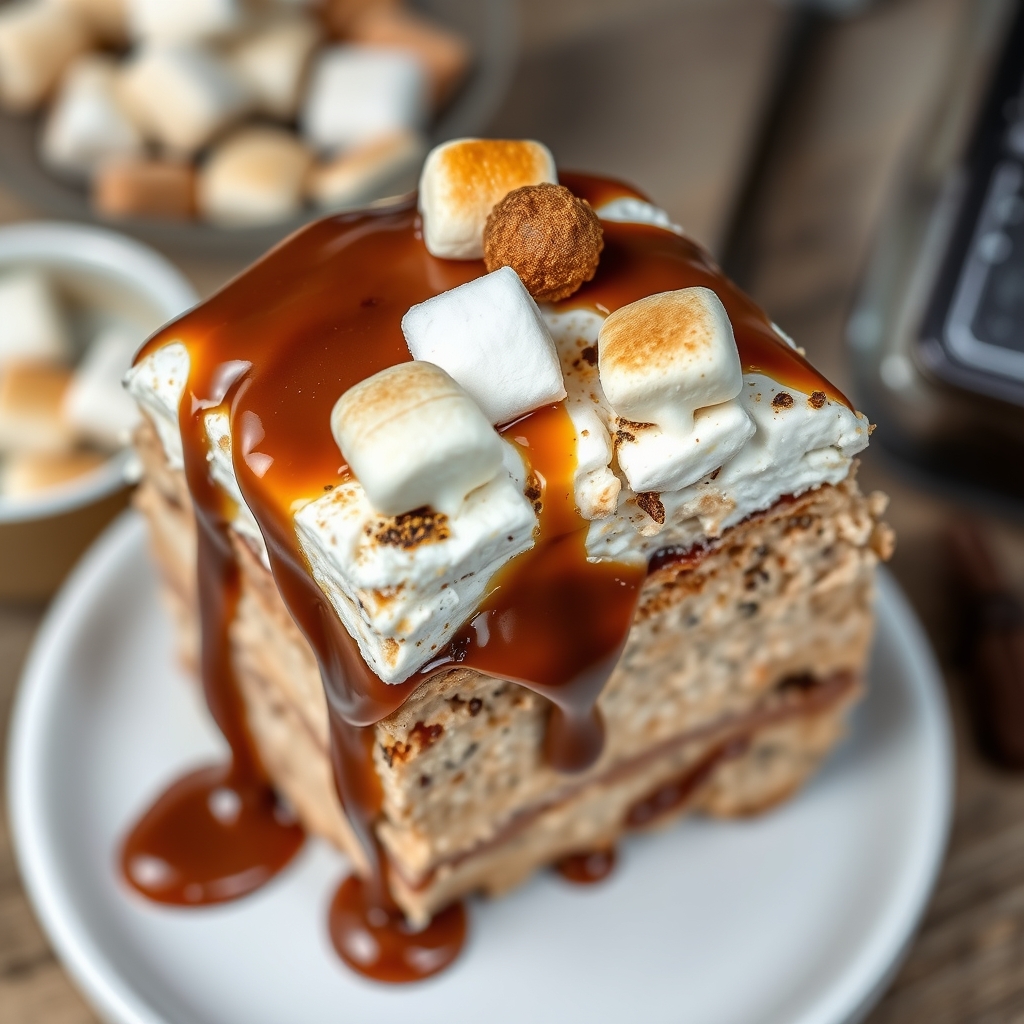
Easy Chai Spiced Overnight Oats

Easy Chai Spiced Overnight Oats

There’s something magical about waking up to a breakfast that’s already prepared, especially when it’s as comforting and flavorful as these Easy Chai Spiced Overnight Oats. Inspired by the warm, aromatic spices of a classic chai latte, this recipe transforms humble oats into a creamy, dreamy morning treat. Whether you’re a busy parent, a meal-prep enthusiast, or simply someone who loves a cozy breakfast, these overnight oats will become a staple in your kitchen. Let’s dive into why this recipe is so special and how you can make it your own.

Why You’ll Love This Recipe

First, let’s talk about why this chai spiced overnight oats recipe deserves a spot in your breakfast rotation.

  • Effortless Morning Routine: Prep takes just 5 minutes the night before, and breakfast is ready when you wake up. No cooking, no fuss.
  • Warm, Cozy Flavors: The blend of cinnamon, cardamom, ginger, and cloves mimics your favorite chai latte, making breakfast feel like a treat.
  • Customizable Texture: Prefer thick and creamy or light and fluffy? Adjust the liquid ratio to suit your taste.
  • Nutrient-Packed: Oats are a great source of fiber, and adding chia seeds boosts protein and omega-3s for a balanced start to your day.
  • Meal-Prep Friendly: Make a batch for the week and enjoy a grab-and-go breakfast that keeps you full until lunch.

Ingredients Breakdown

Every ingredient in this chai spiced overnight oats recipe plays a crucial role in creating the perfect balance of flavor and texture. Here’s what you’ll need:

  • Rolled Oats: The base of the dish, rolled oats soften overnight while retaining a pleasant chewiness. Avoid steel-cut oats, as they won’t soften enough without cooking.
  • Chai Spices: A mix of cinnamon, cardamom, ginger, and cloves brings that signature chai warmth. Freshly ground spices offer the best flavor.
  • Chia Seeds: These tiny seeds add thickness, a slight crunch, and a boost of nutrition.
  • Milk: Use dairy or plant-based milk like almond or oat milk for creaminess. The choice affects richness, so pick your favorite.
  • Sweetener: Maple syrup or honey enhances the spices. Adjust to taste or omit if preferred.
  • Vanilla Extract: A splash rounds out the flavors, adding depth to the chai spices.
  • Yogurt (Optional): For extra creaminess and tang, stir in a spoonful of Greek or dairy-free yogurt before serving.

How to Make Easy Chai Spiced Overnight Oats

Ready to make the easiest breakfast ever? Follow these simple steps for perfect chai spiced overnight oats every time.

  1. Mix Dry Ingredients: In a jar or bowl, combine ½ cup rolled oats, 1 teaspoon chia seeds, ½ teaspoon cinnamon, ¼ teaspoon cardamom, ⅛ teaspoon ginger, and a pinch of cloves.
  2. Add Wet Ingredients: Pour in ½ cup milk, 1 teaspoon maple syrup, and ¼ teaspoon vanilla extract. Stir well to ensure the spices are evenly distributed.
  3. Refrigerate Overnight: Cover and let the mixture sit in the fridge for at least 6 hours, or up to 3 days. The oats will soften and absorb the liquid.
  4. Stir and Adjust: Before eating, give the oats a good stir. If they’re too thick, add a splash of milk. For extra creaminess, mix in a spoonful of yogurt.
  5. Top and Enjoy: Garnish with sliced almonds, a drizzle of honey, or fresh fruit for added texture and flavor.

Pro Tips for the Best Results

Take your chai spiced overnight oats to the next level with these expert tips.

  • Use Fresh Spices: Ground spices lose potency over time. For the brightest flavor, buy small quantities and replace them every 6 months.
  • Layer for Meal Prep: If making multiple servings, layer the dry and wet ingredients in a jar without stirring. Mix just before eating to prevent sogginess.
  • Experiment with Tea: For an even stronger chai flavor, steep a chai tea bag in warm milk before adding it to the oats.
  • Let It Rest: While 6 hours is the minimum, 8-12 hours yields the creamiest texture. Plan accordingly for the best results.

Variations and Substitutions

This recipe is incredibly versatile. Here are some delicious twists to try.

  • Protein Boost: Stir in a scoop of vanilla protein powder or top with nut butter for added staying power.
  • Dairy-Free: Use almond, coconut, or oat milk and skip the yogurt or opt for a plant-based version.
  • Fruit-Forward: Add diced apples, pears, or bananas before serving for natural sweetness and freshness.
  • Decadent Dessert Version: Mix in dark chocolate chips or a swirl of caramel sauce for a treat-like breakfast.

What to Serve With It

While these chai spiced overnight oats are satisfying on their own, pairing them with complementary dishes can turn breakfast into a feast.

  • Fresh Fruit Salad: A mix of berries, mango, or citrus adds brightness and vitamins.
  • Crunchy Granola: Sprinkle granola on top for contrasting texture.
  • Warm Beverages: Pair with a cup of masala chai, coffee, or golden milk for a cozy drink duo.
  • Savory Sides: Balance the sweetness with scrambled eggs or avocado toast for a heartier meal.

How to Store and Reheat

Overnight oats are a meal-prep dream, but proper storage ensures freshness.

  • Refrigeration: Store in an airtight container for up to 3 days. Stir well before eating, as separation is normal.
  • Freezing: Portion into freezer-safe jars for up to 1 month. Thaw overnight in the fridge and stir in extra milk if needed.
  • Reheating: Enjoy cold, or warm gently in the microwave for 30-60 seconds if preferred. Add milk to loosen if necessary.

Frequently Asked Questions (FAQs)

Here are answers to common questions about chai spiced overnight oats.

  • Can I use quick oats instead of rolled oats? Yes, but the texture will be softer. Reduce the liquid slightly to compensate.
  • Why are my oats too runny or too thick? Adjust the milk quantity next time. Runny oats need less liquid; thick oats need more.
  • Can I make this without chia seeds? Absolutely, but the texture will be less pudding-like. Increase oats slightly for thickness.
  • Is this recipe gluten-free? Yes, if using certified gluten-free oats. Check spice labels for cross-contamination if needed.
  • How can I reduce the sweetness? Skip the sweetener or use a sugar-free alternative like stevia. The spices will still shine.

Final Thoughts

These Easy Chai Spiced Overnight Oats are more than just a convenient breakfast—they’re a small act of self-care that makes mornings feel special. Whether you’re savoring them slowly at home or grabbing a jar on your way out, the comforting blend of spices and creamy oats is sure to bring a smile to your day. Don’t be afraid to experiment with toppings and variations to make this recipe uniquely yours. Once you try it, you’ll understand why overnight oats have such a devoted following. Here’s to effortless, delicious mornings!

Print
clock clock iconcutlery cutlery iconflag flag iconfolder folder iconinstagram instagram iconpinterest pinterest iconfacebook facebook iconprint print iconsquares squares iconheart heart iconheart solid heart solid icon

Easy Chai Spiced Overnight Oats

  • Author: The Oat Enthusiast

Description

A creamy, spiced overnight oats recipe infused with warm chai flavors. Perfect for busy mornings—just grab and go!


Ingredients

Scale

For the Crust:

  • For the oats:
  • 1/2 cup rolled oats
  • 1/2 cup milk (dairy or plant-based)
  • 1/4 cup Greek yogurt
  • 1 tbsp chia seeds
  • For the chai spice blend:
  • 1/2 tsp ground cinnamon
  • 1/4 tsp ground cardamom
  • 1/4 tsp ground ginger
  • 1/8 tsp ground cloves
  • 1/8 tsp ground nutmeg
  • For sweetening:
  • 1 tbsp honey or maple syrup
  • 1/2 tsp vanilla extract
  • For topping (optional):
  • Sliced almonds
  • Fresh berries

Instructions

1. Prepare the Crust:

  1. 1. In a mason jar or airtight container, combine oats, milk, yogurt, and chia seeds.
  2. 2. Add all chai spices (cinnamon, cardamom, ginger, cloves, nutmeg) and mix well.
  3. 3. Stir in honey/maple syrup and vanilla extract until fully incorporated.
  4. 4. Seal the container and refrigerate overnight (or at least 4 hours).
  5. 5. Before serving, stir and add a splash of milk if too thick.
  6. 6. Top with almonds and berries if desired.

Notes

For stronger chai flavor, steep a chai tea bag in warm milk for 5 minutes before using. Oats keep for up to 3 days refrigerated.
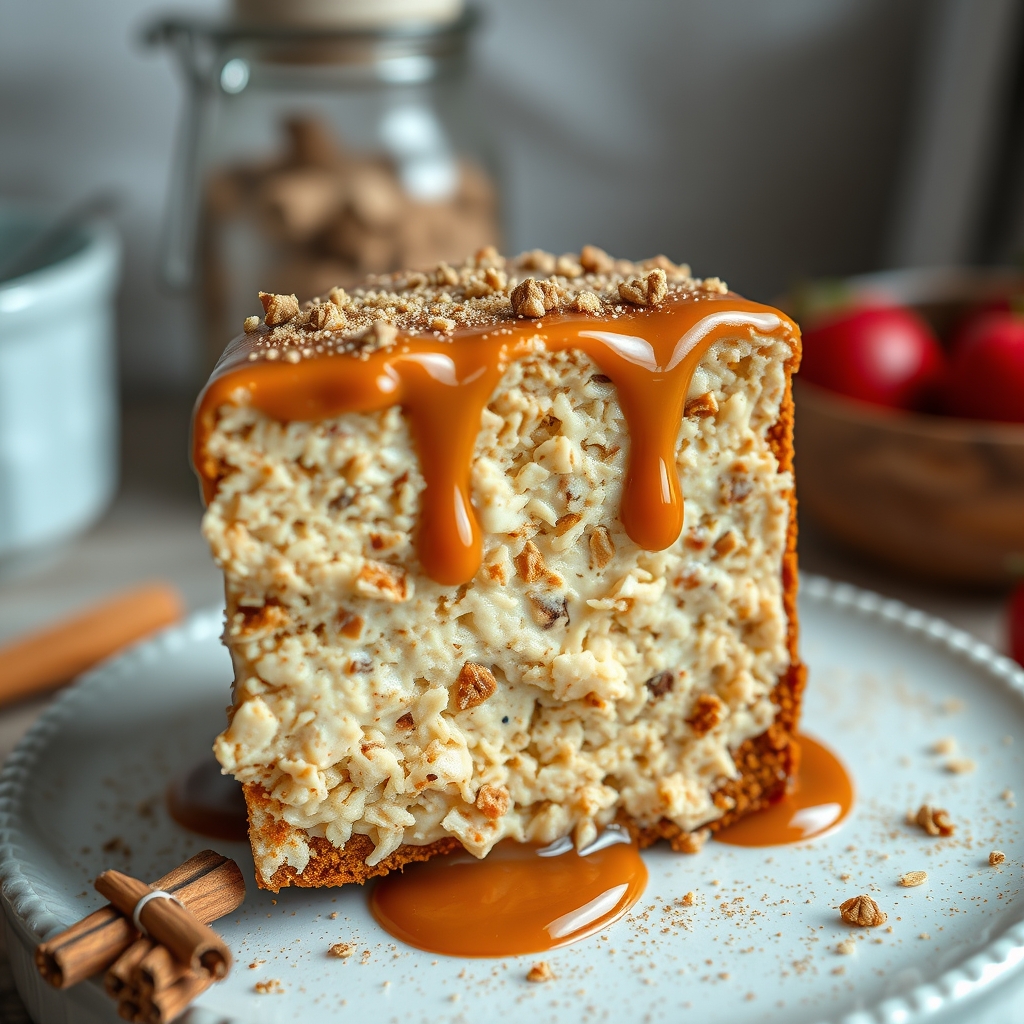
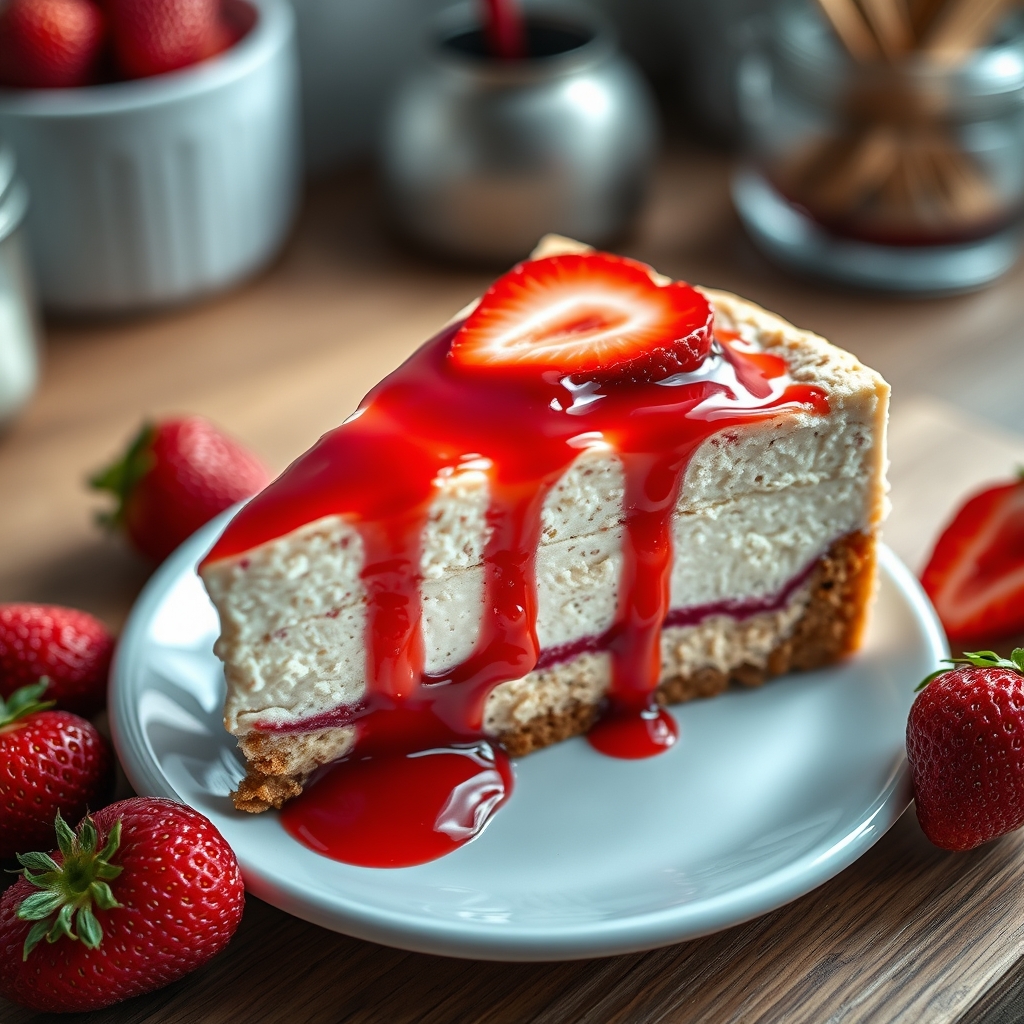
Strawberry Cheesecake Overnight Oats

Strawberry Cheesecake Overnight Oats

Imagine waking up to a creamy, dreamy breakfast that tastes like dessert but fuels your day like a wholesome meal. That’s exactly what Strawberry Cheesecake Overnight Oats deliver. This no-cook, make-ahead breakfast is packed with protein, fiber, and the irresistible flavor of fresh strawberries and tangy cream cheese. Whether you’re meal-prepping for the week or treating yourself to a lazy weekend brunch, this recipe is a game-changer. Let’s dive into why this dish is a must-try and how to make it perfectly every time.

Why You’ll Love This Recipe

First, let’s talk about why Strawberry Cheesecake Overnight Oats deserve a permanent spot in your breakfast rotation.

  • Effortless Morning Routine: Prep the night before, and breakfast is ready when you are. No cooking, no fuss—just grab and go.
  • Decadent Yet Nutritious: With the creamy richness of cheesecake and the natural sweetness of strawberries, it feels indulgent but is packed with protein, fiber, and antioxidants.
  • Perfect for Meal Prep: Make a batch on Sunday, and you’ve got breakfast sorted for the week. It stays fresh in the fridge for days.
  • Customizable: Swap ingredients to fit dietary needs or preferences—dairy-free, gluten-free, or lower sugar options work beautifully.
  • Kid-Friendly: Even picky eaters will love this sweet, creamy breakfast that tastes like dessert.

Ingredients Breakdown

Every ingredient in this recipe plays a crucial role in creating that luscious strawberry cheesecake flavor and texture. Here’s what you’ll need:

  • Rolled Oats: The base of the dish, providing fiber and a satisfying chew. Quick oats can be used, but rolled oats yield the best texture.
  • Greek Yogurt: Adds creaminess and a protein boost. Opt for plain or vanilla for the best flavor balance.
  • Cream Cheese: The star ingredient that brings the cheesecake flavor. Light or full-fat both work, but full-fat delivers the richest taste.
  • Milk: Any variety works—dairy, almond, oat, or soy. It thins the mixture to the perfect consistency.
  • Fresh Strawberries: For natural sweetness and a burst of freshness. Frozen strawberries can be used if fresh aren’t available.
  • Honey or Maple Syrup: A touch of sweetness to tie everything together. Adjust to taste.
  • Chia Seeds: Optional but recommended for extra thickness and omega-3s.
  • Vanilla Extract: Enhances the cheesecake flavor profile.
  • Graham Cracker Crumbs: A sprinkle on top mimics the classic cheesecake crust.

How to Make Strawberry Cheesecake Overnight Oats

Follow these simple steps for the creamiest, most flavorful overnight oats:

  1. Mix the Base: In a bowl, whisk together the rolled oats, Greek yogurt, softened cream cheese, milk, honey (or maple syrup), chia seeds, and vanilla extract until smooth and well combined.
  2. Layer the Strawberries: Dice half the strawberries and fold them into the oat mixture. Reserve the rest for topping.
  3. Chill Overnight: Divide the mixture into jars or airtight containers. Seal and refrigerate for at least 4 hours, preferably overnight.
  4. Add Toppings: Before serving, top with the remaining fresh strawberries and a sprinkle of graham cracker crumbs for crunch.
  5. Enjoy: Eat cold straight from the fridge, or let it sit at room temperature for 10 minutes if you prefer a softer texture.

Pro Tip: For extra creaminess, blend the cream cheese with the milk first to avoid lumps.

Pro Tips for the Best Results

Take your Strawberry Cheesecake Overnight Oats to the next level with these expert tricks:

  • Soften the Cream Cheese: Let it sit at room temperature for 30 minutes before mixing to ensure a smooth consistency.
  • Use Full-Fat Dairy: Full-fat yogurt and cream cheese deliver the richest, most authentic cheesecake flavor.
  • Adjust Sweetness: Taste before chilling and add more honey if needed. The flavors mellow overnight.
  • Double the Batch: This recipe keeps well for up to 5 days, making it perfect for meal prep.
  • Toast the Graham Crumbs: For extra depth, lightly toast the crumbs in a dry pan before sprinkling.

Variations and Substitutions

This recipe is incredibly adaptable. Here are some delicious twists:

  • Dairy-Free: Use coconut yogurt, vegan cream cheese, and almond milk.
  • Higher Protein: Add a scoop of vanilla protein powder or collagen peptides.
  • Different Fruits: Swap strawberries for blueberries, raspberries, or even peaches.
  • Nutty Crunch: Top with chopped almonds, pecans, or walnuts instead of graham crackers.
  • Chocolate Lovers: Stir in cocoa powder or mini chocolate chips for a chocolate-strawberry version.

What to Serve With It

While these overnight oats are satisfying on their own, here are some pairings to round out your meal:

  • Fresh Fruit Salad: A mix of berries, kiwi, and mango adds brightness.
  • Hard-Boiled Eggs: For a protein-packed savory balance.
  • Green Smoothie: A spinach-banana smoothie complements the sweetness.
  • Hot Coffee or Tea: A warm drink contrasts beautifully with the cold, creamy oats.

How to Store and Reheat

Strawberry Cheesecake Overnight Oats are ideal for make-ahead meals. Here’s how to store them:

  • Refrigeration: Keep in sealed containers for up to 5 days. The oats soften over time but stay delicious.
  • Freezing: Not recommended, as the texture of the dairy and oats can change when thawed.
  • Reheating: Best enjoyed cold, but if you prefer warm oats, microwave for 30-60 seconds, stirring halfway.

Frequently Asked Questions (FAQs)

Can I use steel-cut oats instead of rolled oats?
Steel-cut oats won’t soften enough in the fridge. Stick to rolled or quick oats for the right texture.

Can I make this without cream cheese?
Yes, but the cheesecake flavor will be milder. Increase the yogurt or blend in cottage cheese for a similar creaminess.

How do I prevent the oats from becoming too thick?
Add an extra splash of milk before serving to loosen the texture if needed.

Is this recipe gluten-free?
Use certified gluten-free oats and skip the graham crumbs (or use a gluten-free alternative) to make it gluten-free.

Can I add protein powder?
Absolutely! Stir in a scoop of vanilla or unflavored protein powder when mixing the base.

Final Thoughts

Strawberry Cheesecake Overnight Oats are proof that breakfast can be both nourishing and indulgent. Whether you’re rushing out the door or savoring a slow morning, this recipe delivers on flavor, convenience, and satisfaction. Experiment with different toppings and variations to make it your own, and don’t be surprised if it becomes your new breakfast obsession. Here’s to mornings that feel a little sweeter—one creamy, strawberry-packed bite at a time.

Print
clock clock iconcutlery cutlery iconflag flag iconfolder folder iconinstagram instagram iconpinterest pinterest iconfacebook facebook iconprint print iconsquares squares iconheart heart iconheart solid heart solid icon

Strawberry Cheesecake Overnight Oats

  • Author: The Oat Enthusiast

Description

A creamy, no-cook breakfast that tastes like dessert! These strawberry cheesecake overnight oats combine rolled oats, Greek yogurt, fresh strawberries, and a hint of vanilla for a protein-packed morning treat.


Ingredients

Scale

For the Crust:

  • For the oats:
  • 1/2 cup rolled oats
  • 1/2 cup milk (dairy or plant-based)
  • 1/4 cup Greek yogurt
  • 1 tbsp chia seeds
  • 1 tsp vanilla extract
  • 1 tbsp honey or maple syrup
  • For the strawberry layer:
  • 1/2 cup fresh strawberries, diced
  • 1 tsp lemon juice
  • 1 tsp sugar (optional)
  • For the topping:
  • 2 tbsp cream cheese, softened
  • 1 tbsp Greek yogurt
  • 1 tsp honey
  • Extra strawberries for garnish

Instructions

1. Prepare the Crust:

  1. 1. In a mason jar or airtight container, combine all oat ingredients (oats, milk, yogurt, chia seeds, vanilla, and honey). Stir well.
  2. 2. In a small bowl, mix diced strawberries with lemon juice and sugar (if using). Let sit for 5 minutes to release juices.
  3. 3. Layer the strawberry mixture over the oat mixture in the jar.
  4. 4. In another small bowl, whisk together cream cheese, yogurt, and honey until smooth.
  5. 5. Dollop the cream cheese mixture on top of the strawberries.
  6. 6. Cover and refrigerate overnight (or at least 4 hours).
  7. 7. Before serving, top with fresh strawberry slices and an extra drizzle of honey if desired.

Notes

For best texture, use full-fat Greek yogurt and cream cheese. The oats will keep for up to 3 days in the refrigerator. If you prefer a sweeter version, increase honey to 2 tbsp total.

The Creamiest Chicken with Sun-Dried Tomatoes

The Creamiest Chicken with Sun-Dried Tomatoes

There’s something magical about the combination of tender chicken, rich cream, and the bold, tangy sweetness of sun-dried tomatoes. This dish, The Creamiest Chicken with Sun-Dried Tomatoes, is a weeknight dinner hero that feels indulgent yet comes together in under 30 minutes. Whether you’re cooking for a special occasion or just craving something comforting, this recipe delivers restaurant-quality flavors with minimal effort. Let’s dive into why this dish is a must-try and how to make it perfectly every time.

Why You’ll Love This Recipe

If you’re still on the fence about making this dish, here are a few reasons why it’s about to become a staple in your kitchen:

  • Unbeatable Creaminess: The velvety sauce, made with heavy cream and Parmesan, clings to every bite of chicken, creating a luxurious texture.
  • Bold, Balanced Flavors: Sun-dried tomatoes add a sweet-tart depth, while garlic and herbs bring savory warmth.
  • Quick and Easy: From prep to plate, this dish takes less than 30 minutes, making it perfect for busy weeknights.
  • Versatile: Serve it over pasta, mashed potatoes, or crusty bread—it adapts to whatever you’re craving.
  • Crowd-Pleasing: Whether for date night or family dinner, this dish impresses every time.

Ingredients Breakdown

Every ingredient in this recipe plays a crucial role in building layers of flavor and texture. Here’s what you’ll need and why each one matters:

  • Chicken Breast: Boneless, skinless chicken breasts are the star—they cook quickly and absorb the sauce beautifully.
  • Sun-Dried Tomatoes: Packed in oil for extra richness, these add a concentrated tomato sweetness and slight chewiness.
  • Heavy Cream: The base of the sauce, creating a luscious, silky consistency.
  • Garlic: Freshly minced garlic infuses the dish with aromatic depth.
  • Chicken Broth: Adds savory depth and thins the sauce slightly for the perfect consistency.
  • Parmesan Cheese: Melts into the sauce, adding nutty saltiness and helping it thicken.
  • Italian Seasoning: A blend of dried herbs (basil, oregano, thyme) that ties everything together.
  • Spinach (Optional): For a pop of color and freshness, wilted spinach balances the richness.

How to Make The Creamiest Chicken with Sun-Dried Tomatoes

Follow these steps for a foolproof, creamy chicken dish that’s packed with flavor:

  1. Prep the Chicken: Pat the chicken breasts dry and season generously with salt and pepper. This ensures a golden sear and locks in moisture.
  2. Sear the Chicken: Heat olive oil in a large skillet over medium-high heat. Cook the chicken for 5–6 minutes per side until golden and cooked through. Transfer to a plate and tent with foil.
  3. Sauté the Aromatics: In the same skillet, add minced garlic and sun-dried tomatoes. Sauté for 1 minute until fragrant, scraping up any browned bits from the chicken.
  4. Deglaze and Simmer: Pour in chicken broth, stirring to loosen any stuck-on bits. Add heavy cream and Italian seasoning, then simmer for 2–3 minutes to slightly thicken.
  5. Add Parmesan: Stir in grated Parmesan until melted and smooth. Taste and adjust seasoning with salt and pepper.
  6. Return the Chicken: Nestle the chicken back into the sauce, spooning it over the top. Optional: Add spinach and wilt for 1–2 minutes.
  7. Serve: Garnish with fresh basil or parsley and serve immediately over your favorite side.

Pro Tips for the Best Results

  • Don’t Overcook the Chicken: Use a meat thermometer to ensure it reaches 165°F internally—this keeps it juicy.
  • Use Sun-Dried Tomatoes in Oil: They’re more flavorful and tender than dry-packed ones.
  • Freshly Grate Parmesan: Pre-shredded cheese contains anti-caking agents that can make the sauce grainy.
  • Let the Sauce Reduce: Simmer until it coats the back of a spoon for the creamiest texture.
  • Rest the Chicken: Let it sit for 5 minutes after cooking to redistribute juices.

Variations and Substitutions

This recipe is wonderfully adaptable. Here are some ways to tweak it:

  • Protein Swap: Try shrimp, turkey cutlets, or even tofu for a vegetarian version.
  • Dairy-Free: Substitute heavy cream with coconut cream and use nutritional yeast instead of Parmesan.
  • Extra Veggies: Add mushrooms, bell peppers, or artichokes for more texture.
  • Spicy Kick: Stir in red pepper flakes or a dash of hot sauce for heat.
  • Herb Twist: Fresh basil or thyme can replace Italian seasoning for a brighter flavor.

What to Serve With It

This creamy chicken pairs beautifully with:

  • Pasta: Fettuccine, penne, or gnocchi soak up the sauce perfectly.
  • Mashed Potatoes: A classic comfort pairing for the ultimate creamy bite.
  • Crusty Bread: For mopping up every last drop of sauce.
  • Roasted Vegetables: Asparagus, zucchini, or green beans add a fresh contrast.
  • Light Salad: A simple arugula salad with lemon vinaigrette balances the richness.

How to Store and Reheat

Leftovers? Here’s how to keep them tasting great:

  • Refrigeration: Store in an airtight container for up to 3 days.
  • Freezing: Freeze without spinach for up to 2 months. Thaw overnight in the fridge.
  • Reheating: Warm gently on the stovetop with a splash of broth or cream to revive the sauce. Avoid microwaving, which can overcook the chicken.

Frequently Asked Questions (FAQs)

Can I use chicken thighs instead of breasts?
Absolutely! Thighs are more forgiving and stay juicy. Adjust cooking time to 7–8 minutes per side.

What if I don’t have sun-dried tomatoes?
Roasted red peppers or a tablespoon of tomato paste can work in a pinch, though the flavor will differ.

How can I make the sauce thicker?
Simmer longer to reduce, or whisk in a slurry of 1 tsp cornstarch mixed with 1 tbsp water.

Is there a way to lighten up this dish?
Swap half the heavy cream for whole milk or evaporated milk, though the sauce will be less rich.

Can I make this ahead?
Yes, but add the cream and Parmesan just before serving to prevent separation.

Final Thoughts

This Creamy Chicken with Sun-Dried Tomatoes is more than just a meal—it’s a little bowl of comfort that feels like a hug. Whether you’re cooking for yourself or sharing it with loved ones, the combination of tender chicken, rich sauce, and vibrant sun-dried tomatoes is sure to delight. Don’t be surprised if it becomes your new go-to recipe for both quick dinners and special occasions. Happy cooking!

Print
clock clock iconcutlery cutlery iconflag flag iconfolder folder iconinstagram instagram iconpinterest pinterest iconfacebook facebook iconprint print iconsquares squares iconheart heart iconheart solid heart solid icon

The Creamiest Chicken with Sun-Dried Tomatoes

  • Author: Chef Maria

Description

This dish features tender chicken breasts smothered in a luxurious, creamy sauce with the rich, tangy flavor of sun-dried tomatoes. Perfect for a cozy dinner, it’s easy to make yet impressive enough for guests.


Ingredients

Scale

For the Crust:

  • For the Chicken:
  • 4 boneless, skinless chicken breasts
  • 1 teaspoon salt
  • 1/2 teaspoon black pepper
  • 1 tablespoon olive oil
  • For the Sauce:
  • 1/2 cup sun-dried tomatoes (packed in oil, drained and chopped)
  • 3 cloves garlic, minced
  • 1 cup heavy cream
  • 1/2 cup chicken broth
  • 1/2 teaspoon dried oregano
  • 1/4 teaspoon red pepper flakes (optional)
  • 1/2 cup grated Parmesan cheese
  • 2 tablespoons fresh basil, chopped
  • Salt and pepper to taste

Instructions

1. Prepare the Crust:

  1. 1. Season the chicken breasts with salt and pepper on both sides.
  2. 2. Heat olive oil in a large skillet over medium-high heat. Add the chicken and cook for 5-6 minutes per side, or until golden brown and cooked through. Remove from the skillet and set aside.
  3. 3. In the same skillet, add the sun-dried tomatoes and garlic. Sauté for 1-2 minutes until fragrant.
  4. 4. Pour in the heavy cream and chicken broth, stirring to combine. Add oregano and red pepper flakes (if using). Simmer for 3-4 minutes until the sauce slightly thickens.
  5. 5. Stir in the Parmesan cheese until melted and smooth. Taste and adjust seasoning with salt and pepper as needed.
  6. 6. Return the chicken to the skillet, spooning the sauce over the top. Simmer for another 2-3 minutes to heat through.
  7. 7. Garnish with fresh basil before serving. Serve hot over pasta, rice, or with crusty bread.

Notes

For extra flavor, use the oil from the sun-dried tomatoes to cook the chicken. If the sauce is too thick, thin it with a little more chicken broth. Leftovers can be stored in an airtight container in the fridge for up to 3 days.

Banana Oatmeal Chocolate Chip Cookies

Banana Oatmeal Chocolate Chip Cookies

There’s something magical about the combination of ripe bananas, hearty oats, and melty chocolate chips in a cookie. These Banana Oatmeal Chocolate Chip Cookies are the perfect blend of wholesome and indulgent—soft, chewy, and packed with just the right amount of sweetness. Whether you’re looking for a quick breakfast bite, an afternoon snack, or a healthier dessert option, this recipe delivers. Plus, it’s a fantastic way to use up those overripe bananas sitting on your counter. Let’s dive into why these cookies are a must-try and how to make them perfectly every time.

Why You’ll Love This Recipe

If you need convincing to bake these cookies today, here are a few reasons why they’re a guaranteed hit:

  • Perfectly balanced texture—The oats add a satisfying chewiness while the bananas keep them soft and moist.
  • Naturally sweetened—Ripe bananas reduce the need for excess sugar, making these cookies a healthier treat.
  • Easy to make—No fancy equipment or complicated steps required, just simple mixing and baking.
  • Kid-friendly and crowd-pleasing—The combination of chocolate and banana is universally loved, making these cookies a hit with all ages.
  • Meal-prep friendly—These cookies store well, so you can make a batch ahead for quick snacks throughout the week.

Ingredients Breakdown

Understanding the role of each ingredient helps you make the best possible cookies. Here’s what you’ll need:

  • Ripe bananas—The star of the show. They add natural sweetness, moisture, and a subtle banana flavor. The spottier, the better!
  • Rolled oats—Provide structure and a hearty, chewy texture. Avoid instant oats for the best results.
  • All-purpose flour—Gives the cookies stability. For a gluten-free version, substitute with a 1:1 gluten-free flour blend.
  • Brown sugar—Enhances chewiness and caramel-like depth. You can reduce the amount if your bananas are very ripe.
  • Butter—Adds richness and helps with spreading. For a dairy-free option, use coconut oil.
  • Egg—Binds everything together. A flax egg works for a vegan alternative.
  • Chocolate chips—Because everything’s better with chocolate. Dark, milk, or even white chocolate all work beautifully.
  • Cinnamon and vanilla extract—Warm spices and vanilla elevate the flavor profile.

How to Make Banana Oatmeal Chocolate Chip Cookies

Follow these steps for perfectly baked cookies every time:

  1. Preheat your oven to 350°F (175°C) and line a baking sheet with parchment paper.
  2. Mash the bananas in a large bowl until smooth. A few small lumps are fine for texture.
  3. Cream the butter and sugar—In a separate bowl, beat softened butter with brown sugar until light and fluffy.
  4. Combine wet ingredients—Add the egg, mashed bananas, and vanilla to the butter mixture, mixing well.
  5. Mix dry ingredients—In another bowl, whisk together flour, oats, cinnamon, baking soda, and salt.
  6. Fold everything together—Gradually add the dry ingredients to the wet, stirring just until combined. Avoid overmixing.
  7. Add chocolate chips—Gently fold in the chocolate chips for even distribution.
  8. Scoop and bake—Drop tablespoon-sized portions of dough onto the baking sheet, spacing them about 2 inches apart. Bake for 12-14 minutes, or until the edges are golden.
  9. Cool before serving—Let the cookies rest on the baking sheet for 5 minutes before transferring to a wire rack.

Pro Tips for the Best Results

  • Use very ripe bananas—The darker the peels, the sweeter and more flavorful your cookies will be.
  • Chill the dough—If the dough feels too sticky, refrigerate it for 30 minutes to make scooping easier.
  • Don’t overbake—The cookies will firm up as they cool, so pull them out when they’re just set.
  • Toast the oats—For extra depth, lightly toast the oats in a dry pan before adding them to the dough.
  • Customize the mix-ins—Try adding chopped nuts, dried fruit, or even a swirl of peanut butter for variety.

Variations and Substitutions

This recipe is wonderfully adaptable. Here are some delicious twists:

  • Gluten-free—Swap all-purpose flour for a gluten-free blend and ensure your oats are certified gluten-free.
  • Vegan—Use a flax egg and coconut oil instead of butter.
  • Lower sugar—Reduce the brown sugar by half or omit it entirely if your bananas are very sweet.
  • Add-ins—Stir in shredded coconut, walnuts, or even a sprinkle of sea salt on top before baking.
  • Spiced version—Add a pinch of nutmeg or cardamom for extra warmth.

What to Serve With It

These cookies are delicious on their own, but here are some perfect pairings:

  • A cold glass of milk or a warm cup of coffee for dunking.
  • A scoop of vanilla ice cream sandwiched between two cookies for an indulgent treat.
  • Fresh fruit, like sliced strawberries or berries, for a balanced snack.
  • A drizzle of melted peanut butter or caramel sauce for extra decadence.

How to Store and Reheat

To keep your cookies fresh:

  • Room temperature—Store in an airtight container for up to 3 days.
  • Refrigerate—If your kitchen is warm, refrigerate for up to a week.
  • Freeze—Place cooled cookies in a freezer-safe bag for up to 3 months. Thaw at room temperature or warm in the oven at 300°F for 5 minutes.

Frequently Asked Questions (FAQs)

Can I use quick oats instead of rolled oats?

Quick oats will work, but the texture will be softer. Rolled oats provide the best chewiness.

Why are my cookies too flat?

This could be due to overripe bananas or too much butter. Try chilling the dough before baking to prevent excessive spreading.

Can I make these without eggs?

Yes! A flax egg (1 tbsp ground flaxseed + 3 tbsp water) works perfectly as a binder.

How do I know when the cookies are done?

The edges should be lightly golden, and the centers will look slightly underbaked—they’ll firm up as they cool.

Can I double the recipe?

Absolutely! This recipe scales well. Just make sure your mixing bowl is large enough to accommodate the extra ingredients.

Final Thoughts

These Banana Oatmeal Chocolate Chip Cookies are proof that simple ingredients can create something truly special. Whether you’re baking them for a quick breakfast, an after-school snack, or a cozy dessert, they’re sure to bring smiles. The best part? They’re forgiving, adaptable, and always delicious. So grab those ripe bananas and get baking—you won’t regret it. Happy baking!

Print
clock clock iconcutlery cutlery iconflag flag iconfolder folder iconinstagram instagram iconpinterest pinterest iconfacebook facebook iconprint print iconsquares squares iconheart heart iconheart solid heart solid icon

Banana Oatmeal Chocolate Chip Cookies

  • Author: Baking Enthusiast

Description

Soft, chewy cookies packed with banana flavor, hearty oats, and melty chocolate chips. A healthier twist on classic cookies that’s perfect for breakfast or dessert!


Ingredients

Scale

For the Crust:

  • For the cookie dough:
  • 2 ripe bananas, mashed (about 1 cup)
  • 1/2 cup creamy peanut butter (or almond butter)
  • 1/4 cup honey or maple syrup
  • 1 teaspoon vanilla extract
  • For the dry ingredients:
  • 1 1/2 cups old-fashioned rolled oats
  • 1/2 cup whole wheat flour (or all-purpose)
  • 1 teaspoon cinnamon
  • 1/2 teaspoon baking soda
  • 1/4 teaspoon salt
  • For mix-ins:
  • 1/2 cup semi-sweet chocolate chips
  • 1/4 cup chopped walnuts (optional)

Instructions

1. Prepare the Crust:

  1. 1. Preheat oven to 350°F (175°C). Line a baking sheet with parchment paper.
  2. 2. In a large bowl, mash bananas until smooth. Stir in peanut butter, honey, and vanilla until well combined.
  3. 3. In a separate bowl, whisk together oats, flour, cinnamon, baking soda, and salt.
  4. 4. Gradually add dry ingredients to wet ingredients, mixing until just combined. Fold in chocolate chips and walnuts (if using).
  5. 5. Drop dough by rounded tablespoons onto prepared baking sheet, spacing 2 inches apart. Flatten slightly with the back of a spoon.
  6. 6. Bake for 12-14 minutes until edges are golden. Let cool on baking sheet for 5 minutes before transferring to a wire rack.

Notes

Store in an airtight container for up to 5 days. For crispier cookies, bake an extra 1-2 minutes. Dough can be refrigerated for up to 2 days before baking.

S’mores Overnight Oats – Quick & Easy Breakfast Recipe!

S’mores Overnight Oats – Quick & Easy Breakfast Recipe!

Imagine waking up to a breakfast that tastes like dessert but fuels your day with wholesome ingredients. That’s exactly what you get with these S’mores Overnight Oats—a creamy, dreamy, no-cook breakfast that combines the nostalgic flavors of s’mores with the convenience of overnight oats. Whether you’re a busy parent, a meal-prep enthusiast, or just someone with a sweet tooth, this recipe is about to become your new morning ritual.

Why You’ll Love This Recipe

There are countless reasons to adore this recipe, but here are the top five that make it a standout:

  • Effortless Morning Routine: Prep takes just 5 minutes the night before, and breakfast is ready when you wake up.
  • Decadent Yet Nutritious: Packed with fiber from oats, protein from yogurt, and just enough chocolate to feel indulgent.
  • Kid-Friendly & Crowd-Pleasing: The s’mores flavor is universally loved, making it a hit with picky eaters and adults alike.
  • No Cooking Required: Perfect for hot summer days or when you don’t want to turn on the stove.
  • Customizable: Easily adapt it to be dairy-free, vegan, or higher in protein with simple swaps.

Ingredients Breakdown

Let’s dive into the key ingredients that make these overnight oats so irresistible:

  • Rolled Oats: The base of the recipe, providing a chewy texture and slow-digesting carbs to keep you full.
  • Milk or Dairy-Free Alternative: Adds creaminess and helps soften the oats overnight. Almond, oat, or coconut milk work beautifully.
  • Greek Yogurt: Boosts protein and creates a rich, tangy contrast to the sweetness.
  • Chia Seeds: A nutrient powerhouse that thickens the mixture naturally.
  • Mini Chocolate Chips: Melts slightly overnight for pockets of chocolatey goodness.
  • Marshmallows: The star of the s’mores experience—opt for mini marshmallows or a dollop of marshmallow fluff.
  • Graham Cracker Crumbs: Adds crunch and that signature s’mores flavor.
  • Honey or Maple Syrup: Just enough sweetness to tie everything together.

How to Make S’mores Overnight Oats – Quick & Easy Breakfast Recipe!

Follow these simple steps for a flawless batch every time:

  1. Mix the Base: In a mason jar or airtight container, combine ½ cup rolled oats, ½ cup milk, ¼ cup Greek yogurt, 1 tablespoon chia seeds, and 1 teaspoon honey. Stir well.
  2. Layer the Goodness: Sprinkle 1 tablespoon mini chocolate chips and 1 tablespoon graham cracker crumbs over the mixture. Gently press them in.
  3. Top with Marshmallows: Add 1 tablespoon mini marshmallows or a swirl of marshmallow fluff.
  4. Refrigerate: Seal the jar and let it sit in the fridge for at least 4 hours, preferably overnight.
  5. Serve: The next morning, give it a stir, add an extra sprinkle of graham crackers and chocolate chips if desired, and enjoy cold or slightly warmed.

Pro Tips for the Best Results

  • For extra creaminess, use a 1:1 ratio of milk to yogurt.
  • Toast the graham cracker crumbs lightly before adding for a deeper flavor.
  • If you prefer warm oats, microwave for 30-60 seconds before serving—just don’t overheat the marshmallows.
  • Let the oats sit for at least 4 hours; any less and they won’t soften properly.

Variations and Substitutions

This recipe is wonderfully adaptable. Here are some delicious twists:

  • Vegan: Use coconut yogurt and maple syrup instead of honey.
  • Higher Protein: Add a scoop of vanilla protein powder or collagen peptides.
  • Nut-Free: Swap chia seeds for hemp seeds.
  • Different Flavors: Try crushed Oreos instead of graham crackers for a cookies-and-cream version.

What to Serve With It

While these oats are satisfying on their own, here are some pairings to round out your meal:

  • A hot cup of coffee or cold brew for a caffeine boost.
  • Fresh berries like strawberries or raspberries for a tart contrast.
  • A dollop of whipped cream for extra indulgence.

How to Store and Reheat

These oats keep beautifully for up to 3 days in the fridge. Store them in an airtight container to prevent drying out. If you’d like to freeze them, omit the marshmallows and add them fresh after thawing. To reheat, microwave in 30-second intervals, stirring in between.

Frequently Asked Questions (FAQs)

Can I use steel-cut oats instead of rolled oats?
No, steel-cut oats won’t soften enough without cooking. Stick to rolled oats for the right texture.

Can I make this without chia seeds?
Yes, but the mixture will be thinner. Add an extra tablespoon of oats to compensate.

Are there sugar-free options for this recipe?
Absolutely! Use sugar-free chocolate chips and a keto-friendly sweetener like monk fruit.

Can I prep a big batch for the week?
Yes, but add the graham crackers and marshmallows fresh each day to maintain texture.

Final Thoughts

There’s something magical about starting your day with a breakfast that feels like a treat but nourishes you from the inside out. These S’mores Overnight Oats are proof that healthy eating doesn’t have to be boring—it can be fun, flavorful, and downright delicious. Whether you’re meal-prepping for the week or surprising your family with a special breakfast, this recipe is sure to bring smiles. Give it a try, and let the s’mores nostalgia take over!

Print
clock clock iconcutlery cutlery iconflag flag iconfolder folder iconinstagram instagram iconpinterest pinterest iconfacebook facebook iconprint print iconsquares squares iconheart heart iconheart solid heart solid icon

S’mores Overnight Oats – Quick & Easy Breakfast Recipe!

  • Author: Breakfast Enthusiast

Description

A delicious and easy-to-make breakfast that combines the classic flavors of s’mores with the convenience of overnight oats. Perfect for busy mornings!


Ingredients

Scale

For the Crust:

  • For the Oats:
  • 1/2 cup rolled oats
  • 1/2 cup milk (any kind)
  • 1 tablespoon chia seeds
  • 1 tablespoon honey or maple syrup
  • 1/2 teaspoon vanilla extract
  • For the Toppings:
  • 1 tablespoon mini chocolate chips
  • 1 tablespoon crushed graham crackers
  • 1 tablespoon mini marshmallows

Instructions

1. Prepare the Crust:

  1. 1. In a mason jar or small bowl, combine the rolled oats, milk, chia seeds, honey, and vanilla extract.
  2. 2. Stir well to ensure everything is mixed thoroughly.
  3. 3. Cover and refrigerate overnight, or for at least 4 hours.
  4. 4. In the morning, give the oats a good stir and add a splash of milk if the mixture is too thick.
  5. 5. Top with mini chocolate chips, crushed graham crackers, and mini marshmallows.
  6. 6. Enjoy cold, or heat in the microwave for 30 seconds if you prefer warm oats.

Notes

For an extra s’mores flavor, you can toast the marshmallows with a kitchen torch before serving. Store leftovers in the fridge for up to 2 days.