Create Your Own Pineapple Coconut Dream Cake Delight Today!

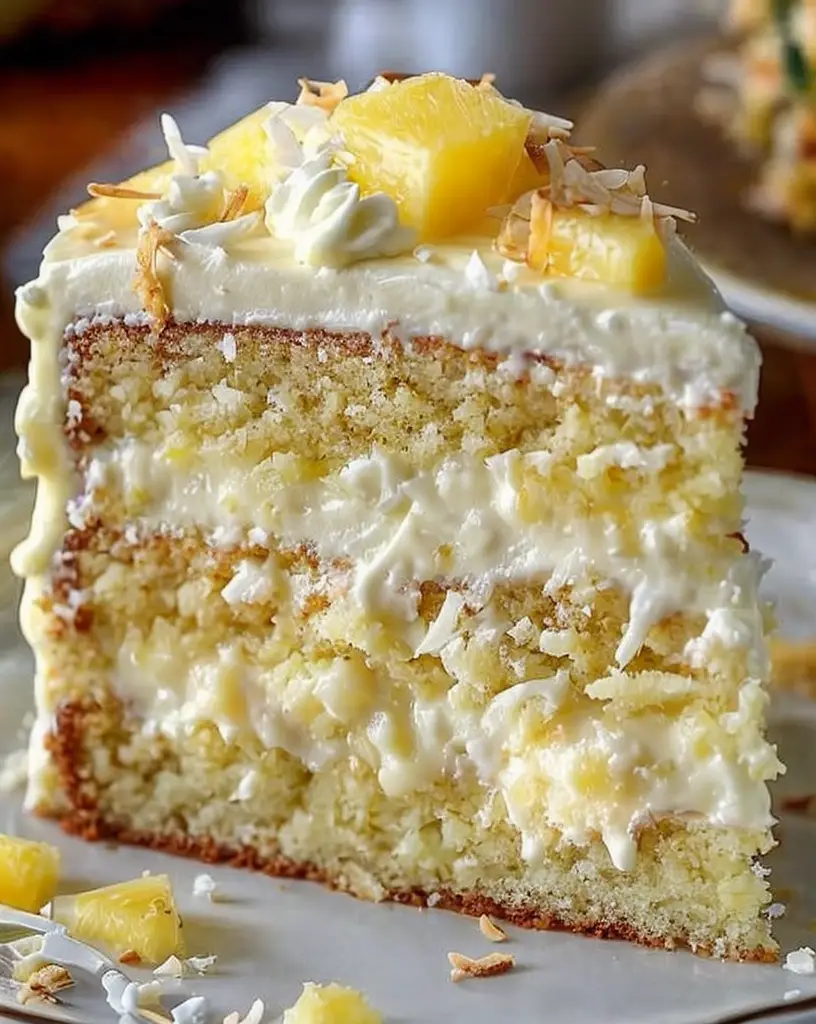
Pineapple Coconut Dream Cake: A Tropical Paradise for Your Taste Buds

⚖️
Difficulty
Medium

⏲️
Prep Time
30 mins

🕒
Cook Time
45 mins

⏱️
Total Time
1 hr 15 mins

🍽️
Servings
12 servings

The Pineapple Coconut Dream Cake is a delightful dessert that transports you straight to a tropical paradise. With its luscious layer of pineapple paired with creamy coconut, this cake is perfect for any occasion. The sweet, juicy pineapple enhances the rich flavors of coconut, while a light, fluffy cake provides the ideal base, making every bite a heavenly experience. This cake not only pleases the palate but also delights the senses with its vibrant colors reminiscent of sandy beaches and palm trees.

When you cut into the Pineapple Coconut Dream Cake, the moisture seeps out, filling the room with an irresistible aroma. The combination of the sweet, tangy pineapple and the nutty profile of the coconut creates a flavor explosion that is simply unforgettable. Whether you’re celebrating a special event or just indulging in a slice after a long day, this cake offers a taste of sunshine no matter the season.

Quick Recipe Highlights

  • Flavor Profile: The bright flavors of pineapple combined with the creamy sweetness of coconut create a refreshing and irresistible taste experience.
  • Texture: The cake has a moist and fluffy texture, while the frosting is creamy and smooth, providing a delightful contrast.
  • Aroma: Expect a tropical aroma that wafts through your kitchen, thanks to the fresh pineapple and rich coconut.
  • Visual Appeal: This cake boasts a gorgeous golden hue with a garnish of toasted coconut flakes and pineapple slices, making it a stunning centerpiece for any gathering.
  • Skill Level Needed: This recipe is accessible for bakers of all skill levels, making it a great choice for both novices and seasoned cooks.
  • Special Equipment: A round cake pan and an electric mixer are recommended for optimal results, ensuring the cake rises beautifully.

Recipe Overview

  • Difficulty Level: Although this Pineapple Coconut Dream Cake requires multiple steps, careful following of the instructions will yield a stunning cake that is well worth the effort.
  • Category: This cake is perfect as a dessert or a sweet treat for brunch, making it versatile for various meal occasions.
  • Cuisine: The recipe is influenced by tropical culinary traditions, especially drawing from Hawaiian flavors, which celebrate the use of pineapple and coconut.
  • Cost: The ingredients are generally affordable, making this recipe a budget-friendly choice for your baking adventures.
  • Season: Perfect for summer gatherings and celebrations, this cake embodies the essence of sunshine and warmth.
  • Occasion: Ideal for birthdays, baby showers, and potlucks, this cake is sure to impress your guests.

Why You’ll Love This Recipe

The Pineapple Coconut Dream Cake not only delivers a fabulous taste but also an exciting texture that can awaken your senses. The combination of fluffy cake with creamy frosting and chunks of real pineapple creates an experience that feels indulgent yet refreshing. It’s a treat that can highlight any celebration, providing a delightful tropical shortcut from the everyday dessert routine.

One of the standout benefits of this recipe is its convenience. The preparation steps are straightforward, allowing anyone to bring a touch of tropical bliss to their kitchen with minimal fuss. Gathering fresh ingredients and assembling them takes no time, and the bake time allows you to focus on other tasks or simply enjoy the pleasant baking aroma wafting through your home.

Nutritiously, the inclusion of pineapple adds a dose of vitamins, while coconut provides healthy fats. Together, they not only enhance the flavor but also contribute to a more balanced treat. This cake is an invitation to indulge without the guilt, showcasing how desserts can combine taste and nutrition beautifully.

Moreover, this cake shines when it comes to social settings. Imagine serving this creation at a gathering, where its colorful appearance and tropical aroma captivate everyone. It encourages conversations around sweet memories associated with summer, vacations, and sunny beaches, making it an excellent conversation starter.

Cost-effectiveness is another asset of this recipe. With easily sourced ingredients that often fit into a standard grocery budget, you can whip up this delightful cake without breaking the bank. Plus, the satisfaction gained from creating this treat in your own kitchen adds to its appeal, making it an accessible option for all.

Historical Background and Cultural Significance

The roots of the Pineapple Coconut Dream Cake can be traced back to the tropical islands, where pineapple and coconut thrive. Both ingredients have long been primary commodities in Hawaiian culture, symbolizing abundance and hospitality. These tropical flavors have crossed cultural boundaries, becoming popular across various cuisines globally.

Culturally, the cake represents a celebration of summer, often associated with luaus and beach parties. Its creation speaks to the joy of sharing a piece of tropical indulgence with friends and family, fostering connections amidst the spirit of fun and relaxation.

Over time, the recipe has evolved, incorporating various techniques and flavor elements based on regional adaptations. Some have introduced layers of cream cheese frosting for an added tang, while others prefer lighter whipped cream variations to enhance the cake’s airy texture.

Regional variations of this cake can include different fruits or nuts, adjusted based on what is locally available or seasonally ripe. In some coastal cities, macadamia nuts might be added for a delightful crunch, showcasing how versatile and loved this cake has become in global baking traditions.

Ingredient Deep Dive

Pineapple: Pineapple brings a proprietary sweetness and a vibrant tropical flavor to the cake. Rich in vitamin C and manganese, it promotes digestion and offers antioxidant benefits. When selecting pineapple, choose fresh, firm fruits with a sweet aroma. To store, keep intact at room temperature; once cut, refrigerate in an airtight container.

Coconut: Coconut provides a delicious nutty taste that complements the pineapple perfectly. It contains healthy fats, which can contribute to better heart health. Opt for unsweetened shredded coconut for the best flavor and texture. Store it in a cool, dark place, and using it soon after purchasing will ensure maximum freshness.

Common Mistakes to Avoid

  • Not properly measuring ingredients: Accuracy in measuring flour and sugar is vital for achieving the right texture in your cake.
  • Using warm eggs: Ensure your eggs are at room temperature for better emulsification with the wet ingredients, resulting in a fluffier cake.
  • Overmixing the batter: Overmixing can lead to a dense cake, so mix until just combined to keep it light and airy.
  • Misjudging baking time: Always check your cake a few minutes before the suggested time, as ovens can vary in temperature.
  • Not adjusting the recipe for altitude: If you live at a high altitude, adjustments in flour and liquid can help ensure proper baking results.
  • Skipping the cooling process: Allow your cake to cool completely before frosting to prevent the frosting from melting off.
  • Underestimating ingredient substitutions: Using alternatives without considering their properties can alter the final product, so make informed choices.
  • Not enough pineapple: Ensure you are using sufficient pineapple for flavor; this is crucial for the cake’s tropical identity.

Essential Techniques

Whipping Egg Whites: This technique is essential for creating a light and airy cake. Start with clean, dry beaters and whip the egg whites until soft peaks form. Avoid overwhipping, which can lead to a dry texture. The goal is to create volume and support for the cake structure.

Creaming Butter and Sugar: This foundational technique cream is crucial for incorporating air into your cake batter. Begin with room-temperature butter and sugar, mixing until the color lightens and the mixture becomes fluffy. Look for a pale, creamy texture; this indicates sufficient air has been incorporated, contributing to the cake’s rise.

Pro Tips for Perfect Pineapple Coconut Dream Cake

– Use fresh, ripe pineapple for the best sweetness and flavor; canned options can lack the brightness.
– Consider toasting shredded coconut for added depth and a delightful crunch in your finished cake.
– Always preheat your oven to ensure even baking throughout.
– Let the cake layers cool completely before layering and frosting to maintain structural integrity.
– Frosting works best when the cake is chilled, making it easier to achieve a smooth finish.
– For added tropical flair, top with maraschino cherries or slices of fresh pineapple.
– Ensure all your ingredients, especially dairy and eggs, are at the same temperature before mixing for the best emulsion.
– Enhance the flavor by adding a splash of coconut extract in the batter for more coconut goodness.

Variations and Adaptations

Regional variations often feature distinct flavor profiles; consider using passion fruit or mango puree for a tropical twist. Seasonal adaptations can involve fresh berries for summer gatherings, integrating local ingredients to make each version unique. For dietary modifications, substituting gluten-free flour can cater to gluten-sensitive guests without compromising flavor.

Flavor variations could include chocolate coconut layers or lemon zest for added brightness. Texture modifications might involve creating a layer of cream cheese frosting for contrast or integrating nuts for crunch. Presentation alternatives could involve a simple dusting of powdered sugar for a classic look, or a lavish drizzle of coconut cream for a more extravagant appearance.

Serving and Presentation Guide

When plating your Pineapple Coconut Dream Cake, consider using a cake stand for elevation and drama. Garnish with toasted coconut flakes and strategically placed pineapple slices for a stunning visual. Pair with whipped cream as a side for a fluffy contrast, and serve cool for the best flavor experience.

For modern suggestions, consider serving with a tropical fruit salad or a scoop of coconut ice cream to complement the flavors. Maintain attention to portion control by slicing into equal pieces, ensuring each serving contains a delightful mix of cake, frosting, and pineapple.

Wine and Beverage Pairing

To enhance your dining experience with Pineapple Coconut Dream Cake, consider pairing it with a light and fruity wine, such as a Riesling or Moscato, which complements the tropical flavors. For a non-alcoholic option, a sparkling lemonade or ginger beer can provide refreshing effervescence.

Coffee lovers may enjoy a well-brewed vanilla latte alongside the cake, as the richness of the coffee balances out the sweetness of the dessert. Remember, when serving, it’s beneficial to keep drinks cool to balance the warmth of the baked goods.

Storage and Shelf Life

To keep your Pineapple Coconut Dream Cake fresh, store it in an airtight container at room temperature for up to three days. If you need to keep it longer, refrigeration will extend the shelf life to about a week. Always look for signs of spoilage, such as a change in texture or odors.

For freezing, slice the cake and wrap each piece tightly in plastic wrap, followed by foil. This ensures that it remains sealed and fresh, allowing for up to three months of quality storage. To reheat, let it thaw in the fridge overnight; you can revive its moisture by wrapping it in a damp paper towel during reheating.

Make Ahead Strategies

To streamline your preparation, bake and cool the cake layers one day in advance. Wrap them in plastic wrap and store in the refrigerator to lock in moisture. Frosting can also be made ahead of time; just ensure it’s stored correctly to prevent drying out.

When you’re ready to assemble, allow the layers to come to room temperature for the best spreadability. Remember that adding fresh components such as fruit or whipped cream right before serving will enhance the overall presentation and taste.

Scaling Instructions

When halving the recipe, make sure to adjust the pan size accordingly to maintain even baking times. Doubling or tripling allows for a larger gathering—just ensure you have a sufficiently big mixing bowl and ample space in your oven.

Timing modifications may be necessary; larger cakes usually require an extended baking time, while smaller batches will cook quicker. Take care to adjust based on your oven’s heat distribution for optimal results.

Nutritional Deep Dive

The Pineapple Coconut Dream Cake yields ahead in a macro breakdown of carbohydrates, primarily from sugar and flour, and healthy fats derived from coconut. Incorporating pineapple adds valuable vitamin C and dietary fiber, while the cake remains a delightful treat when enjoyed in moderation.

A closer look at micronutrients reveals potassium and magnesium present in the pineapple, alongside beneficial nutrients from coconut’s healthy fat profile. For those watching their dietary intake, it’s important to consider portion sizes to enjoy this indulgence responsibly while still benefiting from the key nutrients.

Dietary Adaptations

Making the Pineapple Coconut Dream Cake gluten-free is achievable by swapping regular flour for gluten-free flour mixes. For a dairy-free option, use coconut milk and vegan butter in your frosting for a completely dairy-free version.

These adaptations allow more individuals to enjoy this wonderful cake while tailoring it to specific dietary needs, providing a delicious alternative without sacrificing flavor or texture. Adjusting sugar content can also appeal to low-carb and keto dieters, allowing more people to indulge in this tropical dessert.

Troubleshooting Guide

If your cake turns out too dense, assess whether you overmixed the batter or added too much flour. To fix flavors that seem off-balance, consider adjusting sweetness by adding a bit of salt or an acidic element like lemon juice to elevate the taste.

Equipment challenges can arise when using an unfamiliar oven; keep a close eye on your cake, testing frequently to avoid overbaking. Ingredient substitutions like using different fats (such as oil instead of butter) can change texture; ensure that any swaps balance out with the other elements in the recipe.

Recipe Success Stories

Community feedback about the Pineapple Coconut Dream Cake highlights its ability to create joyful memories and satisfy a wide range of taste preferences. Many readers love sharing their variation successes, using different fruit combinations or unique frostings that offer creative alternatives.

Adaptation stories often inspire others to experiment with this recipe, leading to newfound family favorites during the summer months. Recipe reviews showcase how this cake has become a staple at festive gatherings, with many sharing photography tips that highlight its beautiful layers and textures.

Frequently Asked Questions

Q: Can I make this cake gluten-free?

A: Yes, you can easily swap the flour for a gluten-free blend, ensuring the cake remains equally delightful.

Q: Can I use canned pineapple instead of fresh?

A: Canned pineapple can be used, but ensure it’s well-drained to prevent excess moisture in the cake.

Q: How do I store leftovers?

A: Store leftover cake in an airtight container at room temperature for up to three days or refrigerate for longer shelf life.

Q: Can I freeze the cake?

A: Yes, wrap individual slices tightly in plastic wrap and foil for up to three months in the freezer.

Q: What can I use instead of eggs?

A: Replace each egg with a quarter cup of unsweetened applesauce or a flaxseed meal equivalent for a vegan option.

Q: Can I add nuts to the recipe?

A: Absolutely! Chopped macadamia or walnuts can be added for texture and flavor.

Q: Why is my cake dense?

A: Density can result from overmixing the batter or using the wrong flour measurement, so ensure you mix just until combined and measure accurately.

Q: What frosting works best with this cake?

A: Cream cheese frosting pairs beautifully, while whipped cream can add a light touch to the finished cake.

Q: How long does this cake last in the fridge?

A: When properly stored, it can last up to one week in the refrigerator without losing quality.

Q: Can I bake this cake in a different pan type?

A: Yes, baking in a bundt pan or cupcakes is feasible, but baking times will vary, so monitor the cake carefully.

Additional Resources

For those eager to explore further, consider trying related recipes such as tropical fruit salads or coconut macaroons. Technique guides focusing on mixing methods and frosting techniques can be extremely useful as well.

Ingredient information specific to fruits and nuts can add to your expertise when making future desserts. Additionally, equipment recommendations for cake baking will assist beginners in creating perfect cakes every time, along with seasonal variations that inspire creativity in your baking endeavors.

Join the Conversation

We encourage you to share your baking experiences with Pineapple Coconut Dream Cake on social media. Tagging us with your photos helps build a community of dessert lovers eager to swap tips and celebrate creativity in the kitchen. Your recipe reviews can not only inspire others but also refine what makes this treat truly special.

Feel free to contribute your unique variations, along with any suggestions based on your experience. We’d love to see how this tropical delight comes to life in your home and brings joy to your table!

The Recipe

Pineapple Coconut Dream Cake

Serves: 12 servings

Prep Time: 30 mins

Cook Time: 45 mins

Total Time: 1 hr 15 mins

Kitchen Equipment Needed

  • Round cake pans (2)
  • Mixing bowl
  • Electric mixer
  • Rubber spatula
  • Cooling rack

Ingredients

  • 2 cups all-purpose flour
  • 1 ½ cups granulated sugar
  • 1 cup coconut milk
  • 1 cup crushed pineapple (drained)
  • ½ cup unsweetened shredded coconut
  • ½ cup unsalted butter, softened
  • 3 large eggs
  • 1 ½ tsp baking powder
  • 1 tsp vanilla extract
  • ½ tsp salt

Directions

  1. Preheat the oven to 350°F (175°C) and grease the cake pans.
  2. In a mixing bowl, cream butter and sugar together until light and fluffy.
  3. Add eggs one at a time, mixing well after each addition. Stir in the vanilla.
  4. In a separate bowl, whisk together the flour, baking powder, and salt.
  5. Combine the dry ingredients with the wet mixture, alternating with the coconut milk, until blended.
  6. Fold in the crushed pineapple and shredded coconut gently.
  7. Divide the batter evenly into the prepared cake pans and smooth the tops.
  8. Bake for 30-35 minutes or until a toothpick comes out clean.
  9. Let the cakes cool in pans for 10 minutes before transferring to a wire rack.
  10. Once cooled, frost with your choice of frosting and decorate as desired.

Recipe Notes

  • For extra flavor, consider adding a splash of coconut extract to the batter.
  • Ensure all ingredients are at room temperature before starting for optimal mixing.
  • This cake can be made a day in advance; wrap the layers in plastic wrap after cooling to maintain moisture.

Delicious Chicken Wonton Soup Recipe for Warm Comfort Food

Delicious Chicken Wonton Soup: A Heartwarming Comfort Food

⚖️
Difficulty
Moderate

⏲️
Prep Time
30 mins

🕒
Cook Time
40 mins

⏱️
Total Time
70 mins

🍽️
Servings
4

Chicken Wonton Soup is the epitome of comforting cuisine, combining delicate wontons stuffed with seasoned chicken and an aromatic broth that warms the soul. This recipe is not just a meal; it evokes memories of home cooking, family gatherings, and shared moments at the dinner table. Each spoonful of this hearty soup offers a burst of flavors that take you on a delightful culinary journey, perfect for any occasion, from casual weeknight dinners to festive celebrations.

With its savory essence and heartwarming qualities, Chicken Wonton Soup stands out for its nourishing ingredients and delightful textures. The tender wontons glide through a rich chicken broth, complemented by fresh vegetables that add both crunch and color. The combination of ginger, garlic, and scallions awakens the senses, making this dish a favorite among those seeking comfort food that doesn’t compromise on flavor.

Quick Recipe Highlights

  • Flavor Profile: The soup is a lovely balance of savory and umami flavors, punctuated by the brightness of ginger and scallions.
  • Texture: Silky wontons meld perfectly with a warm, luscious broth, while tender vegetables add a pop of crunch.
  • Aroma: The herbs and spices create an aromatic bouquet that embraces you with warmth as it simmers.
  • Visual Appeal: The presentation dazzles with vibrant colors from greens and subtle golden broth, inviting your taste buds to awaken.
  • Skill Level Needed: This recipe requires basic cooking skills but is manageable for any home cook willing to learn.
  • Special Equipment: A soup pot or stockpot for simmering, and a steamer for wontons elevates your cooking experience.

Recipe Overview

  • Difficulty Level: This Chicken Wonton Soup is marked as moderate due to its multiple steps, but it is rewarding and accessible with practice.
  • Category: Ideal for soups or comfort food, this dish serves as a delightful starter or main course.
  • Cuisine: A beloved staple in Chinese cuisine, wonton soup showcases the rich culinary heritage with regional variations across Asia.
  • Cost: The cost is reasonable, relying mainly on fresh ingredients like chicken, vegetables, and wonton wrappers that are often budget-friendly.
  • Season: Great for all seasons, it shines especially during the cold months when a warm soup is most comforting.
  • Occasion: Perfect for family dinners, holiday gatherings, or casual meet-ups that require a warm touch of hospitality.

Why You’ll Love This Recipe

One of the standout features of Chicken Wonton Soup is its tantalizing taste and mouth-feel, thanks to the combination of juicy chicken-filled wontons and flavorful broth. Each bite is comforting, with a refreshing note from the herbs that brighten your palate. The balance of flavors achieves that coveted homemade taste, perfect for anyone craving heartfelt cuisine.

Additionally, the convenience and ease of preparation make this dish a favorite among busy cooks. With just a bit of advanced preparation for the wontons, and a single pot of simmering broth, you’ll have a satisfying meal ready in under an hour. The ability to make the wontons and broth ahead of time means less stress on cooking day and more time spent enjoying the company of family and friends.

Beyond comfort, Chicken Wonton Soup also offers a range of nutritional benefits. Packed with protein from chicken, as well as vitamins and minerals from fresh vegetables, this dish supports a well-rounded diet. Adjusting the ingredients can tailor the soup to your specific dietary needs without sacrificing taste or texture.

The social and entertaining aspect of Chicken Wonton Soup elevates its worth. It often brings people together, whether you’re sharing the experience of making wontons or gathering around a pot of soup. It invites conversation and warmth, making it perfect for family dinner nights or gatherings with friends.

Finally, this recipe offers both cost-effectiveness and accessibility, as the majority of the ingredients can be found at any grocery store, and many items are staples already in your pantry. This soup allows you to create an impressive and satisfying meal without breaking the bank, making it an excellent choice for home cooks of all levels.

Historical Background and Cultural Significance

Chicken Wonton Soup has origins deeply rooted in Chinese culinary traditions, where wonton dumplings were traditionally made by hand and served in a flavorful broth. This comforting dish is often relished during celebrations, marked as auspicious, symbolizing prosperity and harmony. As Chinese immigrants settled in various parts of the world, they brought this humble dish with them, adapting it to local ingredients and tastes.

The cultural importance of wonton soup resonates with themes of family and community, often appearing in family recipes passed down through generations. As families gather around the table to enjoy this warm offering, it fosters connections and creates memories that celebrate heritage and traditions.

Over the years, the evolution of the recipe has seen multiple iterations, with various fillings and spice blends creating regional differences. While traditional recipes focus on pork filling, many modern versions, like our chicken-filled wontons, reflect dietary preferences and health-conscious choices.

Various regional variations of Chicken Wonton Soup have emerged, particularly in the United States, where it is frequently served in bowls adorned with a melange of garnishes such as cilantro, chili oil, or green onions. This adaptability showcases its universal appeal, allowing the dish to thrive in diverse culinary worlds.

Ingredient Deep Dive

Chicken is the primary ingredient, providing a rich source of protein essential for a balanced diet. When selecting chicken for the soup, opt for fresh, organic cuts that are free of antibiotics and hormones for the best flavor and health benefits. Proper storage involves keeping it refrigerated and ensuring any unused portions are frozen promptly to maintain freshness. Substituting chicken with ground turkey or tofu can cater to various dietary preferences while still creating a delicious protein-rich filling.

Wonton wrappers are the next important component, traditionally made from flour and water. These wrappers allow for versatile fillings and can also be made from whole grain flour for added nutrition. When selecting wonton wrappers, look for those with minimal preservatives for a healthier option. Store them in an airtight container to prolong their shelf life. For those seeking gluten-free alternatives, rice paper can serve as a suitable substitute, although it will yield a different texture.

Fresh vegetables such as bok choy or carrots not only add flavor but also bring necessary nutrients, enriching the soup’s health profile. These vegetables should be crisp and vibrant when selected. Proper washing and cutting techniques will enhance their flavor contribution. For seasonal adaptations, don’t hesitate to incorporate any fresh greens from your garden or local market, maintaining a creative and nutritious approach.

Common Mistakes to Avoid

  • Not sealing the wontons properly: Ensuring all edges are well-sealed prevents soggy wontons that may break apart in the broth, leading to a less desirable texture.
  • Overcooking the wontons: It’s essential to monitor the cooking time to keep them tender yet firm, as overcooking can ruin their delicate texture.
  • Using too much filling: While you may be tempted to pack them, having too much filling can lead to bursting, which affects the soup’s overall integrity.
  • Neglecting seasoning: A broth that lacks proper seasoning can taste bland, so adjust flavors throughout the cooking process to achieve desired complexity.
  • Using pre-made broth: While convenient, homemade broth offers a far richer flavor profile; opt for homemade whenever possible for the best results.
  • Ignoring proper vegetable cuts: Uneven vegetable pieces can lead to inconsistent cooking times; aim for uniformity to ensure thorough cooking.
  • Not chilling the broth: Allowing the soup to cool before serving can enhance flavors as it gives time for the ingredients to meld beautifully.
  • Forgetting to garnish: Garnishing with fresh herbs or a dash of chili oil elevates presentation and flavor, creating a more inviting dish.
  • Holding back on aromatics: Aromatics are essential for depth; don’t hesitate to include garlic, ginger, and onions generously.
  • Being afraid to adapt: This recipe is versatile; feel free to swap ingredients based on availability or personal preferences for a unique twist.

Essential Techniques

Creating homemade wontons is fundamental for achieving that authentic taste. Start by placing a small amount of filling in the center, dipping your finger in water to moisten the edges, then folding and sealing tightly. Mastering this technique ensures your wontons remain intact during cooking. Common pitfalls include overfilling and not sealing edges completely, both of which can ruin the texture and presentation of your soup.

Simmering the broth is another crucial technique that enhances flavor. Begin with aromatic ingredients that should be sautéed until fragrant, followed by adding your broth base and allowing it to simmer for a period of time to develop depth. Visual cues for success include watching for slight bubbling and activating a fragrant aroma wafting through your kitchen—indicating a well-developed broth.

Pro Tips for Perfect Chicken Wonton Soup

To master the art of Chicken Wonton Soup, consider making your broth a day ahead, allowing the flavors to deepen overnight. Refrigerate it, then skim off any fat before reheating it for a cleaner taste. Experiment with different fillings by incorporating shrimp or vegetables to cater to various palates, mixing it up based on your mood or the season.

When handling wonton wrappers, keep them covered with a damp cloth to prevent them from drying out while you work. This simple step makes assembling and sealing them much easier. If you’re short on time, picking up pre-made wontons can be convenient, though they generally lack the fresh flavor of homemade.

Balance the broth by adding a splash of soy sauce or rice vinegar right before serving for added acidity, enhancing the overall flavor profile. Tweak the seasoning to your liking, adding chili oil or sriracha for those who enjoy a spicy twist.

Lastly, a touch of fresh herbs sprinkled on top just before serving elevates presentation and taste, providing brightness and depth. Don’t skip out on that last flourish, as it transforms the dish into an inviting masterpiece.

Variations and Adaptations

Explore regional variations of your Chicken Wonton Soup by substituting traditional filling with local proteins or incorporating unique spices and herbs that reflect your culinary landscape. During fall and winter months, add root vegetables like sweet potatoes for a seasonal twist.

For dietary modifications, consider a vegan approach by using plant-based proteins like mushrooms or tofu, paired with a vegetable broth that highlights the natural sweetness of the vegetables. If you’re looking to amp up the texture, consider adding crispy fried onions atop for added crunch and flavor.

Flavor variations are also endless. Incorporate aromatic spices such as five-spice powder into your filling or broth, which can introduce a delightful warmth to this comforting meal. Alternate nutrition-based adaptations such as low-carb versions by replacing wonton wrappers with zucchini noodles can accommodate various diets while still delivering taste.

Presentation alternatives can also enhance your dish when serving. Instead of a traditional bowl, try serving individual portions in teacups or small mason jars for casual gatherings, making each serving visually appealing while accommodating personal preferences.

Serving and Presentation Guide

Plating your Chicken Wonton Soup beautifully makes all the difference. Utilize a shallow bowl for a classic approach, allowing the vibrant colors of the broth and vegetables to stand out. Use a ladle to create a wide but shallow pool of broth, gently placing the wontons in the center.

Garnishing ideas include a drizzle of sesame oil and a sprinkle of chopped cilantro or green onions for a fresh and vibrant touch. Traditional accompaniments such as chili paste or soy sauce on the side can be offered to allow guests to personalize their dishes further.

In modern servings, consider temperature as a factor. Serve the soup piping hot to enhance flavors, but take care to avoid scalding, particularly for younger guests. Portion control tips include serving smaller portions in starter bowls, encouraging second servings while maintaining appetite control and minimizing waste.

Wine and Beverage Pairing

When selecting a wine to accompany your Chicken Wonton Soup, consider light and crisp options such as a Sauvignon Blanc, which nicely contrasts the broth’s richness while enhancing the soup’s depth. Another excellent choice is a dry Riesling, which offers a refreshing balance with its fruity notes.

For non-alcoholic alternatives, a lightly brewed herbal tea can serve as a soothing partner, while sparkling water with a wedge of lemon adds a refreshing and palate-cleansing element. If coffee or tea is a preference, a subtly flavored green tea could enhance the meal’s freshness and cultural ties.

Remember to serve your beverages chilled or room temperature, depending on the choice. Presentation can enhance your dining experience; consider using unique glasses or teacups that reflect your culinary theme, creating a cohesive dining experience that delights guests.

Storage and Shelf Life

Proper storage is key to maintaining the quality and safety of your Chicken Wonton Soup. Store any leftover soup in an airtight container in the refrigerator for up to three days. For longer storage, consider freezing the soup in portions, allowing for quick and convenient meal prep later on.

Temperature requirements play an integral role; always allow the soup to cool to room temperature before refrigerating or freezing to prevent condensation buildup inside your containers. Container recommendations include glass jars or BPA-free plastic containers with tight-fitting lids to preserve flavor and texture.

Signs of spoilage may include off-smells, discoloration, or mold growth, indicating it’s time to discard the soup. Reheating instructions are simple; gently warm the soup on the stove over low heat, stirring occasionally to ensure even warmth. When freezing, place soup in freezer-friendly bags, lying them flat for easy storage.

Make Ahead Strategies

Preparing elements ahead of time enhances the cooking experience when making Chicken Wonton Soup. Consider prepping the broth a day in advance—allowing the flavors to meld overnight before use. Store the broth in airtight containers in the refrigerator, then heat it just before serving.

Wontons can be made ahead and frozen for future use, allowing for quick meal options. Place them on a baking sheet until frozen, then transfer them to airtight bags, ensuring minimal air contact to prevent freezer burn. This advanced prep doesn’t compromise taste and maintains freshness.

Quality impact assessment is crucial when planning; avoid overcooking the wontons upon boiling by adding them directly into the simmering broth while it’s still hot. Assembly tips include arranging all ingredients on a prep station, allowing for smooth and efficient assembly when ready to cook.

Reheating guidelines suggest gentle warming techniques to ensure you don’t compromise the wontons’ texture. Fresh element additions, such as adding herbs or greens just before serving, can enhance flavors even when elements are made ahead of time.

Scaling Instructions

If you find yourself needing to scale your Chicken Wonton Soup recipe, halving or doubling the ingredients is straightforward. However, you should maintain the balance of flavors to ensure that each portion still delights the palate.

When doubling or tripling, be mindful of the cooking time, as larger quantities may take slightly longer to heat through. Use a larger pot to accommodate the extra volume adequately and ensure that your ingredients are mixed well.

Equipment adjustments may also be necessary; consider utilizing a Dutch oven for larger batches, as its design maintains even heat distribution for simmering. Always taste the broth as you scale, adjusting seasoning gradually so the flavors remain harmonious regardless of batch size.

For storage considerations, be sure to use appropriately sized containers, allowing for any expansion during freezing. Label containers with date and contents to easily keep track of cooked meals in your freezer.

Nutritional Deep Dive

When examining Chicken Wonton Soup nutritionally, it provides a well-balanced meal packed with macros. The primary source of protein comes from the chicken, which supplies essential amino acids critical for muscle maintenance and repair. Each serving offers a healthy balance of carbohydrates from the wontons and fiber from the accompanying vegetables.

Micronutrient analysis reveals that this comforting dish offers vitamins A and C from the fresh vegetables, which play significant roles in maintaining immune function and skin health. The flavor-enhancing herbs add additional nutrients that contribute to an overall nutritious meal that supports well-being.

Health benefits extend beyond just physical nourishment; this dish also caters to mental health by providing comfort food during stressful times. The act of cooking and enjoying a warm bowl of soup can enhance mood and create a sense of nostalgia that supports emotional wellness.

For portion analysis, consider the total caloric intake per serving; aim for well-rounded portions that cater to individual dietary needs, while providing ample nutrients to support a balanced diet. Weight management tips include enjoying smaller servings upfront, offering the opportunity for second helpings if desired, making this dish as enjoyable as it is nutritious.

Dietary Adaptations

For individuals with gluten sensitivities, consider making Chicken Wonton Soup gluten-free by using rice paper or gluten-free wonton wrappers. Ensure all sauces and broth ingredients are gluten-free to maintain the integrity of the meal for those following specific diets.

Dairy-free variations can be achieved by ensuring no cream or cheese is added to any of the components. This dish is inherently dairy-free provided the broth and wontons are free from dairy-based garnishes or fillers.

Those following a vegan diet can easily adapt this recipe: swap chicken for a plant-based protein like tofu or tempeh, and utilize vegetable stock. Utilizing a medley of veggies and seasonings keeps the flavor profile rich and satisfying without compromising taste.

Low-carb variations can be accomplished by omitting the wonton wrappers entirely and replacing them with vegetables like zucchini or shirataki noodles. This caters to keto dieters or anyone looking to reduce carbohydrate intake while enjoying the comforting soup’s essence.

For those interested in Paleo or other specific diets, build your recipe around whole-food ingredients that adhere to strict dietary guidelines. Ensure to check all product labels for compliance regarding diet restrictions or preferences.

Troubleshooting Guide

If the texture of your wontons seems off, the issues may arise from overcooking, causing them to become too mushy or falling apart. A quick fix is to check the cooking time closely, adjusting as needed to keep them tender yet firm.

Flavor balance can be tricky; should your broth taste too strong or bland, incrementally adjust by adding more water to dilute or sprinkle a pinch of salt for enhancement until achieving the desired flavor profile.

Temperature problems often stem from a lack of heat when simmering the soup; ensure that your burner is set to medium-high heat before reducing to a lower temperature for simmering to maintain a steady, gentle boil.

If you encounter difficulties with equipment, ensure your pot is large enough to accommodate all ingredients properly. Also, ensure that the heat is distributed evenly across the base to avoid hot spots that may burn some ingredients.

Ingredient substitutions are commonplace in cooking. When replacing components, do so thoughtfully; for example, if you lack wonton wrappers, utilizing small rice paper rolls still replicates the essence of the dish, maintaining your cooking goals.

Timing concerns can impact how the flavors meld; if you find your broth isn’t as developed as desired, try simmering longer for a deeper taste, giving the aromatics more time to impart their flavors fully.

Recipe Success Stories

Community feedback on this Chicken Wonton Soup has shown immense appreciation for its comforting nature and delightful flavor. Many readers have shared their adaptation stories, from playing with different fillings like shrimp to experimenting with spice levels, reflecting the dish’s versatility.

Variation successes have been highlighted by those eager to share their creativity; feedback highlights using ground turkey or adding unexpected veggies for unique spins on this classic recipe. Each rendition showcases the recipe’s adaptability, resonating well within various home kitchens.

Readers often express their gratitude for the comprehensive instructions that demystify the creation process—helping even novice cooks to achieve gratifying results. Recommendations on photographic tips have emerged, inspiring others to capture their culinary achievements and share their joy on social platforms.

From social media shares featuring vibrant dishes to personalized recipes, the community around Chicken Wonton Soup continues to grow. Its inviting nature fosters families wanting to create lasting memories over wholesome meals, marking this soup as not just food, but a bonding experience.

Frequently Asked Questions

Q: Can I make Chicken Wonton Soup ahead of time?

A: Absolutely! You can prepare the broth and wontons in advance. Store them separately in the fridge, and combine them when ready to serve. This saves time and allows flavors to meld beautifully.

Q: What kind of chicken should I use?

A: Fresh, organic chicken is recommended, whether using breasts, thighs, or ground chicken. Each option provides different textures and flavors tailored to your preference.

Q: How can I freeze the wontons?

A: To freeze wontons, place them on a baking sheet in a single layer until frozen solid, then transfer them to freezer bags. This method prevents them from sticking together.

Q: Can I use store-bought broth?

A: While store-bought broth can work in a pinch, homemade broth enhances flavor significantly, adding richness to your soup that store-bought varieties often lack.

Q: What’s the best way to garnish my Chicken Wonton Soup?

A: Fresh herbs like cilantro, sliced green onions, or a drizzle of sesame oil are fantastic garnish options. Consider adding chili oil for those who enjoy a spicy kick!

Q: How long does Chicken Wonton Soup last in the refrigerator?

A: The soup can be stored in an airtight container in the fridge for up to three days. It’s best to serve freshly made for optimal taste and texture.

Q: Can I substitute the wontons for something else?

A: Yes! If you want to avoid wontons entirely, feel free to replace them with zucchini or shirataki noodles for a low-carb alternative, while still enjoying the delicious broth.

Q: How can I make this recipe spicy?

A: To increase the heat factor, add chili paste directly to the broth or sprinkle crushed red pepper flakes before serving. Customize the heat to your personal preference!

Q: What’s the best way to reheat the soup?

A: Gently reheat the soup on the stovetop over low heat, stirring frequently to prevent the wontons from sticking together. Avoid boiling to maintain their texture.

Q: Are there gluten-free wonton wrappers available?

A: Yes, there are gluten-free wonton wrappers made from rice flour. Alternatively, you can use rice paper as a substitute for a different texture altogether.

Additional Resources

For anyone interested in exploring more comforting dishes, consider checking out related recipes such as Egg Drop Soup and Hot and Sour Soup that utilize similar flavor profiles and cooking techniques.

Techniques that enhance your cooking, such as the art of making dumplings or homemade broth, are excellent resources. They can elevate your soup-making skills, leading to even tastier results in future culinary delights.

Ingredient-specific information on herbs and spices can also add depth to your overall cooking repertoire. Equip yourself with knowledge about seasonal produce and how to select fresh ingredients, ensuring the best tasting results across your meals.

Equipment recommendations for soup pots, steamers, and food processors will help you streamline your prep, making the process smoother and more enjoyable. Investing in quality kitchen tools can enhance your time spent in the kitchen.

And for those interested in seasonal variations, consider looking into recipes that highlight seasonal produce — enhancing flavors while keeping your meals fresh and exciting year-round!

Join the Conversation

We invite you to share your Chicken Wonton Soup journey with us on social media. Whether you post photos of your finished dish or offer your own tips and variations, your experiences can inspire others!

Engage with the community by commenting on recipe reviews and sharing how this dish has fit into your family traditions. Your feedback helps continually improve this beloved recipe and foster conversations about cultural and culinary experiences in our kitchens.

Don’t forget to experiment with its preparation and presentation, and feel free to share your photography tips. Every bowl of Chicken Wonton Soup represents a story worth celebrating, bridging communities and cultures through the simple act of sharing a meal.

The Recipe

Chicken Wonton Soup

Serves: 4

Prep Time: 30 mins

Cook Time: 40 mins

Total Time: 70 mins

Kitchen Equipment Needed

  • Soup pot or stockpot
  • Steamer basket
  • Cutting board
  • Knife
  • Mixing bowl
  • Ladle

Ingredients

  • 1 lb ground chicken
  • 1 pack wonton wrappers
  • 4 cups chicken broth
  • 2 cups bok choy, chopped
  • 1 cup carrots, julienned
  • 1 tablespoon soy sauce
  • 2 teaspoons ginger, minced
  • 2 teaspoons garlic, minced
  • 2 scallions, chopped
  • Salt and pepper to taste

Directions

  1. In a bowl, mix the ground chicken with ginger, garlic, soy sauce, salt, and pepper. Set aside.
  2. To assemble the wontons, place a teaspoon of the chicken mixture in the center of each wrapper, moisten the edges with water, and fold to seal.
  3. Bring a pot of water to a boil, then place the wontons in a steamer basket over the pot, cover, and steam for 8-10 minutes.
  4. In another pot, bring the chicken broth to a simmer; add the carrots and bok choy. Cook for about 5 minutes.
  5. Add the steamed wontons to the broth and gently heat through for 2-3 minutes.
  6. Serve the soup piping hot, garnished with scallions and a drizzle of sesame oil if desired.

Recipe Notes

  • Wontons can be frozen after assembly and cooked directly from frozen.
  • Feel free to customize fillings with vegetables or different meats based on your preference.
  • Adjust the broth seasoning as per your taste for a unique flavor.

Delicious Cajun White Chicken Chili for a Cozy Meal

Cajun White Chicken Chili: A Spicy Twist on a Comfort Classic

⚖️
Difficulty
Easy

⏲️
Prep Time
15 mins

🕒
Cook Time
30 mins

⏱️
Total Time
45 mins

🍽️
Servings
6

Cajun White Chicken Chili is not your typical chili; it pushes the boundaries of flavor while celebrating the comforting heartiness of a classic meal. This recipe combines tender chunks of chicken with a delightful array of spices, creating a dish that is both filling and full of vibrant tastes. The creamy base, enhanced by white beans and a touch of Cajun seasoning, offers a unique twist that is sure to excite your taste buds.

From the moment you start simmering the ingredients, the tantalizing aroma fills the kitchen, drawing everyone near in eager anticipation. Each spoonful is a mix of spice and creaminess, with tender meat and soft beans providing a satisfying texture. With Cajun White Chicken Chili, you’re not just making a meal; you’re crafting a memorable experience that is perfect for family dinners or gatherings with friends.

Quick Recipe Highlights

  • Flavor Profile: This chili boasts a harmonious blend of cayenne pepper, smoked paprika, and cumin that create a warm, spicy depth, balanced with the creaminess of sour cream.
  • Texture: Expect a comforting mix of creamy and chunky textures, featuring tender chicken and hearty white beans.
  • Aroma: The mouthwatering scent of garlic and spices fills the air, inviting everyone to indulge in this delicious dish.
  • Visual Appeal: With its inviting pale color, flecks of green from the bell peppers, and garnishes, this chili is as visually appealing as it is delicious.
  • Skill Level Needed: It’s a straightforward recipe that’s accessible for cooks of all skill levels, making it easy to whip up this delightful dish.
  • Special Equipment: A large pot or Dutch oven is essential for cooking this chili perfectly.

Recipe Overview

  • Difficulty Level: This recipe is categorized as easy, making it perfect for beginner cooks who want to dive into the world of flavorful chili.
  • Category: Cajun White Chicken Chili can be classified as a hearty main dish, ideal for lunch or dinner.
  • Cuisine: This dish draws inspiration from Cajun cuisine, renowned for its robust flavors and comforting warmth.
  • Cost: The ingredients are generally budget-friendly, with chicken and white beans being the key components that won’t break the bank.
  • Season: This recipe shines during cooler months but can be enjoyed year-round for a spicy kick.
  • Occasion: Perfect for family dinners, potlucks, or game day, this chili is a crowd-pleaser.

Why You’ll Love This Recipe

Cajun White Chicken Chili stands out due to its bold flavors and creamy texture that come together seamlessly. The use of Cajun spice not only brings heat but an exciting depth of flavor that is different from the conventional chili. With tender pieces of chicken complementing the hearty white beans, each bite delivers satisfaction while being surprisingly light.

In addition to its taste, this recipe offers convenience as it can be cooked in a single pot, making cleanup easy for busy cooks. The preparation time is minimal, making it accessible for a weeknight dinner or a quick meal for unexpected guests. This chili cooks relatively quickly, allowing you to have a warm and filling meal ready in under an hour.

Nutritionally, this dish is packed with protein thanks to the chicken and beans, making it not only delicious but a healthy choice. The use of spices may also provide benefits such as increased metabolism and enhanced digestion, making it a smart addition to your meal rotation.

Socially, Cajun White Chicken Chili is perfect for entertaining. Its warm, comforting nature encourages sharing and conversation around the table, allowing for memorable dining experiences with friends and family. You can easily double or triple the recipe to serve a crowd, ensuring everyone leaves full and satisfied.

Economically, this recipe is also appealing due to its affordability and simplicity. With easily sourced ingredients, it doesn’t require any specialty items, making it a go-to dish for those looking to impress without overspending.

Historical Background and Cultural Significance

The origins of Cajun cuisine can be traced back to the Acadian people who settled in Louisiana, bringing with them culinary traditions that incorporate local ingredients. Cajun White Chicken Chili is a modern take on these traditions, showcasing the influence of spices and flavors that emerged from the regional culture. While chili originated in Mexico, the infusion of Cajun elements creates a delightful fusion that honors both cultures.

In Cajun culture, food serves as a unifying force, where meals are often shared among family and friends. Cajun White Chicken Chili embodies this spirit of togetherness, encouraging gatherings and communal enjoyment, further enriching its cultural significance. As the recipe evolves, innovative variations appear, showcasing local ingredients and personal touches, reflecting individual preferences and regional flavors.

As Cajun cuisine has grown in popularity, this chili stands as a testament to the versatility and depth of traditional recipes. Its evolution showcases how classic dishes can adapt over time while maintaining their essence and introducing new flavors to a wider audience.

Regional variations of chili abound, but what sets Cajun White Chicken Chili apart is its unique blend of spices and the creamy texture that distinguishes it from its red counterparts. This chili invites cooks to experiment with ingredients and make it their own, fostering a creative and inclusive cooking environment.

Ingredient Deep Dive

Chicken
The primary protein in Cajun White Chicken Chili, chicken offers not only flavor but significant nutritional benefits as well. Rich in protein, it aids in muscle repair and growth. When selecting chicken, look for fresh, unblemished meat, preferably organic or free-range for a more robust flavor. Store raw chicken in the refrigerator for up to two days or freeze it for long-term use.

White Beans
White beans, such as cannellini or navy beans, contribute creaminess and fiber to the chili. They are low in fat and high in protein, making them an excellent complement to the chicken. When selecting beans, opt for organic when possible. Dried beans need soaking, while canned beans should be rinsed before use to reduce sodium content. Store dried beans in a cool, dark place and canned beans in a pantry.

Cajun Seasoning
A critical component, Cajun seasoning imparts flavors of paprika, cumin, and garlic, among others. Its heat level can vary, so taste as you incorporate it into your dish. Homemade blends allow for customization, tailoring it to your heat preference. Store spices in airtight containers away from light to maintain their potency.

Sour Cream
Sour cream adds a rich creaminess, balancing the spiciness of the dish. It provides beneficial probiotics, enhancing digestive health. When buying, look for organic options and check expiration dates. Open sour cream can last about two weeks in the fridge, but always check for signs of spoilage before use.

Common Mistakes to Avoid

  • Overcooking chicken can lead to dryness and chewy textures. To ensure tenderness, cook the chicken just until done, then remove it from the heat.
  • Not seasoning enough can lead to a bland dish. Adjust spices based on your preferences and be generous with seasoning.
  • Using canned beans without rinsing can contribute excess sodium. Rinse them thoroughly before adding to your chili.
  • Cooking at too high a temperature may cause chicken to become tough. Always opt for a gentle simmer to maintain tenderness.
  • Ignoring the importance of time can detract from flavor development. Allowing the chili to simmer enhances the taste, so be patient!
  • Failing to balance textures can cause the dish to feel monotonous. Consider adding crunchy toppings or garnishes for contrast.
  • Using the wrong pot can affect the heat distribution. Choose a pot that’s appropriately sized for even cooking.
  • Disregarding personal heat preferences can affect enjoyment. Start with less spice and adjust as needed to cater to your guests’ palates.
  • Not letting the chili sit for a few minutes after cooking can detract from the flavors. Allow it to sit to meld the ingredients together.
  • Forgetting about garnishes can make the dish feel incomplete. Fresh herbs or a dollop of sour cream add finishing touches that elevate presentation.

Essential Techniques

Searing Chicken
Searing chicken enhances flavor through the Maillard reaction, creating a golden crust. Start with a hot pan and avoid overcrowding; this ensures even cooking and prevents steaming. Mastering this technique will deliver depth to your chicken, making it tender and flavorful.

Simmering
The simmering process is critical for allowing flavors to meld together. Keep the heat low and encourage gentle bubbles. Achieving the right simmer ensures that the ingredients harmonize while avoiding overcooked textures. Visual cues include bubbles breaking the surface without a rolling boil.

Adjusting Seasonings
Throughout cooking, taste and adjust seasonings regularly. This technique is fundamental for achieving a balanced flavor profile. Adding small amounts of spices or acidity in stages allows you to tailor the dish according to your taste preferences. Use caution; a little goes a long way.

Garnishing
Garnishing elevates your dish’s presentation and can enhance flavor. Experiment with toppings like fresh cilantro, sliced green onions, or extra diced jalapeños. Learning to plate with intention invites diners to appreciate not just the taste but the visual appeal of your meal.

Pro Tips for Perfect Cajun White Chicken Chili

Incorporate fresh herbs like cilantro or parsley to brighten flavors just before serving.
Use a homemade Cajun seasoning blend for a personalized spice experience.
Sauté the bell pepper and onion before adding other ingredients for enhanced flavor.
Consider using rotisserie chicken for quick prep—just shred and add to your mixture.
Add a dash of lemon juice before serving; the acidity brightens the overall taste.
Experiment with different beans or lentils for various textures and flavors.
Top with crunchy tortilla chips for added texture and visual appeal.
Serve with a side of cornbread to complement the richness of the chili.

Variations and Adaptations

Regional variations can include the addition of local ingredients, such as chorizo or different beans, reflecting personal tastes and regional influences. Seasonal adaptations might involve incorporating vegetables like zucchini in summer or hearty greens in winter, ensuring the dish feels fresh.

For dietary modifications, consider making this chili vegan by substituting the chicken with plant-based protein and omitting dairy. Flavor variations can be achieved by adjusting the type of peppers used or adding different spices, while texture modifications might include blending some of the mixture for creaminess or keeping it chunky for a heartier bite.

When it comes to presentation, consider serving in individual bowls rather than a communal pot, garnished with colorful toppings. Festive bowls or plates can transform a simple meal into a celebration of flavors and colors.

Serving and Presentation Guide

Plating techniques can transform your dish, arranging chili artfully in each bowl, topped with a swirl of sour cream. Garnish with fresh herbs, such as cilantro, and sprinkle with diced peppers for a colorful addition.

Traditional accompaniments, like rice or cornbread, can be served on the side, enhancing the meal and providing added substance. Modern presentation might involve modeling individual bowls, allowing for personal customization of toppings.

Temperature considerations are vital; serve chili hot but allow it to cool slightly before serving to enhance flavors. Portion control can be managed through measuring tools or standard serving sizes, ensuring everyone enjoys a satisfying yet balanced portion.

Wine and Beverage Pairing

A crisp Sauvignon Blanc pairs beautifully with the spiciness of Cajun White Chicken Chili, complementing the dish without overpowering it. For a red option, a light Pinot Noir’s acidity and fruitiness can enhance the chili’s flavors.

For non-alcoholic alternatives, consider iced tea or a sparkling lemonade to provide refreshing balance to the heat of the chili. If serving coffee or tea, opt for lightly brewed variations that won’t interfere with the flavors of the dish, ensuring a seamless dining experience.

Storage and Shelf Life

Store leftover Cajun White Chicken Chili in an airtight container in the refrigerator for up to four days. For longer storage, consider freezing your chili in meal-sized portions, which can last up to three months.

Temperature requirements are crucial; allow the chili to cool before refrigeration to prevent condensation. Use freezer-safe containers or resealable bags for freezing, removing excess air to enhance preservation.

Signs of spoilage to watch for include off odors, changes in color, or strange textures. When reheating, ensure the chili reaches a temperature of at least 165°F for safe consumption.

For frozen chili, it’s best to thaw in the refrigerator overnight before reheating on the stove for even heating.

Make Ahead Strategies

To streamline dinner preparation, consider cooking your Cajun White Chicken Chili a day in advance. Flavors deepen and improve overnight, enhancing the overall taste.

Store each component separately if you prefer, allowing for fresh additions like sour cream or garnishes just before serving.

Assessing the quality impact, chili often tastes better after melding flavors overnight, but avoid overcooking vegetables to maintain their integrity.

When reheating, be mindful of do not boil, as this can intensify heat levels.

Fresh elements, like herbs or sliced jalapeños, can be added as a final touch just before serving to brighten the flavors and presentation.

Scaling Instructions

If you want to halve the recipe, simply divide each ingredient by two, adjusting seasoning to taste thereafter. For doubling or tripling, measure accurately to maintain flavor balance, particularly with spices.

When scaling up, consider using a larger pot that accommodates the increased volume of ingredients while allowing room for mixing.

Timing modifications may be required; larger quantities can take longer to heat through. Monitor closely and adjust time as necessary to reach desired temperatures uniformly.

For any leftovers, ensure proper storage guidelines are followed, keeping in mind that freezing might alter texture slightly when reheated.

Nutritional Deep Dive

Cajun White Chicken Chili is an excellent source of macronutrients, boasting a healthy balance of protein from chicken and beans. A typical serving provides approximately 30 grams of protein, making it ideal for a satisfying meal.

Micronutrient analysis reveals significant amounts of vitamins and minerals, including iron from chicken and fiber from beans, promoting overall health. Each ingredient contributes essential nutrients that enhance body functions and support wellness.

Health benefits extend beyond mere nutrition; spicy dishes like chili may boost metabolism. Guidelines for portion analysis suggest sticking to a serving size to manage calorie intake.

For those mindful of weight management, the balanced nature of this chili, rich in protein and fiber, can contribute to feelings of fullness, helping prevent overeating.

Dietary Adaptations

For gluten-free versions, avoid any thickening agents that may contain gluten and use certified gluten-free spices.

To make it dairy-free, skip the sour cream or use plant-based alternatives while considering lactose-free products for those with sensitivities.

A vegan adaptation can replace chicken with chickpeas or lentils, with nutritional adjustments for adding protein.

Low-carb or keto diets may require substituting beans with cauliflower to manage carbohydrate intake while maintaining satisfying texture.

Paleo enthusiasts can use coconut milk in place of sour cream, while low-FODMAP options can involve adjusting beans and seasoning types.

Troubleshooting Guide

If you experience texture issues, evaluate cooking times for chicken and beans. Overcooked beans can become mushy while undercooked chicken remains tough; striking a balance is key.

When flavor balance feels lacking, consider adding a splash of vinegar or additional spices to elevate the overall taste profile.

Temperature problems can often be resolved by adjusting your cooking vessel. If your pot retains too much heat, consider transferring to a different surface that allows more even heating.

Common ingredient substitutions might introduce unexpected results; always test and adjust based on your preferences.

Timing concerns can lead to undercooked chicken or overcooked vegetables. Set timers and check progress frequently to achieve perfect results every time.

Recipe Success Stories

Many home cooks have shared their positive experiences making Cajun White Chicken Chili, praising its blend of flavors and ease of preparation. Community engagement reflects a shared love of this dish, with families incorporating it as a weekly favorite due to its simplicity and robustness.

Variation successes come from experimenting with different proteins, resulting in delicious adaptations while maintaining the essence of the recipe. Readers have suggested fun garnishes or serving suggestions that elevate the overall dining experience, further enhancing social interactions around the meal.

Photographic tips include showcasing vibrant toppings and ingredients, capturing the appealing nature of this chili in all its glory to share on social media. This encourages others to recreate the dish in their kitchens, fostering a vibrant recipe-sharing community.

Frequently Asked Questions

Can I make Cajun White Chicken Chili in advance?

Yes, this chili can be made in advance. Flavors deepen overnight, enhancing the overall taste. Store in the refrigerator and reheat gently before serving.

What can I substitute for white beans?

If you don’t have white beans, you can use kidney beans or even chickpeas for a different texture and flavor, while still complementing the chicken well.

What makes Cajun seasoning different?

Cajun seasoning is distinct for its blend of spices like paprika, cayenne, onion, and garlic powder, offering a bold flavor profile compared to other regional seasonings.

Is there a vegetarian version?

Absolutely! Veggies like mushrooms or plant-based proteins work well as substitutes for chicken, while omitting dairy or substituting with plant-based options keeps it vegetarian.

How can I increase the heat level?

For those who enjoy spicier chili, add fresh jalapeños or additional cayenne pepper to your taste preference, ensuring you stir and taste as you go.

What should I serve with Cajun White Chicken Chili?

This chili pairs beautifully with cornbread, rice, or a fresh green salad, all of which offer complementary flavors and textures to enhance the meal.

Can I freeze leftovers?

Yes, Cajun White Chicken Chili freezes well. Portion it into airtight containers and store for up to three months for a convenient future meal.

What if I don’t have Cajun seasoning?

You can create a homemade spice blend by mixing paprika, garlic powder, onion powder, cayenne pepper, and black pepper to replicate the flavor in a pinch.

How long can I store leftovers?

Leftover Cajun White Chicken Chili can be stored in the refrigerator for about four days. Be sure to check for signs of spoilage before consuming.

What variations can I try?

Experiment with different proteins like turkey or sausage, or try varying the beans and included vegetables to suit your personal taste preferences and dietary needs.

Additional Resources

For those interested in culinary exploration, check out similar recipes that delve into various spice blends and comfort food classics. Technique guides on mastering slow cooking or braising can dramatically impact your cooking skills.

Ingredient information can assist in understanding the best sources for each component, translating to better flavors in your dishes. Equipment recommendations for essential kitchen tools will ensure you are prepared for any cooking venture while seasonal variations offer ideas on how to incorporate fresh produce throughout the year.

Join the Conversation

Sharing your culinary experiences has never been easier! Engage with us on social media; share photographs of your Cajun White Chicken Chili creations and connect with fellow food lovers.

Recipe reviews can help build our community, while your suggestions for variations may inspire others to step out of their comfort zones. Cooking is best when shared, so we encourage connections through the kitchen and beyond as we celebrate delicious, homemade meals.

The Recipe

Cajun White Chicken Chili

Serves: 6

Prep Time: 15 mins

Cook Time: 30 mins

Total Time: 45 mins

Kitchen Equipment Needed

  • Large pot or Dutch oven
  • Cutting board
  • Sharp knife
  • Measuring cups and spoons

Ingredients

  • 2 lbs chicken breast, diced
  • 1 can (15 oz) white beans, drained and rinsed
  • 1 onion, diced
  • 1 red bell pepper, diced
  • 4 cloves garlic, minced
  • 4 cups chicken broth
  • 1 cup sour cream
  • 2 tbsp Cajun seasoning
  • 2 tbsp olive oil

Directions

  1. Heat olive oil in a large pot over medium heat. Add diced chicken and cook until browned; approximately 5-7 minutes.
  2. Add onion, bell pepper, and garlic, cooking until softened.
  3. Stir in the Cajun seasoning, allowing it to toast for a minute.
  4. Add the chicken broth and white beans, bringing to a simmer.
  5. Cook for approximately 15-20 minutes, until chicken is cooked through and flavors meld.
  6. Remove from heat and stir in sour cream until combined.
  7. Serve hot, garnished with fresh herbs and additional toppings as desired.

Recipe Notes

  • Feel free to add additional vegetables like corn or zucchini for extra nutrition.
  • For a thicker chili, consider mashing some beans or using less broth.
  • Store leftovers in an airtight container for up to four days, or freeze for convenience.

Delicious Creamy Spinach and Sun-Dried Tomato Fettuccine Alfredo Recipe

Creamy Spinach and Sun-Dried Tomato Fettuccine Alfredo: A Rich and Flavorful Delight

⚖️
Difficulty
Easy

⏲️
Prep Time
10 mins

🕒
Cook Time
20 mins

⏱️
Total Time
30 mins

🍽️
Servings
4

Indulge in a delightful culinary experience with our Creamy Spinach and Sun-Dried Tomato Fettuccine Alfredo. This rich and creamy pasta dish not only tantalizes your taste buds but also offers a comforting embrace, making it the perfect meal for busy weeknights or hosting dinner parties. The combination of luscious fettuccine coated in a velvety Alfredo sauce, brightened by the earthy spinach and the sweet-tart flavor of sun-dried tomatoes, creates a symphony of flavors that will leave you wanting more.

This recipe exemplifies the art of simplicity, where fresh ingredients come together to create a masterpiece. The creaminess of the Alfredo sauce is balanced beautifully with the vibrant greens of spinach and the robust notes of sun-dried tomatoes, making this dish a feast for both the eyes and the palate. Whether you are looking for a satisfying family meal or an impressive dish to serve guests, this creamy fettuccine Alfredo is sure to become a favorite in your recipe repertoire.

Quick Recipe Highlights

  • Flavor Profile: The creamy sauce pairs perfectly with the savory sun-dried tomatoes and the fresh, slightly bitter taste of spinach, creating a balanced and satisfying meal.
  • Texture: The fettuccine delivers a tender yet chewy bite, while the Alfredo sauce adds a luscious creaminess that envelops each noodle.
  • Aroma: The dish is infused with the fragrant notes of garlic and herbs, making it irresistible from the moment it begins cooking.
  • Visual Appeal: Vibrant green spinach and red sun-dried tomatoes contrast beautifully against the creamy pasta, making for an eye-catching presentation.
  • Skill Level Needed: This dish requires minimal culinary expertise, making it accessible for novice cooks while still delightful for seasoned chefs.
  • Special Equipment: No special tools are needed beyond basic kitchen utensils and pots, making this a conveniently attainable recipe.

Recipe Overview

  • Difficulty Level: With its straightforward techniques and quick cooking time, this recipe is perfect for those who want a delicious meal without the fuss.
  • Category: This creamy fettuccine Alfredo fits beautifully into the pasta category, making it ideal for both main courses and sides.
  • Cuisine: Drawing inspiration from Italian cooking, this dish showcases traditional pasta dishes reimagined with fresh and flavorful ingredients.
  • Cost: The ingredients are reasonably priced, making this a budget-friendly meal that doesn’t skimp on flavor.
  • Season: This dish is fantastic year-round but is especially comforting in the cooler months, when a rich and warm pasta meal is most appealing.
  • Occasion: Perfect for both casual family dinners and more formal occasions, this fettuccine Alfredo is versatile enough to suit any dining experience.

Why You’ll Love This Recipe

The Creamy Spinach and Sun-Dried Tomato Fettuccine Alfredo is a celebration of taste and texture that will quickly become a family favorite. The combination of creamy Alfredo sauce, sautéed spinach, and sun-dried tomatoes infuses the dish with a variety of flavors that dance on your palate. The pasta’s rich and comforting nature provides an indulgent experience that’s hard to resist, making it perfect for a cozy night in or entertaining guests.

Convenience is another key aspect of this recipe. With minimal prep time and a total cook time of just 30 minutes, this dish fits perfectly into any busy schedule. The quick assembly allows you to prepare a homemade meal that feels elegant without spending too much time in the kitchen. Plus, with easy-to-find ingredients that you likely already have on hand, this recipe enhances your weeknight cooking routine without adding any stress.

Nutritionally, this dish offers the benefits of spinach, which is rich in vitamins A and C, along with beneficial minerals like iron and calcium. Pairing the greens with wholesome pasta provides carbohydrates necessary for energy, making this a well-rounded meal. The creamy Alfredo sauce can elevate the nutrition of this dish by including additional protein sources, such as grilled chicken or shrimp, for an even heartier option.

This fettuccine Alfredo is also a great option for social gatherings and entertaining, as it is not only delicious but also visually stunning. Its vibrant colors and aromatic flavors make it a highlight on any dinner table, encouraging conversation and enjoyment among guests. This recipe can easily serve a crowd, making it perfect for family get-togethers or potlucks where you want to impress your friends.

Lastly, this meal is quite accessible in terms of cost. Most ingredients are affordable, with replacements for any dietary preferences or restrictions readily available. Whether you choose to stick to the classic recipe or make adaptations, this creamy fettuccine Alfredo allows you to create a dish that suits your taste and budget, making it an easy choice for any occasion.

Historical Background and Cultural Significance

Fettuccine Alfredo originated in Rome in the early 20th century when Alfredo di Lelio created it as a specialty dish for his restaurant. The combination of fettuccine pasta, butter, and Parmigiano-Reggiano cheese quickly became popular among Italian diners and later gained fame in the United States. While the classic version emphasizes simplicity, variations like adding cream or additional ingredients have emerged, showcasing the dish’s flexibility.

Culturally, Fettuccine Alfredo represents a bridge between Italian heritage and American culinary adaptation. It highlights how immigrant cooking traditions can evolve, taking on new interpretations while still holding to their roots. Today, Alfredo sauce is prevalent in various pasta dishes, revered for its rich, comforting qualities.

The evolution of the recipe also signifies the changing tastes and preferences of diners. As more ingredients became accessible, adaptations began to appear across households, leading to a variety of versions enriched with vegetables and proteins. The dish’s adaptability has allowed it to remain relevant in contemporary cooking, appealing to numerous palates and dietary needs.

Regional variations of Fettuccine Alfredo exist globally, often featuring local ingredients or flavors. For instance, the incorporation of spinach or sun-dried tomatoes, as seen in our recipe, showcases how different cultures can put their spin on a classic, giving homage to traditional methods while enhancing the dish’s appeal to modern tastes.

Ingredient Deep Dive

– **Fettuccine Pasta**: Originating from the Lazio region of Italy, fettuccine is a flat, thick noodle perfect for holding creamy sauces. It is traditionally made from flour and eggs, offering a rich flavor and hearty texture. When selecting fettuccine, look for fresh or high-quality dried options for the best results. Store in a cool, dry place, and consider alternatives like whole grain or gluten-free pasta for dietary preferences.

– **Heavy Cream**: This ingredient is crucial for creating the luscious texture of Alfredo sauce. With its high-fat content, heavy cream adds richness and a decadent mouthfeel to the dish. When selecting heavy cream, choose organic or pasteurized varieties for better flavor. Store it refrigerated and ensure it is tightly sealed to maintain freshness.

– **Spinach**: Fresh spinach brings color and nutritional value to the recipe. Rich in vitamins and minerals, spinach is often associated with a healthy diet. Look for vibrant green leaves that are firm and crisp. When storing, keep it refrigerated in a perforated bag to maintain freshness, and consider using frozen spinach if needed for convenience.

– **Sun-Dried Tomatoes**: These bring a tangy sweetness and depth of flavor, balancing the creaminess of the dish. Traditionally produced by drying ripe tomatoes under the sun, they are often packed in oil for added moisture and taste. Look for quality products without preservatives, and store them in the refrigerator once opened to extend shelf life.

– **Parmesan Cheese**: A vital element for authentic Alfredo flavor, Parmesan is a hard cheese that adds saltiness and umami. Opt for freshly grated cheese for the best flavor and texture. Store it in an airtight container in the refrigerator, and consider using Pecorino Romano as a substitute for a sharper taste.

Common Mistakes to Avoid

  • Not salting the pasta water: This is a crucial step in flavoring the fettuccine itself, as it absorbs salt during cooking.
  • Overcooking the pasta: Aim for al dente for the best texture, as overcooked pasta becomes mushy and unappealing.
  • Using low-quality cheese: Freshly grated Parmesan or a similar cheese enhances the flavor; pre-packaged varieties often lack richness.
  • Skipping the seasoning: Adjusting the seasoning with herbs, salt, and pepper elevates the dish tremendously.
  • Adding cream too quickly: Gradually mixing the cream helps in achieving a smooth sauce without curdling.
  • Not incorporating the spinach properly: Make sure the spinach is broken down in the sauce for even distribution and flavor.
  • Using cold ingredients: Room temperature ingredients mix more easily, creating a consistent sauce.
  • Being impatient with the sauce: Allow the sauce to simmer gently to enhance its depth of flavor.
  • Ignoring texture: If the sauce is too thick, add a splash of pasta water to adjust consistency without compromising flavor.
  • Not tasting during preparation: Regularly tasting as you cook helps ensure the flavors are balanced and satisfying.

Essential Techniques

– **Cooking Pasta**: Properly cooking fettuccine is vital for achieving the right texture. Use a large pot with ample salted water to ensure even cooking. Stir occasionally to prevent sticking, and test for doneness by tasting. Al dente pasta should have a firm bite, providing the best base for your Alfredo sauce.

– **Making Alfredo Sauce**: This technique involves creating a creamy consistency that coats the pasta perfectly. Begin by melting butter and adding heavy cream gradually. Stir constantly to prevent clumping and ensure even incorporation of cheese. The key is to keep the heat low to avoid boiling, which can lead to a separated sauce.

Pro Tips for Perfect Creamy Spinach and Sun-Dried Tomato Fettuccine Alfredo

– Choose high-quality ingredients as they greatly influence the final flavor of your dish. Fresh, seasonal produce enhances taste and nutrition.
– For added depth, consider incorporating garlic or shallots when sautéing the spinach, infusing the dish with aromatic flavors.
– To boost the nutritional content, include protein such as grilled chicken or shrimp; this not only enhances flavor but also makes a heartier meal.
– Adjust the thickness of the sauce by adding reserved pasta water gradually. This not only helps your sauce adhere to the noodles but also enhances the dish’s creaminess.
– Garnish with fresh herbs, like basil or parsley, for a pop of color and added freshness.
– If you enjoy a little heat, add red pepper flakes to the sauce for a subtle kick.
– Serve immediately to enjoy the creaminess of the sauce, as it tends to thicken as it cools.
– Store leftovers in an airtight container, but be aware the texture may change upon reheating; adding a splash of cream can help restore creaminess.

Variations and Adaptations

– **Regional Variations**: Different regions in Italy sometimes add local cheeses or distinctive vegetable medleys to customize their Alfredo dishes. Explore using gorgonzola or ricotta cheese for unique flavor profiles.
– **Seasonal Adaptations**: In spring, consider adding seasonal asparagus or peas alongside spinach for a fresh flourish. In winter, using roasted butternut squash can add sweetness and warmth.
– **Dietary Modifications**: For a vegan alternative, use plant-based cream and nutritional yeast in place of dairy. This maintains the creamy texture while keeping it free of animal products.
– **Flavor Variations**: Experiment with different herbs and spices; a hint of lemon juice can add brightness, while smoked paprika introduces an interesting savory note.
– **Texture Modifications**: For a crunch, consider topping your Alfredo with toasted pine nuts or breadcrumbs before serving.
– **Presentation Alternatives**: Serve in a family-style dish for sharing, or plate individually with fresh parsley and a sprinkle of Parmesan for an impressive visual touch.

Serving and Presentation Guide

To serve Creamy Spinach and Sun-Dried Tomato Fettuccine Alfredo beautifully, consider using a large, shallow bowl that allows the dish to spread out. Twirl the fettuccine using tongs to create nest-like portions, showcasing the vibrant colors of the spinach and tomatoes. A sprinkle of fresh parsley or basil adds a pop of color, while a light dusting of grated Parmesan elevates the presentation.

Pair with warm, crusty bread and a side salad for a complete meal that looks as delightful as it tastes. Ensure that the pasta is served hot, as the sauce tends to thicken as it cools. Portion control is crucial; aim for about 1 ½ cups of pasta per serving, allowing for ample sauce to complement each bite.

Wine and Beverage Pairing

When it comes to selecting the perfect wine to pair with Creamy Spinach and Sun-Dried Tomato Fettuccine Alfredo, opt for a light, crisp white wine such as Pinot Grigio or Sauvignon Blanc. These wines complement the creamy sauce and enhance the dish’s flavors without overwhelming the palate. For a red option, a light-bodied Chianti can provide a pleasant contrast.

If you prefer non-alcoholic options, a sparkling water with a slice of lemon can refresh the palate and enhance the meal’s lightness. Additionally, herbal teas, particularly chamomile or green tea, provide aromatic appreciation that pairs well with creamy dishes, enhancing the overall dining experience.

Storage and Shelf Life

For optimal storage, place any leftover Creamy Spinach and Sun-Dried Tomato Fettuccine Alfredo in an airtight container to maintain freshness. Refrigerate the dish, where it can last up to 3-4 days. When storing, consider separating the sauce from the pasta if possible, as this helps in maintaining texture.

Check for signs of spoilage such as an off smell or unusual discoloration before reheating. When reheating, gently warm the dish over low heat on the stove; adding a splash of heavy cream or pasta water helps restore the creamy texture. If desired, frozen leftovers can last up to a month; when ready to use, thaw in the refrigerator overnight before reheating.

Make Ahead Strategies

To streamline meal prep, consider making the Alfredo sauce ahead of time. Store it in the refrigerator for up to three days, allowing for quick assembly with freshly cooked fettuccine. Prepare the spinach and sun-dried tomatoes separately, mixing them into the sauce just before serving to maintain their freshness.

Additionally, cook your pasta al dente beforehand and store it, tossing it with a little olive oil to prevent sticking. When ready to serve, combine the pasta with the pre-made Alfredo sauce over low heat for a few minutes until warmed through. This strategy not only saves time but also improves flavor development as the ingredients meld together.

Scaling Instructions

When scaling the Creamy Spinach and Sun-Dried Tomato Fettuccine Alfredo recipe, adjustments can be easily made to serve more or fewer individuals. For halving the recipe, simply divide all ingredients and instructions by two, keeping an eye on cooking times.

Doubling or tripling the recipe for larger groups is straightforward; ensure you have a large enough pot for cooking and consider using multiple pans for quicker sautéing. Adjust your timing by checking for doneness as cooking may take a little longer in larger batches. Remember to keep an eye on the final sauce consistency and flavor, adjusting seasoning as needed.

Nutritional Deep Dive

The nutritional composition of Creamy Spinach and Sun-Dried Tomato Fettuccine Alfredo varies based on ingredient specifics, but generally, it contains a balanced mix of macronutrients. The dish offers carbohydrates from fettuccine, healthy fats from the cream, and protein if using cheese or additional proteins like chicken.

Micronutrient-wise, spinach provides vitamins A, C, and K, alongside important minerals like iron and magnesium. Sun-dried tomatoes add antioxidants that assist in lowering inflammation and supporting heart health. Overall, with a focus on portion control, this dish can fit into a balanced meal plan.

Additionally, for those monitoring dietary intake, consider adjusting portion sizes. Using whole grain or high-fiber pasta can enhance satiety without significantly altering the flavor profile, supporting weight management goals while still enjoying this rich dish.

Dietary Adaptations

– **Gluten-free**: Substitute the fettuccine with gluten-free pasta alternatives made from rice, quinoa, or legumes to accommodate gluten sensitivities.
– **Dairy-free**: Use coconut cream or cashew cream in place of heavy cream, and nutritional yeast can replace Parmesan for a cheesy flavor.
– **Vegan**: Complement the dairy-free option by substituting butter with olive oil and incorporating plant-based protein options for a hearty meal.
– **Low-carb**: Consider using spiralized vegetables like zucchini or shirataki noodles as a low-carb substitute for fettuccine while maintaining a satisfying meal.
– **Keto**: Perfect for a ketogenic diet by utilizing creamy, high-fat options with low-carb pasta alternatives, enhancing flavors without sugar.
– **Paleo**: Utilize cauliflower-based or veggie noodles along with fresh ingredients free from processed sugars and grains.
– **Low-FODMAP**: Opt for lactose-free cream and limit portion sizes of sun-dried tomatoes for a dish that fits low-FODMAP guidelines without sacrificing flavor.

Troubleshooting Guide

– **Texture Issues**: If the sauce is too thick, add a bit of reserved pasta water gradually until reaching the desired creaminess.
– **Flavor Balance**: For a bland taste, consider incorporating additional seasonings, such as fresh herbs or a squeeze of lemon juice to brighten flavors.
– **Temperature Problems**: If the pasta sits too long and cools, reheat gently on low heat, adding cream or water to revitalize the sauce.
– **Equipment Challenges**: If your blender or food processor is inadequate for a smooth sauce, try using an immersion blender directly in the pot.
– **Ingredient Substitutions**: If you lack sun-dried tomatoes, cherry tomatoes roasted in olive oil can offer a similar flavor profile.
– **Timing Concerns**: If pressed for time, consider using pre-cooked pasta or store-bought Alfredo sauce as a starting point before customizing with your ingredients.

Recipe Success Stories

Community feedback highlights the joy and satisfaction this Creamy Spinach and Sun-Dried Tomato Fettuccine Alfredo recipe brings. Readers appreciate how easily it fits into busy schedules while still having a gourmet quality. Many have shared their own variations, such as adding grilled chicken or using different vegetables, showcasing the recipe’s versatility and appeal.

Adaptation stories often reveal how families love customizing the dish with their favorite ingredients, reinforcing the recipe’s adaptability across different palates. Photographers are encouraged to share images that highlight the dish’s vibrancy and richness, inspiring others to try their take on this classic recipe.

Frequently Asked Questions

Can I freeze the Alfredo sauce?
Yes, you can freeze the Alfredo sauce. However, the texture may change upon reheating. To freeze effectively, store the sauce in an airtight container and thaw overnight in the refrigerator before gently reheating.

Can I use different vegetables?
Absolutely! Feel free to experiment with seasonal vegetables such as asparagus, broccoli, or peas to add more flavor and color to your dish.

What type of cheese should I use?
Freshly grated Parmesan is traditional for Alfredo sauce, but you can also use Pecorino Romano for a sharper taste or a blend of both for added depth.

How do I make pasta ahead of time?
You can cook pasta in advance and store it, tossing it with a little olive oil to prevent sticking. When ready to serve, gently reheat in a skillet with sauce or boiling water.

Is this recipe suitable for meal prep?
Yes! The dish can be prepared ahead of time, and the sauce will keep well in the refrigerator for a few days, making it convenient for meal planning.

Can I use low-fat dairy products?
Using low-fat cream or cheese can reduce the calorie content, but it may change the overall flavor and texture of the dish.

How long can leftovers be stored?
Leftovers can be stored in the refrigerator for up to 3-4 days when kept in an airtight container.

Can I add protein to the dish?
Yes! Grilled chicken, shrimp, or even crispy tofu can be added for an extra protein boost and to make the dish more filling.

What herbs pair well with this Alfredo?
Fresh herbs like basil, parsley, or oregano can enhance the flavors of the dish and add freshness, making them great additions.

What’s the best way to reheat the fettuccine?
Gently reheat in a skillet on low heat, adding a splash of cream or pasta water to bring back creaminess and prevent it from drying out.

Additional Resources

If you’re loving this Creamy Spinach and Sun-Dried Tomato Fettuccine Alfredo, check out our related recipes that offer similar flavors or techniques. Explore other sauces, like a classic marinara or pesto, to elevate your pasta dishes.

Learn more about essential cooking techniques, such as sauce-making or pasta preparation, to deepen your culinary skills. For those curious about ingredients, delve into the delightful world of cheeses or explore the health benefits of specific herbs and spices to enhance your cooking repertoire.

Join the Conversation

We’d love to hear your thoughts on this Creamy Spinach and Sun-Dried Tomato Fettuccine Alfredo recipe! Share your variations and experiences on social media with us, and be sure to tag your delicious photographs. Your insights help foster a community of food lovers.

Don’t hesitate to leave a review or suggestion for future recipes, as your feedback is invaluable in our culinary journey together. Join the discussion on our forum for tips, tricks, and stories from fellow food enthusiasts who are just as passionate about cooking as you are.

The Recipe

Creamy Spinach and Sun-Dried Tomato Fettuccine Alfredo

Serves: 4

Prep Time: 10 mins

Cook Time: 20 mins

Total Time: 30 mins

Kitchen Equipment Needed

  • Large pot for boiling pasta
  • Skillet for sauce preparation
  • Measuring cups and spoons
  • Colander
  • Spatula or wooden spoon
  • Tongs for serving

Ingredients

  • 12 oz fettuccine pasta
  • 1 tablespoon olive oil
  • 2 cups fresh spinach
  • 1/2 cup sun-dried tomatoes, chopped
  • 1/2 cup heavy cream
  • 1/2 cup grated Parmesan cheese
  • 1/4 teaspoon garlic powder
  • Salt and pepper to taste
  • Fresh basil or parsley for garnish

Directions

  1. Cook fettuccine according to package instructions until al dente. Drain and set aside.
  2. In a large skillet, heat olive oil over medium heat. Sauté spinach until wilted, about 2-3 minutes.
  3. Add sun-dried tomatoes and stir to combine with spinach.
  4. Lower the heat and pour in heavy cream, stirring to combine.
  5. Add grated Parmesan cheese, then season with garlic powder, salt, and pepper. Stir until the cheese melts and the sauce thickens.
  6. Toss cooked fettuccine into the sauce, ensuring the pasta is well-coated.
  7. Serve immediately, garnished with fresh basil or parsley.

Recipe Notes

  • For a lighter version, consider using half-and-half instead of heavy cream.
  • Feel free to add protein like grilled chicken or shrimp for a heartier dish.
  • If using jarred sun-dried tomatoes, drain excess oil before adding to the dish.
  • Store leftovers in an airtight container in the refrigerator for up to 3-4 days.

Delicious Mediterranean Seafood Stew Recipe for Healthy Eating

Mediterranean Seafood Stew: A Flavorful Journey Through the Mediterranean

⚖️
Difficulty
Medium

⏲️
Prep Time
30 mins

🕒
Cook Time
50 mins

⏱️
Total Time
80 mins

🍽️
Servings
4 servings

The Mediterranean Seafood Stew is an exquisite dish that embodies the vibrant flavors and rich traditions of the Mediterranean coast. This recipe combines an array of seafood, including succulent shrimp, tender fish, and clams, all simmered in a fragrant, tomato-based broth infused with fresh herbs. The balance of spices perfectly complements the natural sweetness of the seafood, creating a comforting and hearty meal that feels like a warm hug. Perfect for sharing with family or friends, this stew brings an authentic taste of the Mediterranean to your table.

This delightful meal not only tastes incredible but also offers an enticing visual appeal. Picture a steaming bowl filled with bright colors: the ruby red of tomatoes, the gleaming white of fish, and the fresh greens of herbs and parsley dancing on top. Each spoonful provides a symphony of textures—from the soft, delicate seafood to the slightly chunky vegetables. The aroma of garlic, fennel, and the briny scent of the ocean wafting through the air create an irresistible invitation to dive into this delicious culinary experience.

Quick Recipe Highlights

  • Flavor Profile: An exquisite blend of savory seafood flavors, sweetness from ripe tomatoes, and aromatic herbs.
  • Texture: Creamy broth with tender seafood, crunchy vegetables, and fresh herbs for a delightful mouthfeel.
  • Aroma: Inviting aromas of garlic, fresh herbs, and ocean breeze fill your kitchen as it simmers.
  • Visual Appeal: A beautiful presentation of colorful seafood and vibrant broth topped with fresh herbs.
  • Skill Level Needed: Moderate skill with a focus on ingredient preparation and cooking techniques.
  • Special Equipment: A large pot or Dutch oven for simmering and serving.

Recipe Overview

  • Difficulty Level: This Mediterranean Seafood Stew is classified as medium difficulty, requiring basic knife skills and an understanding of cooking techniques for seafood.
  • Category: This stew is a hearty main dish, perfect for family-style meals or gatherings.
  • Cuisine: Rooted in Mediterranean traditions, this dish showcases the region’s rich culinary heritage featuring fresh seafood and seasonal vegetables.
  • Cost: The overall cost of ingredients is moderate, using a mix of budget-friendly seafood and pantry staples.
  • Season: Enjoy this stew year-round, with peak seafood availability typically in warmer months.
  • Occasion: Ideal for dinner parties, cozy family dinners, or any occasion where you want to impress your guests.

Why You’ll Love This Recipe

One of the most compelling reasons to embrace Mediterranean Seafood Stew is its taste and texture appeal. With the harmonious combination of seafood varieties, each bite presents a unique flavor that reflects the sea’s bounty. The rich broth, enveloping the ingredients, enhances the seafood’s taste while providing a warming comfort on cooler evenings.

Preparing this stew is also incredibly convenient, allowing for flexibility with ingredient selection based on what’s available or in season. You can use any combination of seafood you have on hand, making it a fantastic way to minimize waste while enjoying a delightful meal. The straightforward cooking process means it can be on the table in about an hour, allowing you to enjoy quality time with loved ones or ease into a relaxing evening.

From a nutritional standpoint, this dish offers a wealth of benefits. Seafood is an excellent source of lean protein, omega-3 fatty acids, and essential vitamins and minerals. Paired with fresh vegetables and herbs, Mediterranean Seafood Stew not only satisfies the palate but also nourishes the body, making it an excellent option for those seeking a balanced meal.

Socially, this stew has significant entertaining value. It’s a dish that naturally encourages sharing and conversation, making it the perfect centerpiece for dinner parties or family gatherings. Neighbors and friends will appreciate your culinary efforts, creating a warm and inviting atmosphere where everyone can come together to savor the rich flavors.

Moreover, this Mediterranean dish is cost-effective and accessible. With smart selection of seafood and vegetables, you can create a meal that feels extravagant without breaking the bank. Whether sourcing fish from your local market or opting for frozen options, it’s easy to make this dish truly your own with thoughtful ingredient choices.

Historical Background and Cultural Significance

The origin story of Mediterranean Seafood Stew can be traced back through centuries, deeply rooted in coastal communities that relied on the ocean for sustenance. Historically, fishermen would return from their daily expeditions with the freshest catch, transforming it into simple yet flavorful meals by combining it with readily available local ingredients such as tomatoes, garlic, and herbs.

Culturally, this stew holds importance in various Mediterranean countries, often appearing at family gatherings and festive occasions. Each region has its own twist on the recipe, influenced by the variety of seafood available and the culinary traditions passed down through generations. Whether it’s a Spanish zarzuela or Italian cioppino, each variation tells a story of its locale and the harmonious relationship between the people and the sea.

The evolution of the recipe over time reflects changes in seafood availability, cooking techniques, and flavor preferences. Modern variations may incorporate global influence, experimenting with spices and ingredients that were historically rare in Mediterranean diets, broadening the flavor spectrum and showcasing culinary creativity.

Regional variations abound, highlighting the diversity of the Mediterranean coastline. For instance, a Greek seafood stew may include the famed ouzo for a hint of anise, while a Moroccan blend introduces spices like saffron and cumin, exhibiting the adaptability and rich multicultural heritage of this beloved dish.

Ingredient Deep Dive

The key ingredient of this Mediterranean Seafood Stew is seafood, which varies widely across the Mediterranean region. Fish like cod and snapper are beloved for their mild flavor and flaky texture. These varieties not only taste great but are also rich in omega-3 fatty acids, promoting heart health. When selecting fish, look for fillets that are firm to the touch with a clean, ocean-like smell—these indicate freshness.

Shellfish, including shrimp and clams, add depth to the stew. Shrimp are recognized for their sweet flavor and tender bite, while clams offer a briny punch and unique texture. When purchasing shellfish, ensure they are stored on ice and have tightly closed shells, a sign they are alive and fresh. If you are unable to find specific seafood, feel free to substitute with what is locally available.

Tomatoes, both canned and fresh, are foundational for the stew’s base, providing acidity to balance the seafood’s rich flavors. The use of San Marzano tomatoes in particular can elevate the stew with their sweetness and low acidity. Store ripe tomatoes at room temperature to enhance their flavor, and use high-quality canned varieties for convenience and consistency.

Herbs, such as parsley and dill, not only enhance the stew’s flavor but also contribute to its aromatic appeal. Fresh herbs should be bright and fragrant, while dried herbs can be stored in a cool, dark place to maintain their potency. When seasoning your stew, remember that fresh herbs are typically added towards the end of cooking to retain their flavor, while dried varieties benefit from longer cooking times to release their essence.

Common Mistakes to Avoid

  • Using frozen seafood that is improperly thawed – Always thaw seafood in the refrigerator overnight; microwaving can alter texture and flavor.
  • Overcooking seafood – Seafood cooks quickly; watch closely to avoid a rubbery texture.
  • Under-seasoning the broth – Season gradually to build depth of flavor; seafood can be bland without enough seasoning.
  • Not using fresh ingredients – Fresh seafood and herbs significantly enhance the dish’s overall quality and taste.
  • Adding all ingredients at once – Introduce seafood at different times for optimal doneness and texture variation.
  • Ignoring aromatics – Sautéing garlic and onions at the beginning creates a flavor foundation for your stew.
  • Using low-quality canned tomatoes – High-quality canned tomatoes can make a difference in taste; opt for San Marzano varieties.
  • Skipping the resting time – Letting the stew rest for a few minutes after cooking allows flavors to meld.
  • Choosing the wrong pot – A heavy-bottomed pot or Dutch oven distributes heat evenly, essential for simmering.
  • Failing to taste and adjust – Taste your stew as it cooks; small adjustments in seasoning can elevate the entire dish.

Essential Techniques

Sautéing aromatics is a fundamental technique in creating Mediterranean Seafood Stew. Sautéing garlic and onions until fragrant lays the groundwork for a flavorful broth. To master this technique, use medium heat and avoid browning the garlic too much, as it can lead to bitterness. A visual cue of success is when the garlic turns golden and the onions are translucent.

Layering flavors is crucial for the stew’s success. Start with sautéed aromatics, adding tomatoes, and other ingredients gradually. This method allows each ingredient’s flavors to develop fully. A key pitfall is adding everything at once, which can dilute flavors and lead to uneven cooking. Taste as you go and adjust seasoning accordingly for a harmonious blend.

Cooking seafood requires attention and precision. Seafood should be added in stages according to cooking time; delicate fish cooks faster than sturdy shellfish like clams. Look for solids that turn opaque or firm to the touch as indicators of doneness. A common mistake is overcooking, which can quickly turn tender seafood into rubbery bites.

Pro Tips for Perfect Mediterranean Seafood Stew

1. Always source the freshest seafood, ideally from local fish markets. Ask about the day’s catch for the best flavor and quality.
2. Use homemade seafood stock if possible; it amplifies the overall taste and richness of the stew.
3. Adjust the level of heat and spices to your preference—don’t hesitate to add a pinch of chili flakes for a spicy kick!
4. Incorporate seasonal vegetables or herbs to enhance both flavor and nutrition, reflecting the season’s bounty.
5. To save time, prep all ingredients before starting to cook; this streamlines the process and allows for a smoother cooking experience.
6. Use a lid on your pot while simmering to create a steamy environment that helps the seafood cook evenly.
7. Garnish with fresh lemon and herbs right before serving for a pop of brightness that complements the dish beautifully.
8. Pair with crusty bread or a side salad to create a well-rounded meal that everyone will enjoy.

Variations and Adaptations

Mediterranean Seafood Stew offers endless possibilities for regional variations. In the Spanish version, add spicy chorizo for an added depth of flavor. Rare variations like a Thai-inspired stew use coconut milk and lemongrass to create a unique twist that embraces tropical elements.

Seasonal adaptations are equally delightful—consider incorporating spring vegetables like asparagus and peas in late spring or root vegetables during colder months for warmth and sustenance. You can opt for hearty winter fish, ensuring the ingredients reflect what is freshest and appropriate for the season.

Dietary modifications can make this stew inclusive of various preferences. For a vegan version, replace seafood with plant-based protein options, such as tofu or jackfruit, combined with vibrant vegetables. Additionally, those on a low-carb journey can skip traditional grains and serve the stew over zoodles or cauliflower rice for a healthier approach.

The establishment of flavor variations can involve experimenting with spices; adding saffron for a luxurious touch or utilizing a pinch of smoked paprika can transform the dish altogether. For texture modifications, adjusting the cooking technique by grilling or broiling seafood separately before adding it to the stew enhances the variety including crunchiness.

In terms of presentation, serving in individual bowls with a side of crusty bread looks aesthetically pleasing. Drizzling a touch of high-quality olive oil over the top right before serving adds to the visual appeal while enhancing the final flavor.

Serving and Presentation Guide

When it comes to plating your Mediterranean Seafood Stew, opt for a shallow, wide bowl to showcase the gorgeous colors and textures of the seafood. Start by ladling the stew into the bowl, arranging the seafood artistically for visual interest. You can use a large spoon to gently position the seafood prominently for a more inviting presentation.

Garnishing is essential—it adds freshness and a pop of color. Add a sprinkle of fresh parsley, a few lemon wedges, or a drizzle of balsamic reduction for a culinary touch that guests will appreciate. Traditional accompaniments such as crusty bread or a light salad can complement the stew beautifully, enhancing the overall experience.

Consider serving the stew at a temperature that is warm to hot but not boiling. This ensures enjoyable eating without scalding your guests. For portion control, consider the composition of seafood and broth; a standard serving should ensure your guests enjoy ample seafood while not being overwhelmed by broth.

Wine and Beverage Pairing

When selecting a wine pairing for Mediterranean Seafood Stew, a crisp white wine like Sauvignon Blanc or a dry rosé works exceptionally well. Both options enhance the seafood’s natural flavors without overpowering them, offering a refreshing contrast to the dish’s richness. Serve chilled to further elevate the dining experience.

For non-alcoholic alternatives, consider a sparkling water infused with lemon or rosemary, providing a refreshing palate cleanser between bites. If coffee or tea is preferred, a light herbal tea can complement the stew nicely, providing warmth and a gentle finish to the meal.

Ensure your chosen beverages are served at the appropriate temperature to enhance their flavor; white wines should be chilled, while non-alcoholic options should be crisp and refreshing.

Storage and Shelf Life

Proper storage is crucial for maintaining the quality and flavor of Mediterranean Seafood Stew. After cooking, it should be cooled down to room temperature and stored in an airtight container. It can be kept in the refrigerator for up to three days, allowing you to enjoy leftovers while preserving freshness.

If you plan on freezing the stew, use freezer-safe containers to store portions for later use. Ideally, consume frozen stews within three months to enjoy optimal flavor. When reheating, ensure the stew is thoroughly warmed on the stove to a temperature of 165°F, ensuring food safety and the best tasting experience.

Look out for signs of spoilage, such as off-odors or significant texture changes; if unsure, it’s best to err on the side of caution and discard any questionable leftovers.

Make Ahead Strategies

To make Mediterranean Seafood Stew ahead of time, prepare the base of the stew by sautéing the aromatics and simmering the broth without adding seafood. Cool the base, store it in the fridge, and when you’re ready to serve, add fresh seafood for quick cooking—this method enhances flavors while minimizing prep time on the day of serving.

Consider prepping fresh vegetables and herbs in advance—chop and store separately in linked containers to ensure they maintain freshness. When it’s time for cooking, everything is at your fingertips, allowing for stress-free assembly.

Quality is key; do not add seafood until the stewing process is ready to begin, as seafood can spoil quickly. This strategy ensures that seafood retains its original taste and texture, avoiding overcooking.

Scaling Instructions

Halving the recipe requires simply dividing the ingredient amounts by two, ensuring the final flavor balance remains intact. For each serving size, adjust quantities accurately, while maintaining the same cooking duration.

Doubling or tripling the recipe for gatherings may require additional cooking vessels or batches to prevent overcrowding in the pot. Monitor timing as increased amounts can require slightly longer cooking continuous monitoring for even cooking.

Ensure you account for the size of your storage containers when scaling up. Larger quantities may need separate storage, keeping the same standards for proper temperature and cooling practices for food safety.

Nutritional Deep Dive

Mediterranean Seafood Stew boasts a balanced nutritional profile. The macro breakdown indicates that seafood provides lean protein, critical for muscle building and repair, while the inclusion of healthy fats supports heart health. Carbohydrates from veggies offer essential energy, while the low-calorie content promotes weight management.

Micronutrient analysis highlights a wealth of vitamins and minerals; seafood is rich in vitamin D and B vitamins that benefit overall health. The tomatoes enhance the dish with antioxidants like lycopene, known for promoting cellular health.

Health benefits extend beyond nutritional value; flexibility in ingredient selection allows for strict dietary consideration with gluten-free, dairy-free, or keto-friendly options. This adaptability enhances accessibility for individuals seeking diverse dietary needs.

Lastly, consider portion analysis; an average serving can yield a satisfying meal with beneficial nutrients, enhancing digestibility and giving the body essential energy without a heavy feeling. This stew is an excellent option for a light yet hearty dinner.

Dietary Adaptations

For a gluten-free version of Mediterranean Seafood Stew, simply ensure all ingredients are verified gluten-free, including potential thickeners or marinades. Utilizing fresh herbs and spices without additives maintains the dish’s authenticity.

Dairy-free adaptations require replacing any dairy-based components—like butter or cream—with olive oil or coconut milk, ensuring the essence of the stew remains intact while catering to dairy-free diets.

Individuals following a vegan diet can replace seafood with hearty vegetables, tofu, or chickpeas to maintain a satisfying texture and protein content. This adjustment allows preserving the delicious broth enriched with nutritional benefits.

Low-carb and keto adjustments can be easily made by omitting starchy vegetables and grains, enhancing the recipe with more non-starchy options such as zucchini or cauliflower. This provides an equally delightful experience without added carbs.

For paleo dieters, ensure all ingredients adhere to the diet’s guidelines; opting for freshly sourced seafood and vegetables can result in a wholesome option that aligns with the paleo lifestyle.

Troubleshooting Guide

If you encounter texture issues, such as rubbery seafood, consider the cooking duration; seafood should be cooked just until tender. If this happens, it would imply an overcooking mistake occurred.

Flavor balance concerns can arise if the stew is too bland—gradually adjusting seasoning can elevate it. Use fresh herbs and a splash of lemon juice to brighten flavors.

Temperature problems typically stem from unmonitored simmering; ensuring a steady, gentle simmer prevents ingredients from overcooking. Conversely, if the stew is simmered too low, it may require extended cooking time.

Equipment challenges, such as a pot that does not distribute heat evenly, may lead to uneven cooking of seafood; employ a heavy-bottomed pot for better results.

Timing concerns on multi-tasking during prep can often interfere; organizing a timeline for all ingredients helps streamline the cooking process without added stress.

Recipe Success Stories

Community feedback emphasizes how Mediterranean Seafood Stew has brightened family gatherings, with many expressing delight in the ability to modify classic recipes to suit their preferences or dietary needs. Readers have shared variations that enriched their experiences, showcasing personal touches that made the recipe unique.

Many have reported success in casserole-style presentations that take the stew to another level, highlighting the flexibility of serving, whether in individual bowls or sharing platters. Suggestions to incorporate various regional seafood have introduced exciting gastronomical experiences to traditional gatherings.

Readers often recommended thoughtful photography tips to capture the stew’s vibrant colors, emphasizing the beauty of fresh ingredients and presentation flair, while requesting feedback to encourage community engagement.

These success stories showcase not only how the recipe has inspired home cooks but also created a collaborative atmosphere where diverse culinary practices were celebrated and exchanged.

Frequently Asked Questions

Q: Can I use frozen seafood for this stew?

A: Yes, you can use frozen seafood, but ensure it is properly thawed before cooking. Overnight thawing in the refrigerator is recommended to maintain texture and flavor.

Q: What can I substitute if I can’t find fresh tomatoes?

A: Canned San Marzano tomatoes are an excellent substitute and will provide similar flavor and acidity to the stew.

Q: How long can leftovers be stored?

A: Leftovers can be stored in an airtight container in the refrigerator for up to three days. Be sure to reheat thoroughly before consuming.

Q: Is it possible to make this stew in advance?

A: Yes, prepare the broth and vegetables ahead of time, adding fresh seafood just before serving for the best texture and flavor.

Q: Can I make this stew vegetarian or vegan?

A: Absolutely! Replace the seafood with hearty vegetables or tofu and use vegetable broth for a compelling vegetarian or vegan dish.

Q: How do I know when the seafood is done cooking?

A: Seafood is cooked when it turns opaque and firm to the touch. Shrimp should also display a pink color when properly cooked.

Q: Can I add different types of seafood?

A: Yes, feel free to experiment with your favorite seafood choices based on availability or personal preference!

Q: What should I serve with Mediterranean Seafood Stew?

A: This stew pairs excellently with crusty bread, a light salad, or even over grains like rice or couscous.

Q: How can I enhance the flavor of the stew?

A: Using high-quality canned tomatoes, fresh herbs, and an appropriate amount of seasoning will significantly enhance the stew’s flavor.

Q: Is there a specific type of wine that pairs well with this dish?

A: Crisp white wines like Sauvignon Blanc or dry rosé pair perfectly with Mediterranean Seafood Stew, enhancing the seafood flavors.

Additional Resources

If you’re eager to explore more, check out related recipes such as a classic Bouillabaisse, a light Mediterranean salad, or easy garlic bread to complement your meal. Consider technique guides for mastering seafood cooking or a deeper dive into ingredient information to explore the benefits of various vegetables and herbs.

For those curious about equipment recommendations, look into investing in quality cookware that can withstand prolonged use for a seamless cooking experience. Seasonal variations in the recipe can offer fresh takes as well, allowing you to experience new flavors all year round.

Join the Conversation

Share your cooking experience on social media, and don’t forget to use a specific hashtag to connect with fellow enthusiasts. Engaging with our community through reviews and recipe recommendations can foster creativity and innovation in your cooking journey, encouraging cooking adventure stories.

Exchange photography tips for capturing that perfect Instagram shot of your Mediterranean Seafood Stew, and feel free to suggest your favorite ingredient substitutions or variations. Embracing a collaborative spirit invites creativity, where everyone can enjoy the richness of Mediterranean cuisine together.

The Recipe

Mediterranean Seafood Stew

Serves: 4 servings

Prep Time: 30 mins

Cook Time: 50 mins

Total Time: 80 mins

Kitchen Equipment Needed

  • Large pot or Dutch oven
  • Chopping board
  • Sharp knife
  • Measuring cups and spoons
  • Serving bowl

Ingredients

  • 1 lb shrimp, peeled and deveined
  • 1 lb fish fillets (cod or snapper preferred)
  • 1 lb clams, cleaned
  • 4 cups ripe tomatoes, chopped or canned
  • 1 onion, finely chopped
  • 4 cloves garlic, minced
  • 2 cups vegetable or seafood broth
  • 1 cup dry white wine
  • 2 tablespoons olive oil
  • 1 teaspoon dried oregano
  • ½ teaspoon red pepper flakes
  • Salt and pepper to taste
  • Fresh parsley, for garnish
  • Lemon wedges, for serving

Directions

  1. Heat olive oil in a large pot over medium heat. Add chopped onions and sauté until transparent, about 5 minutes.
  2. Stir in minced garlic and cook for another minute until fragrant.
  3. Add chopped tomatoes, broth, and white wine to the pot. Bring to a gentle simmer.
  4. Season with oregano, red pepper flakes, salt, and pepper. Let simmer for 20-25 minutes, allowing the flavors to meld.
  5. Add clams to the pot first and cover, cooking until they start to open, about 5 minutes.
  6. Add shrimp and fish fillets, stirring gently to combine. Cover and cook for an additional 5-7 minutes or until seafood is fully cooked.
  7. Remove from heat and let stand for a few minutes before serving.
  8. Garnish with fresh parsley and serve with lemon wedges.

Recipe Notes

  • For a more robust flavor, consider adding saffron or smoked paprika to the broth.
  • Feel free to substitute seafood based on availability or preference.
  • This stew can be easily doubled for larger gatherings.
  • Serve with crusty bread for a delightful dip into the rich broth.