Delicious Strawberry Cheesecake Dump Cake: Easy Recipe to Try

Strawberry Cheesecake Dump Cake: A Simple Delight

⚖️
Difficulty
Easy

⏲️
Prep Time
15 mins

🕒
Cook Time
45 mins

⏱️
Total Time
60 mins

🍽️
Servings
8 servings

Indulging in a slice of Strawberry Cheesecake Dump Cake is like biting into a sweet slice of summer. This delightful dessert combines succulent strawberries with a creamy cheesecake layer, all enveloped in a crumbly cake. It’s easy to make and perfect for gatherings, parties, or simply treating yourself after a long day. With minimal preparation and bake time, this recipe is great for anyone looking to whip up a decadent dessert without the fuss.

The beauty of this Strawberry Cheesecake Dump Cake lies not only in its flavor but also in its texture. The moistness of freshly baked cake contrasts perfectly with the luscious creaminess of cheesecake and the burst of freshness from sweet strawberries. Each forkful is a harmonious blend of indulgence and comfort, making it a favorite in many homes. Whether served warm with a scoop of vanilla ice cream or chilled with whipped cream, this dessert always hits the mark!

Quick Recipe Highlights

  • Flavor Profile: This cake features a delightful mix of sweet strawberries complemented by a rich cheesecake flavor, balanced with vanilla notes. Each bite offers a perfect sweetness that is not overpowering.
  • Texture: Expect a delightful contrast between a buttery cake layer, soft creamy cheese, and juicy strawberry pieces. It offers a tender and moist mouthfeel that melts in your mouth.
  • Aroma: The cake emits a comforting aroma filled with the scent of fresh strawberries combined with hints of vanilla and buttery goodness that will have everyone craving a taste.
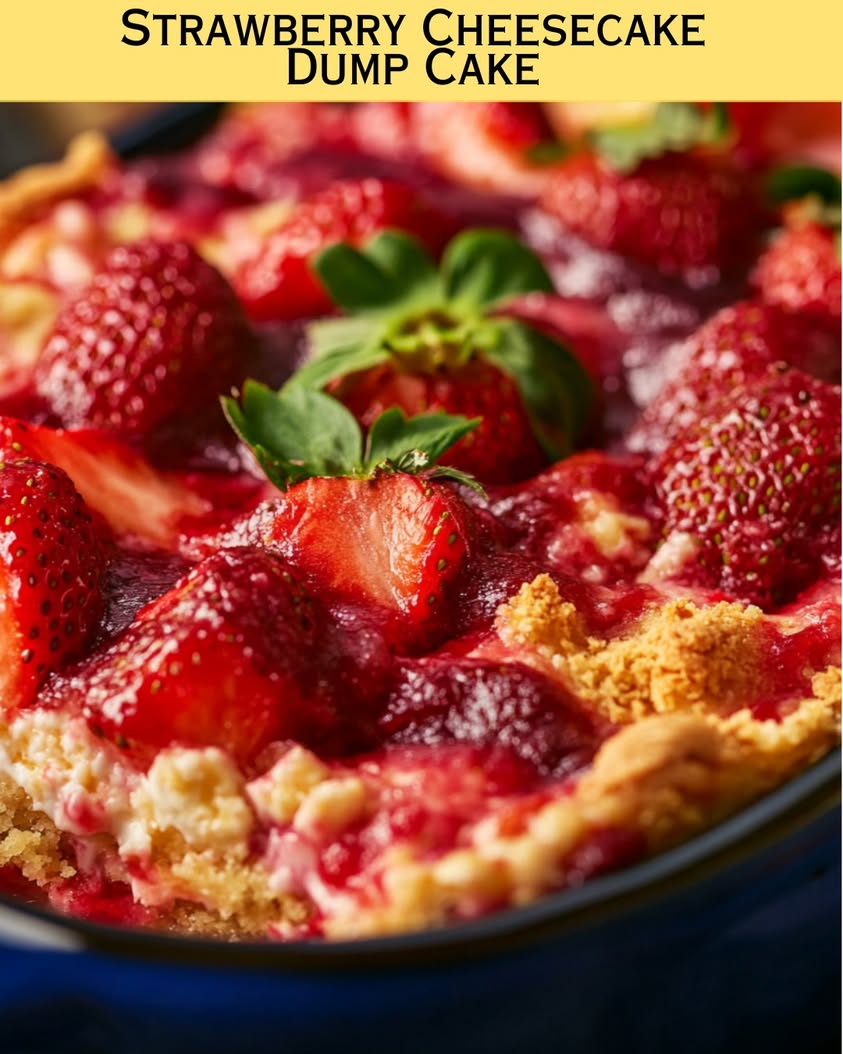
  • Visual Appeal: Layered presentation with vibrant red strawberries atop a creamy white cheesecake layer, all on a pale golden cake base, guarantees a show-stopping dessert that is as beautiful as it is delicious.
  • Skill Level Needed: This is a beginner-friendly recipe that requires little more than mixing and baking, making it accessible for cooks of all skill levels.
  • Special Equipment: You’ll need standard baking tools, including a mixing bowl, measuring cups, a spoon, and a baking dish. No fancy gadgets required!

Recipe Overview

  • Difficulty Level: This Strawberry Cheesecake Dump Cake is classified as easy, making it suitable for novice bakers. With clear instructions and minimal steps, success is almost guaranteed!
  • Category: This recipe fits perfectly into the dessert category, ideal for satisfying sweet cravings after dinner or as a delightful treat at brunch.
  • Cuisine: Inspired by American dessert traditions, this cake evokes the flavors of classic cheesecake combined with playful modern twists, making it a beloved choice for many.
  • Cost: Making this cake is budget-friendly; utilizing seasonal strawberries alongside staple pantry ingredients ensures you can whip it up without breaking the bank!
  • Season: Best enjoyed in the spring and summer when strawberries are ripe, fresh, and full of flavor, allowing you to highlight the fruit at its peak.
  • Occasion: This delightful dessert is fantastic for celebrations, family gatherings, picnics, or any occasion where you want to impress with minimal effort.

Why You’ll Love This Recipe

The first bite of this Strawberry Cheesecake Dump Cake immediately captures the essence of summer. The sweet, fresh strawberries create a burst of flavor that beautifully complements the rich creaminess of the cheesecake layer nestled beneath the golden cake. The perfect balance of textures provides a satisfying experience, where every forkful combines soft cake, creamy cheese, and juicy fruit. It’s a crowd-pleaser that will leave your guests wanting more.

The convenience of this recipe is another reason to love it. With just a handful of ingredients, you can quickly throw everything together and pop it in the oven. No complex techniques or extensive prep work is required; simply mix and bake. This makes it ideal for busy days or unexpected guests, ensuring that dessert is always just an hour away.

Nutritionally, while it’s still a treat, the inclusion of strawberries offers some health benefits. Strawberries are packed with antioxidants, vitamins, and fiber. This means you can enjoy your dessert while sneaking in a bit of health consciousness. It’s a delightful way to satisfy cravings without feeling entirely guilty!

Socially, this Strawberry Cheesecake Dump Cake serves as a perfect centerpiece for gatherings. The way it combines familiar flavors makes it approachable and loved by all ages. Whether it’s a birthday, family reunion, or casual get-together, serving this cake creates an inviting atmosphere encouraging conversation and enjoyment among friends and family.

Lastly, the cost-effectiveness of this recipe means it’s accessible to everyone. Using simple, readily available ingredients, you can create something genuinely impressive without the need for expensive or hard-to-find items. This ease of accessibility encourages home baking, inspiring many to get into the kitchen and create delicious desserts.

Historical Background and Cultural Significance

The origins of cheesecakes can be traced back to ancient Greece and Rome, showcasing a long-standing history of creamy, rich desserts. Over the years, the cheesecake evolved into various forms, especially within American cuisine, where it became a staple dessert at celebrations and family gatherings. The Strawberry Cheesecake variant reflects regional fruit availability, making it a cherished summer dessert in many households.

Cheesecake’s cultural importance runs deep as it represents comfort food and celebration. In many families, cheesecake has been passed down through generations, adapting to individual tastes and regional differences. The addition of strawberries not only enhances the flavor but also signifies the joy of summer harvests, connecting the dessert to seasonal celebrations.

As recipes transitioned through time, the dump cake style emerged in the 1970s, simplifying the baking process by allowing all ingredients to be mixed in without separate layers. The Strawberry Cheesecake Dump Cake is a modern evolution that pays homage to traditional flavors while promoting simplicity in preparation.

Regional variations are abundant with this cake, where local fruits and flavor profiles often influence the recipe. Each takes on a unique flair, yet the central theme of cake and cheesecake remains steadfast. This variation keeps the dessert lively, encouraging experimentation in flavors.

Ingredient Deep Dive

**Strawberries:** Strawberries hold a special place in various cultures throughout history, often symbolizing love and passion. Their nutritional benefits include high levels of vitamin C, manganese, and antioxidants which contribute to overall health. When selecting strawberries, look for firm, bright red berries without any dark spots. To store, keep them refrigerated in a breathable container, and use them within a few days for the best flavor. If fresh strawberries aren’t available, frozen ones can be used as a substitute.

**Cream Cheese:** Cream cheese has a rich history, dating back to the 19th century, where it started as a creamy cheese alternative. Rich in fat and creamy goodness, it’s a staple in many desserts. When choosing cream cheese, opt for full-fat versions for the best flavor and texture. Store it in its original packaging and keep it refrigerated. If you’re looking for a lighter version, Neufchâtel cheese can serve as a suitable alternative.

**Cake Mix:** Using cake mix simplifies dessert preparation, allowing for a quick mix-and-bake option. This ingredient originated in the mid-20th century, revolutionizing home baking by offering convenience and consistency. For the best results, check the expiration date and avoid mixes with additives or preservatives. You can make your own cake mix by combining flour, sugar, baking powder, and salt if you prefer a homemade touch.

**Butter:** Butter not only enhances flavor and texture in baking but also boasts a rich culinary history. Full of key nutrients and high in saturated fats, it’s important to use high-quality butter for the best results. When selecting butter, choose unsalted for baking to control the salt levels. Store wrapped in the refrigerator or freeze for longer shelf life, ensuring it’s at room temperature before use for better mixing.

Common Mistakes to Avoid

  • Using cold ingredients: It’s essential to bring your cream cheese and eggs to room temperature for a smooth batter. Cold ingredients can cause lumps in your mixture.
  • Not preheating the oven: Starting with a preheated oven ensures consistent baking temperatures. Skipping this step often leads to uneven cooking.
  • Overmixing the batter: Mixing too much can result in a dense cake. Gently mix until just combined for a light and airy texture.
  • Forgetting to grease the baking dish: This could lead to a sticky disaster that makes serving challenging. Properly greasing ensures clean serving.
  • Using stale or expired ingredients: Always check the expiration dates on your cake mix and cream cheese to avoid off-flavors.
  • Not adjusting baking time for altitude: If you’re baking at a higher altitude, recognize that your baking times and temperatures may need adjustment.
  • Ignoring the importance of cooling: Allowing the cake to cool properly before slicing is critical for optimal texture and flavor.
  • Skipping garnishes: A simple dusting of powdered sugar or some fresh strawberries on top enhances visual appeal and elevates the dessert.

Essential Techniques

**Mixing:** Proper mixing is vital to achieving the right texture and flavor in your Strawberry Cheesecake Dump Cake. To master this, blend ingredients until just combined; overmixing can lead to a gummy texture. Look for visual cues such as a smooth batter without visible lumps for success.

**Baking:** Understanding the baking process ensures an even rise and a perfect bake. It’s important to monitor the cooking time and check for doneness using a toothpick. When it comes out clean, the cake is ready! Avoid opening the oven door too frequently to prevent temperature drops.

**Cooling:** Allow your cake to cool in the pan for a bit before transferring it to a wire rack. This cooling time helps the flavors meld and improves texture. Be cautious of removing the cake too soon, as it can result in crumbling or collapsing.

Pro Tips for Perfect Strawberry Cheesecake Dump Cake

1. Use fresh, ripe strawberries for the best flavor and sweetness; frozen strawberries will work but may alter the texture slightly.
2. For an elevated cream cheese flavor, add a bit of lemon zest to the batter. This will brighten up the dish beautifully!
3. Allow your ingredients to come to room temperature for smoother mixing and a creamier texture.
4. If you want to make it ahead, prepare the cake the day before, let it cool, and keep it in the refrigerator overnight.
5. For added crunch, sprinkle crushed graham crackers on top before serving, mimicking a traditional cheesecake crust.
6. Drizzle a bit of chocolate or caramel sauce over the top for a decadent finishing touch.
7. Experiment with different flavored cake mixes, such as vanilla or lemon, for unique takes on the dessert.
8. Always taste the batter before baking! Adjust sweetness as necessary according to your personal preference.

Variations and Adaptations

There are endless possibilities when it comes to adapting the Strawberry Cheesecake Dump Cake. Consider substituting strawberries with other fruits such as blueberries, raspberries, or peaches, allowing you to enjoy different flavors throughout the seasons. Each fruit brings its unique sweetness, leading to delightful variations.

For seasonal adaptations, incorporate spices like cinnamon or nutmeg in the fall to introduce warm flavors or even consider a pumpkin cheesecake dump variant. When it comes to dietary modifications, you can easily make this dessert gluten-free by using a gluten-free cake mix or substitutions to fit a low-carb or keto-friendly diet using alternative sweeteners.

Flavor variations can also include adding extracts such as almond or coconut for a more complex flavor profile. For a vibrant presentation, try adding layers of whipped cream or toasted coconut on top. Lastly, choose presentation alternatives, such as individual mini Dump Cakes baked in jars for a fun, personal touch for your gatherings.

Serving and Presentation Guide

Plating techniques for your Strawberry Cheesecake Dump Cake can significantly enhance its appeal. Consider serving it in individual portions or a larger slice on a colorful plate for a beautiful display. Garnishing is essential; fresh strawberries, whipped cream, or mint sprigs can add color and freshness, making your dessert visually stunning.

Traditional accompaniments include a scoop of vanilla ice cream or a dollop of whipped cream to elevate the flavor. For modern suggestions, consider drizzling warm chocolate or caramel sauce over the top before serving. This adds sweetness and a touch of indulgence.

Temperature considerations are important; serve warm for extra gooeyness or chilled for a refreshing treat, depending on your preference. For portion control, consider slicing the cake into smaller pieces, allowing guests to enjoy a taste without feeling overwhelmed.

Wine and Beverage Pairing

Pairing wine with your Strawberry Cheesecake Dump Cake can take your dessert experience to the next level. A light, sparkling Moscato complements the rich creaminess and sweet strawberries perfectly, enhancing the dessert’s bright flavors. Alternatively, a Rosé offers a lovely contrast with fruity notes that balance the sweetness.

For non-alcoholic options, consider serving a refreshing iced tea or lemonade with a hint of mint. These beverages offer a great contrast to the rich dessert without overwhelming the palate. If you’re a coffee enthusiast, a medium roast coffee pairs beautifully, providing a robust counterbalance to the sweetness of the cake.

Serving temperatures for wine should be chilled, allowing brightness to shine, while beverages like coffee can be enjoyed hot or iced according to preference, creating perfect pairing opportunities.

Storage and Shelf Life

To properly store your Strawberry Cheesecake Dump Cake, keep it covered in the refrigerator to maintain freshness and moisture levels. It can last up to four to five days in the fridge, but it’s best enjoyed fresh. For longer storage, consider freezing portions in an airtight container for up to three months.

When freezing, make sure the cake is cooled completely and wrapped securely to prevent freezer burn. Thaw in the refrigerator overnight when you’re ready to enjoy it again. Signs of spoilage include an off-smell, mold, or drastic changes in texture, so always check before consumption.

For reheating, gently warm individual slices in the microwave for about 20-30 seconds or in the oven. If frozen, allow to thaw before reheating for the best results.

Make Ahead Strategies

To save time, consider making your Strawberry Cheesecake Dump Cake ahead of time. You can prepare it a day in advance and store it in the refrigerator, which allows the flavors to meld beautifully. For the best texture and flavors, assemble the cake during baking and let it cool overnight before serving.

If you’re looking to break down the steps, you can prepare the fruit and cheesecake mix a day early, storing them separately in the refrigerator. Assemble just before cooking for fresher textures.

Quality is key; ensure all elements are fresh before assembly, as this impacts the final tastes and textures. When reheating, add fresh elements, like whipped cream or mint, to refresh the cake and enhance its presentation.

Scaling Instructions

Scaling the Strawberry Cheesecake Dump Cake is easy! If you wish to halve the recipe, simply divide each ingredient by two and use a smaller baking dish. Adjust timing accordingly as the smaller bake may require less time in the oven.

If doubling or tripling the recipe, ensure you have a larger baking dish to accommodate the extra volume. Monitor cooking times closely, as larger cakes typically take longer to bake. Always check for doneness using the toothpick test.

When scaling, remember to adjust storage considerations; larger cakes may require different containers for proper storage. Always write down your adjustments for future reference to streamline the process.

Nutritional Deep Dive

A macro breakdown of your Strawberry Cheesecake Dump Cake includes carbohydrates from the cake mix and sugars from the strawberries, making it a sweet indulgence. With approximately 350-400 calories per slice, it’s essential to enjoy this dessert in moderation, especially if you’re watching your energy intake.

Micronutrient analysis shows that strawberries provide vital vitamins C and K, making the dish not only delicious but slightly nutritious. Dairy from the cream cheese adds calcium, though high fat content means moderation is key in diets focused on heart health.

In terms of health benefits, this dessert can provide mental satisfaction and pleasure with its sweet flavors, beneficial for overall well-being. However, portion analysis is crucial; understanding serving sizes helps maintain a balanced approach to indulgence.

For weight management, consider balancing a slice of this cake with a healthy meal or exercise, allowing for indulgence without negatively impacting dietary goals.

Dietary Adaptations

For those following specific diets, the Strawberry Cheesecake Dump Cake can easily be modified. A gluten-free version can be achieved with gluten-free cake mix, ensuring everyone can enjoy it. For a dairy-free alternative, consider using cashew cream cheese and plant-based butter, both delicious substitutes.

Vegans can also enjoy this treat by using flax eggs or applesauce instead of eggs and ensuring all other ingredients are plant-based. Those on low-carb or keto diets can switch to low-carb cake mixes and sweeteners to indulge without the carbs.

If you’re looking to adapt for a paleo diet, utilize almond flour for the cake base and raw honey or maple syrup as sweeteners, adjusting taste and health benefits. Lastly, for low-FODMAP considerations, be cautious with fruit types and quantities to suit dietary restrictions.

Troubleshooting Guide

If your Strawberry Cheesecake Dump Cake has texture issues, it could result from overmixing or incorrect ingredient temperatures. To solve this, ensure ingredients are at room temperature, and mix just until combined.

Flavor balance can be an issue; if it’s too sweet, incorporate a pinch of salt to enhance flavors and bring out the sweetness. If the cake is overly dense, check your baking time and ensure the baking powder wasn’t expired.

Temperature problems typically arise from incorrect oven settings; ensure your thermometer works correctly, and avoid opening the door unnecessarily. For equipment challenges, replace faulty tools, especially in mixing and baking, to achieve optimal results.

If you’re unsure about ingredient substitutions, always perform a taste test! This helps guarantee flavor cohesion throughout the dish. Timing concerns can be remedied by planning and prepping ingredients in advance to fit your schedule.

Recipe Success Stories

Community feedback often highlights the Strawberry Cheesecake Dump Cake’s reliability as a crowd-pleaser. Many share stories of how it has quickly become a go-to recipe for family gatherings, with friends and relatives always requesting it.

Variations of this cake often emerge from readers wanting to try new fruit combinations or flavorings. For example, people have showcased versions with mixed berries or even chocolate swirl variations, leading to delighted responses among their guests.

Adapting the recipe to accommodate food allergies or preferences has proven successful for many. Friends have shared how including gluten-free alternatives allowed them to enjoy this beloved dessert without worry.

Readers suggest adding spices or different toppings inspired their own creativity at home. Photographers showcase stunning images of their finished cakes, inspiring others to try and share their experiences.

Frequently Asked Questions

1. Can I use frozen strawberries in this recipe? Yes, frozen strawberries can be utilized, but they may alter the texture slightly. Ensure they’re fully thawed and drained before use to avoid excess moisture in the batter.

2. How should I serve the cake? The Strawberry Cheesecake Dump Cake can be served warm or chilled. Top with whipped cream or vanilla ice cream for a delightful contrast to the creamy cake!

3. Can I make this dessert ahead of time? Absolutely! You can prepare it a day in advance, and it will taste even better after resting in the fridge overnight. Just ensure it’s covered well to retain moisture.

4. Is there a gluten-free option? Yes! Simply use a gluten-free cake mix to make this cake accessible to those with gluten sensitivities. Make sure to check all other ingredients as well.

5. How long can I store leftover cake? The cake can be stored in the refrigerator for about 4-5 days when kept covered. For longer storage, consider freezing portions for up to three months.

6. What can I substitute for cream cheese? You can use dairy-free cream cheese or even Greek yogurt. For a lighter flavor, consider a mascarpone cheese, but keep in mind the taste will vary.

7. Can I use different fruits? Yes! You can easily swap strawberries for blueberries, raspberries, or peaches, depending on the season and your preference, allowing for a unique dessert each time.

8. What if my cake comes out too dense? A dense cake could be a result of overmixing. Always mix until just combined and ensure you’re using fresh baking powder for the best rise.

9. Could I use a different type of cake mix? Certainly! Vanilla, lemon, or even chocolate cake mix can provide exciting twists while maintaining the lush cheesecake layers.

10. What’s the best way to reheat leftovers? For the best results, gently reheat individual slices in the microwave for 20-30 seconds or in the oven at low temperature until warmed through.

Additional Resources

If you enjoyed the Strawberry Cheesecake Dump Cake, consider checking out related recipes like No-Bake Cheesecake or Berry Cobbler for similar flavors. Technique guides focusing on baking foundational skills can enhance your culinary abilities further.

For ingredient insights, discover how to choose fresh produce or the benefits of seasonal baking. Equipment recommendations can also guide you in selecting the best tools for this and other recipes. Lastly, explore seasonal variations of similar desserts, integrating fresh, local flavors into your baking adventures.

Join the Conversation

Engage with us by sharing your photos of the Strawberry Cheesecake Dump Cake on social media! We encourage you to explore different variations and adapt the recipe to fit your tastes. Your reviews help others in the community, inspiring newfound creativity in the kitchen.

Explore our dedicated recipe comment section to share your experiences and suggestions. Together, we can build a collection of success stories that showcase the joy of baking and sharing delicious homemade desserts.

The Recipe

Strawberry Cheesecake Dump Cake

Serves: 8 servings

Prep Time: 15 mins

Cook Time: 45 mins

Total Time: 60 mins

Kitchen Equipment Needed

  • Baking dish (9×13 inch)
  • Mixing bowl
  • Measuring cups and spoons
  • Spatula

Ingredients

  • 1 package (15.25 oz) of yellow cake mix
  • 1 package (8 oz) of cream cheese, softened
  • 1 cup of fresh strawberries, sliced
  • ½ cup of unsalted butter, melted
  • 1 cup of sugar
  • ½ cup of milk
  • 1 teaspoon of vanilla extract

Directions

  1. Preheat your oven to 350°F (175°C).
  2. In a mixing bowl, combine the softened cream cheese and sugar until smooth. Stir in milk and vanilla extract.
  3. Spread sliced strawberries evenly in the bottom of a greased 9×13 inch baking dish.
  4. Pour the cream cheese mixture over the strawberries, spreading evenly.
  5. In another bowl, combine the cake mix and melted butter, stirring until crumbly.
  6. Sprinkle the cake mix evenly over the cream cheese layer.
  7. Bake in the preheated oven for 45 minutes, or until the top is golden and bubbly.
  8. Allow to cool slightly before serving. Enjoy warm or chilled!

Recipe Notes

  • Feel free to experiment with other fruits like blueberries or raspberries.
  • This can be made ahead of time and stored in the refrigerator for up to 3 days.
  • Top with whipped cream for an extra layer of delight.

Delicious Creamy Crockpot Chicken: Simple Recipe For Any Night

Creamy Crockpot Chicken: A Comforting Meal for Any Day

⚖️
Difficulty
Easy

⏲️
Prep Time
15 mins

🕒
Cook Time
6 hours

⏱️
Total Time
6 hours 15 mins

🍽️
Servings
4-6

The creamy crockpot chicken is the ultimate comfort food, perfect for any day of the week. This succulent dish relies on the slow cooking method to infuse the chicken with rich flavors, while the creamy sauce elevates the taste to an entirely new level. You’ll find yourself immersed in the delicious aroma that fills your home as this dish simmers, making it impossible to resist coming back for seconds! The combination of tender chicken, spices, and a heavenly sauce creates a delightful experience that not only satiates your hunger but warms your heart as well.

Imagine the sensory delight of the first bite: the chicken is incredibly moist, falling apart with the touch of a fork, drenched in a creamy sauce that boasts hints of garlic and onion. Each mouthful is an exploration of flavors that complement each other beautifully, with the richness of the cream balancing the subtle warmth from black pepper and herbs. The dish is visually appealing too, with the golden chicken pieces glistening in the sauce and surrounded by vibrant vegetables.

Quick Recipe Highlights

  • Flavor Profile: This dish offers an exquisite blend of savory and creamy flavors with hints of garlic and herbs.
  • Texture: The chicken is tender and juicy, while the sauce is smooth and luscious, creating a delightful mouthfeel.
  • Aroma: The aromatic notes of garlic, onion, and herbs release an inviting scent while cooking.
  • Visual Appeal: Served in a rich, creamy sauce, the golden chicken contrasts beautifully with colorful vegetables.
  • Skill Level Needed: Perfect for cooks of all skill levels, from beginners to seasoned chefs.
  • Special Equipment: Simply requires a crockpot and basic kitchen tools like measuring cups and spoons.

Recipe Overview

  • Difficulty Level: This creamy crockpot chicken recipe is easy to prepare, making it accessible to everyone.
  • Category: Ideal for a family dinner, potlucks, or weeknight meals.
  • Cuisine: Rooted in American comfort food traditions, it brings together classic flavors in a modern way.
  • Cost: Budget-friendly, ingredients can be found at most grocery stores without breaking the bank.
  • Season: Great for any season, especially comforting during colder months.
  • Occasion: Perfect for casual family dinners or gatherings with friends.

Why You’ll Love This Recipe

This creamy crockpot chicken dish stands out for its delightful taste and texture appeal. With every bite, you’ll enjoy the tender chicken coupled with a velvety sauce that clings just perfectly. The combination of seasonings not only complements the chicken but also enhances its natural flavors, creating a dish that feels both comforting and gourmet.

One of the key benefits of this recipe is its convenience. Simply toss all the ingredients into the crockpot, set it, and let it cook while you go about your day. There’s something truly liberating about a “set-it-and-forget-it” meal that doesn’t require you to hover over the stove, making it a go-to option for busy weeknights.

Nutritionally, this dish offers protein-rich chicken along with a mix of vegetables, providing a balanced meal that can fit various diets. The creamy sauce can also be lighter or richer based on your preferences, allowing for easy customization without sacrificing taste.

Beyond the simple enjoyment of flavor, this creamy crockpot chicken is a great dish to share. Be it family dinners or casual gatherings with friends, the comforting aroma and delicious taste invite conversation and heartwarming connection, making it a staple at social gatherings.

Lastly, its cost-effectiveness cannot be overstated. With readily available ingredients and minimal prep needed, it’s an affordable meal solution that doesn’t skimp on flavor but satisfies your cravings without stretching your budget.

Historical Background and Cultural Significance

The origins of creamy crockpot chicken can be traced back to traditional American recipes that celebrated comfort food. With the rise of home cooking in the mid-20th century, the crockpot emerged as a popular kitchen appliance, allowing families to prepare hearty meals without extensive prep or cooking time. This method of cooking made it easier for busy households to enjoy quality home-cooked meals.

Culturally, the dish holds significance as it embodies the values of home and family, often found on tables during gatherings and special occasions. The warmth and comfort it provides is reminiscent of home-cooked meals shared with loved ones, reinforcing feelings of nostalgia and togetherness.

As the recipe has evolved over the years, many have begun experimenting with variations, incorporating local seasonings or ingredients to make it reflect regional flavors. This flexibility has contributed to its widespread appeal across different groups.

Regional variations can include the addition of different spices representative of cultural influences, showcasing how adaptable the dish is while still retaining its core attributes of being creamy, comforting, and satisfying.

Ingredient Deep Dive

Chicken is the star of this dish, rich in protein and low in fat, making it a staple in many diets. The history of chicken as a food source can be traced back thousands of years, valued for its versatility and nutritional benefits. When selecting chicken for this recipe, look for fresh, high-quality cuts preferably from a trusted butcher or grocery store. Proper storage in the refrigerator is essential and chicken should ideally be used within 1 to 2 days if fresh, or can be frozen for extended use.

Cream is the uniting ingredient for this dish, adding richness and flavor. Historically, cream has been used in cooking for centuries, especially in European cuisines. For a lighter version, substitute heavy cream with half-and-half or even a dairy-free option like coconut cream. When utilizing cream, ensure it is fresh and stored appropriately to retain its quality.

Herbs and spices bring vibrancy to the dish. Classics like garlic and onion are not only flavorful but also provide numerous health benefits. Garlic has been linked to various health benefits including improved immune function. When choosing herbs, fresh ones are preferred as they tend to have more flavor, but dried herbs can be suitable alternatives if fresh is not available. Store dried herbs in a cool, dark place to maintain their potency.

Vegetables like carrots and peas add brightness and nutrients. Historically, vegetables have been integral in various cuisines as they enhance the overall nutritional value of meals. Select vibrant, crisp vegetables, and store them properly—most can last for several days in the fridge. Consider seasonal vegetables based on the time of year for the freshest taste.

Common Mistakes to Avoid

  • Overcooking the chicken can lead to a dry texture; remember it continues cooking after you turn off the crockpot.
  • Not browning the chicken first can miss out on deepening the flavors; take a few extra minutes to sear it before adding to the pot.
  • Skipping the seasoning will result in a bland dish; always season your ingredients well for maximum flavor impact.
  • Using low-quality ingredients can impact the final taste; sourcing fresh, high-quality ingredients pays off in flavor.
  • Not checking the consistency of the sauce can leave you with either too thick or too runny sauce; make adjustments with broth or cream.
  • Loading too many ingredients can overwhelm the dish; be mindful of ingredient quantities to ensure balanced flavors.
  • Neglecting to sauté aromatics before adding can lead to muted flavors; the sautéing process enhances the taste immensely.
  • Not letting it rest before serving can make it hard to portion; letting it sit allows the sauce to thicken up slightly.
  • Ignoring variations in cooking times due to different crockpot brands; always test for doneness before serving.
  • Failing to taste and adjust seasonings towards the end can lead to unbalanced flavors; always taste and tweak as needed.

Essential Techniques

Searing the chicken before it goes into the crockpot is an impactful technique that enhances the flavor through caramelization. This process not only locks in moisture but also enriches the overall dish. To master the technique, preheat your pan and allow time for the surface to brown, creating a depth of flavor. Common pitfalls include overcrowding the pan which prevents proper browning.

Layering ingredients correctly in the crockpot is crucial for flavor development. Starting with protein on the bottom allows it to absorb spices and juices from above. Master this technique by organizing your ingredients for optimal flavor integration. A common mistake is not accounting for cooking time differences among ingredients, which can lead to uneven cooking.

Monitoring the sauce consistency while cooking is essential for achieving the desired texture. Use a spoon to stir occasionally and flow down the sides of the crockpot to check thickness. Knowing when to add liquid can alter the dish’s success; too little may make it dry, while too much might dilute flavors.

Pro Tips for Perfect Creamy Crockpot Chicken

– For enhanced flavor, marinate the chicken overnight with herbs and spices before cooking.
– Use homemade or high-quality broth instead of water to intensify the sauce.
– Feel free to experiment with varied herbs like thyme or rosemary for additional layers of flavor.
– Incorporate seasonal vegetables to update the recipe, making it fresh each time.
– Monitor the cooking time and adjust based on your crockpot’s efficiency; some cook faster than others.
– Adding a splash of lemon juice before serving can brighten up the flavors.
– For a thicker sauce, remove the lid for the last hour of cooking.
– Serve with crusty bread or over rice to soak up the delicious sauce.

Variations and Adaptations

– Regional variations might include adding ingredients typical to certain cuisines, such as salsa for a twist on flavors.
– Seasonal adaptations allow you to introduce autumn vegetables like butternut squash or root vegetables ensuring freshness.
– Dietary modifications can be easily made; substitute cream with coconut milk for a dairy-free option or use whole grains for a heartier meal.
– Flavor variations can arise by adding spicy peppers or smoked paprika for a different taste profile.
– Texture modifications can be achieved by incorporating different ingredients, such as quinoa or pasta, to create a more substantial hearty meal.
– Presentation alternatives include serving it in a creamy casserole dish topped with fresh herbs for a pop of color.

Serving and Presentation Guide

When plating your creamy crockpot chicken, consider using a large, shallow bowl to display the dish elegantly. Start with a base of the creamy sauce, followed by the chicken pieces arranged nicely on top. Garnish with freshly chopped parsley or chives for a bright touch. Serving suggestions could also include rustic bread or herbed rice, adding a beautiful contrast and complementing flavors.

For garnishing, a sprinkle of freshly grated parmesan can enhance both the look and flavor. The addition of vibrant vegetables not only adds color but also contributes to a more substantial dish. Serve piping hot, ensuring that the rich aroma of the meal wafts across the table, inviting guests to dig in.

Remember temperature considerations; this dish is best enjoyed warm, allowing the flavors to shine. Portion control is vital, especially if serving guests; aim for equal servings of chicken and sauce per dish to maintain balance.

Wine and Beverage Pairing

When it comes to wine pairing for creamy crockpot chicken, a light-bodied white wine like Sauvignon Blanc complements the dish perfectly. Its crispness balances the creaminess while enhancing the herbal notes. For those who prefer red wine, a Pinot Noir provides a nice fruitiness without overwhelming the palate.

If you’re searching for non-alcoholic alternatives, consider pairing the meal with a sparkling water infused with lime or a fresh herbal iced tea. Both options add refreshing flavors that match nicely with the richness of the dish.

For those who enjoy coffee or tea, a light herbal tea or a cappuccino can provide a comforting finish to the meal, enhancing the dining experience.

Storage and Shelf Life

Storing leftover creamy crockpot chicken should be done promptly to ensure safety. Allow the dish to cool, then transfer it to an airtight container and place it in the refrigerator where it can last for 3 to 4 days. For longer storage, consider freezing portions in freezer-safe bags, ensuring to remove excess air.

Proper temperature requirements are crucial; store at or below 40°F to keep the chicken fresh. Signs of spoilage include an off smell, discoloration, or slimy texture—discard any leftovers showing these symptoms.

Reheating instructions suggest warming it gently on the stovetop or microwave, adding a splash of liquid if the sauce thickens too much during storage. If you’re planning to freeze some initially, leave out the cream until you’re ready to reheat for the best texture.

Make Ahead Strategies

Preparing creamy crockpot chicken ahead of time is extremely convenient. You can chop your vegetables and season your chicken a day in advance; store them separately in the refrigerator until you’re ready to cook. This prep timeline allows you to streamline the cooking process on the day you plan to serve it.

Quality impact assessment is essential when preparing ahead. The chicken remains flavorful even when marinated overnight, as this enhances tenderness and integration of spices. Assembly tips include assembling all ingredients in the crockpot the night before and storing it in the fridge; an easy solution for busy days.

When reheating, it’s best to add a little additional seasoning since flavors may mellow during storage. Lastly, consider adding fresh herbs or garnishes just before serving for that fresh taste.

Scaling Instructions

Halving the recipe is straightforward; simply divide all ingredient quantities in half. Adjust the cooking time if necessary, especially if using smaller portions to maintain moisture.

Doubling or tripling the recipe is feasible; if increasing significantly consider using a larger crockpot to ensure even cooking. Keep in mind that larger quantities might require minor timing adjustments, so monitor the chicken’s doneness towards the end of cooking.

Equipment adjustments like using multiple crockpots may be necessary when preparing larger quantities. Storage considerations should also be taken into account; having enough containers to hold entire portions will prevent waste.

Nutritional Deep Dive

This creamy crockpot chicken delivers a good balance of macronutrients, featuring high-quality protein from the chicken and healthy fats from the cream. A standard serving contributes significantly to daily protein requirements while also providing essential amino acids needed for muscle repair and growth.

Regarding micronutrient analysis, this dish boasts high levels of vitamins A and C from added vegetables, essential for immune functionality and skin health. Nutritional benefits extend to supporting heart health and promoting satiety due to its protein and fat content.

Dietary considerations are approachable; by tweaking ingredients, it can fit various diet plans. For those mindful of calorie intake, portion control is an effective strategy as it allows you to enjoy the flavor without excessive caloric consumption. Weight management tips could include opting for leaner cuts of chicken and replacing cream with lighter alternatives without sacrificing taste.

Dietary Adaptations

For those following a gluten-free diet, there’s no need for adjustments, as all ingredients are naturally gluten-free. To make a dairy-free version, substitute cream with coconut milk or a plant-based cream alternative, achieving a rich and creamy end result.

Vegans can modify the recipe using tofu or tempeh instead of chicken, combined with a vegan cream alternative for richness. Low-carb or keto diets can be accommodated by replacing starchy vegetables with non-starchy counterparts, like spinach or zucchini.

Paleo guidelines can be followed by using fresh and unprocessed ingredients, sticking to healthy fats and proteins in the dish. Low-FODMAP adaptations can be made simply by eliminating high-FODMAP ingredients like garlic onions and using garlic-infused oil for flavor.

Troubleshooting Guide

Common texture issues can occur if the chicken becomes mushy during cooking; this can be avoided by ensuring that you don’t cook it overly long or adjust the cooking time as necessary. For flavor balance, if the dish tastes flat, consider adding a touch of acid like lemon juice or vinegar to brighten up the dish.

Temperature problems might arise if the crockpot isn’t working correctly; regularly check the settings and refer to the user manual for troubleshooting tips. If using substitutions for ingredients, taste as you go to prevent mismatched flavors or textures in your dish.

Timing concerns are particularly important; if your schedule is tight, prepare your ingredients ahead and set your crockpot timer for the appropriate cook time to prevent over or under-cooking.

Recipe Success Stories

Our readers have shared wonderful feedback on the creamy crockpot chicken, celebrating its ease and comforting taste. Many have reported that it has become a family favorite, with kids and adults alike eagerly looking forward to it on dinner nights.

Variation successes included adapting the recipe to include different vegetables; readers love how it allows for creativity while following the standard recipe. Recipe photography tips often involve capturing the creamy texture and enticing garnishes, showcasing the dish’s appeal.

Readers also suggested pairing it with various side options, showcasing the dish’s versatility. The community engagement on social media has been heartwarming, with users sharing their versions and replacements, creating a vibrant conversation around the recipe.

Frequently Asked Questions

Can I use frozen chicken in this recipe?

Yes, you can use frozen chicken; however, make sure to cook it for a longer time—around 7 to 8 hours on low to ensure it’s thoroughly cooked and safe to eat.

What can I substitute for cream?

You can substitute cream with cottage cheese, coconut cream, or a dairy-free option like almond milk to maintain a creamy texture without the dairy.

How do I store leftovers?

Leftovers can be stored in an airtight container in the refrigerator for up to 4 days or can be frozen for up to 2 months for future meals.

Can I add other vegetables?

Absolutely! Feel free to add your favorite vegetables such as bell peppers, mushrooms, or broccoli to enrich the flavor and nutritional value.

How do I reheat the creamy crockpot chicken?

Reheat it gently in the microwave or stovetop over low heat, adding a splash of broth or cream to maintain the sauce’s consistency.

Is this recipe kid-friendly?

Yes, this creamy crockpot chicken is very kid-friendly; the flavors are mild, and it’s easy for little ones to enjoy. Just be sure to monitor spice levels if preferred.

Can I make it spicy?

Certainly! Add some chili flakes or diced jalapeños during cooking to introduce a delightful heat appropriate for your family’s tastes.

What goes well with creamy crockpot chicken?

This dish pairs excellently with rice, mashed potatoes, or a warm crusty bread to soak up the delicious sauce.

How long does it take to cook in a high setting?

If you are cooking on the high setting, the creamy crockpot chicken will generally take about 3 to 4 hours, so check for doneness frequently.

Can I make this in advance?

Yes! You can prepare the ingredients the night before and assemble everything in the crockpot in the morning for a delightful dinner later.

Additional Resources

Explore more related recipes such as Tuscan chicken or curry chicken for different flavor experiences. For technique guides, consider checking our slow cooking tips and tricks, which enhance your crockpot skills.

Ingredient information regarding chicken cuts, cream types, and vegetable selections can further increase your culinary repertoire. Lastly, equipment recommendations for upgraded kitchen gear will assist in simplifying your cooking processes, allowing for delicious results every time.

Join the Conversation

Engage with us on social media to share your thoughts about creamy crockpot chicken. We love seeing your personal variations and adaptations that make this dish uniquely yours!

Feel free to leave a recipe review sharing your experiences with the dish, along with any photography tips to help others highlight the creamy goodness. Let’s build a vibrant community together around our love for delicious food and cooking!

The Recipe

Creamy Crockpot Chicken

Serves: 4-6

Prep Time: 15 mins

Cook Time: 6 hours

Total Time: 6 hours 15 mins

Kitchen Equipment Needed

  • Crockpot
  • Skillet
  • Measuring cups and spoons
  • Cutting board
  • Chef’s knife

Ingredients

  • 4 boneless, skinless chicken breasts
  • 1 cup heavy cream
  • 1 cup chicken broth
  • 1 onion, chopped
  • 2 cloves garlic, minced
  • 2 cups carrots, sliced
  • 1 teaspoon dried thyme
  • Salt and pepper to taste

Directions

  1. In a skillet over medium heat, season the chicken breasts with salt, pepper, and thyme, then sear until golden brown, about 3-4 minutes on each side.
  2. Transfer the seared chicken into the crockpot, followed by the chopped onion, garlic, and sliced carrots.
  3. Pour the chicken broth and heavy cream over the top, ensuring all ingredients are covered.
  4. Set the crockpot to low and cook for 6 hours or until the chicken is tender and cooked through.
  5. Once done, shred the chicken in the sauce and stir to combine before serving.

Recipe Notes

  • For a dairy-free version, substitute heavy cream with coconut cream or nut milk.
  • Feel free to add other vegetables like peas or bell peppers during the last hour of cooking.
  • Adjust seasoning according to taste; feel free to experiment with herbs.

Kickstart Your Day with a Nutritious Smoothie Recipe

Kickstart Your Day with a Delicious and Nutritious Smoothie

⚖️
Difficulty
Easy

⏲️
Prep Time
10 mins

🕒
Cook Time
0 mins

⏱️
Total Time
10 mins

🍽️
Servings
2

Who’s ready to kickstart their day with a delicious and nutritious smoothie? This vibrant smoothie not only fuels your body but also tantalizes your taste buds with a delightful blend of fresh fruits and superfoods. Whether you’re rushing out the door or savoring a relaxing morning, this smoothie provides a perfect, on-the-go breakfast or a revitalizing snack. Packed with vitamins and beneficial nutrients, it’s a simple yet incredibly satisfying way to ensure you’re starting your day on the right foot.

Imagine sipping on a cool, creamy concoction that bursts with flavors like ripe bananas, luscious berries, and a touch of honey for sweetness. Each sip is a refreshing experience that leaves you feeling invigorated and ready to tackle the day ahead. With the option to customize with your favorite ingredients, this smoothie can suit any dietary preference while still being quick and easy to prepare.

Quick Recipe Highlights

  • Flavor Profile: The perfect balance of sweet and tart, this smoothie combines the deliciousness of banana and the brightness of berries.
  • Texture: Smooth and creamy, this drink has a luxurious mouthfeel, making it indulgent and satisfying.
  • Aroma: A delightful scent of fresh fruits wafts through the air, enhancing the overall sensory experience.
  • Visual Appeal: The vibrant colors of the various fruits create an eye-catching presentation that’s as pleasing to the eyes as it is to the palate.
  • Skill Level Needed: Anyone can master this smoothie, making it perfect for beginners and expert cooks alike.
  • Special Equipment: All you need is a blender, which makes cleanup a breeze!

Recipe Overview

  • Difficulty Level: This smoothie is incredibly easy to prepare, making it suitable for all skill levels, including novice cooks.
  • Category: This recipe fits perfectly into the breakfast or snack category, providing a great way to incorporate fruits into your diet.
  • Cuisine: While it draws inspiration from various cuisines that celebrate fresh fruits, it is primarily influenced by the health-focused tendencies of modern-day smoothie culture.
  • Cost: The ingredients are typically inexpensive, making this a budget-friendly option for anyone looking to eat healthily.
  • Season: Ideal for all seasons, this smoothie can help cool you down in the summer and provide a burst of vitamins during the colder months.
  • Occasion: Perfect for busy weekday breakfasts, leisurely weekend brunches, or as a mid-afternoon pick-me-up.

Why You’ll Love This Recipe

The taste and texture of this smoothie are simply irresistible. The bananas provide Natural sweetness while the berries add a tartness that balances perfectly. Creamy yogurt or plant-based milk lends a smooth texture, making every sip delightful. This nutrient-packed recipe is not only delicious but also quick and convenient to prepare, taking less than ten minutes from start to finish. With its refreshing flavors and creamy consistency, it’s a guaranteed way to make your mornings brighter.

Convenience is another key advantage of this smoothie. With minimal clean-up and prep time, you won’t waste a moment of your busy day. Just toss your ingredients into the blender, blend until smooth, and you’re ready to enjoy! It’s an incredibly flexible recipe too, allowing you to switch up the fruits based on what you have on hand.

The nutritional advantages are outstanding. Packed with vitamins, antioxidants, and fiber, this smoothie offers a health boost that can enhance your energy and support digestion. Bananas are rich in potassium and fiber, while berries are known for their antioxidant properties, making this smoothie both delicious and beneficial for your overall health.

Socially, this smoothie is perfect for gatherings and brunches. You can easily double the recipe for a crowd, making it an excellent choice for entertaining friends or family. Moreover, since it’s vegetarian and can be adapted for vegan diets, it caters to diverse dietary needs, bringing everyone together around a healthy beverage.

Cost-effectiveness adds to its appeal, as the ingredients are generally affordable and accessible. You can often find them fresh at any local grocery store, and if you want to cut costs, freezing overripe bananas and berries is an excellent option. This smoothie makes healthy eating sustainable and achievable.

Historical Background and Cultural Significance

The smoothie has evolved significantly over the decades, beginning as a simple fruit puree to the nutrient-dense beverages we enjoy today. Originating in the United States during the health food movement of the 1960s and 1970s, smoothies have transformed into a popular global phenomenon, prized for their nutritional value and variety.

Culturally, smoothies symbolize a shift toward healthier eating habits and a greater focus on incorporating fruits and vegetables into our diets. They have become a staple in many cafes and households, thanks to their versatility and ease of preparation, making them culturally significant in promoting healthy living.

The evolution of the smoothie is also attributed to its adaptability in various cuisines. Different cultures have put their spin on the basic smoothie formula, incorporating unique ingredients and techniques, thereby broadening the appeal and application of this delicious drink.

Regional variations abound, with tropical regions infusing their smoothies with local fruits such as mangoes and papayas, while colder climates might lean toward berry-focused blends. This versatility showcases the accessibility and global appreciation of smoothies as a beverage.

Ingredient Deep Dive

Bananas: Central to this smoothie, bananas are botanically classified as berries and have a long history of cultivation. Rich in potassium and fiber, they help regulate blood pressure and improve digestive health. When selecting bananas, look for those with a vibrant yellow color, and store them at room temperature. They can be frozen for more extended use, providing a creamy texture when blended.

Berries: This recipe typically features strawberries and blueberries, both rich in antioxidants and vitamins. Historically used in various cultures for their medicinal properties, they are great for heart health. When selecting berries, pick ones that are bright and firm. Store them in the refrigerator, but avoid washing them until you are ready to eat to prolong freshness.

Common Mistakes to Avoid

  • Using Overripe Bananas: While ripe bananas add sweetness, overripe ones can lead to a gummy texture. Use bananas that are ripe but not overly mushy.
  • Too Much Liquid: Adding too much liquid dilutes the flavor. Start with small amounts and adjust to achieve your desired consistency.
  • Skipping the Blend Time: Ensure you blend long enough to fully incorporate all ingredients. A poorly blended smoothie may end up chunky and unimpressive.
  • Inefficient Lid Placement: Failing to seal your blender properly can lead to messy spills. Always check that the lid is secure before blending.
  • Poor Ingredient Choices: Using stale or out-of-season fruits can negatively impact flavor. Opt for fresh and seasonal produce for the best results.
  • Not Layering Ingredients: If using a powerful blender, start by adding liquid and softer items first, followed by harder ingredients. This promotes even blending.
  • Ignoring Sweetness Levels: Taste your smoothie before serving. You may want to add honey, maple syrup, or a sweeter fruit for balance.
  • Neglecting Nutrients: Supplements like protein powder can enhance nutritional value. Consider including them for an extra health boost.
  • Forgetting Garnishes: A simple garnish elevates presentation. Consider topping with whole berries or seeds for added visual appeal.
  • Not Cleaning the Blender Immediately: Leaving ingredients to sit can lead to difficult cleaning. Rinse your blender right after use for easy cleanup.

Essential Techniques

Blending: Blending is crucial for achieving that creamy texture. For best results, blend all ingredients on high for at least 30-60 seconds, ensuring everything is well incorporated. A common pitfall is stopping too soon—watch for smoothness and consistency as visual cues for success.

Ingredient Layering: Layering your ingredients can greatly affect the blending outcome. Always place liquids and softer ingredients at the bottom, followed by softer fruits, and finally, the harder ingredients at the top. This ensures everything blends evenly and prevents clogging the blades.

Pro Tips for Perfect Smoothies

1. Freeze your bananas and berries beforehand for an extra cold and creamy texture.

2. Add a handful of greens like spinach or kale for added nutrition without compromising taste.

3. Use a high-quality blender for smoother results, especially with tougher ingredients.

4. Don’t neglect portion sizes; keep your smoothie servings manageable to avoid overwhelming flavors.

5. Experiment with different types of liquid bases like coconut water or almond milk for new flavor profiles.

6. For extra protein, consider adding Greek yogurt, nut butter, or a protein powder of your choice.

7. Always taste before serving; adjust sweetness or acidity by adding honey, citrus, or more fruit.

8. Play with textures by incorporating seeds or granola as toppings just before serving.

Variations and Adaptations

Regional variations can offer new twists on the classic smoothie. For example, try adding tropical fruits like mango or pineapple for a refreshing, beach-inspired version. Adapt the ingredients seasonally by using winter fruits like oranges or pomegranates to celebrate different harvests.

Dietary modifications are easy to implement as well. For a dairy-free version, substitute yogurt with a plant-based alternative or omit it entirely. The smoothie can also be made low-carb by using sugar-free sweeteners and skipping the banana for another fruit or vegetable.

Texture modifications can enhance the experience; for a thicker consistency, add oats or chia seeds. If you prefer a thinner drink, increase the liquid content cautiously to maintain flavor intensity.

Furthermore, presentation alternatives can make your smoothie visually appealing; serve it in a tall glass and garnish with whole berries or mint. This adds an inviting touch and a pop of color that can be enticing.

Serving and Presentation Guide

To plate your smoothie perfectly, consider using a tall and sleek glass. This allows the vibrant colors of the smoothie to shine through, enticing guests and family members alike. Garnishing with fresh fruit or a sprinkle of chia seeds can enhance both the appearance and texture.

Traditional accompaniments such as granola or toasted nuts on the side can provide a satisfying crunch that contrasts beautifully with the smooth drink. Alternatively, you could offer a variety of straws for added fun, as well as small fruit skewer decorations for a festive touch.

Temperature considerations are crucial; smoothies are best served cold. For maximum refreshment, blending the ingredients with ice can enhance the chilled experience. Remember to also monitor portion control; serving too much can overwhelm, while appropriately-sized servings invite guests back for more.

Wine and Beverage Pairing

For a delightful pairing, consider a light sparkling wine such as Prosecco, which complements the fruity flavors of the smoothie without overpowering them. The bubbles add an effervescent experience that elevates the entire brunch experience.

If you prefer non-alcoholic options, freshly brewed iced green tea provides a refreshing cleanse that pairs beautifully with fruity smoothies. You can also serve flavored sparkling water for a fizzy, fun alternative that maintains the healthy theme.

Additional choices can include herbal teas with fruity notes. Their fragrance enhances the aromatic experience of the smoothie, creating an exciting and flavorful meal or snack.

Storage and Shelf Life

For optimal freshness, consume your smoothie immediately after blending. However, if you have leftovers, store them in an airtight container in the refrigerator for up to 24 hours. It’s best to give it a quick stir or shake before consuming again to ensure even consistency.

For long-term storage, consider freezing portions. Pour the smoothie into ice cube trays or muffin tins, freeze until solid, then transfer to a sealed bag. This allows you to blend up smoothie packs for quick mornings and ensures you have a healthy option ready to go.

Signs of spoilage can manifest as discoloration or an off smell, indicating it’s time to discard. Reheating isn’t advisable; instead, blend the frozen portions directly from the freezer for an instant refreshment.

Make Ahead Strategies

To streamline your mornings or brunch preparations, pre-measure and chop ingredients the night before. Store them in ziplock bags in the fridge or freezer, and simply toss everything into the blender in the morning. This will save you time and hassle.

Assemble a smoothie pack by combining fruits, liquids, and even greens in individual containers, making it easy to grab and blend. This strategy helps maintain quality while offering immediate access to healthy ingredients.

Consider adding fresh components, such as seeds or nuts, after blending for improved texture and enhanced flavor just before consumption. These additions can provide crunch even after being stored for a short period.

Scaling Instructions

If you’re preparing for a crowd, scaling your smoothie recipe is easy. Doubling or tripling the ingredients ensures everyone can enjoy this tasty treat. Always use a larger blender or blend in smaller batches to maintain efficiency.

When scaling, keep an eye on blending times and liquid ratios to maintain the smooth texture. Adjusting these factors is crucial when increasing quantities.

Store any additional servings in separate containers for easy access. This allows you to create single-serving portions, making it simple to enjoy nutritious smoothies throughout the week.

Nutritional Deep Dive

Analyzing the macros, this smoothie is generally low in calories yet high in essential vitamins. A typical serving can provide around 150 calories, depending on the ingredients, making it ideal for weight management or as a light snack.

Micronutrient analysis reveals the abundance of vitamins C and B6, potassium, and dietary fiber present in this drink. Bananas contribute significantly to potassium levels, which are vital for heart health, while berries add antioxidants that combat oxidative stress.

The health benefits extend beyond just weight management or basic nutrition; regular consumption can improve digestion and strengthen immunity due to the fiber and vitamins found in the fruits.

With portion analysis in mind, this smoothie serves as a satisfying, nutrient-rich option that can be easily integrated into breakfast routines or enjoyed as a refreshing afternoon boost. Weight management is simplified when such a delicious option is included in your diet.

Dietary Adaptations

To accommodate gluten-free diets, ensure all ingredients, including any additives, are certified gluten-free. The basic smoothie recipe is naturally gluten-free, making it a great option for those on this diet.

Dairy-free substitutions are simple; use almond milk or coconut yogurt instead of dairy-based yogurt or milk. This keeps the creaminess while catering to allergen concerns.

If you follow a vegan diet, substitute any honey with agave or maple syrup to maintain sweetness without animal products. The recipe remains entirely plant-based, satisfying vegan standards without sacrificing flavor.

Low-carb adaptations can be made by using unsweetened almond milk and substituting fruits with lower sugar options, such as avocados or leafy greens. This preserves the fulfilling aspect of smoothies while catering to specific dietary needs.

For keto followers, consider using only those ingredients that keep net carbs at a minimum, prioritizing fats and proteins. Regularly monitoring portion sizes remains vital for anyone aiming to maintain a keto lifestyle.

Troubleshooting Guide

If your smoothie turns out too thick, add a splash more liquid and blend again. Always start with minimal liquid to avoid the opposite problem of having a watery texture.

If the flavor feels off, consider adjusting sweetness levels by incorporating a natural sweetener or a splash of citrus, like lemon or lime juice, to brighten flavors.

Should the smoothie separate after sitting, simply blend again for a few seconds before serving. This issue can arise from the natural settling of ingredients.

If difficulty arises with your blender, make sure not to overload it, regulate your ingredients, and layer them appropriately as noted previously to facilitate smooth blending.

Ingredient substitutions can occasionally lead to differences in resulting flavors; always taste and adjust seasonings for best results, particularly if experimenting with new ingredients.

Lastly, timing can affect freshness. To avoid flavor loss, blend just before serving or store in airtight containers as previously discussed.

Recipe Success Stories

Many readers have shared their own variations, adding protein powder for sustenance post-workout or incorporating unique fruits they’ve discovered at local markets. These adaptations reflect creativity while staying true to the smoothie concept, ensuring it remains a beloved staple.

Community feedback highlights how easy this recipe has been to integrate into busy lives. Readers have reported great success with meal prep packs, making smoothies a weekly ritual that feeds their families.

Photography tips shared by readers also emphasize the beauty of presenting smoothies with a vibrant garnish, elevating their look and inspiring others to try making their variations at home.

Ultimately, the best stories revolve around finding joy in simple ingredients and the satisfaction of experimentation, reinforcing that enjoying a delicious smoothie can be accessible to all.

Frequently Asked Questions

Q1: Can I use frozen fruit in this smoothie?
Absolutely! Frozen fruits work great and can give you a creamier texture while also keeping your smoothie refreshingly cold. Just note that you might want to reduce the amount of ice you add.

Q2: How long will a smoothie last in the fridge?
It’s best to consume smoothies shortly after making them for optimal freshness. If you need to store it, consume within 24 hours and give it a good shake before drinking.

Q3: Can I make this smoothie without a blender?
While a blender is the best tool for achieving a smooth consistency, you can use an immersion blender. Alternatively, you could mash some ingredients by hand, but it won’t have the same texture.

Q4: Is this smoothie suitable for kids?
Yes! This smoothie is not only delicious but also packed with nutrients. You can also facilitate their involvement in making it; they’ll love choosing their fruits!

Q5: How can I make this smoothie more filling?
You can add ingredients like oatmeal, chia seeds, or nut butter to increase the fiber and protein content, making it more satisfying.

Q6: Can I add protein powder?
Definitely! Adding protein powder is a great way to increase nutritional content, especially if this smoothie is being consumed as a post-workout snack.

Q7: What liquid should I use in my smoothie?
You can use water, milk (dairy or non-dairy), fruit juice, or even coconut water. Each will impart a different flavor and nutritional profile.

Q8: Can I make it vegan?
Yes! Simply substitute yogurt with plant-based alternatives and use agave syrup or maple syrup instead of honey to maintain the vegan nature of the smoothie.

Q9: What if I don’t like bananas?
Bananas are often used for sweetness and creaminess, but you can substitute with avocados for a creamy texture, or use other frozen fruits to maintain sweetness.

Q10: Can this be a meal replacement?
Yes! With the right additions like protein powder and other nutritious toppings, it can serve as a quick and healthy meal option.

Additional Resources

For those seeking more ideas, explore our collection of related recipes for nutritious smoothies and bowls. Each recipe highlights the use of seasonal ingredients, which can add diversity to your dietary habits.

Consider reading up on ingredient selection guides to optimize freshness and quality in your kitchen. Understanding how to properly choose and store ingredients can greatly enhance your cooking adventures.

We also recommend checking out technique guides that can provide advanced blending techniques or creative ways to incorporate superfoods for even healthier smoothie options.

Join the Conversation

Sharing your smoothie creations on social media is a fantastic way to engage with like-minded individuals. Posting photography of your beautifully crafted smoothies can inspire others to try them too.

Engage with our community by leaving reviews or sharing your adaptations of the recipe. We love hearing feedback and seeing the variety of methods used to make this healthy drink.

Don’t hesitate to get creative and suggest ingredients or flavors you discovered that would enhance this beverage, inviting more conversation and input to this delicious journey!

The Recipe

Nutritious Morning Smoothie

Serves: 2

Prep Time: 10 mins

Cook Time: 0 mins

Total Time: 10 mins

Kitchen Equipment Needed

  • High-Speed Blender
  • Measuring Cups
  • Knife
  • Cutting Board

Ingredients

  • 2 ripe bananas
  • 1 cup frozen mixed berries
  • 1 cup Greek yogurt (or plant-based alternative)
  • 1 cup milk (or almond milk)
  • 1 tablespoon honey (optional)
  • 1 tablespoon chia seeds (optional)

Directions

  1. Peel the bananas and break them into smaller pieces.
  2. Combine all ingredients in the blender, starting with the liquid at the bottom.
  3. Blend on high speed until smooth and creamy, about 30 seconds.
  4. Taste and adjust sweetness if necessary by adding honey.
  5. Pour into glasses and enjoy immediately!

Recipe Notes

  • For a thicker smoothie, add more frozen fruit.
  • Try swapping coconut yogurt for a tropical flavor.
  • This smoothie can be frozen for up to 3 months; just blend again after thawing.

Irresistibly Creamy Parmesan Sausage Soup Recipe for Cozy Nights

Creamy Parmesan Sausage Soup: A Cozy Comfort Food Delight

⚖️
Difficulty
Easy

⏲️
Prep Time
10 mins

🕒
Cook Time
30 mins

⏱️
Total Time
40 mins

🍽️
Servings
4

The Creamy Parmesan Sausage Soup is a warm, indulgent dish perfect for chilly evenings or when you simply want to indulge your comfort food cravings. This delightful soup combines the rich flavors of Italian sausage with the creamy texture of Parmesan cheese, creating a luxurious blend that embraces you from the first spoonful. The Earthy notes from the vegetables complement the savory sausage while the Parmesan adds an irresistible creaminess, making this soup a favorite for families and gatherings alike.

As you prepare this savory dish, your kitchen will fill with an intoxicating aroma that immediately draws everyone in. Your family and friends will be excited to gather around the table as the scents of garlic, onion, and spice waft through the air. Each bowl of Creamy Parmesan Sausage Soup is not just a meal; it’s a warm hug on a cold day, reminding you of home and happy memories shared over good food.

Quick Recipe Highlights

  • Flavor Profile: A harmonious blend of spicy sausage, creamy Parmesan, and fresh herbs that tantalizes the taste buds.
  • Texture: A smooth and creamy base enriched with tender sausage and hearty vegetables, offering a satisfying mouthfeel.
  • Aroma: The enticing combination of garlic, onion, and herbs creates a welcoming and comforting scent.
  • Visual Appeal: The soup boasts a beautiful creamy color accented by the deep brown sausage and fresh green herbs.
  • Skill Level Needed: This recipe is easy to follow, making it perfect for cooks of all skill levels.
  • Special Equipment: A large pot or Dutch oven is recommended for this recipe, along with an immersion blender for creamy texture.

Recipe Overview

  • Difficulty Level: This Creamy Parmesan Sausage Soup is labeled as easy, perfect for beginner cooks who want to impress without overwhelming themselves.
  • Category: This soup falls under hearty meals, suitable for lunch or dinner, ideal for family gatherings or cozy nights in.
  • Cuisine: Drawing from Italian flavors, this recipe incorporates classic ingredients that reflect the rich culinary traditions of Italy, adapted for home cooking.
  • Cost: The approximate cost for the ingredients is budget-friendly, averaging $15, making it easy to whip up without breaking the bank.
  • Season: Enjoyed year-round, this soup shines brightest in the fall and winter when comfort foods are most desired.
  • Occasion: Perfect for casual family dinners, potlucks, or as a first course for festive holiday meals.

Why You’ll Love This Recipe

The Creamy Parmesan Sausage Soup’s rich flavor and creamy texture are what make it a standout dish. The savory Italian sausage pairs beautifully with the creamy base, creating a depth of flavor that keeps you coming back for more. With each spoonful, the comforting warmth of the soup envelops you, making it a satisfying meal that feels indulgent yet is simple to prepare.

Convenience is at the heart of this recipe. With minimal prep time and straightforward instructions, you can have a delicious meal on the table in under an hour. This allows you to enjoy an uplifting meal even on your busiest days. Leftovers reheat beautifully, ensuring you can enjoy this delightful soup throughout the week.

The nutritional advantages of this Creamy Parmesan Sausage Soup are another reason to love it. Packed with protein from the sausage and vitamins from the vegetables, it’s a well-rounded meal that keeps you fueled. The presence of rich Parmesan cheese also provides calcium and other important nutrients, making it a healthier comfort food option.

This soup holds significant social and entertaining value, as it’s great for gatherings. Large pots of this creamy soup can feed a crowd, making it a fantastic choice for potlucks, parties, or family dinners where cozy meals are appreciated.

Lastly, its cost-effectiveness adds to its appeal. With affordable ingredients that are likely already in your pantry, this soup offers a gourmet experience at a fraction of the price, making it accessible for everyone.

Historical Background and Cultural Significance

The origin of sausage soup can be traced back to traditional Italian cuisine, where simple, hearty meals were crafted from readily available ingredients. Italian families developed variations of sausage soup to utilize leftover meats and pantry staples, ensuring nothing went to waste and keeping their meals delicious and satisfying.

Sausage itself has deep roots in Italian culture, with numerous regional varieties that contribute unique flavors and histories. Exploring the foundations of this dish connects us to the rich culinary traditions that celebrate family gatherings and shared meals.

Over the years, the recipe has evolved to include various ingredients depending on regional influences. While some variations highlight spicy chorizo or local vegetable varieties, the creamy Parmesan element has stayed consistent, enhancing the overall flavor profile.

As people experiment with this soup in their kitchens, they often infuse personal touches and regional flavors, creating countless adaptations that continue to celebrate its culinary history while introducing new tastes.

Ingredient Deep Dive

Italian Sausage
Italian sausage is central to this soup, and its origins can be traced back centuries in Italy, often made from pork seasoned with fragrant spices. Rich in flavor, it enhances not only the taste but also the texture of the dish. High in protein, sausage is satisfying and a great source of energy. When buying, seek out fresh sausage with visible herbs and spices, and for storage, keep it refrigerated, ideally using it within a few days or freezing for longer.

Parmesan Cheese
Parmesan cheese, a staple in Italian cooking, is known for its distinct flavor and versatility. Its production dates back to the Middle Ages in the Emilia-Romagna region, where it has become a symbol of quality. Nutritionally, Parmesan is high in calcium and protein, making it a beneficial addition to meals. Opt for freshly grated cheese when possible, as it enhances the dish’s richness, and store it in a cool, dry place or the refrigerator to maintain its quality.

Vegetables
A medley of vegetables, typically including onion, garlic, and celery, forms the base of the soup. Each ingredient adds its unique flavor, nutritional benefits, and history. Onions and garlic have been used in cooking since ancient times, celebrated for their health properties. When selecting vegetables, look for crisp and fresh options, and for storage, keep them in a cool, dry environment to avoid spoilage.

Common Mistakes to Avoid

  • Not browning the sausage: Browning the sausage creates depth of flavor; skip this step and the soup may taste flat.
  • Skipping the sautéing step: Sautéing the onions and garlic before adding liquids enhances aroma and flavor; don’t rush this step.
  • Using pre-grated cheese: Freshly grated Parmesan melts better and imparts a more robust flavor than store-bought pre-grated varieties.
  • Overcooking the vegetables: Keep an eye on your veggies, as overcooking can lead to mushy textures and loss of nutrients.
  • Not seasoning properly: Taste as you go and adjust seasoning to avoid a bland soup; salt and pepper are essential!
  • Using low-quality sausage: The quality of your sausage will greatly influence the overall flavor of your soup; choose good quality ingredients.
  • Not letting it rest: Allowing your soup to sit for a few minutes before serving helps the flavors meld together beautifully.
  • Ignoring the importance of presentation: Taking time to add garnishes like fresh herbs or a sprinkle of cheese makes your soup visually appealing.

Essential Techniques

Browning meat is important for developing flavors in this creamy soup. Start with a hot pot and add the sausage, allowing it to sear properly. This technique not only enhances taste but also provides a delightful texture contrast. To master this, don’t overcrowd the pot; cook in batches if necessary for even browning.

Sautéing vegetables is a fundamental technique that helps release their natural flavors. Begin with medium heat, allowing the onions to become translucent and the garlic fragrant while avoiding burning. Watch closely and stir regularly to ensure even cooking, making this process essential for a flavor-packed soup.

Blending the soup to achieve a creamy consistency can elevate the dish. If using an immersion blender, take care to only partially blend for a chunkier texture if desired. Visual cues for success include a smooth, cohesive mixture without visible vegetable chunks.

Pro Tips for Perfect Creamy Parmesan Sausage Soup

When making this soup, ensure you choose high-quality Italian sausage to maximize flavor. You can also experiment with different types, such as spicy or sweet, for a personalized twist.

Utilize homemade chicken or vegetable broth for added depth, enhancing the soup’s flavor profile whilst being healthier than store-bought options.

For an extra creamy soup, consider adding a splash of heavy cream just before serving. This gives a luxurious texture that pairs perfectly with the Parmesan.

Let the soup rest before serving to allow flavors to blend harmoniously, resulting in a richer taste.

As soup is re-heated, remember to add a splash of liquid to maintain the right consistency, preventing it from becoming too thick.

Experiment with adding greens such as spinach or kale for added nutrition and texture; simply stir in towards the end of cooking for wilting freshness.

Finally, serve with a variety of fresh bread options, such as crusty baguettes or soft rolls, for a complete dining experience.

Variations and Adaptations

This Creamy Parmesan Sausage Soup can be easily tailored to suit various tastes. For régional variations, consider incorporating local sausage types or spices that reflect your culinary heritage.

For seasonal adaptations, add in winter vegetables like butternut squash or sweet potatoes during colder months for a heartier texture.

For dietary modifications, you can replace heavy cream with coconut milk for a dairy-free version or use vegetable broth and plant-based sausage for a vegan option.

Flavor variations could include adding a splash of white wine for acidity or a hint of lemon zest for brightness, elevating the overall dish.

If you prefer a thicker soup, add a little more cream and reduce liquids, while for those favoring a lighter option, consider increasing broth and reducing dairy.

Lastly, presentation alternatives might involve garnishing with different herbs or adding a drizzle of olive oil for a restaurant-quality finish.

Serving and Presentation Guide

When it comes to plating your Creamy Parmesan Sausage Soup, consider using wide, shallow bowls to showcase the beautiful texture and colors of the soup.

Add garnishes like fresh parsley or a sprinkle of additional Parmesan cheese atop each serving to enhance visual appeal and flavor complexity.

Serve alongside garlic bread or crusty baguettes to create a satisfying meal; these traditional accompaniments pair perfectly with the creamy soup.

Modern serving suggestions may involve using rustic or artisanal bowls to present an inviting homemade feel; consider warm plates to keep the soup hot longer.

For temperature considerations, serve the soup steaming hot to fully appreciate the rich flavors and comforting qualities, ensuring a delightful dining experience.

Lastly, portion control is essential to avoid serving too much; a standard serving is typically around one to one-and-a-half cups to maintain a balanced meal.

Wine and Beverage Pairing

When choosing a wine to pair with Creamy Parmesan Sausage Soup, opt for a light and crisp white wine, such as Pinot Grigio or Sauvignon Blanc, which complements the creaminess without overwhelming the flavors.

For red wine enthusiasts, a light-bodied Chianti can harmonize with the sausage while enhancing the rich, peppery flavors.

Non-alcoholic alternatives might include sparkling water with a slice of lemon for refreshing accompaniment, balancing the sumptuous richness of the soup.

If you enjoy coffee or tea, consider a smooth herbal tea that won’t compete with the soup’s flavors, aiding digestion and refreshing the palate.

Temperature considerations play a role here; serve the soup hot while pairing it with wines slightly cooler than room temperature for the best experience.

For the ultimate dining experience, encourage guests to share their favorite combinations, fostering lively conversation around the table.

Storage and Shelf Life

To store Creamy Parmesan Sausage Soup, allow it to cool completely before transferring it into airtight containers. It can safely be refrigerated for up to three days.

If you want to store it longer, freezing is an excellent option. Use freezer-safe containers or bags, ensuring to leave some space for expansion; it can last for up to three months.

In terms of temperature requirements, soup should always be kept at or below 40°F in the refrigerator to maintain food safety.

Signs of spoilage include off odors or a change in color or texture; discard it if these occur.

When reheating, gently warm on the stovetop and add a splash of broth or water if the soup appears too thick, restoring its creamy consistency.

If previously frozen, allow the soup to thaw in the refrigerator overnight before reheating for the best results.

Make Ahead Strategies

For the best make-ahead strategies, prepare the soup base up to the point right before adding the cream. Allow it to cool before refrigerating; this can extend your prep timeline significantly.

Consider freezing the soup in portions for quick meals. This approach enables you to pull out only what you need, saving time on busy days.

Assessing quality impact, remember that while flavors meld beautifully after resting, freezing may slightly alter the texture of the cream; thus, consider adding it fresh after defrosting.

Assembly tips include preparing toppings separately and adding them just before serving, ensuring they are fresh and vibrant.

When reheating, gradually warm the soup while stirring gently to prevent curdling, maintaining smoothness and richness on the palate.

Lastly, fresh elements such as herbs or croutons can be added to each serving for a delightful touch of flavor and texture.

Scaling Instructions

For halving or doubling the recipe, easily adjust the quantities of ingredients proportionally; cook time remains roughly the same unless making very large batches.

When tripling the recipe, use a larger pot to ensure even cooking and avoid overcrowding, which could affect browning and flavor.

Consider equipment adjustments based on your batch size, such as additional pots if necessary, to maintain speed in preparation.

Timing modifications may include monitoring the cooking and simmering stages closely for larger quantities, as they may require slight extensions for full flavor development.

For storage considerations, allocate enough container space for large batches; consider portioning out smaller sizes for easier management later.

Lastly, communicate with those you’re serving about the increased volume, as this soup is perfect for larger gatherings or meals.

Nutritional Deep Dive

The macro breakdown of Creamy Parmesan Sausage Soup typically includes proteins from the sausage and the cheese, while fats are derived from the cream and Parmesan, creating a balance of energy sources.

Upon micronutrient analysis, you will find vitamin A from vegetables, calcium from cheese, and iron from the sausage, all contributing to a well-rounded nutritional profile.

Notably, the health benefits of this soup include high protein content, offering satiety and energy while also delivering essential vitamins and minerals from the vegetables.

Dietary considerations are minimal, as this soup can easily be adapted for gluten-free or low-carb diets with simple ingredient swaps.

Portion analysis suggests that the soup can coordinate well with a side salad to boost veggie intake without excess calories.

With mindful planning, this comforting dish can aid in weight management by providing the satisfaction and fullness you seek from comfort food without compromising on nutrition.

Dietary Adaptations

For those needing a gluten-free option, ensure all ingredients are certified gluten-free. Using rice or gluten-free pasta can provide that comforting texture without compromising dietary needs.

Switching to dairy-free for this recipe involves using plant-based cream and cheese alternatives to achieve a similar texture, making it accessible for vegans or lactose-intolerant individuals.

For a low-carb modification, substitute starchy vegetables with non-starchy options like zucchini or cauliflower, retaining satisfaction without excess carbohydrates.

The keto approach can integrate certain high-fat varieties of sausage and cream to maximize flavor, while using lower-carb vegetables to sustain a keto-friendly profile.

Paleo enthusiasts might rejoice by using wholesome ingredients free from processed foods, ensuring the soup remains nourishing and compliant.

For those following a low-FODMAP diet, utilizing specific vegetable selections and reducing garlic will create a friendly recipe for digestive sensitivities, expanding its reach.

Troubleshooting Guide

If your Creamy Parmesan Sausage Soup ends up too thick, simply stir in a bit more broth or cream until reaching desired consistency; being cautious to simmer gently prevents curdling.

When facing texture issues, such as graininess from the cheese, ensure you are using freshly grated cheese and slowly incorporate it into warm soup to promote even melting.

Flavor balance could be skewed when the soup tastes bland; remedy this with seasoning adjustments like salt and pepper or adding an acid like lemon juice for brightness.

Temperature problems can arise if the soup gets too hot, causing ingredients to break down; consider lowering heat and adding more broth to offset this.

Equipment challenges with immersion blenders might lead to splattering; ensure you pulse gently at first for an thorough blend without creating a mess.

Ingredient substitutions can affect the overall taste, so opt for similar types of meat or cheese whenever replacing core ingredients to maintain the essence of this comforting soup.

Timing concerns can include overcooking the vegetables; keep them slightly firm, as they’ll continue cooking after being added to the soup.

Recipe Success Stories

Our community has shared their love for the Creamy Parmesan Sausage Soup, highlighting its ease of preparation and incredible warmth that comforts everyone during chilly evenings.

Readers have enjoyed varying the ingredients to include their family’s favorite veggies or even experimenting with spicier sausages for a unique flavor profile that suits individual tastes.

Adaptation stories come from those who modify this recipe as a means of utilizing leftovers, proving its versatility while minimizing waste.

Photography tips from satisfied readers indicate that presenting the soup in rustic bowls with colorful garnishes dramatically enhances its visual appeal, making for stunning social media posts.

Community feedback emphasizes the ability to customize the recipe; various flavors and textures have inspired more creativity in their kitchens, solidifying its status as a family favorite.

The positive response surrounding this delicious recipe showcases the joy of shared meals and how this soup has become a staple in many households.

Frequently Asked Questions

Can I use a different type of sausage for this soup?

Absolutely! You can experiment with different sausage varieties, whether it’s spicy, sweet, or even turkey sausage. Each option will bring its unique flavor to the soup. Just ensure the sausage you choose complements the creamy base.

Is it possible to make this soup dairy-free?

Yes! Substitute heavy cream with coconut milk or a dairy-free cream alternative, and replace Parmesan with nutritional yeast for a nutty, cheesy flavor without dairy.

How do I store leftovers?

Cool the soup completely before transferring it into airtight containers. Store in the refrigerator for up to three days or freeze for up to three months. Ensure to label containers for easy identification.

Can I add more vegetables to this recipe?

Definitely! Feel free to add vegetables such as spinach, kale, carrots, or bell peppers to enhance nutrition and add more texture. Just ensure they are cooked to your preference.

What can I serve with this soup?

This creamy soup pairs beautifully with crusty bread, garlic bread, or a fresh side salad. Its rich flavors make it perfect for a comforting meal.

How do I get the creaminess just right?

The key to achieving a creamy texture lies in using freshly grated Parmesan and slowly adding cream while stirring. If your soup appears too thick, a splash of broth or water will help maintain that lush creaminess.

Can this recipe be doubled?

Yes! Doubling the recipe is easy; just adjust the ingredient quantities accordingly and ensure your pot is large enough to accommodate it all for even cooking.

Can I make this soup ahead of time?

Creamy Parmesan Sausage Soup can be made in advance. Prepare and store in the fridge, then heat before serving. To preserve texture, consider adding cream just before serving.

What should I do if my soup is too salty?

If you find your soup too salty, you can add diced potatoes to absorb excess salt. Increase the volume of the soup with added broth or water, which will help to balance the flavors.

How can I thicken the soup if it’s too thin?

If your soup is thinner than desired, you can thicken it by stirring in a cornstarch slurry (1 tablespoon cornstarch mixed with 2 tablespoons cold water) or by simmering it uncovered to reduce and thicken naturally.

Additional Resources

Explore more delicious recipes on our blog, including seasonal soups, pasta dishes, and hearty casseroles. If you’re looking to enhance your cooking skills, check out our technique guides that cover everything from sautéing to blending.

For those interested in ingredient information, dive deeper into profiles of common vegetables, meats, and pantry staples that can elevate your cooking. Additionally, we offer equipment recommendations for the best tools to utilize in your cooking journey.

Seasonal variations are also featured, providing inspiration for adapting beloved dishes as new ingredients come into season, ensuring fresh flavors year-round!

Join the Conversation

We love hearing from our readers! Share your adaptations, successes, and personal touches to the Creamy Parmesan Sausage Soup on social media. Utilize our dedicated hashtags and tag us in your delicious creations!

Photography tips abound in our community; feel free to exchange ideas for enhancing your food photography skills and presentation techniques.

Leave a review sharing your experience with the recipe or suggest your favorite variations; engaging with one another is what we cherish! Join us and let’s create a space of culinary innovation while together enjoying these flavorsome creations!

The Recipe

Creamy Parmesan Sausage Soup

Serves: 4

Prep Time: 10 mins

Cook Time: 30 mins

Total Time: 40 mins

Kitchen Equipment Needed

  • Large pot or Dutch oven
  • Immersion blender (optional)
  • Measuring cups and spoons
  • Wooden spoon
  • Cutting board and knives

Ingredients

  • 1 pound Italian sausage, casings removed
  • 1 medium onion, diced
  • 3 cloves garlic, minced
  • 2 celery stalks, chopped
  • 4 cups chicken or vegetable broth
  • 1 cup heavy cream
  • 1 cup grated Parmesan cheese
  • Salt and pepper to taste
  • Fresh parsley for garnish

Directions

  1. In a large pot, brown the Italian sausage over medium heat. Break it into smaller pieces with a wooden spoon as it cooks.
  2. Once the sausage is browned and cooked through, add the diced onion, garlic, and celery. Sauté until translucent and fragrant, about 5 minutes.
  3. Pour in the chicken or vegetable broth, stirring to combine. Bring to a boil, then reduce heat and let it simmer for about 15 minutes.
  4. Stir in the heavy cream and grated Parmesan cheese, mixing well until smooth and creamy. Season with salt and pepper to taste.
  5. If desired, use an immersion blender to blend the soup to your preferred consistency; just a few pulses for a chunkier texture!
  6. Serve hot, garnished with fresh parsley and additional Parmesan if desired.

Recipe Notes

  • Feel free to add in additional vegetables for extra nutrition, such as spinach or carrots.
  • Store leftovers in an airtight container in the fridge for up to three days or freeze for longer storage.
  • For a dairy-free option, use coconut milk and nutritional yeast.

Awaken to Irresistible Golden Custardy French Toast Delight

Perfect Golden Custardy French Toast: Wake Up to Delight!

⚖️
Difficulty
Easy

⏲️
Prep Time
10 mins

🕒
Cook Time
15 mins

⏱️
Total Time
25 mins

🍽️
Servings
4 servings

Wake up to the tantalizing aroma of perfectly golden, custardy French toast! This classic breakfast dish combines crispy edges with a soft, flavorful interior, creating a delightful contrast that will charm your taste buds. The rich flavors of vanilla and cinnamon, interspersed with the subtle sweetness of syrup, make each bite an extravagant treat, whether it’s a weekday breakfast or a luxurious weekend brunch.

Imagine sinking your fork into a thick slice of custard-soaked bread, lightly crisped to a golden brown. This French toast not only feeds the stomach but also the soul, providing warmth and comfort. Incorporating simple ingredients like eggs, milk, and your favorite bread, this recipe allows you to whip up a blissful start to your day with minimal fuss. It’s the kind of breakfast that turns an ordinary morning into something truly special.

Quick Recipe Highlights

  • Flavor Profile: This French toast boasts a deliciously sweet and spiced flavor, thanks to the combination of cinnamon, vanilla, and maple syrup.
  • Texture: Expect a harmonious blend of crispy and soft textures, with crunchy edges that cradle a lush, creamy center.
  • Aroma: The warmth of cinnamon and vanilla fills your kitchen, tempting everyone to the table.
  • Visual Appeal: Golden toast, glistening with syrup, topped with fresh fruits, creates an inviting breakfast spread.
  • Skill Level Needed: This recipe is easy to follow, making it perfect for both beginners and seasoned cooks.
  • Special Equipment: You only need a whisk, a mixing bowl, and a skillet to achieve French toast perfection!

Recipe Overview

  • Difficulty Level: Easy; this French toast recipe is straightforward and requires no special culinary skills.
  • Category: Breakfast or brunch; ideal for satisfying morning cravings or casual gatherings.
  • Cuisine: French culinary tradition transforms simple ingredients into a beloved comfort food dish around the world.
  • Cost: Budget-friendly; made primarily with pantry staples, it’s a cost-effective meal option.
  • Season: Great year-round; enjoy this dish during any season for a comforting breakfast experience.
  • Occasion: Perfect for any occasion, from family breakfasts to entertaining guests on special mornings.

Why You’ll Love This Recipe

Indulging in this perfect French toast combines delectable taste and delightful texture that will leave you craving more. The buttery richness paired with a sweet maple syrup drizzle creates an unforgettable breakfast experience. Each bite transports you to a world of homemade comfort, making mornings more enjoyable and memorable.

This recipe excels in convenience. With minimal prep time and quick cooking steps, you can have a warm breakfast ready in under 30 minutes. It’s a reliable choice when you’re dealing with busy mornings or simply need an effortless weekend treat.

Nutritionally, this French toast can be tailored to your dietary preferences. Using whole grain bread can enhance fiber content, while a dash of fresh fruit adds vibrant vitamins and nutrients. With smart choices, this dish can be both indulgent and wholesome.

Socially, French toast fosters connections, inviting family and friends to gather around the table. Sharing breakfast not only nourishes the body but also strengthens bonds, creating cherished moments over delicious food.

Cost-effective and accessible, this recipe utilizes inexpensive ingredients, allowing you to treat yourself without breaking the bank. It’s perfect for those who love a gourmet feel at a fraction of the restaurant price.

Historical Background and Cultural Significance

French toast’s origins trace back to the Roman Empire, where bread was soaked in a mixture of milk and egg, similar to today’s preparation. This dish showcased the ingeniousness of utilizing stale bread, turning waste into a delightful meal.

Culturally, French toast holds a cherished place in many breakfast traditions around the globe. Each region puts its spin on the classic, reflecting local ingredients and flavors that enrich the dish. Variations like “Armerican toast” in America and “pain perdu” in France highlight its universal appeal.

As time passed, the recipe evolved, integrating diverse toppings and cooking techniques. It has transitioned from a humble breakfast to a beloved dish featured in brunch menus worldwide. Each adaptation tells a story woven into culinary tradition.

Regional variations showcase creative additions, such as fruit toppings, flavored syrups, or even savory twists with cheeses and herbs. This continual evolution reflects society’s culinary diversity and creativity, making French toast a beloved, adaptable staple.

Ingredient Deep Dive

Bread: Bread is the cornerstone of this dish, with varieties ranging from classic white bread to brioche or challah. Each type provides a unique texture and flavor. Choose fresh or slightly stale bread to effectively absorb the custard mixture without falling apart. Store leftover bread in an airtight container to retain optimal freshness.

Eggs: Eggs provide the custardy texture of French toast. They are rich in protein and nutrients, helping to create a fuller meal. When selecting eggs, opt for organic or free-range for a higher quality flavor. Store eggs in their carton in a cool area of your refrigerator, and consider using egg substitutes if needed for dietary preferences.

Milk: Milk complements the eggs in forming the custard. Whether you choose whole, skim, or a dairy alternative, each option will affect richness and flavor — whole milk provides the richest result. Store milk in the fridge and use it before the expiration date for the freshest taste.

Cinnamon: This spice gives French toast its signature warmth and flavor. High-quality ground cinnamon can elevate your dish while also providing health benefits, such as anti-inflammatory properties. Store it in a cool, dark place. Use fresh cinnamon for the best results, as it loses potency over time.

Common Mistakes to Avoid

  • Using stale bread: While slightly stale bread is ideal, overly dried-out bread will not yield the desired custardy result.
  • Not whisking the eggs thoroughly: Ensure your egg mixture is well-combined for even distribution of flavor and texture.
  • Over-soaking the bread: Allowing the bread to soak too long can lead to mushiness. A quick dip on each side is typically sufficient.
  • Cooking at too high a temperature: High heat can cause the outside to burn while leaving the inside uncooked. Keep your skillet at medium heat for uniform cooking.
  • Neglecting flavoring: Don’t overlook the importance of flavorings like vanilla and cinnamon; they elevate the dish significantly.
  • Using non-stick pans incorrectly: Always add butter or oil before heating your non-stick skillet to prevent sticking.
  • Skipping toppings: A bare toast lacks visual and flavor appeal. Consider toppings like syrup, fruits, or whipped cream to amplify enjoyment.
  • Not monitoring cooking time: Keep an eye on your French toast to prevent overcooking, which can dry it out.
  • Using low-quality ingredients: Quality ingredients make a noticeable difference in flavor, so opt for the best you can find.
  • Serving cold: French toast is best enjoyed hot off the skillet, so serve immediately to maintain optimal texture and warmth.

Essential Techniques

Whisking: Properly whisking the eggs with the milk is essential to create a homogenous custard mixture. This technique ensures that the flavors meld and the mixture coats the bread evenly. Turn the whisk in circular motions to achieve full incorporation without any lumps.

Soaking: Soaking bread correctly is crucial for achieving a custardy interior. Dip each slice briefly, allowing the bread to absorb the mixture effectively without becoming overly soggy. Monitor the time carefully for the best results.

Cooking: Cooking on medium heat helps develop a golden crust while maintaining a soft interior. Use a non-stick skillet or griddle to ensure even cooking and easy flipping. Carefully watch for browning; flip only when the underside has reached your desired color.

Plating: Plating elevates the visual appeal of your French toast. Use a large plate, stack several slices, and layer toppings creatively. Drizzle syrup, add fresh fruits, or finish with powdered sugar to create an inviting presentation.

Pro Tips for Perfect French Toast

1. Use thick slices of bread for better texture; thicker pieces absorb the custard without falling apart.
2. Allow the bread to sit at room temperature for a few minutes before soaking, which aids in even absorption.
3. Experiment with different types of bread, such as sourdough or cinnamon-raisin, for unique flavor profiles.
4. For a richer custard, substitute cream for part of the milk used in the mixture.
5. Add a pinch of nutmeg alongside cinnamon for a warm, aromatic kick.
6. Consider letting the soaked bread sit for a few minutes before cooking to improve flavor depth.
7. If preparing a large batch, keep cooked slices warm in the oven until service time.
8. Get creative with toppings—try honey, yogurt, or mascarpone for an enhanced taste experience.

Variations and Adaptations

Regional Variations: In France, traditional “pain perdu” is often flavored with orange zest. This citrus twist can be easily incorporated into the custard mixture for added brightness. Meanwhile, in Portugal, “rabanadas” are typically enjoyed during the Christmas season, often flavored with port wine or sugar cinnamon.

Seasonal Adaptations: During autumn, consider adding pumpkin puree and spice to your custard mixture for a seasonal flair. In spring and summer, fresh berries can be folded into the batter or served as a topping for nach flavor variety.

Dietary Modifications: For a vegan version, substitute eggs with flax eggs or silken tofu and opt for plant-based milk. Gluten-free options can be successfully achieved using gluten-free bread while maintaining the delightful taste.

Flavor Variations: Experiment with flavor changes by adding almond or coconut extract along with vanilla. This opens up the dish to new aromatic experiences, aligning well with tropical or nutty toppings.

Texture Modifications: A souffled French toast can be created by baking the soaked bread in the oven, producing a puffy, custardy delight. This method also allows for preparation in larger quantities with minimal effort during busy mornings.

Presentation Alternatives: Consider serving French toast in a casserole form for brunch gatherings. Layer the bread in a baking dish, pour over the custard, and bake until set. This change not only simplifies service but also remains visually impressive.

Serving and Presentation Guide

Serve French toast hot off the griddle, ideally garnished with a dusting of powdered sugar for a refined finish. Consider using a large, elegant plate to display the toast attractively, stacking several slices vertically for height. Drizzle rich maple syrup or honey over the top, allowing it to cascade down the sides for an appealing effect.

For added flair, fresh fruit such as berries or bananas can be fanned out beside the toast. Whipped cream adds a luxurious touch, and a sprinkle of chopped nuts provides an appealing crunch. If serving for a special occasion, serve with a side of rich chocolate sauce or fruit compote for drizzling.

Temperature is key; serve French toast while it’s warm, as this enhances both taste and texture. As for portion control, offer each guest a generous slice paired with a side of fruit or yogurt to maintain balance.

Wine and Beverage Pairing

Pair your French toast with a light-bodied wine such as a sparkling wine or prosecco for a festive touch. These bubbly options provide a refreshing contrast to the richness of the toast. For non-alcoholic beverages, consider a fruity iced tea or fresh lemonade, providing bright notes that balance the sweetness.

Coffee lovers can elevate their breakfast with a rich brew; a latte or cappuccino complements the creamy texture beautifully. The light acidity in coffee cuts through the dish’s richness, making each sip refreshing.

Temperature is essential; serve sparkling beverages chilled to maintain their effervescence. If opting for coffee or tea, serve it hot, allowing guests to enjoy a warm drink alongside their decadent French toast.

Storage and Shelf Life

Proper storage of leftover French toast ensures quality when reheating. Place uneaten portions in an airtight container in the refrigerator. It’s best consumed within 3 days to maintain flavor and texture. When reheating, consider using a skillet over low heat to revive the original crispiness.

For longer storage, freezing is an option; individually wrap slices in plastic wrap and store in an airtight bag or container. They can maintain quality up to 1-2 months in the freezer. When ready to enjoy, thaw overnight in the fridge or use a microwave; just be cautious to avoid sogginess.

Signs of spoilage include unpleasant odors or unusual color changes. If you notice these, it’s best to err on the side of caution and discard any questionable portions.

Make Ahead Strategies

Prepare your French toast batter the night before for quick assembly in the morning. Store the custard mixture in the refrigerator and soak the bread just before cooking to keep it from becoming overly soggy. Additionally, consider assembling baked French toast casseroles for easy serving at brunch gatherings.

For the best outcome, you can keep soaked French toast in the fridge for up to an hour before cooking. This timeline allows flavors to meld without sacrificing texture. When ready, simply heat a skillet and cook as directed.

Reheating pre-cooked slices in the toaster or air fryer ensures a crunchy surface, bringing back its delightful crispiness. For time-saving strategies, opt to prepare individual servings and reheat as needed.

Scaling Instructions

Scaling this French toast recipe can be done effortlessly. To halve the recipe, simply cut ingredient measurements in half and follow the same instructions. For doubling or tripling, prepare larger quantities in batches, ensuring you have sufficient cooking space.

Equipment adjustments are essential when scaling; using a larger skillet or griddle allows for simultaneous cooking of multiple slices. When making a larger batch, consider spreading the cooking process over two skillets if accessible.

Timing modifications may be necessary; larger batches could require slightly more cooking time. Keep an eye on temperature indicators, ensuring all slices reach golden perfection while maintaining the internal custardy qualities.

Always consider storage for leftovers. Properly cool the cooked portions before refrigerating or freezing to preserve quality.

Nutritional Deep Dive

French toast offers a balanced array of macronutrients, primarily carbohydrates from the bread, protein from eggs, and fats from butter or oil. Depending on the type of bread used, fiber levels can significantly vary, enriching the dish’s health profile.

Micronutrients also play an essential role; eggs are a great source of vitamins like B12 and D, while whole grain bread provides important nutrients like iron and magnesium. By choosing nutrient-dense ingredients, you can enhance the health benefits of your meal.

The health benefits of this dish extend to promoting satiety and energy release. Pairing with fresh fruits can boost vitamin intake, creating a more nutritious meal option for your morning routine.

When considering portion analysis, the serving size should be mindful of personal dietary needs. Adjust toppings based on personal caloric goals to maintain a balanced breakfast that satisfies.

Weight management tips include controlling portions of syrup or cream. Opting for fresh fruit or yogurt as toppings can also provide sweetness without the added sugars found in syrups.

Dietary Adaptations

For a gluten-free version, select gluten-free bread to ensure suitable options for those with gluten sensitivities. Many brands offer delicious bread choices that hold up well in this recipe.

Dairy-free adaptations can be achieved using nut milks or coconut milk as replacements for regular milk. Vegan substitutes like flaxseed meal or chia seeds serve as excellent egg alternatives.

Those on low-carb diets can use cloud bread or almond flour bread to stay within their macros. Feeling adventurous? Keto adaptations can involve low-carb sweeteners in place of sugar for a similarly satisfying treat.

Paleo-friendly options can eliminate processed ingredients entirely, turning to natural sweeteners and organic ingredients with minimal processing. Each adaptation journeys deep into possibility while maintaining the core essence of delicious French toast.

Troubleshooting Guide

For texture issues, if your French toast turns out too soggy, ensure that soaking time is monitored closely. If the interior becomes dry, consider increasing the egg mixture ratio to improve moisture retention.

Flavor balance can occasionally be off; if lacking sweetness, ensure the right ratios of sugars and flavorings in the custard mix. Monitor spices closely, as cinnamon and nutmeg are potent and should be added thoughtfully.

If experiencing temperature problems, make sure the skillet is preheated adequately before introducing the bread. Low heat can lead to uneven cooking, so avoid rushing this step for the best results.

Equipment challenges arise when using different cooking tools; if a nonstick skillet is unavailable, be cautious of the cooking oil to ensure ease of flipping. Familiarizing yourself with your tools ensures confidence while cooking.

Ingredient substitutions may change outcomes; maintain familiarity with how different types of bread interact with the custard elements to guarantee a successful result.

Timing concerns can also lead to culinary mishaps; if cooking is rushed, this will negatively impact flavor and texture. Always take your time when preparing French toast for optimal outcomes.

Recipe Success Stories

Community feedback often highlights the delightful balance of flavors in this French toast recipe. Many fans report their families raving about weekend brunches, inviting them to make it a regular breakfast choice.

Variation successes come from experimenting with different toppings. One reader shared how adding caramelized bananas brought a whole new depth of flavor, creating an upgraded breakfast experience that everyone loved.

Adaptation stories illustrate creativity in using gluten-free breads without sacrificing traditional flavors. Our community has found solutions that resonate well with dietary restrictions while maintaining the comforting taste of classic French toast.

Photography tips provided by readers continue to inspire others to capture their culinary creations. Simple plating showcases the dish’s beauty and makes it look appealing in dining settings.

Engaging with various recipe variations showcases the creativity among our followers, with themes like pumpkin-spiced fall additions or summer berry toppings constantly emerging in conversation.

Frequently Asked Questions

1. Can I use day-old bread for French toast? Yes! Day-old or slightly stale bread is actually ideal as it absorbs the custard without becoming overly soggy. Thicker bread types are recommended for the best results.

2. How do I store leftover French toast? Place any uneaten French toast in an airtight container in the refrigerator for up to 3 days. You can also freeze leftovers wrapped in plastic wrap for several weeks.

3. Can I make French toast without eggs? Absolutely! You can substitute eggs with flaxseed meal mixed with water (1 tbsp flaxseed meal + 3 tbsp water = 1 egg) or use silken tofu for custard-like texture.

4. What’s the best way to reheat French toast? Reheat in the oven at 350°F until warmed through, or use the toaster to maintain its crispiness. Microwaving is quicker but may lead to a softer exterior.

5. How can I make my French toast sweeter? Add extra sugar or maple syrup to the egg mixture, or top with powdered sugar, fruit preserves, or whipped cream after cooking for an added sweet treat.

6. What type of bread is best for French toast? Brioche, challah, and thick-cut white bread are all excellent choices for French toast due to their ability to soak up the custard without falling apart.

7. Can French toast be made in advance? Yes! You can prepare a custard mixture the night before and soak the bread for a quick breakfast. Alternatively, baked French toast can be made ahead and reheated.

8. How do I prevent my French toast from sticking to the pan? Always preheat the skillet before adding butter or oil, which helps create a non-stick surface. Avoid flipper mishaps by using a spatula to gently lift and check for readiness.

9. Can I use milk alternatives in this recipe? Of course! Any milk alternative, such as almond milk or coconut milk, works well in the custard to suit your dietary preferences while retaining the recipe’s creamy quality.

10. What can I use instead of maple syrup? Other delicious alternatives include honey, agave syrup, or fruit compotes. Each option provides a unique flavor twist to complement your French toast.

Additional Resources

Enhance your breakfast repertoire with related recipes that utilize similar techniques or complementary flavors. Try our delectable breakfast casseroles, oatmeal variations, or other delicious brunch ideas that pamper the palate.

Explore our technique guides that delve deeper into cooking techniques, including mastering perfect pancake flipping or experimenting with various egg-cooking styles.

Stay informed about ingredient health benefits and where to source the freshest produce and artisanal ingredients to elevate your breakfast game to the next level.

Equipment recommendations cover essential cooking tools that aid in creating your breakfast mastery — consider investing in quality skillets, whisking tools, and mixing bowls that make the process smooth and straightforward.

Don’t forget to check out seasonal variations, which highlight timely offerings that incorporate ingredients and techniques reflective of each season — think festive eggnog French toast in winter or refreshing fruit-topped variations in summer!

Join the Conversation

Share your culinary success stories with this French toast recipe on social media. Engage with your community through photography tips to showcase your masterpiece! Encourage friends to leave their feedback and suggestions, contributing to a vibrant discussion surrounding delicious breakfasts.

Life is all about experience, and creating culinary variations evokes creativity. We invite readers to share their unique twists to inspire others — whether it’s a family recipe brought to the table or an innovative topping that elevates taste!

Consider participating in our community by submitting your review, sharing photos, and connecting with fellow food enthusiasts. Finding new ways to enjoy this classic dish fosters a shared passion for great food from every corner of the kitchen!

The Recipe

Perfect Golden Custardy French Toast

Serves: 4 servings

Prep Time: 10 mins

Cook Time: 15 mins

Total Time: 25 mins

Kitchen Equipment Needed

  • Whisk
  • Mixing Bowl
  • Skillet or Griddle
  • Spatula
  • Airtight container (for leftovers)

Ingredients

  • 4 slices thick bread (brioche, challah, or sourdough)
  • 2 large eggs
  • 1 cup milk (whole, almond, or oat)
  • 1 tsp vanilla extract
  • 1 tsp ground cinnamon
  • 1 tbsp butter (for cooking)
  • Optional toppings: maple syrup, powdered sugar, fresh fruit, or whipped cream

Directions

  1. In a large mixing bowl, whisk together eggs, milk, vanilla extract, and cinnamon until well combined.
  2. Dip each slice of bread into the egg mixture, ensuring each side is fully coated. Allow access liquid to drip off.
  3. Heat a skillet or griddle over medium heat and melt butter, ensuring it coats the bottom of the pan.
  4. Add soaked bread slices to the pan, cooking until golden brown on one side, about 3-4 minutes.
  5. Flip the bread and cook for an additional 2-3 minutes until both sides are perfectly golden and cooked through.
  6. Serve immediately with your choice of toppings.

Recipe Notes

  • Experiment with various bread types for different textures and flavors.
  • Add a splash of orange juice or a bit of nutmeg in the egg mixture for an exciting twist.
  • Cook in batches and keep finished slices warm in an oven set at a low temperature until ready to serve.