Delicious Brownies in Muffin Pans: A Perfect Treat Recipe

Decadent Brownies in Muffin Pans: Bite-Sized Chocolate Bliss

⚖️
Difficulty
Easy

⏲️
Prep Time
15 mins

🕒
Cook Time
20 mins

⏱️
Total Time
35 mins

🍽️
Servings
12 servings

Indulge your senses with these delightful brownies baked in muffin pans, a perfect combination of rich chocolate flavor and convenience. Each brownie delivers a fudgy texture that melts in your mouth, making them an irresistible treat for chocolate lovers. The use of muffin pans not only makes these brownies easy to bake but also allows for uniform portions that are perfect for sharing at parties or enjoying as a sweet snack throughout the week.

These brownies boast a deeply satisfying chocolate essence from high-quality cocoa powder and chocolate chips, delivering an intense flavor with every bite. The texture varies from the gooey center to the slightly crisp edges, creating a delightful contrast that enhances the overall experience. This unique baking method allows you to elevate a traditional brownie recipe into bite-sized pieces that are perfect for any occasion, whether it’s a family gathering or a cozy night in.

Quick Recipe Highlights

  • Flavor Profile: Intensely chocolatey with a hint of vanilla, these brownies are a chocolate lover’s dream.
  • Texture: Expect a rich, fudgy center with a slightly crisp exterior, giving you a satisfying bite.
  • Aroma: The aroma of baked chocolate and vanilla wafts through your kitchen, inviting everyone to indulge.
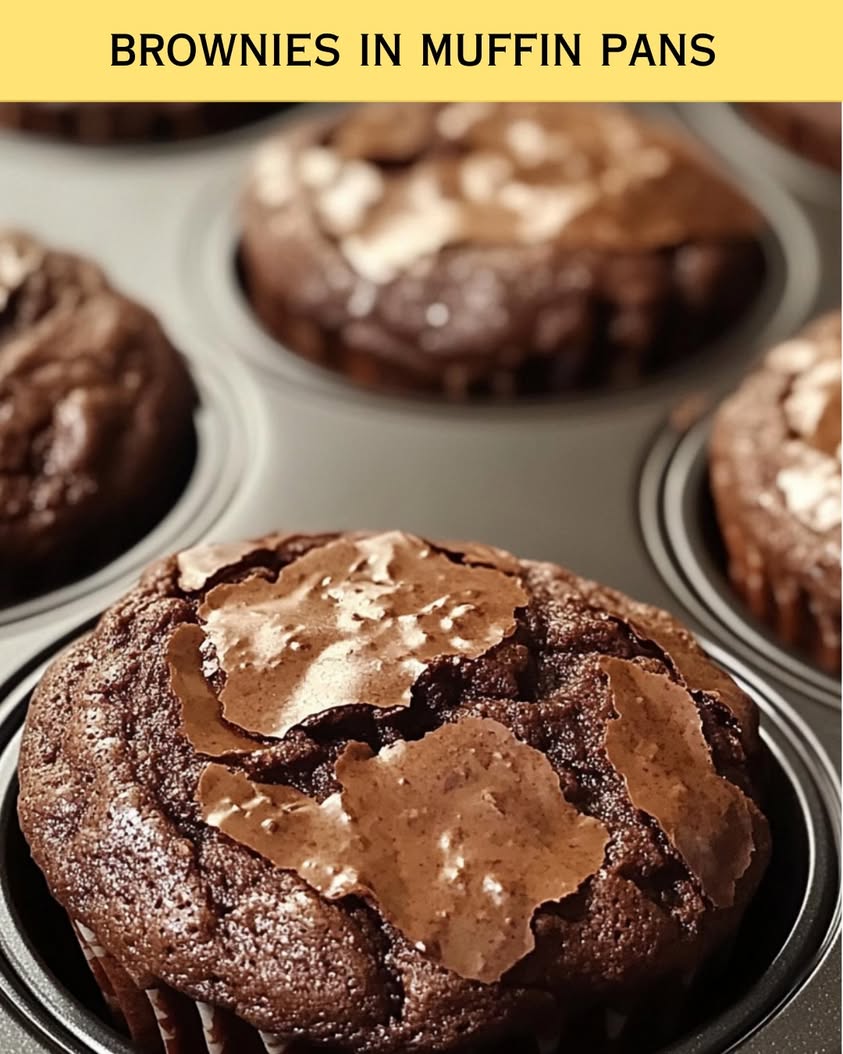
  • Visual Appeal: The brownies come out of the oven with a shiny top and a beautiful dark brown color.
  • Skill Level Needed: This easy recipe requires minimal baking skills, making it perfect for beginners.
  • Special Equipment: Just a muffin pan and an oven are needed, making this recipe accessible to everyone.

Recipe Overview

  • Difficulty Level: The ease of making brownies in muffin pans makes them ideal for beginners and seasoned bakers alike.
  • Category: These brownies fit perfectly into dessert categories or as a sweet snack for tea time.
  • Cuisine: Hailing from classic American desserts, these brownies symbolize indulgence and comfort.
  • Cost: Ingredients are budget-friendly, allowing you to spoil your family or guests without breaking the bank.
  • Season: Enjoy these brownies year-round, they are particularly beloved in the cooler months when a touch of sweetness is needed.
  • Occasion: Ideal for birthday parties, potlucks, or casual get-togethers.

Why You’ll Love This Recipe

These brownies stand out not only for their taste but also for their delightful texture. Each bite starts with a slightly crunchy top layer, revealing a warm, soft, and gooey center that envelops your palate in chocolate comfort. This harmonious blend makes them perfect for satisfying your chocolate cravings any time of day.

Convenience is one of the key benefits of this recipe. Unlike traditional brownies that require cutting and plating, using muffin pans allows you to serve fully portioned pieces right out of the pan. This makes them an excellent choice for gatherings, as guests can simply grab one and enjoy it, keeping mess to a minimum.

In terms of nutrition, these brownies can be adjusted to include healthy substitutions without sacrificing flavor. Consider using whole wheat flour or reducing sugar for a guilt-free treat. Each serving still offers the delicious chocolate flavor you desire while being mindful of health.

Socially, these brownies serve as a warm and inviting dessert option, encouraging guests to indulge and share their thoughts on these tasty bites. They create a sense of community during meals, sparking conversation and delight among friends and family.

Cost-effective yet luxurious, these brownies are made from simple ingredients that you likely have on hand. This affordability makes it easy to whip up a batch whenever you’re in a baking mood, allowing you to treat yourself or others without breaking your budget.

Historical Background and Cultural Significance

Brownies have a rich history that dates back to the late 19th century in the United States. Their exact origin remains a topic of debate, but they are believed to have been created when bakers attempted to make chocolate cakes but modified the recipes. This experimentation resulted in a deeply chocolaty, fudgy dessert that would soon become a classic.

Culturally, brownies have evolved into a symbol of comfort food across the United States and beyond. They are a staple at family gatherings, bake sales, and school functions, epitomizing homestyle baking. This dessert brings a sense of nostalgia and warmth, reminding many of their childhood.

Over the years, the recipe for brownies has adapted to include a variety of flavors and ingredients. From traditional chocolate to unique adaptations featuring nuts, fruits, or even swirls of cream cheese, brownies have maintained their status as a beloved treat. Each new variation reflects cultural influences and culinary creativity, ensuring their place in dessert history.

Regional variations of brownies often reflect local ingredients and preferences. For example, in some Southern states, pecans are a popular addition, while others may incorporate espresso or peanut butter for added flavor. These adaptations showcase how versatile and universal the love for brownies can be.

Ingredient Deep Dive

Butter
Butter is a key ingredient in brownies, contributing to their rich flavor and fudgy texture. Its high-fat content helps to create that delightful melt-in-your-mouth experience. When choosing butter, opt for unsalted varieties to control the overall saltiness of your dessert. Store butter in the fridge and use it within the recommended timeframe for optimal flavor.

Cocoa Powder
Cocoa powder is essential for achieving the deep chocolate flavor in brownies. When selecting cocoa powder, choose unsweetened varieties for baking to control the sweetness of your recipe. You can store it in a cool, dry place, and it can last for up to two years. For variations, consider using Dutch-process cocoa for a richer flavor or dark cocoa for a deeper color.

Common Mistakes to Avoid

  • Overmixing the batter can lead to dense brownies; stir just until ingredients are combined.
  • Not preheating the oven can result in uneven baking, affecting texture.
  • Using stale flour can alter the taste; always check your ingredients before baking.
  • Forgetting to line the muffin pan can make cleanup difficult and the brownies hard to remove.
  • Not testing for doneness can lead to undercooked or burnt edges; stick to the skewer test.
  • Using cold ingredients straight from the fridge can affect the batter consistency; let them warm to room temperature.
  • Overbaking can dry out the brownies; check them a few minutes before the recommended bake time.
  • Ignoring the cooling time can lead to crumbling; allow them to set before serving.

Essential Techniques

Mixing the Batter
Properly mixing brownie batter is essential for achieving the right texture. Start by combining wet ingredients before adding dry to ensure an even distribution. Avoid overmixing, as this can make the brownies tough. Aim for a smooth batter with a few lumps for the best results.

Checking Doneness
To ensure the brownies are perfectly cooked, test for doneness with a toothpick. Insert it into the center; it should come out with a few moist crumbs but not wet batter. Keep in mind that brownies will continue to cook slightly while cooling, so it’s best to err on the side of underbaking slightly.

Pro Tips for Perfect Brownies in Muffin Pans

1. Rotate the muffin pan halfway through baking for even cooking, as ovens can have hot spots.
2. Use high-quality chocolate to enhance the flavor of your brownies significantly.
3. Allow the brownies to cool completely in the pan before removing them to avoid crumbling.
4. Experiment with add-ins like nuts or chocolate chunks for extra texture.
5. For fudgier brownies, slightly underbake them; they will set up perfectly as they cool.
6. Dust with powdered sugar or drizzle with chocolate ganache for an elegant presentation.
7. Consider using muffin liners for easier removal and a cleaner presentation.
8. Double the recipe for larger gatherings or to satisfy chocolate cravings over several days.

Variations and Adaptations

Brownies in muffin pans lend themselves to an array of delightful variations. For regional flavors, consider adding local nuts or fruits. Seasonal adaptations include pumpkin or peppermint during fall and winter holidays, respectively, while a cheesecake swirl is an elegant twist for special occasions.

For those with dietary restrictions, ingredient substitutions such as gluten-free flour or alternative sweeteners can be made without compromising flavor. Flavor variations are virtually endless; try incorporating espresso powder or caramel swirls to jazz up your brownies while maintaining that essential chocolate base.

Texture modifications can also be a fun way to experiment; add oats for chewier bites or shredded coconut for an unexpected twist. For presentation, consider stacking brownies with dollops of whipped cream or ice cream on top, while an arrangement on colorful platters provides a feast for the eyes.

Serving and Presentation Guide

Plating brownies artfully involves arranging them on a decorative plate, ideally using a cake stand to showcase them at a gathering. For garnishing, a sprinkle of sea salt or a drizzle of caramel or chocolate sauce adds an appealing finish. Traditional accompaniments like vanilla ice cream or fresh berries elevate the dessert experience.

Modern serving suggestions could include layering them with whipped cream and fruit in jars for a trendy touch. Temperature matters as well; serving them slightly warm enhances the fudgy experience, while cooled brownies cut evenly into squares create a more structured presentation.

Portion control is essential, especially when serving at parties; having them pre-cut and displayed reduces excess consumption while being visually appealing.

Wine and Beverage Pairing

For a delightful pairing with these brownies, consider a rich red wine such as Cabernet Sauvignon or a fruity Merlot that complements the chocolate flavors beautifully. If you prefer non-alcoholic options, a creamy vanilla milkshake or cold brew coffee can enhance the decadent experience.

Warm beverages like a hot cup of coffee or spiced chai tea create a cozy contrast with the brownies, especially in cooler months. Serving the wine or coffee at the appropriate temperature enhances the overall flavor and enjoyment of your dessert.

Storage and Shelf Life

To properly store brownies in muffin pans, allow them to cool completely before placing them in an airtight container. They can be kept at room temperature for about 3-4 days or refrigerated for up to a week. For longer storage, these brownies can be frozen for up to three months.

When you want to enjoy them later, simply thaw at room temperature. Signs of spoilage include a dry texture or visible mold, so always check conditions before eating. Reheating brownies in a microwave for a few seconds can restore their gooeyness, making them feel freshly baked again.

Make Ahead Strategies

If you’re planning a gathering, consider prepping the brownie batter a day in advance. Store it in the fridge until you’re ready to bake; this can enhance flavors while freeing up your time on the day of the event. Make sure to bring it to room temperature before baking for the best texture.

You can also bake the brownies the day before your event, allowing the flavors to settle. If you need to serve warm brownies, reheat them briefly in the microwave just before serving. Adding fresh fruit or whipped cream right before serving can give a fresh element without compromising the work you did earlier.

Scaling Instructions

If you want to halve the recipe, closely monitor the baking time, as smaller portions will cook faster. Doubling or tripling the batch is easy, but make sure you have enough muffin pans to accommodate the increased volume.

When scaling, be prepared to modify the baking time; use the toothpick test to gauge doneness for larger batches. Always consider the container sizes, as larger batches may require deeper or wider pans for even baking.

Nutritional Deep Dive

Each brownie in muffin pans is packed with rich flavor while providing essential macronutrients, depending on your ingredient choices. The brownies typically contain a mix of carbohydrates from sugar and flour, fats from butter, and protein from eggs.

Micronutrient analysis reveals trace amounts of calcium and iron from both cocoa powder and eggs. For those managing their diet, brownies can still be satisfying without guilt with the use of healthier ingredient substitutions. Being mindful of portions is crucial, as these rich treats can quickly add up in caloric intake.

Weight management can become more manageable when you opt for portion-controlled desserts like these brownies, allowing for indulgence while keeping an eye on overall dietary balance.

Dietary Adaptations

For those following a gluten-free diet, substituting traditional flour for gluten-free all-purpose flour can be done easily in this recipe and still offer excellent results. Dairy-free versions can be made using coconut oil or vegan butter, along with almond or oat milk in place of regular milk.

Vegan brownies can also be created by substituting eggs with Flaxseed meal or applesauce. For those on low-carb or keto diets, almond flour can replace all-purpose flour, and sugar substitutes like erythritol can create sweeter treats without the carbs.

The paleo diet is another option, using almond or coconut flour along with natural sweeteners, like honey. Ensure variations are firmly tested to guarantee they still deliver the fudgy chocolate goodness that brownies are known for.

Troubleshooting Guide

Addressing texture issues is often about adjusting baking time or ensuring even mixing. If your brownies come out too cake-like, consider reducing the flour or baking time next round. For overly fudgy cookies, introduce a tad more flour or remove them from the oven earlier.

Balancing flavors is essential; if they taste too sweet, a pinch of salt can enhance the chocolate flavor significantly. If they are too dense, mixing the batter longer might introduce air for a lighter texture, but be careful not to overmix.

Temperature problems can arise if your oven is not calibrated; consider investing in an oven thermometer to ensure accurate bake temperatures. If you encounter problems with ingredient substitutions, always research beforehand to find compatible replacements that don’t compromise the recipe’s integrity.

Recipe Success Stories

Community feedback on these brownies has been overwhelmingly positive, with many readers praising the ease of the recipe and delightful taste. Various success stories include families reinventing their favorite classic recipes using muffin pans, bringing forth nostalgic memories of baking together.

Variations shared include adding nuts or dried fruit, with readers noting how these simple additions take brownies to a whole new level. Adaptation stories abound as well, with people modifying ingredients to cater to dietary needs, resulting in equally delicious outcomes.

Photography tips have also surfaced, emphasizing the importance of natural light for capturing the rich colors of these brownies, enticing others to try the recipe themselves. Recipe reviews highlight how this simple treat has become a family favorite, carrying on a baking tradition filled with love and creativity.

Frequently Asked Questions

Can I freeze brownies?
Absolutely! Brownies can be frozen for up to three months. Just make sure to let them cool completely before wrapping them tightly to prevent freezer burn.

How do I know when my brownies are done?
A toothpick inserted into the center should come out with a few moist crumbs. Be careful not to let it come out completely clean, as this can indicate they are overbaked.

Can I substitute cocoa powder with melted chocolate?
Yes, you can substitute cocoa powder with melted chocolate. Use a 1:1 ratio for unsweetened cocoa powder and make sure to reduce fat slightly to accommodate the chocolate.

Why are my brownies too cakey?
Cakey brownies are often a result of too much flour or overmixing the batter. Ensure you’re measuring ingredients correctly and mix just until combined.

What’s the best way to store brownies?
Store brownies in an airtight container at room temperature for up to four days. Refrigeration can extend their life but may alter the texture slightly.

Can I make these brownie muffins vegan?
Yes! Substitute the eggs with flaxseed meal or applesauce and use dairy-free butter or oil instead for a vegan version.

What kind of chocolate should I use?
High-quality semi-sweet or dark chocolate works best; however, feel free to experiment with your favorite types to customize the flavor.

Can I add extra ingredients like nuts or caramel?
Absolutely! You can fold in any extras you desire, but be cautious with quantities to maintain the right balance of wet and dry ingredients.

Why did my brownies stick to the pan?
If you didn’t line the muffin pan or grease it properly, brownies can stick. Always line with parchment or use muffin liners for easy removal.

Can I use a different type of pan?
Yes, you can use a square or rectangular baking dish, but watch the baking time as it may vary compared to muffin pans.

Additional Resources

For those loving the brownie experience, consider trying other related recipes like blondies or various chocolate desserts. Resources on baking techniques can further enhance your skills, especially learning about ingredient variations and their effects.

Finding information about ingredients can also assist in meal planning. Equipment recommendations for baking can streamline your process, ensuring you have what you need to create these delicious treats smoothly.

Seasonal variations can provide inspiration for adapting this recipe, utilizing ingredients fresh during different times of the year to keep flavors exciting and interesting.

Join the Conversation

We’d love to see your baking successes! Share your brownie creations on social media, experiment with different flavors, and engage with our community by exchanging tips. Document your experience with photography to inspire others in the kitchen.

Discussing your variations and personal tweaks can lead to an enriching community experience. Don’t hesitate to leave feedback or suggestions based on your baking journey with these delightful brownie muffins. Let’s celebrate the joy of baking, one batch of brownies at a time!

The Recipe

Brownies in Muffin Pans

Serves: 12 servings

Prep Time: 15 mins

Cook Time: 20 mins

Total Time: 35 mins

Kitchen Equipment Needed

  • Muffin pan
  • Mixing bowls
  • Whisk or electric mixer
  • Spatula
  • Measuring cups and spoons
  • Parchment paper (optional)

Ingredients

  • 1/2 cup unsalted butter
  • 1 cup granulated sugar
  • 2 large eggs
  • 1 teaspoon vanilla extract
  • 1/3 cup unsweetened cocoa powder
  • 1/2 cup all-purpose flour
  • 1/4 teaspoon salt
  • 1/4 teaspoon baking powder
  • 1/2 cup chocolate chips (optional)

Directions

  1. Preheat the oven to 350°F (175°C) and grease the muffin pan or line with muffin liners.
  2. In a mixing bowl, melt the butter and stir in the sugar, eggs, and vanilla until well combined.
  3. In a separate bowl, mix together the cocoa powder, flour, salt, and baking powder.
  4. Gradually add the dry mixture to the wet mixture, stirring until just combined.
  5. If desired, fold in chocolate chips for an extra chocolatey treat.
  6. Pour the batter into the prepared muffin pan, filling each cup about 2/3 full.
  7. Bake for 15-20 minutes, checking for doneness with a toothpick.
  8. Allow to cool in the pan for a few minutes before removing and enjoying!

Recipe Notes

  • For a richer chocolate flavor, substitute some of the flour with additional cocoa powder.
  • These brownies store well at room temperature for a few days or can be frozen for longer storage.
  • Feel free to customize with nuts, caramel or favorite mix-ins.

Delicious Slow Cooker Poor Man’s Stew for Budget-Friendly Meals

Slow Cooker Poor Man’s Stew: A Hearty and Budget-Friendly Meal

⚖️
Difficulty
Easy

⏲️
Prep Time
15 mins

🕒
Cook Time
6 hours

⏱️
Total Time
6 hours 15 mins

🍽️
Servings
6 servings

Slow Cooker Poor Man’s Stew is the epitome of comfort food, perfect for those busy weeknights when you want a hearty meal ready at the end of the day without much fuss. This stew combines simple, wholesome ingredients into a flavor-packed dish that will warm your soul and fill your belly. The slow cooking process allows all the flavors to meld beautifully, creating a dish that is not only delicious but also perfect for families on a budget.

Imagine coming home after a long day, greeted by the mouth-watering aroma of tender beef, fresh vegetables, and herbs simmering gently in your slow cooker. Each spoonful bursts with rich flavor, making it a delightful treat for the whole family. The simplicity of the ingredients doesn’t compromise the taste; instead, it proves that comfort meals can be made with accessible ingredients that anyone can find in their pantry.

Quick Recipe Highlights

  • Flavor Profile: A savory blend of tender beef, seasoned vegetables, and aromatic herbs come together for a comforting taste experience.
  • Texture: The stew boasts a delightful balance of tender meat and soft vegetables, with a slightly thick broth that clings to each bite.
  • Aroma: Expect your kitchen to be filled with the warm, inviting scents of garlic, onions, and herbs, drawing everyone to the table.
  • Visual Appeal: The rich hues of brown from the beef and the vibrant greens of the vegetables create an inviting and hearty dish.
  • Skill Level Needed: This easy recipe is perfect for beginners and seasoned cooks alike; just chop, assemble, and let the slow cooker do the work.
  • Special Equipment: All you need is a slow cooker, a cutting board, and a knife to get started.

Recipe Overview

  • Difficulty Level: This recipe is labeled as easy, making it a perfect entry point for those new to cooking, as it requires minimal preparation and skills.
  • Category: This dish fits the category of stew and is ideal for a main course, perfect for a cozy family dinner.
  • Cuisine: Slow Cooker Poor Man’s Stew draws inspiration from various culinary traditions, emphasizing hearty, rustic meals that utilize accessible ingredients.
  • Cost: The budget-friendly nature of this recipe makes it an excellent choice for families, with primary ingredients costing only a few dollars.
  • Season: This stew is best enjoyed during the colder months, as its warm and filling nature provides comfort and satisfaction.
  • Occasion: Perfect for weeknight dinners or casual gatherings, this stew brings everyone around the table to enjoy a hearty meal together.

Why You’ll Love This Recipe

The taste of Slow Cooker Poor Man’s Stew is truly unbeatable. As the beef cooks down, it becomes incredibly tender, soaking up the flavors of the broth and accompanying vegetables. This blend creates a mouthwatering combination that warms your spirit and satisfies your hunger. Each spoonful is not only delicious but offers comfort that reminds you of home-cooked meals from childhood.

Convenience is another major draw to this recipe. Simply chop your vegetables, toss in the meat, add your spices, and turn on the slow cooker. While you go about your day, the stew concocts itself, allowing you to focus on other tasks without worrying about dinner. This makes it a great option for busy families or anyone needing an easy meal solution after a long day.

Nutritionally, this stew is packed with essential vitamins and minerals from the assortment of vegetables. You get a fantastic mix of fibrous carbs and protein, making it a hearty, balanced meal when served with bread or rice. The combination of slow-cooked beef and vegetables provides your body with the nourishment it needs while remaining indulgent enough to feel like a treat.

Socially, this recipe shines as a crowd-pleaser. There’s something about stew that invites people in for a hearty helping while sparking conversation around the dinner table. Whether you’re hosting friends or enjoying a family meal, this dish promotes connection and comfort through shared food experiences.

Finally, the cost-effectiveness of this recipe cannot be overlooked. With just a few inexpensive ingredients, you can create a filling meal that serves many, making it an economical choice for any budget-conscious cook.

Historical Background and Cultural Significance

The roots of Poor Man’s Stew can be traced back to times when resources were scarce, and families needed to make the most out of what they had. The concept of using inexpensive ingredients to create a delicious meal has been a staple in many cultures, showcasing ingenuity and resourcefulness. This stew reflects a culinary tradition that values sustainability and minimizing waste, making it relevant in today’s food landscape.

Over the years, the recipe has evolved, with variations found across different regions. Each culture adapts the basic principles—using local ingredients and spices to create unique versions that showcase their culinary heritage. For example, Mexican versions might include spices like cumin, while Italian adaptations may introduce herbs such as oregano.

This stew not only brings nourishment but also tells a story of communal dining and cultural traditions surrounding food. Stews have historically been enjoyed on communal tables, bringing families together around hearty meals. The simplicity of the dish fosters a sense of comfort and familiarity that resonates through generations.

Regional variations highlight how a fundamental recipe can transcend cultural boundaries while retaining its essence. Each family’s twist on Poor Man’s Stew brings a piece of their story to the table, making it a dish cherished across various cultures, united by the love of home-cooked goodness.

Ingredient Deep Dive

– **Beef:** As the main protein, beef adds richness and depth to the stew. It’s important to choose cuts that benefit from slow cooking, such as chuck roast, which becomes tender and flavorful. Look for marbled cuts for the best flavor, and remember to trim excess fat to keep the stew balanced. Store it in the fridge for up to 3 days, or freeze for longer preservation.

– **Vegetables:** Common choices include potatoes, carrots, and onions, which add sweetness, texture, and nutrients. These staples are not only budget-friendly but also versatile; you can swap in seasonal vegetables as desired. Fresh vegetables should be stored in a cool, dry place and can last for several days in the fridge. For substitutions, feel free to experiment with sweet potatoes or different root vegetables.

– **Broth:** The foundation of your stew’s flavor comes from the broth. Opt for low-sodium options to control the salt level. Homemade broth adds an exceptional depth of flavor; if using store-bought, look for quality brands. Store leftover broth in the fridge for up to a week or freeze it for future use.

– **Herbs and Spices:** Commonly used herbs include thyme, rosemary, and bay leaves, which enhance the stew’s aroma. For additional flavor dimensions, consider adding garlic and black pepper. Fresh herbs should be used quickly, while dried spices can be stored for months. Experiment with different spices such as smoked paprika to bring a unique touch to your stew.

Common Mistakes to Avoid

  • Adding too much water: A common mistake is oversaturating the stew with water, resulting in a diluted flavor. Aim for just enough liquid to barely cover the ingredients for robust flavors.
  • Not browning the meat: Skipping the browning step can lead to a less flavorful stew. Searing the beef before adding it to the slow cooker enhances its taste and texture.
  • Overcrowding the pot: Packing too many ingredients into the slow cooker can lead to uneven cooking. Always ensure there’s enough room to allow heat to circulate effectively.
  • Using the wrong cut of beef: Using lean cuts can yield a tough texture; instead, opt for tougher cuts that marinate well, like chuck roast, which break down beautifully while cooking.
  • Not seasoning enough: Under-seasoning can make the stew bland. Don’t be afraid to test and adjust seasoning throughout the cooking process.
  • Skipping the simmer: Rushing through the cooking time can result in tough meat and undercooked vegetables; be patient to allow proper simmering.
  • Not letting it rest: Skipping the resting step after cooking can mean missing out on flavorful benefits; letting it sit for about 30 minutes allows flavors to meld more profoundly.
  • Ignoring the ingredients’ quality: Always choose the freshest ingredients available for optimal flavor and nutrition. This can make a significant difference in the overall dish.
  • Covering the slow cooker: Always ensure your slow cooker lid is properly secured, but be cautious about removing it too often, which can disrupt cooking temperature.
  • Failing to balance acidity: A well-balanced stew includes both acidity from ingredients like tomatoes or vinegar, enhancing flavor complexity—don’t forget this crucial element.

Essential Techniques

Browning meat is a crucial technique for deepening the flavor of your stew. Searing the beef is important because it creates a caramelized crust that adds richness. To master this, ensure your pan is hot and avoid overcrowding it. Look for a deep golden-brown color to indicate success.

Layering flavors is also key in stew-making. Start by sautéing aromatic ingredients, such as onions and garlic, before adding the rest to build a complex flavor base. This technique offers aromatic richness, essential for a tasty final dish. Use a wooden spoon to scrape any browned bits from the pan, incorporating them into the dish for added depth.

Pro Tips for Perfect Slow Cooker Poor Man’s Stew

1. **Use high-quality beef:** Always select the best quality cuts available. Grass-fed options can enhance flavor while also providing better nutritional value.
2. **Chop vegetables uniformly:** Ensure all vegetables are cut to roughly the same size so they cook evenly and enhance the stew’s texture.
3. **Add herbs at the right time:** Fresh herbs should be added toward the end of cooking to retain their flavor, while dried herbs can be added at the beginning.
4. **Consider an umami lift:** Adding a splash of Worcestershire sauce or soy sauce can deepen the stew’s flavor profile significantly.
5. **Adjust seasoning gradually:** Taste periodically throughout the cooking process and adjust salt rather than adding it all at once for a better-balanced dish.
6. **Make it spicy:** If you enjoy a bit of heat, consider incorporating chili flakes or jalapeños for a kick.
7. **Enhance broth richness:** For an instant boost, toss in some tomato paste or a few spoonfuls of instant coffee for an unexpected depth of flavor.
8. **Experiment with thickening techniques:** If the stew is too thin, consider adding a slurry made from cornstarch and water towards the end of cooking to achieve the desired thickness.

Variations and Adaptations

Regional variations of Poor Man’s Stew can bring exciting flavors to the table. For instance, a Mexican twist might introduce spices like chipotle and corn, transforming the stew into something with a distinctly different profile. Seasonal adaptations could include adding fresh, seasonal veggies like zucchini or squash in summertime, while winter months could be ideal for root vegetables like parsnips.

Dietary modifications may include swapping out beef for chicken or turkey for a lighter version, or opting for lentils as a vegetarian alternative, creating a hearty plant-based stew. Flavor variations can also be achieved with different herbs and spices, adding more exotic seasonings like garam masala for an Indian-inspired version.

For texture modifications, consider adding barley or quinoa for a more filling addition, or using lentils to create a thicker consistency. Presentation alternatives might involve serving the stew over a bed of rice or using a deep bowl for a rustic look, fitting the heartiness of the dish.

Serving and Presentation Guide

Plating techniques can elevate your stew experience. Consider spooning the stew into rustic bowls for a homey feel or shallow plates for a more modern twist. A sprinkle of fresh herbs on top adds a pop of color and freshness, while a dollop of sour cream or yogurt can provide creaminess.

Garnishing ideas like crispy fried onions or fresh parsley can enhance both flavor and presentation. Traditional accompaniments to serve alongside this stew include crusty bread or cornbread, perfect for soaking up the savory broth. Modern serving suggestions like serving in mason jars can lend a unique visual to your presentation.

When considering temperature, serve the stew warm but not piping hot to allow guests to enjoy each meal without burning their tongues. Portion control tips suggest serving smaller portions initially, as the stew is quite filling, ensuring everyone has room to enjoy sides and desserts.

Wine and Beverage Pairing

Wine pairings for Slow Cooker Poor Man’s Stew can enhance the dining experience remarkably. A robust red wine, like a Cabernet Sauvignon or a Malbec, complements the dish’s savory flavor profile beautifully. These wines have tannins that work well with the richness of the beef.

For a non-alcoholic alternative, consider serving iced herbal teas or fruit-infused waters that provide a refreshing contrast to the warm, hearty stew. If coffee or tea pairing is desired, a rich coffee brewed with a hint of cinnamon can elevate the meal even further.

Temperature considerations are vital; wine should be served at room temperature while non-alcoholic options can be served chilled. Consider presenting with matching glasses for both wine and non-alcoholic drinks for an elegant touch.

Storage and Shelf Life

Proper storage methods for your stew start with allowing it to cool before transferring it to airtight containers. The stew can be stored in the fridge for about 3-4 days and is perfect for meal prepping. For longer preservation, freezing is an excellent option, allowing you to enjoy the flavor for up to 3 months.

Temperature requirements dictate that the stew should cool to room temperature before refrigeration to prevent condensation build-up. Recommended containers include glass or BPA-free plastic, which retain flavor well.

Signs of spoilage include a sour smell or visible mold; if in doubt, it’s best to discard the stew. Reheating instructions suggest warming it on the stovetop or in the microwave until thoroughly heated, adding a splash of broth if needed to rejuvenate the moisture. Freezing guidelines suggest portioning out servings beforehand, making it easy to defrost only what you need.

Make Ahead Strategies

A good prep timeline can make enjoying Poor Man’s Stew effortless. Chop your vegetables the day before and store them in the fridge, so they’re ready to go. You can also brown the beef a day ahead and allow it to cool before refrigerating it, staggered for ease on the cooking day.

For storage between steps, keep prepped ingredients in individual containers to maintain freshness and flavors. Assessing quality impact between steps can help optimize ingredients, ensuring maximum flavor when the stew is finally assembled.

Assembly tips suggest layering the ingredients in the slow cooker by placing meat on the bottom and vegetables on top to help with even cooking. For rewarming guidelines, aim to heat thoroughly at a low setting to preserve the meat’s tenderness and prevent the vegetables from becoming mushy. Fresh additions such as herbs should be added just before serving to preserve their brightness.

Scaling Instructions

When it comes to halving the recipe, simply reduce each ingredient by half to maintain flavor and balance. This is an easy way to create a smaller batch suitable for fewer servings while ensuring everyone gets to enjoy this comforting stew.

Doubling or tripling will require re-evaluating your slow cooker size; ensure it’s large enough to hold the increased volume. When scaling, distribute ingredients evenly, maintaining proportions to avoid altering the original taste.

Timing modifications can include extending cooking times slightly when increasing the quantity to ensure all ingredients cook through adequately. Remember to check doneness and tenderness of the meat to ensure a perfect result.

For storage considerations, larger batches can generally be stored the same as smaller batches, remembering to ensure cool-down rules are applied consistently for freshness.

Nutritional Deep Dive

A macro breakdown of this stew reveals a rich source of protein from the beef, making it a filling meal ideal for those looking to maintain energy levels without excess calories. Each serving typically contains moderate fats, essential for nutrient absorption, and they’re minimized if lean cuts are used.

Micronutrient analysis highlights the array of vitamins and minerals provided by the vegetables, including vitamin C, potassium, and fiber, contributing to overall health. These nutrients aid in digestion and promote heart health, making this a nourishing meal option.

Health benefits extend to the heartiness of the stew, providing comfort without sacrificing nutritional integrity. It’s particularly beneficial for individuals looking to meal prep healthy options—each serving is balanced and can be paired with grain products for a complete meal.

Dietary considerations should note that while the dish is hearty, it can easily be adjusted for those with specific dietary needs, such as gluten-free or low-carb diets, making it versatile for a wide range of eaters. Portion analysis ensures manageable serving sizes, contributing to weight management strategies without leaving anyone hungry.

Dietary Adaptations

When adapting the Slow Cooker Poor Man’s Stew recipe for gluten-free diets, simply replace any wheat-based ingredients with certified gluten-free alternatives. You can use gluten-free broth and ensure any thickeners used are also gluten-free to maintain safety.

For those needing a dairy-free option, be mindful of any ingredient that may contain dairy, like butter. Substitute with olive oil or coconut oil for sautéing to achieve a similar richness without compromising dietary needs.

Vegan adaptations are easily achievable by replacing beef with plant-based proteins such as lentils or mushrooms, which can offer a hearty texture while adding a boost of nutrients and fiber.

Low-carb dieters can modify this dish by omitting potatoes and instead using cauliflower for a similar texture without the carbs, making for a lighter dish that adheres to dietary restrictions.

For those following a keto or paleo diet, simply stick to low-carb vegetables and replace starches with nutrient-dense leafy greens or root vegetables while avoiding legumes.

Implementing low-FODMAP guidelines can be accomplished by using appropriate vegetables and avoiding certain beans, ensuring that everyone can enjoy this hearty dish without discomfort.

Troubleshooting Guide

Texture issues, such as a watery consistency, can often be resolved by allowing the stew to simmer uncovered during the last hour, which will help thicken the broth.

Flavor balance problems can typically be corrected with careful seasoning adjustments; consider a splash of acid or sweetness, like vinegar or a bit of brown sugar, which can balance flavors effectively.

Temperature problems, if your stew isn’t cooking thoroughly, could stem from uneven heat distribution in your slow cooker, so ensure it’s placed on a stable surface and avoid frequent lid lifting.

Equipment challenges often center around slow cooker sizes; be cautious about adjusting cooking times if you’re using a smaller model to avoid affecting the outcome.

Ingredient substitutions can sometimes lead to unexpected flavors or textures, so it’s best to research alternatives carefully to maintain the dish’s integrity and taste.

Timing concerns may arise if you’re unsure how long to cook a doubled recipe; always err on the side of longer cooking times while checking for doneness along the way to ensure all components are tender.

Recipe Success Stories

Community feedback often highlights the ease and flavor of Slow Cooker Poor Man’s Stew, with many praising its ability to bring families together for enjoyable mealtime experiences. Many have shared their adaptations, showcasing regional twists that incorporate local ingredients, enhancing connection to culture and tradition.

Variation successes can include tweaks that make it their own, such as additional spices that reflect personal preferences or dietary needs, showing the versatility of this beloved dish.

Readers have suggested tips on photography, from bowl selection to lighting, emphasizing how a colorful presentation can make this hearty stew even more enticing in visuals, promoting engagement and making others eager to try it out.

Your own adaptation stories can inspire others to take on home cooking as well, sharing your triumphs of successfully creating this rich stew at home, showcasing both the journey and the beautiful result that brings everyone to the table.

Frequently Asked Questions

Can I use frozen meat for this stew?

Yes, you can use frozen meat, but it’s advisable to thaw it first for more even cooking and to ensure it’s safe to consume. If using frozen meat, extend the cooking time to ensure it reaches the right temperature throughout.

How long can leftovers last in the fridge?

Leftovers can typically last for 3-4 days in the fridge when stored correctly in an airtight container. Be sure to cool the stew to room temperature before refrigerating to maintain quality.

Can I cook this on high instead of low?

Yes, you can cook the stew on high for approximately half the time. However, the low-and-slow method is recommended to allow the flavors to meld and the beef to become tender and juicy.

What can I serve with Poor Man’s Stew?

This stew pairs wonderfully with crusty bread or fresh rolls for dipping. You can also serve over rice or with a side salad for added freshness.

Can I make this dish ahead of time?

Certainly! You can prepare the ingredients the day before and assemble them in the slow cooker in the morning. Or, you can cook it entirely and reheat it when ready to serve.

What’s a good way to thicken the stew?

If your stew is too thin, combine equal parts cornstarch and cold water, creating a slurry, and stir it into the stew while heating. Let it simmer for a few minutes until it thickens.

Is this recipe suitable for batch cooking?

Absolutely! This stew is perfect for batch cooking. Make a large batch and portion it out for future meals; it freezes well and can be easily reheated.

What type of beef is best for this recipe?

Chuck roast is ideal as it becomes tender during long cooking and is flavorful. Look for cuts with good marbling for the best results.

Can I use other types of meat?

Yes, you can substitute beef with chicken, pork, or even plant-based proteins like lentils and chickpeas for a vegetarian version of the stew.

How can I make this stew spicier?

To add some heat, incorporate chili powder, cayenne pepper, or fresh jalapeños into your ingredients. Adjust to taste based on your spice preference.

Additional Resources

If you enjoyed this recipe, consider exploring related recipes such as hearty vegetable soup or classic chicken curry. Techniques for perfecting slow cooking will enhance your skills, so check out guides with tips on cooking times and equipment selection.

Ingredient information is also useful for understanding the benefits and characteristics of the foods you’re using, while equipment recommendations can guide you towards the best tools for successful meal preparation. Seasonal variations can inspire you as you explore ways to incorporate fresh, local produce into your dishes for year-round enjoyment.

Join the Conversation

We’d love to hear your thoughts on Slow Cooker Poor Man’s Stew! Share your experience and any variations you’ve tried. Don’t forget to showcase your recipe reviews and beautiful photos on social media, tagging us for a chance to be featured.

Engaging with our community encourages sharing of tips and experiences, and we welcome recipe variations that bring a unique twist to this classic dish. Start the conversation today and help inspire others to experience the joy of cooking and sharing meals with loved ones.

The Recipe

Slow Cooker Poor Man’s Stew

Serves: 6 servings

Prep Time: 15 mins

Cook Time: 6 hours

Total Time: 6 hours 15 mins

Kitchen Equipment Needed

  • Slow cooker
  • Knife
  • Cutting board
  • Large spoon for stirring
  • Airtight containers for storage

Ingredients

  • 2 lbs beef chuck roast, cut into 1-inch pieces
  • 4 medium potatoes, diced
  • 3 carrots, sliced
  • 1 onion, chopped
  • 3 cloves garlic, minced
  • 4 cups beef broth
  • 1 tablespoon Worcestershire sauce
  • 2 teaspoons dried thyme
  • 1 bay leaf
  • Salt and pepper to taste

Directions

  1. In a skillet, brown the beef over medium heat for 5-7 minutes until it’s sealed and brown all over. This step enhances the flavor.
  2. Transfer the browned beef to the slow cooker. Add the diced potatoes, sliced carrots, chopped onion, and minced garlic.
  3. Pour in the beef broth and Worcestershire sauce. Stir in the dried thyme, bay leaf, and seasoning with salt and pepper.
  4. Cover and cook on low for approximately 6 hours, or until the meat is tender and vegetables are cooked through.
  5. Remove the bay leaf before serving. Taste and adjust seasoning as necessary. Serve hot and enjoy!

Recipe Notes

  • For added flavor, consider adding a tablespoon of tomato paste to the pot.
  • Feel free to substitute the vegetables based on what you have available.
  • This stew can be frozen for up to 3 months; just be sure to cool it down completely before freezing.

Delicious Slow Cooker Chicken and Dumplings for Cozy Nights

Slow Cooker Chicken and Dumplings: A Comforting Classic

⚖️
Difficulty
Easy

⏲️
Prep Time
15 mins

🕒
Cook Time
6 hours

⏱️
Total Time
6 hours 15 mins

🍽️
Servings
6 servings

Indulging in a bowl of Slow Cooker Chicken and Dumplings is like receiving a warm hug on a chilly day. This beloved classic dinner recipe brings together moist, tender chicken and fluffy dumplings, all simmered in a luscious, creamy broth that sings with flavor. The aroma fills your home as it cooks, creating a cozy atmosphere that begs to be enjoyed with family or friends. Whether it’s a busy weeknight or a weekend gathering, this delightful dish promises comfort and satisfaction with every bite.

The beauty of this Slow Cooker Chicken and Dumplings recipe lies not only in its taste but also in its simplicity. The slow cooker does the hard work for you, allowing the flavors to meld beautifully over hours. As you pull apart the chicken and serve it with the hearty dumplings, you will experience a delightful contrast of textures—the creamy broth, soft chicken, and fluffy dumplings combine for a comforting meal that feels like home. This cherished family recipe is sure to become a staple in your kitchen.

Quick Recipe Highlights

  • Flavor Profile: A savory mix of chicken, fresh vegetables, and creamy broth, elevated by herbs such as thyme and parsley.
  • Texture: Tender chicken paired with soft, pillowy dumplings creates a satisfying mouthfeel that is truly comforting.
  • Aroma: The delightful blend of garlic, onions, and chicken simmering in the slow cooker fills your home with inviting aromas.
  • Visual Appeal: Creamy broth with vibrant vegetables and fluffy dumplings makes for an incredibly appetizing presentation.
  • Skill Level Needed: Perfect for beginners, this recipe requires no complex techniques—just follow the simple steps!
  • Special Equipment: A reliable slow cooker is all you need to achieve this delicious meal with minimal effort.

Recipe Overview

  • Difficulty Level: This is an easy recipe that anyone can master! The slow cooker simplifies the process, allowing you to focus on gathering ingredients rather than intensive cooking techniques.
  • Category: This dish falls under the comfort food category, ideal for a family dinner or cozy gatherings.
  • Cuisine: Slow Cooker Chicken and Dumplings embodies traditional American comfort food, blending influences from various regional dishes across the country.
  • Cost: The ingredients are budget-friendly, with the main expenses being chicken and vegetables, making it economically accessible for families.
  • Season: Enjoy this dish year-round, but it’s especially delightful in colder months when cravings for warmth and comfort peak.
  • Occasion: Perfect for family dinners, game days, or cozy gatherings with friends—everyone loves homemade comfort food!

Why You’ll Love This Recipe

The richness of flavors in this Slow Cooker Chicken and Dumplings will captivate you with every mouthful. The tender chicken becomes infused with the creamy, herb-laden broth, while the dumplings soak up the savory goodness. This dish provides a nostalgic taste that reminds you of family gatherings and celebrations. With every bite, you’ll experience the essence of home-cooked comfort.

Convenience is key in today’s fast-paced world, and this recipe offers just that. With only a few minutes of prep, you can set it and forget it, allowing you to spend quality time with loved ones while the slow cooker does its magic. No need to fret over constant monitoring or complicated techniques—simply add your ingredients and return home to an inviting, delicious meal.

Nutritionally, this recipe has a lot to offer. Packed with protein from the chicken and enriched with vegetables, it becomes a balanced meal that nourishes the body and soul. The variety of vegetables can be adjusted based on your preferences, giving you the flexibility to pack in even more nutrients.

When it comes to social gatherings, this dish shines as an inviting centerpiece. Serve it family-style and let everyone dig in. The comforting aroma and hearty flavors will have your guests returning for seconds. Sharing this meal at the table creates a bonding experience, perfect for fostering warm conversation and memories.

Cost-effectiveness is another perk of this Slow Cooker Chicken and Dumplings recipe. Using inexpensive, everyday ingredients ensures that you can create a satisfying meal without breaking the bank. Plus, leftovers can be enjoyed the next day, providing you with twice the comfort at a fraction of the cost!

Historical Background and Cultural Significance

Slow Cooker Chicken and Dumplings originated as a humble dish that reflects the resourcefulness of early American cooking. Often made to utilize leftover chicken and pantry staples, it provided a comforting solution for families, especially during harsh winters when fresh ingredients were scarce. Over time, this dish has evolved, with recipes passed down through generations, adapting to accommodate personal tastes and family traditions.

This dish holds significant cultural importance in American culinary history, commonly associated with Southern cooking. It embodies the essence of hospitality, where comfort food is shared among family and friends. The traditional use of a slow cooker has made this dish accessible, allowing home cooks to produce a hearty meal effortlessly.

The evolution of Slow Cooker Chicken and Dumplings is fascinating. Traditional dumplings were typically made from scratch, but modern recipes have simplified the process by using baking mix or pre-made dough. This adaptation has made it easier for busy families to replicate the comforting flavors without sacrificing taste.

Regional variations have sprouted, with some areas incorporating their own local flavors and ingredients. For instance, Southern adaptations may include more vegetables, while Northern versions might focus on a creamier broth. Each version carries the hallmark of a family recipe, deeply revered and warmly cherished.

Ingredient Deep Dive

Chicken is the star ingredient of this classic dish. Historically, chicken was a basic staple in American kitchens, often raised on family farms. It provides essential protein, making it an excellent choice for a wholesome meal. When selecting chicken, look for fresh cuts with no visible bruises or dark spots. Store it in the refrigerator and use it within two days or freeze it for longer preservation.

Flour-based dumplings are a key component, delivering that comforting texture we associate with the dish. Flour has been a staple in cooking for centuries. It serves as a source of carbohydrates, which provide energy. Choose all-purpose flour for a reliable texture, and remember to keep it stored in a cool, dry place. If you need alternatives, consider using almond flour for gluten-free options.

Carrots, celery, and onions add both flavor and nutrition to the dish. These vegetables are packed with vitamins and minerals, contributing to a balanced meal. When selecting fresh produce, opt for organic options when possible. Store them in the refrigerator in a produce bin to maintain freshness. For substitutions, you can use frozen vegetables if fresh are unavailable.

Chicken broth enhances the dish’s overall flavor and provides moisture. Broth, traditionally made from simmering chicken bones, is a great source of minerals. Use low-sodium broth for more control over the dish’s saltiness. Store any unused broth in the fridge and use it within a week or freeze it for future recipes. Vegetable broth can be a flavorful substitute in vegetarian adaptations.

Herbs like thyme and parsley elevate the flavor profile significantly, bringing aromatic notes to the dish. They have been used for centuries both for culinary and medicinal purposes. Choose fresh herbs for the best flavor, though dried ones can be used in a pinch. Store fresh herbs in the refrigerator wrapped in damp paper towels. If you’re out, consider using Italian seasoning as an alternative.

Common Mistakes to Avoid

  • Not browning the chicken: Browning the chicken before adding it to the slow cooker enhances flavor. Skipping this step can lead to a less robust taste.
  • Skipping the simmer: Allowing the dish to simmer properly is crucial to developing flavors. Rushing this process compromises the overall taste.
  • Overmixing the dumpling dough: Overworking the dough can lead to tough dumplings. Mix just until combined for light and fluffy results.
  • Using high heat too early: Cooking the dish on high for too long can result in dried-out chicken. Opt for low and slow cooking for tenderness.
  • Not adding enough liquid: Make sure to include adequate broth to prevent the dish from drying out during the cooking process.
  • Neglecting spices: Seasoning throughout the cooking process is important. Ensure to taste and adjust seasoning as needed for balance.
  • Forgetting to check doneness: Chicken should reach an internal temperature of 165°F. Use a meat thermometer to ensure safety.
  • Serving too hot: Let the dish cool for a few minutes before serving to avoid burning your mouth on piping hot dumplings.

Essential Techniques

Using a slow cooker is the heart of this recipe. It’s important because it allows flavors to meld while keeping the chicken incredibly tender. To master it, simply layer the ingredients correctly, starting with the chicken and ending with the vegetables on top. Avoid opening the lid too often to maintain steady cooking temperatures. Look for the cooking time in your recipe and touch the food gently; it should feel tender and fork-letting.

Making dumplings is an essential step that can be tricky. The mixing process must be done carefully to ensure fluffy results. To master this technique, use a light hand when combining the ingredients, striving for a sticky consistency. One common pitfall is using too much liquid; visual cues include a slightly thick but pourable batter. The perfect dumpling should rise and float just above the broth while expanding as it cooks.

Pro Tips for Perfect Slow Cooker Chicken and Dumplings

Ensure you prepare your ingredients the night before for an easy morning setup. This allows all flavors to meld better and makes the cooking process smoother. Use high-quality ingredients wherever possible, as this significantly impacts the final dish’s taste. Adjust the thickness of the broth by adding flour or cornstarch mixed with water if you prefer a thicker consistency.

For flavor boosting, add a tablespoon of lemon juice or a splash of white wine to brighten the broth, enhancing its overall appeal. If you like a bit of heat, consider incorporating red pepper flakes for an added kick. To reduce the cooking time, you can cut the chicken into smaller pieces to ensure it cooks evenly.

Consider topping off the dish with freshly chopped parsley right before serving. This not only adds freshness but also enhances the visual appeal. Lastly, remember to save any leftovers for a warming lunch the next day, as the flavors continue to develop and improve overnight.

Variations and Adaptations

If you’re looking for regional flavors, consider adding ingredients such as corn or diced potatoes for a more heartiness. Seasonal adaptations like adding butternut squash in autumn or peas in spring can bring a fresh twist to the dish. For dietary modifications, swapping out regular dumplings for gluten-free versions is straightforward—use a gluten-free flour mix for similar results.

Try introducing different herbs, such as rosemary or sage, for a change in flavor profile—these add a new depth to the dish. Adjust the texture by cooking the dumplings only at the end, allowing them to steam rather than simmer in the broth for a firmer consistency. For presentation alternatives, serve the dish in individual bowls with mixed greens on the side.

Serving and Presentation Guide

For a vibrant presentation, serve your Chicken and Dumplings in large bowls and garnish with fresh parsley or chives. This brightens the dish and adds a fresh layer of flavor. You can also drizzle a touch of cream over the top for a luxurious finish. Pair it with crusty bread for dipping, adding an inviting touch to your meal.

Temperature considerations are important; serve this dish warm for the best experience. Plate into bowls just before serving to keep the dumplings from overcooking—maintain their fluffy texture. Portion control is helpful, ensuring everyone has a hearty serving without excess leftovers. Presenting the dish family style allows for a communal and cozy dining experience.

Wine and Beverage Pairing

A lovely white wine such as Sauvignon Blanc complements the comforting flavors of Chicken and Dumplings beautifully. Its crisp acidity cuts through the richness of the broth while enhancing the flavor of the chicken. Alternatively, a light-bodied red like Pinot Noir can add an interesting contrast without overpowering the dish.

For non-alcoholic alternatives, consider serving sparkling water with a slice of lemon for a refreshing accompaniment. Iced tea, either sweetened or unsweetened, pairs well, providing a balanced backdrop to the rich flavors of the dish. Gentle herbal teas can also enhance the comforting nature of the meal.

Storage and Shelf Life

Store any leftover Chicken and Dumplings in airtight containers in the refrigerator for up to 3 days. To maintain freshness, ensure they are cooled to room temperature before storing. If you intend to keep them longer, freezing is an option—pack the dish in freezer-safe containers and enjoy it for up to three months.

Signs of spoilage include an off odor or discoloration of the dumplings. When reheating, ensure the chicken reaches an internal temperature of 165°F to ensure it is safe to eat. For best results, reheat in a pot on the stove, adding a splash of broth to keep the dish moist. Dumplings might require a quick addition of water or broth to prevent them from drying out.

Make Ahead Strategies

You can prepare the chicken and vegetables the night before and store them separately to save time. When you’re ready, simply add the prepared ingredients into the slow cooker in the morning. Alternatively, make a double batch and freeze half for a quick meal later—store in portions for easy defrosting.

To enhance flavors, consider marinating the chicken in spices and herbs overnight before cooking. This will infuse deeper flavors during the slow cooking process. For dumplings, prepare the dough a few hours in advance and refrigerate it until you’re ready to use it. This allows the flavors to develop further for even more delicious dumplings.

Scaling Instructions

If you’re looking to halve the recipe, simply adjust the ingredients accordingly, ensuring that the slow cooker remains adequately filled to prevent drying out. For doubling or tripling, a larger slow cooker is essential, and you may need to adjust cooking time slightly, especially if the cooker is very full—monitor closely for doneness.

Timing modifications are crucial when scaling. Larger batches may require more cooking time, while smaller batches will cook quicker. Make a note of this if you’re experimenting with different batch sizes for the first time. For leftovers, ensure to store appropriately, and never refreeze an already frozen meal to maintain quality.

Nutritional Deep Dive

A typical serving of Slow Cooker Chicken and Dumplings offers a satisfying balance of macronutrients. You’ll get protein from the chicken, carbohydrates from the dumplings, and healthy fats if using additional oils or creams. Understanding this balance is vital for anyone looking to maintain a healthy diet.

On the micronutrient side, this dish provides vitamins A and C from the vegetables, iron from the chicken, and various B vitamins. These nutrients play critical roles in bolstering the immune system, improving energy levels, and enhancing overall health. Monitoring portion sizes can support weight management and make this dish a wholesome choice any day.

Dietary Adaptations

For those following a gluten-free diet, simply substitute conventional flour in the dumplings for a gluten-free mix. This ensures you can enjoy the comforting experience without the symptoms associated with gluten intolerance. For a dairy-free version, replace cream with coconut milk or a dairy-free alternative.

Vegan adaptations are possible as well—substituting the chicken for plant-based proteins and using vegetable broth instead of chicken broth yields a delicious alternative. For low-carb options, consider vegetable dumplings or simply enjoy the chicken and broth with a side of steamed vegetables to keep it light yet comforting.

If you are on a keto diet, using chicken thighs and reducing starchy vegetables provides low-carb meal options. Lastly, paleo enthusiasts can enjoy a similar dish by sticking to clean ingredients—using almond flour for dumplings and avoiding dairy altogether.

Troubleshooting Guide

If you encounter texture issues, such as soggy dumplings, check the amount of liquid used. You can resolve this by reducing the initial broth slightly. For flavor balance, consider adding more herbs or spices as needed towards the end of cooking, allowing time for the flavors to meld without overpowering the dish.

Temperatures can be problematic if your slow cooker runs inconsistently. If you find the chicken is undercooked, monitor cooking times closely and allow for extra cooking time if needed. Equipment challenges can arise if your slow cooker isn’t functioning properly; hold a firm understanding of your appliance to adjust expectations.

Ingredient substitutions may not always yield the same results. If you’re experimenting, make sure to account for differences in moisture and texture with the ingredients you choose. Not all substitutes are equal, so a little planning goes a long way towards achieving the desired outcome.

Timing concerns can lead to overcooked chicken or dumplings if you’re not attentive. Always have the recipe accessible to adjust cooking times accordingly based on your specific slow cooker’s performance.

Recipe Success Stories

Community feedback for this recipe has been overwhelmingly positive, with many expressing gratitude for the ease and flavors it delivers. Families report making it regularly, especially during busy school weeks, as children and adults alike love its comfort and familiarity.

Variations shared on social media highlight unique twists that readers have made, such as incorporating different spices or vegetables. These adaptations inspire further creativity with the recipe, showcasing the versatility of Chicken and Dumplings in various households. Readers take pride in their personal modifications, showing the dish’s adaptability.

Photography tips from the community suggest showcasing the vibrant colors of the vegetables and the creamy broth—highlighting the appealing presentation is key to capturing interest. Many users comment on the challenge of conducting a successful shoot due to the enticing aroma distracting them from the task!

Suggestions for making the dish even better pour in regularly. Some share tips on how to prepare healthier versions or improve the technique, further enriching the community’s engagement with the recipe. Encouraging readers to leave feedback fosters a sense of community ownership over the recipe.

Frequently Asked Questions

Can I use frozen chicken in this recipe?

Yes, you can use frozen chicken, but it’s important to adjust the cooking time accordingly. Ensure that it reaches an internal temperature of 165°F before consuming.

What if my dumplings are not cooking thoroughly?

If your dumplings are not cooked through, it might be an issue of temperature. Ensure they are submerged in the broth and consider cooking them for a bit longer.

Can I prepare this recipe in advance?

Absolutely! You can prep the ingredients the night before and store them in the refrigerator. Just add them to the slow cooker in the morning for a hassle-free dinner.

How do I store leftovers?

Store leftovers in airtight containers in the refrigerator for up to 3 days. You can also freeze portions for longer storage if desired.

What if my broth is too thick?

If the broth becomes too thick, simply add a splash of water or broth to thin it out. Stir well before serving.

Is there a vegetarian version of this dish?

Yes! You can substitute the chicken with your choice of plant-based protein and use vegetable broth for a completely vegetarian meal.

How can I thicken the broth?

To thicken the broth, you can mix a tablespoon of cornstarch with water and add it to the slow cooker in the last hour of cooking.

Can I use different vegetables in the recipe?

Certainly! Feel free to add vegetables like potatoes, peas, or green beans to customize the dish to your liking.

What should I serve with Chicken and Dumplings?

This dish pairs wonderfully with crusty bread or a light side salad. Some also enjoy it with a glass of wine or iced tea.

How long does it take to cook on high setting?

If you prefer to cook on high, the chicken and dumplings will typically be ready in about 4 hours, though this can vary based on your slow cooker.

Additional Resources

For those inspired to explore further, consider checking out my related recipes, such as Creamy Mushroom Risotto or Classic Beef Stew. These comfort food options balance flavors and textures wonderfully, perfect for any occasion.

I also provide technique guides that dive into using a slow cooker effectively, allowing you to explore more traditional and modern recipes that suit your lifestyle. Ingredient information is available for those who wish to learn about seasonal alternatives or enhance their overall cooking knowledge.

Equipment recommendations are crucial in ensuring you have the best results. Researching top brands of slow cookers or kitchen gadgets will elevate your cooking experience. Seasonal variations can invigorate your meal planning with fresh ideas inspired by the changing seasons.

Join the Conversation

I invite you to share your cooking experiences on social media with photos of your Slow Cooker Chicken and Dumplings creations! Your photography tips can inspire others within our community to enhance their presentations.

Leave your recipe reviews or suggestions—each story adds to the collective experience. Engaging with fellow home cooks can be enlightening. Share your variations and ideas; I look forward to seeing how you make this recipe your own!

The Recipe

Slow Cooker Chicken and Dumplings

Serves: 6 servings

Prep Time: 15 mins

Cook Time: 6 hours

Total Time: 6 hours 15 mins

Kitchen Equipment Needed

  • Slow cooker
  • Mixing bowl
  • Measuring cups and spoons
  • Whisk
  • Cutting board
  • Sharp knife

Ingredients

  • 2 lbs boneless, skinless chicken thighs
  • 4 cups chicken broth
  • 3 cups mixed vegetables (carrots, celery, peas)
  • 1 medium onion, diced
  • 2 cups flour
  • 1 tablespoon baking powder
  • 1 teaspoon salt
  • ½ cup milk
  • ½ cup melted butter
  • 1 tablespoon dried thyme
  • Fresh parsley for garnish

Directions

  1. Place the chicken in the slow cooker and add the diced onions, mixed vegetables, thyme, and chicken broth. Season with salt and pepper to taste.
  2. Cover and cook on low for 6-7 hours or until the chicken is tender.
  3. About 30 minutes before serving, in a mixing bowl, combine flour, baking powder, and salt. Add milk and melted butter, stirring until just combined to form a soft dough.
  4. Drop spoonfuls of the dumpling mixture over the simmering chicken and vegetables in the slow cooker.
  5. Cover and cook on high for an additional 30 minutes or until dumplings are fluffy and cooked through.
  6. Once done, shred the chicken with two forks, stir the mixture, and serve hot, garnished with fresh parsley.

Recipe Notes

  • For thicker broth, whisk in a bit of cornstarch mixed with water before serving.
  • For a lighter version, use skinless chicken breasts instead of thighs.
  • Frozen vegetables can be used instead of fresh; just adjust the cooking time accordingly.

Cheesy Pasta Dish: The Ultimate One-Pot Comfort Food Recipe

Cheesy One-Pan Pasta: The Ultimate Comfort Dish

⚖️
Difficulty
Easy

⏲️
Prep Time
10 mins

🕒
Cook Time
20 mins

⏱️
Total Time
30 mins

🍽️
Servings
4

Pasta lovers, gather around for a cheesy, saucy, and totally comforting dish that will become a weeknight favorite! This Cheesy One-Pan Pasta is not only simple to prepare but packed with flavors that will keep you coming back for more. Imagine twirling your fork around tender pasta enveloped in a rich and creamy cheese sauce, combined with savory vegetables and seasonings that dance on your palate. With minimal effort required, you’ll find yourself making this dish time and again.

The beauty of this recipe lies in its ability to cook all in one pan, allowing the flavors to meld beautifully while keeping cleanup to a minimum. The creamy cheese sauce pairs perfectly with the al dente pasta, ensuring every bite bursts with rich flavor and comforting creaminess. Whether you’re cooking for your family or entertaining friends, this dish won’t let you down.

Quick Recipe Highlights

  • Flavor Profile: The blend of creamy cheese, herbs, and sautéed vegetables creates a comforting and delicious flavor that warms the heart.
  • Texture: Enjoy the delightful contrast of creamy pasta and perfectly tender veggies, all coated in a luscious cheese sauce.
  • Aroma: The enticing aroma of garlic and freshly cooked pasta will fill your kitchen, making it impossible to resist.
  • Visual Appeal: This dish is visually enticing, with vibrant colors from fresh vegetables and a golden cheese coating.
  • Skill Level Needed: This easy recipe requires just basic cooking skills, perfect for beginners and experienced cooks alike.
  • Special Equipment: All you need is a large skillet or pot for this recipe, making it accessible for any home cook.

Recipe Overview

  • Difficulty Level: This Cheesy One-Pan Pasta is classified as easy, thanks to its minimal steps and straightforward cooking process.
  • Category: Ideal for a quick dinner, this dish also shines as a potluck favorite, side dish, or comforting weekend meal.
  • Cuisine: A delightful fusion of Italian-inspired comfort food, perfect for lovers of pasta and cheese.
  • Cost: Budget-friendly, this recipe makes use of everyday ingredients that won’t break the bank.
  • Season: Enjoy this comforting pasta dish all year round; it’s a perfect cozy choice for chilly evenings.
  • Occasion: Great for weeknight dinners, family gatherings, or even as a comforting dish when feeling under the weather.

Why You’ll Love This Recipe

One of the best aspects of this Cheesy One-Pan Pasta is its incredible taste and texture. The creamy cheese envelops the perfectly cooked pasta, bringing warmth and comfort to every bite. The addition of sautéed vegetables adds depth, enhancing both flavor and nutrition. If you’re craving a cozy meal that satisfies, look no further!

Another great reason to love this dish is its convenience. The one-pan approach simplifies the cooking process, allowing you to spend less time in the kitchen and more time enjoying your meal. It’s perfect for busy weeknights when you need something hearty and filling without the fuss.

Nutritionally, this pasta dish strikes a nice balance. You can sneak in a variety of vegetables, contributing to a well-rounded meal, while the cheese provides a good source of protein and calcium. This makes it a delightful option for those looking to nourish their bodies while indulging in a favorite comfort food.

Socially, this dish is a hit at gatherings. Its universally appealing flavors and inviting aroma make it a perfect centerpiece for any gathering. Share this meal with friends or family for an enjoyable dining experience filled with laughter and warmth.

Lastly, the cost-effectiveness of this recipe can’t be understated. The ingredients are readily available and affordable, making this Cheesy One-Pan Pasta not only a delicious choice but also a smart one for those watching their budgets. You can make a satisfying meal without compromising on taste or quality.

Historical Background and Cultural Significance

The origins of pasta can be traced back to ancient civilizations, with roots in Italy that date back centuries. Pasta, in its many forms, has evolved into a dietary staple enjoyed worldwide. The Cheesy One-Pan Pasta variation reflects the Italian love for combining pasta with rich flavors, making it a beloved comfort food.

Culturally, this dish represents community and family, often serving as the centerpiece for shared meals. In Italian households, pasta dishes like this are often passed down through generations, each family adding their spin, further enriching the culture surrounding this beloved food.

As with many comfort foods, this recipe reflects culinary evolution. With the rise of one-pot meals, the Cheesy One-Pan Pasta has emerged as a practical and quick alternative that retains the essence of traditional recipes while catering to modern cooking styles.

Regional variations of pasta dishes can be found all over the world. From mac and cheese in the United States to creamy pastas in various Italian regions, the adaptability of pasta continues to shine. This dish gives you a taste of this versatility wrapped up in a simple and delicious recipe.

Ingredient Deep Dive

Pasta is the heart of this dish, playing a crucial role in providing texture and nourishment. Often coming from durum wheat, pasta is not only filling but also versatile, lending itself to a variety of dishes. Rich in carbohydrates, it provides energy for your day. When choosing pasta, select high-quality varieties for the best results.

Cheese is another star ingredient. It not only adds creaminess but also a flavor profile that complements the pasta beautifully. Different types of cheese can offer unique flavors; for instance, Parmesan brings a nutty essence, while mozzarella adds a gooey texture. Selecting fresh cheese can elevate this dish significantly.

Vegetables add color, texture, and nutrients. Ingredients like bell peppers, spinach, or zucchini can be included to enhance the dish. Fresh veggies ensure vibrant color and maximum flavor, contributing to a well-rounded meal. They’re also an excellent outlet for seasonal produce.

The herbs and spices used in this recipe bring depth to the flavor. Fresh basil, oregano, and garlic are commonly used to create aromatic notes that complement the creaminess of the cheese. Choose fresh herbs when possible, as they enhance the overall taste more than dried varieties.

To bind the flavors together, broth or cream is often used. Vegetable broth adds subtle seasoning while keeping it vegetarian-friendly. Alternatively, using cream provides a rich lusciousness that many adore in comfort foods. Understanding these ingredients makes preparing this dish a joyful experience.

Common Mistakes to Avoid

  • Overcooking the pasta: Keep an eye on cooking times; aim for al dente to maintain a good texture.
  • Using the wrong cheese type: Not all cheeses melt well. Stick to varieties that are known for their melting qualities, like mozzarella or gouda.
  • Neglecting to season: Don’t forget to season the pasta water. A well-seasoned base equals flavor in every bite.
  • Cooking vegetables too long: Add vegetables towards the end to maintain their freshness and crunch.
  • Not allowing the sauce to thicken: Give your cheese sauce a moment to reduce and thicken for that creamy consistency.
  • Skipping the broth: Always use broth for an extra flavor punch; water alone lacks the depth needed.
  • Using cold cheese: Room temperature cheese melts better, enhancing the creaminess throughout the dish.
  • Rushing the preparation: Take your time to allow flavors to develop; a rushed meal seldom has the same depth.
  • Sacrificing quality for quantity: Using cheap pasta and cheese may save money but will compromise the dish’s flavor and enjoyment.
  • Not letting leftovers cool before storage: Let the dish cool slightly before storing to prevent condensation and sogginess.

Essential Techniques

To achieve the perfect pasta texture, cooking it al dente is crucial. This technique involves boiling the pasta until it’s firm to the bite while allowing for further absorption of flavors from the sauce. To master this, ensure you taste frequently and aim to drain it just before it reaches your ideal texture.

Creating a creamy cheese sauce is another vital skill. Use low heat and gradually add cheese, stirring consistently until melted. A common pitfall is applying high heat, which can lead to separating fats rather than uniform creaminess. Visual cues, such as a smooth, glossy consistency, will indicate success.

Sautéing vegetables properly is essential for enhancing their flavors without overcooking. Aim for a tender-crisp texture by stirring frequently in a hot pan, and always preheat your skillet to avoid a soggy result. Fresh vegetables should retain some crunch and their vibrant colors.

Combining flavors effectively requires an understanding of seasoning. Taste as you go, and remember that salt and herbs are not just for the end of cooking; integrate them throughout to build layers of flavor. The goal is to have a harmonious blend that showcases the pasta and sauce.

Finally, mastering the art of keeping everything together in a one-pan dish requires timing. Plan your steps so that the pasta is cooked just as the sauce thickens. This coordination ensures that every element of the dish melds perfectly, creating a satisfying dining experience.

Pro Tips for Perfect Cheesy One-Pan Pasta

1. Always use a large pot or skillet to ensure even heat distribution and prevent sticking.
2. For extra flavor, consider adding a splash of white wine to the lightly sautéed garlic and vegetables before incorporating the broth.
3. Don’t rinse your pasta after cooking; this removes the starch that helps the sauce adhere.
4. For a lighter twist, replace half the cream with low-fat milk or broth.
5. Customize your cheese blend; combining different cheeses can create a unique flavor profile tailored to your taste.
6. For added protein, stir in cooked chicken, shrimp, or beans before serving.
7. Keep a reserved pasta cooking water nearby to adjust the thickness of the sauce as needed.
8. Experiment with additional herbs or spices to create a personalized flavor; chili flakes add heat, while thyme offers earthiness.

Variations and Adaptations

This Cheesy One-Pan Pasta recipe is wonderfully versatile! You can easily adjust it by changing the protein source, with options like grilled chicken, shrimp, or tofu to suit dietary preferences. For vegetarian adaptations, consider incorporating lentils or chickpeas to boost protein content.

Seasonal adaptations can also be delightful! In spring, add fresh asparagus or peas for a burst of color and sweetness; in winter, hearty vegetables like kale or Brussels sprouts pair beautifully. This dish takes well to whatever is available locally, ensuring freshness and flavor.

If you’re looking to modify the flavors, experiment with different cheese types. Adding blue cheese or feta can bring an unexpected tang, while a sprinkle of smoked cheddar offers a unique twist. Each alteration alters the dish’s profile, keeping it exciting for repeat meals.

Textural modifications can be made by toasting breadcrumbs with herbs and cheese for a crunchy topping that contrasts the creamy pasta. This adds an extra layer of enjoyment and a delightful crunch.

Don’t forget about presentation! Using colorful vegetables not only boosts nutritional value but also makes the dish visually appealing. Adding fresh herbs, a drizzle of olive oil, or a spritz of lemon juice can elevate the presentation even further.

Serving and Presentation Guide

Presentation plays a big role in how a dish is perceived. For this Cheesy One-Pan Pasta, consider plating it in a large serving bowl to encourage family-style sharing. Use a fork to create nests of pasta, topped with finely chopped herbs or a sprinkle of grated cheese.

Garnishing ideas include fresh basil leaves or a dusting of paprika for color contrast. A squeeze of fresh lemon can enhance the flavor and brighten the dish, while toasted pine nuts can add a gourmet touch.

In terms of accompaniments, a simple side salad with a tangy vinaigrette balances the richness of the pasta beautifully. Additionally, a slice of crusty garlic bread can serve as the perfect vehicle for scooping up the cheesy goodness.

Temperature is key when serving this dish; serve immediately while warm to enjoy the gooey texture of the cheese. If you need to hold it for a few minutes, cover it with foil to maintain warmth and moisture.

Portion control is also important; serve reasonable portions that allow guests to enjoy without overwhelming them. For family-style dinners, consider a larger serving bowl with a ladle for easy self-serving.

Wine and Beverage Pairing

Pairing this Cheesy One-Pan Pasta with the right beverage can elevate your dining experience. A crisp white wine, such as Sauvignon Blanc or Pinot Grigio, complements the dish’s creamy richness. These wines enhance the flavors while cutting through the cheese’s richness.

If you prefer red wine, opt for a light-bodied option like Pinot Noir. Its fruitiness will harmonize well with the pasta’s flavors without overshadowing the dish. Serve the wine chilled to enhance its refreshing qualities against the warm comfort of the pasta.

For non-alcoholic alternatives, consider a refreshing sparkling water with a slice of lemon. It offers a palate-cleansing effect and balances the richness of the meal.

Tea lovers might enjoy serving a light herbal tea, such as chamomile or peppermint, which offers a soothing end to the meal.

Remember to chill beverage options beforehand, as serving temperatures can significantly impact the overall enjoyment of the meal.

Storage and Shelf Life

Proper storage is essential for maintaining the quality of your Cheesy One-Pan Pasta leftover. Store in an airtight container in the refrigerator for up to 3 days. Ensure it cools completely before sealing to prevent moisture buildup.

For longer storage, consider freezing portions; place the pasta in freezer-safe bags or containers and label. It can last up to 2 months in the freezer. Thaw overnight in the refrigerator and reheat in a skillet for best results.

When reheating, add a splash of liquid to restore the creaminess. Heat on low and stir frequently, checking for a creamy consistency. Be cautious not to overcook, as this can lead to a dry texture.

Signs of spoilage include an off smell or strange texture; when in doubt, discard any questionable leftovers to ensure safety.

Freezing guidelines are key—no composting leftover portions after a big meal! Instead, portion and label before stashing in the freezer for a quick meal on busy days.

Make Ahead Strategies

Planning ahead is a great way to ensure a smooth cooking experience. Start by prepping your ingredients in advance. Chop vegetables and measure out cheeses, storing them in the fridge for easy access. This will save you precious time on cooking day.

You can also make the sauce ahead of time. Store the cheese sauce in a separate container and warm it when ready to cook the pasta. Cook pasta al dente, cool it down in ice water, and store it in the refrigerator if making a day ahead.

Assembling the dish within a day of serving is ideal for freshness and flavor. Start by layering the pasta, sauce, and vegetables in your cooking pot before cooking; let it sit, then warm before serving for concentrated flavors.

Remember that adding fresh herbs or garnishes just before serving will ensure they retain their vibrant flavors and colors, enhancing the dish’s final presentation.

Finally, always check ingredient freshness prior to preparation, ensuring optimal flavor and quality in every bite!

Scaling Instructions

Scaling this Cheesy One-Pan Pasta is simple! To halve the recipe, just divide each ingredient measurement in half while adjusting cooking time accordingly. Less pasta may require slightly less sauce, so keep an eye on the consistency while cooking.

If you wish to double or triple the recipe, use larger pots to accommodate the increased volume. Avoid overcrowding your cooking vessel, as this can lead to uneven cooking. Stick to one pan, letting flavors meld effectively.

Consider timing adjustments based on quantity; additional pasta may require slightly longer cook times. Test the pasta for doneness as cooking progresses to ensure it remains perfectly tender.

Always remember to adjust the seasoning according to scaled recipes; a larger batch may require more herbs and spices.

In terms of storage, ensuring you have enough containers for leftover portions is crucial—plan for multiple sizes if needed!

Nutritional Deep Dive

A thorough nutritional breakdown of the Cheesy One-Pan Pasta reveals a balance of macronutrients. With each serving, expect a hearty dose of carbohydrates from pasta, providing energy.

Proteins from cheese contribute to muscle repair and maintenance, making it a satisfying dish. The vegetables add fiber and vitamins, enhancing overall nutrient uptake in each bite.

Micronutrient analysis highlights important vitamins like Vitamin A from vegetables and calcium from cheese, both vital for overall health and wellness. Being mindful of portion sizes can ensure a well-rounded meal while enjoying the comfort of pasta.

For those considering dietary goals, moderating cheese quantity can help keep calories in check while maintaining the heartiness of the dish. Low-fat options are also available for lighter meals without sacrificing flavor.

Finally, this dish can be integrated into weight management plans by adjusting servings and incorporating more vegetables.

Dietary Adaptations

For those needing gluten-free options, replacing standard pasta with gluten-free varieties is a simple adaptation. The choice of rice or quinoa pasta can provide satisfying alternatives that maintain similar qualities to traditional pasta.

If you’re looking for a dairy-free version, substitutes like cashew cheese or nutritional yeast can offer a rich, cheesy flavor without the dairy. Cream alternatives can also be utilized to create a luxurious sauce without cow’s milk.

Vegans can enjoy this dish by following the same cheese substitutions, incorporating more vegetables, or adding plant-based protein sources like lentils for additional depth.

Low-carb adaptations can be achieved by replacing pasta with spiralized zucchini or cauliflower rice, perfect for individuals following keto or other carb-restricted diets.

Paleo-friendly variations can simply exclude modern grains and dairy while embracing wholesome ingredients like natural fats, fresh vegetables, and proteins to create hearty meals.

Troubleshooting Guide

Texture issues can arise if overcooked pasta or cooked vegetables. The key is to monitor closely and taste frequently, aiming for al dente pasta that maintains bite and crisp vegetables that provide contrast to cheesiness.

For flavor balance, if your dish is too salty, consider adding a splash of lemon juice to brighten flavors or include an additional splash of broth. If under-seasoned, a touch of salt or a sprinkle of parmesan can enhance the overall dish.

Temperature problems during cooking can often result from stovetops that vary in real heating power. Invest in quality cookware that evenly distributes heat; heat slowly while adjusting cooking times as needed.

Equipment challenges such as inadequate pots can hinder cooking. Use a wide, heavy-bottomed pot to avoid burning and promote even cooking.

If ingredient substitutions leave the dish lacking texture, remember to incorporate elements that add crunch or creaminess based on the missing components—think nuts, seeds, or alternative veggie additions.

Timing concerns can typically be avoided by prepping everything in advance. If you find yourself running late, reducing serving sizes helps to speed cooking time without sacrificing quality.

Recipe Success Stories

The community feedback on this Cheesy One-Pan Pasta has been overwhelmingly positive. Many home cooks enjoy how easy it is to make while still delivering bold flavors that impress family and friends alike.

Readers have shared their variations, showcasing how they’ve adapted the dish to suit their tastes—whether adding spicy sausage, seasonal vegetables, or healthy greens to better align with personal preferences.

Adaptation stories reveal the versatility of the recipe, with countless home chefs adding their touches and blending flavors that reflect their culinary heritage while maintaining the integrity of the dish.

Photography tips often accompany these mentioned modifications, suggesting natural lighting and simple plating to highlight the creamy texture and vibrant colors that make the dish visually appealing.

The interactions surrounding this recipe demonstrate how food can be a connector, sparking conversations and encouraging creativity, leading to greater kitchen adventures.

Frequently Asked Questions

Can I use frozen vegetables in this recipe?

Absolutely! Frozen vegetables can work just as well, but be sure to add them at the appropriate time to ensure they cook through properly without becoming mushy.

What can I use as a cheese substitute for this recipe?

For a dairy-free version, try cashew cheese, nutritional yeast, or a store-bought vegan cheese alternative. These options can provide a similar creaminess and flavor without dairy.

How should I store leftovers?

Store any leftover Cheesy One-Pan Pasta in an airtight container in the refrigerator for up to 3 days. Ensure it cools completely before sealing it to maintain freshness.

Can I prepare this dish in advance?

Yes! You can prep your ingredients ahead of time. Just keep them refrigerated until you’re ready to cook. Assemble the dish and cook the same day for the best flavor and texture.

Is it possible to make this pasta dish gluten-free?

Yes, simply replace the regular pasta with gluten-free varieties, such as rice or corn pasta. This allows those with gluten sensitivities to enjoy a similar dish.

Can I use different types of pasta?

Definitely! Feel free to experiment with various pasta shapes. Just remember to adjust cooking times as necessary based on the type you choose.

What kind of cheese should I use for the best flavor?

A combination of cheeses often works best. Try mozzarella for stretchiness and cheddar for richness, or experiment with parmesan for added flavor depth.

How can I make this dish spicier?

Add red pepper flakes or sauté chopped jalapeños with your vegetables. This will kick up the heat without overpowering the delicious cheesy flavor.

Can I freeze Cheesy One-Pan Pasta?

Yes, this dish freezes well. Just portion it into airtight containers, label them, and store them in the freezer for up to 2 months. Reheat gently when ready to serve.

What sides go well with Cheesy One-Pan Pasta?

A light side salad or garlic bread pairs well with this dish. It balances out the richness and supports a satisfying meal.

How do I reheat frozen leftovers properly?

Thaw overnight in the refrigerator for best results. Reheat on the stovetop over low heat, adding a bit of broth or milk to restore creaminess as needed.

Additional Resources

For expanding your culinary repertoire, check out our related recipes featuring pasta in different forms—like delicious baked pasta dishes or fresh pasta salads.

You can also explore our technique guides focused on cooking pasta perfectly al dente or creating creamy sauces that wow.

Ingredients like seasonal vegetables will not only enhance flavor but ensure you’re using fresh produce; explore more about selecting and storing produce effectively.

When equipping your kitchen, consider investing in high-quality pots that are perfect for one-pan meals, giving you the versatility to create a range of dishes with ease.

Finally, dive into seasonal variations by utilizing the best local produce for your dishes and enjoying different flavors throughout the year.

Join the Conversation

We’d love for you to share your experiences with our Cheesy One-Pan Pasta recipe on social media! Tag us in your photos, and let us know any modifications you made to personalize your dish.

Your feedback not only helps us improve recipes but also inspires others to get creative in the kitchen. We encourage you to leave reviews and suggestions in the comments below to foster community engagement.

Whether you’ve created a unique twist or simply followed the recipe, your culinary adventures can inspire others to embrace the joys of cooking and share in the delight.

Don’t forget, the fun doesn’t stop here; join our newsletter for more delicious recipes and exclusive cooking tips!

The Recipe

Cheesy One-Pan Pasta

Serves: 4

Prep Time: 10 mins

Cook Time: 20 mins

Total Time: 30 mins

Kitchen Equipment Needed

  • Large skillet or pot
  • Cutting board
  • Sharp knife
  • Measuring cups and spoons
  • Wooden spoon or spatula

Ingredients

  • 8 ounces of pasta (your choice)
  • 2 cups vegetable broth
  • 1 cup heavy cream
  • 1 cup mixed vegetables (bell peppers, spinach, etc.)
  • 1 cup shredded cheese (mozzarella or cheddar)
  • 2 tablespoons olive oil
  • 1 teaspoon garlic powder
  • Salt and pepper to taste

Directions

  1. Heat olive oil in a large skillet over medium heat. Add mixed vegetables sauté for 3-4 minutes until tender.
  2. Add vegetable broth, cream, and pasta; stir to combine. Bring to a boil, then reduce heat to a simmer.
  3. Cook pasta according to package instructions, stirring occasionally until al dente. Add cheese and stir until melted and creamy.
  4. Season with garlic powder, salt, and pepper, then serve warm and enjoy!

Recipe Notes

  • Feel free to adjust the types of cheese based on preference.
  • For added protein, mix in grilled chicken or beans.
  • Leftovers can be stored in the fridge for up to 3 days or frozen for later use.

Delicious Crockpot Ham and Potato Casserole for Busy Weeknights

Crockpot Ham and Potato Casserole: A Hearty Comfort Food Delight

⚖️
Difficulty
Easy

⏲️
Prep Time
15 mins

🕒
Cook Time
6 hrs

⏱️
Total Time
6 hrs 15 mins

🍽️
Servings
4-6

Crockpot Ham and Potato Casserole is a warm, indulgent dish that brings together the savory flavors of ham, tender potatoes, and creamy cheese, all simmered to perfection in your slow cooker. This recipe is perfect for family gatherings or cozy weeknight dinners, where you can set it to cook and enjoy the rich aromas wafting through your home. With every bite, you’ll experience a delightful blend of textures – the softness of the potatoes against the hearty ham and the gooey cheese creates a satisfying mouthfeel that is hard to resist.

What makes this casserole stand out is its simplicity. It requires minimal prep and lets the crockpot do the heavy lifting, allowing you to spend more time with loved ones. The layers of flavors meld beautifully over hours of cooking, resulting in a comforting dish that warms both the heart and soul. Serve it hot from the pot, and watch as it quickly disappears from the table, leaving everyone asking for seconds!

Quick Recipe Highlights

  • Flavor Profile: The combination of smoky ham paired with creamy cheddar and earthy potatoes creates a rich and savory dish that’s utterly comforting.
  • Texture: You’ll enjoy the contrasting textures of soft, fluffy potatoes, chewy ham, and melted cheese, providing a delightful bite each time.
  • Aroma: As it cooks, the mingling scents of ham, herb-infused cream, and broccoli fills the kitchen, inviting everyone to gather around.
  • Visual Appeal: This casserole is visually stunning with its golden cheese crust and bright green broccoli peeking through the layers, making it an inviting dish.
  • Skill Level Needed: With its straightforward steps, this recipe is easily accessible for beginner cooks or anyone looking for a hassle-free meal.
  • Special Equipment: You will only need a reliable slow cooker or crockpot to achieve that perfectly tender result.

Recipe Overview

  • Difficulty Level: This crockpot recipe is classified as easy, making it a great choice for novice cooks and busy families looking for simple meal prep.
  • Category: It’s a hearty casserole, perfect for main course dinners and potluck gatherings, providing substantial nourishment and flavor.
  • Cuisine: Influenced by American comfort food traditions, this casserole reflects the homely and flavorful essence of classic family dishes.
  • Cost: The ingredients used are budget-friendly, with ham, potatoes, and cheese being accessible, making this a great option for economical cooking.
  • Season: Ideal for chilly fall and winter days, this dish brings warmth and comfort during cold months when hearty meals are most appreciated.
  • Occasion: Perfect for family dinners, holiday meals, or gatherings with friends, this casserole shines at both casual and festive occasions.

Why You’ll Love This Recipe

The taste and texture of the Crockpot Ham and Potato Casserole truly shine, thanks to the delightful combination of smoky ham and creamy, melted cheese enveloping tender potatoes. This harmony of flavors not only makes for a savory bite but also creates a satisfying dish that evokes warmth and nostalgia with every mouthful.

One of the most significant advantages of this recipe is its convenience. Simply combine the ingredients into the crockpot and let it work its magic while you carry on with your day. The long, slow cooking time breaks down the starch in the potatoes, yielding an ultra-creamy finish that tenderizes the ham and melds all the flavors splendidly—a true no-fuss meal.

Nutritionally, this casserole offers a good balance of carbohydrates from the potatoes, proteins from the ham, and fats from the cheese. Including broccoli or your choice of vegetables not only enhances its nutritional value but also introduces important vitamins and minerals, making it a well-rounded dish.

This meal is also fantastic for entertaining—simply set it in the center of the table, and allow guests to help themselves. Its communal nature invites conversation and sharing, guaranteeing that it is a hit at family gatherings.

On top of all that, this casserole is exceptionally cost-effective, allowing you to feed a family or group without breaking the bank. With its simple ingredients and easy preparation, it ensures that anyone can enjoy a delicious homemade meal without extensive effort.

Historical Background and Cultural Significance

The origins of ham and potato casseroles can be traced back to the early 20th century as households sought to utilize leftovers creatively. Conglomerating staple ingredients into a single dish was a practical solution during tougher times, thus establishing the casserole as a hallmark of American home cooking.

Culturally, dishes like the Crockpot Ham and Potato Casserole symbolize warmth, togetherness, and familial love. Many families pass down their recipes, including personal touches that signify deeper connections and cherished memories. It reflects a sense of community where people bond over shared meals.

Over the years, this dish has evolved, with numerous variations emerging that integrate local ingredients or catering to dietary restrictions. Whether you’re making it with leftover holiday ham or incorporating seasonal vegetables, each rendition tells a unique culinary story.

Regionally, you might find variations in the method of preparation or the ingredients used, as different cultures present their versions of a comforting casserole, showcasing the versatility of this humble dish while retaining its core essence.

Ingredient Deep Dive

Ham: As a primary ingredient in this casserole, ham not only introduces a rich, smoky flavor but also offers several nutritional benefits such as protein, B vitamins, and minerals like zinc. When selecting ham, look for good quality and try to choose a piece that is less processed for a more robust flavor. Store leftover ham properly wrapped in the fridge for several days or freeze for longer storage. If you need to substitute, turkey or chicken can be excellent alternatives.

Potatoes: Potatoes are the backbone of this dish, providing texture and heartiness while also being a good source of vitamins C and B6, along with potassium and fiber. When choosing potatoes, opt for waxy varieties like Yukon Gold or Red potatoes for achieving the best creamy results. They can be stored in a cool, dark place for optimal freshness and may be substituted with sweet potatoes or cauliflower for variation.

Common Mistakes to Avoid

  • Not cutting potatoes evenly can lead to uneven cooking. Aim for similar-sized pieces for consistent texture and doneness throughout.
  • Exceeding the cooking time can cause potatoes to turn mushy. Aiming for the recommended cooking period ensures all ingredients maintain their shape and integrity.
  • Using lower quality cheese may result in a dish that doesn’t melt well. Stick with good melting cheese like cheddar for the best results.
  • Overcrowding the crockpot can impede proper cooking. Ensure that there’s enough room for heat circulation by not overfilling the pot.
  • Failing to layer ingredients effectively may lead to inconsistent flavors. Start with potatoes, followed by cheese, ham, and liquids for even mixing of flavors.
  • Not seasoning the ingredients adequately can result in blandness. Generously season with salt, pepper, and your choice of herbs before cooking.
  • Skipping the pre-cooking of certain ingredients like onions or garlic might sacrifice depth of flavor. A quick sauté enhances their aromatic properties substantially.
  • Not allowing the casserole to rest after cooking can lead to a soupy texture. Letting it sit for a few minutes helps it thicken up nicely.
  • Using too much cream can make the casserole overly rich. Balance with just enough to achieve creaminess without overwhelming the dish.
  • Disregarding food safety practices with leftover pork can lead to spoilage. Always refrigerate and consume leftovers within a safe timeframe.

Essential Techniques

Layering Ingredients: Proper layering is crucial in achieving an evenly cooked casserole. Start with a base layer of potatoes, followed by meats and cheeses, then repeat to create layers. This method promotes even flavor distribution and cooking.

Cooking in a Crockpot: Slow cooking allows for flavors to meld together beautifully. Familiarize yourself with your crockpot settings and make adjustments based on the timing and ingredients to avoid over or undercooking.

Pro Tips for Perfect Crockpot Ham and Potato Casserole

1. Sauté onions and garlic before adding them to the crockpot for enhanced flavors, creating a more aromatic base.

2. Add vegetables like broccoli or peas in the last hour of cooking for freshness without overcooking, preserving their vibrant color.

3. Opt for a mix of cheeses for a complex flavor profile. Adding a tangy cheese like feta alongside cheddar can elevate taste.

4. If you prefer a crispy top, transfer the casserole to the oven for the last few minutes of cooking under the broiler.

5. Experiment with herbs and spices; thyme, rosemary, or paprika can add an exciting twist to the traditional recipe.

6. If you’re using a bone-in ham, consider using the leftover bone for even deeper flavor while cooking the casserole.

7. Allow the dish to cool for a few minutes before serving for the best texture and to enhance its flavor before enjoying.

8. For a spicy kick, consider adding jalapeños or your choice of chili flakes to the mix.

Variations and Adaptations

Regional variations can include adding beans or other locally preferred vegetables, catering to the tastes and traditions of different areas. Seasonal adaptations like sweet potato instead of regular potatoes in fall can also honor the flavors of the harvest.

Dietary modifications such as using dairy-free cheese or gluten-free cream soups make this casserole accessible to more people. Vegan adaptations could replace ham with plant-based proteins while using non-dairy substitutes for cheese.

Flavor variations, such as incorporating BBQ sauce or mustard, can invigorate the casserole experience, while texture modifications could involve pre-roasting some vegetables to add crunch at the top.

For presentation alternatives, consider serving in individual ramekins rather than a large dish for a more sophisticated appearance at gatherings.

Serving and Presentation Guide

To plate, use a large spoon to serve the casserole directly from the crockpot, allowing guests to see the appealing layers inside. Consider garnishing with fresh herbs like parsley or chives for an added touch of color and flavor.

Traditional accompaniments for this dish include a light salad or crusty bread, providing balance to the richness of the casserole. Modern serving suggestions could see the casserole topped with crispy fried onions for added crunch.

Temperature considerations are important; ensure the casserole is served bubbling hot for optimal taste. Control portion sizes by offering serving spoons to help guests serve themselves generously while managing leftovers effectively.

Wine and Beverage Pairing

For wine pairings, a light-bodied white like Chardonnay complements the dish beautifully, balancing its rich flavors. Non-alcoholic alternatives could include iced tea with lemon or a sparkling water infusion for a refreshing contrast.

If coffee or tea fits the occasion, consider serving a robust dark roast or a calming herbal blend, offering guests a rounded culinary experience. Temperature considerations require that beverages are served at their optimal temperatures to enhance enjoyment alongside this warm casserole.

Storage and Shelf Life

For storage, place any leftovers in an airtight container and refrigerate within two hours of cooking. Properly stored, it will last about 3-4 days in the refrigerator. For longer shelf life, consider freezing portions; it can last up to three months when but wrapped securely.

Signs of spoilage include off smells, excessive moisture, or an unusual color change. For best quality, reheat in the microwave or oven until heated through, ensuring it reaches at least 165°F for food safety.

Make Ahead Strategies

Consider prepping ingredients the night before, chopping vegetables and layering them in the crockpot, covering and refrigerating for convenience. The morning of serving, simply plug it in to start cooking.

When assembling, maintain quality by storing cut potatoes in water overnight to prevent browning, and add tender vegetables later on to preserve texture. Following the reheating guidelines ensures that the fresh elements remain vibrant when serving this make-ahead dish.

Scaling Instructions

For halving the recipe, simply reduce each ingredient proportionally to maintain flavor balance. Alternatively, doubling or tripling the ingredients is easily manageable in a larger crockpot; just monitor cooking time to suit the increased volume.

Equipment adjustments may be necessary; a larger slow cooker will accommodate trips, while timing modifications should be made for larger batches to ensure complete cooking. Properly storing excess portions afterward will maintain freshness and taste.

Nutritional Deep Dive

From a macro perspective, this casserole provides a comforting combination of carbohydrates from potatoes and protein from ham, delivering a satisfying meal. Micronutrient analysis shows it’s packed with essential vitamins such as C and B6 from the potatoes and a variety of minerals.

Health benefits extend beyond basic nutrition; potatoes offer fiber which aids digestion. However, it’s important to consider portion sizes, especially when monitoring weight, as the creamy nature can be calorie-dense, encouraging mindful eating.

Dietary Adaptations

For gluten-free diets, use certified gluten-free cream soups and check the labels of processed ingredients. Dairy-free individuals can opt for alternatives like almond or coconut milk, combined with dairy-free cheese for a similar creamy texture without lactose.

Vegan adaptations would involve choosing plant-based proteins such as lentils or chickpeas—and using nut or soy-based cheeses to maintain the dish’s desired flavor profile. The options for low-carb or keto diets can be explored by substituting potatoes with cauliflower or rutabaga.

Troubleshooting Guide

If texture issues arise, such as overly mushy potatoes, avoid cooking for too long next time or use waxy potatoes for structurally sound outcomes. Likewise, if you find the flavors are off-balance, adjust seasoning levels gradually to find that perfect harmony during cooking.

Temporary temperature problems, like portions remaining cold, can be rectified with longer cooking times on low. If you face equipment challenges, ensure your slow cooker is plugged in and functioning to avoid food safety concerns.

Recipe Success Stories

Community feedback on this recipe has been overwhelmingly positive, with many sharing their success stories and variations through social media platforms. A significant number have found joy in using leftover holiday ham, transforming what could be waste into a delicious meal.

Fans have also taken the liberty to adapt this recipe by incorporating their favorite vegetables or spices, creating unique versions that cater to personal tastes. Unique photography tips have emerged from the community as members share their visual interpretations, making this dish even more appealing.

Frequently Asked Questions

Can I use fresh potatoes instead of frozen?
Yes, using fresh potatoes will yield a better texture, but ensure to cut them to similar sizes for even cooking.

Is it possible to cook this casserole on high heat instead of low?
While it can be done, cooking on high may not produce the same tender result. Cooking low and slow is recommended for the best flavor integration and texture.

What type of ham is best to use?
A good-quality cooked ham works best, whether it’s leftover from holidays or store-bought deli ham.

Can I omit the cream?
Yes, you can use substitutes like milk or a low-fat version for a lighter dish, or vegetable broth for a low-calorie option.

Can I freeze the casserole?
Absolutely! After it’s cooked, ensure it cools down, then store it in the appropriate freezer containers for up to three months.

What’s the best way to reheat leftovers?
The best way to reheat is in the oven at 350°F until warmed through, or in the microwave if you’re in a hurry.

Is this casserole kid-friendly?
Definitely! Its creamy texture and mild flavors make it appealing to children. You can also sneak in additional veggies if desired!

What can I serve with this casserole?
It pairs beautifully with a light green salad or garlic bread, providing a nice balance to the rich flavors of the casserole.

Can I make this ahead of time?
Yes! You can prep the ingredients the night before and store them in the fridge until ready to cook.

What other vegetables can I add?
Feel free to add spinach, bell peppers, or corn to enhance nutrition and flavor; just adjust cooking times accordingly.

Additional Resources

For more related recipes, consider trying out classics like Chicken Pot Pie or Beef Stew. Additionally, diving into technique guides can enhance your cooking skills, featuring lessons on slow cooking, ingredient prep, and flavor balancing. Ingredient information about various produce can help you make informed choices while shopping, and equipment recommendations ensure you have the right tools for your kitchen adventures.

Join the Conversation

Share your experience by tagging us on social media while trying out this recipe. We love to see your photography and hear your feedback—what variations did you make? Engage with our community and participate in discussions about modifications, successes, and your personal touch to this delightful dish.

The Recipe

Crockpot Ham and Potato Casserole

Serves: 4-6

Prep Time: 15 mins

Cook Time: 6 hrs

Total Time: 6 hrs 15 mins

Kitchen Equipment Needed

  • Crockpot or slow cooker
  • Cutting board
  • Sharp knife
  • Measuring cups and spoons
  • Spatula or spoon for mixing

Ingredients

  • 2 cups cubed ham
  • 4 cups diced potatoes
  • 2 cups shredded cheddar cheese
  • 1 cup heavy cream
  • 1 cup broccoli florets (optional)
  • 1 medium onion, diced
  • 2 garlic cloves, minced
  • Salt and pepper to taste
  • 1 teaspoon dried thyme (optional)

Directions

  1. Prepare your ingredients by dicing the potatoes, ham, and onion; garlic should be minced.
  2. Layer half of the diced potatoes at the bottom of the crockpot.
  3. Top the potatoes with half of the ham, followed by half of the cheese and diced onion.
  4. In a bowl, whisk together the heavy cream, garlic, thyme, salt, and pepper; pour half over the layers in the crockpot.
  5. Repeat the layers with the remaining ingredients in the same order.
  6. Cover and cook on low for approximately 6 hours, or until the potatoes are tender.
  7. If using, stir in broccoli in the last hour of cooking for added color and flavor.
  8. Serve hot, garnished with fresh herbs if desired.

Recipe Notes

  • Feel free to experiment with different vegetables or cheeses to tailor this casserole to your preferences.
  • Leftovers are great; simply refrigerate and reheat for a quick meal.
  • Consider adding a burst of flavor with topped fried onions for serving for added texture.
  • Adjust cooking times based on your specific slow cooker model, as they can vary widely.