Best Guacamole Recipe – Creamy, Fresh, and Easy to Make

Delicious Guacamole: A Flavorful Delight for Every Occasion

⚖️
Difficulty
Easy

⏲️
Prep Time
10 mins

🕒
Cook Time
0 mins

⏱️
Total Time
10 mins

🍽️
Servings
4 servings

Guacamole is the ultimate appetizer that blends creamy avocado with vibrant flavors, making it a party favorite and a family staple. The moment you dip your chip into this green goodness, you’re greeted with a rich, buttery texture balanced by the zing of fresh lime juice and the savory crunch of diced onions. This classic Mexican dip not only captivates the taste buds but also brings joy and comfort to any gathering. Whether you’re hosting a lively fiesta or simply enjoying a quiet evening at home, guacamole is a delightful companion.

This recipe for guacamole is not only quick and easy but is also adaptable to your personal taste. You can enjoy it mild or spice it up with jalapeños, and it also pairs perfectly with various dishes from tacos to grilled meats. The versatility and freshness of ingredients available mean that you can prepare a batch in just ten minutes, which makes it an excellent choice for spontaneous get-togethers or game day snacks. Unleash the guacamole magic, and watch it disappear as your friends and family dive in for another scoop.

Quick Recipe Highlights

  • Flavor Profile: The creaminess of avocado melds beautifully with zesty lime and aromatic cilantro, creating an irresistible blend of savory and fresh.
  • Texture: This guacamole features a smooth and creamy base, punctuated with bits of crunchy onion and cilantro for a delightful contrast.
  • Aroma: Experience the fresh and bright notes of lime juice combined with earthy undertones of avocado and herbaceous cilantro.
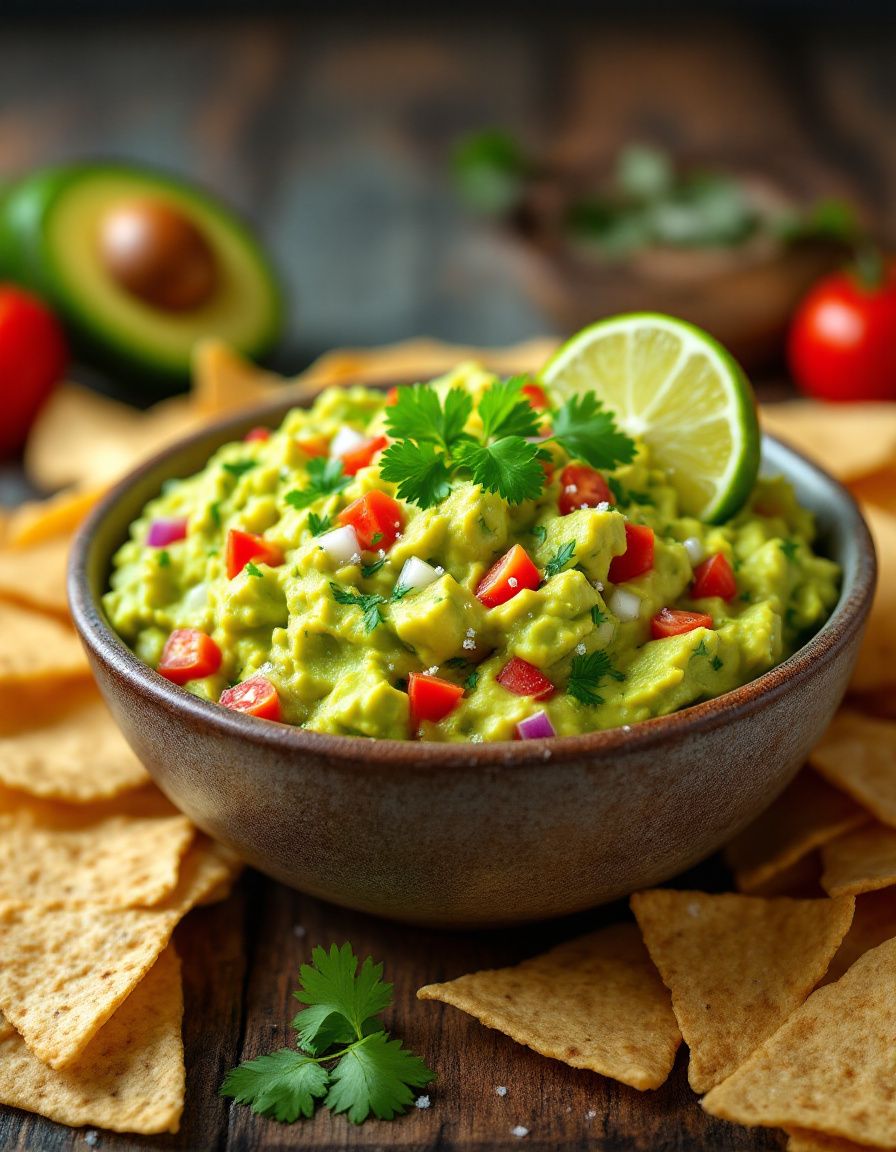
  • Visual Appeal: The vibrant green hue of the avocado against the colorful specks of onion and cilantro makes for an eye-catching presentation.
  • Skill Level Needed: With no cooking involved, this easy recipe is perfect for all skill levels, making it accessible to novice cooks and seasoned chefs alike.
  • Special Equipment: All you’ll need is a good mixing bowl and a fork or a masher to combine the ingredients effortlessly.

Recipe Overview

  • Difficulty Level: This guacamole recipe is easy, requiring no complex techniques or cooking skills, just mixing.
  • Category: Perfect for appetizers, snacks, and nibbles at any mealtime or social gathering.
  • Cuisine: Originating from Mexico, this dish showcases rich culinary traditions and flavors, highlighting the importance of fresh, local ingredients.
  • Cost: Affordable, with avocados being the main cost, making it suitable for a budget-friendly gathering.
  • Season: Best enjoyed during summer months when avocados are in season, but delicious year-round.
  • Occasion: Ideal for parties, picnics, and as a side to grilled dishes, bringing a festive touch to any meal.

Why You’ll Love This Recipe

Guacamole is a tantalizing blend of taste and texture that keeps guests coming back for more. Each scoop is a fusion of rich flavor from the avocados, brightened by the citrus of lime, and brought alive with a hint of garlic and onion. As you savor this dip, the velvety creaminess wraps around your taste buds, invoking comfort and satisfaction — it truly is a delicious affair.

Convenience is another reason to love this guacamole. In just ten minutes, you can whip up a fresh batch that will elevate any meal or gathering. It’s a no-cook recipe, which means there’s minimal cleanup and less fuss in your kitchen—a true blessing for anyone short on time. Whether you’re hosting a barbecue or simply snacking during a movie marathon, this guacamole is readily available and adaptable.

Nutritionally, avocados are rich in healthy fats and packs essential vitamins and minerals, such as potassium and fiber. This guacamole not only serves as a delightful treat but also provides health benefits that align with a balanced diet. Enjoy guilt-free indulgence as you dip your tortilla chips or add it to your salads.

Sharing food, especially something as vibrant as guacamole, creates an inviting atmosphere that encourages conversation and connection. Whether you’re bringing dip to a potluck or serving it at home, this recipe adds excitement and a hint of festivity—it’s hard not to smile while enjoying this delightful concoction.

Finally, this homemade guacamole is extremely cost-effective. With just a few fresh ingredients, you have a crowd-pleasing dish without breaking the bank. Avocados are often available at reasonable prices, and you can customize the recipe to suit your wallet’s needs, ensuring that delicious guacamole is always within reach.

Historical Background and Cultural Significance

The origins of guacamole can be traced back to the Aztecs, who created a similar avocado mixture called “ahuaca-mulli.” This ancient dish was typically made with softened avocados mixed with onions, chilies, and lime juice. The history associated with guacamole highlights its importance in Mexican culture and cuisine over the centuries. The simple yet flavorful blend resonated with many, leading to its widespread popularity.

In Mexican culture, guacamole is more than just a dip; it represents gatherings, celebrations, and a sense of community. Traditionally served during holidays and festivals, this dish has become synonymous with social events. Its presence encourages sharing and fosters togetherness, placing it firmly as a staple in Mexican culinary tradition.

Over the years, guacamole has evolved as international cuisines have embraced it, leading to various interpretations. Different regions have developed unique combinations of ingredients based on local produce and flavor preferences. This evolution highlights the versatility of guacamole, allowing it to be customized to suit any palate.

From its humble beginnings to its rise as a global icon, guacamole has become a beloved ingredient in many dishes and served at celebrations worldwide. Its light-hearted flavor and ability to be paired with a wide range of foods only add to its cultural significance, cementing its place in the hearts of food enthusiasts everywhere.

Ingredient Deep Dive

Avocado is the star ingredient of guacamole, known for its creamy texture and rich flavor. This fruit is packed with healthy monounsaturated fats, which promote heart health and provide sustained energy. When selecting avocados, look for ones that yield slightly to pressure, indicating ripeness. Proper storage involves keeping them at room temperature until ripe, then refrigerating leftovers to prolong freshness. For substitutions, you can try using ripe, mashed bananas for a sweet twist, or even cooked sweet potatoes for a unique take.

Lime juice adds a vital zing to the guacamole, elevating its flavor profile. Rich in vitamin C and antioxidants, lime enhances both the taste and nutritional value of the dish. When choosing limes, look for those with smooth skin that feel heavy for their size. After juicing, store any unused lime juice in the refrigerator, or even freeze it in an ice cube tray for future use. Lime zest can also be used for added fragrance and flavor enhancement.

Cilantro, another key ingredient, infuses a fresh herbal note to the guacamole. This leafy herb is celebrated for its health benefits, including anti-inflammatory properties and vitamin K content. Look for vibrant green cilantro without wilting. When storing cilantro, trim the ends and place it in water in the fridge as you would with flowers. There’s also the option to substitute parsley if cilantro isn’t available, though the flavor will differ slightly.

Common Mistakes to Avoid

  • Using unripe avocados: Select ripe avocados for a creamy texture. Unripe avocados can make your guacamole taste bland and difficult to mash.
  • Over-mashing: While it’s tempting to achieve a silky texture, some chunks enhance the overall enjoyment. Mash to your preferred consistency, leaving some small pieces.
  • Skipping lime juice: Lime juice preserves the avocado’s bright color and adds crucial flavor. Don’t omit it, as it enhances the freshness.
  • Not seasoning adequately: Taste your guacamole as you make it, adjusting the salt, lime, and garlic to achieve balance.
  • Including stems in cilantro: Ensure you only use the leaves of cilantro for flavor. Stems can be bitter and undesirable.
  • Letting guacamole sit too long: Exposure to air causes avocado to brown. Serve promptly and store any leftovers properly to minimize browning.
  • Using old garlic: Ensure your garlic is fresh. Old or dried-out garlic can impart a bitter flavor, negatively affecting your guacamole.
  • Overloading with ingredients: While customization is great, too many additions can overwhelm the avocado. Stick to a few key flavors for a balanced taste.

Essential Techniques

When making guacamole, the primary technique is mashing the avocados. This is important for achieving the desired consistency—smooth but with some lumps. To master this skill, use a fork or potato masher. Be gentle when mixing in additional ingredients, allowing the flavors to blend without overworking the avocados. A common pitfall is over-mashing, which can result in a paste rather than the ideal chunky dip. Look for a creamy texture with visible bits of avocado for the best results.

Another essential technique is proper seasoning. It is crucial to taste and adjust as you go, especially with lime and salt. Start with small amounts, mixing thoroughly before adding more. This approach prevents overpowering the guacamole with too much acidity or saltiness. A visual cue for success is the bright green color; if it starts to dull or turn brown, you’re likely adding too much lime or resting too long before serving.

Pro Tips for Perfect Guacamole

To ensure perfect guacamole every time, start with ripe avocados. Press gently on the skin; it should yield slightly. If not ripe, leave them at room temperature until they do.

Use fresh lime juice instead of bottled for a brighter flavor. The acidity of fresh lime enhances the taste and keeps the avocado from browning quickly.

Chill your serving bowl in advance to keep the guacamole fresh and cool during serving.

For an extra kick, finely chop jalapeños and mix them in. Add them little by little to find your preferred spice level.

Enhance flavors with ground cumin or smoked paprika for a twist on traditional guacamole.

Serve guacamole with assorted dippers beyond chips, like fresh vegetables or toasted pita, for a colorful platter.

For easy storage, press plastic wrap directly onto the surface of the guacamole to reduce air exposure and prevent browning.

Fresh cilantro enhances flavor; add it at the end of the preparation for the best taste.

Variations and Adaptations

Guacamole is versatile and can adapt to regional tastes; for instance, adding diced tomatoes can create a fresher taste reminiscent of salsa. Southern-style versions often incorporate corn for a hearty bite, while Latin variants may include chilies for added spice.

Seasonal adaptations work wonderfully as well. In the fall, try incorporating diced roasted peppers for a smoky depth. During summer, go for local produce like fresh corn or diced mango for sweetness that complements the avocado.

For those on specific diets, dietary modifications can include swapping traditional ingredients for alternatives—using lime zest for lime juice in keto versions or replacing avocados with creamy tahini for a similar texture minus the fruit.

Flavor variations can include adding ingredients like bacon, feta cheese, or roasted garlic for unique twists. Experiment to find your perfect blend while still retaining the core avocado taste.

Lastly, consider presentation alternatives. Puppet out dip in avocado shells or serve it in hollowed-out bell peppers for interesting visual flair. Fun garnishing can include pomegranate seeds or diced radishes sprinkled on top for pops of color.

Serving and Presentation Guide

When serving guacamole, presentation is as important as flavor. Use a colorful bowl that contrasts with the vibrant green of the dip to visually attract guests. For a rustic feel, consider serving in the original avocado shell.

Garnish your guacamole with a sprinkle of fresh cilantro or diced tomatoes to add color and freshness. Serve it with a diverse range of dippers; think crispy tortilla chips, crunchy veggie sticks, or even pita bread.

Temperature considerations are key; serve guacamole chilled to counteract any possible browning. If you’re serving outdoors, consider keeping your guacamole in a bowl over ice to maintain freshness.

Portion control matters; provide guests with small bowls of guacamole alongside dippers, allowing everyone to enjoy the dip without double-dipping or contaminating the main dish. This thoughtful planning enhances the overall dining experience.

Wine and Beverage Pairing

Wine pairings for guacamole typically feature light, crisp whites such as Sauvignon Blanc, which complement the creamy richness of the avocado and brighten the overall flavor profile. Alternatively, consider a light Pinot Grigio for its refreshing acidity.

For non-alcoholic options, sparkling water with a wedge of lime offers a refreshing complement to the dish, cutting through its richness whilst enhancing the zesty flavors.

If coffee or tea is suitable alongside, opt for a lightly brewed herbal tea that won’t overpower the taste of the guacamole. Serve it chilled for best results.

When pairing beverages, aim for those that will refresh the palate. Avoid overly rich or heavy drinks that can mask the vibrant flavors of your guacamole, allowing it to shine on its own.

Storage and Shelf Life

To extend the shelf life of guacamole, store it in an airtight container as soon as possible. Ensure that no air can seep in, as this is what causes browning. If you have leftover avocado pit, you can add it into the container to minimize discoloration.

Refrigeration is key; guacamole can last 1-2 days in the fridge when stored properly. If it starts to turn brown, simply scrape off the top layer, and the flavorful green beneath will still be great.

For longer storage, consider freezing guacamole in ice cube trays. This way, you can portion out small servings for future snacking. Thaw in the refrigerator overnight before use, stirring well upon thawing to restore consistency.

Check for spoilage; guacamole that has any off-smell or has turned completely brown should be discarded. Otherwise, keeping it in optimal conditions can extend its delightful flavors.

Make Ahead Strategies

If you want to make guacamole ahead of time, prepare it just a day in advance. This keeps the flavors fresh without losing too much vibrancy. Store it in an airtight container, pressing plastic wrap directly onto the guacamole surface to reduce air exposure.

As for prep timelines, keep your ingredients measured and ready to go the day before so you can quickly combine them. If adding ingredients last-minute, consider chopping vegetables beforehand.

Quality is vital; waiting too long might affect texture, so enjoy it as soon as possible—after a day’s wait, you’ll again have vibrant and flavorful dip.

For an exciting addition, think about refreshing flavors such as diced mango or pomegranate seeds right before serving for a burst of freshness that keeps your guests tantalized.

Lastly, ensure you have all the elements prepared to assemble just before serving; this elevates the overall freshness of your guacamole.

Scaling Instructions

When scaling your guacamole recipe, adjustments are straightforward. To halve the recipe, simply measure the avocado, lime juice, and other additions accordingly, while retaining the same proportions for flavor balance.

If doubling or tripling, ensure you have a large enough mixing bowl to accommodate your ingredients. You may also need to use a better mashing tool to handle a larger quantity effectively.

Timing modifications may be unnecessary as the prep can still be completed within the same timeframe. If you’re preparing for a larger crowd, consider serving in multiple bowls to keep the presentation appealing.

Put aside thought for storage when scaling; larger batches may require more airtight containers to maintain freshness.

Lastly, remember that occasionally flavors may intensify in larger batches, so taste and adjust seasoning as you master copy proportions.

Nutritional Deep Dive

Examining the nutritional content of guacamole reveals a complex mix of macro and micronutrients. Avocados are rich in healthy fats, mainly monounsaturated fat, which is beneficial for heart health. The typical serving contains a significant amount of fiber, aiding digestion and providing a sense of fullness.

In terms of micronutrients, avocados deliver vitamins such as E, K, and folate. Lime juice adds a burst of vitamin C, further enhancing the nutritional value. Together, these nutrients contribute toward a healthier immune system and overall well-being.

Health benefits of eating guacamole include improved cholesterol levels, thanks to its healthy fat content; studies suggest that monounsaturated fats can lower bad cholesterol while raising the good. The presence of dietary fiber also promotes regularity, further aiding digestion.

Proper portion analysis is essential; while guacamole is nutritious, its caloric density can add up quickly. Stick to 1/4 cup servings to maintain balance while benefiting from its healthy fats and nutrients.

Lastly, as part of a weight management plan, use guacamole as a substitute for less wholesome fats like mayo; it enhances flavor while providing healthier options in various dishes.

Dietary Adaptations

For gluten-free options, guacamole is already a perfect choice served with gluten-free tortillas, vegetables, or corn chips. Individuals with gluten sensitivities can enjoy this dip without worry.

Dairy-free alternatives are natural here; guacamole contains no dairy, making it suitable for vegans and those avoiding lactose. Pair with plant-based dippers to maintain the healthfulness of the snack.

Low-carb enthusiasts will appreciate guacamole for its contribution of healthy fats without the excess carbs found in many snack options. Pair with cucumber slices or bell pepper strips for a fulfilling experience.

Keto dieters should rejoice in the avocado’s low carbohydrate content and high-fat profile. Use it generously within meals, enhancing burgers or salads without breaching carb limits.

Paleo eaters can trust in the whole food ingredients of guacamole, making it compliant with their dietary restrictions. Simply pair with fresh veggies to keep snacks healthy and uncomplicated.

For low-FODMAP diets, adjust the quantity of onion and garlic, or replace them with chives to maintain flavor without triggering discomfort.

Lastly, for other specific diets, such as vegan-vegetarians, guacamole serves as an excellent source of healthy fats and fittingly complements salads, tacos, or main dishes without containing animal products.

Troubleshooting Guide

If you encounter texture issues, such as overly creamy or pasty guacamole, ensure you mash the avocados properly while leaving some small chunks for desired consistency.

For an unbalanced flavor, taste and adjust seasonings, adding small quantities of lime juice or salt until the flavors align harmoniously. Avoid over-mixing, which can lead to a bland profile.

Temperature concerns arise when guacamole is served, potentially wilting the fresh ingredients. Keep bowls chilled, and if necessary, serve on ice to maintain temperature during parties.

Equipment challenges might involve the struggle to mash avocados smoothly; opt for a potato masher or fork depending on your preference and ensure ripeness for easy mashing.

If flavor falls short due to ingredient substitutions, adding additional lime or spices can enhance taste and restore a compelling profile.

Finally, timing adherence is crucial for optimal freshness. If your guacamole doesn’t taste as bright after a few days, discard it and prepare a new batch, as flavors diminish over time.

Recipe Success Stories

Community feedback has revealed that many enjoy tweaking this guacamole recipe by adding personal touches, such as incorporating pineapple for a tropical spin or adding spices for a personal flair, ensuring that each batch is unique to their taste.

Variations success stories often include the triumph of those who created their style through the introduction of hot peppers, resulting in fiery recipes that cater to spicy food enthusiasts, enhancing gatherings with extra zest.

Adaptation stories showcase how readers have used this guacamole recipe as a dip for fresh veggies and chips, becoming a dietary staple for health-conscious friends, transforming it into a mainstay at every gathering.

One reader suggested using guacamole as a filling for sandwiches, blending textures together while retaining its classic taste, which proved to be a delightful success.

For photography tips, many have shared that including fresh lime wedges or sprigs of cilantro makes for a colorful and appetizing photo that highlights the vibrant hues of the dish.

Frequently Asked Questions

1. Can I make guacamole in advance?
Yes, you can make guacamole ahead of time. To keep it fresh, store it in an airtight container and press plastic wrap directly onto the surface to minimize air exposure. It’s ideal to consume it within 1-2 days for optimal freshness.

2. What can I do to prevent my guacamole from turning brown?
To prevent browning, add lime juice immediately after mashing the avocados and cover the surface tightly with plastic wrap, ensuring minimal air contact. Storing in an airtight container also helps.

3. Can I freeze guacamole?
Yes, you can freeze guacamole in an ice cube tray or in a sealed container. For best results, use it within 3-6 months, and thaw in the refrigerator overnight before serving.

4. Is guacamole healthy?
Yes, guacamole is healthy as it contains avocados rich in healthy fats, fiber, vitamins, and minerals. However, watch your portion sizes, as it can be calorie-dense.

5. How do I ripen avocados quickly?
To ripen avocados quickly, place them in a brown paper bag with an apple or banana, as these fruits release ethylene gas, which speeds up ripening. Leave them at room temperature for a day or two.

6. Can I use dried spices instead of fresh ingredients?
While it’s best to use fresh ingredients for optimal flavor, dried spices can be used in a pinch. Adjust quantities according to taste, but keep in mind that fresh ingredients enhance taste and aroma.

7. What is the best way to serve guacamole?
Guacamole is best served chilled in a bowl with assorted dippers such as tortilla chips, colorful veggies, or even spread onto tacos. Consider adding garnishes for an appealing presentation.

8. How many avocados do I need for a large gathering?
For a large gathering, anywhere from 4 to 6 ripe avocados will typically suffice for a group of 10-12 people, assuming you serve it alongside other snacks.

9. Can I add other ingredients to my guacamole?
Absolutely! Feel free to experiment with additional ingredients like diced tomatoes, corn, jalapeños, or pineapple to create variations that suit your taste.

10. What is the best way to store leftover guacamole?
Store leftover guacamole in an airtight container with a layer of plastic wrap pressed directly against the surface. This prevents air exposure and minimizes browning.

Additional Resources

For related recipes, consider exploring dishes like pico de gallo or salsa verde for vibrant accompaniments to your guacamole.

Technique guides that focus on avocado handling or knife skills can also elevate your culinary skills and enhance your guacamole preparation process.

When it comes to ingredient information, discover local avocado varieties to find the best flavor profiles available in your area and the different health benefits they might provide.

Investing in quality kitchen tools, like a sturdy masher or mixing bowl, can facilitate easy preparation and enjoyable cooking experiences.

If you desire seasonal variations, consider how using local, in-season ingredients can lend unique flavors to your guacamole, making each preparation special.

Join the Conversation

Engage with us on social media by sharing your guacamole creations, using hashtags to connect with other food lovers.

For those interested in improving their food photography, get involved in recipe sharing communities where you can exchange tips and best practices while showcasing your best bites.

Your recipe reviews and feedback inspire us to continually improve; we love hearing your thoughts on our guacamole recipe and how it worked for you.

Feel free to suggest variations; we welcome contributions from our readers to share their inventive culinary twists on this classic dish.

Let’s come together to celebrate food—each scoop of guacamole represents not only a delicious dish but an experience shared with loved ones.

The Recipe

Guacamole

Serves: 4 servings

Prep Time: 10 mins

Cook Time: 0 mins

Total Time: 10 mins

Kitchen Equipment Needed

  • Mixing bowl
  • Fork or potato masher
  • Measuring spoons
  • Knife
  • Cutting board

Ingredients

  • 3 ripe avocados
  • 1 lime, juiced
  • 1 small onion, finely diced
  • 1 tomato, diced
  • 1 clove garlic, minced
  • Salt, to taste
  • Fresh cilantro, chopped (optional)
  • Jalapeño, minced (optional, for spice)

Directions

  1. Cut the avocados in half, remove the pit, and scoop the flesh into a mixing bowl.
  2. Using a fork or potato masher, mash the avocados to your desired consistency.
  3. Add lime juice, diced onion, garlic, diced tomato, and salt to the mashed avocados.
  4. Gently mix all the ingredients until well combined.
  5. If desired, fold in chopped cilantro and minced jalapeño at this stage.
  6. Taste and adjust seasoning as necessary; adding more lime juice or salt to your liking.
  7. Transfer to a serving bowl and garnish with additional cilantro, if desired, and serve immediately.

Recipe Notes

  • Store leftovers in an airtight container with plastic wrap pressed against the surface to minimize browning.
  • Consider adding diced pineapple or corn for a unique flavor twist.
  • This recipe is very adaptable; feel free to customize based on your preferences!

Best Italian Pasta Salad Recipe – Perfect for Any Occasion

Italian Pasta Salad: A Refreshing Twist on a Classic Favorite

⚖️
Difficulty
Easy

⏲️
Prep Time
15 mins

🕒
Cook Time
10 mins

⏱️
Total Time
25 mins

🍽️
Servings
4 servings

Indulge in a bowl of vibrant Italian Pasta Salad that brings a colorful assortment of flavors and textures to your table. Perfect as a side dish at summer barbecues or as a light lunch option, this recipe features tender pasta intertwined with a medley of fresh vegetables and tangy dressings that awaken the senses. The combination of ripe tomatoes, crispy bell peppers, and olives tossed with olive oil and vinegar creates a flavor explosion that defines Italian cuisine.

This Italian Pasta Salad is not just about taste—it’s about experience. Each bite blends chewy pasta with crunchy vegetables, providing an excitement that makes it hard to stop eating. The aroma of Italian herbs wafts through the air, inviting anyone nearby to join in on the deliciousness. Whether you’re preparing a family gathering or indulging in a simple weeknight dinner, this dish transforms any occasion into a festive Italian feast.

Quick Recipe Highlights

  • Flavor Profile: Fresh, savory, with a hint of tanginess from the vinaigrette and herbs.
  • Texture: A delightful contrast of soft pasta, crunchy vegetables, and briny olives.
  • Aroma: Inviting scents of basil, oregano, and garlic fill the air.
  • Visual Appeal: Bursting colors from red and yellow peppers, green herbs, and black olives make this salad a feast for the eyes.
  • Skill Level Needed: Requires basic cooking skills; perfect for beginners.
  • Special Equipment: A large mixing bowl and a pot for boiling pasta.

Recipe Overview

  • Difficulty Level: This Italian Pasta Salad is an easy recipe, making it perfect for novice cooks looking to amplify their culinary skills without overwhelming techniques.
  • Category: Ideal for summer salads, side dishes, or light lunches, it fits seamlessly into any mealtime.
  • Cuisine: Rooted in Italian tradition, this dish celebrates seasonal produce and the use of simple, quality ingredients.
  • Cost: This recipe is budget-friendly, with common ingredients easily found at local grocery stores.
  • Season: Best enjoyed during the warmer months, when fresh vegetables are at their peak.
  • Occasion: Perfect for picnics, potlucks, and family gatherings, it’s sure to impress guests.

Why You’ll Love This Recipe

The Italian Pasta Salad is a delightful medley of flavors that are both refreshing and satisfying. The combination of fresh vegetables, herbs, and al dente pasta makes every bite a delicious experience. Tossing the salad with a zesty dressing further enhances the harmonious elements, creating a palate-pleasing dish that’s sure to please everyone.

Convenience is another amazing aspect of this recipe. You can whip it up in no time, allowing for quick meal prep during busy weekdays. Additionally, it’s a great dish to prepare ahead of time since it only gets better as the flavors meld together in the fridge. This makes it a smart choice for meal prepping or make-ahead lunches.

Nutritional advantages abound as well. Packed with fiber from vegetables and complex carbohydrates from pasta, this salad is filling yet light. Adding olive oil provides healthy fats, making it a wholesome choice for those who wish to eat healthily without sacrificing flavor.

Socially, the Italian Pasta Salad serves as the ideal dish for gatherings. Its vibrant appearance and delicious taste make it a great conversation starter at parties. Guests will love digging into a colorful bowl of goodness, whether served as a side or main dish.

Finally, the cost-effectiveness of this recipe can’t be overlooked. With easily accessible ingredients and a minimal cooking process, you can feed a crowd without breaking the bank. The blend of fresh produce and pantry staples delivers a satisfying meal that remains within budget.

Historical Background and Cultural Significance

The origins of pasta salad are rooted in traditional Italian cooking, where pasta is often utilized in various forms. This dish might have evolved from the classic Italian antipasto, where various ingredients are combined to create a delightful starter. Traditional Italian cuisine values fresh ingredients, which is why this salad is a celebration of seasonal produce.

Italian Pasta Salad holds cultural significance, as it reflects the Italian philosophy of using local, fresh ingredients to create community-focused meals. Food in Italy is often associated with togetherness; pasta salads embody this sentiment with their vibrant presentations and communal sharing style.

As this dish has evolved over time, variations have emerged. In the United States, it gained popularity as a convenient side dish, especially at barbecues and potlucks. It has undergone several adaptations, impacting its traditional roots but also showcasing its versatility.

Regionally, variations of pasta salad exist globally, each incorporating local flavors and ingredients. From Mediterranean versions featuring feta cheese to Asian-inspired recipes with sesame oil, this dish’s adaptability is one reason for its worldwide appeal.

Ingredient Deep Dive

Pasta: Pasta serves as the backbone of Italian Pasta Salad, providing substance to the dish. Nutritionally, it offers carbohydrates for energy and can be purchased in various forms. Selecting high-quality pasta is crucial; opt for whole grain or gluten-free options for added health benefits. Store it in a cool, dry place, and consider alternatives like chickpea or lentil pasta for variations.

Bell Peppers: These colorful vegetables add sweetness, crunch, and a wealth of vitamins to the salad. Their bright colors enhance the visual appeal, while their crisp texture provides a refreshing contrast. When selecting bell peppers, look for firm skins and vibrant colors. They’re best stored in the crisper drawer of the fridge, where they can last up to a week.

Common Mistakes to Avoid

  • Overcooking the Pasta: Undercook it slightly since the pasta will soak up some dressing and continue to soften when mixed with the other ingredients.
  • Using Insufficient Salt: Salt is essential for enhancing flavors; don’t forget to season the pasta water and dressing adequately.
  • Inadequate Cooling: Make sure to let the pasta cool before mixing to prevent wilting fresh herbs and veggies.
  • Skipping the Dressing: Freshness comes from the dressing; always dress the salad just before serving for maximum flavor impact.
  • Choosing Old Vegetables: Use vibrant, fresh vegetables to maintain the intended crunchy texture.
  • Incorrect Temperature: Serve the salad cold for the best experience; not chilling it can diminish its appeal.
  • Packing Too Tightly: Leave some air in the mixing bowl so the flavors can meld without crushing the ingredients.
  • Not Letting It Rest: Allow the pasta to sit after dressing; it helps in flavor development.

Essential Techniques

Cooking Pasta: The most crucial step is to cook the pasta al dente. This ensures a pleasant bite and allows it to hold up against the dressing. Use a large pot of salted boiling water to cook the pasta, following package instructions. Avoid overcooking by tasting it a minute or two before the timer ends.

Mixing Ingredients: Properly combining the dressing with the salad is essential for even flavor distribution. Drizzle the dressing over the cooled pasta and vegetables, then gently toss to combine. Be careful not to mash the ingredients; using a folding motion can help maintain the salad’s structure and appearance.

Pro Tips for Perfect Italian Pasta Salad

1. Chill your pasta salad for at least an hour before serving to intensify the flavors.
2. Experiment with different herbs such as parsley, basil, or oregano for customizable flavors.
3. Use a variety of colorful veggies for visual interest and more nutrients.
4. Consider incorporating protein options like grilled chicken, tuna, or chickpeas for added heartiness.
5. Adjust the acidity by adding different vinegars to suit personal preferences.
6. Distribute the dressing gradually—start with a small amount and adjust to your taste.
7. Use high-quality olive oil, as it significantly affects the overall flavor profile.
8. For a creamy twist, consider adding a dollop of mayonnaise or Greek yogurt.

Variations and Adaptations

One delightful variation is adding seasonal vegetables like asparagus in spring or roasted cherry tomatoes in summer. Each season can bring its unique twist to enhance the dish. For those with dietary restrictions, consider gluten-free pasta or replacing traditional pasta with spiralized vegetables such as zucchini for a low-carb adaptation.

Hosting a potluck? Why not create a Mediterranean-inspired version by adding feta cheese, Kalamata olives, and artichoke hearts for an exciting flavor profile? Incorporating protein can also modify the texture, making the salad more filling for main dish purposes.

For presentation, consider layering the ingredients in a clear bowl to showcase the colors, providing a feast for the eyes as well as the palate. Finally, for a spicy kick, try tossing in some pepperoncini or a splash of hot sauce.

Serving and Presentation Guide

For an elegant presentation, arrange the salad in a large glass bowl, allowing guests to appreciate the colorful layers. Garnish with fresh basil or parsley to enhance the visual appeal. Pair with crusty bread for a complete meal.

Temperature is crucial; serve the salad chilled to maximize its refreshing taste. For portion control, offer small servings in individual dishes, making it easier for guests to serve themselves without mess.

Consider using themed serving dishes to match the occasion, and be mindful of providing utensils for easy serving. Also, an infused olive oil drizzled on top just before serving elevates the dish and impresses diners.

Wine and Beverage Pairing

A crisp white wine like Pinot Grigio pairs beautifully with Italian Pasta Salad, emphasizing its fresh flavors. Alternatively, a light red such as Chianti complements the tanginess of the salad while providing a rich contrast.

For non-alcoholic options, consider Italian sodas or sparkling water with lemon, which refreshing complements the dish. If you prefer coffee, a light roast cold brew can be a unique addition to the meal, providing a refreshing caffeine kick without overpowering the flavors.

Temperature matters significantly; ensure the wines are served chilled to enhance their crispness. When pairing, aim for balance—opt for wines that offer a refreshing quality similar to the salad itself.

Storage and Shelf Life

To maintain freshness, store leftover Italian Pasta Salad in an airtight container in the fridge. It can last for about 3 to 5 days, but consuming it within 2 to 3 days is preferable for the best flavor and texture.

When storing, keep the dressing separate if possible to prevent the salad from becoming soggy. If you need to store it with the dressing, ensure it’s fully chilled before sealing to minimize condensation.

Signs of spoilage include a noticeable off smell or mushy vegetables, indicating it’s time to discard the salad. Reheat noble pasta dishes but do so gently to avoid making the salad warm—warm pasta salad is less appealing.

Make Ahead Strategies

Preparing the Italian Pasta Salad a day in advance can enhance its flavors. Cook and cool the pasta, toss it with a bit of olive oil to prevent sticking, and prepare the vegetables. You can add them right before serving to preserve their crunchiness.

If you’re hosting, consider prepping the dressing separately. By mixing the vinaigrette and letting it rest, you intensify its flavors. Just before serving, fold the dressing into the pasta salad for that perfect flavor infusion.

Using airtight containers for storage between steps helps maintain freshness. When it’s time to serve, allow the salad to sit at room temperature for about 30 minutes for the best texture.

Scaling Instructions

If you wish to halve the recipe, ensure you adjust the cooking times accordingly—especially for the pasta, which may require less time in boiling water. When doubling or tripling, consider using a larger pot or mixing bowl to accommodate the increased volume.

Always keep an eye on the cooking time when scaling up; the pasta may need an additional minute or two.

Proper storage is key; for larger quantities, opt for multiple shallow containers instead of one deep dish, allowing for quicker cooling and better preservation.

Nutritional Deep Dive

Italian Pasta Salad typically provides a well-balanced macro breakdown with carbohydrates from pasta, healthy fats from olive oil, and fiber from vegetables. The combination supports energy levels while keeping the dish light.

In terms of micronutrient analysis, bell peppers and tomatoes offer vitamin C and antioxidants, while pasta provides vital B vitamins. Including a variety of vegetables boosts overall nutrient intake and adds color.

For health benefits, limit the quantity of greasy dressings; focus on homemade vinaigrettes for more control over calories and fats. Monitor portion sizes to ensure balanced eating, especially for those managing weight.

Dietary Adaptations

For a gluten-free version, simply substitute regular pasta with gluten-free alternatives made from rice, quinoa, or corn. Additionally, check labels for dressings to ensure other ingredients are free from gluten.

Vegetarians can enhance this salad by including chickpeas or kidney beans for protein, ensuring a fulfilling meal. For a vegan approach, replace traditional dairy dressings with plant-based alternatives, such as tahini or cashew cream dressings.

For low-carb options, spiralized zucchini can replace pasta while still delivering the satisfying crunch. Keep in mind those on specific diets, like keto or paleo, may want to skip high-carb items in favor of fresh, wholesome ingredients.

Troubleshooting Guide

Common texture issues can arise if pasta is overcooked; to avoid this, always check the pasta for doneness a minute or two early. If the result is too mushy, consider letting the salad chill to firm it up slightly.

If the flavor balance is off, add fresh herbs or a squeeze of lemon to brighten the taste. Adjust the dressing by mixing a small amount of vinegar with olive oil to enhance acidity.

When faced with equipment challenges, ensure your boiling pot is large enough; insufficient space can lead to uneven cooking of pasta. If you encounter ingredient substitutions, ensure taste compatibility; for instance, use fresh herbs when fresh basil isn’t available.

Timing concerns may arise during gatherings where the salad needs to be prepared in conjunction with multiple dishes—consider cutting and preparing ingredients in batches beforehand to ease the process during cooking.

Recipe Success Stories

Feedback from the community shows that this Italian Pasta Salad has become a staple for many home cooks. Variations featuring seasonal vegetables have received praise, encouraging creativity and customization based on available ingredients.

Many readers have shared their positive experiences with meal prepping this dish for the week, highlighting its convenience and flavor retention. Others have noted how it sparks memories of family gatherings, further emphasizing its appeal.

Suggestions for photography tips often come from users sharing their beautifully plated creations on social media. A vibrant bowl of Italian Pasta Salad garnished with fresh herbs makes for an eye-catching post.

Frequently Asked Questions

Can I make Italian Pasta Salad ahead of time?

Yes, making your salad a day in advance allows the flavors to meld beautifully. Prep the dressing separately and combine just before serving for optimal freshness.

What type of pasta is best for pasta salad?

Short, sturdy pasta shapes like rotini, farfalle, or penne work best as they hold the dressing well and add a nice texture.

Is Italian Pasta Salad healthy?

Absolutely! When made with fresh vegetables and a moderate amount of healthy fats like olive oil, it can be a nutritious dish that provides a variety of vitamins and minerals.

Can I use frozen vegetables in my salad?

While fresh is ideal, you can use thawed frozen vegetables. Make sure to drain and dry them to avoid excess moisture.

Is there a vegetarian option for this salad?

Yes, simply add plant-based protein options like chickpeas or use dressings made without dairy ingredients to create a delicious vegetarian-friendly version.

How should I store leftover pasta salad?

Store any leftovers in an airtight container in the fridge. It should last around 3-5 days, though it’s best enjoyed within the first few days.

Can I add protein to my pasta salad?

Definitely! Grilled chicken, tuna, or chickpeas can be added to create a more filling meal.

What if my salad is too dry?

If you find your salad lacking moisture, simply add a bit more dressing or a splash of olive oil to enhance its flavor and texture.

Can I use other dressings?

Feel free to experiment with different dressings—ranch, balsamic vinaigrette, or homemade dressings can all complement the salad.

Is it possible to make pasta salad gluten-free?

Yes, use gluten-free pasta made from rice, quinoa, or corn, and ensure other ingredients are also gluten-free.

Additional Resources

If you’re interested in other refreshing side dishes, don’t miss our collection of summer salads, including Greek Salad and Caprese Skewers. For technique guides, check out our post on mastering pasta cooking, ensuring perfect texture every time.

For ingredient information, browse our guide to seasonal vegetables so you can make the most of local produce. If you’re in the market for kitchen equipment, read reviews of must-have tools for efficient meal prep.

Finally, explore seasonal variations that cater to ingredients available at different times of the year, maximizing flavor and freshness in your cooking.

Join the Conversation

We encourage you to share your experience making the Italian Pasta Salad on social media! Tag us, and don’t forget to include your creative twists and additions. We love seeing how our readers give their own flair to recipes.

Photography tips can help elevate your dishes; natural lighting and colorful backgrounds make all the difference. Join in the community conversation by leaving feedback, sharing recipe variations, and suggesting new ideas for content.

Our community thrives on viewer input, so your experiences matter! Together, we can continue to create delicious, memorable meals and inspire each other along the way.

The Recipe

Italian Pasta Salad

Serves: 4

Prep Time: 15 mins

Cook Time: 10 mins

Total Time: 25 mins

Kitchen Equipment Needed

  • Large mixing bowl
  • Pot for boiling pasta
  • Knife and cutting board
  • Measuring spoons
  • Serving utensils

Ingredients

  • 8 oz pasta (rotini or penne)
  • 1 cup cherry tomatoes, halved
  • 1 cup bell peppers, chopped
  • 1/2 cup black olives, sliced
  • 1/4 cup red onion, diced
  • 1/4 cup fresh basil, chopped
  • 1/4 cup olive oil
  • 2 tbsp red wine vinegar
  • Salt and pepper, to taste
  • 1 tsp Italian seasoning

Directions

  1. Cook the pasta according to package instructions until al dente; drain and let cool.
  2. In a large mixing bowl, combine the cooled pasta with cherry tomatoes, bell peppers, olives, onion, and basil.
  3. In a separate bowl, whisk together the olive oil, red wine vinegar, Italian seasoning, salt, and pepper.
  4. Pour the dressing over the pasta mixture and toss gently to combine.
  5. Chill in the refrigerator for at least an hour before serving to allow flavors to meld.
  6. Serve cold and enjoy!

Recipe Notes

  • To enhance flavors, let the salad marinate in the dressing a few hours before serving.
  • Feel free to add grilled chicken or chickpeas for an added protein boost.
  • Vary the vegetables by adding seasonal produce for fresh options.
  • Store leftovers in an airtight container in the fridge for up to 3-5 days.

Delicious Avocado Pasta Salad Recipe for Healthy Eating

Delicious Avocado Pasta Salad: A Fresh and Creamy Delight

⚖️
Difficulty
Easy

⏲️
Prep Time
15 mins

🕒
Cook Time
10 mins

⏱️
Total Time
25 mins

🍽️
Servings
4

Pasta salads are a versatile and satisfying dish, and this avocado pasta salad is a perfect example of that. Combining the creaminess of ripe avocados with the satisfying bite of al dente pasta, this dish is not just a delight to eat but a feast for the eyes as well. The vibrant green of the avocado pairs beautifully with the colorful array of vegetables, making it a stunning centerpiece for any gathering. Whether you’re looking for a quick lunch or a side dish for a summer barbecue, this avocado pasta salad brings a refreshing twist to traditional salads.

The luscious avocado creates a rich and creamy dressing that perfectly coats every strand of pasta. With the added crunch from fresh vegetables like bell peppers and cherry tomatoes, each bite offers a delightful combination of flavors and textures. This salad is not only delicious but packs a nutritional punch, featuring healthy fats from the avocados and an abundance of vitamins from the vegetables. Easy to prepare and customizable to suit your palate, this salad is bound to become a favorite in your recipe repertoire.

Quick Recipe Highlights

  • Flavor Profile: This avocado pasta salad offers a creamy, nutty flavor with bright, fresh notes from the vegetables.
  • Texture: A wonderful combination of smooth, creamy avocado with crunchy veggies and tender pasta creates a satisfying mouthfeel.
  • Aroma: Engaging aromas from fresh herbs and the earthiness of ripe avocados make this dish appealing.
  • Visual Appeal: The vibrant colors of green avocado, red tomatoes, and yellow bell peppers make this salad visually striking.
  • Skill Level Needed: This recipe requires minimal culinary skills, making it accessible to novice cooks.
  • Special Equipment: Only basic kitchen equipment such as boiling pot, knife, and mixing bowl are needed for preparation.

Recipe Overview

  • Difficulty Level: This avocado pasta salad is easy to prepare, requiring minimal effort and time, making it perfect for beginners.
  • Category: Ideal as a side dish, lunch option, or a light dinner, it suits various meal occasions.
  • Cuisine: While inspired by Mediterranean ingredients, this dish incorporates a mix of culinary influences for a unique flair.
  • Cost: The ingredients are budget-friendly, typically costing around $10 for a serving of four, making it economical.
  • Season: This salad shines in the warmer months when avocados and fresh vegetables are at their peak.
  • Occasion: Perfect for picnics, potlucks, and casual family dinners, it’s versatile for any setting.

Why You’ll Love This Recipe

This avocado pasta salad is a culinary delight with an appealing taste and texture. The creamy avocado serves as a base, bringing a luxurious consistency that envelops the pasta, while the freshness of the vegetables adds a welcome crunch. The balance of flavors means you can enjoy this dish as a simple lunch or a sophisticated side for a dinner party, making it suitable for any occasion.

Convenience is another standout feature of this recipe. With just a few simple steps and minimal cooking time, you can whip up this salad quickly. Prep the ingredients while the pasta cooks, and within 25 minutes, you have a complete meal. Plus, any leftovers can easily be stored in the fridge for the next day, providing a quick meal option that won’t skimp on flavor.

Nutritionally, this salad is a great choice! The avocados provide healthy monounsaturated fats, which are essential for heart health, while the vegetables add fiber and plenty of vitamins. As a bonus, this dish is naturally gluten-free if you choose a gluten-free pasta option, making it accessible for various dietary needs.

Socially, this avocado pasta salad shines as a crowd-pleaser. Its vibrant colors draw guests in, and the flavor combinations offer something for everyone. Whether you’re hosting a summer gathering or a casual lunch, this dish serves as a conversation starter, inviting guests to share their culinary experiences.

Lastly, its cost-effectiveness is a winning aspect. With easily sourced ingredients typically available year-round, you can create a delightful salad without breaking the bank. With its ease of preparation, health benefits, and the cheerful company it brings, this avocado pasta salad is bound to be a repeat star in your kitchen.

Historical Background and Cultural Significance

The concept of combining pasta with fresh ingredients has existed for centuries, originating from Italian culinary traditions. As different cultures embraced pasta, variations began to emerge, adapting to local ingredients and tastes. Avocado, a staple in Mexican cuisine, has gained global popularity for its luscious texture and rich flavor, making it a natural pairing with pasta salads.

Culturally, salads hold a significant place in Mediterranean cuisine, often showcasing seasonal vegetables and healthy fats. This avocado pasta salad embodies the essence of a Mediterranean diet, celebrated for its health benefits. The marriage of pasta with vibrant vegetables and creamy avocado highlights the prevalence of fresh, health-conscious eating, reflecting modern dietary trends.

Over time, this dish has evolved into numerous interpretations, with chefs and home cooks putting their unique twists on the recipe. Some may add proteins to enhance the dish further, such as grilled chicken or shrimp, while others may switch up the veggies to showcase seasonal produce. This adaptability showcases how food can evolve and encompass diverse tastes and cultures.

Regional variations also play a part in the story of avocado pasta salad. Regions where avocados thrive typically showcase them in various culinary forms, including salads, dips, and sauces. This fusion of Italian pasta with the creamy richness of avocado symbolizes how interconnected modern cuisine has become, combining elements from different cultures to create delicious dishes that resonate globally.

Ingredient Deep Dive

Avocado: Avocados are rich in healthy fats, particularly monounsaturated fat, renowned for promoting heart health. Historically, avocados originated in South Mexico and have since become a staple in cuisines worldwide. When selecting avocados, look for ones that yield slightly to gentle pressure, indicating ripeness. They should be stored in a cool, dark place until ripe and can be refrigerated to prolong freshness once cut.

Pasta: Pasta holds a foundational place in numerous culinary traditions, particularly in Italy, where its origins date back to ancient civilizations. Pasta is a versatile carbohydrate source, available in various forms—from whole wheat to gluten-free options—offering different nutritional benefits. Selecting high-quality, dried pasta ensures optimal cooking results. Store pasta in a cool, dry place, away from humidity, and always refer to package instructions for cooking times for the best texture.

Cherry Tomatoes: Cherry tomatoes are flavorful bite-sized jewels that originated in South America. Their sweetness and juiciness add a refreshing element to salads and other dishes. When shopping, choose vibrant-colored tomatoes with smooth skins. Store them at room temperature to maintain their sweet flavor, and enjoy them fresh, or consider roasting them to enhance their sweetness.

Bell Peppers: Colorful bell peppers add a crunchy texture and a hint of sweetness to this salad. Originally cultivated in Central and South America, they are now enjoyed worldwide. Select firm, glossy peppers without blemishes for optimal freshness. Store them in the fridge’s vegetable drawer, where they can last up to a week, and consider roasting or grilling for added flavor depth.

Common Mistakes to Avoid

  • Overcooking the pasta: Ensure you cook the pasta al dente to avoid mushiness.
  • Not seasoning adequately: Adding salt to the pasta water is essential to enhance overall flavor.
  • Using unripe avocados: Check for ripeness by feeling for slight yield before cutting; unripe avocados won’t blend smoothly.
  • Neglecting to toss: Mix all ingredients thoroughly to achieve an even distribution of flavor.
  • Adding too much dressing: Start with less dressing and add more if necessary; overwhelming flavors can mask freshness.
  • Cutting veggies too large: Smaller, bite-sized pieces ensure better integration of flavors and easier eating.
  • Skipping the herbs: Fresh herbs elevate the dish significantly; don’t leave them out.
  • Letting leftovers sit too long: Consume within a couple of days for the best taste and freshness.

Essential Techniques

Cooking Pasta: Cooking pasta properly is essential for achieving the right texture. Always bring a large pot of salted water to a rolling boil before adding pasta. This ensures even cooking and prevents sticking. Taste your pasta a minute or two before the package suggests to ensure the right al dente texture—perfect for salads.

Mashing Avocado: Mastering the art of mashing avocados is crucial for a creamy dressing. Use a fork or a potato masher; if you prefer a chunkier texture, mash gently. For smooth avocado dressing, blend until silky. The key is to ensure there are no big lumps, allowing the dressing to coat the pasta evenly.

Pro Tips for Perfect Avocado Pasta Salad

1. **Use ripe avocados:** Opt for avocados that yield slightly to pressure for the best creamy texture in your salad.
2. **Cook pasta to al dente:** This prevents the pasta from becoming mushy when mixed with the dressing.
3. **Season the ingredients:** Don’t forget to add salt and pepper to taste; it brings out the freshness of the vegetables.
4. **Incorporate lemon juice:** A splash of lemon juice not only adds brightness but also prevents avocados from browning.
5. **Chill before serving:** Allowing the salad to sit in the fridge for at least 30 minutes enhances flavor melding.
6. **Add protein:** For a complete meal, consider adding grilled chicken, chickpeas, or feta cheese for added flavors and nutrients.
7. **Experiment with herbs:** Try different herbs like basil or cilantro to customize the flavor profile according to your preferences.
8. **Serve immediately:** While this salad can be stored, it’s best enjoyed fresh for optimal texture and flavor.

Variations and Adaptations

One delightful adaptation is to consider adding different proteins, such as diced grilled chicken or shrimp, to turn the salad into a more substantial meal. For a heartier variation, you can substitute traditional pasta with whole grain or legume-based pasta, which adds additional fiber and nutrients to the dish.

Seasonal adaptations also offer a fresh twist. In winter months, consider roasting vegetables like zucchini or bell peppers for a warm-inspired salad option. In the summer, use fresh, seasonal ingredients like local corn or peas that provide an added sweetness and natural crunch.

For those with dietary restrictions, the salad can easily be made vegan by omitting cheese and ensuring that all ingredients align with plant-based choices. Similarly, gluten-free pasta can be used to cater to gluten sensitivities without sacrificing flavor.

Players in flavor variation can explore different dressings; try adding a balsamic vinaigrette for a tangy contrast or a spicy harissa for some heat. Each variation enhances the dish uniquely and allows for personal preferences in taste and ingredients.

Serving and Presentation Guide

To present your avocado pasta salad beautifully, consider a large, shallow bowl for serving that showcases the vibrant colors. Garnishing with freshly chopped herbs not only enhances visual appeal but also adds a fresh touch. Slices of lemon or lime on the side can provide a pop of color and an opportunity for guests to add more acidity to their portions.

Accompaniments like toasted garlic bread or a simple green salad elevate the dish’s presentation. If serving for special occasions, consider individual portions in mason jars for a charming and portable option. Temperature is also a factor—this dish is best served chilled or at room temperature, so plan accordingly.

Lastly, for portion control, consider using a set serving spoon or portioning the salad into cups or small bowls to help guests serve themselves appropriately, maintaining balance while ensuring everyone gets a taste.

Wine and Beverage Pairing

For wine lovers, a crisp Sauvignon Blanc pairs beautifully with the creamy avocado and vibrant vegetables, enhancing the freshness of the dish. Alternatively, a light Pinot Grigio provides a refreshing complement to avocado’s richness.

Non-alcoholic options like sparkling water with lemon offer a refreshing lift without overpowering flavors. If you prefer coffee or tea, an iced herbal tea with mint can refresh the palate and serve as a delightful complement in warmer months.

For serving, chill the wine in the fridge ahead of time to ensure it’s perfectly cooled before serving, enhancing the dining experience. Choose glassware that showcases the drink’s color and aroma, setting an elegant tone for your meal.

Storage and Shelf Life

To maximize the shelf life of your avocado pasta salad, store it in an airtight container in the refrigerator. Proper storage can keep it fresh for up to 2 days.

Temperature management is important; keep the salad cool, especially if serving at an outdoor gathering on warm days. Signs of spoilage include browning of the avocado, strange smells, or a slimy texture—if any of these are present, it’s best to discard it.

When reheating, if you’ve added protein, make sure to heat it gently to avoid overcooking. For the best results, consider serving the salad cold to preserve the fresh ingredients and their individual textures.

Additionally, if you know you won’t finish the salad within a couple of days, consider freezing the pasta without the dressing and fresh ingredients. When you’re ready to consume it again, thaw in the refrigerator and mix in freshly mashed avocado for the best quality.

Make Ahead Strategies

Making the avocado pasta salad ahead of time can be a great strategy for busy weekdays. You can cook the pasta and chop the vegetables a day in advance, storage separately in airtight containers. This preparation time allows you to assembly quickly right before serving.

Consider leaving the avocado to be added just before serving. This helps prevent browning and keeps the dressing fresh and creamy without altering the dish’s overall appearance. Similarly, prepare the dressing separately to retain the freshest flavors before the mix.

Assessing quality is key; some ingredients may wilt if mixed too far ahead or become overly dressed, so consider combining everything within a few hours of serving. After mixing, allow it to chill in the refrigerator for the flavors to meld beautifully.

Refreshing the salad can be as simple as adding a few splashes of lemon juice and some fresh herbs before serving to enhance the flavors and visual appeal once assembled.

Scaling Instructions

If you need to halve the recipe, simply cut all ingredient amounts in half, ensuring you adjust cooking times by checking that the pasta is adequately cooked while still achieving that desired al dente texture. This scaling is perfect for smaller gatherings or lunch for two.

If doubling or tripling the recipe for a larger gathering, ensure that you have larger pots for boiling pasta. You may want to add the ingredients gradually to ensure everything gets evenly coated with dressing, which might be challenging in a large bowl.

Time modifications are key; while cooking time for pasta may remain the same, assembling in larger quantities requires proper mixing techniques to ensure even distribution of the creamy avocado dressing.

For storage, consider using multiple airtight containers, especially if differing flavors or added ingredients are being used, to ensure they can be enjoyed separately later without flavor mixing.

Nutritional Deep Dive

Analyzing the nutritional aspect of this avocado pasta salad reveals a balance of macros; it generally consists of carbohydrates from the pasta, healthy fats from avocados, and protein if complemented with additional ingredients such as beans or grilled chicken.

Micronutrient-wise, this salad is packed with vitamins from the array of colorful vegetables, including A, C, and K vitamins, along with various antioxidants, contributing to overall health benefits.

Health consumption of avocado has also been linked to benefits in heart health and cholesterol control due to its fiber and healthy fat content; incorporating this into your diet can support metabolic health significantly.

Portion control is essential when enjoying pasta, as moderation can help with weight management while enjoying the healthy fats present without overindulgence. By providing a generous serving of vegetables along with the pasta, this recipe offers a well-balanced meal option suitable for varied dietary needs.

Dietary Adaptations

For gluten-free adaptations, ensure the pasta used is specifically labeled gluten-free, which can be made from rice, corn, or legumes, catering to those with sensitivities without sacrificing taste.

A dairy-free version can be achieved simply by ensuring no cheese is added and ensuring the dressing ingredients align with dairy-free options. Use plant-based alternatives like nutritional yeast for added flavor when desired.

For vegan adaptations, maintain the use of entirely plant-based ingredients, adding in tofu or chickpeas for protein-rich components.

Those looking for low-carb options can explore spiralized zucchini noodles as an alternative to traditional pasta or simply a larger serving of the adjoining salad elements for a hearty, light dish.

Explore using various substitutions for a keto-friendly version; make sure any added dressings have healthy fats as the base without added sugars, maintaining a delicious balance of flavors.

Troubleshooting Guide

When encountering texture issues, especially if the pasta becomes too soft, ensure you’re cooking it to al dente as a crucial first step. If your dressing is too thick, consider adding a touch of olive oil or additional lime juice gradually until achieving the desired consistency.

Flavor balance may falter if too many ingredients overwhelm the salad; take time to taste as you add and adjust seasonings minimally and incrementally until the perfect flavor emerges. Avoid dumping in ingredients without a final taste test to preserve the overall profile.

For temperature problems, especially with avocados browning, keep them out of direct light and moisture until serving; applying citrus juices as a protective layer also slows down browning.

Should equipment challenges arise, using a sturdy knife for chopping ensures precision while not liquidating your dressing utensil, achieving that creamy consistency without lumps or chunks.

Adjusting for timing concerns can usually be managed by prepping ingredients ahead of time, ensuring everything is washed, chopped, ready, and only the pasta needs cooking last to accompany the readiness of all other elements for your salad’s completion.

Recipe Success Stories

Community feedback is a testament to the joy this avocado pasta salad brings to gatherings and meal preparations alike. Home cooks share how guests consistently request the recipe, finding it easy to modify for personal tastes or dietary restrictions, allowing everyone at the table to enjoy.

Many readers enjoy customizing the recipe, swapping out ingredients based on availability or preference, resulting in unique adaptations that still carry the same lightness and creaminess that started it all. Adaptation involves swapping out pasta with seasonal vegetables instead or even integrating different grains like quinoa, delighting many who seek variety in tried-and-true recipes.

Photography tips for capturing the bright colors of this salad can highlight the vibrancy of vegetables and the smoothness of the avocado dressing. Using natural light and overhead angles enhances the presentation significantly, showcasing the dish’s appeal for food blogs or sharing on social media.

Reader suggestions often showcase their successful versions of the salad, whether introducing a touch of spice or using alternative dressings, proving just how versatile this recipe truly is, allowing for endless personalization while maintaining its original charm.

Frequently Asked Questions

Can I make avocado pasta salad ahead of time? Yes, you can prepare the pasta and vegetables in advance but add the avocado and dressing closer to the serving time to prevent browning and maintain freshness.

How long does avocado pasta salad last? It typically lasts for about 2 days in the refrigerator, provided it is stored in an airtight container.

Can I freeze avocado pasta salad? It’s not recommended to freeze a salad with avocado, as it changes texture and flavor. However, you can freeze the pasta separately and mix fresh ingredients when ready to serve.

What types of pasta work best in this recipe? Any type of pasta can be used; however, whole wheat or gluten-free varieties are excellent options for added nutrition or dietary needs.

Can I add protein to this salad? Definitely! Grilled chicken, shrimp, chickpeas, or feta cheese are all great additions to make the salad a heartier dish.

What can I use instead of avocado? If you’re looking for a substitute, consider using tahini or a creamy yogurt dressing, but note it won’t replicate the taste and texture of avocado.

Is it necessary to use fresh herbs? While it’s not obligatory, fresh herbs greatly enhance the flavor profile and should be considered for the best results.

Can I serve it warm? Although this pasta salad is traditionally served cold or at room temperature, it can be enjoyed warm if desired, but you may want to adjust dressing flavors accordingly.

What’s the best way to prevent the avocados from browning? Coating the mashed avocado with lime or lemon juice helps prevent oxidation which causes browning. Mixing in fresh avocado just before serving is also an effective strategy.

How many servings does this recipe yield? This recipe serves about 4 people, making it ideal for a light meal or side dish, but can easily be scaled to serve more.

Additional Resources

Explore related recipes like Caprese salad or quinoa tabbouleh for a fresh take on side dishes that celebrate seasonal ingredients. Technique guides on cooking pasta or mastering the perfect avocado can expand your culinary skills, ensuring you can recreate this salad with efficient ease.

Ingredient information detailing the health benefits of avocados and the variety of pasta shapes can further enhance your understanding of friendly substitutions or additions. Equipment recommendations for cooking techniques will also pave the way for maximum efficiency and joy in the process of creating this delicious dish.

Looking ahead, consider seasonal variations as a way to keep this recipe fresh. Incorporating in-season vegetables not only enhances flavor but also connects with the natural rhythms of food cultivation, tasting their best when at peak.

Join the Conversation

We encourage you to share your experiences with this avocado pasta salad on social media—tagging your culinary adventures and sharing photos enhances our community. Sharing tips or personal adaptations does wonders in inspiring fellow cooks and creates a space for friendly exchanges.

Consider sharing your photography of the dish online; the colors and textures make for great engagement! Participating in the conversation through comments, suggestions, or even recipe variations fosters a community of home cooks eager for creative inspiration.

Don’t forget to rate the recipe and leave a comment about your experience, as feedback helps improve our offerings and build a shared love for cooking. It connects us through food, bringing people together from different backgrounds and experiences as we all journey through culinary creations!

The Recipe

Avocado Pasta Salad

Serves: 4

Prep Time: 15 mins

Cook Time: 10 mins

Total Time: 25 mins

Kitchen Equipment Needed

  • Large pot
  • Colander
  • Mixing bowl
  • Knife
  • Spatula

Ingredients

  • 200g pasta (your choice)
  • 2 ripe avocados
  • 1 cup cherry tomatoes, halved
  • 1 bell pepper, diced
  • ¼ cup fresh parsley, chopped
  • 2 tablespoons lime juice
  • Salt and pepper, to taste

Directions

  1. Cook the pasta in salted boiling water according to package instructions. Drain and set aside to cool.
  2. In a mixing bowl, mash the avocados with the lime juice until smooth.
  3. Add the cooled pasta, cherry tomatoes, bell pepper, and parsley to the mashed avocado.
  4. Gently mix all the ingredients until fully combined. Season with salt and pepper to taste.
  5. Chill in the refrigerator for 30 minutes before serving to enhance the flavors.

Recipe Notes

  • Consider adding grilled chicken for a protein boost.
  • For a spicier rendition, mix in diced jalapeños or a dash of hot sauce.
  • Substitute lime juice with lemon juice for a tangy variation.

The Ultimate Recipe for Irresistibly Delicious Cornbread

The BEST Cornbread: A Delicious Journey Through Flavors and Textures

⚖️
Difficulty
Easy

⏲️
Prep Time
10 mins

🕒
Cook Time
20 mins

⏱️
Total Time
30 mins

🍽️
Servings
8 serving

Who’s ready for the BEST cornbread you’ve ever tasted? 🌽✨ This recipe brings together a lovely balance of sweetness and savoriness with a texture that’s consistently moist yet crumbly. Perfectly baked cornbread is a soul-soothing comfort food that pairs beautifully with chili, barbecues, or simply as a treat to enjoy by itself. As you cut into this golden delight, the enticing aroma wafts through the air, hinting at the flavor explosion waiting for you.

In this blog post, I will guide you step-by-step on how to create this incredible cornbread. With just a handful of ingredients, you can achieve a dish that’s not only easy to make but also elevates any meal. The balance of sweet corn and tender crumb will satisfy all taste buds, making it a delightful addition to your recipe repertoire.

Quick Recipe Highlights

  • Flavor Profile: The sweetness of corn and the buttery richness combine for a mouthwatering experience.
  • Texture: Light and fluffy inside with a slightly crispy golden crust.
  • Aroma: The scent of butter and fresh corn fills your kitchen with warmth.
  • Visual Appeal: Golden-yellow color with a perfect rise makes this cornbread tempting on any table.
  • Skill Level Needed: Ideal for novices and experts alike—great for family cooking sessions!
  • Special Equipment: Simply requires a mixing bowl, whisk, and baking pan for effortless preparation.

Recipe Overview

  • Difficulty Level: This cornbread is easy to prepare, making it an excellent choice for new bakers while still being satisfying for those with more culinary experience. The uncomplicated steps ensure success every time.
  • Category: Cornbread fits beautifully within the comfort food category and is perfect for side dishes at BBQs or holiday gatherings.
  • Cuisine: With roots in Southern cuisine, cornbread is cherished across the United States and can be found in countless family recipes around the world.
  • Cost: A budget-friendly option, the ingredients are typically inexpensive and accessible, making this recipe a practical choice for any kitchen.
  • Season: While cornbread can be enjoyed year-round, it’s particularly popular in fall and winter months, offering warmth and comfort during chilly weather.
  • Occasion: Perfect for gatherings, potlucks, or even a cozy family dinner, this cornbread really shines as a warm welcoming treat.

Why You’ll Love This Recipe

This cornbread tantalizes your taste buds with its sweet and savory combination, offering a deliciously satisfying experience. Each bite provides a perfect balance of flavors that evoke a sense of warmth and nostalgia. The texture is light yet hearty, making it versatile enough to complement any dish, from chili to roasted meats.

Convenience is another reason to adore this recipe—prep takes just 10 minutes, allowing you more time to focus on your hob or spending time with loved ones. Easily mixed in a single bowl, clean-up is quick and easy, making it an ideal choice for busy days.

From a nutritional standpoint, cornbread offers carbohydrates while incorporating the goodness of corn, which is rich in fiber and antioxidants. When made with whole grain cornmeal, it contributes to digestive health while providing energy for your day.

This cornbread is not only a family favorite but also a fantastic way to bring friends together. It’s perfect for gatherings or celebrations, as friends and family can break bread together, making memories over delicious food. It creates a social atmosphere that fosters warmth and connection among those who share in the meal.

Finally, the cost-effectiveness of this recipe can’t be overlooked. The affordability of the ingredients makes it accessible for anyone, meaning you can satisfy cravings without breaking the bank. Making delicious cornbread at home allows for better control over quality ingredients and flavors.

Historical Background and Cultural Significance

The origins of cornbread date back to Native American tribes who embraced corn as a staple. Over generations, this food evolved and spread through various regions of the United States, adapting to local tastes and ingredients. Today, cornbread is a beloved dish that holds significant cultural importance, particularly in Southern cuisine.

Culturally, cornbread represents community and sharing, often served at large family gatherings, church potlucks, or festive occasions. The shared experience of enjoying this traditional dish fosters connection and warmth, embodying the spirit of hospitality that is prevalent in the Southern states.

Over time, cornbread recipes have evolved to include diverse adaptations, such as sweet cornbread or spicy versions, incorporating ingredients such as jalapeños, cheese, or honey. These variations illustrate the dish’s versatility and adaptability to different culinary traditions.

Regional variations also play a role in the cultural significance of cornbread. From Northern corn muffins to Southern skillet cornbread, each practice highlights the locals’ flavors and preferences, creating a tapestry of culinary history that we still enjoy today.

Ingredient Deep Dive

Cornmeal: The primary ingredient in cornbread, cornmeal brings a unique sweetness and distinctive texture. Cornmeal has been a staple in many cultures for centuries, used in various dishes. It is rich in fiber and essential nutrients, making it a healthy choice.

Selecting the right cornmeal is crucial—for optimal flavor, choose coarse or medium-ground cornmeal. Store cornmeal in a cool, dry place. Consider freezing it for extended shelf life. If you can’t find cornmeal, you can substitute it with polenta, keeping in mind the flavor variation.

Buttermilk: This ingredient contributes a tangy flavor and helps achieve a moist texture in the cornbread. Traditionally, buttermilk was a natural byproduct of churning butter, giving it a unique cultural origin. It’s filled with beneficial probiotics and nutrients, aiding in digestion.

When selecting buttermilk, looking for low-fat or fat-free options can provide a healthier alternative. If buttermilk is unavailable, yogurt mixed with milk can serve as an excellent substitute, preserving the tanginess while still achieving the desired moisture level.

Common Mistakes to Avoid

  • Using the wrong type of cornmeal: Always use yellow or white cornmeal, avoiding flours that do not have that distinct flavor.
  • Overmixing the batter: This can lead to tough cornbread; mix just until combined for a light texture.
  • Not preheating the oven: Failing to preheat can result in uneven baking times and inconsistent results.
  • Skipping the resting time: Allowing the batter to rest for a few minutes helps with the consistency and fluffiness.
  • Not greasing the pan properly: A well-greased pan ensures that your cornbread releases easily after baking.
  • Using cold ingredients: Bring eggs and buttermilk to room temperature for better mixing and fluffiness.
  • Failing to check for doneness: Always use a toothpick in the center; if it comes out clean, your cornbread is ready.
  • Storing incorrectly: Store uneaten cornbread in an airtight container to prevent staleness.
  • Using too much baking powder: The right amount is crucial; too much can create a bitter taste.
  • Not covering during baking: If your cornbread browns too quickly, tent it with foil to prevent overcooking.

Essential Techniques

Proper Mixing: Mixing the ingredients correctly is vital for achieving the right texture. Combine the dry and wet ingredients separately, then mix just until you see no more dry flour. Overmixing could lead to a dense, gummy cornbread.

Baking in a hot skillet: Using a hot cast-iron skillet creates a delightful crispy crust. Preheat your skillet with a bit of oil or butter before adding the batter for the best results.

Pro Tips for Perfect Cornbread

1. Use freshly ground cornmeal for a more robust flavor and texture.

2. Experiment with add-ins like corn kernels, jalapeños, or cheese for a personalized twist.

3. Serve warm with honey or butter to enhance the flavor profile.

4. Always taste your batter before baking—add a pinch of sugar or salt if needed.

5. For a sweeter version, increase the sugar slightly and add more honey for a delightful flavor boost.

6. Utilize butter or ghee for greasing your pan, as it adds extra flavor to the crust.

7. Check your oven’s temperature accuracy; an oven thermometer can help maintain the right temperature.

8. Cool the cornbread in the pan for at least 10 minutes before serving for easy removal.

Variations and Adaptations

Regional variations can transform your cornbread experience. For instance, Southern-style cornbread typically excludes sugar, while Northern versions often include it for sweetness. Additionally, you can create a savory cornbread by incorporating ingredients like bacon, cheddar cheese, or herbs.

Seasonal adaptations are also possible. For summer, consider adding fresh herbs or summer vegetables, such as zucchini or jalapeños, to bring fresh flavors to your bread. In fall, try spicing it up with pumpkin puree and cinnamon for a seasonal twist.

Dietary modifications cater to various preferences. For gluten-free versions, swap maize flour with a gluten-free blend. If you need a dairy-free version, use almond milk mixed with apple cider vinegar instead of buttermilk.

Flavor variations can include experimenting with different types of cheeses, such as smoked gouda or feta, to create a unique profile that resonates with your taste. This is an intriguing way to make cornbread your own!

Serving and Presentation Guide

For plating, consider serving cornbread in a cast-iron skillet for a rustic look. Garnish with fresh herbs sprinkled on top, or serve slices with butter or honey drizzled on the side to enhance visuals. Cornbread can be cut into strips or squares, fitting into any presentation style.

Traditional accompaniments include chili, BBQ, or fried chicken, offering perfectly balanced flavors. For modern presentation, try pairing cornbread with unique dips or spreads, like roasted garlic butter or spicy salsas to elevate the entire meal.

Wine and Beverage Pairing

When it comes to wine pairings, a chilled Sauvignon Blanc works well with the sweetness of cornbread. Alternatively, a fruity Pinot Noir can enhance the overall experience. For non-alcoholic beverage options, consider crafting a refreshing iced tea with mint or lemon to complement the cornbread’s flavors.

Storage and Shelf Life

To store your cornbread, allow it to cool completely before wrapping it in plastic wrap or placing it in an airtight container. Cornbread can typically last around 3-4 days at room temperature. For longer storage, freezing is recommended; cut into portions and store in freezer-safe bags. Chocolate cornbread can maintain quality for up to three months when frozen.

Make Ahead Strategies

To speed up your cooking process, consider preparing the dry ingredient mix a day in advance. Keep the components sealed tightly and then combine with wet ingredients when ready to bake. This allows for minimal prep time when you want to enjoy cornbread within minutes.

Scaling Instructions

To halve the recipe, simply divide each ingredient by two, ensuring even proportions remain intact. When doubling, consider a larger baking dish and monitor the baking time, possibly extending it slightly to achieve the perfect texture. Always test for doneness using the toothpick method. For larger gatherings, scaling up is easy; however, adjust the amount of butter or oil for greasing accordingly to maintain that delightful crust.

Nutritional Deep Dive

Examining the nutritional content reveals that cornbread is primarily composed of carbohydrates, making it a great source of energy. The incorporation of cornmeal further provides fiber and essential vitamins, including B6 and Folate, which are important for metabolic functions.

Minerals like magnesium and phosphorus are abundant in corn, contributing to overall health. When considering portion sizes, stick to about 1 square (about 70g) to maintain balanced calorie intake, adding fresh vegetables or proteins to round out your meal.

Dietary Adaptations

To create gluten-free cornbread, substitute traditional wheat flour with a gluten-free blend for similar textures and flavors. This adaptation allows those with dietary restrictions to enjoy the same delightful experience. Further, traditional cornbread recipes can easily modify into dairy-free options by using almond milk and coconut oil instead of buttermilk and butter.

Troubleshooting Guide

Common texture issues arise from overmixing, which can create a dense and gummy consistency. To solve this, gently fold ingredients until just combined. If your cornbread lacks flavor, test your baking powder’s freshness, or increase sugar slightly for a more balanced taste. Should you encounter baking temperature problems, consider investing in an oven thermometer to ensure accurate baking conditions are met, fostering consistent results every time you bake!

Recipe Success Stories

Countless readers have shared their joyous culinary experiences with this cornbread recipe, celebrating its ease and scrumptiousness. Many report their adjustments have led to delightful flavors, whether adding jalapeños for heat or sweetening with maple syrup for a unique twist.

Frequently Asked Questions

Q1: Can I use regular milk instead of buttermilk?
A: Yes! You can use regular milk, just add a tablespoon of vinegar or lemon juice per cup to mimic buttermilk’s acidity.

Q2: How can I ensure my cornbread rises perfectly?
A: Ensure your baking powder is fresh and that your oven is properly preheated before baking.

Q3: Can I add cheese to this cornbread recipe?
A: Absolutely! Cheese can enhance flavor and richness, making for a delightful variation.

Q4: How do I reheat cornbread?
A: Reheat in an oven at 350°F (175°C) for about 10 minutes or until warmed through.

Q5: How do I store leftover cornbread?
A: Wrap it in plastic wrap and store it in an airtight container for up to 4 days at room temperature.

Q6: Why is my cornbread dry?
A: This can occur if you overbake it or skimp on wet ingredients. Ensure proper measuring and baking times.

Q7: How can I make cornbread sweeter?
A: Simply increase the sugar content slightly, or add honey or maple syrup for additional flavor.

Q8: Is cornbread gluten-free?
A: Traditional cornbread is not gluten-free. However, you can make it gluten-free by substituting the flour with a gluten-free blend.

Q9: Can I use frozen corn in the recipe?
A: Yes! Just make sure to thaw and drain the corn before adding it to the batter.

Q10: How do I prevent my cornbread from sticking to the pan?
A: Grease the pan generously with butter or oil, or use parchment paper for added assurance.

Additional Resources

If you enjoyed this cornbread recipe, explore our other delightful bread recipes, including classic muffins, savory flatbreads, and more! Additional technical guides can help you perfect your baking skills, while equipment recommendations ensure you have the right tools for success.

Join the Conversation

Share your cornbread creations on social media and tag us! We’d love to see your unique twists and adaptations. Join our community for recipe exchanges, feedback, or tips to improve your baking skills as you embark on delicious culinary adventures together.

The Recipe

The BEST Cornbread

Serves: 8

Prep Time: 10 mins

Cook Time: 20 mins

Total Time: 30 mins

Kitchen Equipment Needed

  • Mixing bowl
  • Whisk
  • Cast iron skillet or baking pan

Ingredients

  • 1 cup cornmeal
  • 1 cup all-purpose flour
  • 1 tablespoon baking powder
  • 1/4 cup sugar
  • 1/2 teaspoon salt
  • 1 cup buttermilk
  • 1/4 cup melted butter
  • 2 large eggs

Directions

  1. Preheat your oven to 425°F (220°C), and place your skillet in the oven to heat.
  2. In a mixing bowl, combine cornmeal, flour, baking powder, sugar, and salt.
  3. In another bowl, whisk together buttermilk, melted butter, and eggs until well blended.
  4. Pour the wet ingredients into the dry ingredients, mixing gently to combine.
  5. Remove the hot skillet from the oven and pour a tablespoon of melted butter into it, swirling to coat the bottom.
  6. Pour the cornbread batter into the hot skillet and bake for 20 minutes or until the top is golden brown and a toothpick comes out clean.
  7. Allow to cool slightly before slicing and serving.

Recipe Notes

  • For a sweeter cornbread, increase sugar to 1/3 cup.
  • Feel free to add in fresh kernels of corn or jalapeños for added flavor.
  • Can be stored in an airtight container at room temperature for up to 4 days.

Delicious Pineapple Quick Bread Recipe for Easy Baking Adventures

Pineapple Quick Bread: A Delicious Tropical Treat

⚖️
Difficulty
Easy

⏲️
Prep Time
15 mins

🕒
Cook Time
60 mins

⏱️
Total Time
75 mins

🍽️
Servings
8

Pineapple Quick Bread is a delightful recipe that brings the refreshing taste of tropical fruit right into your kitchen. This bread is not only easy to prepare but also offers a deliciously moist texture and a hint of sweetness that pairs perfectly with breakfast or as an afternoon snack. As you slice into the golden loaf, the aroma of fresh pineapple fills the air, enticing everyone around. Imagine a warm slice spread with butter, melting into the bread, and infusing each bite with rich tropical flavor.

What sets this Pineapple Quick Bread apart is its versatility. You can enjoy it fresh from the oven, or serve it toasted with cream cheese for a delightful twist. Ideal for gatherings, this recipe can bring a taste of the tropics to any occasion, captivating taste buds and sparking conversation. With an infusion of coconut or walnuts, the flavor of this bread can be further elevated, making it a delightful addition to your recipe collection.

Quick Recipe Highlights

  • Flavor Profile: This Pineapple Quick Bread is wonderfully sweet with tangy notes from the fresh pineapple, creating a balanced flavor experience.
  • Texture: Expect a moist and tender crumb, with a delightful chew from any added nuts or coconut, enhancing its delightful texture.
  • Aroma: The baking process releases a tropical aroma that invigorates the kitchen, making it a must-try for pineapple lovers.
  • Visual Appeal: With its golden-brown crust and flecks of pineapple, this bread looks as inviting as it tastes.
  • Skill Level Needed: Perfect for novice bakers, this recipe requires no special techniques or equipment, just a mixing bowl and a loaf pan.
  • Special Equipment: A standard loaf pan and a mixing bowl are all you need to create this delightful bread.

Recipe Overview

  • Difficulty Level: Pineapple Quick Bread is classified as an easy recipe, making it suitable for cooks of any skill level.
  • Category: This recipe falls under quick breads and is perfect for breakfast, brunch, or a casual snack.
  • Cuisine: Embracing tropical flavors, this bread showcases influences from Hawaiian and Caribbean cooking traditions.
  • Cost: Inexpensive to make, the costs primarily come from the pineapple and pantry staples, making it budget-friendly.
  • Season: Best enjoyed in the summer when fresh pineapples are at their peak, but delicious year-round.
  • Occasion: Perfect for parties, picnics, or casual coffee gatherings, this quick bread adapts seamlessly to any event.

Why You’ll Love This Recipe

Pineapple Quick Bread boasts a unique taste with each bite, combining sweetness and tropical flair that captivates anyone who tries it. The moistness of the bread ensures a satisfying mouthfeel, complemented by optional nuts or coconut, adding delightful textures that make the experience memorable.

The convenience of this recipe cannot be overstated. With minimal prep and cook time, you can have a freshly baked loaf ready to serve in under an hour. This quick bread is an excellent choice for those with a busy lifestyle but who still want to enjoy homemade treats.

In terms of nutrition, pineapple is high in vitamin C and manganese, providing health benefits along with its refreshing taste. Making bread at home also allows you to control the ingredients, providing a healthier alternative to store-bought varieties filled with preservatives and excess sugars.

Pineapple Quick Bread is not just a treat; it serves as a fantastic conversation starter when serving guests. Share the joys of baking and the deliciousness of this bread, making any gathering more special.

With its affordability, you don’t have to break the bank to treat yourself or your guests. The ingredients are accessible, and the result—an irresistible loaf of Pineapple Quick Bread—will always be worth the effort.

Historical Background and Cultural Significance

Pineapple cultivation has a rich history and dates back to the indigenous peoples of South America, where it was domesticated long before European exploration. Their appreciation for the fruit laid the groundwork for how pineapples are utilized in various cultures today, including in this quick bread recipe.

In many tropical regions, pineapples signify hospitality and warmth. Including it in a recipe like Pineapple Quick Bread showcases the spirit of sharing and showcases how an ingredient can bring people together over a meal.

The evolution of quick bread recipes reflects changes in baking techniques and the introduction of baking soda and powder. This particular recipe has adopted those principles, allowing bakers to enjoy quick and easy options ready for consumption in no time.

Variations of quick bread exist worldwide—from banana bread in the United States to Irish soda bread in Europe. This highlights the adaptability of quick breads, making Pineapple Quick Bread a unique, yet familiar option that combines a beloved fruit with classic bread-making techniques.

Ingredient Deep Dive

Pineapple
Pineapple, known for its sweet and tangy flavor, has a long-standing cultural significance, especially in tropical regions. Rich in vitamins and minerals, it aids digestion and boosts immunity. When selecting, look for a ripe pineapple with a sweet aroma. Store it in the fridge for up to a week, or freeze slices for later use. For substitutions, canned pineapple can work in a pinch, but fresh enhances the flavor.

Flour
Flour is a staple in bread-making, serving as the base for structure. Whole wheat flour can add nutritional value, while all-purpose flour provides a lighter texture. Always opt for fresh flour, ensuring it’s stored in a cool, dry place. For gluten-free options, almond or coconut flour works well in many recipes with slight adjustments.

Sugar
Sugar balances flavors and contributes to browning. Opt for granulated sugar for traditional recipes, but consider brown sugar for additional moisture and flavor depth. Always buy sugar in sealed containers to keep it fresh. In terms of substitutes, honey or agave nectar can replace sugar in equal parts, adjusting for sweetness levels.

Common Mistakes to Avoid

  • Overmixing the batter can lead to dense bread; mix just until combined.
  • Not measuring ingredients accurately can affect the bread’s texture; use kitchen scales for precision.
  • Using too much heat can burn the crust while leaving the inside raw; follow the recipe temperature recommendations.
  • Neglecting to preheat the oven could result in inconsistent baking; always start with a preheated oven.
  • Skipping the cooling time could cause the bread to be gummy inside; allow it to cool before slicing.
  • Using overly ripe or undercooked pineapple can alter flavor; ensure the pineapple is fresh.
  • Not greasing the pan can lead to sticking; use parchment paper or non-stick spray.
  • Ignoring the ingredient substitutions can lead to unexpected flavors; always test new ingredients beforehand.

Essential Techniques

Mastering the creaming method enables the butter and sugar to incorporate air, resulting in lighter bread. To achieve this, beat the butter and sugar together until fluffy. Avoid over-mixing after adding dry ingredients to keep the texture tender.

Incorporating ripe ingredients is key when making quick bread. Properly mash your pineapple to achieve a uniform distribution of flavor and moisture. Be cautious of excess moisture, as this can make the bread soggy—drain any excess liquid before mixing.

Pro Tips for Perfect Pineapple Quick Bread

1. Use fresh, ripe pineapple for the best flavor and moisture balance; avoid canned if possible.
2. Consider adding chopped nuts or coconut flakes for texture and additional flavor nuances.
3. Let the bread cool completely before slicing to prevent gummy centers.
4. Experiment with spices like cinnamon or nutmeg for a warm aroma.
5. Make it ahead of time as it tastes even better the next day after resting.
6. Line the loaf pan with parchment paper for easy removal and cleanup.
7. Keep a close eye on the baking time; ovens can vary, and yours might need slight adjustments.
8. Serve with flavored cream cheese for a unique breakfast experience.

Variations and Adaptations

For regional variations, try incorporating different fruits, such as bananas or mangoes, for a unique twist on the classic recipe. Adding seasonal spices like cloves or pumpkin spice can elevate your Pineapple Bread during the fall.

When considering dietary modifications, swap out regular flour for gluten-free alternatives like almond flour. Vegan alternatives can replace eggs and butter with flax seeds and coconut oil, making it an inclusive recipe for everyone.

Enhancing your quick bread’s flavor can be done by mixing in citrus zest or dried fruits for a fruity burst. Adjusting the texture by adding oats can make it heartier, while more chocolate chips can satisfy any sweet tooth.

Serving and Presentation Guide

Enhance your presentation with rustic plating, placing slices on a wooden board, garnished with fresh pineapple slices and mint leaves. Consider drizzling honey over the slices or sprinkling powdered sugar for a refined look.

For garnishing ideas, try serving with whipped cream or homemade whipped cream cheese for an added touch. Traditional accompaniments, like coffee or tea, work wonderfully, elevating the brunch experience.

Maintain your bread’s ideal temperature by serving it warm, or at room temperature for a more relaxed, inviting feel. Portion control can be managed by cutting thicker or thinner slices based on your guests’ preferences.

Wine and Beverage Pairing

Pair the Pineapple Quick Bread with a glass of chilled Prosecco, whose effervescence complements the sweet notes of the pineapple. Alternatively, a light, fruity Riesling offers a refreshing balance.

For non-alcoholic alternatives, consider pairing with freshly brewed hibiscus tea or a tropical fruit juice blend, enhancing the tropical flavor profile. Serving temperature is important; keep the beverage chilled to contrast the warm bread.

If coffee is your choice, a light roast with fruity notes or a spiced chai can offer a harmonious pairing that enhances the flavor experience.

Storage and Shelf Life

Store your Pineapple Quick Bread in an airtight container at room temperature for up to three days. For longer shelf life, consider refrigerating it, where it can last up to a week.

When freezing, slice the bread and wrap it tightly in foil or freezer bags to prevent freezer burn, enabling storage for up to three months. To thaw, simply leave at room temperature or pop it into a microwave for a few seconds.

Check for signs of spoilage, such as mold or an off smell. Gently reheating slices in the toaster or oven enhances the flavor, bringing back its moistness.

Make Ahead Strategies

This Pineapple Quick Bread is ideal for making ahead of time. You can prepare the batter a day in advance and bake it fresh when you need it.

Store pre-mixed ingredients separately and combine them on baking day for optimal freshness. Quality will remain intact for the best taste and texture, which enhances the experience for your guests.

For added convenience, consider cutting slices in advance for easy serving. Allowing flavors to meld overnight will provide a richer taste, making it an excellent choice for gatherings or weekend breakfasts.

Scaling Instructions

For halving the recipe, simply divide all the ingredient quantities by two, ensuring to adjust baking time accordingly, checking for doneness slightly earlier.

Doubling or tripling this recipe for events means using larger mixing bowls and increased baking times; opt for multiple smaller loaves for even baking.

For equipment adjustments, a larger capacity loaf pan will be necessary for increased quantities, and you may need to adjust the oven racks to allow for even heat distribution during the baking process.

Nutritional Deep Dive

Examining the macronutrients of Pineapple Quick Bread reveals a balance of carbohydrates, with the pineapple providing natural sugars. The fiber from flour and optional nuts supports digestive health.

Micronutrient analysis shows that this bread is rich in vitamin C, potassium, and manganese, thanks to the pineapple content. This gives a boost to the immune system and supports overall health.

When considering health benefits, the use of whole grains can improve heart health while also keeping you feeling fuller for longer. Practicing portion control will help with weight management, making this treat a guilt-free indulgence.

Dietary Adaptations

For gluten-free options, substitute traditional flour with almond or coconut flour, adjusting the liquid ratios to maintain moisture in the bread.

Dairy-free adaptions can include using plant-based milk and vegan butter alternatives, maintaining the integrity of the recipe while accommodating dietary restrictions.

If you’re leaning towards a low-carb or keto-friendly option, consider using almond flour along with sugar substitutes like erythritol which will keep the carb count down.

Paleo followers can eliminate refined sugars entirely, opting for natural sweeteners like honey or maple syrup instead, while still enjoying a delicious slice of bread.

Troubleshooting Guide

If your bread turns out too dense, consider the mixing method; over-mixing can create a tough loaf—mix until just combined.

For flavor balance, adjust sugar levels based on the sweetness of your pineapple; if overly sweet, consider adding a pinch of salt to enhance flavors.

If your sides are browning too quickly while the center remains undercooked, cover the loaf with foil during the last half of baking to avoid burning.

Ingredient substitutions can change the bread’s structure; adjust flour types according to recipe requirements and don’t overload with wet ingredients.

Recipe Success Stories

The response from the community has been overwhelmingly positive, with many sharing their variations of Pineapple Quick Bread, highlighting delicious inclusions like shredded coconut or macadamia nuts.

Adaptation stories abound, with individuals finding success in dietary substitutions, allowing this traditional recipe to become more accessible to diverse diets.

Photography tips for showcasing your Pineapple Quick Bread have been shared by readers, encouraging artistic presentations that will entice more bakers to try the recipe.

Readers regularly share their successes on social media, creating a vibrant dialogue around this delicious and accessible recipe, enhancing its popularity and reach.

Frequently Asked Questions

Can I use canned pineapple instead of fresh?

Yes, canned pineapple can be used, but it is essential to drain it well to avoid excess moisture in the batter. Fresh pineapple offers a brighter flavor profile.

How do I store leftover Pineapple Quick Bread?

Store leftovers in an airtight container at room temperature for up to three days or refrigerate for up to a week. Sliced bread can also be frozen for later enjoyment.

What if my bread doesn’t rise properly?

Improper rising can be caused by expired leavening agents; always check the dates on your baking powder or baking soda before use.

Can I substitute the sugar in the recipe?

Absolutely! You can replace granulated sugar with alternatives like brown sugar, coconut sugar, or a sugar substitute, adjusting measurement based on the sweetness level you prefer.

Is Pineapple Quick Bread suitable for vegetarians and vegans?

This bread can easily be made vegan by replacing eggs with flaxseed meal mixed with water and using plant-based butter instead. Always check other ingredients for hidden animal products.

Can I add other fruits to this bread?

Yes, feel free to experiment with other fruits! Bananas, diced mangoes, or even berries can be lovely additions, but keep an eye on overall moisture levels when adding.

What’s the best way to serve Pineapple Quick Bread?

Pineapple Quick Bread is delicious both warm and at room temperature. Consider serving it with cream cheese, butter, or even yogurt for a delightful breakfast or snack.

How can I make my bread more flavorful?

Add spices like cinnamon or vanilla extract, and consider folding in nuts or coconut for added flavor. You can also experiment with citrus zest for brightness.

Is it necessary to use nuts in this recipe?

It’s not necessary to include nuts. If you have nut allergies or prefer a nut-free version, just skip this addition. You can substitute with seeds if desired.

What if my bread is too moist?

If the bread comes out too moist, it may be due to excessive pineapple juice. Always drain fresh pineapple and avoid packing the measuring cup when measuring wet ingredients.

Additional Resources

For more delicious variations, explore related recipes that utilize quick bread techniques, such as banana bread or zucchini bread. Each brings its unique flavor while retaining the ease of a quick bread.

Seek out technique guides focused on perfecting the art of baking to elevate your skills, ensuring success every time you step into the kitchen.

Understanding ingredients deeply can enhance your cooking knowledge, making your baking adventures more satisfying and successful.

For equipment recommendations, explore quality mixing bowls or loaf pans that will serve you well in all your baking endeavors.

Seasonal variations can inspire fresh makes, such as pumpkin spice quick bread in the fall, diversifying your baking lineup throughout the year.

Join the Conversation

Engage with fellow bakers on social media by sharing your Pineapple Quick Bread photos, showcasing your creativity and personal touches.

Consider photography tips that highlight the beauty of your baked goods, encouraging engagement and inspiration among the community.

Feedback and recipe reviews help foster better connections—share your thoughts to inspire others to make this delightful bread.

Join the dialogue around recipe variations, where you can learn from others and exchange creative ideas, enriching the baking community.

Discovering new ideas and modifications not only enhances your cooking but builds stronger bonds within the foodie community.

The Recipe

Pineapple Quick Bread

Serves: 8

Prep Time: 15 mins

Cook Time: 60 mins

Total Time: 75 mins

Kitchen Equipment Needed

  • Loaf pan
  • Mixing bowls
  • Measuring cups and spoons
  • Mixing spoon or electric mixer
  • Cooling rack

Ingredients

  • 1 ½ cups all-purpose flour
  • 1 cup sugar
  • ½ cup unsalted butter, softened
  • 2 large eggs
  • 1 cup crushed pineapple, well-drained
  • 1 tsp baking soda
  • 1 tsp baking powder
  • ½ tsp salt
  • 1 tsp vanilla extract
  • Optional: ½ cup chopped nuts or shredded coconut

Directions

  1. Preheat the oven to 350°F (175°C) and grease a loaf pan.
  2. In a mixing bowl, cream together the softened butter and sugar until light and fluffy.
  3. Add the eggs, one at a time, mixing well after each addition. Stir in pineapple and vanilla extract.
  4. In another bowl, whisk together the flour, baking soda, baking powder, and salt.
  5. Gradually combine the dry ingredients with the wet mixture, being careful not to overmix.
  6. If desired, fold in chopped nuts or coconut.
  7. Pour the batter into the prepared loaf pan and smooth the top.
  8. Bake for 60 minutes or until a toothpick inserted in the center comes out clean.
  9. Let cool in the pan for 10 minutes before transferring to a cooling rack.
  10. Slice and enjoy your delicious Pineapple Quick Bread!

Recipe Notes

  • This bread freezes well; wrap slices in foil and store in an airtight container.
  • Feel free to experiment with different spices to find your favorite flavor profile.
  • For added sweetness, drizzle with honey or top with a light glaze.