Sweet and Savory Pineapple Chicken and Rice – A Perfect Balance of Flavor!

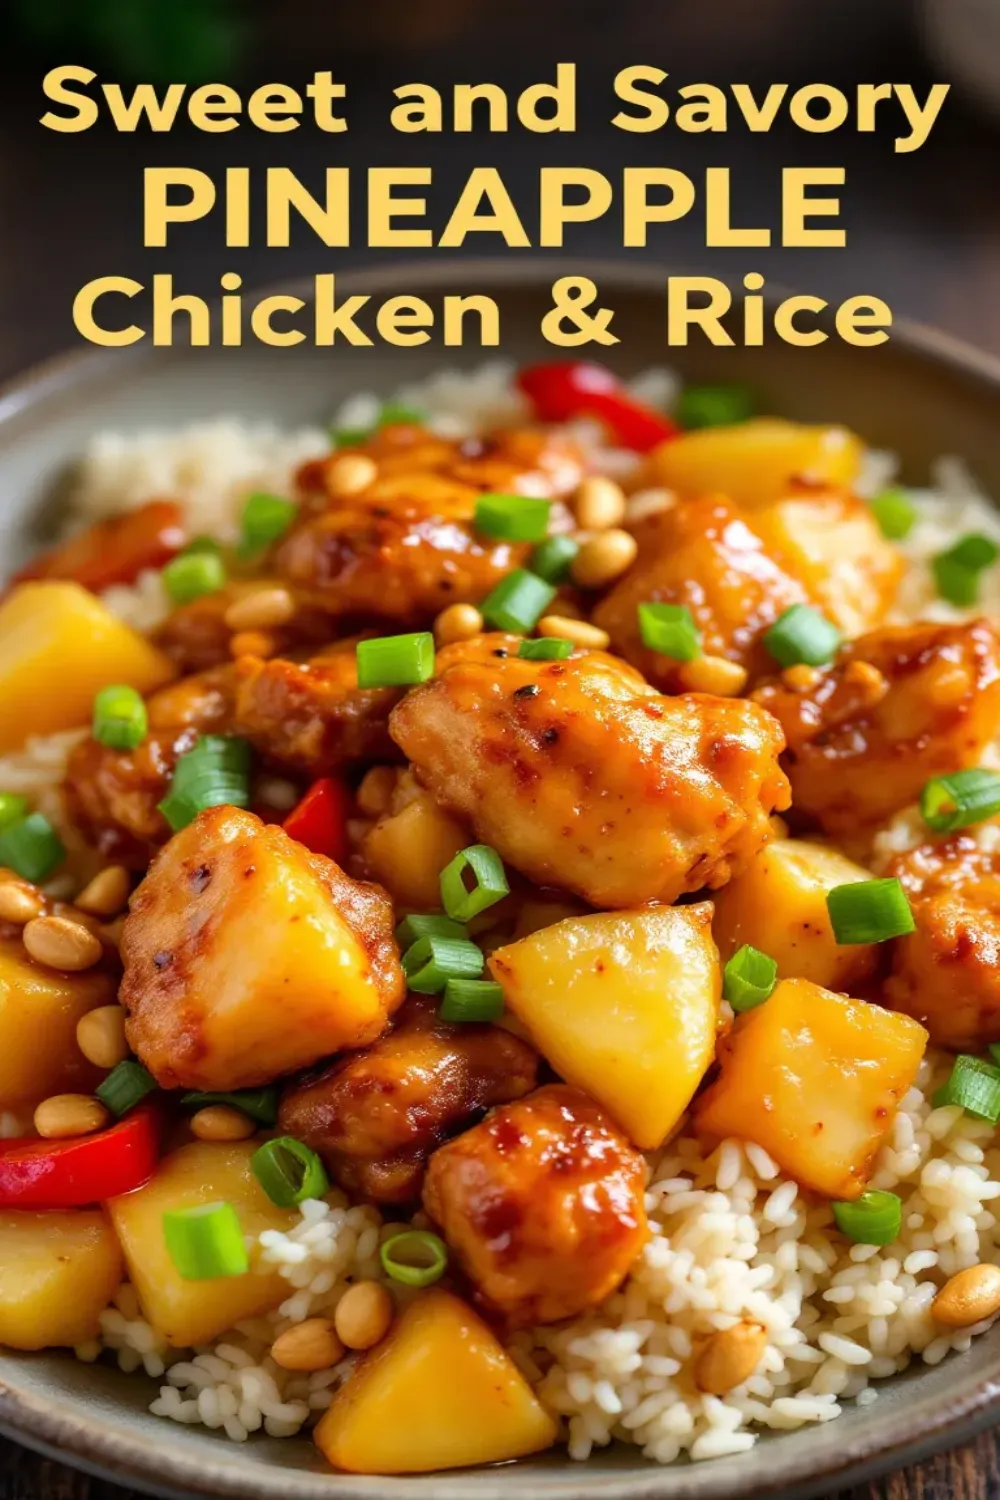
If you love the perfect combination of sweet and savory, then this Pineapple Chicken and Rice recipe is for you! Juicy, caramelized chicken, coated in a sticky, sweet, and tangy pineapple sauce, is served over fluffy rice, making this dish an absolute flavor bomb.

Inspired by Hawaiian and Asian flavors, this dish is quick, easy, and packed with tropical goodness. It’s perfect for a weeknight dinner, meal prep, or a family gathering when you want something delicious and satisfying.

Why You’ll Love This Recipe

✔️ Sweet & Savory Perfection – The best balance of tangy pineapple and savory soy sauce.
✔️ Quick & Easy – Ready in 30 minutes with minimal ingredients.
✔️ One-Pan Magic – Less cleanup, more flavor!
✔️ Customizable – Works with different proteins, veggies, and spice levels.
✔️ Great for Meal Prep – Stores well & reheats beautifully.

Let’s dive into the ingredients, step-by-step guide, pro tips, variations, serving suggestions, and FAQs to master this mouthwatering dish! 🍍🍗🍚


What Makes Pineapple Chicken Special?

This dish perfectly blends tropical pineapple sweetness with garlicky, umami-rich soy sauce and tender, caramelized chicken. The natural acidity of pineapple helps tenderize the chicken, making it even more flavorful!

🌟 The Secret? A homemade pineapple glaze made with pineapple juice, soy sauce, brown sugar, and a touch of garlic and ginger—it’s pure magic!


Key Ingredients & Their Roles

1. Chicken (The Protein Star) 🍗

  • Boneless, skinless chicken breasts or thighs work best.
  • Thighs = more juicy & flavorful, while breasts = leaner & firmer.

2. Pineapple (The Sweet Element) 🍍

  • Fresh or canned pineapple chunks work great.
  • Pineapple juice is used in the sauce for natural sweetness.

3. Garlic & Ginger (The Flavor Boosters) 🧄🌿

  • Adds depth and warmth to balance the sweetness.

4. Soy Sauce & Brown Sugar (The Savory-Sweet Combo) 🌿

  • Soy sauce provides umami, while brown sugar caramelizes beautifully.

5. Rice (The Base) 🍚

  • Jasmine rice, brown rice, or even cauliflower rice work well.

6. Bell Peppers & Green Onions (For Freshness) 🌶️🌿

  • Add color, crunch, and a pop of freshness.

7. Optional Extras (For More Flavor) 🔥

  • Red pepper flakes or sriracha – For a spicy kick.
  • Sesame seeds – Adds nutty crunch.
  • Cashews or almonds – Extra texture & crunch.

Step-by-Step Cooking Instructions

Step 1: Cook the Rice

  • Rinse 1 cup of rice under cold water.
  • Cook with 2 cups of water & a pinch of salt.
  • Fluff with a fork & set aside.

🔹 For Extra Flavor: Add 1 tbsp coconut milk or chicken broth to the rice while cooking.


Step 2: Prepare the Pineapple Sauce

  • In a bowl, whisk together:
    ½ cup pineapple juice
    ¼ cup soy sauce
    2 tbsp brown sugar
    1 tbsp rice vinegar (or lime juice)
    1 tbsp cornstarch (to thicken the sauce)
    1 tsp minced garlic
    1 tsp grated ginger
  • Set aside.

Step 3: Cook the Chicken

  • Cut 2 large chicken breasts (or 4 thighs) into bite-sized pieces.
  • Toss with:
    1 tbsp cornstarch (for crispy edges)
    ½ tsp salt & black pepper
  • Heat 1 tbsp oil in a pan over medium-high heat.
  • Sear chicken for 5-7 minutes, flipping until golden brown.

Step 4: Add the Pineapple & Veggies

  • Add 1 cup pineapple chunks & 1 sliced bell pepper to the pan.
  • Sauté for 2-3 minutes until caramelized.

Step 5: Pour in the Sauce & Simmer

  • Pour the pineapple sauce into the pan.
  • Simmer for 2-3 minutes until the sauce thickens & coats the chicken.
  • Stir in sliced green onions for extra flavor.

Step 6: Assemble the Dish

  • Serve the chicken & pineapple sauce over rice.
  • Garnish with sesame seeds, cilantro, & extra pineapple chunks.

Pro Tips for the Best Pineapple Chicken & Rice

✔️ Use fresh pineapple – It’s sweeter and more flavorful.
✔️ Cornstarch on the chicken – Creates a light, crispy coating.
✔️ Caramelize the pineapple – Adds deeper sweetness.
✔️ Simmer the sauce briefly – Thickens it perfectly.
✔️ Garnish for freshness – Green onions, cilantro, and sesame seeds enhance the flavor.


Flavor Variations & Customizations

1. Spicy Pineapple Chicken 🔥

  • Add 1 tsp Sriracha or red pepper flakes for heat.
  • Toss in chopped jalapeños for extra spice.

2. Teriyaki Pineapple Chicken 🍍🍶

  • Swap soy sauce for teriyaki sauce.
  • Add a drizzle of honey for extra glaze.

3. Coconut Pineapple Chicken 🌴

  • Add ½ cup coconut milk for a tropical creamy twist.
  • Serve with coconut rice instead of plain rice.

4. Hawaiian BBQ Chicken 🍍🔥

  • Toss chicken in BBQ sauce before serving.
  • Grill pineapple for a smoky depth.

5. Low-Carb & Keto Pineapple Chicken 🥑

  • Serve with cauliflower rice instead of regular rice.
  • Use tamari or coconut aminos instead of soy sauce.

Best Side Dishes to Serve with Pineapple Chicken

Classic Pairings

🍲 Egg Fried Rice – A delicious upgrade.
🥒 Cucumber Salad – Light and refreshing.
🥟 Potstickers or Spring Rolls – A tasty appetizer.

Healthy Options

🥦 Steamed Broccoli or Bok Choy – Adds a fresh crunch.
🥑 Avocado & Tomato Salad – Creamy contrast.

Drinks to Pair with This Dish

🍹 Pineapple Smoothie or Iced Tea – Complements the tropical flavors.
🍷 White Wine (Riesling or Sauvignon Blanc) – A crisp, fruity match.


FAQs – Everything You Need to Know

1. Can I use canned pineapple instead of fresh?

Yes! Just drain the syrup to avoid excess sweetness.

2. How do I store leftovers?

Store in an airtight container in the fridge for up to 3 days.

3. How do I reheat without drying out the chicken?

Reheat on low heat in a pan with a splash of water or microwave with a damp paper towel.

4. Can I make this in a slow cooker?

Yes! Cook on low for 4 hours, adding cornstarch at the end to thicken the sauce.

5. Is this dish gluten-free?

Yes—just use gluten-free soy sauce or tamari.


Conclusion

This Sweet and Savory Pineapple Chicken and Rice is easy, flavorful, and packed with tropical goodness! Whether you’re cooking for a weeknight meal, meal prep, or a summer gathering, this dish is sure to impress.

🔥 Try it today & enjoy the ultimate sweet-savory combo! 🔥

Print

clock clock iconcutlery cutlery iconflag flag iconfolder folder iconinstagram instagram iconpinterest pinterest iconfacebook facebook iconprint print iconsquares squares iconheart heart iconheart solid heart solid icon

Sweet and Savory Pineapple Chicken and Rice – A Perfect Balance of Flavor!

  • Author: Chef Emy

Description

A perfect balance of sweet and savory, this Pineapple Chicken and Rice dish is loaded with tender chicken, juicy pineapple, and a flavorful sauce that ties it all together. It’s a quick, one-pan meal that’s perfect for busy weeknights!


Ingredients

Scale

For the Chicken & Rice:

  • 2 boneless, skinless chicken breasts, cut into bite-sized pieces
  • 1 tbsp olive oil
  • 1/2 tsp salt
  • 1/2 tsp black pepper
  • 1/2 tsp garlic powder
  • 1/2 tsp smoked paprika
  • 1 1/2 cups uncooked jasmine rice (or long-grain white rice)
  • 1 3/4 cups chicken broth
  • 1 cup pineapple chunks (fresh or canned, drained)
  • 1/2 cup red bell pepper, diced
  • 1/2 cup green bell pepper, diced
  • 1/4 cup green onions, chopped (for garnish)
  • 1/4 cup toasted cashews or almonds (optional for crunch)

For the Sweet & Savory Sauce:

  • 1/4 cup soy sauce
  • 2 tbsp honey
  • 2 tbsp pineapple juice (from the canned pineapple)
  • 1 tbsp rice vinegar
  • 1 tsp sesame oil
  • 2 cloves garlic, minced
  • 1/2 tsp ground ginger
  • 1 tbsp cornstarch + 2 tbsp water (for thickening)

Instructions

  • Cook the Chicken:

    • Heat olive oil in a large skillet or wok over medium-high heat.
    • Add chicken pieces and season with salt, black pepper, garlic powder, and paprika.
    • Cook for 5-6 minutes until golden brown and fully cooked. Remove from the pan and set aside.
  • Sauté the Veggies & Pineapple:

    • In the same pan, add diced bell peppers and pineapple chunks.
    • Sauté for 3-4 minutes until slightly softened and caramelized.
  • Cook the Rice:

    • Add uncooked rice to the pan and stir to coat.
    • Pour in chicken broth, stir well, and bring to a simmer.
    • Cover and let cook on low for 15-18 minutes, or until rice is tender.
  • Prepare the Sweet & Savory Sauce:

    • In a small bowl, whisk together soy sauce, honey, pineapple juice, rice vinegar, sesame oil, garlic, and ginger.
    • In a separate small bowl, mix cornstarch and water, then add to the sauce. Stir well.
  • Combine Everything:

    • Return the cooked chicken to the skillet.
    • Pour the sauce over everything and stir to coat.
    • Cook for 2-3 more minutes, until the sauce thickens and everything is well combined.
  • Serve & Enjoy:

    • Garnish with chopped green onions and toasted cashews or almonds for extra crunch.
    • Serve hot and enjoy the sweet and savory flavors in every bite!

Notes

This dish is a delicious mix of tender chicken, juicy pineapple, and fluffy rice, all coated in a flavorful sauce. Perfect for meal prep or a quick, satisfying dinner!

Keywords: #PineappleChicken #SweetAndSavory #OnePanMeal #EasyDinners #FlavorfulEats

Longhorn Steakhouse Parmesan Crusted Chicken – A Flavorful Copycat Recipe!

If you’ve ever dined at Longhorn Steakhouse, you know that their Parmesan Crusted Chicken is one of their most famous and irresistible dishes. This juicy, grilled chicken breast is topped with a creamy, cheesy ranch spread and a crispy, golden Parmesan crust, creating a dish that’s bursting with flavor and texture.

With this easy copycat recipe, you can recreate Longhorn’s signature Parmesan Crusted Chicken at home in just 30 minutes, using simple ingredients and straightforward steps.

Why You’ll Love This Recipe

✔️ Restaurant-Quality Taste – Just like Longhorn Steakhouse!
✔️ Juicy & Flavorful – Grilled chicken with rich Parmesan topping.
✔️ Quick & Easy – Ready in under 30 minutes.
✔️ Perfect for Meal Prep – Great for lunches or family dinners.
✔️ Customizable – Works with different cheeses, seasonings, or even air-frying.

Let’s dive into the ingredients, step-by-step instructions, expert tips, variations, serving ideas, and FAQs to make sure you nail this dish perfectly! 🍗🧀🔥


What Makes Longhorn’s Parmesan Crusted Chicken Special?

The two-part topping makes this dish stand out:
1️⃣ A creamy ranch-Parmesan spread that keeps the chicken juicy and flavorful.
2️⃣ A crispy Parmesan crust made with buttery panko breadcrumbs.

When combined, these layers create a rich, cheesy, and crispy topping over a tender, grilled chicken breast—making every bite absolutely delicious!


Key Ingredients & Their Roles

1. Chicken (The Juicy Base) 🍗

  • Boneless, skinless chicken breasts – Pound them to an even thickness for perfect cooking.

2. Parmesan Ranch Spread (The Creamy Layer) 🧀

  • Mayonnaise & Ranch Dressing – Adds creaminess and tangy flavor.
  • Parmesan Cheese – A nutty, salty richness.
  • Garlic Powder & Black Pepper – Enhances the flavor.

3. Crispy Parmesan Crust (The Crunch Factor) 🥖🧈

  • Panko Breadcrumbs – For the crunchiest topping.
  • Melted Butter – Helps golden the crust.
  • More Parmesan! – Extra cheesy goodness.

4. Seasonings & Marinade (For Extra Flavor) 🌿

  • Olive Oil, Lemon Juice, Garlic Powder, Paprika, and Black Pepper – Infuses the chicken with bold, smoky flavors.

Step-by-Step Cooking Instructions

Step 1: Pound & Marinate the Chicken

  • Place 4 boneless, skinless chicken breasts between plastic wrap.
  • Pound to ½-inch thickness for even cooking.
  • In a bowl, mix:
    2 tbsp olive oil
    1 tbsp lemon juice
    1 tsp garlic powder
    ½ tsp paprika
    Salt & black pepper (to taste)
  • Coat the chicken in the marinade & let it rest for 10 minutes (or up to 2 hours in the fridge).

Step 2: Cook the Chicken

Grill Option:

  • Preheat a grill or grill pan to medium-high heat.
  • Grill chicken for 4-5 minutes per side until golden brown & cooked through (165°F internal temp).

Stovetop Option:

  • Heat 1 tbsp olive oil in a pan over medium heat.
  • Cook chicken for 5-6 minutes per side.

Oven Option:

  • Bake at 400°F (200°C) for 20-25 minutes.

Set cooked chicken aside.


Step 3: Make the Parmesan Ranch Spread

  • In a bowl, mix:
    ½ cup mayonnaise
    ¼ cup ranch dressing
    ½ cup grated Parmesan cheese
    ½ tsp garlic powder
  • Stir until creamy.

Step 4: Make the Crispy Parmesan Topping

  • In another bowl, mix:
    ¾ cup panko breadcrumbs
    ¼ cup grated Parmesan cheese
    2 tbsp melted butter
    1 tsp garlic powder
  • Stir until combined.

Step 5: Assemble & Broil the Chicken

  • Spread a generous layer of the Parmesan ranch spread over each chicken breast.
  • Sprinkle the crispy Parmesan topping evenly over the top.
  • Broil in the oven at 450°F for 2-3 minutes until the topping is golden brown & crispy.

Step 6: Serve & Enjoy!

  • Garnish with fresh parsley & extra Parmesan.
  • Serve immediately with your favorite sides!

Pro Tips for the Best Parmesan Crusted Chicken

✔️ Pound chicken to even thickness – Ensures even cooking.
✔️ Use freshly grated Parmesan – Melts better & has more flavor.
✔️ Let the chicken rest before slicing – Keeps it juicy.
✔️ Broil at the end – Adds the perfect crispy crust.
✔️ Use panko breadcrumbs – They give the best crunch.


Flavor Variations & Customizations

1. Spicy Parmesan Chicken 🌶️

  • Add ½ tsp cayenne pepper to the ranch spread.
  • Drizzle with hot honey or Sriracha.

2. Air Fryer Parmesan Chicken 🍗🔥

  • Cook chicken in air fryer at 375°F for 15 minutes.
  • Add toppings & air fry for 2-3 more minutes.

3. Low-Carb & Keto Version 🥑

  • Use almond flour instead of breadcrumbs.
  • Replace ranch dressing with full-fat Greek yogurt.

4. Italian-Style Parmesan Chicken 🍅🧀

  • Add 1 tbsp pesto to the ranch spread.
  • Serve with marinara sauce & basil.

5. Extra Cheesy Version 🧀🔥

  • Mix in shredded mozzarella with the topping for an extra melty layer.

Best Side Dishes to Serve with Parmesan Crusted Chicken

Classic Steakhouse Pairings

🥔 Garlic Mashed Potatoes – Creamy & buttery.
🥦 Roasted Broccoli or Asparagus – A healthy, crunchy side.
🍞 Buttery Texas Toast – Perfect for scooping up extra sauce.

Lighter & Healthier Options

🥗 Crispy Caesar Salad – A fresh contrast.
🍅 Caprese Salad – Bright & flavorful.
🌾 Quinoa or Cauliflower Rice – Low-carb & nutritious.

Pasta Pairings

🍝 Creamy Alfredo Pasta – Extra indulgence.
🍅 Penne with Marinara – A tangy complement.


FAQs – Everything You Need to Know

1. Can I use chicken thighs instead of breasts?

Yes! Boneless chicken thighs work great but may need an extra 5 minutes in the oven.

2. How do I store leftovers?

Store in an airtight container in the fridge for up to 3 days.

3. How do I reheat without drying out?

Reheat in the oven at 350°F for 10 minutes, or in an air fryer for 3-4 minutes.

4. Can I make this ahead of time?

Yes! Prepare the chicken & toppings separately, then assemble & broil just before serving.


Conclusion

This Longhorn Steakhouse Parmesan Crusted Chicken is crispy, cheesy, garlicky, and absolutely delicious! Whether you’re making it for a weeknight dinner, meal prep, or a fancy steakhouse-style meal, this dish is guaranteed to impress.

🔥 Try it today & enjoy restaurant-quality chicken at home! 🔥

Print
clock clock iconcutlery cutlery iconflag flag iconfolder folder iconinstagram instagram iconpinterest pinterest iconfacebook facebook iconprint print iconsquares squares iconheart heart iconheart solid heart solid icon

Longhorn Steakhouse Parmesan Crusted Chicken – A Flavorful Copycat Recipe!

  • Author: Chef Emy

Description

Craving that famous Longhorn Steakhouse Parmesan Crusted Chicken? This copycat recipe delivers tender, juicy chicken topped with a crispy, cheesy crust—just like the restaurant favorite!


Ingredients

Scale

For the Chicken:

  • 4 boneless, skinless chicken breasts
  • 2 tbsp olive oil
  • 1 tsp salt
  • 1/2 tsp black pepper
  • 1 tsp garlic powder
  • 1 tsp onion powder
  • 1 tsp Italian seasoning
  • 1/2 tsp smoked paprika
  • 1 tbsp lemon juice

For the Parmesan Crust:

  • 1 cup shredded Parmesan cheese
  • 1 cup shredded provolone cheese (or mozzarella)
  • 1/2 cup panko breadcrumbs
  • 2 tbsp melted butter
  • 1/2 tsp garlic powder
  • 1/2 tsp Italian seasoning

For the Ranch Cream Sauce:

  • 1/4 cup ranch dressing
  • 1/4 cup mayonnaise
  • 1/2 tsp garlic powder
  • 1/2 tsp black pepper

Instructions

  • Preheat & Prepare:

    • Preheat oven to 400°F (200°C).
    • Grease a baking dish or line a sheet pan with parchment paper.
  • Season & Cook the Chicken:

    • Pat chicken dry and rub with olive oil.
    • Season with salt, pepper, garlic powder, onion powder, Italian seasoning, smoked paprika, and lemon juice.
    • Bake for 20-25 minutes, or until the internal temperature reaches 165°F (75°C).
  • Make the Parmesan Crust:

    • In a bowl, mix Parmesan, provolone, panko breadcrumbs, melted butter, garlic powder, and Italian seasoning.
  • Prepare the Ranch Cream Sauce:

    • Whisk together ranch dressing, mayonnaise, garlic powder, and black pepper.
  • Assemble & Broil:

    • Spread a thin layer of the ranch cream sauce over each cooked chicken breast.
    • Top with the Parmesan crust mixture.
    • Place under the broiler for 2-3 minutes until golden and crispy.
  • Serve & Enjoy:

    • Garnish with fresh parsley and serve with mashed potatoes, roasted veggies, or a fresh salad.

Notes

This Parmesan Crusted Chicken is just as rich, cheesy, and crispy as Longhorn’s version—but made right in your kitchen!

Keywords: #ParmesanCrustedChicken #LonghornCopycat #CheesyChicken #EasyDinners #ComfortFood


Garlic Parmesan Chicken and Potatoes – The Ultimate One-Pan Dinner!

If you’re looking for a flavor-packed, easy-to-make dinner that requires minimal cleanup, this Garlic Parmesan Chicken and Potatoes is the perfect solution! Juicy, oven-roasted chicken, crispy golden potatoes, and a garlic butter Parmesan sauce come together in one pan for a deliciously satisfying meal.

This one-pan wonder is ideal for busy weeknights, meal prep, or family dinners, offering big flavors with little effort.

Why You’ll Love This Recipe

✔️ One-Pan Simplicity – Less cleanup, more flavor!
✔️ Garlic & Parmesan Heaven – The best combo for a rich, savory taste.
✔️ Juicy Chicken & Crispy Potatoes – Perfectly seasoned and roasted together.
✔️ Easy & Budget-Friendly – Simple ingredients, restaurant-quality flavor.
✔️ Customizable – Works with different seasonings, proteins, and veggies.

Let’s dive into the ingredients, step-by-step instructions, expert tips, variations, serving ideas, and FAQs to perfect this one-pan masterpiece! 🧄🧀🥔🍗


Key Ingredients & Their Roles

1. Chicken (The Protein Star) 🍗

  • Bone-in, skin-on chicken thighs or breasts for maximum juiciness.
  • Boneless, skinless options work but may cook faster.

2. Potatoes (The Crispy, Flavorful Side) 🥔

  • Yukon Gold or red potatoes – Best for crispy edges.
  • Russet potatoes – Get extra crispy but need a bit more oil.

3. Garlic Parmesan Butter Sauce (The Flavor Booster) 🧄🧈🧀

  • Butter & Olive Oil – Keeps everything moist and flavorful.
  • Fresh garlic – For deep, rich garlic flavor.
  • Parmesan cheese – Adds nutty, salty goodness.
  • Paprika, Italian seasoning, & black pepper – Enhances the dish.

4. Extra Flavor Additions (Optional) 🌿

  • Red pepper flakes – Adds a spicy kick.
  • Lemon zest & juice – Brightens up the dish.
  • Fresh parsley – For a pop of freshness.

Step-by-Step Cooking Instructions

Step 1: Preheat the Oven

  • Set your oven to 400°F (200°C).
  • Lightly grease a large baking sheet or cast-iron skillet.

Step 2: Prepare the Chicken

  • Pat 4 chicken thighs or 2 large chicken breasts dry.
  • Season with:
    1 tsp salt
    ½ tsp black pepper
    1 tsp garlic powder
    ½ tsp paprika
  • Set aside to let the flavors absorb.

Step 3: Prep the Potatoes

  • Dice 1 ½ lbs of potatoes into bite-sized cubes.
  • Toss in a bowl with:
    1 tbsp olive oil
    ½ tsp salt & black pepper
    ½ tsp paprika
    ½ tsp garlic powder

Step 4: Make the Garlic Parmesan Butter

  • Melt 4 tbsp butter in a small pan.
  • Stir in:
    4 minced garlic cloves
    ½ cup grated Parmesan cheese
    1 tsp Italian seasoning
    1 tbsp chopped fresh parsley (optional)

Step 5: Assemble the Pan

  • Arrange the chicken on one side of the baking sheet.
  • Spread potatoes on the other side.
  • Drizzle half of the garlic Parmesan butter over everything.

Step 6: Bake to Perfection

  • Roast for 35-40 minutes at 400°F (200°C).
  • Halfway through, stir the potatoes and baste the chicken with the remaining garlic butter.

Step 7: Broil for Extra Crispiness

  • In the last 3-5 minutes, set the oven to broil for extra crispy potatoes and golden chicken skin.

Step 8: Serve & Enjoy!

  • Garnish with extra Parmesan & fresh parsley.
  • Serve hot & enjoy the delicious garlicky, cheesy goodness! 🧄🧀🥔🍗

Pro Tips for the Best Garlic Parmesan Chicken & Potatoes

✔️ Use bone-in, skin-on chicken – Stays juicier and crispier.
✔️ Don’t overcrowd the pan – Helps everything roast evenly.
✔️ Preheat the baking sheet – Extra crispiness guaranteed.
✔️ Toss potatoes halfway through – Ensures even crispiness.
✔️ Broil at the end – Perfect golden, crispy finish.


Flavor Variations & Customizations

1. Spicy Garlic Parmesan Chicken & Potatoes 🔥

  • Add ½ tsp cayenne pepper or red pepper flakes to the butter sauce.
  • Drizzle with hot honey or Sriracha before serving.

2. Creamy Garlic Parmesan Sauce 🥛🧄

  • Mix ½ cup heavy cream with Parmesan for a rich, creamy version.

3. Lemon Herb Chicken & Potatoes 🍋🌿

  • Add lemon zest and juice to the butter sauce for a fresh, zesty kick.

4. Keto & Low-Carb Version 🥑

  • Swap potatoes for roasted cauliflower or zucchini.
  • Use ghee instead of butter for a keto-friendly fat.

Best Side Dishes to Serve with Garlic Parmesan Chicken & Potatoes

Light & Fresh Pairings

🥗 Crisp Caesar Salad – Creamy, tangy balance.
🥒 Cucumber Tomato Salad – Refreshing & light.

Extra Carbs for Comfort

🍞 Garlic Bread – Perfect for soaking up juices.
🍚 Buttery Rice or Quinoa – Great for a complete meal.

Roasted Veggies for Balance

🥦 Roasted Broccoli or Asparagus – Simple & delicious.
🍅 Cherry Tomatoes & Peppers – Adds color & freshness.


FAQs – Everything You Need to Know

1. Can I use boneless chicken?

Yes! Boneless chicken breasts work but cook faster (around 25 minutes).

2. How do I store leftovers?

Store in an airtight container in the fridge for up to 3 days.

3. How do I reheat without drying out?

Reheat in the oven at 350°F (175°C) for 10 minutes or in a skillet with a splash of broth.

4. Can I add vegetables to this dish?

Absolutely! Add broccoli, bell peppers, or green beans for extra nutrition.

5. What’s the best way to make this dish gluten-free?

This dish is already gluten-free! Just ensure all seasonings and Parmesan are GF-certified.


Conclusion

Garlic Parmesan Chicken and Potatoes is the ultimate easy, flavorful, and satisfying one-pan meal! With crispy roasted potatoes, juicy chicken, and a rich garlic butter sauce, this dish is guaranteed to be a family favorite.

🔥 Try it tonight for a delicious, no-fuss dinner! 🔥

Print

clock clock iconcutlery cutlery iconflag flag iconfolder folder iconinstagram instagram iconpinterest pinterest iconfacebook facebook iconprint print iconsquares squares iconheart heart iconheart solid heart solid icon

Garlic Parmesan Chicken and Potatoes – The Ultimate One-Pan Dinner!

  • Author: Chef Emy

Description

This one-pan Garlic Parmesan Chicken and Potatoes is the ultimate weeknight meal! Juicy, tender chicken is roasted alongside crispy, golden potatoes, all tossed in a rich garlic butter and Parmesan sauce. Easy, flavorful, and minimal cleanup!


Ingredients

Scale

For the Chicken & Potatoes:

  • 4 boneless, skinless chicken breasts (or thighs)
  • 1 1/2 lbs baby potatoes, halved (Yukon Gold or red potatoes work best)
  • 3 tbsp olive oil
  • 1 tsp salt
  • 1/2 tsp black pepper
  • 1 tsp paprika
  • 1 tsp Italian seasoning
  • 1/2 tsp onion powder

For the Garlic Parmesan Sauce:

  • 4 tbsp unsalted butter, melted
  • 4 cloves garlic, minced
  • 1/2 tsp red pepper flakes (optional, for heat)
  • 1/2 cup grated Parmesan cheese
  • 1 tbsp chopped fresh parsley
  • Juice of 1/2 lemon (for brightness)

Instructions

  • Preheat & Prepare:

    • Preheat oven to 400°F (200°C).
    • Lightly grease a large baking sheet or line it with parchment paper.
  • Season the Potatoes:

    • In a bowl, toss halved potatoes with 2 tbsp olive oil, salt, black pepper, paprika, Italian seasoning, and onion powder.
    • Spread evenly on one side of the baking sheet.
  • Prepare the Chicken:

    • Rub chicken breasts with the remaining 1 tbsp olive oil and season with salt, black pepper, and paprika.
    • Nestle the chicken next to the potatoes on the baking sheet.
  • Make the Garlic Parmesan Sauce:

    • In a small bowl, whisk together melted butter, minced garlic, red pepper flakes, Parmesan, parsley, and lemon juice.
    • Drizzle half of the sauce over the chicken and potatoes.
  • Bake:

    • Bake uncovered for 25-30 minutes, or until chicken is cooked through (165°F internal temp) and potatoes are golden.
    • Halfway through baking, stir the potatoes for even crispiness.
  • Broil for Crispiness (Optional):

    • For an extra crispy finish, broil on high for 2-3 minutes at the end.
  • Serve & Enjoy:

    • Drizzle the remaining garlic Parmesan sauce over everything before serving.
    • Garnish with extra Parmesan and parsley.

Notes

One pan, big flavors, and hardly any cleanup—what more could you ask for? This Garlic Parmesan Chicken and Potatoes is a dinner winner!

Keywords: One pan, big flavors, and hardly any cleanup—what more could you ask for? This Garlic Parmesan Chicken and Potatoes is a dinner winner!

Cheesy Garlic Chicken Wraps – The Ultimate Flavor-Packed Wrap!

If you’re looking for a quick, easy, and outrageously delicious meal, then Cheesy Garlic Chicken Wraps are about to become your new favorite! These wraps are loaded with juicy, seasoned chicken, gooey melted cheese, and a garlicky buttery sauce, all wrapped in a crispy, golden tortilla.

Perfect for lunch, dinner, meal prep, or even a snack, these wraps offer a bold mix of flavors with a satisfying crunch.

Why You’ll Love This Recipe

✔️ Cheesy & Garlicky Goodness – Melty cheese + buttery garlic sauce = heaven!
✔️ Quick & Easy – Ready in under 30 minutes.
✔️ Versatile – Customize with different proteins, cheeses, or add-ins.
✔️ Great for Meal Prep – Make ahead & reheat easily.
✔️ Family-Friendly – Even picky eaters will love it!

Let’s dive into the ingredients, step-by-step instructions, expert tips, variations, serving ideas, and FAQs to make sure you nail this dish perfectly! 🌯🔥


Key Ingredients & Their Roles

1. Chicken (The Protein Base) 🍗

  • Use boneless, skinless chicken breasts or thighs.
  • Shredded rotisserie chicken works great for a shortcut!

2. Cheese (The Gooey Factor) 🧀

  • Mozzarella – Melts beautifully.
  • Cheddar – Adds sharpness.
  • Monterey Jack or Pepper Jack – A mild or spicy twist.

3. Garlic Butter Sauce (The Flavor Bomb) 🧄🧈

  • Butter + minced garlic – The perfect savory kick.
  • Parsley or Italian seasoning – Adds herby goodness.

4. Tortillas (The Wrap Base) 🌯

  • Use flour tortillas for a soft, crispy exterior.
  • Whole wheat or low-carb tortillas for a healthier option.

5. Extra Seasonings (For Depth) 🌿🌶️

  • Paprika, onion powder, garlic powder – Adds flavor.
  • Red pepper flakes (optional) – For a spicy touch.

Step-by-Step Cooking Instructions

Step 1: Prepare the Chicken

  • Cut 2 large chicken breasts into small cubes.

  • Season with:
    1 tsp garlic powder
    1 tsp onion powder
    ½ tsp paprika
    Salt & black pepper to taste

  • Heat 1 tbsp olive oil in a pan over medium heat.

  • Sauté chicken for 5-7 minutes until fully cooked.

  • Remove from heat & set aside.


Step 2: Make the Garlic Butter Sauce

  • Melt 2 tbsp butter in a small pan.
  • Add 3 minced garlic cloves & cook for 30 seconds until fragrant.
  • Stir in ½ tsp Italian seasoning or parsley.
  • Remove from heat.

Step 3: Assemble the Wraps

  • Lay a large flour tortilla flat.
  • Sprinkle a layer of shredded mozzarella & cheddar cheese.
  • Add a generous amount of cooked chicken.
  • Drizzle garlic butter sauce over the chicken.
  • Sprinkle extra cheese on top for extra gooeyness.

Step 4: Fold & Toast the Wraps

  • Fold the sides of the tortilla inward, then roll it up tightly.
  • Heat a pan over medium heat & lightly grease with butter or oil.
  • Place wraps seam-side down & toast for 2-3 minutes per side until golden brown.

Step 5: Serve & Enjoy!

  • Slice wraps diagonally & serve warm.
  • Garnish with extra parsley, Parmesan cheese, or red pepper flakes.
  • Serve with dipping sauces (ranch, garlic aioli, or marinara).

Pro Tips for the Best Cheesy Garlic Chicken Wraps

✔️ Use fresh garlic – It gives the best flavor compared to garlic powder.
✔️ Toast in butter – Adds a crispy, golden texture.
✔️ Double the cheese – Extra melty goodness makes it amazing!
✔️ Let the wrap sit for a minute after cooking – This helps it hold together when slicing.
✔️ Serve immediately – Best eaten fresh when the cheese is hot & gooey.


Flavor Variations & Customizations

1. Spicy Garlic Chicken Wrap 🌶️

  • Add ½ tsp cayenne pepper or extra red pepper flakes.
  • Use spicy Pepper Jack cheese.

2. BBQ Chicken Wrap 🍗

  • Toss the chicken in BBQ sauce before assembling.
  • Use smoked Gouda or cheddar for a BBQ twist.

3. Buffalo Chicken Wrap 🔥

  • Coat chicken in buffalo sauce before wrapping.
  • Serve with ranch or blue cheese dip.

4. Low-Carb & Keto Version 🥑

  • Use lettuce wraps instead of tortillas.
  • Swap butter for olive oil for a healthier version.

5. Vegetarian Garlic Cheese Wrap 🌿

  • Swap chicken for grilled mushrooms, zucchini, or tofu.

Best Side Dishes to Serve with Cheesy Garlic Chicken Wraps

Dipping Sauces & Condiments

🥣 Garlic Aioli – A creamy garlic dip.
🌿 Pesto Mayo – For an herby twist.
🔥 Chipotle Sauce – For smoky heat.
🍅 Marinara Sauce – Classic pairing.

Sides & Snacks

🍟 Garlic Parmesan Fries – Extra crispy & flavorful.
🥗 Caesar Salad – A light, fresh contrast.
🥑 Guacamole & Chips – Adds creaminess.
🌽 Elote (Mexican Street Corn) – Sweet & smoky.


FAQs – Everything You Need to Know

1. Can I make this wrap ahead of time?

Yes! Assemble the wraps, but don’t toast them. Store in the fridge for up to 2 days, then toast when ready.

2. How do I store & reheat leftovers?

  • Store in an airtight container in the fridge for up to 3 days.
  • Reheat in a pan or air fryer for best crispiness.

3. Can I freeze these wraps?

Yes! Wrap in foil or plastic wrap, then freeze for up to 2 months. Thaw overnight & reheat in a skillet.

4. What’s the best cheese for these wraps?

Mozzarella, cheddar, Monterey Jack, or a blend of three cheeses work best!

5. Can I make these wraps dairy-free?

Yes! Use dairy-free cheese and swap butter for olive oil.


Conclusion

Cheesy Garlic Chicken Wraps are the perfect blend of gooey cheese, juicy chicken, and bold garlic flavors wrapped in a crispy, golden tortilla. Whether you’re making them for lunch, dinner, or a snack, they’re guaranteed to be a huge hit!

🔥 Try them today and enjoy the ultimate cheesy, garlicky goodness! 🔥

Print
clock clock iconcutlery cutlery iconflag flag iconfolder folder iconinstagram instagram iconpinterest pinterest iconfacebook facebook iconprint print iconsquares squares iconheart heart iconheart solid heart solid icon

Cheesy Garlic Chicken Wraps – The Ultimate Flavor-Packed Wrap!

  • Author: Chef Emy

Description

These Cheesy Garlic Chicken Wraps are loaded with tender, juicy chicken, gooey melted cheese, and a rich garlic butter sauce—all wrapped in a crispy tortilla. Perfect for lunch, dinner, or an easy meal on the go!


Ingredients

Scale

For the Chicken:

  • 2 boneless, skinless chicken breasts, cooked and shredded
  • 1 tsp olive oil
  • 1/2 tsp salt
  • 1/2 tsp black pepper
  • 1/2 tsp paprika
  • 1/2 tsp garlic powder

For the Garlic Butter Sauce:

  • 3 tbsp unsalted butter, melted
  • 2 cloves garlic, minced
  • 1/2 tsp Italian seasoning
  • 1 tbsp fresh parsley, chopped

For the Wraps:

  • 4 large flour tortillas
  • 1 1/2 cups shredded mozzarella cheese
  • 1/2 cup shredded cheddar cheese
  • 1/4 cup grated Parmesan cheese
  • 1/2 cup sour cream or ranch dressing (for serving)

Instructions

  • Prepare the Chicken:

    • Heat olive oil in a skillet over medium heat.
    • Add shredded chicken, salt, black pepper, paprika, and garlic powder. Stir and cook for 2-3 minutes until heated through. Set aside.
  • Make the Garlic Butter Sauce:

    • In a small bowl, mix melted butter, minced garlic, Italian seasoning, and parsley.
  • Assemble the Wraps:

    • Lay a tortilla flat and sprinkle a mix of mozzarella, cheddar, and Parmesan cheese on half of the tortilla.
    • Add a generous portion of the seasoned chicken.
    • Drizzle with garlic butter sauce for extra flavor.
    • Fold the tortilla in half, pressing lightly.
  • Cook the Wraps:

    • Heat a clean skillet or griddle over medium heat.
    • Place the wrap in the pan and cook for 2-3 minutes per side, until golden brown and crispy, and the cheese is melted.
  • Serve & Enjoy:

    • Slice each wrap in half and serve with sour cream, ranch dressing, or extra garlic butter for dipping.

Notes

These wraps are crispy on the outside, cheesy on the inside, and bursting with garlic butter goodness! Perfect for a quick weeknight meal or meal prepping for the week.

Keywords: #CheesyGarlicWraps #EasyChickenDinners #CrispyWraps #CheeseLovers #QuickMeals

Crispy Cheesy Chicken Alfredo Air Fryer Calzones – A Flavorful Comfort Food After Cooking

Crispy Cheesy Chicken Alfredo Air Fryer Calzones – A Flavorful Comfort Food After Cooking

⚖️
Difficulty
Beginner-Friendly

⏲️
Prep Time
30 mins

🕒
Cook Time
15 mins

⏱️
Total Time
45 mins

🍽️
Servings
8 servings

Hey there, food lovers! If you’re on the lookout for a delicious and comforting meal that packs in all the flavors of Chicken Alfredo with the convenience of air fryer calzones, then this recipe is for you. The Crispy Cheesy Chicken Alfredo Air Fryer Calzones are not just about indulgence; they’re about creating a memorable meal that will have your family and friends asking for seconds. These calzones are perfect for those nights when you want something hearty yet easy to prepare.

The aroma of freshly cooked, crispy cheese and the tender bites of chicken in an alfredo sauce create a symphony of flavors that make every bite satisfyingly delicious. The crust is perfectly golden on the outside, while the filling remains gooey and cheesy inside. The texture is both crunchy and melt-in-your-mouth soft, making it irresistible to everyone who takes a bite.

Here’s why you’ll love this recipe:

  • Flavor Profile: Rich, creamy alfredo sauce with chunks of succulent chicken and melted cheese.
  • Texture: Crispy on the outside, tender and gooey inside with just the right amount of crunch.
  • Aroma: The delightful scent of garlic, Parmesan, and fresh herbs wafting from your kitchen as these calzones are being air fried to perfection.
  • Visual Appeal: Golden brown and slightly golden crispy edges with a vibrant alfredo sauce drizzled over the top. They look absolutely appetizing!
  • Skill Level Needed: This recipe is perfect for beginners as it involves simple steps like assembling and air frying.

This dish fits into several categories, making it versatile and suitable for a variety of occasions:

  • Difficulty Level: Easy to follow with step-by-step instructions. Even first-time chefs can master this recipe with ease!
  • Category: Comfort food, appetizer, main course.
  • Cuisine: American cuisine infused with Italian flavors for a delightful twist on traditional comfort foods.
  • Cost: Relatively inexpensive, using common pantry staples and affordable ingredients like chicken breast and frozen pizza dough.
  • Season: Ideal year-round as it can be adapted to seasonal vegetables or herbs if desired.
  • Occasion: Perfect for casual dinner parties, family meals, or a quick weeknight treat when you want something delicious without the fuss of preparing elaborate dishes.

Why not dive into this recipe? You’ll be rewarded with a delightful dish that will become a staple in your meal repertoire. Let’s explore what makes these calzones so appealing and how to make them at home:

Ingredient Deep Dive

  • Chicken Breast: Rich, protein-packed meat that forms the base of this dish, providing essential nutrients like protein and vitamins.
  • Pizza Dough: Perfect for calzones as it’s versatile and easy to work with. Learn how to select the best type and tips on handling dough without tearing or overworking it.

Common Mistakes to Avoid

  • Misjudging the air fryer temperature can lead to soggy calzones, not crispy ones.
  • Overloading the air fryer basket may cause uneven cooking and longer cooking times.
  • Failing to pre-bake the calzones before air frying can result in a doughy texture instead of a golden, crisp crust.

Essential Techniques

  • Caramelizing Garlic: Essential for depth of flavor. Learn how to caramelize garlic without burning it and the importance in developing a rich aroma.
  • Folding Calzones: A crucial step that ensures the filling is evenly distributed. Tips on how to fold calzones perfectly to create an even, attractive shape.

Pro Tips for Perfect Crispy Cheesy Chicken Alfredo Air Fryer Calzones

  • Always pre-bake the calzone dough before air frying to ensure a crisp crust.
  • Add a bit of olive oil to the air fryer basket for extra flavor and to prevent sticking.
  • Use fresh herbs like basil or parsley to enhance the aroma and taste.

Variations and Adaptations

  • Substitute chicken with beef or vegetarian alternatives for a different flavor profile.
  • Incorporate seasonal vegetables like spinach or mushrooms for added nutrition and freshness.
  • Add cheese varieties like mozzarella, parmesan, or cheddar to suit your taste preference.

Serving and Presentation Guide

  • Plate the calzones on a serving platter with garnishes like fresh parsley and lemon zest for an attractive presentation.
  • Pair with a side salad or garlic bread for a complete meal.

Wine and Beverage Pairing

  • Serve with a glass of white wine like Chardonnay to complement the richness of the alfredo sauce.
  • For non-alcoholic alternatives, serve with sparkling water or lemonade for a refreshing touch.

Storage and Shelf Life

  • Store leftovers in an airtight container in the refrigerator for up to 3 days.
  • Reheat calzones in the oven at 350°F until heated through, ensuring they retain their crispness.

Make Ahead Strategies

  • Assemble ingredients and components the day before for an easy setup on cooking night.
  • Pre-bake calzones up to a week in advance and reheat as needed.

Scaling Instructions

  • Halve or double the recipe based on the number of servings desired, adjusting timing accordingly for best results.

Nutritional Deep Dive

  • Comprehensive breakdown of macros and micronutrients to aid in weight management and health benefits.

Dietary Adaptations

  • Options for gluten-free, dairy-free, vegan, low-carb, keto, Paleo, and other specific diets are available by adjusting ingredients and techniques.

Troubleshooting Guide

  • Solutions for texture issues like soggy calzones or dry chicken.

Recipe Success Stories

  • Reader stories of successful attempts and adaptation successes with tips on photography and community engagement.

Frequently Asked Questions

  • Q: Can I substitute chicken for beef in this recipe? A: Yes, you can easily swap chicken for beef or another protein to suit your taste.
  • Q: How do I make the alfredo sauce smoother? A: Blend the alfredo sauce briefly after cooking to achieve a silkier texture.

Additional Resources

  • Explore related recipes and techniques for air fryer dishes, ingredient information, equipment recommendations, and seasonal variations.

Join the Conversation

  • Engage with us on social media by sharing your cooking adventures. Tips on photography, recipe reviews, and community engagement are always welcome.

Crispy Cheesy Chicken Alfredo Air Fryer Calzones

Serves: 4

Prep Time: 20 mins

Cook Time: 15 mins

Total Time: 35 mins

Kitchen Equipment Needed

  • Air fryer
  • Parchment paper
  • Baking sheet

Ingredients

  • 1 lb boneless, skinless chicken breasts, sliced into strips
  • 2 cups Alfredo sauce
  • 1 cup shredded mozzarella cheese
  • 1/4 cup grated Parmesan cheese
  • 1 small onion, finely chopped
  • 3 cloves garlic, minced
  • 2 tablespoons olive oil
  • 1 teaspoon dried oregano
  • Salt and pepper to taste
  • Parchment paper for calzones

Directions

  1. Cook chicken strips in air fryer until golden brown, approximately 8-10 minutes.
  2. In a saucepan, combine Alfredo sauce with cheese, onion, garlic, oregano, and cook for 5-7 minutes on low heat until melted and well combined.
  3. Assemble calzones by placing chicken strips in the center of parchment paper, pour over Alfredo mixture, and fold into a half-moon shape. Seal edges with water.
  4. Cook assembled calzones in air fryer at 400°F for 12-15 minutes until golden brown.

Recipe Notes

  • Ensure chicken is fully cooked to prevent any harmful bacteria.
  • Feel free to experiment with different cheese varieties or add additional toppings like mushrooms or bell peppers.