Glazed Carrot Bundt Cake with Cream Cheese Swirl

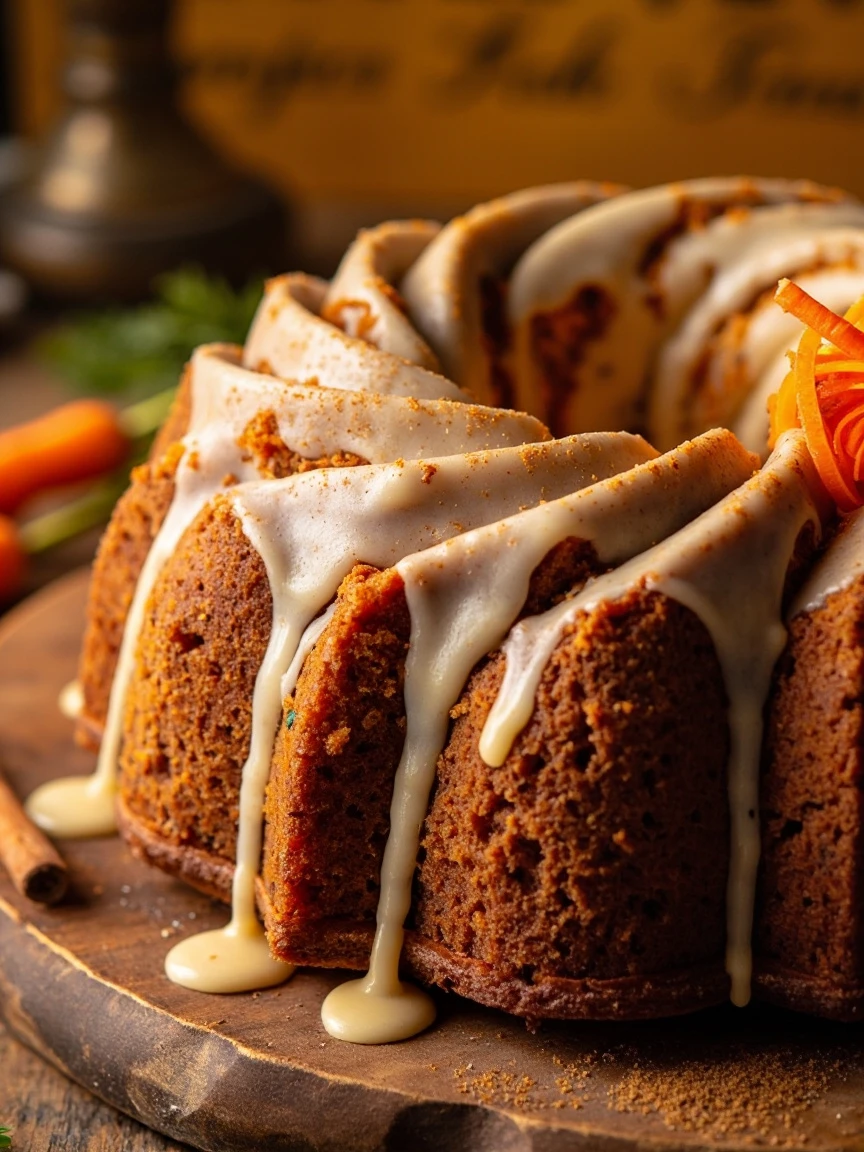
Glazed Carrot Bundt Cake with Cream Cheese Swirl: A Cozy Twist on a Classic

There’s something magical about the way a Bundt cake commands attention—its elegant ridges, the way it towers on a cake stand, and that first slice revealing a hidden surprise inside. This Glazed Carrot Bundt Cake with Cream Cheese Swirl is no exception. Imagine tender, spiced carrot cake ribboned with a tangy cream cheese swirl, all crowned with a glossy vanilla glaze. It’s the kind of dessert that feels equally at home at a spring brunch or a fall potluck, and I guarantee it’ll have your guests asking for seconds.

I first stumbled upon the idea for this recipe after a marathon baking session with my niece, who declared carrot cake “boring” (kids, right?). Determined to win her over, I tweaked my classic carrot cake recipe by adding a creamy swirl and baking it in my grandmother’s vintage Bundt pan. The result? A cake so moist and flavorful, even the skeptics couldn’t resist. Plus, the Bundt shape means no fussy layering—just mix, swirl, bake, and glaze. Whether you’re a seasoned baker or a newbie, this recipe is forgiving and foolproof.

Why You’ll Love This Glazed Carrot Bundt Cake

This isn’t just another carrot cake—it’s a showstopper with personality. Here’s why it’s worth every bite:

  • Perfect texture: The cake stays moist for days thanks to grated carrots and a touch of applesauce.
  • Creamy surprise: The swirl adds a tangy contrast to the warm spices.
  • Easy elegance: The Bundt pan does the heavy lifting for a stunning presentation.
  • Crowd-pleaser: It’s a hit with both carrot cake lovers and those who usually pass on it.

How to Make Glazed Carrot Bundt Cake with Cream Cheese Swirl

Ingredients You’ll Need

Gather these pantry staples (full measurements in the recipe card below):

  • Fresh carrots (skip pre-shredded—they’re too dry!)
  • Cream cheese, softened
  • Warm spices like cinnamon and nutmeg
  • Crushed pineapple or applesauce for extra moisture
  • Powdered sugar for the glaze

Step-by-Step Tips

  1. Prep the pan: Grease every nook of your Bundt pan with butter and flour—or use baking spray with flour. Trust me, you don’t want the cake sticking!
  2. Swirl smartly: Alternate spoonfuls of batter and cream cheese mixture, then use a knife to gently marble. Don’t overmix, or you’ll lose the swirl effect.
  3. Cool completely: Let the cake cool in the pan for 15 minutes, then invert onto a rack. Rushing this step can cause breakage (learned that the hard way!).

Recipe Variations & Serving Ideas

This cake is versatile! Try these twists:

  • Nutty crunch: Fold ½ cup toasted pecans or walnuts into the batter.
  • Citrus zest: Add orange zest to the glaze for a bright finish.
  • Mini Bundts: Use a mini Bundt pan (adjust baking time to 20–25 minutes).

Serve slices with a dollop of whipped cream or a scoop of vanilla ice cream. For a brunch twist, pair it with spiced chai latte.

Frequently Asked Questions

Can I make this carrot Bundt cake ahead? Yes! Bake it 1–2 days in advance; wrap tightly and glaze before serving.

How do I store leftovers? Keep refrigerated for up to 5 days due to the cream cheese swirl.

Can I freeze this cake? Freeze unglazed slices for up to 3 months. Thaw overnight and add glaze.

Why did my cake stick to the pan? Likely under-greasing. Next time, use a pastry brush to coat every crevice.

Can I use yogurt instead of applesauce? Absolutely! Greek yogurt adds similar moisture and a slight tang.

What’s the best way to grate carrots? Use the small holes of a box grater or a food processor. Avoid large shreds—they affect texture.

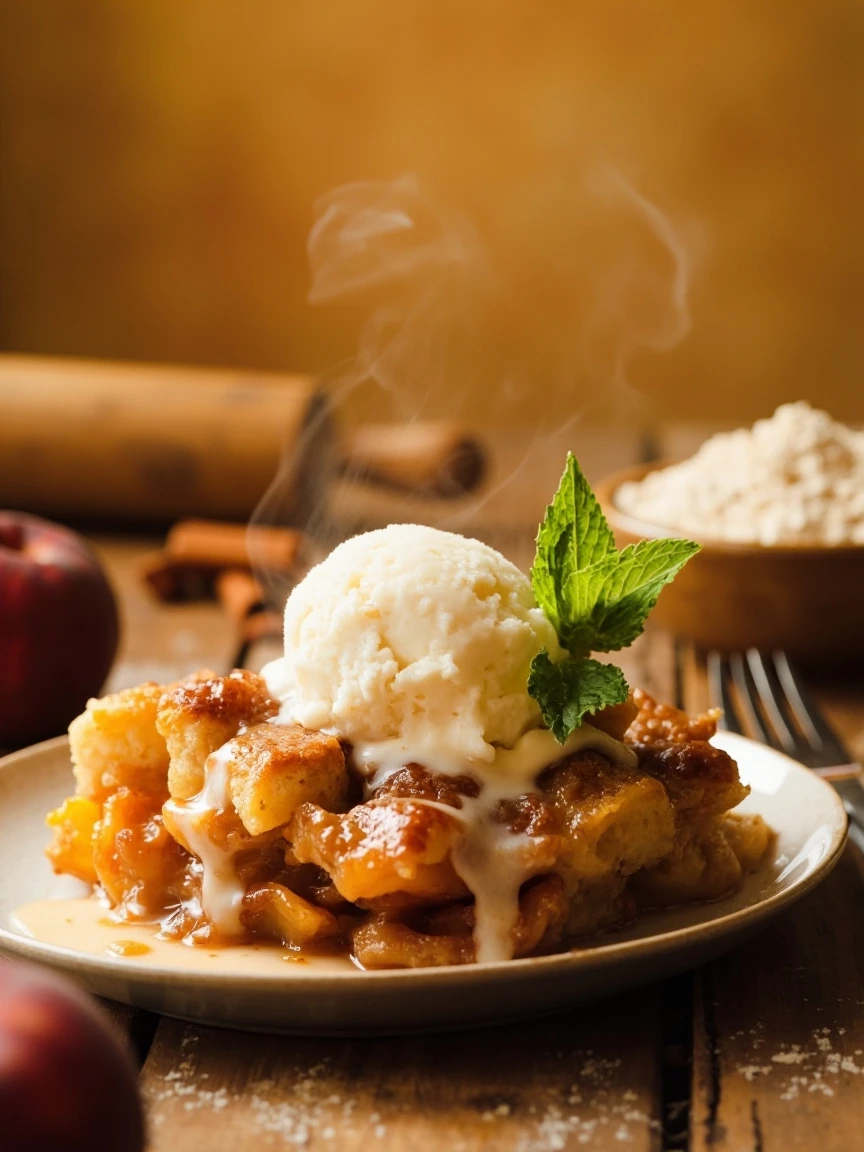
Whether you’re baking for a special occasion or just because, this Glazed Carrot Bundt Cake with Cream Cheese Swirl is bound to become a favorite. It’s the kind of recipe that feels like a hug—comforting, a little nostalgic, and impossible to resist. So preheat that oven, grab your favorite Bundt pan, and let’s make something delicious together. And if you’re looking for more cozy desserts, try my spiced apple bread next—it’s another reader favorite!

Print
clock clock iconcutlery cutlery iconflag flag iconfolder folder iconinstagram instagram iconpinterest pinterest iconfacebook facebook iconprint print iconsquares squares iconheart heart iconheart solid heart solid icon

Glazed Carrot Bundt Cake with Cream Cheese Swirl

  • Author: Baking Enthusiast

Description

A moist and flavorful carrot cake baked in a Bundt pan with a rich cream cheese swirl and topped with a sweet glaze. Perfect for special occasions or a delightful dessert any day.


Ingredients

Scale

For the Crust:

  • For the Cake:
  • 2 cups all-purpose flour
  • 2 teaspoons baking powder
  • 1 teaspoon baking soda
  • 1 teaspoon ground cinnamon
  • 1/2 teaspoon ground nutmeg
  • 1/2 teaspoon salt
  • 1 cup granulated sugar
  • 1 cup packed brown sugar
  • 1 cup vegetable oil
  • 4 large eggs
  • 2 teaspoons vanilla extract
  • 3 cups grated carrots
  • 1/2 cup crushed pineapple, drained
  • 1/2 cup chopped walnuts (optional)
  • For the Cream Cheese Swirl:
  • 8 oz cream cheese, softened
  • 1/4 cup granulated sugar
  • 1 large egg
  • 1 teaspoon vanilla extract
  • For the Glaze:
  • 1 cup powdered sugar
  • 2 tablespoons milk
  • 1/2 teaspoon vanilla extract

Instructions

1. Prepare the Crust:

  1. Preheat oven to 350°F (175°C). Grease and flour a 10-inch Bundt pan.
  2. In a large bowl, whisk together flour, baking powder, baking soda, cinnamon, nutmeg, and salt.
  3. In another bowl, beat granulated sugar, brown sugar, oil, eggs, and vanilla until smooth.
  4. Gradually mix dry ingredients into the wet mixture until just combined.
  5. Fold in grated carrots, crushed pineapple, and walnuts (if using). Set aside.
  6. For the cream cheese swirl, beat cream cheese, sugar, egg, and vanilla until smooth.
  7. Pour half of the carrot cake batter into the prepared Bundt pan. Spoon cream cheese mixture over the batter, then top with remaining cake batter.
  8. Bake for 50-60 minutes, or until a toothpick inserted comes out clean. Cool in pan for 15 minutes, then invert onto a wire rack to cool completely.
  9. For the glaze, whisk powdered sugar, milk, and vanilla until smooth. Drizzle over cooled cake before serving.

Notes

For best results, ensure all ingredients are at room temperature before mixing. The cake can be stored in an airtight container in the refrigerator for up to 5 days.

No-Bake Strawberry Cheesecake Cups

No-Bake Strawberry Cheesecake Cups: A Dreamy Dessert in Minutes

There’s something magical about the combination of creamy cheesecake and fresh strawberries—it’s like summer in every bite. But let’s be real: turning on the oven when the weather heats up? No, thank you. That’s where these No-Bake Strawberry Cheesecake Cups come in. They’re cool, effortless, and so delicious, you’ll wonder why you ever bothered with a traditional cheesecake pan.

Picture this: a buttery graham cracker crust, a velvety cheesecake filling, and a glossy strawberry topping that’s just sweet enough. The best part? You can whip these up in 20 minutes (yes, really) and let the fridge do the rest of the work. Whether you’re hosting a last-minute girls’ night, need a kid-friendly treat, or just want to satisfy your sweet tooth without the fuss, these individual cups are your new go-to. Plus, they’re as pretty as they are tasty—no one needs to know how easy they were!

Why You’ll Love These No-Bake Strawberry Cheesecake Cups

If you’re still on the fence, here’s why this recipe deserves a spot in your dessert rotation:

  • No oven required—perfect for hot days or tiny kitchens.
  • Portion-controlled—no fighting over the last slice!
  • Endlessly customizable—swap strawberries for blueberries, mango, or even a drizzle of chocolate.
  • Kid-approved—little hands love helping with the layers.

How to Make No-Bake Strawberry Cheesecake Cups

Ingredients You’ll Need

  • 1 ½ cups graham cracker crumbs
  • ¼ cup melted butter
  • 8 oz cream cheese, softened
  • ½ cup powdered sugar
  • 1 tsp vanilla extract
  • 1 cup heavy whipping cream
  • 1 ½ cups fresh strawberries, diced
  • 2 tbsp strawberry jam (optional, for glaze)

Step-by-Step Instructions

  1. Prep the crust: Mix graham cracker crumbs and melted butter until combined. Press 2 tablespoons into the bottom of each cup or jar.
  2. Make the filling: Beat cream cheese, powdered sugar, and vanilla until smooth. In a separate bowl, whip the heavy cream to stiff peaks, then fold it into the cream cheese mixture.
  3. Layer it up: Divide the filling evenly over the crusts. Chill for at least 1 hour (or 15 minutes in the freezer if you’re impatient like me).
  4. Top it off: Toss diced strawberries with jam (if using) and spoon over the set cheesecake layer. Serve immediately or refrigerate for up to 2 days.

Tips for the Best Cheesecake Cups

Want to take these from great to can I have the recipe? status? Try these pro tips:

  • Use full-fat cream cheese for the creamiest texture (low-fat versions can get grainy).
  • For a lighter version, swap half the cream cheese with Greek yogurt.
  • If your strawberries aren’t super sweet, add a sprinkle of sugar or a splash of lemon juice to brighten them up.
  • Short on time? Use store-bought strawberry sauce instead of fresh berries.

These cups are also a fantastic way to use up summer berries. If you’re looking for more fruity inspiration, check out our Berry Chia Pudding for another no-bake treat!

Frequently Asked Questions

Can I make these ahead of time?

Absolutely! Assemble the cups (without the strawberry topping) up to 2 days in advance. Add the berries just before serving to keep them fresh.

Can I use frozen strawberries?

Yes, but thaw and drain them well to avoid a watery topping. Pat them dry with a paper towel first.

What can I use instead of graham crackers?

Try crushed vanilla wafers, Oreos (for a chocolate twist), or even gluten-free pretzels for a salty-sweet vibe.

How do I store leftovers?

Cover tightly and refrigerate for up to 3 days. The crust may soften slightly, but they’ll still taste delicious.

Can I freeze no-bake cheesecake cups?

Yes! Freeze without the strawberry topping for up to 1 month. Thaw in the fridge overnight before adding berries.

Is there a dairy-free version?

Swap cream cheese for cashew cream and use coconut whipped cream. The texture will be slightly different but still tasty!

There you have it—a dessert that’s as easy to make as it is to love. These No-Bake Strawberry Cheesecake Cups are proof that the best things in life don’t require an oven (or a fancy pastry degree). Whether you’re serving them at a picnic, potluck, or just because it’s Tuesday, they’re guaranteed to bring a little joy to your day. For more no-fuss sweet ideas, don’t miss our 5-Minute Chocolate Mug Cake—because sometimes, you just need dessert now.

Print
clock clock iconcutlery cutlery iconflag flag iconfolder folder iconinstagram instagram iconpinterest pinterest iconfacebook facebook iconprint print iconsquares squares iconheart heart iconheart solid heart solid icon

No-Bake Strawberry Cheesecake Cups

  • Author: Dessert Delights

Description

Creamy no-bake strawberry cheesecake served in individual cups with a crunchy graham cracker crust and fresh strawberry topping. Perfect for summer gatherings!


Ingredients

Scale

For the Crust:

  • For the crust:
  • 1 1/2 cups graham cracker crumbs
  • 1/4 cup granulated sugar
  • 6 tablespoons melted unsalted butter
  • For the filling:
  • 16 oz cream cheese, softened
  • 1/2 cup powdered sugar
  • 1 teaspoon vanilla extract
  • 1 cup heavy whipping cream, whipped to stiff peaks
  • For the topping:
  • 2 cups fresh strawberries, diced
  • 1/4 cup granulated sugar
  • 1 teaspoon lemon juice
  • Optional garnish:
  • Whipped cream
  • Whole strawberries

Instructions

1. Prepare the Crust:

  1. 1. Make the crust: In a bowl, mix graham cracker crumbs, sugar, and melted butter until combined.
  2. 2. Press 2-3 tablespoons of mixture firmly into the bottom of each serving cup. Chill for 15 minutes.
  3. 3. Prepare filling: Beat cream cheese until smooth. Add powdered sugar and vanilla, mixing well.
  4. 4. Gently fold in whipped cream until fully incorporated.
  5. 5. Spoon or pipe filling over chilled crusts, leaving room for topping. Refrigerate for 1 hour.
  6. 6. Make topping: Combine strawberries, sugar, and lemon juice in a bowl. Let macerate for 20 minutes.
  7. 7. Top cheesecakes with strawberry mixture before serving. Garnish with whipped cream and whole berries if desired.

Notes

For best results, chill cups for at least 4 hours before serving. Can be made 1 day ahead – add strawberry topping just before serving. Substitute other berries or fruit preserves for variation.

Old-Fashioned Lemon Loaf Cake

Old-Fashioned Lemon Loaf Cake: A Sunny Slice of Nostalgia

There’s something magical about the simplicity of an Old-Fashioned Lemon Loaf Cake. It’s the kind of recipe that feels like a hug from your grandmother—warm, comforting, and just sweet enough to brighten even the cloudiest day. Whether you’re savoring a slice with your afternoon tea or sharing it at a potluck, this cake has a way of bringing people together. The tender crumb, the zesty glaze, the buttery richness… it’s no wonder this classic has stood the test of time.

I first fell in love with this recipe during a rainy spring weekend when I needed a little pick-me-up. As the lemony aroma filled my kitchen, I realized this wasn’t just a cake; it was a mood-lifter, a conversation starter, and a delicious way to celebrate life’s small joys. And the best part? It’s incredibly easy to make. No fancy techniques or obscure ingredients—just pure, uncomplicated goodness. If you’re craving a dessert that’s both humble and extraordinary, this loaf cake is your answer.

Why You’ll Love This Old-Fashioned Lemon Loaf Cake

This isn’t just any lemon cake. Here’s what makes it special:

  • Perfect balance: Tangy lemon and sweet vanilla play harmoniously.
  • Moist texture: Thanks to buttermilk (or a simple DIY substitute).
  • Versatile: Fancy it up with berries or keep it classic.
  • Freezer-friendly: Bake ahead for last-minute guests.

How to Make Old-Fashioned Lemon Loaf Cake

Ingredients You’ll Need

  • 1 ½ cups all-purpose flour
  • 1 tsp baking powder
  • ½ tsp salt
  • ½ cup unsalted butter, softened
  • 1 cup granulated sugar
  • 2 large eggs
  • 2 tbsp lemon zest
  • ¼ cup fresh lemon juice
  • ½ cup buttermilk (or milk + ½ tbsp vinegar)
  • 1 tsp vanilla extract

Step-by-Step Instructions

  1. Prep: Preheat oven to 350°F (175°C). Grease a 9×5-inch loaf pan.
  2. Dry mix: Whisk flour, baking powder, and salt in a bowl.
  3. Cream: Beat butter and sugar until fluffy. Add eggs one at a time.
  4. Zest: Fold in lemon zest, juice, and vanilla.
  5. Combine: Alternate adding dry mix and buttermilk, mixing gently.
  6. Bake: Pour batter into pan. Bake 50–60 minutes until golden.
  7. Glaze: Drizzle with a mix of powdered sugar and lemon juice while warm.

Pro Tips for the Best Lemon Loaf

Want bakery-level results? Try these tricks:

  • Room-temperature ingredients: They blend more evenly for a smoother batter.
  • Fresh lemons: Bottled juice can’t match the brightness of fresh zest and juice.
  • Don’t overmix: Stir until just combined to avoid a dense loaf.

For more baking inspiration, check out our guide to Perfect Vanilla Cupcakes—another timeless favorite!

Variations to Try

This recipe is wonderfully adaptable:

  • Blueberry-lemon: Fold in 1 cup fresh blueberries.
  • Lavender-infused: Add 1 tsp culinary lavender to the dry ingredients.
  • Gluten-free: Swap flour for a 1:1 gluten-free blend.

Frequently Asked Questions

Can I make this lemon loaf cake dairy-free?
Yes! Use plant-based butter and almond milk + lemon juice instead of buttermilk.

How do I store lemon loaf cake?
Keep it in an airtight container at room temperature for 3 days or freeze for up to 3 months.

Why did my cake sink in the middle?
This usually happens if the cake is underbaked or the oven temperature is too low. Use an oven thermometer to check accuracy.

Can I use bottled lemon juice?
Fresh is best for flavor, but bottled works in a pinch. Skip the zest if using bottled.

What’s the secret to a moist lemon loaf?
Buttermilk and not overbaking are key. Check for doneness with a toothpick at 50 minutes.

Can I double this recipe?
Absolutely! Double all ingredients and use two loaf pans or a bundt pan.

There you have it—a loaf cake that’s as delightful to bake as it is to eat. Whether you’re reviving a family tradition or starting a new one, this Old-Fashioned Lemon Loaf Cake is sure to become a staple. For more citrusy treats, explore Tangy Lemon Bars or dive into the science of baking with King Arthur Baking’s Lemon Guide. Now, go preheat that oven and let the lemony bliss begin!

Print
clock clock iconcutlery cutlery iconflag flag iconfolder folder iconinstagram instagram iconpinterest pinterest iconfacebook facebook iconprint print iconsquares squares iconheart heart iconheart solid heart solid icon

Old-Fashioned Lemon Loaf Cake

  • Author: Classic Baking Co.

Description

A moist, tender lemon loaf cake with a sweet-tart glaze that’s perfect for afternoon tea or as a bright dessert. This old-fashioned recipe uses simple ingredients for maximum lemon flavor.


Ingredients

Scale

For the Crust:

  • For the cake:
  • 1 1/2 cups all-purpose flour
  • 1 teaspoon baking powder
  • 1/4 teaspoon salt
  • 1/2 cup unsalted butter, softened
  • 1 cup granulated sugar
  • 2 large eggs
  • 1/2 cup whole milk
  • 2 tablespoons fresh lemon zest
  • 1/4 cup fresh lemon juice
  • For the glaze:
  • 1 cup powdered sugar
  • 23 tablespoons fresh lemon juice
  • 1 teaspoon lemon zest (optional)

Instructions

1. Prepare the Crust:

  1. Preheat oven to 350°F (175°C). Grease a 9×5-inch loaf pan and line with parchment paper.
  2. Whisk together flour, baking powder, and salt in a medium bowl. Set aside.
  3. In a large bowl, cream butter and sugar until light and fluffy (about 3 minutes).
  4. Beat in eggs one at a time, then stir in lemon zest and juice.
  5. Alternately add flour mixture and milk to butter mixture, beginning and ending with flour.
  6. Pour batter into prepared pan and bake for 45-55 minutes until a toothpick comes out clean.
  7. Cool in pan for 15 minutes, then transfer to a wire rack.
  8. For glaze: Whisk powdered sugar and lemon juice until smooth. Drizzle over cooled cake.
  9. Let glaze set for 30 minutes before slicing.

Notes

For extra lemon flavor, poke holes in warm cake with a skewer and brush with lemon syrup (equal parts lemon juice and sugar heated until dissolved). Store covered at room temperature for up to 3 days.

Classic Deviled Eggs with a Twist

Classic Deviled Eggs with a Twist: A Crowd-Pleasing Appetizer

There’s something undeniably nostalgic about deviled eggs. They’re the ultimate potluck staple, the star of holiday spreads, and the appetizer that disappears faster than you can say, “Did someone bring seconds?” But what if we took that beloved classic and gave it a little upgrade? Enter these Classic Deviled Eggs with a Twist—creamy yolks whipped with tangy Dijon, a hint of hot sauce, and crowned with crispy bacon and fresh chives. Trust me, these won’t last long on the platter.

I first fell in love with deviled eggs at my grandma’s Sunday dinners. Hers were simple but perfect—just mayo, mustard, and a sprinkle of paprika. Over the years, I’ve played with flavors (sometimes successfully, other times… not so much). This version, though, is a winner. The smoky bacon adds a savory crunch, while the chives bring a fresh pop of color and flavor. Whether you’re hosting a brunch, a picnic, or just craving a snack with personality, these eggs are your new go-to. Plus, they’re surprisingly easy to make!

Why You’ll Love These Classic Deviled Eggs with a Twist

Deviled eggs are already a crowd favorite, but here’s why this version stands out:

  • Irresistible texture: Silky-smooth filling meets crispy bacon for the perfect bite.
  • Bold flavor: Dijon mustard and hot sauce add a tangy kick that balances the richness.
  • Easy to customize: Swap bacon for smoked salmon or add a dash of curry powder for variety.
  • Always a hit: Perfect for parties, holidays, or even a quick snack.

How to Make Classic Deviled Eggs with a Twist

Ingredients You’ll Need

  • 6 large eggs, hard-boiled and peeled
  • 3 tbsp mayonnaise
  • 1 tsp Dijon mustard
  • ½ tsp hot sauce (like Tabasco)
  • Salt and pepper, to taste
  • 2 slices cooked bacon, crumbled
  • 1 tbsp fresh chives, finely chopped
  • Paprika, for garnish (optional)

Step-by-Step Instructions

  1. Prep the eggs: Slice each hard-boiled egg in half lengthwise. Gently pop out the yolks into a bowl and arrange the whites on a serving plate.
  2. Make the filling: Mash the yolks with a fork, then stir in mayonnaise, Dijon, hot sauce, salt, and pepper until smooth and creamy.
  3. Fill the eggs: Spoon or pipe the yolk mixture back into the egg whites. Pro tip: Use a zip-top bag with the corner snipped for easy piping!
  4. Top and serve: Sprinkle with crumbled bacon, chives, and a dusting of paprika for color. Chill for 15 minutes before serving (if you can wait that long).

Tips for the Best Deviled Eggs

Want to take your deviled eggs from good to legendary? Here’s how:

  • Perfect hard-boiled eggs: Place eggs in a pot, cover with cold water, bring to a boil, then turn off the heat and let sit for 10 minutes. Transfer to ice water to stop cooking.
  • Make ahead: Prep the eggs and filling separately up to a day in advance, then assemble before serving.
  • Get creative: Try topping with pickled jalapeños, everything bagel seasoning, or even a drizzle of sriracha.

Frequently Asked Questions

Can I make deviled eggs ahead of time?
Yes! Store the filling and whites separately in the fridge for up to 24 hours, then assemble before serving.

What’s the best way to peel hard-boiled eggs?
Crack the shells gently and peel under cool running water—it helps loosen the membrane. Older eggs also peel easier than fresh ones!

Can I use Greek yogurt instead of mayo?
Absolutely! Swap mayo for Greek yogurt for a lighter twist. The texture will be slightly tangier but still creamy.

How long do deviled eggs last in the fridge?
They’re best eaten within 2 days, but let’s be honest—they’ll be gone long before then.

What other toppings work well?
Try smoked salmon, diced pickles, or even a sprinkle of crumbled feta for extra flavor.

Can I make these deviled eggs spicy?
Of course! Add extra hot sauce, a pinch of cayenne, or even minced jalapeños to the filling.

Whether you’re serving these at a summer BBQ, a holiday gathering, or just because, these Classic Deviled Eggs with a Twist are guaranteed to impress. They’re the perfect blend of familiar comfort and exciting flavor—just like your favorite pair of jeans but way more delicious. Looking for more easy appetizers? Try my Cheesy Garlic Pull-Apart Bread or Caprese Skewers for another crowd-pleasing bite. And if you’re curious about the science behind perfect hard-boiled eggs, Serious Eats has a great guide. Happy cooking, and don’t be surprised when these disappear in minutes!

Print
clock clock iconcutlery cutlery iconflag flag iconfolder folder iconinstagram instagram iconpinterest pinterest iconfacebook facebook iconprint print iconsquares squares iconheart heart iconheart solid heart solid icon

Classic Deviled Eggs with a Twist

  • Author: Chef Emily

Description

A modern take on the classic deviled eggs, featuring a creamy filling with a hint of spice and a crunchy topping for added texture. Perfect for parties or as an elegant appetizer.


Ingredients

Scale

For the Crust:

  • For the eggs:
  • 6 large eggs
  • 1/2 cup water (for boiling)
  • For the filling:
  • 1/4 cup mayonnaise
  • 1 teaspoon Dijon mustard
  • 1/2 teaspoon white vinegar
  • 1/4 teaspoon smoked paprika
  • 1/8 teaspoon cayenne pepper (optional)
  • Salt and black pepper to taste
  • For the topping:
  • 2 tablespoons finely chopped chives
  • 1 tablespoon crispy fried onions (crushed)
  • Paprika for garnish

Instructions

1. Prepare the Crust:

  1. 1. Place the eggs in a single layer in a saucepan and cover with water (about 1/2 cup). Bring to a boil over medium-high heat.
  2. 2. Once boiling, cover the pan and remove from heat. Let the eggs sit for 10 minutes.
  3. 3. Transfer the eggs to an ice bath to cool completely (about 5 minutes).
  4. 4. Peel the eggs carefully and slice them in half lengthwise. Remove the yolks and place them in a bowl.
  5. 5. Mash the yolks with a fork until smooth. Add mayonnaise, Dijon mustard, white vinegar, smoked paprika, cayenne pepper (if using), salt, and black pepper. Mix until creamy.
  6. 6. Spoon or pipe the yolk mixture back into the egg white halves.
  7. 7. Garnish each deviled egg with chopped chives, crispy fried onions, and a light dusting of paprika.
  8. 8. Chill in the refrigerator for at least 30 minutes before serving.

Notes

For a smoother filling, blend the yolk mixture in a food processor. Adjust the cayenne pepper to control the spice level. Store leftovers in an airtight container in the fridge for up to 2 days.

Old-Fashioned Peach Cobbler

Old-Fashioned Peach Cobbler: A Timeless Dessert for Every Occasion

There’s something undeniably comforting about an Old-Fashioned Peach Cobbler. The sweet, juicy peaches bubbling beneath a golden, buttery crust—it’s like a hug in dessert form. Whether you’re serving it at a summer barbecue, a family reunion, or just craving a cozy night in, this classic treat never goes out of style. And the best part? It’s incredibly easy to make, even if you’re not a seasoned baker.

I remember the first time I made this cobbler for my grandmother. She took one bite, closed her eyes, and sighed, “Now that tastes like home.” That’s the magic of this recipe—it’s simple, nostalgic, and packed with flavor. Plus, it’s versatile! Don’t have fresh peaches? No problem. Canned or frozen work just as well. Want to add a twist? A sprinkle of cinnamon or a dash of bourbon can take it to the next level. Let’s dive into this beloved dessert and make some memories along the way.

Why You’ll Love This Old-Fashioned Peach Cobbler

This recipe is a crowd-pleaser for so many reasons. Here’s why it’ll become your go-to dessert:

  • Effortless to make: No fancy techniques—just mix, bake, and enjoy.
  • Uses pantry staples: Flour, sugar, butter, and peaches (fresh or canned).
  • Perfect for any season: Summer peaches shine, but frozen peaches work year-round.
  • Endlessly customizable: Add vanilla ice cream, whipped cream, or a drizzle of caramel.

How to Make Old-Fashioned Peach Cobbler

Ingredients You’ll Need

  • 6 cups fresh peaches, peeled and sliced (or 2 cans of peaches, drained)
  • 1 cup granulated sugar, divided
  • 1 cup all-purpose flour
  • 1 teaspoon baking powder
  • 1/2 teaspoon salt
  • 1/2 cup unsalted butter, melted
  • 3/4 cup milk
  • 1 teaspoon vanilla extract
  • 1/2 teaspoon cinnamon (optional)

Step-by-Step Instructions

  1. Preheat your oven to 375°F (190°C) and grease a 9×13-inch baking dish.
  2. Toss the peaches with 1/2 cup sugar and set aside. If using canned peaches, skip the sugar.
  3. Make the batter: In a bowl, whisk flour, remaining sugar, baking powder, and salt. Stir in melted butter, milk, and vanilla until just combined.
  4. Assemble: Pour the batter into the dish, then spoon peaches evenly on top. Sprinkle with cinnamon if desired.
  5. Bake for 40–45 minutes until golden and bubbly. Let cool slightly before serving.

Tips for the Best Peach Cobbler

Want to make your cobbler unforgettable? Here are a few pro tips:

  • Use ripe peaches: They’re sweeter and juicier. If they’re firm, let them sit on the counter for a day or two.
  • Don’t overmix the batter: A few lumps are fine—overmixing makes the crust tough.
  • Serve warm: Pair it with vanilla ice cream for that irresistible hot-and-cold contrast.
  • Storage: Keep leftovers covered in the fridge for up to 3 days. Reheat in the oven for best texture.

For more fruity dessert inspiration, check out our Mixed Berry Crisp—it’s another easy, crowd-favorite!

Frequently Asked Questions

Can I use frozen peaches for peach cobbler?

Absolutely! Thaw and drain them first to avoid excess liquid.

What’s the difference between peach cobbler and peach crisp?

Cobbler has a biscuit-like topping, while crisp uses an oat-based crumble. Both are delicious—try our Peach Crisp if you love crunchy toppings!

How do I prevent a soggy cobbler crust?

Make sure your peaches aren’t overly juicy. If using fresh, toss them with a bit of cornstarch to thicken the filling.

Can I make peach cobbler ahead of time?

Yes! Assemble it, cover, and refrigerate overnight. Bake it just before serving.

What’s the best way to peel peaches?

Blanch them in boiling water for 30 seconds, then transfer to ice water. The skins will slide right off.

Can I use other fruits in this cobbler recipe?

Definitely! Apples, berries, or cherries work wonderfully. Adjust sugar based on the fruit’s sweetness.

There you have it—a foolproof Old-Fashioned Peach Cobbler that’s as easy to make as it is delicious. Whether you’re sharing it with loved ones or savoring it solo, this dessert is sure to bring a little sweetness to your day. For more classic recipes, explore our guide to Vintage Desserts That Never Go Out of Style. Happy baking!

Print
clock clock iconcutlery cutlery iconflag flag iconfolder folder iconinstagram instagram iconpinterest pinterest iconfacebook facebook iconprint print iconsquares squares iconheart heart iconheart solid heart solid icon

Old-Fashioned Peach Cobbler

  • Author: Grandma's Kitchen

Description

A classic Southern peach cobbler with a buttery, biscuit-like topping that soaks up the sweet peach juices. Perfect served warm with a scoop of vanilla ice cream.


Ingredients

Scale

For the Crust:

  • For the peach filling:
  • 6 cups fresh peaches, peeled and sliced (about 67 medium peaches)
  • 3/4 cup granulated sugar
  • 1/4 cup brown sugar
  • 1 teaspoon ground cinnamon
  • 1/4 teaspoon ground nutmeg
  • 1 tablespoon lemon juice
  • 2 tablespoons cornstarch
  • For the cobbler topping:
  • 1 cup all-purpose flour
  • 1/4 cup granulated sugar
  • 1/4 cup brown sugar
  • 1 teaspoon baking powder
  • 1/2 teaspoon salt
  • 6 tablespoons cold unsalted butter, cubed
  • 1/4 cup boiling water
  • For sprinkling:
  • 2 tablespoons granulated sugar
  • 1/2 teaspoon ground cinnamon

Instructions

1. Prepare the Crust:

  1. Preheat oven to 400°F (200°C).
  2. In a large bowl, combine peaches, 3/4 cup granulated sugar, 1/4 cup brown sugar, 1 teaspoon cinnamon, nutmeg, lemon juice, and cornstarch. Mix well and pour into a 9×13 inch baking dish.
  3. Bake peach mixture for 10 minutes while you prepare the topping.
  4. In another bowl, whisk together flour, 1/4 cup granulated sugar, 1/4 cup brown sugar, baking powder, and salt.
  5. Cut in the cold butter using a pastry cutter or your fingers until the mixture resembles coarse crumbs.
  6. Stir in boiling water until just combined (batter will be thick).
  7. Remove peaches from oven and drop spoonfuls of the topping over the hot peach mixture.
  8. Combine remaining 2 tablespoons sugar with 1/2 teaspoon cinnamon and sprinkle over the topping.
  9. Bake for 25-30 minutes until topping is golden brown and peach filling is bubbly.
  10. Let cool for 15 minutes before serving. Best served warm with vanilla ice cream.

Notes

For canned peaches: Use 2 (29 oz) cans of peaches in light syrup, drained (about 5 cups). Reduce sugar in filling to 1/2 cup total. The cobbler topping will be very thick – that’s normal! Don’t overmix it.