Lemon Cream Pie Bars with Graham Crust

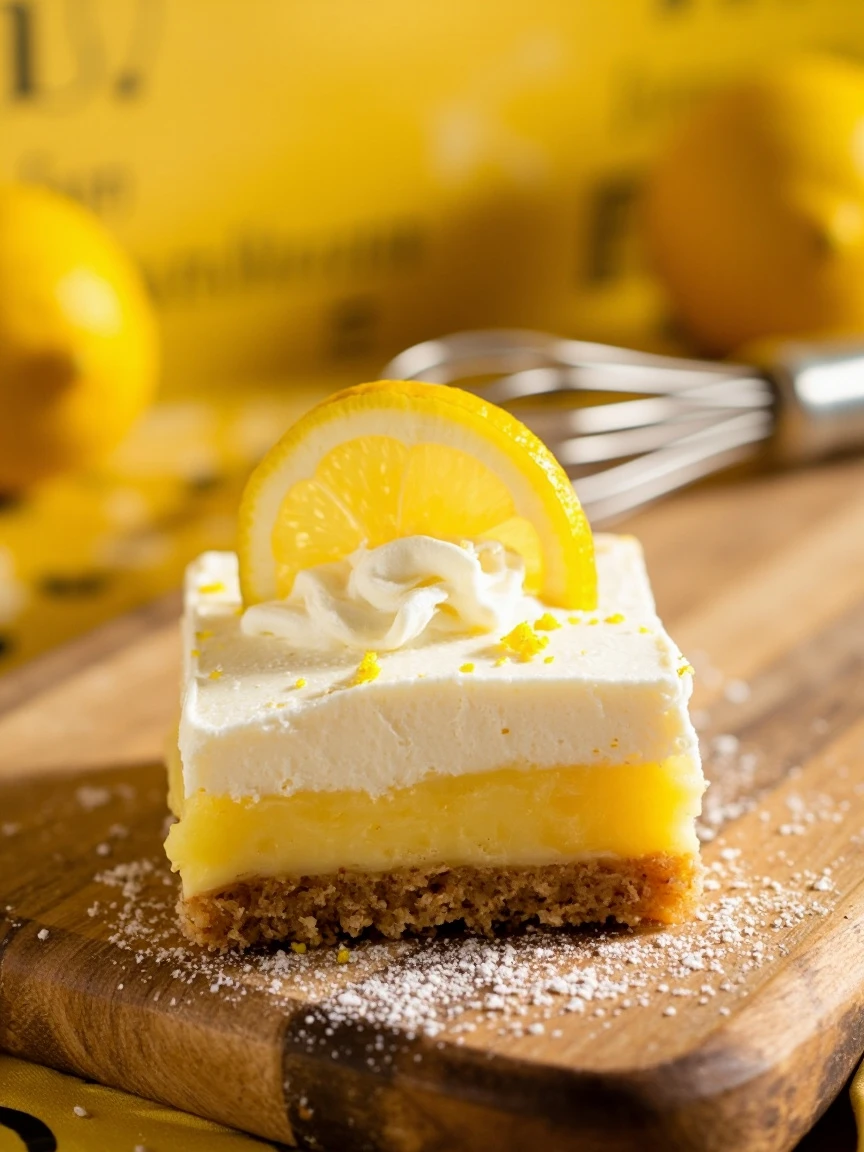
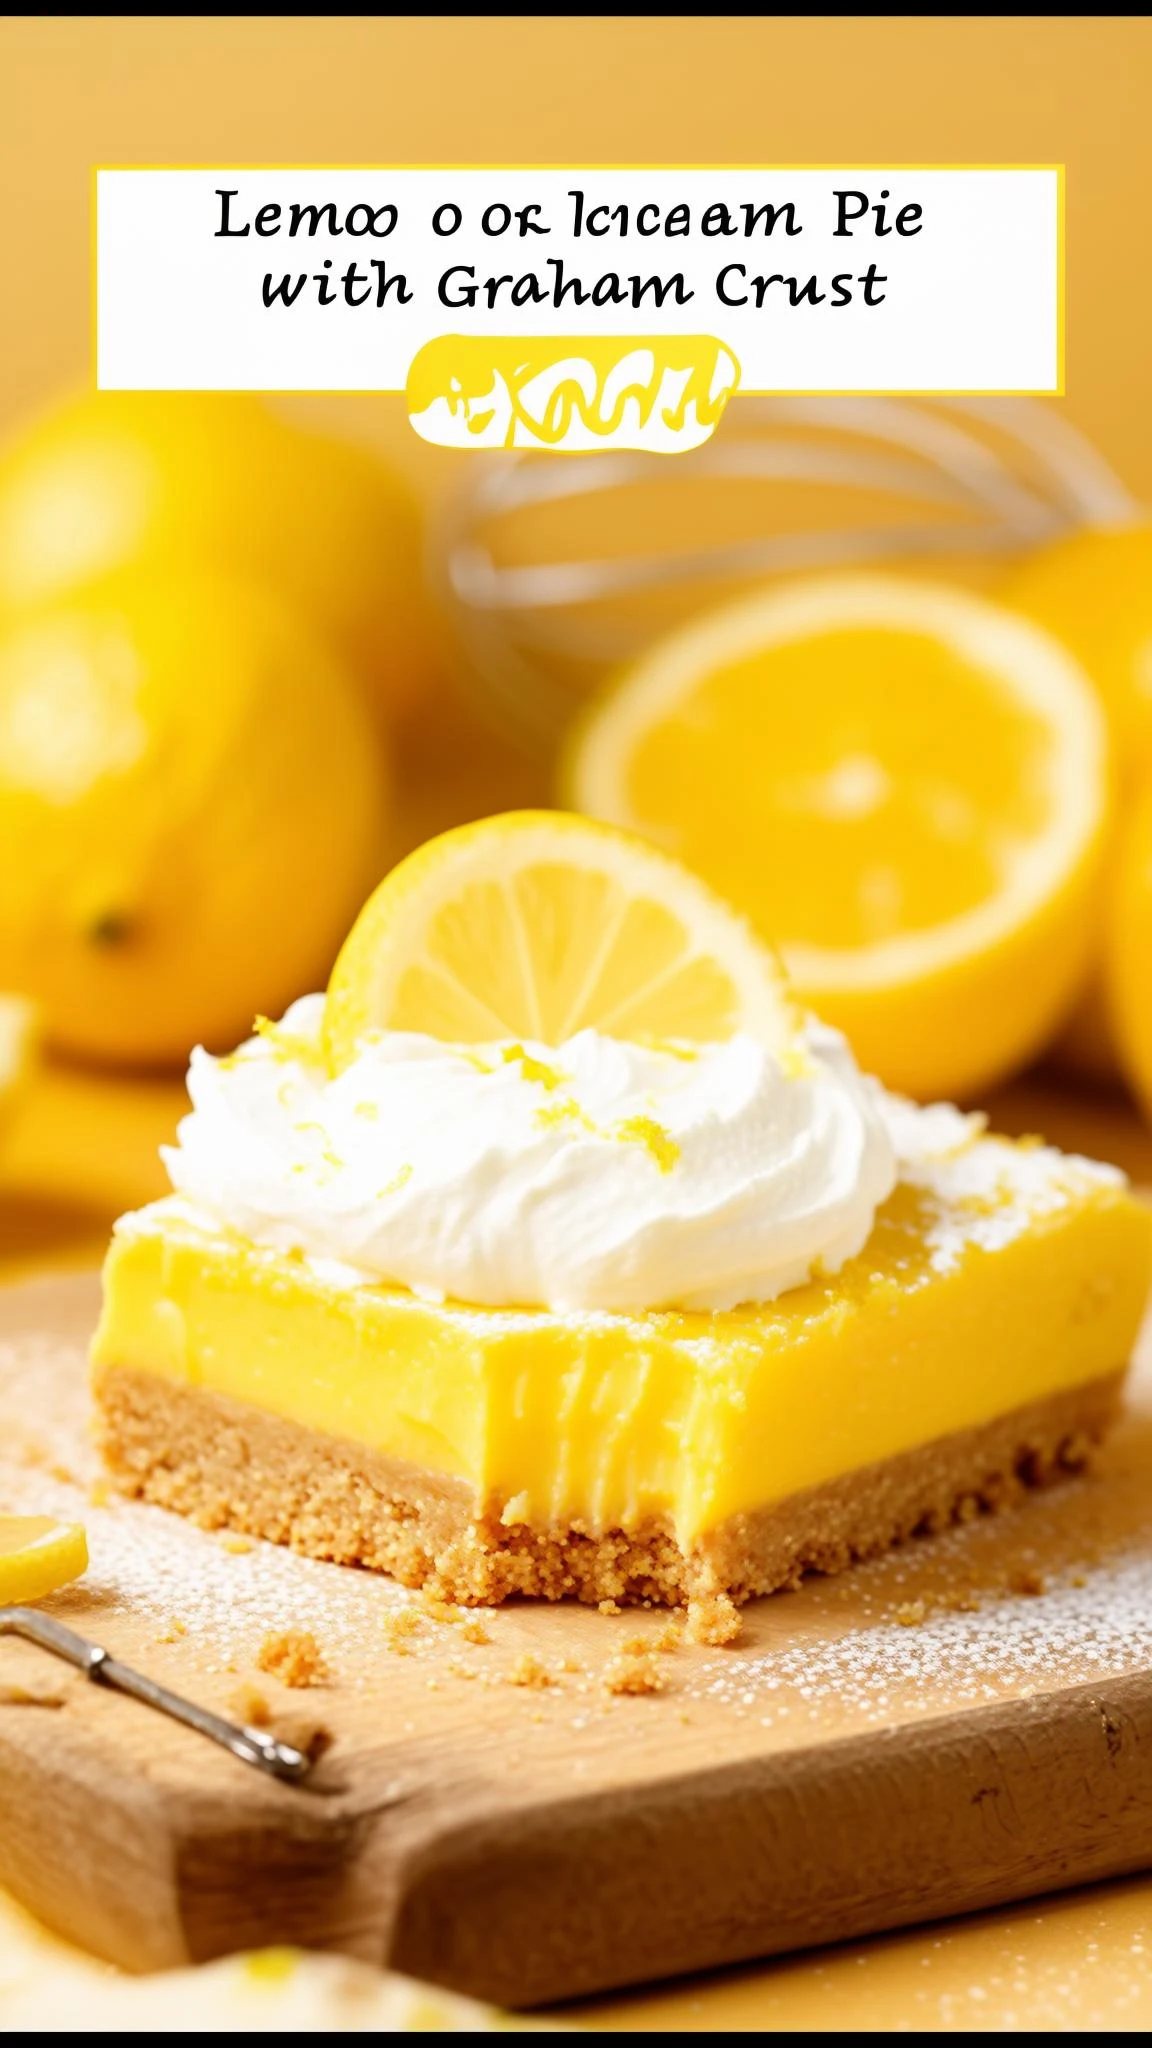
Lemon Cream Pie Bars with Graham Crust: A Zesty No-Bake Treat

There’s something magical about the combination of tart lemon and sweet cream, especially when it’s nestled in a buttery graham cracker crust. These Lemon Cream Pie Bars with Graham Crust are my go-to dessert when I want something refreshing, effortless, and downright irresistible. Whether you’re hosting a summer picnic, craving a bright treat after dinner, or just need a little sunshine on a plate, these bars deliver every time.

I first stumbled upon this recipe during a particularly chaotic week when my oven decided to quit on me (thanks, universe). Desperate for a dessert that required zero baking, I whipped up these lemon cream pie bars—and they were an instant hit. The creamy filling is light yet indulgent, the graham crust adds the perfect crunch, and the lemon zest? Pure happiness. Plus, they’re so easy to make, you’ll wonder why you haven’t been making them all along. If you love no-bake desserts as much as I do, you’ll also adore these No-Bake Chocolate Peanut Butter Bars for another fuss-free favorite.

Why You’ll Love These Lemon Cream Pie Bars

These bars are the ultimate crowd-pleaser, and here’s why:

  • No baking required—perfect for hot summer days or oven malfunctions (we’ve all been there).
  • Bright, tangy flavor balanced with creamy sweetness.
  • Only 15 minutes of active prep time—yes, really!
  • Make-ahead friendly—they chill beautifully in the fridge.

How to Make Lemon Cream Pie Bars with Graham Crust

Ingredients You’ll Need

  • For the crust: Graham cracker crumbs, melted butter, sugar, and a pinch of salt.
  • For the filling: Cream cheese, sweetened condensed milk, fresh lemon juice, lemon zest, and vanilla extract.
  • For topping (optional): Whipped cream and extra lemon zest for garnish.

Step-by-Step Instructions

  1. Make the crust: Mix graham cracker crumbs, melted butter, sugar, and salt. Press firmly into a lined pan and chill.
  2. Whip up the filling: Beat cream cheese until smooth, then add condensed milk, lemon juice, zest, and vanilla. Pour over the crust.
  3. Chill and set: Refrigerate for at least 4 hours (or overnight) until firm.
  4. Slice and serve: Cut into squares, add a dollop of whipped cream, and enjoy!

Tips for the Best Lemon Cream Pie Bars

Want to take these bars to the next level? Here are my pro tips:

  • Use fresh lemon juice—it makes all the difference in flavor compared to bottled.
  • For a toasted crust, bake the graham layer at 350°F for 8 minutes before adding the filling (though it’s still delicious unbaked!).
  • Swap the graham crust for a shortbread crust if you prefer a richer base.

Frequently Asked Questions

Can I use bottled lemon juice?
While fresh lemon juice is ideal for the brightest flavor, bottled juice works in a pinch—just add a bit more zest.

How long do these bars last in the fridge?
They’ll stay fresh for up to 5 days if stored in an airtight container.

Can I freeze lemon cream pie bars?
Yes! Freeze them for up to 2 months. Thaw in the fridge before serving.

What can I use instead of graham crackers?
Try digestive biscuits, vanilla wafers, or even gluten-free graham crumbs.

Can I make these bars ahead for a party?
Absolutely! They’re perfect for prepping a day in advance.

Why is my filling too soft?
It likely needs more chilling time. Pop it back in the fridge for another hour or two.

Whether you’re a lemon lover or just need a simple dessert that wows, these Lemon Cream Pie Bars with Graham Crust are sure to become a staple in your recipe rotation. For more citrusy inspiration, check out Food Network’s lemon recipe collection—because sometimes, life just calls for a little extra zest. Happy baking (or not baking, in this case)!

Luma Style Visual
Print
clock clock iconcutlery cutlery iconflag flag iconfolder folder iconinstagram instagram iconpinterest pinterest iconfacebook facebook iconprint print iconsquares squares iconheart heart iconheart solid heart solid icon

Lemon Cream Pie Bars with Graham Crust

  • Author: Baking Enthusiast

Description

These Lemon Cream Pie Bars feature a buttery graham cracker crust topped with a luscious lemon cream filling. Perfectly tangy and sweet, they’re an easy no-bake dessert that everyone will love.


Ingredients

Scale

For the Crust:

  • For the Graham Cracker Crust:
  • 1 1/2 cups graham cracker crumbs
  • 1/3 cup granulated sugar
  • 6 tablespoons unsalted butter, melted
  • For the Lemon Cream Filling:
  • 1 (14 oz) can sweetened condensed milk
  • 1/2 cup fresh lemon juice (about 3 lemons)
  • 1 tablespoon lemon zest
  • 1 cup heavy whipping cream
  • 2 tablespoons powdered sugar
  • For Garnish (Optional):
  • Lemon slices
  • Whipped cream
  • Additional graham cracker crumbs

Instructions

1. Prepare the Crust:

  1. 1. Prepare the crust: In a bowl, mix graham cracker crumbs, sugar, and melted butter until well combined.
  2. 2. Press the mixture firmly into the bottom of an 8×8-inch baking dish lined with parchment paper. Chill in the fridge for 15 minutes to set.
  3. 3. Make the lemon filling: In a large bowl, whisk together sweetened condensed milk, lemon juice, and lemon zest until smooth.
  4. 4. In a separate bowl, whip the heavy cream and powdered sugar until stiff peaks form.
  5. 5. Gently fold the whipped cream into the lemon mixture until fully incorporated.
  6. 6. Pour the filling over the chilled crust and spread evenly.
  7. 7. Refrigerate for at least 4 hours (or overnight) until fully set.
  8. 8. Slice into bars and garnish with lemon slices, whipped cream, or extra graham crumbs if desired.

Notes

For a stronger lemon flavor, add an extra tablespoon of lemon zest. Store leftovers in the refrigerator for up to 3 days.

Spring Garden Quiche with Asparagus and Spinach


Spring Garden Quiche with Asparagus and Spinach: A Fresh Celebration of the Season

There’s something magical about spring produce—tender asparagus, vibrant spinach, and fresh herbs that practically beg to be turned into something delicious. This Spring Garden Quiche with Asparagus and Spinach is my love letter to the season, a dish that’s as bright and welcoming as a sunny morning. Whether you’re hosting a Mother’s Day brunch or just treating yourself to a cozy weekend meal, this quiche is here to delight.

I’ll admit, I used to be intimidated by quiche. Would the crust turn out flaky? Could I avoid the dreaded soggy bottom? But after years of tweaking (and a few hilarious kitchen mishaps), I’ve landed on a foolproof method that’s both forgiving and fabulous. The secret? A mix of creamy eggs, tangy goat cheese, and just the right amount of seasonal veggies. Trust me, even the pickiest eaters will come back for seconds.

Why You’ll Love This Spring Garden Quiche

This isn’t just another quiche—it’s a celebration of spring on a plate. Here’s why it’s a must-try:

  • Seasonal superstar: Packed with asparagus and spinach, it’s a delicious way to enjoy spring’s bounty.
  • Meal-prep friendly: Tastes just as good reheated, making it perfect for busy weeks.
  • Versatile: Serve it warm for brunch or at room temperature for a picnic.
  • Crowd-pleaser: Works for vegetarians (or add bacon for meat lovers—no judgment here!).

How to Make Spring Garden Quiche with Asparagus and Spinach

Ingredients You’ll Need

  • 1 pre-made pie crust (or make your own for extra bragging rights)
  • 6 large eggs
  • 1 cup heavy cream
  • 1 cup fresh spinach, roughly chopped
  • 1/2 lb asparagus, trimmed and cut into 1-inch pieces
  • 1/2 cup crumbled goat cheese
  • 1/4 teaspoon nutmeg (trust me on this!)
  • Salt and pepper to taste

Step-by-Step Instructions

  1. Prep the crust: Preheat oven to 375°F (190°C). Blind bake the pie crust for 10 minutes to avoid sogginess.
  2. Sauté the veggies: In a skillet, lightly cook asparagus until bright green, then wilt the spinach. Let cool slightly.
  3. Whisk the filling: Beat eggs, cream, nutmeg, salt, and pepper until smooth.
  4. Layer it up: Spread veggies and goat cheese in the crust, then pour egg mixture over.
  5. Bake: 35–40 minutes until the center is set and the top is golden. Let rest 10 minutes before slicing.

Tips for Quiche Success

Want to make this quiche even better? Here are my pro tips:

  • Blind baking is key: A par-baked crust ensures a crisp base. Use pie weights or dried beans if you don’t have fancy tools.
  • Don’t overbake: The quiche will continue to set as it cools. Look for a slight jiggle in the center.
  • Customize it: Swap goat cheese for feta or add mushrooms for extra earthiness. For more spring inspiration, try my Spring Salad Collection.

Frequently Asked Questions

Can I make this quiche ahead of time?

Absolutely! Bake it the day before and reheat at 300°F for 15 minutes. The flavors meld beautifully overnight.

What’s the best way to store leftovers?

Keep refrigerated for up to 3 days. Reheat slices in the oven or toaster oven for best texture.

Can I freeze spring vegetable quiche?

Yes! Wrap slices tightly and freeze for up to 2 months. Thaw in the fridge before reheating.

Is there a dairy-free alternative?

Swap cream for coconut milk and use dairy-free cheese. Check out Minimalist Baker for great plant-based tips.

How do I prevent a soggy quiche crust?

Blind baking is crucial! Also, pat veggies dry after cooking to remove excess moisture.

What pairs well with asparagus quiche?

A light salad, fresh fruit, or roasted potatoes complete the meal. For drinks, try these spring cocktails.

Whether you’re welcoming spring with a garden brunch or just craving a slice of comfort, this quiche is here to deliver. The creamy filling, flaky crust, and pops of green make every bite feel like a celebration. And if you’re anything like me, you’ll find yourself making it all season long—because nothing says “spring” quite like a table filled with good food and even better company.


Luma Style Visual
Print
clock clock iconcutlery cutlery iconflag flag iconfolder folder iconinstagram instagram iconpinterest pinterest iconfacebook facebook iconprint print iconsquares squares iconheart heart iconheart solid heart solid icon

Spring Garden Quiche with Asparagus and Spinach

  • Author: The Seasonal Chef

Description

A light and flavorful quiche packed with fresh spring vegetables like asparagus and spinach, nestled in a flaky homemade crust. Perfect for brunch or a light dinner.


Ingredients

Scale

For the Crust:

  • For the crust:
  • 1 1/4 cups all-purpose flour
  • 1/2 teaspoon salt
  • 1/2 cup unsalted butter, chilled and cubed
  • 34 tablespoons ice water
  • For the filling:
  • 1 tablespoon olive oil
  • 1 small onion, diced
  • 1 bunch asparagus, trimmed and cut into 1-inch pieces
  • 2 cups fresh spinach, roughly chopped
  • 4 large eggs
  • 1 cup whole milk
  • 1/2 cup heavy cream
  • 1/2 teaspoon salt
  • 1/4 teaspoon black pepper
  • 1/4 teaspoon nutmeg
  • 1 cup shredded Gruyère cheese

Instructions

1. Prepare the Crust:

  1. 1. Prepare the crust: In a food processor, pulse flour and salt. Add chilled butter and pulse until mixture resembles coarse crumbs.
  2. 2. Gradually add ice water, 1 tablespoon at a time, pulsing until dough comes together. Form into a disk, wrap in plastic, and chill for 30 minutes.
  3. 3. Preheat oven to 375°F (190°C). Roll out dough on a floured surface and fit into a 9-inch pie dish. Trim edges and prick bottom with a fork. Line with parchment and pie weights, then blind bake for 15 minutes. Remove weights and bake 5 more minutes.
  4. 4. Make the filling: Heat olive oil in a skillet. Sauté onion for 3 minutes, then add asparagus and cook for 4 more minutes. Stir in spinach until wilted. Remove from heat.
  5. 5. Whisk together eggs, milk, cream, salt, pepper, and nutmeg in a bowl.
  6. 6. Spread vegetable mixture in the pre-baked crust. Sprinkle cheese evenly over top, then pour egg mixture over everything.
  7. 7. Bake for 35-40 minutes until center is set and top is golden. Let cool 10 minutes before slicing.

Notes

• Substitute half-and-half for milk/cream if desired. • For a deeper flavor, roast the asparagus instead of sautéing. • Quiche can be made 1 day ahead – reheat at 300°F for 15 minutes.

Glazed Carrot Bundt Cake with Cream Cheese Swirl

Glazed Carrot Bundt Cake with Cream Cheese Swirl: A Cozy Dessert Masterpiece

There’s something undeniably comforting about a bundt cake—its elegant curves, the way it slices into perfect portions, and how it fills the kitchen with warmth. Now, imagine that classic charm paired with the cozy flavors of spiced carrot cake and a luscious cream cheese swirl. This Glazed Carrot Bundt Cake with Cream Cheese Swirl is the dessert of your dreams: moist, lightly spiced, and topped with a glossy glaze that makes it as beautiful as it is delicious.

Whether you’re hosting a brunch, celebrating a birthday, or just treating yourself (because why not?), this cake is a showstopper. The cream cheese swirl adds a tangy contrast to the sweet carrots and warm cinnamon, while the glaze ties everything together. Plus, it’s easier to make than a layer cake—no fussy frosting required! If you love carrot cake but crave a fresh twist, this recipe is your new best friend. And if you’re a bundt fan, don’t miss our Classic Lemon Bundt Cake for another crowd-pleaser.

Why You’ll Love This Glazed Carrot Bundt Cake

This isn’t just any carrot cake—it’s a bundt cake, which means it’s automatically fancier. Here’s why it’s a must-bake:

  • Perfect texture: Moist, tender crumb thanks to grated carrots and a touch of applesauce.
  • Cream cheese magic: A marbled swirl adds richness without overwhelming the spices.
  • Easy elegance: The glaze drips beautifully, making it look bakery-worthy with zero effort.
  • Crowd-friendly: Serves 12+ and stays fresh for days (if it lasts that long!).

Key Ingredients & Substitutions

Here’s what you’ll need for this spiced beauty:

  • Carrots: Freshly grated works best, but pre-shredded saves time (just pat them dry).
  • Cream cheese: Full-fat for the best swirl texture. For a lighter version, try Neufchâtel.
  • Spices: Cinnamon, nutmeg, and a pinch of ginger. Pumpkin pie spice works too!
  • Glaze: Powdered sugar, milk, and vanilla. Add orange zest for a citrusy twist.

How to Make Glazed Carrot Bundt Cake with Cream Cheese Swirl

Don’t let the fancy looks fool you—this cake is straightforward. Here’s the step-by-step:

  1. Prep the pan: Generously grease your bundt pan (use butter + flour or baking spray).
  2. Make the batter: Whisk dry ingredients, mix wet ingredients, then combine. Fold in carrots.
  3. Swirl time: Drop spoonfuls of cream cheese mixture onto the batter, then marble with a knife.
  4. Bake: 50–60 minutes at 350°F, until a toothpick comes out clean. Cool completely before glazing.

Pro tip: For extra moisture, soak the grated carrots in the wet ingredients for 10 minutes before mixing. And if your cake sticks? Don’t panic—patch it with glaze, and no one will know! (We’ve all been there.)

Serving & Storage Tips

This cake shines at room temperature, but here’s how to keep it fresh:

  • Serve: Slice with coffee for brunch or with a scoop of vanilla ice cream for dessert.
  • Store: Cover at room temp for 3 days or refrigerate for up to 5 days (let it warm up before serving).
  • Freeze: Wrap unglazed slices tightly; freeze for up to 3 months. Thaw and glaze before serving.

Frequently Asked Questions

Can I use a different pan?
Yes! A 9×13-inch pan works—bake for 35–40 minutes. Skip the swirl if you prefer a simpler sheet cake.

How do I prevent a dry bundt cake?
Don’t overbake! Check at 50 minutes, and use a kitchen scale for accurate flour measurements (weight chart here).

Can I add nuts or raisins?
Absolutely! Fold in ½ cup chopped walnuts or pecans, or ¼ cup plump raisins for extra texture.

Why did my cream cheese sink?
The swirl should be thick—if it’s too runny, add 1 tbsp flour to the cream cheese mixture.

Can I make this gluten-free?
Swap in a 1:1 GF flour blend (like Bob’s Red Mill) and ensure your spices are GF-certified.

What’s the best glaze consistency?
Aim for a thick but pourable glaze—add milk 1 tsp at a time until it ribbons off your spoon.

There you have it—a Glazed Carrot Bundt Cake with Cream Cheese Swirl that’s as fun to make as it is to eat. Whether you’re a bundt newbie or a seasoned baker, this recipe is a guaranteed hit. The spices, the tangy swirl, and that glossy finish make it a dessert worth savoring. So preheat that oven, grab your favorite bundt pan, and let’s bake something unforgettable. (And if you’re feeling extra, try our Spiced Pumpkin Bread next—it’s another fall favorite!)

Luma Style Visual
Print
clock clock iconcutlery cutlery iconflag flag iconfolder folder iconinstagram instagram iconpinterest pinterest iconfacebook facebook iconprint print iconsquares squares iconheart heart iconheart solid heart solid icon

Glazed Carrot Bundt Cake with Cream Cheese Swirl

  • Author: Baking Enthusiast

Description

A moist and flavorful carrot Bundt cake with a rich cream cheese swirl and a sweet glaze drizzle. Perfect for any occasion!


Ingredients

Scale

For the Crust:

  • For the cake batter:
  • 2 cups all-purpose flour
  • 2 teaspoons baking powder
  • 1 teaspoon baking soda
  • 1 teaspoon ground cinnamon
  • 1/2 teaspoon ground nutmeg
  • 1/2 teaspoon salt
  • 1 cup granulated sugar
  • 1 cup packed brown sugar
  • 1 cup vegetable oil
  • 4 large eggs
  • 2 teaspoons vanilla extract
  • 3 cups grated carrots
  • 1/2 cup crushed pineapple, drained
  • 1/2 cup chopped walnuts (optional)
  • For the cream cheese swirl:
  • 8 oz cream cheese, softened
  • 1/4 cup granulated sugar
  • 1 large egg
  • 1 teaspoon vanilla extract
  • For the glaze:
  • 1 cup powdered sugar
  • 2 tablespoons milk
  • 1/2 teaspoon vanilla extract

Instructions

1. Prepare the Crust:

  1. Preheat oven to 350°F (175°C). Grease and flour a 10-inch Bundt pan.
  2. In a large bowl, whisk together flour, baking powder, baking soda, cinnamon, nutmeg, and salt.
  3. In another bowl, beat granulated sugar, brown sugar, oil, eggs, and vanilla until smooth.
  4. Gradually mix dry ingredients into wet ingredients until just combined.
  5. Fold in grated carrots, crushed pineapple, and walnuts (if using). Set aside.
  6. Prepare cream cheese swirl: Beat cream cheese, sugar, egg, and vanilla until smooth.
  7. Pour half of the carrot cake batter into the prepared Bundt pan.
  8. Spoon cream cheese mixture over the batter, avoiding the edges.
  9. Top with remaining carrot cake batter, spreading gently to cover.
  10. Bake for 50-60 minutes or until a toothpick inserted comes out clean.
  11. Cool in pan for 15 minutes, then invert onto a wire rack to cool completely.
  12. For the glaze: Whisk powdered sugar, milk, and vanilla until smooth. Drizzle over cooled cake.

Notes

For best results, ensure cream cheese is at room temperature before mixing. Store cake covered in the refrigerator for up to 5 days. The pineapple adds moisture but can be omitted if preferred.

No-Bake Strawberry Cheesecake Cups

No-Bake Strawberry Cheesecake Cups: A Dreamy Dessert in Minutes

There’s something magical about a dessert that feels indulgent yet requires almost zero effort. These No-Bake Strawberry Cheesecake Cups are exactly that—a creamy, dreamy treat that’s as easy to make as it is delicious. Whether you’re hosting a last-minute gathering, craving a sweet pick-me-up, or just want to treat yourself without turning on the oven, this recipe is your new best friend.

Picture this: velvety cheesecake filling layered with a buttery graham cracker crust and topped with juicy, fresh strawberries. It’s like summer in a cup! And the best part? No baking, no fuss, just pure dessert bliss. I first whipped these up on a sweltering afternoon when the thought of heating up the kitchen was unbearable. My kids devoured them in minutes, and I’ve been making them on repeat ever since. Trust me, once you try these, they’ll become your go-to dessert for busy days (or lazy ones—no judgment here!).

Why You’ll Love These No-Bake Strawberry Cheesecake Cups

If you need a little more convincing (though I doubt you will after one bite), here’s why this recipe is a winner:

  • No oven required: Perfect for hot days or tiny kitchens.
  • Ready in 20 minutes: Faster than ordering takeout!
  • Customizable: Swap strawberries for blueberries, raspberries, or even a drizzle of chocolate.
  • Kid-friendly: Little hands love helping with the layers.

How to Make No-Bake Strawberry Cheesecake Cups

Ingredients You’ll Need

  • 1 ½ cups graham cracker crumbs
  • 6 tbsp melted butter
  • 8 oz cream cheese, softened
  • 1 cup powdered sugar
  • 1 tsp vanilla extract
  • 1 cup heavy whipping cream
  • 1 ½ cups fresh strawberries, diced

Step-by-Step Instructions

  1. Make the crust: Mix graham cracker crumbs and melted butter. Press 2 tbsp into each cup.
  2. Whip the filling: Beat cream cheese, powdered sugar, and vanilla until smooth. In a separate bowl, whip the cream to stiff peaks, then fold into the cream cheese mixture.
  3. Layer and chill: Divide the filling among the cups, top with strawberries, and refrigerate for at least 1 hour (if you can wait that long!).

Tips for the Perfect Cheesecake Cups

Want to take these from great to *chef’s kiss*? Here are my pro tips:

  • Use room-temperature cream cheese to avoid lumps.
  • For a lighter texture, fold the whipped cream gently into the filling.
  • Short on time? Skip chilling—these are delicious right away (though firmer if you wait).

If you love no-bake desserts, you’ll adore these No-Bake Chocolate Peanut Butter Bars—another family favorite!

Frequently Asked Questions

Can I use frozen strawberries?

Yes! Thaw and drain them well to avoid excess moisture.

How long do these cheesecake cups last?

Up to 3 days in the fridge—if they last that long!

Can I make these gluten-free?

Absolutely! Swap graham crackers for gluten-free cookies or gluten-free graham crackers.

What’s the best way to soften cream cheese?

Leave it on the counter for 30 minutes or microwave in 10-second bursts.

Can I use a different fruit?

Of course! Blueberries, raspberries, or even mango would be delicious.

Is there a dairy-free version?

Try vegan cream cheese and coconut whipped cream.

There you have it—the easiest, most delightful dessert to satisfy your sweet tooth without breaking a sweat. These No-Bake Strawberry Cheesecake Cups are proof that sometimes the simplest things bring the most joy. Whip up a batch, grab a spoon, and savor every creamy, fruity bite. (And maybe hide one in the fridge for later—you deserve it!)

Luma Style Visual
Print
clock clock iconcutlery cutlery iconflag flag iconfolder folder iconinstagram instagram iconpinterest pinterest iconfacebook facebook iconprint print iconsquares squares iconheart heart iconheart solid heart solid icon

No-Bake Strawberry Cheesecake Cups

  • Author: Dessert Delights

Description

Creamy no-bake cheesecake layered with fresh strawberries and a buttery graham cracker crust, served in individual cups for a perfect single-serving dessert.


Ingredients

Scale

For the Crust:

  • For the crust:
  • 1 1/2 cups graham cracker crumbs
  • 1/4 cup granulated sugar
  • 6 tablespoons unsalted butter, melted
  • For the cheesecake filling:
  • 16 oz cream cheese, softened
  • 1/2 cup granulated sugar
  • 1 teaspoon vanilla extract
  • 1 cup heavy whipping cream
  • For the strawberry topping:
  • 2 cups fresh strawberries, diced
  • 1/4 cup granulated sugar
  • 1 teaspoon lemon juice

Instructions

1. Prepare the Crust:

  1. 1. In a medium bowl, mix graham cracker crumbs, 1/4 cup sugar, and melted butter until combined.
  2. 2. Press 2 tablespoons of the mixture firmly into the bottom of each serving cup. Chill for 15 minutes.
  3. 3. In a large bowl, beat cream cheese, 1/2 cup sugar, and vanilla until smooth and creamy.
  4. 4. In a separate bowl, whip heavy cream until stiff peaks form, then gently fold into cream cheese mixture.
  5. 5. Divide cheesecake filling evenly among cups, smoothing the tops. Chill for 1 hour.
  6. 6. Combine strawberries, 1/4 cup sugar, and lemon juice in a bowl. Let sit for 10 minutes to macerate.
  7. 7. Top each cheesecake cup with strawberry mixture before serving.

Notes

For best results, chill the cheesecake cups for at least 4 hours before adding strawberry topping. Can be made 1 day ahead – store topping separately.

Old-Fashioned Lemon Loaf Cake

Old-Fashioned Lemon Loaf Cake: A Sunny Slice of Nostalgia

There’s something magical about the scent of citrus and butter wafting through the kitchen—especially when it’s from an Old-Fashioned Lemon Loaf Cake. This humble yet irresistible treat is the kind of dessert that feels like a warm hug, evoking memories of grandma’s baking or lazy Sunday afternoons with a cup of tea. Whether you’re craving a bright, tangy bite to pair with your morning coffee or need a simple yet stunning dessert for a gathering, this loaf cake delivers every time.

What makes this recipe stand out? It’s the perfect balance of tart and sweet, with a tender crumb that melts in your mouth. Unlike overly complicated desserts, this loaf cake relies on pantry staples and a little love. Plus, it’s forgiving—no fancy techniques required! If you’ve ever struggled with dry or dense lemon cakes, this version (with a secret ingredient—sour cream!) guarantees moist, fluffy perfection. Trust me, one slice won’t be enough.

Why You’ll Love This Old-Fashioned Lemon Loaf Cake

This isn’t just any lemon cake. Here’s why it’ll become your go-to:

  • Zesty & Bright: Fresh lemon zest and juice pack a punch of flavor.
  • Moist & Tender: Sour cream keeps it luxuriously soft for days.
  • Simple Elegance: No fuss—just mix, bake, and enjoy.
  • Versatile: Perfect for breakfast, dessert, or gifting.

How to Make Old-Fashioned Lemon Loaf Cake

Ingredients You’ll Need

  • 1 ½ cups all-purpose flour
  • 1 tsp baking powder
  • ½ tsp salt
  • ½ cup unsalted butter, softened
  • 1 cup granulated sugar
  • 2 large eggs
  • ½ cup sour cream
  • 2 tbsp fresh lemon juice
  • 1 tbsp lemon zest
  • 1 tsp vanilla extract

Step-by-Step Instructions

  1. Prep: Preheat oven to 350°F (175°C). Grease a 9×5-inch loaf pan.
  2. Dry Mix: Whisk flour, baking powder, and salt in a bowl.
  3. Cream Butter & Sugar: Beat butter and sugar until fluffy. Add eggs one at a time.
  4. Combine Wet & Dry: Alternate adding dry mix and sour cream. Stir in lemon juice, zest, and vanilla.
  5. Bake: Pour batter into the pan. Bake 50–60 minutes until a toothpick comes out clean.
  6. Cool & Enjoy: Let cool before slicing. Optional: Drizzle with a lemon glaze!

Tips for the Perfect Lemon Loaf

Want to elevate your cake? Try these tricks:

  • Room-Temperature Ingredients: Ensures even mixing.
  • Don’t Overmix: Stir until just combined for a tender crumb.
  • Double the Glaze: For extra tang, mix powdered sugar with lemon juice and drizzle generously.

Fun fact: My neighbor once traded me a jar of honey for a slice of this cake—true story! It’s that good.

Pairing Suggestions

This loaf pairs beautifully with a cup of Earl Grey tea or a scoop of vanilla bean ice cream. For a brunch spread, serve it alongside berry chia pudding.

Frequently Asked Questions

Can I use bottled lemon juice? Fresh is best for flavor, but bottled works in a pinch.

How do I store lemon loaf cake? Keep it wrapped at room temperature for 3 days or freeze for up to a month.

Can I make this gluten-free? Yes! Swap flour for a 1:1 gluten-free blend.

Why did my cake sink in the middle? Overmixing or underbaking are likely culprits.

Can I add blueberries? Absolutely—fold in 1 cup fresh or frozen berries for a twist.

What’s the best way to zest a lemon? Use a fine grater and avoid the bitter white pith. Here’s a handy guide.

Whether you’re baking for yourself or sharing with loved ones, this Old-Fashioned Lemon Loaf Cake is a timeless treat that never goes out of style. The bright citrus flavor and buttery richness make it a year-round favorite—because sometimes, the simplest recipes are the ones that stick with us the longest. Happy baking!

Luma Style Visual
Print
clock clock iconcutlery cutlery iconflag flag iconfolder folder iconinstagram instagram iconpinterest pinterest iconfacebook facebook iconprint print iconsquares squares iconheart heart iconheart solid heart solid icon

Old-Fashioned Lemon Loaf Cake

  • Author: Classic Baking Co.

Description

A moist, tender lemon loaf cake with a sweet-tart glaze that delivers bright citrus flavor in every bite. This timeless recipe features buttermilk for richness and a crackly sugar crust.


Ingredients

Scale

For the Crust:

  • For the cake:
  • 1 1/2 cups all-purpose flour
  • 1 teaspoon baking powder
  • 1/4 teaspoon baking soda
  • 1/4 teaspoon salt
  • 1/2 cup unsalted butter, softened
  • 1 cup granulated sugar
  • 2 large eggs
  • 2 tablespoons lemon zest (about 2 lemons)
  • 1/2 cup buttermilk
  • 2 tablespoons fresh lemon juice
  • For the glaze:
  • 1 cup powdered sugar
  • 23 tablespoons fresh lemon juice
  • 1 teaspoon lemon zest

Instructions

1. Prepare the Crust:

  1. 1. Preheat oven to 350°F (175°C). Grease a 9×5-inch loaf pan and line with parchment paper.
  2. 2. Whisk together flour, baking powder, baking soda, and salt in a bowl. Set aside.
  3. 3. In a large bowl, beat butter and sugar until light and fluffy (3-4 minutes).
  4. 4. Add eggs one at a time, then mix in lemon zest.
  5. 5. Alternate adding dry ingredients and buttermilk, beginning and ending with flour mixture. Stir in lemon juice.
  6. 6. Pour batter into prepared pan. Bake 45-55 minutes until a toothpick comes out clean.
  7. 7. Cool in pan 10 minutes, then transfer to a wire rack.
  8. 8. For glaze: Whisk powdered sugar and lemon juice until smooth. Drizzle over cooled cake and sprinkle with zest.

Notes

• For extra lemon flavor, poke warm cake with a skewer and brush with lemon syrup before glazing. • Store airtight at room temperature for up to 3 days. • Freezes well for up to 1 month (unglazed).