Creamy Lemon Chicken Pasta

Creamy Lemon Chicken Pasta
# **SEO-Optimized Creamy Lemon Chicken Pasta Recipe**
**Meta Description:**
*”This Creamy Lemon Chicken Pasta is a quick, 30-minute meal with tender chicken, zesty lemon, and a silky sauce—perfect for weeknight dinners!”*
## **Creamy Lemon Chicken Pasta: A Bright & Comforting Weeknight Dinner**
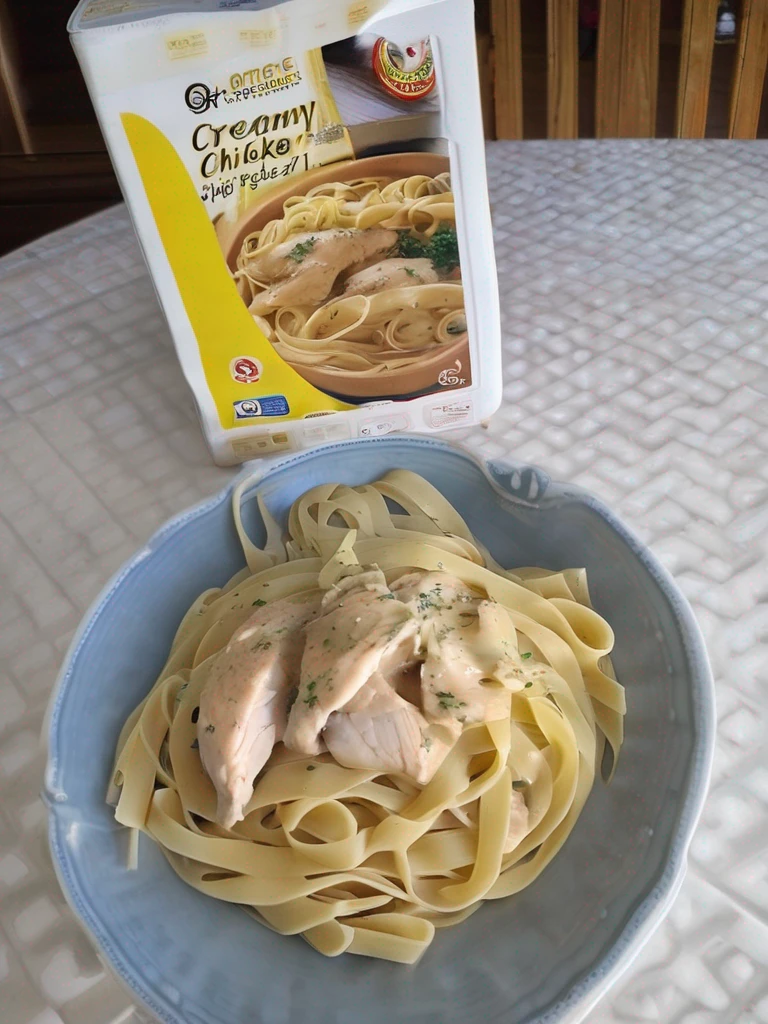
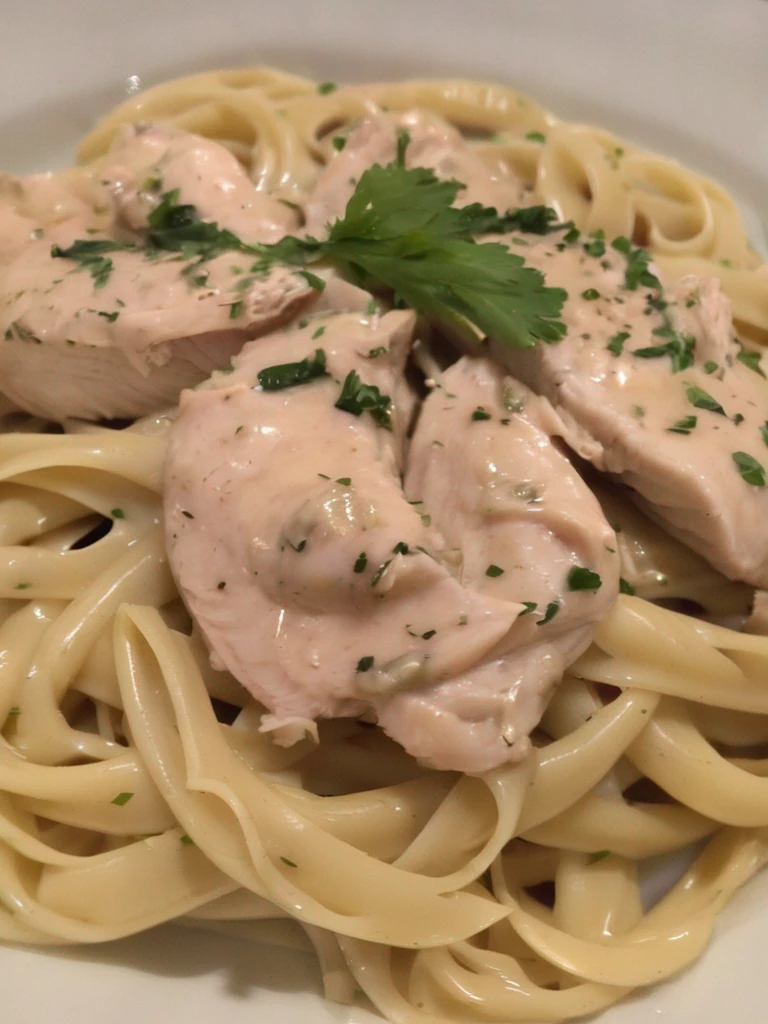
There’s nothing quite like **Creamy Lemon Chicken Pasta**—a dish that balances rich, velvety sauce with a refreshing citrus kick. Perfect for busy nights, this 30-minute meal features tender chicken, al dente pasta, and a bright lemon-infused cream sauce. It’s comfort food with a gourmet twist that will have everyone asking for seconds.
As a mom of two, I love recipes that are fast, flavorful, and family-approved. This **easy lemon chicken pasta** is adaptable (try shrimp or mushrooms!) and reheats beautifully for meal prep. The lemon cuts through the richness, making it light yet satisfying—ideal for spring dinners or cozy weeknights.
## **Why You’ll Love This Creamy Lemon Chicken Pasta**
Here’s why this **quick pasta recipe** deserves a spot in your rotation:
– **Ready in 30 minutes** – Faster than takeout but tastes homemade.
– **Bright & balanced** – Lemon adds freshness to the creamy sauce.
– **Meal prep friendly** – Reheats perfectly for lunches.
– **Kid-approved** – A guaranteed crowd-pleaser for all ages.
## **How to Make Creamy Lemon Chicken Pasta**
### **Ingredients You’ll Need**
– **8 oz pasta** (fettuccine, penne, or linguine)
– **2 boneless, skinless chicken breasts**, sliced
– **3 garlic cloves**, minced
– **1 cup heavy cream** (or half-and-half for a lighter option)
– **Zest and juice of 1 large lemon**
– **½ cup grated Parmesan cheese**
– **2 tbsp butter**
– **Fresh parsley or basil** for garnish
### **Step-by-Step Instructions**
1. **Cook the pasta** – Boil in salted water until al dente. Reserve ½ cup pasta water before draining.
2. **Sear the chicken** – In a large skillet, cook chicken in butter until golden. Set aside.
3. **Make the sauce** – Sauté garlic, then add cream, lemon zest, and juice. Simmer for 3 minutes.
4. **Combine** – Toss in pasta, chicken, and Parmesan. Add pasta water as needed.
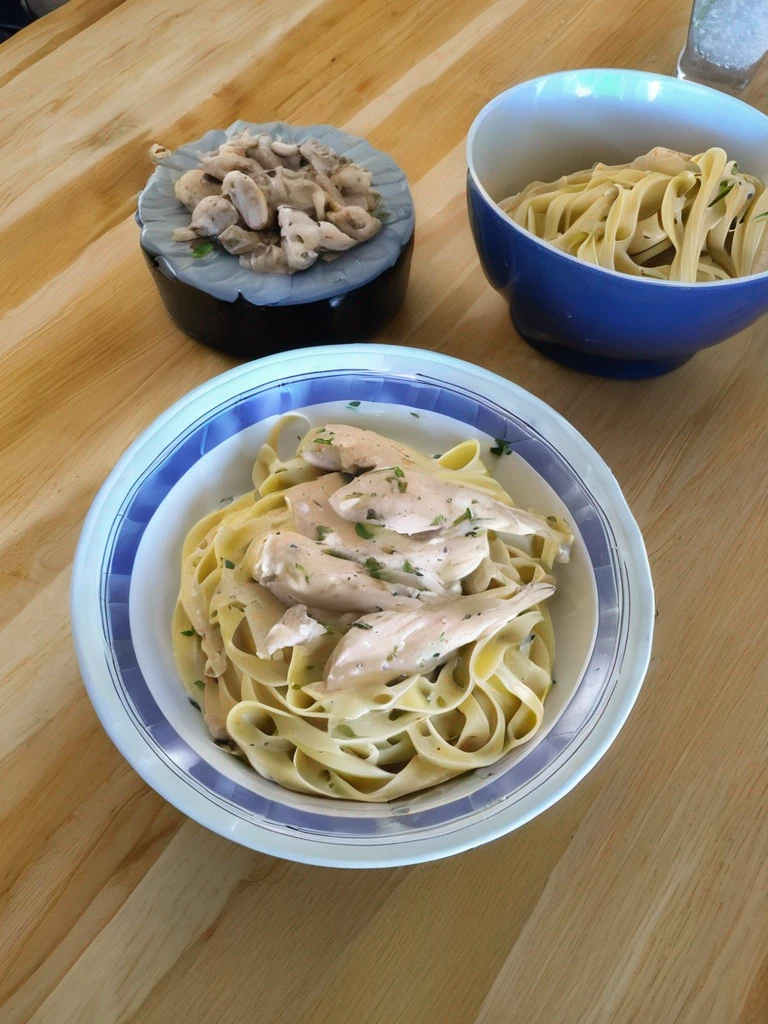
5. **Serve** – Garnish with herbs and extra lemon zest. Enjoy immediately!
## **Tips for the Best Lemon Chicken Pasta**
– **Use pasta water** – The starch helps the sauce cling to noodles.
– **Adjust lemon to taste** – Add an extra squeeze for more tang.
– **Vegetarian option** – Swap chicken for mushrooms or spinach.
*Fun fact: My 7-year-old declared this “fancy restaurant food”—now we have a weekly [Tasty Tuesday](https://exorecipes.com/easy-weeknight-dinners) tradition!*
## **Pairing Suggestions**
Serve with a **[fresh spring salad](https://exorecipes.com/fresh-spring-salads)** or roasted asparagus. Wine lovers will enjoy a crisp **Sauvignon Blanc**—check [Wine Spectator](https://www.winespectator.com/articles/sauvignon-blanc-wine-guide-2023) for pairing tips!
## **Frequently Asked Questions (FAQs)**
### **Can I use milk instead of heavy cream?**
Yes, but the sauce will be thinner. Simmer longer or add cream cheese for thickness.
### **How do I store leftovers?**
Keep in an airtight container for up to 3 days. Reheat with a splash of milk.
### **Can I freeze creamy lemon pasta?**
Freezing may alter the sauce’s texture. For best results, freeze chicken separately and make fresh pasta.
### **What pasta shape works best?**
Ribbons (fettuccine) or short shapes (penne) hold sauce well.
### **Is this dish gluten-free?**
Use gluten-free pasta and check Parmesan labels.
### **Can I add vegetables?**
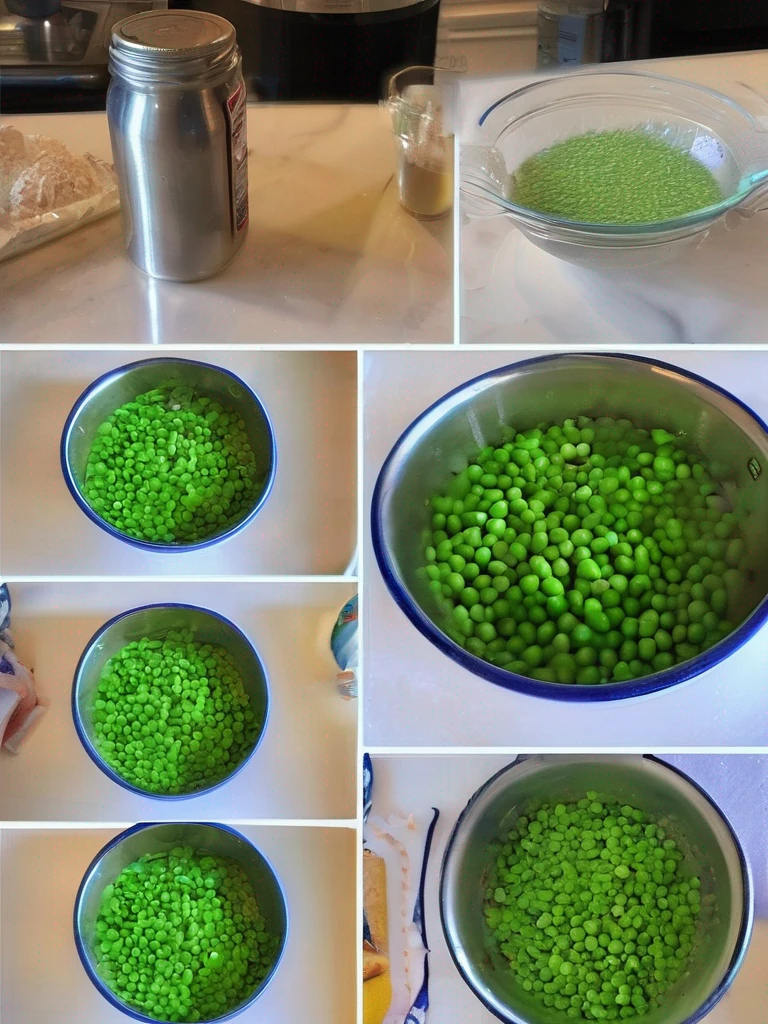
Absolutely! Try peas, sun-dried tomatoes, or wilted arugula.
## **Final Thoughts**
This **Creamy Lemon Chicken Pasta** is the ultimate weeknight dinner—quick, flavorful, and endlessly customizable. Whether you’re cooking for family or impressing guests, this dish delivers restaurant-quality taste in just 30 minutes. Grab a lemon and get cooking—your taste buds will thank you!

Print
clock clock iconcutlery cutlery iconflag flag iconfolder folder iconinstagram instagram iconpinterest pinterest iconfacebook facebook iconprint print iconsquares squares iconheart heart iconheart solid heart solid icon

Creamy Lemon Chicken Pasta

  • Author: Chef Maria

Description

A delicious and easy-to-make pasta dish featuring tender chicken in a creamy lemon sauce with garlic and parmesan. Perfect for weeknight dinners or entertaining guests.


Ingredients

Scale

For the Crust:

  • For the chicken:
  • 2 boneless, skinless chicken breasts
  • 1 tbsp olive oil
  • 1/2 tsp salt
  • 1/4 tsp black pepper
  • 1/2 tsp garlic powder
  • For the pasta:
  • 8 oz fettuccine or linguine
  • 4 cups water
  • 1 tsp salt
  • For the sauce:
  • 2 tbsp butter
  • 3 cloves garlic, minced
  • 1 cup heavy cream
  • 1/2 cup chicken broth
  • 1/4 cup freshly grated parmesan cheese
  • Zest of 1 lemon
  • 2 tbsp lemon juice
  • 1/4 tsp salt
  • 1/4 tsp black pepper
  • For garnish:
  • Fresh parsley, chopped
  • Extra parmesan cheese

Instructions

1. Prepare the Crust:

  1. 1. Cook pasta according to package instructions in salted water. Drain and set aside.
  2. 2. Season chicken breasts with salt, pepper, and garlic powder. Heat olive oil in a large skillet over medium-high heat and cook chicken for 5-6 minutes per side until golden and cooked through. Remove and let rest before slicing.
  3. 3. In the same skillet, melt butter over medium heat. Add garlic and sauté for 30 seconds until fragrant.
  4. 4. Pour in heavy cream and chicken broth, stirring to combine. Bring to a simmer and cook for 2-3 minutes until slightly thickened.
  5. 5. Stir in parmesan cheese, lemon zest, lemon juice, salt, and pepper. Continue cooking for 1-2 minutes until cheese is melted and sauce is creamy.
  6. 6. Add cooked pasta to the sauce, tossing to coat evenly. If needed, add a splash of pasta water to thin the sauce.
  7. 7. Slice the cooked chicken and arrange over the pasta. Garnish with fresh parsley and extra parmesan cheese before serving.

Notes

For a lighter version, you can substitute half-and-half for the heavy cream. The lemon flavor will be strongest right after cooking – for more mellow flavor, reduce lemon juice to 1 tablespoon. Leftovers can be stored in an airtight container in the refrigerator for up to 3 days.

Cheesy Asparagus Casserole

Cheesy Asparagus Casserole: A Creamy, Comforting Side Dish

There’s something magical about a dish that’s both indulgent and wholesome, and this Cheesy Asparagus Casserole is exactly that. Picture tender asparagus spears nestled in a velvety cheese sauce, topped with a golden, buttery breadcrumb crust. It’s the kind of side dish that steals the spotlight at dinner, whether you’re serving it alongside a weeknight roast chicken or as part of a holiday feast. And the best part? It’s surprisingly easy to make!

As a mom of two, I’m always looking for ways to sneak more veggies into our meals without complaints. This casserole is a winner because even my picky eater can’t resist that cheesy goodness. Plus, asparagus is in peak season during spring, making this recipe a fantastic way to celebrate fresh produce. If you’re a fan of cozy, crowd-pleasing dishes like my Creamy Garlic Mashed Potatoes, you’ll adore this one too.

Why You’ll Love This Cheesy Asparagus Casserole

This dish isn’t just delicious—it’s also versatile and packed with perks. Here’s why it’s a must-try:

  • Easy to customize: Swap the cheese blend or add crispy bacon for extra flavor.
  • Meal-prep friendly: Assemble it ahead and bake when ready.
  • Crowd-pleaser: Perfect for potlucks, Easter brunch, or Sunday supper.
  • Nutrient-packed: Asparagus is rich in fiber, vitamins A and K, and antioxidants.

How to Make Cheesy Asparagus Casserole

This recipe comes together in just a few simple steps. Here’s what you’ll need:

Ingredients

  • 1 lb fresh asparagus, trimmed and cut into 2-inch pieces
  • 2 tbsp butter
  • 2 tbsp all-purpose flour
  • 1 ½ cups milk (whole or 2%)
  • 1 cup shredded cheddar cheese
  • ½ cup grated Parmesan
  • ½ tsp garlic powder
  • ½ cup breadcrumbs
  • 1 tbsp olive oil (for breadcrumb topping)
  • Salt and pepper to taste

Instructions

  1. Prep the asparagus: Blanch asparagus in boiling water for 2 minutes, then transfer to ice water to stop cooking. Drain and set aside.
  2. Make the sauce: Melt butter in a saucepan, whisk in flour to form a roux. Gradually add milk, stirring until thickened. Stir in cheeses and garlic powder.
  3. Assemble: Toss asparagus with the cheese sauce, then transfer to a greased baking dish.
  4. Top and bake: Mix breadcrumbs with olive oil, sprinkle over the casserole, and bake at 375°F for 20–25 minutes until bubbly and golden.

Recipe Tips & Variations

Want to make this dish your own? Try these tweaks:

  • Add protein: Fold in diced ham or cooked chicken for a heartier meal.
  • Go low-carb: Skip the breadcrumbs and use crushed pork rinds or almond flour instead.
  • Cheese swaps: Gruyère or Monterey Jack work beautifully here too.

For more cheesy inspiration, check out this guide to perfect cheese sauces from Serious Eats.

Frequently Asked Questions

Can I use frozen asparagus? Yes, but thaw and pat it dry first to avoid excess moisture.

How do I store leftovers? Keep refrigerated for up to 3 days. Reheat in the oven for best texture.

Can I make this gluten-free? Absolutely! Use gluten-free flour and breadcrumbs.

What pairs well with this casserole? Try it with Herb-Crusted Salmon or roasted chicken.

Can I freeze this casserole? It’s best enjoyed fresh, but you can freeze it unbaked for up to 1 month.

How do I pick the best asparagus? Look for firm, bright-green spears with tight tips. Thin stalks are more tender!

Whether you’re craving comfort food or need a standout side dish, this Cheesy Asparagus Casserole delivers every time. It’s a recipe that feels special enough for company but simple enough for busy nights—exactly the kind of dish I love sharing with you. If you try it, tag me on social media so I can see your cheesy masterpiece! And for more veggie-forward recipes, don’t miss my Crispy Roasted Brussels Sprouts next.

Print
clock clock iconcutlery cutlery iconflag flag iconfolder folder iconinstagram instagram iconpinterest pinterest iconfacebook facebook iconprint print iconsquares squares iconheart heart iconheart solid heart solid icon

Cheesy Asparagus Casserole

  • Author: The Kitchen Explorer

Description

A creamy, cheesy asparagus casserole with a crispy breadcrumb topping that makes the perfect side dish for any meal. This comforting dish combines tender asparagus with a rich cheese sauce for a decadent yet easy-to-make recipe.


Ingredients

Scale

For the Crust:

  • For the casserole:
  • 1.5 lbs fresh asparagus, trimmed and cut into 2-inch pieces
  • 3 tablespoons unsalted butter
  • 3 tablespoons all-purpose flour
  • 1.5 cups whole milk
  • 1 cup shredded sharp cheddar cheese
  • 1/2 cup grated Parmesan cheese
  • 1/2 teaspoon garlic powder
  • 1/2 teaspoon onion powder
  • Salt and black pepper to taste
  • For the topping:
  • 1/2 cup panko breadcrumbs
  • 2 tablespoons melted butter
  • 1/4 cup grated Parmesan cheese
  • 1/2 teaspoon dried parsley

Instructions

1. Prepare the Crust:

  1. 1. Preheat oven to 375°F (190°C). Grease a 9×13-inch baking dish.
  2. 2. Blanch asparagus in boiling water for 2 minutes, then drain and plunge into ice water. Drain well and arrange in prepared baking dish.
  3. 3. In a saucepan, melt 3 tablespoons butter over medium heat. Whisk in flour and cook for 1 minute.
  4. 4. Gradually whisk in milk until smooth. Cook, stirring constantly, until sauce thickens (about 3-4 minutes).
  5. 5. Remove from heat and stir in cheddar cheese, 1/2 cup Parmesan, garlic powder, onion powder, salt, and pepper until cheeses melt.
  6. 6. Pour cheese sauce evenly over asparagus in baking dish.
  7. 7. In a small bowl, mix panko, melted butter, 1/4 cup Parmesan, and parsley. Sprinkle over casserole.
  8. 8. Bake for 20-25 minutes until bubbly and topping is golden brown.
  9. 9. Let stand 5 minutes before serving.

Notes

For a lighter version, substitute half-and-half for whole milk. Can be prepared up to the baking step 1 day ahead – cover and refrigerate, then bake as directed (may need 5 extra minutes). Leftovers reheat well in a 350°F oven for 10-15 minutes.

Creamy Lemon Chicken Pasta

Creamy Lemon Chicken Pasta: A Bright & Comforting Weeknight Dinner

There’s something magical about the combination of creamy pasta and zesty lemon—it’s like sunshine on a plate. This Creamy Lemon Chicken Pasta is my go-to when I crave something indulgent yet fresh, and it’s become a favorite in our house for busy weeknights. Picture tender chicken, al dente pasta, and a velvety sauce with just the right tang. Plus, it comes together in about 30 minutes, which means more time for cozy dinners and less time scrubbing pots.

I first stumbled upon this recipe during a particularly chaotic week when my fridge was nearly empty, but I had a lone lemon rolling around and a pack of chicken thighs begging to be used. A little cream, garlic, and Parmesan later, and voilà—a dish that felt restaurant-worthy without the fuss. Whether you’re cooking for picky kids, impressing guests, or just treating yourself (you deserve it!), this pasta delivers every time. Pro tip: Serve it with a crisp green salad or garlic bread to soak up every last drop of that dreamy sauce.

Why You’ll Love This Creamy Lemon Chicken Pasta

Here’s why this dish earns a permanent spot in your rotation:

  • Quick & easy: Ready in 30 minutes—perfect for hectic evenings.
  • Bright & balanced: The lemon cuts through the richness for a light yet satisfying meal.
  • Versatile: Swap chicken for shrimp or mushrooms for a twist.
  • Crowd-pleaser: Even the pickiest eaters ask for seconds.

How to Make Creamy Lemon Chicken Pasta

Ingredients You’ll Need

  • 8 oz pasta (linguine or fettuccine work best)
  • 2 boneless, skinless chicken breasts, sliced
  • 3 garlic cloves, minced
  • 1 cup heavy cream
  • Zest and juice of 1 lemon
  • ½ cup grated Parmesan
  • 2 tbsp olive oil
  • Salt, pepper, and red pepper flakes to taste
  • Fresh parsley for garnish

Step-by-Step Instructions

  1. Cook the pasta: Boil in salted water until al dente. Reserve ½ cup pasta water before draining.
  2. Sear the chicken: Heat olive oil in a skillet over medium-high. Season chicken with salt and pepper, then cook until golden (5–6 minutes per side). Set aside.
  3. Make the sauce: In the same skillet, sauté garlic for 30 seconds. Add cream, lemon zest, and juice, simmering for 2 minutes. Stir in Parmesan until melted.
  4. Combine: Toss pasta and chicken into the sauce, adding pasta water as needed to loosen. Garnish with parsley and extra lemon zest.

Tips for the Best Creamy Lemon Pasta

Want to take it up a notch? Here’s how:

  • Use freshly grated Parmesan—it melts smoother than pre-shredded.
  • Add a splash of white wine to the sauce for extra depth.
  • Love greens? Toss in baby spinach or arugula at the end.

FAQs About Creamy Lemon Chicken Pasta

Can I use milk instead of heavy cream? Heavy cream gives the best texture, but half-and-half works in a pinch (avoid milk—it may curdle).

How do I store leftovers? Keep in an airtight container for up to 3 days. Reheat with a splash of cream to revive the sauce.

What pasta pairs best with lemon sauce? Long, flat noodles like linguine or tagliatelle hold the sauce beautifully.

Can I make this dairy-free? Try coconut cream and nutritional yeast, but the flavor will vary.

Is this dish freezer-friendly? Cream-based sauces can separate when frozen—best enjoyed fresh!

How can I add more veggies? Sautéed mushrooms, asparagus, or cherry tomatoes are delicious additions.

There you have it—a dish that’s as vibrant as it is comforting. Whether you’re winding down after a long day or hosting a last-minute dinner, this Creamy Lemon Chicken Pasta is a guaranteed hit. For more quick and flavorful recipes, check out our Garlic Butter Shrimp Pasta or One-Pan Chicken Dinners. And if you’re curious about balancing citrus flavors in cooking, Serious Eats has a great guide. Now, go forth and twirl that fork with joy!

Print
clock clock iconcutlery cutlery iconflag flag iconfolder folder iconinstagram instagram iconpinterest pinterest iconfacebook facebook iconprint print iconsquares squares iconheart heart iconheart solid heart solid icon

Creamy Lemon Chicken Pasta

  • Author: Chef Maria Bennett

Description

A bright and comforting pasta dish featuring tender chicken in a velvety lemon cream sauce with garlic and parmesan. Perfect for weeknight dinners yet elegant enough for guests.


Ingredients

Scale

For the Crust:

  • For the chicken:
  • 1.5 lbs boneless, skinless chicken breasts
  • 1 tsp salt
  • 1/2 tsp black pepper
  • 1 tsp garlic powder
  • 2 tbsp olive oil
  • For the sauce:
  • 3 cloves garlic, minced
  • 1 cup heavy cream
  • 1/2 cup chicken broth
  • Zest of 1 lemon
  • 3 tbsp lemon juice
  • 1/2 cup grated parmesan
  • 1/2 tsp salt
  • 1/4 tsp red pepper flakes
  • For serving:
  • 12 oz fettuccine pasta
  • 2 tbsp chopped parsley
  • Extra parmesan for garnish

Instructions

1. Prepare the Crust:

  1. 1. Cook pasta according to package directions. Reserve 1/2 cup pasta water before draining.
  2. 2. Season chicken with salt, pepper, and garlic powder. Heat olive oil in large skillet over medium-high heat.
  3. 3. Cook chicken 5-6 minutes per side until golden and 165°F internal temp. Remove and let rest.
  4. 4. In same skillet, sauté garlic 30 seconds until fragrant. Add cream, broth, lemon zest/juice, and seasonings.
  5. 5. Simmer 3-4 minutes until slightly thickened. Whisk in parmesan until smooth.
  6. 6. Slice chicken. Toss drained pasta with sauce, adding reserved pasta water as needed.
  7. 7. Top with chicken, parsley, and extra parmesan. Serve immediately.

Notes

For extra richness, substitute 1/4 cup cream with cream cheese. Sauce thickens upon standing – reheat with splash of milk if needed. Leftovers keep 3 days refrigerated.

Creamy Lemon Chicken Pasta

Creamy Lemon Chicken Pasta: A Bright & Comforting Weeknight Dinner

There’s something magical about the combination of creamy pasta and zesty lemon—it’s like sunshine on a plate, even on the busiest of days. This Creamy Lemon Chicken Pasta is my go-to when I need a meal that feels indulgent but comes together in just 30 minutes. Picture tender chicken, al dente pasta, and a velvety sauce with just the right amount of tang. It’s the kind of dish that makes you pause mid-bite and think, “Wow, I *made* this?”

I first stumbled upon this recipe during a particularly chaotic week when my fridge was nearly empty, but I had a lone lemon rolling around and some leftover chicken. Desperation led to experimentation, and voilà—a new family favorite was born. Now, it’s my secret weapon for impressing last-minute guests or simply treating myself after a long day. (Pro tip: A sprinkle of fresh parsley and extra lemon zest makes it look *chef’s kiss* fancy with zero extra effort.)

Why You’ll Love This Creamy Lemon Chicken Pasta

This dish isn’t just delicious—it’s also incredibly forgiving and adaptable. Here’s why it’s earned a permanent spot in my rotation:

  • Quick & Easy: Ready in 30 minutes, perfect for weeknights.
  • Bright & Balanced: The lemon cuts through the richness for a light yet comforting flavor.
  • Pantry-Friendly: Uses simple ingredients you likely already have.
  • Versatile: Swap chicken for shrimp, or add spinach for extra greens.

How to Make Creamy Lemon Chicken Pasta

Ingredients You’ll Need

  • 8 oz pasta (like fettuccine or penne)
  • 2 boneless, skinless chicken breasts, sliced
  • 2 cloves garlic, minced
  • 1 cup heavy cream
  • Zest and juice of 1 lemon
  • ½ cup grated Parmesan
  • 2 tbsp butter
  • Salt, pepper, and red pepper flakes to taste
  • Fresh parsley for garnish

Step-by-Step Instructions

  1. Cook the pasta: Boil in salted water until al dente. Reserve ½ cup pasta water, then drain.
  2. Sear the chicken: In a large skillet, cook chicken in butter over medium heat until golden. Season with salt and pepper.
  3. Build the sauce: Add garlic, lemon zest, and red pepper flakes to the skillet. Pour in cream and lemon juice, stirring until slightly thickened.
  4. Combine: Toss in pasta and Parmesan, adding reserved pasta water as needed to loosen the sauce.
  5. Serve: Garnish with parsley and extra lemon zest. Devour immediately!

Tips for the Best Creamy Lemon Chicken Pasta

Want to take this dish to the next level? Here are my tried-and-true tricks:

  • Don’t skimp on the lemon zest: It packs a punch of flavor without acidity.
  • Use freshly grated Parmesan: Pre-shredded cheese won’t melt as smoothly.
  • Try a splash of white wine: Deglaze the pan with it before adding cream for extra depth.

If you’re craving more cozy pasta recipes, check out my Garlic Butter Shrimp Pasta or this Creamy Tomato Spinach Pasta for another quick dinner win.

Frequently Asked Questions

Can I use milk instead of heavy cream?

Heavy cream gives the sauce its luxurious texture, but half-and-half will work in a pinch (avoid milk—it may curdle).

How do I store leftovers?

Store in an airtight container for up to 3 days. Reheat with a splash of broth or cream to revive the sauce.

Can I make this gluten-free?

Absolutely! Use gluten-free pasta and double-check your Parmesan (some brands contain anti-caking agents with gluten).

What’s the best pasta shape for this recipe?

Long noodles like fettuccine or linguine are classic, but penne or farfalle hold the sauce well too.

Can I add vegetables?

Yes! Sautéed spinach, asparagus, or sun-dried tomatoes would be delicious additions.

Is this dish freezer-friendly?

The sauce may separate when thawed, so I recommend enjoying it fresh. For meal prep, cook components separately and assemble before serving.

Whether you’re cooking for one or a crowd, this Creamy Lemon Chicken Pasta is guaranteed to bring a little joy to the table. It’s the kind of meal that feels like a warm hug but tastes like a restaurant splurge—without the fuss. For more weeknight inspiration, explore Food Network’s quick dinner ideas or my 30-Minute Meals collection. Now, go forth and twirl that pasta with confidence!

Print
clock clock iconcutlery cutlery iconflag flag iconfolder folder iconinstagram instagram iconpinterest pinterest iconfacebook facebook iconprint print iconsquares squares iconheart heart iconheart solid heart solid icon

Creamy Lemon Chicken Pasta

  • Author: Chef Maria

Description

A delightful and easy-to-make pasta dish featuring tender chicken in a creamy lemon sauce with a hint of garlic and Parmesan. Perfect for weeknight dinners or entertaining guests.


Ingredients

Scale

For the Crust:

  • For the Chicken:
  • 2 boneless, skinless chicken breasts
  • 1 tbsp olive oil
  • 1/2 tsp salt
  • 1/4 tsp black pepper
  • 1/2 tsp garlic powder
  • For the Pasta:
  • 8 oz fettuccine or linguine
  • 1 tbsp salt (for pasta water)
  • For the Sauce:
  • 2 tbsp unsalted butter
  • 3 cloves garlic, minced
  • 1 cup heavy cream
  • 1/2 cup chicken broth
  • 1/4 cup freshly grated Parmesan cheese
  • Zest of 1 lemon
  • Juice of 1 lemon
  • 1/4 tsp red pepper flakes (optional)
  • Salt and pepper to taste
  • For Garnish:
  • Fresh parsley, chopped
  • Extra Parmesan cheese

Instructions

1. Prepare the Crust:

  1. 1. Cook the Pasta: Bring a large pot of salted water to a boil. Add pasta and cook according to package instructions until al dente. Reserve 1/2 cup pasta water, then drain.
  2. 2. Prepare the Chicken: Season chicken breasts with salt, pepper, and garlic powder. Heat olive oil in a large skillet over medium-high heat. Cook chicken for 5-6 minutes per side until golden and cooked through. Remove, let rest, then slice.
  3. 3. Make the Sauce: In the same skillet, melt butter over medium heat. Add garlic and sauté for 30 seconds until fragrant. Pour in heavy cream and chicken broth, stirring to combine. Simmer for 2-3 minutes.
  4. 4. Add Flavor: Stir in Parmesan, lemon zest, lemon juice, and red pepper flakes (if using). Season with salt and pepper to taste.
  5. 5. Combine: Add cooked pasta and sliced chicken to the sauce. Toss well, adding reserved pasta water as needed to thin the sauce.
  6. 6. Serve: Garnish with fresh parsley and extra Parmesan. Enjoy immediately.

Notes

For a lighter version, substitute half-and-half for heavy cream. Adjust lemon zest/juice to taste. Leftovers can be refrigerated for up to 2 days (sauce may thicken—reheat with a splash of broth).

Buttermilk Spring Pea Salad

Buttermilk Spring Pea Salad: A Fresh & Creamy Spring Delight

There’s something magical about spring produce—the crisp snap of sugar snap peas, the sweetness of fresh peas, and the tang of buttermilk dressing all come together in this Buttermilk Spring Pea Salad. It’s the kind of dish that makes you want to throw open the windows, set the table with a checkered cloth, and invite friends over for a lazy afternoon lunch. Whether you’re prepping for a picnic, a potluck, or just craving a bright side dish, this salad is here to save the day.

I first stumbled upon this recipe when I had a surplus of peas from my local farmers’ market (bless those early spring harvests!). I wanted something light yet satisfying, and after a little experimentation, this creamy, herb-flecked beauty was born. The buttermilk dressing adds a subtle tang, while the peas and radishes bring crunch and color. It’s like spring in a bowl—fresh, vibrant, and utterly irresistible. Plus, it comes together in under 20 minutes, which means more time for enjoying the sunshine!

Why You’ll Love This Buttermilk Spring Pea Salad

This salad is a winner for so many reasons. Here’s why it’ll become a staple in your spring recipe rotation:

  • Quick & Easy: Ready in 15 minutes—no cooking required!
  • Perfect for Gatherings: A crowd-pleaser at picnics, BBQs, or Easter brunch.
  • Packed with Freshness: Loaded with spring veggies and herbs.
  • Versatile: Swap ingredients based on what’s in season or your fridge.

How to Make Buttermilk Spring Pea Salad

This recipe is as simple as tossing a few ingredients together, but here’s how to make it shine:

Ingredients

  • 2 cups fresh peas (or thawed frozen peas)
  • 1 cup sugar snap peas, thinly sliced
  • 4 radishes, thinly sliced
  • 1/4 cup red onion, finely diced
  • 1/4 cup fresh mint, chopped
  • 1/2 cup buttermilk
  • 2 tbsp Greek yogurt
  • 1 tbsp lemon juice
  • 1 tsp honey
  • Salt & pepper to taste

Instructions

  1. In a large bowl, combine peas, snap peas, radishes, red onion, and mint.
  2. In a separate bowl, whisk together buttermilk, Greek yogurt, lemon juice, honey, salt, and pepper.
  3. Pour the dressing over the veggies and toss gently to coat.
  4. Chill for at least 10 minutes before serving to let flavors meld.

Recipe Tips & Variations

Want to make this salad your own? Here are a few ideas:

  • Add Protein: Toss in grilled chicken or crumbled feta for a heartier meal.
  • Herb Swap: Try dill or parsley instead of mint for a different flavor.
  • Make It Ahead: This salad keeps well in the fridge for up to 2 days.

If you love fresh, seasonal salads, you’ll adore this Spring Vegetable Medley—it’s another favorite for sunny days!

Frequently Asked Questions

Can I use frozen peas?

Absolutely! Just thaw them first and pat dry to avoid excess moisture.

What can I substitute for buttermilk?

Mix 1/2 cup milk with 1 tsp lemon juice or vinegar and let it sit for 5 minutes.

How long does this salad last?

It’s best within 1–2 days, as the veggies will soften over time.

Can I make it dairy-free?

Yes! Use coconut yogurt and a dairy-free buttermilk alternative.

What pairs well with this salad?

Try it with Grilled Lemon Herb Chicken or crusty bread.

Can I add other veggies?

Of course! Cucumber, asparagus, or baby spinach would be delicious.

There you have it—a salad that’s as easy to make as it is delightful to eat. Whether you’re serving it at a spring gathering or just treating yourself to a fresh, flavorful lunch, this Buttermilk Spring Pea Salad is sure to bring a little sunshine to your table. For more seasonal inspiration, check out Simply Recipes’ spring collection or our guide to Farmers’ Market Finds. Happy cooking!

Print
clock clock iconcutlery cutlery iconflag flag iconfolder folder iconinstagram instagram iconpinterest pinterest iconfacebook facebook iconprint print iconsquares squares iconheart heart iconheart solid heart solid icon

Buttermilk Spring Pea Salad

  • Author: Chef Jamie Oliver

Description

A refreshing and vibrant salad featuring sweet spring peas, crisp vegetables, and a tangy buttermilk dressing. Perfect for picnics or as a light side dish.


Ingredients

Scale

For the Crust:

  • For the salad:
  • 2 cups fresh spring peas (or frozen, thawed)
  • 1 cup sugar snap peas, thinly sliced
  • 1/2 cup radishes, thinly sliced
  • 1/4 cup red onion, finely diced
  • 1/4 cup fresh mint leaves, chopped
  • For the dressing:
  • 1/2 cup buttermilk
  • 2 tablespoons mayonnaise
  • 1 tablespoon lemon juice
  • 1 teaspoon honey
  • 1/2 teaspoon garlic powder
  • Salt and pepper to taste
  • For garnish:
  • 1/4 cup crumbled feta cheese
  • 2 tablespoons toasted pine nuts

Instructions

1. Prepare the Crust:

  1. 1. In a large bowl, combine spring peas, sugar snap peas, radishes, red onion, and mint.
  2. 2. In a separate small bowl, whisk together buttermilk, mayonnaise, lemon juice, honey, garlic powder, salt, and pepper until smooth.
  3. 3. Pour the dressing over the salad and toss gently to coat all ingredients evenly.
  4. 4. Refrigerate for at least 30 minutes to allow flavors to meld.
  5. 5. Before serving, sprinkle with crumbled feta cheese and toasted pine nuts.
  6. 6. Serve chilled and enjoy!

Notes

For a creamier texture, blend the dressing ingredients in a food processor. Substitute Greek yogurt for mayonnaise if desired. Salad tastes best when served within 24 hours.