Buttermilk Spring Pea Salad


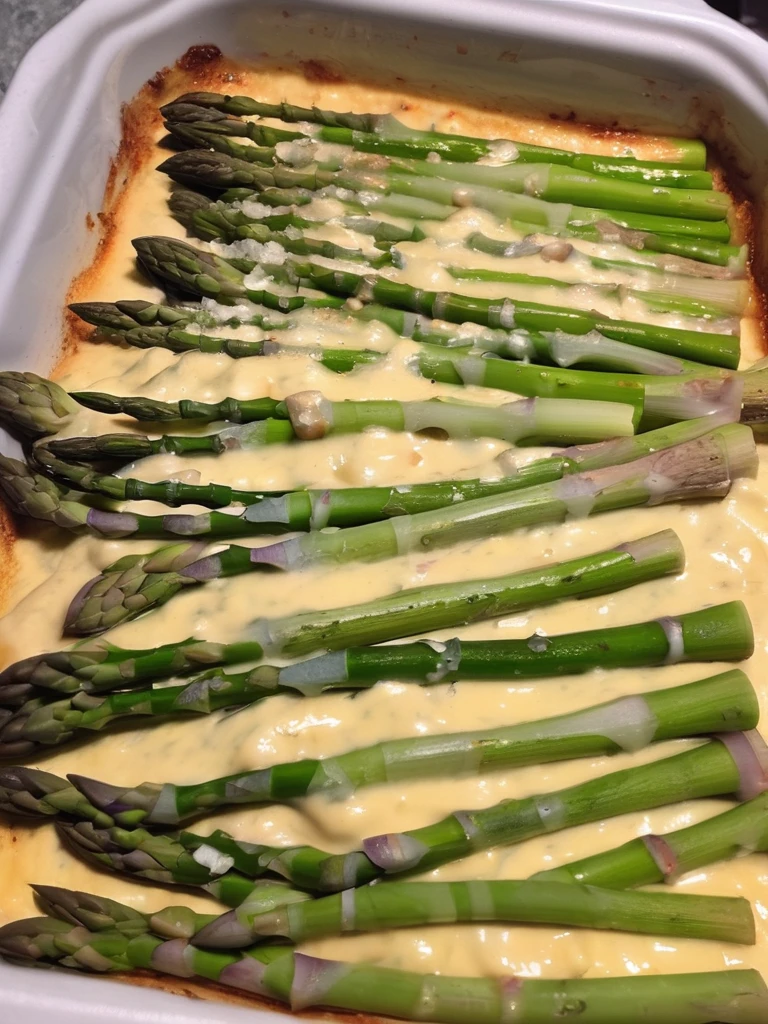
Buttermilk Spring Pea Salad: A Fresh & Creamy Seasonal Delight

There’s something magical about spring produce—it’s bright, crisp, and full of promise. And when tender peas start appearing at the farmers’ market, I know it’s time to whip up my favorite Buttermilk Spring Pea Salad. This dish is like a love letter to the season: sweet peas, fresh herbs, and a tangy buttermilk dressing that ties everything together in the most refreshing way.

I first made this salad for a backyard potluck last year, and let’s just say it disappeared faster than the deviled eggs (and that’s saying something!). The best part? It’s incredibly easy to throw together, whether you’re meal-prepping for the week or need a last-minute side dish that looks like you spent hours on it. Plus, it’s a fantastic way to sneak in extra veggies—even the picky eaters at my table couldn’t resist!

Why You’ll Love This Buttermilk Spring Pea Salad

This salad checks all the boxes for a perfect spring dish:

  • Quick & easy—ready in under 20 minutes.
  • Packed with freshness—peas, mint, and chives bring vibrant flavor.
  • Creamy but light—thanks to the buttermilk dressing.
  • Versatile—serve as a side, on toast, or even as a dip.

How to Make Buttermilk Spring Pea Salad

Ingredients You’ll Need

  • 2 cups fresh or frozen peas (thawed)
  • 1/4 cup buttermilk
  • 2 tbsp Greek yogurt
  • 1 tbsp lemon juice
  • 1 tbsp chopped fresh mint
  • 1 tbsp chopped chives
  • Salt & pepper to taste

Step-by-Step Instructions

  1. In a bowl, whisk together buttermilk, Greek yogurt, and lemon juice until smooth.
  2. Add peas, mint, and chives, gently tossing to coat.
  3. Season with salt and pepper to taste.
  4. Chill for 10 minutes before serving to let flavors meld.

Recipe Tips & Tricks

Want to take this salad to the next level? Here are my favorite tweaks:

  • Add crunch: Toss in some toasted almonds or sunflower seeds.
  • Make it heartier: Stir in crumbled feta or diced avocado.
  • No buttermilk? Mix 1/4 cup milk with 1 tsp vinegar as a substitute.

If you love fresh, seasonal salads, you’ll adore my Spring Vegetable Medley—it’s another quick favorite!

FAQs About Buttermilk Spring Pea Salad

Can I use frozen peas?

Absolutely! Just thaw them first and pat dry to avoid excess moisture.

How long does this salad keep?

It’s best eaten within 2 days—store it in an airtight container in the fridge.

Is there a dairy-free alternative?

Yes! Swap buttermilk for almond milk + lemon juice, and use coconut yogurt.

Can I add protein to make it a meal?

Definitely. Grilled chicken, chickpeas, or hard-boiled eggs work great.

What herbs can I substitute?

Dill or parsley would be delicious if you don’t have mint or chives.

Is this salad kid-friendly?

Surprisingly, yes! The sweetness of peas and creamy dressing wins over little ones.

Spring is all about celebrating simplicity, and this Buttermilk Spring Pea Salad does just that. Whether you’re serving it at a picnic, pairing it with grilled favorites, or just enjoying it straight from the bowl (no judgment here!), it’s a dish that feels as joyful as the season itself. For more fresh ideas, check out Bon Appétit’s spring recipes or my Easy Herb-Forward Dishes for extra inspiration. Happy cooking!


Print
clock clock iconcutlery cutlery iconflag flag iconfolder folder iconinstagram instagram iconpinterest pinterest iconfacebook facebook iconprint print iconsquares squares iconheart heart iconheart solid heart solid icon

Buttermilk Spring Pea Salad

  • Author: Chef Green Thumb

Description

A refreshing and vibrant salad featuring sweet spring peas tossed in a creamy buttermilk dressing, perfect for picnics or light lunches.


Ingredients

Scale

For the Crust:

  • For the salad:
  • 2 cups fresh spring peas (or frozen, thawed)
  • 1 cup sugar snap peas, thinly sliced
  • 1/2 cup radishes, thinly sliced
  • 1/4 cup red onion, finely diced
  • 2 tbsp fresh mint leaves, chopped
  • For the dressing:
  • 1/3 cup buttermilk
  • 2 tbsp mayonnaise
  • 1 tbsp lemon juice
  • 1 tsp honey
  • 1/2 tsp garlic powder
  • 1/4 tsp salt
  • 1/4 tsp black pepper

Instructions

1. Prepare the Crust:

  1. 1. In a large bowl, combine spring peas, sugar snap peas, radishes, red onion, and mint.
  2. 2. In a separate small bowl, whisk together buttermilk, mayonnaise, lemon juice, honey, garlic powder, salt, and pepper until smooth.
  3. 3. Pour dressing over the pea mixture and toss gently to coat all ingredients evenly.
  4. 4. Chill for at least 30 minutes before serving to allow flavors to meld.
  5. 5. Garnish with additional mint leaves if desired and serve cold.

Notes

For extra crunch, add 1/4 cup toasted almonds. Substitute Greek yogurt for mayonnaise if preferred. Dressing thickens when chilled – stir in a teaspoon of water if needed before serving.

Herb Roasted Chicken with Baby Potatoes

Herb Roasted Chicken with Baby Potatoes: A One-Pan Wonder

There’s something magical about a dish that fills your home with the aroma of garlic, rosemary, and golden-brown chicken. This Herb Roasted Chicken with Baby Potatoes is my go-to when I crave comfort without the fuss—whether it’s a hectic Tuesday or a lazy Sunday dinner. The chicken emerges juicy and flavorful, while the potatoes soak up all those herby pan juices, becoming crispy on the outside and melt-in-your-mouth tender inside. It’s the kind of meal that feels like a hug on a plate.

I first stumbled upon this recipe during a chaotic week when my grocery haul consisted of a whole chicken and a bag of baby potatoes (thanks, last-minute shopping!). With a handful of pantry staples—fresh herbs, garlic, and a glug of olive oil—I threw everything onto a sheet pan, crossed my fingers, and let the oven work its magic. The result? A dish so good, my kids asked for seconds (a rare victory!). Now, it’s a staple in our rotation, and I’m thrilled to share it with you.

Why You’ll Love This Herb Roasted Chicken

This recipe is a winner for so many reasons:

  • One-pan ease: Minimal cleanup means more time to relax (or tackle that laundry pile).
  • Versatile flavors: Swap herbs based on what’s in your fridge—thyme, sage, or even lemon zest work beautifully.
  • Crowd-pleaser: Perfect for weeknight dinners or impressing guests without stress.
  • Leftover-friendly: Shred extra chicken for salads, soups, or these easy chicken tacos.

How to Make Herb Roasted Chicken with Baby Potatoes

Ingredients You’ll Need

  • 1 whole chicken (3–4 lbs), patted dry
  • 1.5 lbs baby potatoes, halved
  • 3 tbsp olive oil, divided
  • 4 garlic cloves, minced
  • 2 tbsp fresh rosemary, chopped (or 1 tbsp dried)
  • 1 tbsp fresh thyme leaves
  • 1 tsp salt, plus extra to taste
  • ½ tsp black pepper
  • 1 lemon, quartered (optional)

Step-by-Step Instructions

  1. Prep the chicken: Preheat oven to 425°F (220°C). Rub the chicken with 1 tbsp olive oil, then season inside and out with salt, pepper, garlic, and herbs. Stuff the cavity with lemon quarters if using.
  2. Toss the potatoes: In a bowl, mix potatoes with remaining olive oil, salt, and a pinch of rosemary. Spread them around the chicken on a parchment-lined baking sheet.
  3. Roast to perfection: Bake for 50–60 minutes, basting the chicken halfway, until the skin is crispy and the internal temperature reaches 165°F (74°C). Let rest 10 minutes before carving.

Pro Tips for the Best Roast

Want to elevate this dish? Here’s how:

  • Dry the skin well for maximum crispiness (a paper towel is your friend!).
  • Add veggies: Toss in carrots or Brussels sprouts for extra color and nutrition.
  • Butter boost: Rub softened butter under the skin for extra richness (trust me on this one).

Frequently Asked Questions

Can I use chicken thighs instead? Absolutely! Adjust cooking time to 35–40 minutes.

How do I store leftovers? Keep in an airtight container for up to 3 days. Reheat in the oven to maintain crispiness.

What herbs pair best with roasted chicken? Rosemary, thyme, and sage are classics, but try this herb guide for inspiration.

Can I make this ahead? Prep the chicken and potatoes separately up to a day in advance; assemble before roasting.

Why rest the chicken? Resting lets juices redistribute—skip this step, and you’ll lose moisture when carving.

What to serve with herb roasted chicken? Try a simple green salad or crusty bread to soak up the juices.

Whether you’re cooking for one or feeding a family, this Herb Roasted Chicken with Baby Potatoes is a reminder that the simplest meals often taste the best. It’s a dish that adapts to your mood, your pantry, and your schedule—just like your favorite pair of jeans. So preheat that oven, pour yourself a glass of wine, and let the aroma of herbs and golden chicken work its cozy magic. Happy roasting!

Print
clock clock iconcutlery cutlery iconflag flag iconfolder folder iconinstagram instagram iconpinterest pinterest iconfacebook facebook iconprint print iconsquares squares iconheart heart iconheart solid heart solid icon

Herb Roasted Chicken with Baby Potatoes

  • Author: Chef Maria

Description

A succulent whole chicken roasted with aromatic herbs and tender baby potatoes for a comforting one-pan meal.


Ingredients

Scale

For the Crust:

  • For the Chicken:
  • 1 whole chicken (34 lbs)
  • 2 tbsp olive oil
  • 1 tbsp fresh rosemary, chopped
  • 1 tbsp fresh thyme, chopped
  • 1 tbsp fresh sage, chopped
  • 4 garlic cloves, minced
  • 1 lemon, halved
  • 1 tsp salt
  • 1/2 tsp black pepper
  • For the Potatoes:
  • 1.5 lbs baby potatoes, halved
  • 2 tbsp olive oil
  • 1 tsp garlic powder
  • 1/2 tsp salt
  • 1/4 tsp black pepper
  • For Garnish:
  • Fresh parsley, chopped

Instructions

1. Prepare the Crust:

  1. 1. Preheat oven to 375°F (190°C).
  2. 2. Pat chicken dry and place in a large roasting pan.
  3. 3. Mix herbs, garlic, salt, pepper and 2 tbsp olive oil. Rub mixture under the skin and all over chicken.
  4. 4. Stuff cavity with lemon halves and tie legs together with kitchen twine.
  5. 5. Toss potatoes with remaining olive oil, garlic powder, salt and pepper. Arrange around chicken.
  6. 6. Roast for 1 hour 15 minutes or until internal temperature reaches 165°F (74°C).
  7. 7. Let rest 10 minutes before carving. Garnish with parsley.

Notes

For crispier skin, increase oven temperature to 425°F (220°C) for the last 10 minutes of cooking. Leftovers keep refrigerated for 3 days.

Cheesy Asparagus Casserole

Cheesy Asparagus Casserole: A Creamy, Comforting Side Dish

There’s something magical about a dish that transforms humble ingredients into pure comfort. This Cheesy Asparagus Casserole is exactly that—a cozy, creamy, and utterly irresistible side that’s perfect for holidays, potlucks, or even a simple weeknight dinner. Picture tender asparagus spears smothered in a velvety cheese sauce, topped with a golden, buttery breadcrumb crust. It’s the kind of dish that makes everyone at the table ask for seconds (and maybe even thirds).

As a mom of two picky eaters, I’ve learned that the secret to getting veggies on the table is a generous helping of cheese and a little bit of crunch. This casserole is my go-to when I want something elegant enough for Easter brunch but easy enough for a Tuesday night. Plus, asparagus is packed with nutrients like folate and fiber, so you can feel good about serving it. Whether you’re a seasoned cook or just starting out, this recipe is foolproof and guaranteed to impress.

Why You’ll Love This Cheesy Asparagus Casserole

This dish is a crowd-pleaser for so many reasons. Here’s why it’s a staple in my kitchen:

  • Easy to make: No fancy techniques—just simple, wholesome ingredients.
  • Versatile: Serve it as a side with roasted chicken, ham, or even as a vegetarian main.
  • Meal-prep friendly: Assemble it ahead and bake when ready.
  • Kid-approved: The cheesy goodness wins over even the veggie-averse.

How to Make Cheesy Asparagus Casserole

Ingredients You’ll Need

  • 1 lb fresh asparagus, trimmed
  • 2 tbsp butter
  • 2 tbsp all-purpose flour
  • 1 ½ cups milk
  • 1 cup shredded cheddar cheese
  • ½ cup grated Parmesan
  • ½ cup breadcrumbs
  • 1 tsp garlic powder
  • Salt and pepper to taste

Step-by-Step Instructions

  1. Prep the asparagus: Blanch the asparagus in boiling water for 2 minutes, then transfer to an ice bath to stop cooking. Drain and arrange in a baking dish.
  2. Make the cheese sauce: Melt butter in a saucepan, whisk in flour, then slowly add milk until thickened. Stir in cheddar and Parmesan until smooth.
  3. Assemble: Pour the sauce over the asparagus. Top with breadcrumbs mixed with melted butter.
  4. Bake: At 375°F for 20–25 minutes until bubbly and golden.

Tips for the Best Casserole

Want to take this dish to the next level? Try these pro tips:

  • Use fresh asparagus: Look for bright green, firm spears with tight tips.
  • Customize the cheese: Swap cheddar for Gruyère or Monterey Jack for a different flavor.
  • Add crunch: Mix crushed crackers or panko with the breadcrumbs for extra texture.

For more cheesy inspiration, check out this guide to cheesy casseroles from Serious Eats.

Pairing Suggestions

This casserole pairs beautifully with garlic herb roasted chicken or a simple spring salad. For a full holiday spread, try it alongside creamy mashed potatoes.

Frequently Asked Questions

Can I use frozen asparagus? Yes, but thaw and pat dry first to avoid excess moisture.

How do I store leftovers? Cover and refrigerate for up to 3 days. Reheat in the oven for best texture.

Can I make this gluten-free? Absolutely! Use gluten-free flour and breadcrumbs.

What’s the best cheese for asparagus casserole? Sharp cheddar adds great flavor, but Gruyère or Swiss work too.

Can I add protein? Try mixing in cooked bacon or diced ham for a heartier dish.

How do I prevent a soggy casserole? Don’t overcook the asparagus before baking, and ensure your sauce is thick.

There you have it—a dish that’s as comforting as it is delicious. Whether you’re serving it for a special occasion or just because, this Cheesy Asparagus Casserole is sure to become a family favorite. The next time you’re staring at a bunch of asparagus wondering what to do, remember: cheese makes everything better. Happy cooking!

Print
clock clock iconcutlery cutlery iconflag flag iconfolder folder iconinstagram instagram iconpinterest pinterest iconfacebook facebook iconprint print iconsquares squares iconheart heart iconheart solid heart solid icon

Cheesy Asparagus Casserole

  • Author: The Casserole Queen

Description

A creamy, cheesy asparagus casserole with a crispy breadcrumb topping that makes the perfect side dish for holidays or weeknight dinners. Fresh asparagus is smothered in a rich cheese sauce and baked to golden perfection.


Ingredients

Scale

For the Crust:

  • For the casserole base:
  • 2 lbs fresh asparagus, trimmed and cut into 2-inch pieces
  • 3 tbsp unsalted butter
  • 3 tbsp all-purpose flour
  • 1 1/2 cups whole milk
  • 1/2 cup heavy cream
  • 1 tsp garlic powder
  • 1 tsp onion powder
  • 1/2 tsp salt
  • 1/4 tsp black pepper
  • For the cheese mixture:
  • 1 1/2 cups shredded sharp cheddar cheese
  • 1/2 cup grated parmesan cheese
  • For the topping:
  • 1 cup panko breadcrumbs
  • 2 tbsp melted butter
  • 1/4 tsp paprika
  • 2 tbsp chopped fresh parsley

Instructions

1. Prepare the Crust:

  1. 1. Preheat oven to 375°F (190°C). Grease a 9×13 inch baking dish.
  2. 2. Blanch asparagus: Bring a large pot of salted water to boil. Add asparagus and cook for 2 minutes. Drain and immediately plunge into ice water to stop cooking. Drain well and pat dry.
  3. 3. Make the sauce: In a saucepan over medium heat, melt 3 tbsp butter. Whisk in flour and cook for 1 minute. Gradually whisk in milk and cream until smooth.
  4. 4. Cook sauce: Continue whisking until thickened (about 5 minutes). Stir in garlic powder, onion powder, salt, and pepper.
  5. 5. Add cheeses: Remove from heat and stir in cheddar and parmesan until melted and smooth.
  6. 6. Assemble: Arrange blanched asparagus in prepared dish. Pour cheese sauce evenly over top.
  7. 7. Make topping: Combine panko, melted butter, and paprika. Sprinkle over casserole.
  8. 8. Bake: 25-30 minutes until bubbly and topping is golden. Let rest 5 minutes before serving. Garnish with fresh parsley.

Notes

For a lighter version, substitute half-and-half for the heavy cream. Can be assembled 1 day ahead – cover and refrigerate, then add topping just before baking. Leftovers reheat well in a 350°F oven for 15 minutes.

Creamy Lemon Chicken Pasta

Creamy Lemon Chicken Pasta: A Bright & Comforting Weeknight Dinner

There’s something magical about the combination of creamy pasta and zesty lemon—it’s like sunshine on a plate. If you’ve ever needed a dinner that feels both indulgent and refreshing (without requiring hours in the kitchen), this Creamy Lemon Chicken Pasta is your answer. With tender pan-seared chicken, al dente pasta, and a silky sauce that balances richness and brightness, it’s the kind of meal that makes weeknights feel special.

I first stumbled upon this recipe during a particularly chaotic week when my fridge held nothing but a lone lemon, some cream, and a sad-looking chicken breast. Desperation led to experimentation, and—voilà!—a new family favorite was born. Now, it’s my go-to when I need a quick win or want to impress last-minute guests. Bonus? It’s kid-approved (even my picky eater licks the plate clean).

Why You’ll Love This Creamy Lemon Chicken Pasta

This dish isn’t just delicious—it’s also:

  • Quick & easy: Ready in 30 minutes flat.
  • Versatile: Swap chicken for shrimp or mushrooms if you’re feeling adventurous.
  • Perfect for leftovers: Tastes even better the next day (if it lasts that long).
  • Bright yet comforting: The lemon cuts through the richness for a balanced flavor.

How to Make Creamy Lemon Chicken Pasta

Ingredients You’ll Need

  • 8 oz pasta (linguine or fettuccine work best)
  • 2 boneless, skinless chicken breasts, thinly sliced
  • 3 cloves garlic, minced
  • 1 cup heavy cream
  • Zest and juice of 1 large lemon
  • ½ cup grated Parmesan cheese
  • 2 tbsp olive oil
  • Salt, pepper, and red pepper flakes to taste
  • Fresh parsley for garnish

Step-by-Step Instructions

  1. Cook the pasta: Boil pasta in salted water until al dente. Reserve ½ cup pasta water before draining.
  2. Sear the chicken: Heat olive oil in a large skillet over medium-high heat. Season chicken with salt and pepper, then cook until golden (5–6 minutes). Set aside.
  3. Make the sauce: In the same skillet, sauté garlic until fragrant (30 seconds). Add cream, lemon zest, and juice, stirring to combine. Simmer for 2–3 minutes until slightly thickened.
  4. Combine everything: Toss in cooked pasta, chicken, and Parmesan. Add pasta water as needed to loosen the sauce. Garnish with parsley and serve immediately.

Tips for the Best Creamy Lemon Chicken Pasta

  • Don’t skimp on the lemon zest: It packs a flavor punch! Use a microplane for fine, fragrant zest.
  • Use room-temperature cream: This prevents curdling when adding lemon juice.
  • Want extra veggies? Toss in spinach or sun-dried tomatoes for color and nutrition.

For more easy pasta inspiration, try my Garlic Butter Shrimp Pasta or this Creamy Mushroom Pasta—both are weeknight lifesavers!

Pairing Suggestions

This dish pairs beautifully with a crisp white wine like Sauvignon Blanc or Pinot Grigio. For a non-alcoholic option, try sparkling water with a squeeze of lemon. Serve alongside a simple arugula salad to round out the meal.

Frequently Asked Questions

Can I use milk instead of heavy cream?
Heavy cream gives the sauce its luxurious texture, but half-and-half will work in a pinch (avoid skim milk—it won’t thicken properly).

How do I store leftovers?
Store in an airtight container in the fridge for up to 3 days. Reheat gently with a splash of cream or water to revive the sauce.

Can I make this gluten-free?
Absolutely! Use gluten-free pasta and double-check that your Parmesan is gluten-free (some brands add anti-caking agents).

What’s the best pasta shape for this recipe?
Long, flat noodles like linguine or fettuccine hold the sauce well, but penne or rigatoni also work.

Can I freeze creamy lemon chicken pasta?
Freezing isn’t recommended—the dairy-based sauce may separate when thawed.

How can I add more protein?
Stir in white beans or crispy pancetta for extra heft. For a vegetarian twist, try Lemon Ricotta Pasta.

Whether you’re craving comfort food with a zesty twist or need a dinner that feels fancy without the fuss, this Creamy Lemon Chicken Pasta delivers. It’s the kind of recipe that’ll earn a permanent spot in your rotation—simple enough for busy nights but special enough for date night. And if you’re anything like me, you’ll find yourself making it again and again, tweaking it with whatever’s in your fridge (because some of the best meals start with a little improvisation).

Print
clock clock iconcutlery cutlery iconflag flag iconfolder folder iconinstagram instagram iconpinterest pinterest iconfacebook facebook iconprint print iconsquares squares iconheart heart iconheart solid heart solid icon

Creamy Lemon Chicken Pasta

  • Author: Chef Maria Bennett

Description

A bright and comforting pasta dish featuring tender chicken in a rich, lemony cream sauce with garlic and parmesan. Perfect for weeknight dinners yet elegant enough for guests.


Ingredients

Scale

For the Crust:

  • For the chicken:
  • 2 boneless, skinless chicken breasts
  • 1/2 teaspoon salt
  • 1/4 teaspoon black pepper
  • 1 tablespoon olive oil
  • For the sauce:
  • 3 cloves garlic, minced
  • 1 cup heavy cream
  • 1/2 cup chicken broth
  • Zest of 1 lemon
  • 2 tablespoons lemon juice
  • 1/2 cup grated parmesan cheese
  • For the pasta:
  • 8 oz fettuccine or linguine
  • 2 tablespoons chopped fresh parsley
  • 1/4 teaspoon red pepper flakes (optional)

Instructions

1. Prepare the Crust:

  1. 1. Cook pasta according to package instructions. Reserve 1/2 cup pasta water before draining.
  2. 2. Season chicken breasts with salt and pepper. Heat olive oil in a large skillet over medium-high heat. Cook chicken for 5-6 minutes per side until golden and cooked through. Remove and let rest, then slice.
  3. 3. In the same skillet, sauté garlic for 30 seconds until fragrant. Pour in chicken broth to deglaze, scraping up browned bits.
  4. 4. Reduce heat to medium. Stir in heavy cream, lemon zest, and lemon juice. Simmer for 3-4 minutes until slightly thickened.
  5. 5. Whisk in parmesan cheese until melted. If sauce is too thick, add reserved pasta water 1 tablespoon at a time.
  6. 6. Add cooked pasta and chicken to the sauce, tossing to coat. Garnish with parsley and red pepper flakes before serving.

Notes

For extra flavor, marinate chicken in lemon juice for 30 minutes before cooking. Sauce thickens upon standing – add more broth if needed for leftovers. Substitute half-and-half for lighter (but less creamy) results.

Creamy Lemon Chicken Pasta

Creamy Lemon Chicken Pasta is the perfect weeknight dinner when you crave something comforting yet fresh. This dish combines tender chicken, a silky cream sauce, and a bright pop of lemon for a meal that feels both indulgent and light. What makes this Creamy Lemon Chicken Pasta so special is how effortlessly it comes together—just 30 minutes from stove to table. The tangy lemon balances the richness of the sauce, while the juicy chicken adds heartiness. It’s a versatile recipe, too: swap in shrimp or toss in your favorite veggies for an easy twist. Whether you’re cooking for picky eaters or meal prepping for the week, this pasta delivers flavor without the fuss. Let’s get started!
### **Ingredients You’ll Need**
– **8 oz pasta** (fettuccine or penne work best)
– **2 chicken breasts**, thinly sliced
– **3 garlic cloves**, minced
– **1 cup heavy cream** (or half-and-half for a lighter option)
– **½ cup grated Parmesan** (freshly grated melts best)
– **Zest & juice of 1 lemon**
– **2 tbsp butter**
– **Salt, pepper, & red pepper flakes** to taste
– **Fresh parsley** for garnish
### **Step-by-Step Instructions**
1. **Cook the pasta** in salted water until al dente. Reserve ½ cup pasta water before draining.
2. **Sear the chicken** in butter until golden. Season with salt and pepper.
3. **Make the sauce** by adding garlic, lemon zest, and red pepper flakes. Stir in cream and Parmesan until smooth.
4. **Combine everything** – Toss in pasta, lemon juice, and a splash of pasta water to loosen the sauce.
5. **Garnish & serve** with fresh parsley and extra Parmesan.

## **Pro Tips for the Best Lemon Chicken Pasta**
– **Use freshly grated Parmesan** – It melts better than pre-shredded.
– **Don’t skip the pasta water** – Helps the sauce cling to noodles.
– **Add veggies** – Spinach or mushrooms pair well.
– **Extra richness?** Swap half the cream with [garlic butter sauce](https://exorecipes.com/creamy-garlic-butter-salmon).

## **Frequently Asked Questions (FAQs)**
### **Can I use milk instead of heavy cream?**
Yes, but the sauce will be thinner. For best results, use half-and-half or [evaporated milk](https://www.bonappetit.com/story/milk-substitutes-in-cooking).
### **How do I store leftovers?**
Keep in an airtight container for up to **3 days**. Reheat with a splash of milk to refresh the sauce.
### **Can I make this gluten-free?**
Absolutely! Use gluten-free pasta and check that your Parmesan is GF.
### **What’s the best pasta shape?**
Long noodles (fettuccine) or short shapes (penne) work best. Avoid tiny pasta—it won’t hold the sauce well.
### **Can I freeze creamy lemon chicken pasta?**
Not recommended—the dairy may separate. Try [freezer-friendly meals](https://exorecipes.com/freezer-friendly-meals) instead.
### **How can I make it spicier?**
Add extra red pepper flakes or a dash of hot sauce with the garlic.

There you have it—a delicious *Creamy Lemon Chicken Pasta* that brings restaurant flavor to your kitchen without the fuss. Perfect for busy weeknights, this dish comes together in just **30 minutes** and pairs beautifully with a simple salad or crusty bread. Bright, comforting, and totally doable, it’s a meal you’ll want to make again and again. Now go grab that lemon and start cooking—dinner’s going to be amazing!

Print
clock clock iconcutlery cutlery iconflag flag iconfolder folder iconinstagram instagram iconpinterest pinterest iconfacebook facebook iconprint print iconsquares squares iconheart heart iconheart solid heart solid icon

Creamy Lemon Chicken Pasta

  • Author: Chef Maria Bennett

Description

A vibrant and comforting pasta dish featuring tender chicken in a rich, lemony cream sauce with garlic and parmesan. Perfect for weeknight dinners yet elegant enough for guests.


Ingredients

Scale

For the Crust:

  • For the chicken:
  • 2 boneless, skinless chicken breasts (about 1 lb)
  • 1 tsp salt
  • 1/2 tsp black pepper
  • 1 tsp garlic powder
  • 1 tbsp olive oil
  • For the sauce:
  • 3 cloves garlic, minced
  • 1 cup heavy cream
  • 1/2 cup chicken broth
  • Zest of 1 lemon
  • 2 tbsp lemon juice
  • 1/2 cup grated parmesan cheese
  • 1/4 tsp red pepper flakes (optional)
  • For the pasta:
  • 8 oz fettuccine or linguine
  • 2 tbsp chopped fresh parsley
  • Extra parmesan for serving

Instructions

1. Prepare the Crust:

  1. 1. Cook pasta al dente according to package instructions. Reserve 1/2 cup pasta water before draining.
  2. 2. Season chicken with salt, pepper, and garlic powder. Heat olive oil in a large skillet over medium-high heat. Cook chicken for 5-6 minutes per side until golden and cooked through (165°F internal temp). Remove and let rest, then slice.
  3. 3. In the same skillet, sauté garlic for 30 seconds until fragrant. Add cream, chicken broth, lemon zest, lemon juice, and red pepper flakes. Simmer for 3-4 minutes until slightly thickened.
  4. 4. Stir in parmesan cheese until melted. Add sliced chicken and cooked pasta, tossing to coat. If needed, add reserved pasta water 1 tbsp at a time to adjust consistency.
  5. 5. Garnish with parsley and extra parmesan. Serve immediately.

Notes

For a lighter version, substitute half-and-half for heavy cream. Leftovers keep refrigerated for up to 3 days (sauce will thicken when cold – reheat with a splash of milk).