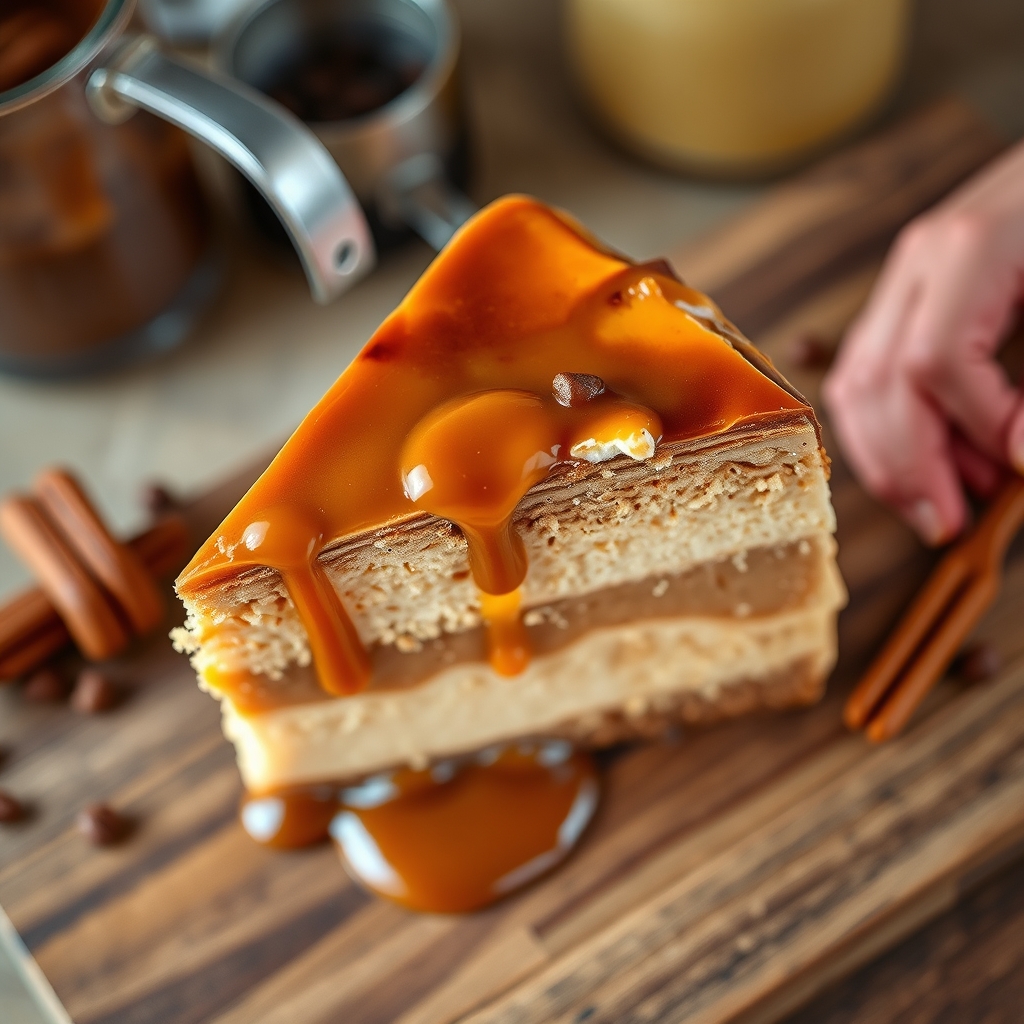
Caramel Iced Coffee

Caramel Iced Coffee

Why You’ll Love This Recipe

When the sun starts to peek through your curtains a bit earlier, and the days stretch out lazily into warm evenings, there’s nothing quite like the refreshing chill of a glass of Caramel Iced Coffee. Here’s why this recipe is bound to become your favorite:

1. Perfect Blend of Sweet and Rich: This caramel iced coffee boasts the ideal balance between the robust flavor of freshly brewed coffee and the sweet, buttery notes of caramel. It’s a delightful treat for any time of day.

2. Simple Ingredients, Big Flavor: With just a handful of simple ingredients, you can create a coffee shop-quality beverage right in your kitchen. It’s both economical and satisfying to make.

3. Customizable to Your Taste: Whether you prefer it extra sweet, extra strong, or somewhere in between, this recipe is incredibly easy to adjust to your personal preference.

4. Quick and Easy Preparation: In just a few minutes, you can whisk together this delicious iced coffee, making it perfect for busy mornings or a quick afternoon pick-me-up.

5. A Refreshing Summer Staple: As the temperature rises, this iced coffee is a cooling oasis that refreshes and energizes, making it an essential addition to your summer routine.

Ingredients Breakdown

Let’s take a closer look at the key ingredients that make this caramel iced coffee so delightful:

– Coffee: The foundation of any great iced coffee is the brew itself. Opt for a medium to dark roast for a robust flavor that stands up well to the sweetness of caramel. Cold brew works wonderfully here, but a strong, cooled espresso or drip coffee can also do the trick.

– Caramel Sauce: This is where the magic happens. The caramel sauce adds a rich, buttery sweetness to the coffee, creating a luscious, dessert-like drink. Homemade caramel sauce is ideal, but a good quality store-bought option will work as well.

– Milk or Cream: To add creaminess and balance to your iced coffee, a splash of milk or cream is essential. Whether you choose whole milk, half-and-half, or a dairy-free alternative like almond or oat milk, it contributes to the smooth texture.

– Ice: It wouldn’t be an iced coffee without plenty of ice cubes. They cool the drink rapidly, making it refreshing and enjoyable.

– Vanilla Extract (Optional): A hint of vanilla extract can elevate the flavor profile, adding a subtle layer of complexity to your drink.

How to Make Caramel Iced Coffee

Creating the perfect caramel iced coffee at home is easier than you might think. Follow these steps for a flawless drink every time:

1. Brew the Coffee: Start by brewing a strong pot of coffee. If you’re using cold brew, prepare it the night before. Allow the coffee to cool to room temperature, or for a faster option, chill it in the refrigerator.

2. Prepare the Glass: Drizzle caramel sauce around the inside of your glass. This not only adds flavor but also creates an enticing visual appeal.

3. Add Ice: Fill the glass with ice cubes. The more ice, the more refreshing your drink will be.

4. Pour the Coffee: Once the coffee is cooled, pour it over the ice, filling the glass about three-quarters full.

5. Mix in Caramel Sauce: Add 1-2 tablespoons of caramel sauce to the coffee, depending on your sweetness preference. Stir well to combine.

6. Add Milk or Cream: Top off your drink with milk or cream, pouring slowly to create a beautiful swirl effect. Stir gently.

7. Garnish and Serve: If desired, add a dollop of whipped cream and a drizzle of caramel sauce on top for an indulgent touch. Serve immediately and enjoy.

Pro Tips for the Best Results

To ensure your caramel iced coffee is absolutely perfect, consider these expert tips:

– Use Cold Brew: For a smoother, less acidic taste, opt for cold brew coffee. It pairs exceptionally well with the sweetness of caramel.

– Homemade Caramel Sauce: If you have the time, making your own caramel sauce can significantly enhance the flavor of your drink. Plus, you can control the sweetness level.

– Chill the Glass: For an extra frosty drink, chill your glass in the freezer for a few minutes before preparing the coffee.

– Adjust Sweetness: Start with a small amount of caramel sauce and add more to taste. It’s easier to add sweetness than to take it away.

– Consider Coffee Ice Cubes: To prevent your drink from becoming diluted, make ice cubes out of coffee. This keeps the flavor strong as the ice melts.

Variations and Substitutions

One of the best things about caramel iced coffee is its versatility. Here are some variations to try:

– Dairy-Free Option: Replace milk or cream with almond milk, coconut milk, or oat milk for a dairy-free version.

– Mocha Twist: Add a tablespoon of chocolate syrup along with the caramel for a mocha caramel iced coffee.

– Spiced Up: Sprinkle a pinch of cinnamon or nutmeg into your coffee for a warm, spiced flavor.

– Salted Caramel: Add a tiny pinch of sea salt to your caramel sauce for a salted caramel variation that’s both sweet and savory.

– Decaf Delight: For an evening treat, use decaffeinated coffee to enjoy the taste without the caffeine buzz.

What to Serve With It

Caramel iced coffee is a delightful treat on its own, but pairing it with the right accompaniment can elevate your experience:

– Pastries: Enjoy your iced coffee with a buttery croissant or a flaky Danish for a classic coffee shop vibe.

– Cookies: Chocolate chip cookies or buttery shortbread are excellent choices that complement the sweetness of the caramel.

– Fruit: Fresh berries or a fruit salad provide a refreshing contrast to the rich flavors of the coffee.

– Breakfast Sandwiches: For a more substantial pairing, try a breakfast sandwich with eggs, cheese, and bacon or avocado.

How to Store and Reheat

While caramel iced coffee is best enjoyed fresh, you can store leftovers for later enjoyment:

– Refrigeration: Store any leftover coffee in a sealed container in the refrigerator for up to 2 days. Keep the milk and caramel sauce separate until you’re ready to serve.

– Freezing: For longer storage, freeze coffee in an ice cube tray. Use these cubes for future iced coffee to prevent dilution.

– Reheating: If you prefer your coffee warm, heat the stored coffee gently on the stove or in a microwave before adding ice and caramel.

Frequently Asked Questions (FAQs)

Can I use instant coffee for this recipe?
Yes, you can use instant coffee if you’re in a pinch. Just dissolve the granules in hot water and let it cool before proceeding with the recipe.

How can I make this drink less sweet?
To reduce the sweetness, simply use less caramel sauce and opt for unsweetened milk or cream.

Is it possible to use flavored coffee?
Absolutely! Flavored coffee can add an extra dimension to your iced coffee. Vanilla or hazelnut flavors work particularly well with caramel.

What’s the best way to make homemade caramel sauce?
For homemade caramel sauce, combine sugar, butter, and cream in a saucepan over medium heat, stirring constantly until smooth and golden.

Can I prepare this in advance for a party?
Yes, you can brew the coffee and prepare the caramel sauce ahead of time. Store them separately and assemble just before serving for the best taste.

Final Thoughts

Caramel iced coffee is more than just a drink; it’s an experience. Whether you’re sipping it on a sunny morning or serving it as a special treat for guests, this delightful beverage is sure to impress. Its rich flavors and refreshing chill make it a staple for coffee lovers everywhere. So go ahead, gather your ingredients, and indulge in a homemade coffee creation that’s bound to become a favorite. Why not make it a tradition to enjoy this delicious treat on lazy weekend afternoons or to kickstart your weekday mornings with a little extra sweetness? Enjoy every sip!

Print
clock clock iconcutlery cutlery iconflag flag iconfolder folder iconinstagram instagram iconpinterest pinterest iconfacebook facebook iconprint print iconsquares squares iconheart heart iconheart solid heart solid icon

Caramel Iced Coffee

  • Author: Coffee Enthusiast

Description

A refreshing and sweet caramel iced coffee perfect for a warm day.


Ingredients

Scale

For the Crust:

  • For the Coffee:
  • 1 cup strong brewed coffee, cooled
  • 1/2 cup milk of choice
  • 2 tablespoons caramel sauce
  • Ice cubes
  • For the Topping:
  • Whipped cream
  • Extra caramel sauce for drizzling

Instructions

1. Prepare the Crust:


    Notes

    For a stronger caramel flavor, add more caramel sauce to taste. For a dairy-free version, use almond or oat milk.

    Oatmeal Applesauce Muffins

    Oatmeal Applesauce Muffins

    There’s something undeniably comforting about the aroma of freshly baked muffins wafting through the kitchen. These Oatmeal Applesauce Muffins are a perfect blend of wholesome ingredients, warm spices, and just the right amount of sweetness. Whether you’re looking for a quick breakfast on the go, a lunchbox treat, or an afternoon snack with a cup of tea, this recipe delivers. The combination of hearty oats and naturally sweet applesauce creates a moist, tender crumb that’s impossible to resist. Let’s dive into why these muffins deserve a spot in your baking rotation.

    Why You’ll Love This Recipe

    These Oatmeal Applesauce Muffins are more than just a tasty treat—they’re a versatile, nutritious, and downright delicious addition to your baking repertoire. Here’s why:

    • Wholesome and Nutritious: Packed with fiber-rich oats and naturally sweetened with applesauce, these muffins are a healthier alternative to sugar-laden bakery versions.
    • Perfect Texture: The applesauce keeps them incredibly moist, while the oats add a satisfying chewiness.
    • Easy to Make: No fancy equipment or complicated steps—just simple ingredients mixed together in one bowl.
    • Kid-Friendly: These muffins are a great way to sneak in extra nutrients for picky eaters without sacrificing flavor.
    • Meal-Prep Friendly: Bake a batch ahead of time for quick breakfasts or snacks throughout the week.

    Ingredients Breakdown

    Understanding the role of each ingredient helps you appreciate how they come together to create the perfect muffin. Here’s what you’ll need:

    • Rolled Oats: The star of the show, oats provide structure, fiber, and a nutty flavor. They also help keep the muffins moist.
    • Applesauce: Acts as a natural sweetener and fat substitute, ensuring a tender crumb while adding subtle apple flavor.
    • Whole Wheat Flour: Adds depth and nutrition, but all-purpose flour works just as well if you prefer a lighter texture.
    • Brown Sugar: Enhances sweetness and moisture with its molasses notes.
    • Eggs: Binds the ingredients together and contributes to the rise.
    • Baking Powder & Baking Soda: Essential leavening agents for a fluffy texture.
    • Cinnamon & Nutmeg: Warm spices that complement the applesauce beautifully.
    • Milk or Buttermilk: Adds moisture and a slight tang, balancing the sweetness.
    • Vanilla Extract: Elevates the overall flavor profile.

    How to Make Oatmeal Applesauce Muffins

    Follow these simple steps for perfectly baked muffins every time:

    1. Preheat and Prepare: Start by preheating your oven to 375°F (190°C) and lining a muffin tin with paper liners or greasing the cups lightly.
    2. Mix Dry Ingredients: In a large bowl, whisk together the oats, flour, brown sugar, baking powder, baking soda, cinnamon, nutmeg, and a pinch of salt.
    3. Combine Wet Ingredients: In another bowl, stir the applesauce, egg, milk (or buttermilk), and vanilla until smooth.
    4. Fold Together: Pour the wet mixture into the dry ingredients and gently fold until just combined. Overmixing can lead to dense muffins.
    5. Fill Muffin Cups: Divide the batter evenly among the muffin cups, filling each about two-thirds full.
    6. Bake: Place in the oven and bake for 18-22 minutes, or until a toothpick inserted in the center comes out clean.
    7. Cool: Let the muffins cool in the pan for 5 minutes before transferring to a wire rack.

    Tip: For extra texture, sprinkle a few oats on top before baking.

    Pro Tips for the Best Results

    Take your Oatmeal Applesauce Muffins to the next level with these expert tricks:

    • Use Room Temperature Ingredients: Cold eggs or milk can cause the batter to seize up. Let them sit out for 20 minutes before mixing.
    • Don’t Overmix: Stir until just combined—lumps are okay! Overworking the batter leads to tough muffins.
    • Soak the Oats: For extra tenderness, soak the oats in the milk for 10 minutes before mixing.
    • Add Mix-Ins: Fold in raisins, chopped nuts, or shredded apple for added texture and flavor.
    • Check Early: Ovens vary, so start checking for doneness at the 16-minute mark.

    Variations and Substitutions

    This recipe is wonderfully adaptable. Here are some ways to customize it:

    • Gluten-Free: Swap the whole wheat flour for a gluten-free blend and ensure your oats are certified gluten-free.
    • Dairy-Free: Use almond milk or coconut milk instead of regular milk.
    • Vegan: Replace the egg with a flax egg (1 tbsp ground flaxseed + 3 tbsp water).
    • Lower Sugar: Reduce the brown sugar by half or use a sugar substitute like maple syrup.
    • Flavor Twists: Add a dash of ginger, cloves, or cardamom for a spiced variation.

    What to Serve With It

    These muffins are delightful on their own, but here are some pairing ideas:

    • Breakfast Spread: Serve with Greek yogurt and fresh berries for a balanced meal.
    • Afternoon Tea: Enjoy with a hot cup of chai or spiced apple cider.
    • Dessert Option: Warm slightly and drizzle with caramel sauce or honey.

    How to Store and Reheat

    Keep your muffins fresh with these storage tips:

    • Room Temperature: Store in an airtight container for up to 3 days.
    • Refrigerate: Extend freshness by refrigerating for up to a week.
    • Freeze: Wrap individually in plastic wrap and freeze for up to 3 months. Thaw at room temperature or reheat in the microwave for 20 seconds.
    • Reheating: Warm in a 300°F oven for 5-10 minutes to restore freshness.

    Frequently Asked Questions (FAQs)

    Can I use quick oats instead of rolled oats?
    Yes, but the texture will be slightly softer. Rolled oats provide a heartier bite.

    Can I substitute the applesauce with something else?
    Mashed banana or pumpkin puree works well, though the flavor will change slightly.

    Why did my muffins turn out dry?
    Overbaking or overmixing the batter can cause dryness. Stick to the recommended bake time and mix gently.

    Can I make these muffins in advance?
    Absolutely! They freeze beautifully—just thaw and enjoy.

    Can I make mini muffins instead?
    Yes, reduce the baking time to 10-12 minutes for mini muffins.

    Final Thoughts

    Oatmeal Applesauce Muffins are a testament to how simple ingredients can create something truly special. Whether you’re baking them for a cozy weekend breakfast or stocking the freezer for busy mornings, these muffins are sure to become a household favorite. The warm spices, tender crumb, and subtle sweetness make them irresistible. So, preheat that oven, gather your ingredients, and let the comforting aroma fill your kitchen. Happy baking!

    Print
    clock clock iconcutlery cutlery iconflag flag iconfolder folder iconinstagram instagram iconpinterest pinterest iconfacebook facebook iconprint print iconsquares squares iconheart heart iconheart solid heart solid icon

    Oatmeal Applesauce Muffins

    • Author: Baking Enthusiast

    Description

    These wholesome oatmeal applesauce muffins are moist, lightly sweetened, and perfect for breakfast or a healthy snack. Made with whole grain oats and unsweetened applesauce, they’re packed with fiber and natural sweetness.


    Ingredients

    Scale

    For the Crust:

    • For dry ingredients:
    • 1 1/2 cups rolled oats
    • 1 cup whole wheat flour
    • 1/2 cup brown sugar
    • 1 tsp baking powder
    • 1/2 tsp baking soda
    • 1 tsp cinnamon
    • 1/4 tsp nutmeg
    • 1/4 tsp salt
    • For wet ingredients:
    • 1 cup unsweetened applesauce
    • 1/2 cup milk (dairy or plant-based)
    • 1/4 cup melted coconut oil
    • 1 large egg
    • 1 tsp vanilla extract
    • For topping (optional):
    • 2 tbsp rolled oats
    • 1 tbsp brown sugar
    • 1/4 tsp cinnamon

    Instructions

    1. Prepare the Crust:

    1. 1. Preheat oven to 375°F (190°C) and line a 12-cup muffin tin with liners or grease well.
    2. 2. In a large bowl, mix all dry ingredients (oats through salt).
    3. 3. In another bowl, whisk together all wet ingredients (applesauce through vanilla).
    4. 4. Pour wet ingredients into dry ingredients and stir until just combined (do not overmix).
    5. 5. Divide batter evenly among muffin cups, filling each about 3/4 full.
    6. 6. Mix topping ingredients and sprinkle evenly over muffin batter.
    7. 7. Bake for 18-22 minutes until tops spring back when lightly pressed.
    8. 8. Cool in pan for 5 minutes, then transfer to wire rack to cool completely.

    Notes

    For vegan version: Use flax egg (1 tbsp ground flax + 3 tbsp water) and plant-based milk. Muffins freeze well for up to 3 months. If using sweetened applesauce, reduce brown sugar to 1/4 cup.

    Oatmeal Muffins – The Best Easy Recipe!

    Oatmeal Muffins – The Best Easy Recipe!

    There’s something undeniably comforting about a warm, freshly baked oatmeal muffin. Whether you’re looking for a quick breakfast on the go, a wholesome snack, or a simple treat to pair with your afternoon tea, these oatmeal muffins deliver on every level. This recipe is foolproof, packed with wholesome ingredients, and comes together in just minutes. Plus, the aroma of cinnamon and oats wafting through your kitchen is reason enough to give them a try.

    Why You’ll Love This Recipe

    If you’re still on the fence about making these oatmeal muffins, let me share a few reasons why they’re an absolute must-try:

    • Quick and Easy – No fancy techniques or complicated steps. Just mix, pour, and bake for a hassle-free baking experience.
    • Healthy and Satisfying – Made with oats, whole wheat flour, and minimal sugar, these muffins are hearty enough to keep you full without the guilt.
    • Perfect for Meal Prep – Bake a batch on Sunday, and you’ll have breakfast ready for the entire week.
    • Kid-Friendly – Soft, slightly sweet, and packed with texture, these muffins are a hit with both kids and adults.
    • Endlessly Customizable – Add nuts, fruit, or chocolate chips to make them your own.

    Ingredients Breakdown

    Every ingredient in these oatmeal muffins plays a crucial role in creating the perfect texture and flavor. Here’s what you’ll need:

    • Rolled Oats – The star of the show, oats add a chewy texture and nutty flavor while keeping the muffins moist.
    • Whole Wheat Flour – Adds fiber and a slightly denser crumb compared to all-purpose flour, making these muffins more filling.
    • Greek Yogurt – Keeps the muffins tender and adds a slight tang while boosting protein.
    • Honey or Maple Syrup – Natural sweeteners that enhance flavor without refined sugar.
    • Eggs – Bind everything together and help the muffins rise.
    • Baking Powder & Baking Soda – Essential for that perfect lift and fluffy texture.
    • Cinnamon & Vanilla Extract – Warm spices that make these muffins smell and taste irresistible.

    How to Make Oatmeal Muffins – The Best Easy Recipe!

    Ready to bake? Follow these simple steps for perfect oatmeal muffins every time.

    1. Preheat and Prep – Preheat your oven to 375°F and line a muffin tin with paper liners or lightly grease it.
    2. Mix Dry Ingredients – In a large bowl, whisk together rolled oats, whole wheat flour, baking powder, baking soda, cinnamon, and a pinch of salt.
    3. Combine Wet Ingredients – In another bowl, whisk eggs, Greek yogurt, honey (or maple syrup), melted butter (or oil), and vanilla extract until smooth.
    4. Combine Wet and Dry – Pour the wet mixture into the dry ingredients and stir gently until just combined. Avoid overmixing to keep the muffins tender.
    5. Fold in Extras – If using add-ins like raisins, nuts, or chocolate chips, fold them in now.
    6. Fill Muffin Cups – Divide the batter evenly among the muffin cups, filling each about ¾ full.
    7. Bake – Bake for 18-20 minutes, or until a toothpick inserted in the center comes out clean.
    8. Cool and Enjoy – Let the muffins cool in the pan for 5 minutes before transferring to a wire rack.

    Pro Tips for the Best Results

    • Soak the Oats – For extra tenderness, soak the oats in milk or yogurt for 10 minutes before mixing.
    • Don’t Overmix – A few lumps are okay! Overmixing leads to dense muffins.
    • Use Room Temperature Ingredients – Cold eggs or yogurt can make the batter uneven. Let them sit out for 20 minutes before baking.
    • Check Early – Ovens vary, so start checking at 16 minutes to avoid overbaking.

    Variations and Substitutions

    One of the best things about this oatmeal muffin recipe is how adaptable it is. Here are some delicious twists:

    • Blueberry Oatmeal Muffins – Fold in fresh or frozen blueberries for a burst of sweetness.
    • Banana Nut – Add mashed banana and chopped walnuts for a classic flavor combo.
    • Chocolate Chip – A handful of dark chocolate chips makes these muffins feel like dessert.
    • Gluten-Free – Swap whole wheat flour for a gluten-free blend.
    • Dairy-Free – Use coconut yogurt and plant-based milk instead of Greek yogurt.

    What to Serve With It

    These muffins are fantastic on their own, but they also pair beautifully with:

    • A dollop of almond butter or cream cheese for extra richness.
    • A warm cup of coffee or chai tea for a cozy breakfast.
    • Fresh fruit and yogurt for a balanced meal.

    How to Store and Reheat

    To keep your oatmeal muffins fresh:

    • Room Temperature – Store in an airtight container for up to 3 days.
    • Refrigerate – Extend freshness for up to a week by refrigerating.
    • Freeze – Wrap individually and freeze for up to 3 months. Thaw at room temperature or microwave for 20 seconds.
    • Reheat – Warm in a 300°F oven for 5 minutes or microwave for 10-15 seconds.

    Frequently Asked Questions (FAQs)

    Can I use instant oats instead of rolled oats?
    Yes, but the texture will be softer. Rolled oats provide better chewiness.

    Can I make these muffins vegan?
    Absolutely! Use flax eggs (1 tbsp ground flax + 3 tbsp water per egg) and plant-based yogurt.

    Why are my muffins dry?
    Overbaking or overmixing can cause dryness. Check doneness early and mix just until combined.

    Can I reduce the sugar?
    Yes, but the muffins will be less sweet. Try reducing the honey by half and adding mashed banana for natural sweetness.

    Final Thoughts

    There you have it—the best easy oatmeal muffin recipe that’s as versatile as it is delicious. Whether you’re baking them for a busy weekday breakfast or a lazy Sunday brunch, these muffins are sure to become a staple in your kitchen. The best part? You can tweak them endlessly to suit your cravings. So grab your mixing bowl and let the aroma of cinnamon and oats fill your home. Happy baking!

    Print
    clock clock iconcutlery cutlery iconflag flag iconfolder folder iconinstagram instagram iconpinterest pinterest iconfacebook facebook iconprint print iconsquares squares iconheart heart iconheart solid heart solid icon

    Oatmeal Muffins – The Best Easy Recipe!

    • Author: Baking Enthusiast

    Description

    These oatmeal muffins are the perfect combination of hearty and sweet, making them an ideal breakfast or snack. Packed with wholesome oats and a touch of cinnamon, they’re easy to make and even easier to enjoy!


    Ingredients

    Scale

    For the Crust:

    • For the dry ingredients:
    • 1 1/2 cups rolled oats
    • 1 cup all-purpose flour
    • 1/2 cup brown sugar
    • 1 tsp baking powder
    • 1/2 tsp baking soda
    • 1 tsp ground cinnamon
    • 1/4 tsp salt
    • For the wet ingredients:
    • 1 cup milk
    • 1/3 cup vegetable oil
    • 1 large egg
    • 1 tsp vanilla extract
    • For optional add-ins:
    • 1/2 cup raisins or chocolate chips (optional)

    Instructions

    1. Prepare the Crust:

    1. 1. Preheat your oven to 375°F (190°C) and line a muffin tin with paper liners or grease lightly.
    2. 2. In a large bowl, combine all the dry ingredients: oats, flour, brown sugar, baking powder, baking soda, cinnamon, and salt. Mix well.
    3. 3. In another bowl, whisk together the wet ingredients: milk, vegetable oil, egg, and vanilla extract.
    4. 4. Pour the wet ingredients into the dry ingredients and stir until just combined. Do not overmix.
    5. 5. If using, fold in raisins or chocolate chips.
    6. 6. Spoon the batter into the prepared muffin tin, filling each cup about 2/3 full.
    7. 7. Bake for 18-20 minutes, or until a toothpick inserted into the center comes out clean.
    8. 8. Let the muffins cool in the tin for 5 minutes, then transfer to a wire rack to cool completely.

    Notes

    For extra texture, sprinkle a few oats on top of each muffin before baking. These muffins stay fresh for up to 3 days in an airtight container or can be frozen for longer storage.

    Blended Baked Oats with Peanut Butter and Chocolate

    Blended Baked Oats with Peanut Butter and Chocolate

    If you’re looking for a breakfast that feels like dessert but is secretly wholesome, you’ve come to the right place. Blended baked oats with peanut butter and chocolate is a game-changer—imagine the cozy texture of oatmeal combined with the richness of a peanut butter cup, all baked to perfection. This recipe is not only easy to make but also endlessly customizable, making it a staple for busy mornings or lazy weekend brunches. Let’s dive into why this dish deserves a spot in your recipe rotation.

    Why You’ll Love This Recipe

    First, let’s talk about why this blended baked oats recipe is about to become your new favorite. Here are just a few reasons:

    • Decadent yet nutritious – It satisfies sweet cravings while packing in fiber, protein, and healthy fats from oats, peanut butter, and a touch of chocolate.
    • Meal prep friendly – Whip up a batch ahead of time and reheat throughout the week for a quick, satisfying breakfast.
    • Kid-approved – The peanut butter and chocolate combo is a universal crowd-pleaser, making it perfect for picky eaters.
    • Versatile base – Swap ingredients to fit dietary needs or experiment with different flavors—it’s endlessly adaptable.
    • No fancy equipment needed – Just a blender and a baking dish are all you need to create this comforting dish.

    Ingredients Breakdown

    Understanding the role of each ingredient helps you make the best possible version of this recipe. Here’s what you’ll need:

    • Rolled oats – The star of the show, providing fiber and a hearty texture. Old-fashioned oats work best for blending.
    • Peanut butter – Adds creaminess and protein. Use natural peanut butter for the best flavor without added sugars.
    • Milk – Any variety works, from dairy to almond or oat milk. It helps create a smooth, pourable batter.
    • Egg – Acts as a binder, giving the baked oats structure. For a vegan version, a flax egg works well.
    • Maple syrup or honey – Just enough sweetness to balance the flavors without overpowering.
    • Chocolate chips – Because everything is better with chocolate. Dark chocolate adds a rich contrast to the peanut butter.
    • Baking powder – A small amount ensures the oats rise slightly for a cake-like texture.
    • Vanilla extract & cinnamon – Warm spices enhance the overall flavor profile.

    How to Make Blended Baked Oats with Peanut Butter and Chocolate

    Now, let’s walk through the simple steps to make this delicious breakfast treat.

    1. Preheat your oven to 350°F (175°C) and lightly grease a small baking dish or ramekin.
    2. Blend the oats – In a blender, combine the oats, milk, peanut butter, egg, maple syrup, baking powder, vanilla, and cinnamon. Blend until smooth, about 30 seconds.
    3. Fold in the chocolate – Transfer the batter to a bowl and gently stir in most of the chocolate chips, reserving a few for topping.
    4. Pour and top – Pour the mixture into your prepared dish and sprinkle the remaining chocolate chips on top.
    5. Bake for 25-30 minutes, or until the center is set and the edges are lightly golden.
    6. Cool slightly before serving—this allows the texture to firm up perfectly.

    That’s it! In less than 30 minutes, you’ll have a warm, gooey, peanut butter chocolate delight that’s perfect for breakfast or dessert.

    Pro Tips for the Best Results

    Want to take your blended baked oats to the next level? Try these expert tips:

    • Use room temperature ingredients – Cold milk or eggs can make the batter lumpy. Let them sit out for a few minutes before blending.
    • Don’t over-blend – A quick pulse is enough to combine everything. Over-blending can make the oats gummy.
    • Adjust sweetness – Taste the batter before baking and add a touch more syrup if needed.
    • Add a crunchy topping – A sprinkle of chopped nuts or granola before baking adds a delightful texture contrast.
    • Let it rest – Allowing the baked oats to cool for 5-10 minutes helps them set properly.

    Variations and Substitutions

    This recipe is incredibly flexible. Here are some delicious ways to switch it up:

    • Vegan version – Swap the egg for a flax egg and use plant-based milk and chocolate chips.
    • Nut-free – Replace peanut butter with sunflower seed butter.
    • Protein boost – Add a scoop of vanilla or chocolate protein powder to the batter.
    • Different flavors – Try almond butter with raspberries or cashew butter with white chocolate.
    • Gluten-free – Ensure your oats are certified gluten-free if needed.

    What to Serve With It

    While these blended baked oats are delicious on their own, here are some perfect pairings:

    • A dollop of Greek yogurt for extra creaminess.
    • Fresh berries or sliced banana for a fruity contrast.
    • A drizzle of extra peanut butter or chocolate sauce for indulgence.
    • A cup of cold milk, coffee, or a smoothie for a complete breakfast.

    How to Store and Reheat

    Leftovers? No problem. Here’s how to keep them fresh:

    • Refrigerate – Store in an airtight container for up to 4 days.
    • Freeze – Wrap individual portions tightly and freeze for up to 2 months.
    • Reheat – Microwave for 60-90 seconds or warm in the oven at 300°F until heated through.

    Frequently Asked Questions (FAQs)

    Can I make this recipe without a blender?
    Yes! Simply use oat flour instead of whole oats and whisk everything together in a bowl.

    Can I double the recipe?
    Absolutely. Double the ingredients and use a larger baking dish, adjusting the baking time as needed.

    Why did my baked oats turn out dry?
    This usually happens if overbaked. Check for doneness a few minutes early—the center should be just set.

    Can I use quick oats instead of rolled oats?
    Yes, but the texture may be slightly softer. Rolled oats provide the best structure.

    Is this recipe suitable for meal prep?
    Yes! Bake a batch on Sunday and reheat throughout the week for an easy breakfast.

    Final Thoughts

    Blended baked oats with peanut butter and chocolate is one of those rare recipes that feels indulgent yet nourishing. Whether you’re meal prepping for the week or treating yourself to a cozy weekend breakfast, this dish delivers every time. The best part? It’s so forgiving—you can tweak it endlessly to suit your tastes. So go ahead, preheat that oven, and get ready to fall in love with your new favorite breakfast.

    Print
    clock clock iconcutlery cutlery iconflag flag iconfolder folder iconinstagram instagram iconpinterest pinterest iconfacebook facebook iconprint print iconsquares squares iconheart heart iconheart solid heart solid icon

    Blended Baked Oats with Peanut Butter and Chocolate

    • Author: Baking Enthusiast

    Description

    A delicious and healthy breakfast option that tastes like dessert! These blended baked oats are packed with peanut butter and chocolate flavors, creating a cake-like texture that’s perfect for starting your day.


    Ingredients

    Scale

    For the Crust:

    • For the oats base:
    • 1/2 cup rolled oats
    • 1/2 ripe banana
    • 1/4 cup milk (dairy or plant-based)
    • 1 egg (or flax egg for vegan)
    • 1 tbsp maple syrup
    • 1/2 tsp baking powder
    • 1/4 tsp vanilla extract
    • Pinch of salt
    • For the mix-ins:
    • 1 tbsp peanut butter
    • 1 tbsp chocolate chips
    • For topping (optional):
    • Extra peanut butter for drizzling
    • Extra chocolate chips

    Instructions

    1. Prepare the Crust:

    1. Preheat oven to 350°F (175°C) and lightly grease a small oven-safe ramekin.
    2. In a blender, combine all the base ingredients: oats, banana, milk, egg, maple syrup, baking powder, vanilla, and salt. Blend until completely smooth.
    3. Stir in the peanut butter and chocolate chips into the blended mixture.
    4. Pour the batter into the prepared ramekin.
    5. Bake for 20-25 minutes until the center is set and the top is golden brown.
    6. Let cool for 5 minutes before serving.
    7. Optional: Drizzle with extra peanut butter and sprinkle with more chocolate chips before serving.

    Notes

    You can double the recipe and bake in a larger dish if serving multiple people. For a protein boost, add a scoop of protein powder to the blender. Store leftovers in the refrigerator for up to 2 days.

    overnight oats recipes

    overnight oats recipes

    There’s something magical about waking up to a ready-made breakfast that’s both nourishing and delicious. Overnight oats recipes have taken the breakfast world by storm, and for good reason. They’re effortless, endlessly customizable, and packed with nutrients to fuel your day. Whether you’re a busy parent, a meal-prep enthusiast, or just someone who loves a no-fuss morning, these recipes are about to become your new best friend.

    Why You’ll Love This Recipe

    Overnight oats are more than just a trend—they’re a game-changer. Here’s why you’ll fall in love with them:

    • Effortless mornings: Prep the night before, and breakfast is ready when you wake up. No cooking, no mess, just grab and go.
    • Nutrient-packed: Loaded with fiber, protein, and healthy fats, overnight oats keep you full and energized for hours.
    • Endless creativity: From fruity to chocolatey, the flavor combinations are limitless, so you’ll never get bored.
    • Meal-prep friendly: Make a batch for the week, and you’ve got breakfast covered for days.
    • Diet-friendly: Easily adaptable for vegan, gluten-free, or dairy-free diets without sacrificing taste.

    Ingredients Breakdown

    The beauty of overnight oats lies in their simplicity. Here’s what you’ll need and why each ingredient matters:

    • Rolled oats: The star of the show. Rolled oats soften perfectly overnight, creating a creamy texture without turning mushy.
    • Milk: Dairy or plant-based, milk adds creaminess and helps the oats absorb liquid. Almond, oat, or coconut milk work beautifully.
    • Chia seeds: These tiny powerhouses thicken the mixture and add a boost of omega-3s and fiber.
    • Greek yogurt: For extra protein and a tangy richness. Vegan yogurt works just as well.
    • Sweetener: Maple syrup, honey, or agave enhance flavor without overpowering. Adjust to taste.
    • Toppings: Fresh fruit, nuts, seeds, or nut butter add crunch, flavor, and nutrients.

    How to Make overnight oats recipes

    Making overnight oats is as easy as 1-2-3. Follow these steps for a foolproof breakfast:

    1. Combine the base: In a jar or bowl, mix rolled oats, chia seeds, and your choice of sweetener.
    2. Add liquids: Pour in milk and yogurt, then stir well to ensure everything is evenly coated.
    3. Seal and refrigerate: Cover tightly and let it sit in the fridge for at least 4 hours, preferably overnight.
    4. Top and enjoy: In the morning, give it a stir, add your favorite toppings, and dig in.

    Tip: If your oats are too thick in the morning, stir in a splash of milk to loosen the texture.

    Pro Tips for the Best Results

    Take your overnight oats from good to extraordinary with these expert tips:

    • Use the right oats: Rolled oats work best—steel-cut oats won’t soften enough, and instant oats can turn too mushy.
    • Layer flavors: Add spices like cinnamon or vanilla extract for depth. A pinch of salt enhances sweetness.
    • Let it rest: The longer the oats sit (up to 12 hours), the creamier they become.
    • Warm it up: If you prefer warm oats, microwave for 30-60 seconds before eating.

    Variations and Substitutions

    Overnight oats are a blank canvas. Try these delicious twists:

    • Berry Bliss: Mix in fresh or frozen berries and a drizzle of almond butter.
    • Tropical Paradise: Use coconut milk, top with mango, pineapple, and shredded coconut.
    • Chocolate Peanut Butter: Stir in cocoa powder and swirl with peanut butter before serving.
    • Pumpkin Spice: Add pumpkin puree and pumpkin spice for a fall-inspired treat.

    Dietary swaps: For gluten-free, use certified gluten-free oats. For vegan, opt for plant-based milk and yogurt.

    What to Serve With It

    While overnight oats are satisfying on their own, pairing them with the right sides can elevate your breakfast:

    • Fresh fruit salad: A colorful mix of seasonal fruits adds freshness and vitamins.
    • Hard-boiled eggs: For extra protein, serve with a side of eggs.
    • Green smoothie: A nutrient-packed drink complements the creamy oats.
    • Hot coffee or tea: A warm beverage balances the cool, creamy texture.

    How to Store and Reheat

    Overnight oats are perfect for meal prep. Here’s how to store them:

    • Refrigeration: Keep in airtight containers for up to 5 days. Stir before eating.
    • Freezing: Portion into freezer-safe jars for up to 3 months. Thaw overnight in the fridge.
    • Reheating: Microwave cold oats for 30-60 seconds, or enjoy them straight from the fridge.

    Frequently Asked Questions (FAQs)

    Can I use steel-cut oats?
    Steel-cut oats won’t soften enough in the fridge. Stick with rolled oats for the best texture.

    Are overnight oats healthy?
    Absolutely! They’re packed with fiber, protein, and healthy fats, making them a balanced breakfast choice.

    Can I make them without yogurt?
    Yes, just increase the milk slightly for creaminess, or use a dairy-free yogurt alternative.

    Why are my oats too thick?
    Add a splash of milk in the morning to loosen the texture to your liking.

    Can I heat them up?
    Definitely. Warm them in the microwave for a cozy breakfast option.

    Final Thoughts

    Overnight oats are the ultimate breakfast hack—simple, nutritious, and endlessly adaptable. Whether you’re rushing out the door or savoring a slow morning, they’re the perfect way to start your day. Experiment with flavors, toppings, and textures to make them your own. Once you try them, you’ll wonder how you ever lived without this easy, delicious breakfast staple.

    Print
    clock clock iconcutlery cutlery iconflag flag iconfolder folder iconinstagram instagram iconpinterest pinterest iconfacebook facebook iconprint print iconsquares squares iconheart heart iconheart solid heart solid icon

    Classic Overnight Oats

    • Author: Healthy Eats Kitchen

    Description

    A simple, no-cook breakfast that’s creamy, customizable, and packed with fiber. Perfect for meal prep!


    Ingredients

    Scale

    For the Crust:

    • For the base:
    • 1/2 cup rolled oats
    • 1/2 cup milk (dairy or plant-based)
    • 1/4 cup Greek yogurt
    • 1 tbsp chia seeds
    • 1 tsp vanilla extract
    • For toppings (optional):
    • 1 tbsp honey or maple syrup
    • 1/4 cup fresh berries
    • 1 tbsp chopped nuts
    • 1/2 tsp cinnamon

    Instructions

    1. Prepare the Crust:

    1. 1. In a mason jar or airtight container, combine oats, milk, yogurt, chia seeds, and vanilla extract.
    2. 2. Stir well until fully mixed. Seal the container.
    3. 3. Refrigerate for at least 4 hours (best overnight).
    4. 4. Before serving, stir and add desired toppings.
    5. 5. Enjoy cold or microwave for 30 seconds if preferred warm.

    Notes

    For thicker oats, reduce milk to 1/3 cup. Keeps refrigerated for up to 3 days. Vegan version: use plant-based yogurt and skip honey.