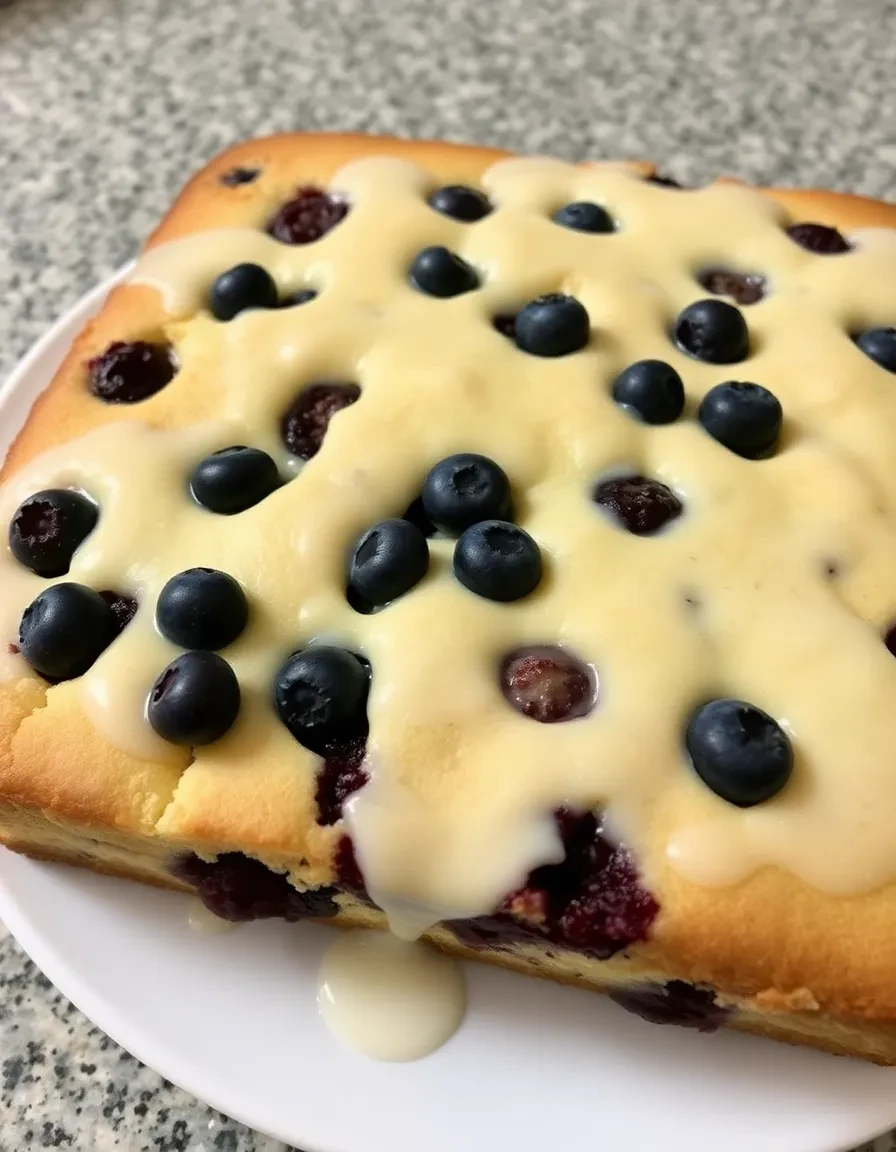
Blueberry Boyfriend Bait: The Irresistible Dessert You Need to Try
There’s something magical about a dessert that’s as fun to say as it is to eat—and Blueberry Boyfriend Bait is exactly that. Picture this: a buttery, crumbly crust topped with juicy blueberries and a sweet, creamy layer that melts in your mouth. It’s the kind of treat that’ll have everyone asking for seconds (and maybe even proposing on the spot—okay, maybe not, but close!).
I first stumbled upon this recipe years ago when I was desperate to impress a certain someone (spoiler: it worked). Since then, it’s become my go-to for potlucks, family gatherings, and those nights when I just need a little extra comfort. The best part? It’s ridiculously easy to make. Whether you’re a baking pro or a newbie, this dessert is foolproof and guaranteed to win hearts.
Why You’ll Love Blueberry Boyfriend Bait
This dessert isn’t just delicious—it’s also versatile, crowd-pleasing, and packed with nostalgic charm. Here’s why it’s a must-try:
- Simple ingredients: Pantry staples like flour, sugar, and butter do most of the work.
- No-fuss prep: Mix, layer, bake—done! No fancy techniques required.
- Adaptable: Swap blueberries for raspberries, blackberries, or even peaches if you’re feeling adventurous.
- Perfect for sharing: Bring it to parties, or keep it all to yourself (we won’t judge).
How to Make Blueberry Boyfriend Bait
Ingredients You’ll Need
- 1 ½ cups all-purpose flour
- 1 ½ cups granulated sugar (divided)
- ½ cup cold unsalted butter, cubed
- 2 cups fresh blueberries (or frozen, thawed)
- 1 cup heavy cream
- 2 large eggs
- 1 tsp vanilla extract
- ½ tsp salt
Step-by-Step Instructions
- Preheat & prep: Heat your oven to 375°F (190°C) and grease a 9×9-inch baking dish.
- Make the crust: In a bowl, mix flour, ½ cup sugar, and salt. Cut in butter until crumbly. Press into the baking dish and bake for 15 minutes.
- Layer the blueberries: Sprinkle blueberries evenly over the warm crust.
- Whisk the creamy layer: In another bowl, whisk eggs, remaining 1 cup sugar, heavy cream, and vanilla. Pour over the blueberries.
- Bake to perfection: Return to the oven for 40–45 minutes until golden and set. Let cool before slicing.
Tips for the Best Blueberry Boyfriend Bait
- For extra texture, sprinkle a handful of oats or chopped nuts into the crust.
- Let it cool completely before cutting—this ensures clean slices.
- Serve with a scoop of vanilla ice cream for the ultimate indulgence.
Blueberry Boyfriend Bait FAQs
Can I use frozen blueberries?
Absolutely! Just thaw and drain them well to avoid excess moisture.
How do I store leftovers?
Cover and refrigerate for up to 3 days. It’s also freezer-friendly for up to a month!
Can I make this gluten-free?
Yes! Swap the all-purpose flour for a 1:1 gluten-free blend.
What’s the origin of the name?
Legend says it’s so irresistible, it could “catch” a boyfriend. We call it a win either way!
Can I use other fruits?
Definitely! Try raspberries, blackberries, or a mix. Adjust sugar slightly for tart fruits.
Why did my middle layer sink?
This can happen if the crust isn’t fully baked before adding the cream. No worries—it’ll still taste amazing!
Whether you’re baking to impress or just treating yourself, Blueberry Boyfriend Bait is a dessert that feels like a hug in every bite. It’s the perfect blend of nostalgia and simplicity, and once you try it, you’ll understand why it’s stood the test of time. Looking for more crowd-pleasing desserts? Check out our Easy Berry Cobbler or this Classic Lemon Bars recipe. For more berry inspiration, Serious Eats has a fantastic roundup. Now, go forth and bake something unforgettable!