Fruit Salad – with honey lime dressing (EASY)

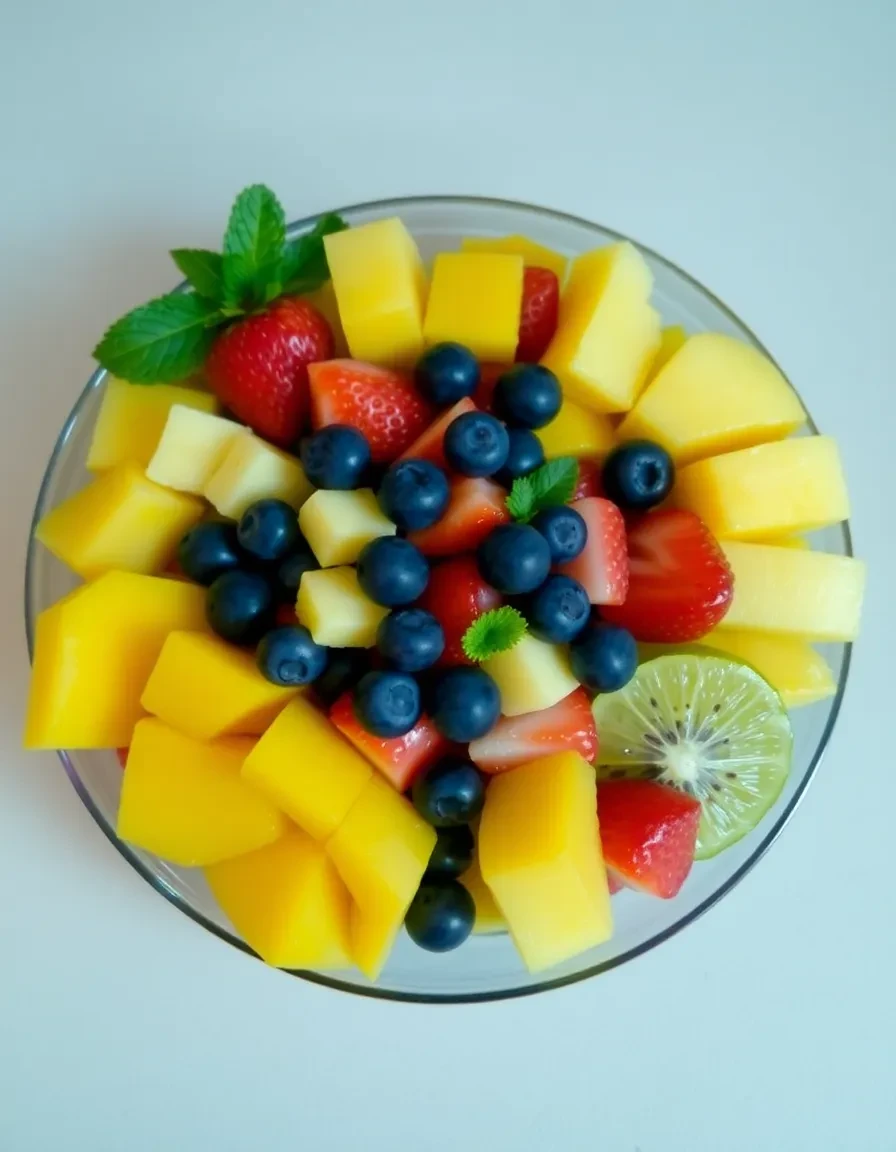
Fruit Salad with Honey Lime Dressing (EASY)

There’s something magical about a bowl of fresh, colorful fruit salad—especially when it’s drizzled with a sweet-tangy honey lime dressing. Whether you’re hosting a summer picnic, prepping for a brunch, or just craving a healthy snack, this easy fruit salad is your answer. It’s vibrant, refreshing, and takes just minutes to toss together. Plus, that honey lime dressing? It’s the kind of simple upgrade that makes everyone ask, What’s your secret? (Spoiler: It’s literally three ingredients.)

I first fell in love with this recipe during a chaotic week when my fridge was half-empty, but my fruit bowl was overflowing. Desperate for something quick, I grabbed whatever fruits looked good, whisked together honey and lime, and voilà—a new family favorite was born. Now, it’s my go-to for potlucks, pool days, or even as a bright side dish for grilled chicken. The best part? You can customize it with whatever’s in season or hiding in your kitchen.

Why You’ll Love This Fruit Salad

This isn’t just any fruit salad. Here’s why it stands out:

  • Effortless elegance: The honey lime dressing elevates simple fruit into something special.
  • Versatile: Use any combination of fruits—berries, melons, citrus, or tropical favorites like mango.
  • Healthy & refreshing: Packed with vitamins and naturally sweet, it’s guilt-free indulgence.
  • Crowd-pleaser: Kids and adults alike adore it (perfect for family gatherings).

How to Make Fruit Salad with Honey Lime Dressing

Ingredients You’ll Need

  • 4 cups mixed fresh fruit (strawberries, blueberries, kiwi, pineapple, etc.)
  • 2 tbsp honey
  • 1 tbsp fresh lime juice
  • 1 tsp lime zest (optional, for extra zing)
  • Fresh mint leaves (for garnish, optional)

Step-by-Step Instructions

  1. Prep the fruit: Wash and chop all fruit into bite-sized pieces. Pro tip: If using apples or bananas, toss them in a little extra lime juice to prevent browning.
  2. Make the dressing: In a small bowl, whisk together honey, lime juice, and zest until smooth.
  3. Combine & chill: Gently toss the fruit with the dressing. Let it sit for 10 minutes to meld flavors, or serve immediately.
  4. Garnish & enjoy: Top with mint leaves for a pop of color and freshness.

Recipe Tips & Tricks

Want to make this fruit salad even better? Try these tricks:

  • Add texture: Sprinkle with toasted coconut or chopped nuts for crunch.
  • Make it ahead: Keep dressing separate until serving to avoid soggy fruit.
  • Boost flavor: A pinch of chili powder or Tajín adds a fun spicy-sweet twist!

For more summer recipe inspiration, check out these refreshing salad ideas from Food Network.

Frequently Asked Questions

Can I use bottled lime juice instead of fresh?
Fresh is best for flavor, but bottled works in a pinch—just adjust to taste.

How long does this fruit salad last?
Up to 2 days in the fridge, though it’s best eaten fresh for optimal texture.

Can I use maple syrup instead of honey?
Absolutely! Agave or maple syrup are great vegan alternatives.

What fruits should I avoid?
Skip watery fruits like watermelon if prepping ahead—they can make the salad soggy.

Is this fruit salad gluten-free?
Yes! Naturally gluten-free and perfect for allergen-friendly gatherings.

Can I add yogurt to this recipe?
For a creamy twist, try a dollop of Greek yogurt or coconut yogurt. It’s delicious!

There you have it—a fruit salad so easy and delicious, it’ll become your warm-weather staple. Whether you’re serving it alongside lemon blueberry pancakes at brunch or packing it for a picnic, that honey lime dressing will have everyone reaching for seconds. So grab your favorite fruits, drizzle generously, and savor every sweet, tangy bite. Happy mixing!

One Pan Balsamic Chicken

One Pan Balsamic Chicken: A Flavor-Packed Weeknight Lifesaver

Ever had one of those days where dinner feels like a mountain you just don’t have the energy to climb? I’ve been there—more times than I’d like to admit. Between work deadlines, laundry piles, and the ever-present “Mom, I’m hungry!” chorus, the last thing I want is a sink full of dishes or a recipe with 15 steps. That’s why this One Pan Balsamic Chicken is my go-to hero. It’s juicy, caramelized, and drizzled with a tangy-sweet glaze that makes even the pickiest eaters ask for seconds. Plus? Everything cooks in a single sheet pan. (Cue the angelic choir.)

What I love most about this dish—aside from the minimal cleanup—is how effortlessly fancy it feels. The balsamic reduction glistens like something from a restaurant menu, while the roasted veggies soak up all those savory juices. It’s the kind of meal that makes you pause mid-bite and think, “I *nailed* this.” And the best part? You likely have most ingredients already: chicken thighs (though breasts work too!), bell peppers, red onion, and that bottle of balsamic vinegar hiding in your pantry since last Thanksgiving. If you’re craving more easy one-pan wonders, try my One Pan Lemon Garlic Salmon next!

Why You’ll Love This One Pan Balsamic Chicken

  • 30 minutes start to finish—perfect for busy weeknights.
  • One pan = less mess (because who has time for scrubbing?).
  • Balanced flavors: Sweet balsamic, savory garlic, and a hint of honey.
  • Meal-prep friendly—double the batch for lunches all week.

Ingredients You’ll Need

  • 1.5 lbs boneless, skinless chicken thighs (or breasts)
  • 3 tbsp balsamic vinegar
  • 2 tbsp honey
  • 3 cloves garlic, minced
  • 1 red bell pepper, sliced
  • 1 red onion, sliced
  • 1 tsp dried thyme
  • Salt and pepper to taste

How to Make One Pan Balsamic Chicken

Pro tip: Line your sheet pan with parchment paper for *truly* effortless cleanup. (I learned this the hard way after scraping off caramelized onion bits for 10 minutes.)

  1. Prep the glaze: Whisk balsamic vinegar, honey, garlic, thyme, salt, and pepper in a bowl.
  2. Toss the veggies: Spread peppers and onions on the pan, drizzle with 1 tbsp glaze, and roast at 425°F for 10 minutes.
  3. Add the chicken: Nestle chicken thighs between the veggies, brush with remaining glaze, and bake 20–25 minutes until chicken hits 165°F.
  4. Broil (optional): For extra caramelization, broil 1–2 minutes at the end.

Serving Suggestions

Pair this with fluffy quinoa, a simple arugula salad, or crusty bread to soak up the glaze. Leftovers? Toss them into a wrap with spinach the next day—the flavors deepen overnight! For more quick dinner ideas, check out my 15-Minute Miso Noodle Soup.

Frequently Asked Questions

Can I use chicken breasts instead of thighs? Absolutely! Just reduce cooking time by 3–5 minutes to avoid dryness.

How do I store leftovers? Keep in an airtight container for up to 3 days. Reheat gently to preserve moisture.

What’s the best balsamic vinegar for this recipe? A mid-range, aged balsamic works best—no need for expensive bottles, but avoid overly acidic “cooking” varieties. Serious Eats has a great guide.

Can I add other vegetables? Yes! Zucchini, mushrooms, or cherry tomatoes would be delicious.

Is this recipe gluten-free? Yes, as long as your balsamic vinegar is gluten-free (most are).

Can I make it dairy-free? It’s already dairy-free—just double-check your honey isn’t processed with dairy if strict.

There you have it—a dinner that’s as kind to your schedule as it is to your taste buds. Whether you’re juggling a hectic weekday or just craving something wholesome without the fuss, this One Pan Balsamic Chicken is your ticket to a satisfying meal (and a few extra minutes of peace). Now, go forth and conquer that pan—I promise it’ll love you back.

One Pan Lemon Chicken Gnocchi

One Pan Lemon Chicken Gnocchi: A Bright & Easy Weeknight Dinner

There’s something magical about a meal that comes together in one pan—especially when it’s as vibrant and comforting as this One Pan Lemon Chicken Gnocchi. Picture tender chunks of chicken, pillowy gnocchi, and a creamy lemon-infused sauce that clings to every bite. It’s the kind of dish that feels indulgent but is secretly simple enough for a busy Tuesday night. (And let’s be honest, we all need more of those.)

As a mom of two, I’m always on the hunt for recipes that balance flavor, speed, and minimal cleanup. This one checks all the boxes. The lemon adds a sunny brightness that cuts through the richness, while the gnocchi soaks up the sauce like little flavor sponges. Plus, since everything cooks in a single skillet, you’ll spend less time scrubbing dishes and more time savoring. If you’re a fan of cozy yet fresh dinners like my Creamy Tuscan Chicken, this recipe is about to become your new go-to.

Why You’ll Love This One Pan Lemon Chicken Gnocchi

Here’s why this dish deserves a permanent spot in your rotation:

  • 30 minutes or less: From stovetop to table, faster than takeout.
  • Minimal cleanup: One pan = more time for Netflix (or, you know, parenting).
  • Bright & balanced: The lemon keeps the creamy sauce from feeling too heavy.
  • Kid-approved: My picky eater gobbles it up—gnocchi is basically tiny pasta clouds!

How to Make One Pan Lemon Chicken Gnocchi

Ingredients You’ll Need

  • 1 lb boneless, skinless chicken thighs (or breasts), cubed
  • 1 package (16 oz) shelf-stable gnocchi
  • 3 cloves garlic, minced
  • 1 cup chicken broth
  • 1/2 cup heavy cream
  • Zest and juice of 1 lemon
  • 1 tsp dried thyme
  • 1/2 cup grated Parmesan
  • 2 tbsp olive oil
  • Salt and pepper to taste
  • Fresh parsley for garnish

Step-by-Step Instructions

  1. Sear the chicken: Heat olive oil in a large skillet over medium-high heat. Season chicken with salt, pepper, and thyme, then cook until golden (5–6 minutes). Remove and set aside.
  2. Toast the gnocchi: In the same pan, add gnocchi and cook for 2–3 minutes until lightly browned. Push to the side.
  3. Build the sauce: Add garlic, lemon zest, and juice, scraping up any browned bits. Pour in broth and cream, stirring to combine.
  4. Simmer: Return chicken to the pan. Reduce heat and let everything simmer for 5 minutes until the sauce thickens slightly.
  5. Finish: Stir in Parmesan until melted. Garnish with parsley and extra lemon zest.

Tips for the Best Lemon Chicken Gnocchi

  • Don’t skip the gnocchi toast: Browning them adds texture and prevents mushiness.
  • Use fresh lemon: Bottled juice won’t give the same vibrant punch.
  • Swap the protein: Try shrimp or mushrooms for a twist! For more easy swaps, check out my Pantry Ingredient Substitutes guide.

Frequently Asked Questions

Can I use frozen gnocchi?

Yes! Thaw it first and pat dry to avoid excess water in the sauce.

How do I store leftovers?

Keep in an airtight container for up to 3 days. Reheat with a splash of broth to revive the creaminess.

Is there a lighter alternative to heavy cream?

Half-and-half works, but the sauce will be thinner. For dairy-free, try coconut milk (it’ll add a subtle sweetness).

Can I make this ahead?

Prep the chicken and sauce base ahead, but cook the gnocchi fresh to avoid sogginess.

What pairs well with this dish?

A crisp green salad or roasted asparagus balances the richness. Need sides? Here’s my 10-Minute Vegetable Sides roundup.

Why use chicken thighs?

They stay juicier than breasts, but either works! For more on cuts, see USDA’s guide to poultry.

Whether you’re craving comfort food with a zesty kick or just need a no-fuss dinner that feels special, this One Pan Lemon Chicken Gnocchi delivers. It’s the kind of meal that makes weeknights a little brighter—and isn’t that what we all need? Pour yourself a glass of wine, scoop up a generous helping, and savor every bite. (Then bask in the glory of only washing one pan.)

Garlic Butter Chicken with Zucchini and Corn – One-Pan, 30-Minute Meal


Garlic Butter Chicken with Zucchini and Corn – A One-Pan, 30-Minute Meal

There’s something magical about a meal that comes together in one pan, especially when it’s bursting with flavor and ready in just 30 minutes. This Garlic Butter Chicken with Zucchini and Corn is my go-to on those nights when time is tight, but my family still deserves something delicious. Picture juicy chicken thighs seared to golden perfection, swimming in a garlicky butter sauce alongside tender zucchini and sweet corn—it’s comfort food without the fuss.

As a mom of two, I’ve learned that weeknight dinners need to be quick, nourishing, and (most importantly) something everyone will actually eat. This recipe checks all those boxes. Plus, since it’s all cooked in one skillet, cleanup is a breeze—meaning more time for cozy family moments (or, let’s be real, collapsing on the couch with a glass of wine). If you love easy one-pan meals like my One-Pan Lemon Herb Salmon, you’ll adore this dish too.

Why You’ll Love This Garlic Butter Chicken

This recipe isn’t just fast—it’s packed with flavor and wholesome ingredients. Here’s why it’s a winner:

  • 30-minute magic: From fridge to table in half an hour.
  • One-pan wonder: Less mess, more flavor.
  • Seasonal veggies: Zucchini and corn add sweetness and texture.
  • Garlic butter sauce: Because everything tastes better with butter and garlic.

How to Make Garlic Butter Chicken with Zucchini and Corn

Ingredients You’ll Need

  • 4 boneless, skinless chicken thighs
  • 2 medium zucchinis, sliced
  • 1 cup corn kernels (fresh or frozen)
  • 4 tbsp butter
  • 4 garlic cloves, minced
  • 1 tsp smoked paprika
  • Salt and pepper to taste
  • Fresh parsley for garnish

Step-by-Step Instructions

  1. Sear the chicken: Heat a large skillet over medium-high heat. Season chicken with salt, pepper, and smoked paprika. Add 1 tbsp butter to the pan and sear chicken for 5–6 minutes per side until golden. Remove and set aside.
  2. Sauté the veggies: In the same pan, add remaining butter, garlic, zucchini, and corn. Sauté for 4–5 minutes until veggies are tender.
  3. Combine and serve: Return chicken to the pan, spooning the garlic butter sauce over it. Garnish with fresh parsley and serve warm.

Tips for the Best Garlic Butter Chicken

Want to take this dish to the next level? Try these pro tips:

  • Use fresh corn in summer: It adds a crisp sweetness. In winter, frozen works just fine.
  • Don’t skimp on browning: That golden crust on the chicken = flavor central.
  • Swap in chicken breasts: If you prefer leaner meat, adjust cooking time to avoid dryness.

Frequently Asked Questions

Can I use chicken breasts instead of thighs?
Yes! Just reduce cooking time slightly to prevent drying out. Chicken thighs are more forgiving, though.

Can I make this dish ahead of time?
It’s best fresh, but leftovers keep for 2–3 days in the fridge. Reheat gently on the stove.

What can I substitute for zucchini?
Yellow squash or even green beans would work well here.

Is this recipe gluten-free?
Yes! Just ensure your spices are gluten-free certified if needed.

Can I add other veggies?
Absolutely! Bell peppers or cherry tomatoes would be delicious additions.

What pairs well with this dish?
Serve with crusty bread to soak up the sauce or a simple side salad. For more ideas, check out my Easy Side Dishes roundup.

There you have it—a meal that’s as easy to make as it is to love. Whether you’re juggling a busy schedule or just craving something simple yet satisfying, this Garlic Butter Chicken with Zucchini and Corn delivers. For more quick dinner inspiration, try my 30-Minute Meals Collection, or explore the science of perfect searing with this Serious Eats guide. Now, go enjoy that extra free time (and maybe that glass of wine).


Thai Chicken Lettuce Wraps

Thai Chicken Lettuce Wraps: A Fresh & Flavorful Weeknight Dinner

There’s something magical about meals that are both light and satisfying—dishes that leave you feeling nourished but never weighed down. That’s exactly why these Thai Chicken Lettuce Wraps have become a staple in my kitchen. They’re packed with vibrant flavors—ginger, garlic, lime, and fresh herbs—all wrapped up in crisp, cool lettuce leaves. Whether you’re looking for a quick weeknight dinner or a crowd-pleasing appetizer, these wraps deliver every time.

I first fell in love with lettuce wraps at a little Thai restaurant years ago. The combination of savory chicken, crunchy veggies, and that irresistible sweet-spicy sauce had me hooked. But when I tried making them at home, I realized just how easy they are to customize. Don’t have cilantro? Try basil. Prefer a bit more heat? Add extra chili. The best part? They come together in under 30 minutes, making them perfect for busy nights when you want something wholesome but don’t have hours to spend in the kitchen.

Why You’ll Love These Thai Chicken Lettuce Wraps

If you need more convincing (though I doubt you will after the first bite), here’s why this recipe is a winner:

  • Quick & Easy: Ready in 30 minutes or less—ideal for hectic weeknights.
  • Healthy & Light: Packed with lean protein and fresh veggies, these wraps are guilt-free.
  • Customizable: Swap ingredients based on what’s in your fridge or your personal taste.
  • Perfect for Sharing: Great for gatherings—let everyone build their own wraps!

How to Make Thai Chicken Lettuce Wraps

Ingredients You’ll Need

  • 1 lb ground chicken (or turkey for a leaner option)
  • 1 tbsp sesame oil
  • 3 cloves garlic, minced
  • 1 tbsp fresh ginger, grated
  • 1/4 cup green onions, chopped
  • 1/2 red bell pepper, diced
  • 1/4 cup carrots, shredded
  • 2 tbsp soy sauce (or coconut aminos for gluten-free)
  • 1 tbsp fish sauce
  • 1 tbsp lime juice
  • 1 tsp honey or maple syrup
  • 1/2 tsp red pepper flakes (optional)
  • Butter lettuce or romaine leaves, for serving
  • Fresh cilantro, mint, and chopped peanuts for garnish

Step-by-Step Instructions

  1. Sauté the Aromatics: Heat sesame oil in a large skillet over medium heat. Add garlic, ginger, and green onions, cooking until fragrant (about 1 minute).
  2. Cook the Chicken: Add ground chicken, breaking it apart with a spatula. Cook until no longer pink (5–6 minutes).
  3. Add Veggies & Sauce: Stir in bell pepper, carrots, soy sauce, fish sauce, lime juice, honey, and red pepper flakes. Cook for another 2–3 minutes.
  4. Serve: Spoon the mixture into lettuce leaves and garnish with fresh herbs and peanuts. Enjoy immediately!

Tips for the Best Lettuce Wraps

  • Lettuce Matters: Butter lettuce or romaine works best—they’re sturdy enough to hold the filling without tearing.
  • Prep Ahead: Chop veggies and make the sauce in advance for even quicker assembly.
  • Extra Crunch: Add water chestnuts or shredded cabbage for an extra texture boost.
  • Make It Spicy: Drizzle with sriracha or add a minced Thai chili for more heat.

Looking for more easy Asian-inspired dishes? Try my Vegetable Stir-Fry or Creamy Peanut Noodles for another quick meal idea!

Frequently Asked Questions

Can I use ground turkey instead of chicken?
Absolutely! Ground turkey works just as well and keeps the dish lean and flavorful.

What lettuce is best for lettuce wraps?
Butter lettuce, romaine, or even iceberg work great—just make sure the leaves are sturdy enough to hold the filling.

Can I make these ahead of time?
Yes! Store the filling in an airtight container for up to 3 days and reheat before serving.

Are Thai Chicken Lettuce Wraps gluten-free?
They can be! Just swap soy sauce for tamari or coconut aminos.

What can I serve with lettuce wraps?
Pair them with coconut rice or a simple cucumber salad for a complete meal.

How do I store leftovers?
Keep the filling and lettuce separate. Reheat the filling in a skillet and assemble fresh wraps when ready to eat.

There you have it—a simple, flavorful dish that’s as fun to make as it is to eat. These Thai Chicken Lettuce Wraps are proof that healthy eating doesn’t have to be boring. Whether you’re cooking for yourself or feeding a crowd, this recipe is sure to become a favorite. For more inspiration, check out Serious Eats’ Thai recipes or Bon Appétit’s weeknight meal ideas. Happy cooking!