Creamy Chicken Gnocchi

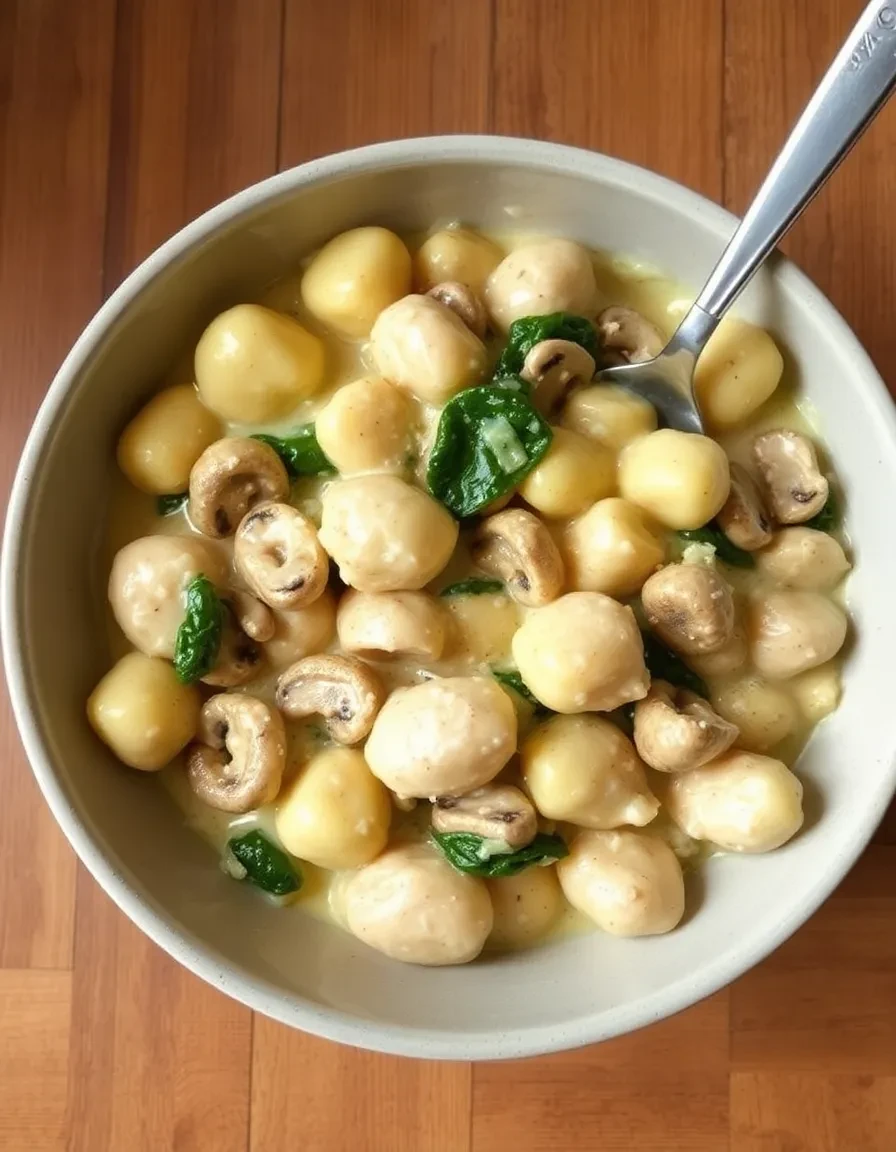
Creamy Chicken Gnocchi: A Comforting One-Pan Wonder

There’s something magical about a dish that feels like a warm hug after a long day. Creamy Chicken Gnocchi is exactly that—a cozy, indulgent meal that comes together in one pan with minimal fuss. Picture tender potato gnocchi, juicy bites of chicken, and a velvety sauce that clings to every bite. It’s the kind of dinner that makes everyone at the table pause mid-conversation just to sigh happily.

As a mom of two, I’m always on the hunt for recipes that strike the perfect balance between comforting and practical. This Creamy Chicken Gnocchi checks all the boxes: it’s quick enough for a weeknight but elegant enough for a weekend gathering. Plus, it’s endlessly adaptable—swap in mushrooms for extra earthiness or add a handful of spinach for a pop of color. Whether you’re cooking for picky eaters or impressing guests, this dish delivers every time.

Why You’ll Love This Creamy Chicken Gnocchi

Here’s why this recipe will earn a permanent spot in your rotation:

  • One-pan wonder: Less cleanup means more time to relax (or sneak in another episode of your favorite show).
  • Ready in 30 minutes: Perfect for those nights when takeout sounds tempting but homemade feels better.
  • Crowd-pleasing flavors: Creamy, savory, and just rich enough without being heavy.
  • Meal-prep friendly: The leftovers taste even better the next day—if there are any!

How to Make Creamy Chicken Gnocchi

Ingredients You’ll Need

  • 1 lb boneless, skinless chicken breasts, cubed
  • 1 package (16 oz) potato gnocchi
  • 2 tbsp olive oil
  • 3 cloves garlic, minced
  • 1 cup heavy cream
  • 1/2 cup chicken broth
  • 1 tsp Italian seasoning
  • 1/2 cup grated Parmesan cheese
  • Salt and pepper to taste
  • Fresh parsley for garnish

Step-by-Step Instructions

  1. Cook the chicken: Heat olive oil in a large skillet over medium-high heat. Season the chicken with salt and pepper, then cook until golden and no longer pink (about 5–6 minutes). Remove and set aside.
  2. Sauté the garlic: In the same skillet, add garlic and sauté for 30 seconds until fragrant. Pour in the chicken broth to deglaze the pan, scraping up any browned bits.
  3. Simmer the sauce: Stir in the heavy cream, Italian seasoning, and Parmesan. Let the sauce simmer for 2–3 minutes until slightly thickened.
  4. Add the gnocchi: Gently fold in the gnocchi and cooked chicken. Simmer for another 5 minutes until the gnocchi is tender and the sauce coats everything beautifully.
  5. Garnish and serve: Sprinkle with fresh parsley and extra Parmesan. Enjoy immediately!

Tips for the Best Creamy Chicken Gnocchi

  • Don’t overcook the gnocchi: They’re done when they float to the top of the sauce—any longer, and they’ll turn mushy.
  • Use fresh garlic: Jarred garlic can’t compete with the depth of flavor from freshly minced cloves.
  • Customize it: Add sun-dried tomatoes for tang or crispy bacon for smokiness. For a lighter twist, try these healthy dinner swaps.

Frequently Asked Questions

Can I use frozen gnocchi for Creamy Chicken Gnocchi?
Yes! Just add them directly to the sauce—no need to thaw first.

How do I store leftovers?
Keep them in an airtight container in the fridge for up to 3 days. Reheat gently on the stove with a splash of broth.

Can I make this dish dairy-free?
Absolutely! Swap heavy cream for coconut cream and use nutritional yeast instead of Parmesan.

What sides pair well with Creamy Chicken Gnocchi?
A simple green salad or roasted veggies balance the richness perfectly.

Can I freeze this dish?
The sauce may separate slightly, but it’ll still taste delicious. Thaw overnight in the fridge before reheating.

Is gnocchi gluten-free?
Traditional gnocchi contains flour, but many brands offer gluten-free versions (check labels!).

Whether you’re craving a cozy night in or need a foolproof dish to serve friends, this Creamy Chicken Gnocchi never disappoints. It’s the kind of recipe that feels like a secret weapon—simple, satisfying, and always met with smiles. For more comforting one-pan meals, try my Creamy Tuscan Chicken next. Happy cooking!

Creamy Chicken Breast in Spinach Parmesan Sauce

Creamy Chicken Breast in Spinach Parmesan Sauce: A Weeknight Wonder

There’s something magical about a dish that feels indulgent yet comes together in minutes. This Creamy Chicken Breast in Spinach Parmesan Sauce is exactly that—a luscious, comforting meal that’s perfect for busy evenings when you crave something hearty but don’t want to spend hours in the kitchen. Imagine tender, juicy chicken breasts swimming in a velvety sauce packed with fresh spinach and nutty Parmesan. It’s the kind of meal that makes you pause mid-bite just to savor the flavor.

As a mom of two, I’m always on the hunt for recipes that balance simplicity and wow-factor. This one checks all the boxes: minimal prep, one-pan convenience, and a sauce so good you’ll want to lick the plate (no judgment here!). Whether you’re cooking for picky eaters or impressing dinner guests, this dish adapts effortlessly. Plus, it pairs beautifully with everything from pasta to crusty bread—perfect for soaking up every last drop of that creamy goodness.

Why You’ll Love This Creamy Chicken Breast Recipe

Here’s why this dish deserves a permanent spot in your dinner rotation:

  • 30-minute magic: From fridge to table in half an hour.
  • Pantry-friendly: Uses simple ingredients you likely have on hand.
  • Nutrient-packed: Spinach adds a boost of vitamins without compromising flavor.
  • Meal-prep hero: The sauce reheats beautifully for next-day lunches.

How to Make Creamy Chicken Breast in Spinach Parmesan Sauce

Ingredients You’ll Need

  • 2 boneless, skinless chicken breasts (butterflied for even cooking)
  • 2 cups fresh spinach (or frozen, thawed and drained)
  • 1/2 cup grated Parmesan cheese (plus extra for garnish)
  • 1 cup heavy cream or half-and-half for a lighter option
  • 2 cloves garlic, minced
  • 1 tsp Italian seasoning
  • Salt and pepper to taste
  • 1 tbsp olive oil

Step-by-Step Instructions

  1. Sear the chicken: Heat olive oil in a skillet over medium-high. Season chicken with salt, pepper, and Italian seasoning, then cook for 5–6 minutes per side until golden. Remove and set aside.
  2. Build the sauce: In the same skillet, sauté garlic until fragrant (about 30 seconds). Add spinach and cook until wilted.
  3. Bring it together: Reduce heat to low, pour in cream, and stir in Parmesan until melted. Return chicken to the pan, simmering for 2–3 minutes to thicken the sauce.
  4. Serve: Garnish with extra Parmesan and a sprinkle of red pepper flakes if you like a kick.

Pro Tips for the Best Results

Want to take this dish to the next level? Try these tricks:

  • Butterfly like a pro: Slice chicken breasts horizontally (but not all the way through) to create even, quick-cooking pieces. Here’s a handy guide from Food Network if you’re new to the technique.
  • Deglaze for depth: After sautéing garlic, add a splash of white wine or chicken broth to scrape up those flavorful browned bits.
  • Spinach swap: Kale or arugula work beautifully if that’s what’s in your fridge.

What to Serve With Your Creamy Chicken

This dish is incredibly versatile! Try pairing it with:

Frequently Asked Questions

Can I use frozen spinach? Absolutely! Just thaw and squeeze out excess moisture before adding it to the sauce.

How do I store leftovers? Keep in an airtight container for up to 3 days. Reheat gently on the stove with a splash of cream to revive the sauce.

Can I make this dairy-free? Yes! Swap cream for coconut milk and use nutritional yeast instead of Parmesan.

What’s the best way to reheat creamy chicken? Low and slow on the stovetop prevents the sauce from separating.

Can I add mushrooms? Definitely! Sauté them with the garlic for an earthy twist.

Is this recipe gluten-free? Yes, as written—just ensure your seasonings are gluten-free if needed.

There you have it—a dish that’s as easy to make as it is delicious. The next time you’re staring into the fridge wondering what to cook, remember this Creamy Chicken Breast in Spinach Parmesan Sauce. It’s the comforting, flavorful answer to your weeknight dinner dilemmas. And if you’re anything like me, you’ll find yourself making it again and again, tweaking it with whatever veggies or herbs are in season. After all, the best recipes are the ones that feel like home.

Irresistible Strawberry Lemon Blondies!

Irresistible Strawberry Lemon Blondies! A Sweet-Tart Treat You Can’t Resist

There’s something magical about the combination of strawberries and lemon—it’s like sunshine and summer berries dancing in every bite. If you’re craving a dessert that’s both sweet and tangy, these Irresistible Strawberry Lemon Blondies are about to become your new obsession. Imagine a buttery blondie base studded with juicy strawberries and brightened with a kiss of lemon zest. They’re soft, chewy, and just the right amount of gooey—perfect for picnics, potlucks, or a well-deserved afternoon treat.

I first made these blondies on a lazy Sunday when my fridge was overflowing with fresh strawberries (thanks, Costco impulse buy!). I wanted something different from the usual strawberry shortcake, and voilà—this recipe was born. What I love most is how effortlessly they come together. No fancy techniques, no waiting for butter to soften—just simple ingredients transformed into something extraordinary. Plus, they’re a hit with kids and adults alike. My neighbor’s toddler once declared them “berry cookies,” and honestly, that’s the highest praise.

Why You’ll Love These Strawberry Lemon Blondies

If you need more convincing (though one bite will do the trick), here’s why these blondies deserve a spot in your recipe rotation:

  • Easy to make: One bowl, minimal cleanup—ready in under an hour!
  • Bursting with flavor: Fresh strawberries and lemon zest elevate classic blondies.
  • Crowd-pleasing: Perfect for bake sales, parties, or a solo indulgence.
  • Versatile: Swap strawberries for raspberries or blueberries if you’re feeling adventurous.

How to Make Irresistible Strawberry Lemon Blondies

Ingredients You’ll Need

  • 1 cup (2 sticks) unsalted butter, melted
  • 1 ½ cups light brown sugar, packed
  • 2 large eggs
  • 1 tsp vanilla extract
  • Zest of 1 lemon
  • 2 cups all-purpose flour
  • ½ tsp salt
  • 1 cup diced fresh strawberries (plus extra for garnish)

Step-by-Step Instructions

  1. Prep: Preheat oven to 350°F (175°C). Line an 8×8-inch baking pan with parchment paper.
  2. Mix wet ingredients: In a large bowl, whisk melted butter and brown sugar until smooth. Add eggs, vanilla, and lemon zest, mixing well.
  3. Add dry ingredients: Gently fold in flour and salt until just combined. Avoid overmixing!
  4. Fold in strawberries: Carefully stir in diced strawberries to distribute evenly.
  5. Bake: Spread batter into the prepared pan. Bake for 30–35 minutes, or until edges are golden and the center is set.
  6. Cool & serve: Let cool for 15 minutes before slicing. Garnish with extra strawberries or a dusting of powdered sugar.

Tips for the Perfect Blondies

Want to nail this recipe every time? Here are my pro tips:

  • Don’t overbake: Blondies should be slightly soft in the center—they’ll firm up as they cool.
  • Use fresh strawberries: Frozen berries release too much moisture. If you must use them, pat them dry first.
  • Boost the lemon: Add a tablespoon of lemon juice to the batter for extra zing.
  • Storage: Keep in an airtight container for up to 3 days (if they last that long!).

For more fruity dessert inspiration, try my Blueberry Lemon Bars or these Raspberry White Chocolate Cookies.

Frequently Asked Questions

Can I use frozen strawberries?

Fresh strawberries work best, but if using frozen, thaw and pat them dry thoroughly to avoid soggy blondies.

Can I make these gluten-free?

Yes! Swap all-purpose flour for a 1:1 gluten-free blend. Check out King Arthur Baking’s gluten-free guide for tips.

How do I store strawberry blondies?

Store in an airtight container at room temperature for 2–3 days or refrigerate for up to 5 days.

Can I add white chocolate chips?

Absolutely! Fold in ½ cup of white chocolate chips for extra decadence.

Why did my blondies turn out cakey?

Overmixing or too much flour can cause a cakey texture. Measure flour carefully and mix until just combined.

Can I double the recipe?

Yes! Use a 9×13-inch pan and extend baking time by 5–10 minutes.

There you have it—a dessert that’s as fun to make as it is to eat. Whether you’re sharing these Irresistible Strawberry Lemon Blondies with friends or savoring them with a cup of tea (hey, no judgment here), they’re sure to bring a little joy to your day. Happy baking!

Carrot Cake Bars

Carrot Cake Bars: A Deliciously Easy Dessert for Any Occasion

There’s something undeniably comforting about carrot cake—the warm spices, the tender crumb, and that luscious cream cheese frosting. But let’s be honest: sometimes, you want all that goodness without the fuss of layering cakes or worrying about presentation. That’s where these Carrot Cake Bars come in! They’re everything you love about classic carrot cake, baked into a simple, shareable pan. Perfect for spring brunches, potlucks, or just satisfying that midweek sweet tooth.

I first made these bars for a last-minute bake sale at my daughter’s school, and let’s just say they disappeared faster than I could say seconds, please! The secret? They’re incredibly moist (thanks to shredded carrots and a touch of applesauce), packed with cozy cinnamon and nutmeg, and topped with a velvety cream cheese frosting that’s impossible to resist. Plus, they’re a sneaky way to get a veggie boost—though we won’t tell if you just call them dessert!

Why You’ll Love These Carrot Cake Bars

Whether you’re a seasoned baker or a newbie, these bars are a win. Here’s why:

  • Easy to make: No fancy equipment or decorating skills needed—just mix, bake, and frost!
  • Crowd-pleasing: They’re a hit with kids and adults alike (even carrot cake skeptics!).
  • Meal-prep friendly: They stay moist for days, making them great for make-ahead treats.
  • Versatile: Add nuts, raisins, or even pineapple for extra texture and flavor.

How to Make Carrot Cake Bars

Ingredients You’ll Need

Here’s what to grab for these irresistible bars:

  • 2 cups grated carrots (about 3–4 medium carrots)
  • 1 ½ cups all-purpose flour
  • 1 tsp baking powder
  • 1 tsp cinnamon
  • ½ tsp nutmeg
  • ½ cup unsweetened applesauce
  • 2 large eggs
  • 1 cup brown sugar
  • ½ cup melted butter or coconut oil
  • 1 tsp vanilla extract

Step-by-Step Instructions

  1. Prep: Preheat oven to 350°F (175°C) and line a 9×13-inch pan with parchment paper.
  2. Mix dry ingredients: Whisk flour, baking powder, cinnamon, and nutmeg in a bowl.
  3. Combine wet ingredients: In another bowl, mix applesauce, eggs, brown sugar, melted butter, and vanilla.
  4. Fold in carrots: Add the wet ingredients to the dry, then stir in grated carrots.
  5. Bake: Spread batter into the pan and bake for 25–30 minutes, until a toothpick comes out clean.
  6. Frost: Once cooled, top with cream cheese frosting (recipe below!).

Cream Cheese Frosting: The Perfect Finishing Touch

No carrot cake is complete without a generous layer of cream cheese frosting! Here’s my go-to recipe:

  • 8 oz cream cheese, softened
  • ½ cup unsalted butter, softened
  • 2 cups powdered sugar
  • 1 tsp vanilla extract

Beat all ingredients until smooth, then spread over cooled bars. Pro tip: For a lighter frosting, try this variation from Food Network!

Recipe Tips & Tricks

  • Grate carrots finely: Larger shreds can make the bars denser.
  • Don’t overmix: Stir until just combined to keep the texture tender.
  • Toast the nuts: If adding walnuts or pecans, toast them first for extra flavor.
  • Storage: Keep bars refrigerated (thanks to the frosting!) for up to 5 days.

Frequently Asked Questions

Can I make carrot cake bars gluten-free?

Absolutely! Swap the all-purpose flour for a 1:1 gluten-free blend. Check out our gluten-free baking guide for best results.

Can I freeze carrot cake bars?

Yes! Freeze unfrosted bars for up to 3 months. Add frosting after thawing.

How do I keep the frosting from melting?

Use full-fat cream cheese and butter, and avoid over-beating. Chill frosted bars if serving outdoors.

Can I use pre-shredded carrots?

Freshly grated carrots work best—pre-shredded ones are often too dry.

What’s a good egg substitute?

Flax eggs (1 tbsp ground flax + 3 tbsp water per egg) work well here.

Can I make these dairy-free?

Yep! Use coconut oil instead of butter and a dairy-free cream cheese alternative.

Whether you’re baking for a special occasion or just because, these Carrot Cake Bars are sure to bring smiles. They’re a reminder that the simplest treats often taste the best—especially when shared. Looking for more easy desserts? Try our famous banana bread or these lemon blueberry muffins next. Happy baking!

Garlic Tomato Chicken with Mozzarella

Garlic Tomato Chicken with Mozzarella: A One-Pan Wonder

There’s something magical about the combination of garlic, tomatoes, and melty mozzarella—especially when they cozy up to tender chicken in a single pan. This Garlic Tomato Chicken with Mozzarella is the kind of dish that feels indulgent but comes together in under 30 minutes, making it a weeknight hero. Whether you’re juggling a busy schedule or just craving comfort food that doesn’t skimp on flavor, this recipe is here to save the day.

I first stumbled upon this combo during a frantic fridge clean-out (you know, those nights when you’re *this close* to ordering takeout). A few cherry tomatoes, a half-used log of mozzarella, and some garlic later—voilà! Dinner was born. Now, it’s a regular in my rotation, and my family practically cheers when they smell it sizzling. The best part? It’s endlessly adaptable. Toss in spinach, swap the chicken for shrimp, or add a sprinkle of red pepper flakes for heat. It’s all about making it *yours*.

Why You’ll Love This Garlic Tomato Chicken with Mozzarella

This dish checks all the boxes:

  • Quick & easy: Ready in 30 minutes flat.
  • One-pan wonder: Fewer dishes = happier you.
  • Packed with flavor: Juicy tomatoes, garlic, and gooey cheese? Yes, please.
  • Meal-prep friendly: Tastes even better the next day.

How to Make Garlic Tomato Chicken with Mozzarella

Ingredients You’ll Need

  • 4 boneless, skinless chicken breasts
  • 2 cups cherry tomatoes, halved
  • 4 cloves garlic, minced
  • 1 cup fresh mozzarella, sliced or torn
  • 2 tbsp olive oil
  • 1 tsp dried oregano
  • Salt and pepper to taste
  • Fresh basil for garnish

Step-by-Step Instructions

  1. Sear the chicken: Heat olive oil in a large skillet over medium-high heat. Season chicken with salt, pepper, and oregano, then cook for 5–6 minutes per side until golden. Remove and set aside.
  2. Sauté the garlic and tomatoes: In the same pan, add garlic and tomatoes. Cook for 2–3 minutes until tomatoes soften and release their juices.
  3. Add the cheese: Return chicken to the pan, nestling it into the tomatoes. Top with mozzarella, cover, and let it melt for 2–3 minutes.
  4. Garnish and serve: Sprinkle with fresh basil and enjoy hot! Pair with crusty bread or a simple garlic parmesan pasta.

Tips for the Best Garlic Tomato Chicken

Want to take this dish to the next level? Try these tricks:

  • Use chicken thighs: For extra juiciness, swap breasts for thighs.
  • Broil for bubbly cheese: Pop the skillet under the broiler for 1–2 minutes for an extra-toasty finish.
  • Add a splash of balsamic: A drizzle of balsamic glaze adds a sweet-tart kick.

Frequently Asked Questions

Can I use shredded mozzarella instead of fresh? Yes, but fresh melts creamier. For a compromise, try shredded whole-milk mozzarella.

How do I store leftovers? Keep in an airtight container for up to 3 days. Reheat gently to avoid rubbery cheese.

Can I make this dairy-free? Absolutely! Swap mozzarella for dairy-free cheese or omit it entirely.

What sides go well with this dish? Try a crisp arugula salad or roasted potatoes.

Can I freeze this recipe? It’s best fresh, but cooked chicken (without cheese) freezes well for up to 2 months.

How can I add more veggies? Stir in spinach, zucchini, or bell peppers when sautéing the tomatoes.

There you have it—a dish that’s as flexible as it is delicious. Whether you’re cooking for one or a crowd, this Garlic Tomato Chicken with Mozzarella is sure to become a staple. And hey, if you’re anything like me, you might just find yourself accidentally making it twice a week. Happy cooking!