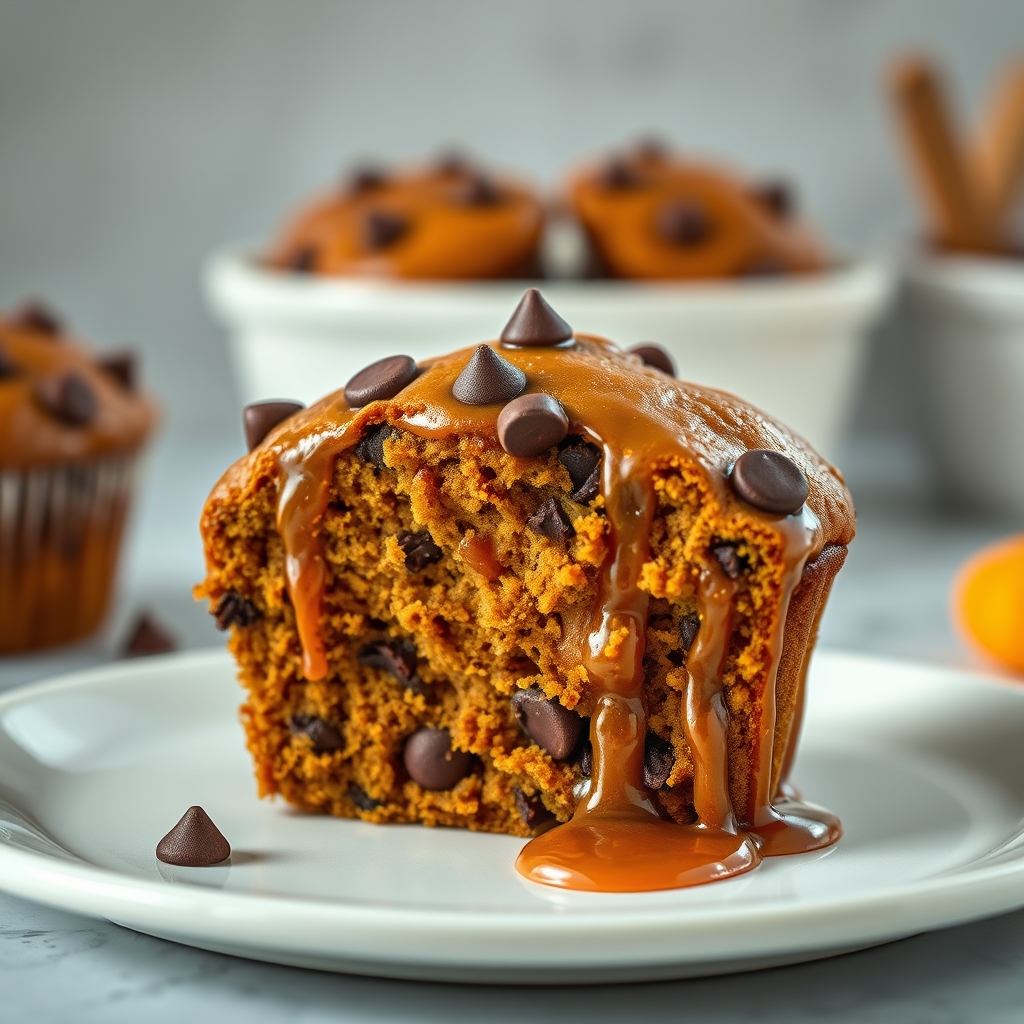
Chocolate Chip Pumpkin Muffins
Oh, the sweet embrace of autumn! As the leaves begin to fall and the air turns crisp, my kitchen becomes a haven of warmth and delicious aromas. There’s something magical about this time of year, isn’t there? The world seems to slow down a bit, offering us time to savor each moment. It was on one of these leisurely Sunday afternoons that I decided to experiment with one of my favorite fall combinations: pumpkin and chocolate. The result? These delightful Chocolate Chip Pumpkin Muffins that are just perfect for a cozy afternoon with a cup of tea.
I remember the first time I baked these muffins. My kitchen was filled with the sound of soft jazz, the windows slightly fogged up from the warmth of the oven. As I mixed the ingredients, my mind drifted back to childhood memories of picking pumpkins at the local farm and coming home with sticky fingers and a wide smile. That’s the magic of baking, isn’t it? It not only fills our bellies but also our hearts with joy and nostalgia.
Ingredients
Here’s what you’ll need to create these delightful muffins:
- 1 and 3/4 cups of all-purpose flour: The foundation of our muffins, providing structure and fluffiness.
- 1 cup of pumpkin puree: The star of the show. Make sure to use pure pumpkin, not the spiced pie filling.
- 2/3 cup of granulated sugar: Adds just the right amount of sweetness to balance the earthy pumpkin flavor.
- 1/2 cup of packed brown sugar: For that deep, caramel-like sweetness that complements the spices beautifully.
- 1/2 cup of vegetable oil: Keeps the muffins moist and tender. You can also use melted coconut oil if you prefer.
- 2 large eggs: They bind everything together and add richness to the batter.
- 1 teaspoon of vanilla extract: A touch of vanilla rounds out the flavor profile perfectly.
- 1 teaspoon of baking soda: Our leavening agent, helping the muffins rise and become wonderfully fluffy.
- 1/2 teaspoon of baking powder: Works with the baking soda for the perfect rise.
- 1/2 teaspoon of salt: Enhances all the flavors and brings balance to the sweetness.
- 1 teaspoon of ground cinnamon: A must-have for that cozy, autumnal spice.
- 1/2 teaspoon of ground nutmeg: Just a hint adds warmth and depth to the flavor.
- 1 cup of chocolate chips: The little pockets of melty chocolate make each bite a delight.
Instructions
Let’s dive into the heartwarming process of making these muffins:
- Preheat your oven: Set it to 350°F (175°C) and line your muffin tin with paper liners. This is the perfect time to take a moment and sip your tea, letting the anticipation build.
- Mix the dry ingredients: In a large bowl, whisk together the flour, baking soda, baking powder, salt, cinnamon, and nutmeg. I always find this step meditative, watching the spices blend into the flour like a gentle autumn breeze.
- Combine the wet ingredients: In another bowl, mix the pumpkin puree, granulated sugar, brown sugar, oil, eggs, and vanilla extract until smooth. The vibrant color of the pumpkin always brings a smile to my face, a reminder of those joyous pumpkin-picking days.
- Bring it all together: Gradually add the wet ingredients to the dry ingredients, stirring gently. Be careful not to overmix—just until everything is combined. This is where the magic happens, as the batter comes alive with the promise of delicious muffins.
- Add the chocolate chips: Fold in the chocolate chips, ensuring they’re evenly distributed. The anticipation of these little bites of happiness is what makes baking so rewarding.
Chocolate Chip Pumpkin Muffins
By Naomi | October 20, 2023
There’s something truly magical about the combination of pumpkin and chocolate chips. Each bite of these Chocolate Chip Pumpkin Muffins transports me to the heart of autumn, where the leaves are changing, and the air is crisp. I find that baking these muffins is not just about creating a delicious treat; it’s also about embracing the season’s warmth and comfort. Let’s dive deeper into making these muffins perfect for you and your loved ones.
Pro Tips for Perfect Muffins
- Don’t Overmix: Gently fold the wet and dry ingredients until just combined. This ensures your muffins stay tender and fluffy.
- Room Temperature Ingredients: Using room temperature eggs and butter helps the ingredients blend seamlessly, giving you a smoother batter.
- Use Fresh Pumpkin: If you can, use fresh pumpkin puree. It adds an unparalleled depth of flavor and moisture.
- Chill the Batter: Let the batter rest in the fridge for about 20 minutes before baking. This helps the muffins rise beautifully.
Variations and Substitutions
These muffins are wonderfully versatile, and you can tailor them to your taste or dietary needs:
- Gluten-Free: Substitute all-purpose flour with a gluten-free flour blend for a delicious gluten-free version.
- Nutty Twist: Add a handful of chopped walnuts or pecans for extra crunch.
- Dairy-Free: Swap out regular milk with almond or oat milk and use dairy-free chocolate chips.
- Spice It Up: Add a pinch of nutmeg or ginger for an extra layer of warmth.
What to Serve With Your Muffins
These muffins are the perfect companion to a warm cup of coffee or tea, especially during a peaceful morning or a cozy afternoon. For a full breakfast spread, pair them with fresh fruit, yogurt, or even a savory omelet. They also make a delightful dessert when served warm with a scoop of vanilla ice cream.
Storage and Reheating Guidance
To keep your muffins fresh, store them in an airtight container at room temperature for up to three days. For longer storage, you can freeze them. Wrap each muffin individually in plastic wrap and place them in a resealable freezer bag for up to three months.
When you’re ready to enjoy, reheat them in the microwave for about 20 seconds or in a preheated oven at 350°F (175°C) for 5-10 minutes until warm.
Frequently Asked Questions
Can I use canned pumpkin for this recipe?
Absolutely! Canned pumpkin works beautifully in this recipe. Just make sure it’s pure pumpkin puree and not pumpkin pie filling.
How do I know when the muffins are done?
Insert a toothpick into the center of a muffin. If it comes out clean or with just a few crumbs, they’re ready. The tops should be golden brown and spring back when lightly touched.
Can I make the batter ahead of time?
Yes, you can prepare the batter and store it in the refrigerator for up to 24 hours before baking. This is a great time-saver for busy mornings!
What can I do if my muffins are too dense?
If your muffins turn out dense, it might be due to overmixing or using old baking powder. Always use fresh ingredients and mix just until combined.
A Warm, Encouraging Final Note
Baking brings us together, creating moments of joy and comfort. As you bake these Chocolate Chip Pumpkin Muffins, remember that perfection isn’t the goal; it’s the love and warmth you bring to the experience that truly matters. Whether you’re sharing these muffins with family, friends, or savoring them alone with a good book, I hope they bring a smile to your face and warmth to your heart. Happy baking!

Chocolate Chip Pumpkin Muffins
Description
Deliciously moist and flavorful chocolate chip pumpkin muffins, perfect for fall mornings or any time you crave a sweet and spicy treat.
Ingredients
For the Crust:
- For the muffins:
- 1 and 3/4 cups all-purpose flour
- 1 cup granulated sugar
- 1/2 cup packed brown sugar
- 1 teaspoon baking soda
- 1/2 teaspoon salt
- 1 teaspoon ground cinnamon
- 1/2 teaspoon ground nutmeg
- 1/4 teaspoon ground cloves
- 1/4 teaspoon ground ginger
- 2 large eggs
- 1 and 1/2 cups pumpkin puree
- 1/2 cup vegetable oil
- 1/4 cup milk
- 1 teaspoon vanilla extract
- 1 cup chocolate chips
Instructions
1. Prepare the Crust:
- Preheat your oven to 350°F (175°C) and line a muffin tin with paper liners.
- In a large bowl, whisk together the flour, sugar, brown sugar, baking soda, salt, cinnamon, nutmeg, cloves, and ginger.
- In another bowl, beat the eggs and add the pumpkin puree, vegetable oil, milk, and vanilla extract. Mix until well combined.
- Gradually add the wet ingredients to the dry ingredients, stirring until just combined. Be careful not to overmix.
- Fold in the chocolate chips gently.
- Spoon the batter into the prepared muffin cups, filling each about 3/4 full.
- Bake for 20-25 minutes, or until a toothpick inserted into the center of a muffin comes out clean.
- Allow the muffins to cool in the pan for 5 minutes, then transfer them to a wire rack to cool completely.
Notes
For a fun variation, try adding chopped nuts or using white chocolate chips instead. Store muffins in an airtight container at room temperature for up to 3 days.