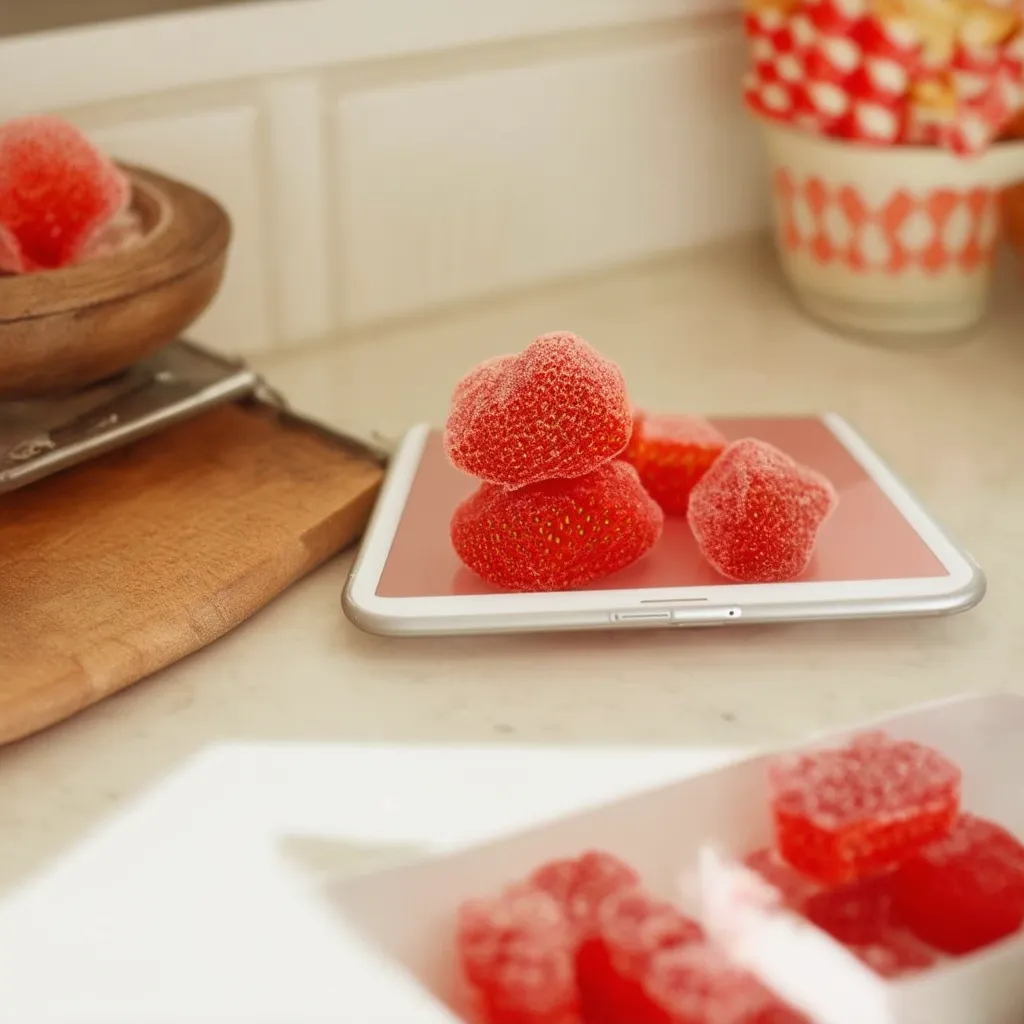
Welcome to the delightful world of homemade sour gummies! In this easy gummy recipe, you will discover how to create tangy strawberry gummies that are not only delicious but also customizable to fit your unique taste. Making your own gummies can be a fun and rewarding experience, allowing you to control the texture and flavor while knowing exactly what goes into your treat. This recipe is perfect for all ages, making it a great activity to share with family and friends. So, roll up your sleeves and get ready for a tasty adventure in gummy-making!
Key Takeaways
- Homemade sour gummies are a fun and rewarding way to enjoy a favorite treat.
- This easy gummy recipe allows for customization in flavor and texture.
- Making tangy strawberry gummies is suitable for all ages.
- Control the ingredients to ensure a healthier snacking option.
- Dive into creativity with different shapes and colors for your gummies.
Introduction to Homemade Gummies
The excitement surrounding homemade gummies is growing among candy enthusiasts and families alike. Making gummy candy at home offers a creative and fulfilling alternative to store-bought options that often contain preservatives and artificial ingredients. Embracing a DIY gummy recipe allows you to control every element of the process, ensuring that each batch is crafted with your preferred flavors and quality ingredients.
Creating these delightful treats can also foster strong bonds between family and friends. Gathering in the kitchen to experiment with different flavors and shapes transforms gummy making into a fun, shared experience. Imagination knows no bounds when it comes to crafting unique gummy candies, whether they are fruity, sour, or themed for special occasions.
As you embark on this delicious journey, you’ll find that homemade gummies not only satisfy your sweet tooth but also serve as a canvas for culinary creativity. Each bite can be a reflection of your personal taste, making the process enjoyable and rewarding. Dive in, and discover the joys of creating your very own gummy candy!
Benefits of Making Your Own Gummies
Creating homemade gummies comes with a variety of significant advantages. One of the primary benefits of homemade gummies is the control you gain over the ingredients. Unlike store-bought candies that may contain artificial colors and additives, homemade versions can be crafted using natural ingredients, ensuring a more nutritious snack.
Additionally, making gummies at home opens up a world of healthier candy options tailored to various dietary preferences, such as vegan or gluten-free choices. This flexibility allows families to cater to individual needs without sacrificing flavor or fun.
Engaging in this process can also serve as one of those fun cooking activities that brings families together. It offers a creative outlet for children and adults alike, allowing everyone to participate in shaping their treats. The joy of crafting personalized gummies creates lasting memories and increases overall satisfaction with the final product.
Homemade gummies often prove to be more cost-effective than purchasing similar products in stores. By utilizing ingredients on hand, you can create large batches for much less than buying pre-packaged treats. This practicality, paired with the joy of making candy together, makes the endeavor both rewarding and enjoyable.
Ingredients for Tangy Homemade Sour Strawberry Gummies
Creating tangy homemade sour strawberry gummies starts with understanding the essential gummy ingredients. A delightful combination of fresh strawberries, gelatin, sweeteners, and citric acid provides an irresistible sour kick. Each component plays a crucial role in achieving that perfect flavor and texture.
Essential Ingredients
Here’s a closer look at the basic gummy components you’ll need:
- Fresh Strawberries: Approximately 1 cup of pureed strawberries enhances both flavor and texture.
- Gelatin: Around 2 tablespoons, preferably high-quality, to ensure chewiness.
- Sweeteners: About 1/4 cup of your favorite sweetener, adjusting to taste.
- Citric Acid: 1 tablespoon to provide that trademark sour flavor.
Using high-quality gelatin is essential as it helps achieve the desired chewiness, which makes these gummies delightful to consume.
Gummy Mold Options
The right gummy molds can significantly influence the appearance of your sour strawberry gummies. Popular options include:
- Silicone Molds: Flexible and easy to use, perfect for a variety of gummy shapes.
- Plastic Candy Molds: Offers a sturdy option and is available in many fun designs.
Some favorite gummy shapes include fruits, bears, and stars, appealing to both kids and adults. Choosing the right mold not only enhances the look but also adds a touch of creativity. A good variety of molds can be easily found online, allowing you to experiment with different gummy shapes.
| Ingredient | Approximate Quantity | Notes |
|---|---|---|
| Fresh Strawberries | 1 cup (pureed) | Enhances flavor and texture |
| Gelatin | 2 tablespoons | High-quality for optimal chewiness |
| Sweeteners | 1/4 cup | Adjust based on taste preference |
| Citric Acid | 1 tablespoon | Provides a sour kick |
Step-by-Step Instructions for Crafting Gummies
Creating your own sour strawberry gummies can be a fun adventure, especially when you understand the basic steps involved. This section guides you through the essential processes of preparing the strawberry puree, mixing gummy ingredients, and setting your gummies.
Preparing the Strawberry Puree
To start with a delightful strawberry puree recipe, wash and hull fresh strawberries thoroughly. Once cleaned, blend the strawberries until a smooth consistency is achieved. A crucial step is to strain the puree through a fine mesh sieve; this ensures a velvety texture. After straining, taste the puree to check its sweetness before moving on. Adjust if necessary, so the final gummy product matches your desired flavor profile.
Mixing the Ingredients
Next, it is time to focus on mixing gummy ingredients. Combine the prepared strawberry puree with gelatin, a pinch of citric acid, and your choice of sweetener. When blending these components, gently heat the mixture on low to prevent boiling. This helps to create a clear and well-combined gummy base, making it easier to follow gummy candy instructions.
Pour and Set
Once your mixture is ready, it’s time for pouring gummy mixture into molds. Carefully fill each mold to avoid spills, and set the filled molds at room temperature or in the refrigerator to cool. A good rule of thumb is to let them set for about an hour. To know when the gummies are ready to be removed, check for a firm texture that holds its shape without sticking. Once they have cooled and firmed, gently pop them out of the molds and enjoy your homemade treats!
Tips for Achieving the Perfect Texture
Crafting delightful gummy candies involves more than just a basic recipe. The texture, taste, and overall experience hinge on gelatin tips and careful adjustments to flavor. Understanding how to maximize the potential of gelatin is key for achieving gummy texture that impresses.
Using Gelatin Effectively
When using gelatin in recipes, choosing between powdered or sheet gelatin can significantly affect the final product. Powdered gelatin is convenient and easily measured, while sheet gelatin offers a cleaner dissolve, which may help in achieving a smoother consistency in your gummies. Leading brands like Knox and Great Lakes provide high-quality options suitable for various homemade confections.
Adjusting Sweetness and Sourness
Balancing flavors is essential in gummy flavor customization. Sweetness adjustments can be made using common sweeteners like honey, agave syrup, or granulated sugar. On the flip side, balancing sourness involves manipulating the acidity of the fruit puree used. Tasting throughout the process ensures the perfect blend that suits your preference. If the sweetness feels overbearing, a dash of citric acid may enhance the sourness balance, creating that classic tart effect.
| Sweetener | Texture Impact | Flavor Profile |
|---|---|---|
| Honey | Soft, chewy | Natural sweetness with floral notes |
| Agave Syrup | Slightly sticky | Mild flavor, less acidic |
| Granulated Sugar | Classic gummy feel | Neutral sweetness |
| Citric Acid | Firmness enhancer | Tart, sour burst |
Creative Variations on Sour Strawberry Gummies
Unlock the full potential of your sour strawberry gummies by exploring creative variations. Customizing your gummy experience can lead to exciting flavor profiles and visually stunning creations.
Adding Other Fruit Flavors
Consider blending your sour strawberry base with other fruit flavors. Fruits such as lemon, lime, or raspberry can add a delightful twist, enhancing the taste and creating mixed fruit gummies that are even more enjoyable. Experimenting with different fruit combinations allows you to craft personalized fruit-flavored gummies that suit your palate.
Experimenting with Colors and Shapes
Colorful gummies not only appeal to the eye but also elevate the overall consumption experience. Incorporate natural coloring from various fruits and vegetables, allowing for vibrant shades that captivate. Fun gummy shapes can further enhance the enjoyment, making them ideal for parties or themed events. Using different molds enables the creation of unique gummy presentations, turning ordinary snacks into engaging edible art. Let your imagination guide your creative gummy ideas.
Storage and Shelf Life of Homemade Gummies
Storing homemade gummies requires some attention to ensure they remain fresh and tasty. Optimal conditions for storing homemade gummies include a cool, dry place out of direct sunlight. High humidity can negatively affect the texture and flavor, so aim for a low-humidity environment.
The typical gummy shelf life lasts about one to two weeks when stored properly. For best consumption, enjoy your gummies within the first week to experience their fullest flavor and chewy texture. As time passes, the gummies may start to lose their appealing consistency.
- Store in an airtight container to prevent moisture absorption.
- Avoid exposing gummies to heat, which can alter their structure.
- For longer retention, consider refrigerating, but be aware that refrigeration may affect texture.
When it comes to preserving gummies, a little precaution goes a long way. Following these storage guidelines will help maintain the quality and enjoyable flavor of your homemade treats. Enjoy your creations with the understanding that the fresher, the better!
| Storage Method | Expected Shelf Life |
|---|---|
| Airtight Room Temperature | 1-2 weeks |
| Refrigerated | 2-3 weeks |
| Frozen | Up to 6 months |
Sugar Alternatives for Health-Conscious Gamers
For those embarking on a healthy gummy recipe journey, it’s essential to explore natural sweeteners as a means of reducing refined sugar intake. Various sugar alternatives, like honey, maple syrup, and agave nectar, serve as excellent choices for enhancing the flavor profile of your gummies while addressing health concerns. Each option presents unique advantages and drawbacks, particularly regarding glycemic index and overall nutrition.
Natural Sweeteners Overview
Natural sweeteners have gained popularity as they offer a diverse range of flavors and health benefits. Here’s a quick comparison of some popular options:
| Natural Sweetener | Type | Glycemic Index (GI) | Health Benefits |
|---|---|---|---|
| Honey | Liquid | 58 | Rich in antioxidants |
| Maple Syrup | Liquid | 54 | Contains minerals like zinc and manganese |
| Agave Nectar | Liquid | 15 | Low GI, suitable for diabetics |
These options allow for a variety of flavors in your sugar-free gummies while promoting better health.
Adjusting the Recipe for Sugar-Free Options
Adapting gummy recipes to be sugar-free can be easily accomplished through the use of sweeteners like stevia and erythritol. These sugar alternatives provide a sweet taste without the additional calories or negative effects associated with traditional sugars. As you modify your healthy gummy recipe, consider the following:
- Stevia is a zero-calorie, plant-based sweetener that offers robust sweetness without impacting blood sugar levels.
- Erythritol is another popular sugar alcohol, contributing to sweetness while minimizing calories and avoiding digestive discomfort for most users.
- Remember that sugar-free gummies may have slight changes in texture or taste, which can be adjusted through trial and error.
Embracing these tips opens the door to a world of healthy candy options that satisfy cravings without compromising health goals.
Conclusion
Crafting your own homemade sour gummies can be an incredibly rewarding experience. This gummy recipe summary highlights the joy of transforming simple ingredients into a delicious treat that everyone can enjoy. By following the steps outlined, you not only create scrumptious tangy homemade sour strawberry gummies, but you also engage in a fun family activity that can bring everyone together in the kitchen.
Emphasizing health benefits and cost-effectiveness, making homemade sour gummies allows you to control the ingredients, ensuring that you and your loved ones enjoy a treat that aligns with your dietary preferences. These gummies can easily be customized with different fruit flavors or shapes to suit your family’s taste.
In final thoughts on gummies, we encourage you to embrace your creativity and experiment with variations to this basic recipe. With every batch, you will grow more adept at perfecting the texture and flavor profiles, turning each gummy-making session into an exciting culinary adventure!
FAQ
What ingredients do I need to make tangy strawberry gummies?
To make homemade sour strawberry gummies, you will need fresh strawberries, gelatin, sweeteners like honey or agave nectar, and citric acid for that delightful sour kick. Ensure you have a high-quality gelatin for the best texture!
Can I customize the flavors of my gummies?
Absolutely! You can add other fruit purees like lemon, lime, or raspberry to create unique flavor combinations. This way, each batch of gummies can be a fun experience, mixing and matching your favorite tastes!
How do I store my homemade gummies?
Store your homemade gummies in an airtight container at a cool, dry place. For longer shelf life, keep them in the refrigerator, and ensure they are consumed within about 1-2 weeks for optimal flavor and texture.
What types of molds work best for gummies?
Silicone molds are perfect because they allow easy removal of the gummies without sticking. You can also find a variety of fun shapes in plastic molds to make your gummies appealing to kids and adults alike!
Can I make sugar-free gummies?
Yes! You can use natural sweeteners like stevia or erythritol as substitutes for traditional sugar. Just keep in mind that this may slightly change the texture and taste, so adjust the recipe accordingly.
Is making gummies a fun activity for kids?
Definitely! Crafting homemade gummies can be a fantastic bonding experience for families. Kids love the creativity involved in choosing flavors and shapes, making it a fun cooking activity everyone can enjoy.
How long do I need to let my gummies set?
After pouring the mixture into molds, allow the gummies to set at room temperature for about 30 minutes to an hour, then refrigerate for an additional 1-2 hours to ensure they firm up nicely.
Are homemade gummies healthier than store-bought ones?
Yes! Homemade gummies allow you to control the ingredients, avoiding preservatives and artificial additives found in many store-bought varieties. Plus, you can tailor them to fit dietary preferences such as vegan or gluten-free!
What can I do if my gummies are too soft?
If your gummies turn out too soft, it may be due to not using enough gelatin. You can try increasing the gelatin quantity in your next batch or cooking the mixture a little longer before pouring it into molds.
