Best Healthy Starbucks Secret Menu Drinks for 2020

15 Healthy Starbucks Secret Menu Drinks For 2020

⚖️
Difficulty
Easy

⏲️
Prep Time
5 mins

🕒
Cook Time
0 mins

⏱️
Total Time
5 mins

🍽️
Servings
1

Are you ready to elevate your beverage game with some delightful, healthy options? Welcome to the world of Starbucks Secret Menu drinks! These drinks not only satisfy your taste buds but also allow you to indulge without compromising your healthy lifestyle. Whether you’re craving something fruity, creamy, or a little bit spicy, the Starbucks Secret Menu has something to offer everyone, and we’ve curated a list of 15 irresistible drinks for 2020. Get ready to explore the wonders that lie beyond the typical orders!

From light and refreshing iced beverages perfect for a sunny afternoon to warming and cozy options ideal for chilly mornings, each drink champions distinctive flavors and health-conscious ingredients. Unlocking these drinks isn’t just about taste; it’s a fun way to customize your beverage experience. The magical combinations crafted from Starbucks’ base drinks give you the freedom to play with flavors and make something that truly caters to your cravings.

Quick Recipe Highlights

  • Flavor Profile: Experience the delightful marriage of refreshing fruits with creamy textures that dance on your palate.
  • Texture: From velvety drink options to refreshing icy blends, these beverages will leave you craving more.
  • Aroma: Each secret drink bursts with aromatic hints of berries, coconut, and espresso, creating an inviting atmosphere.
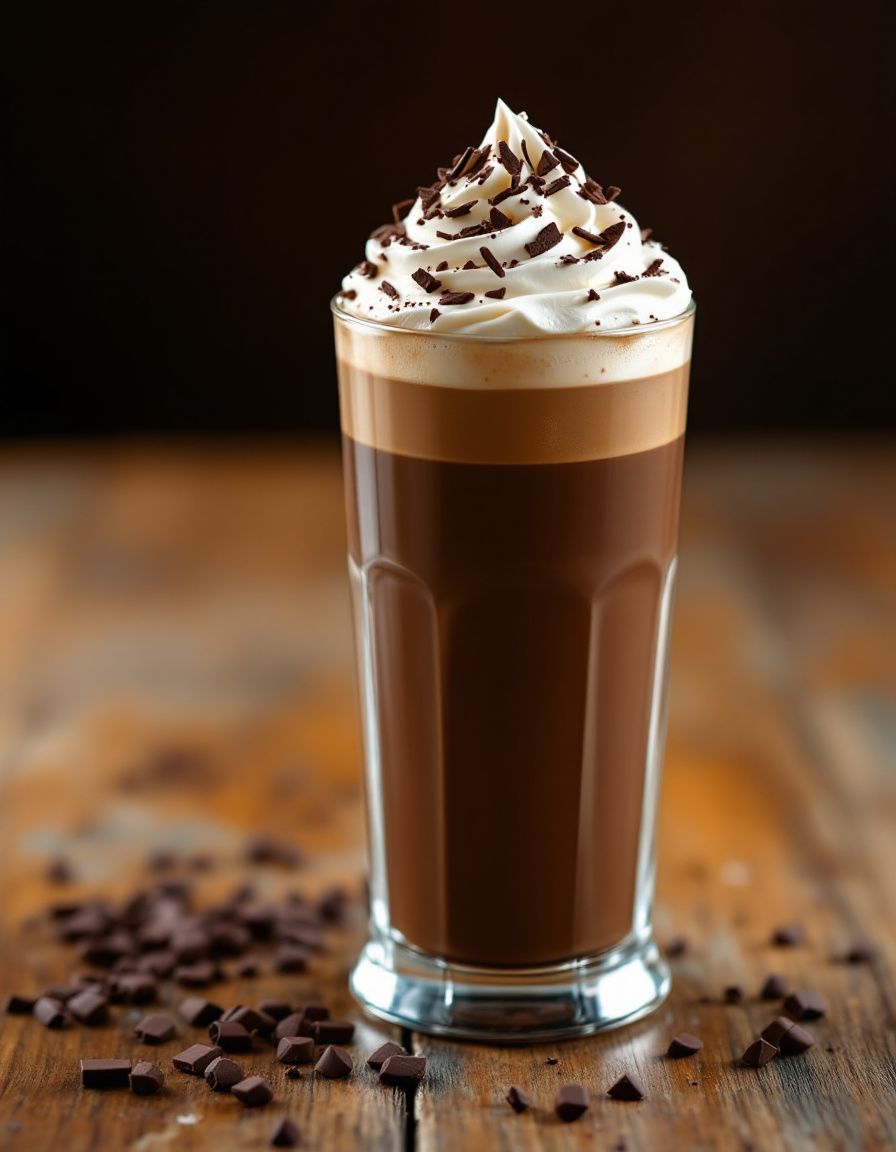
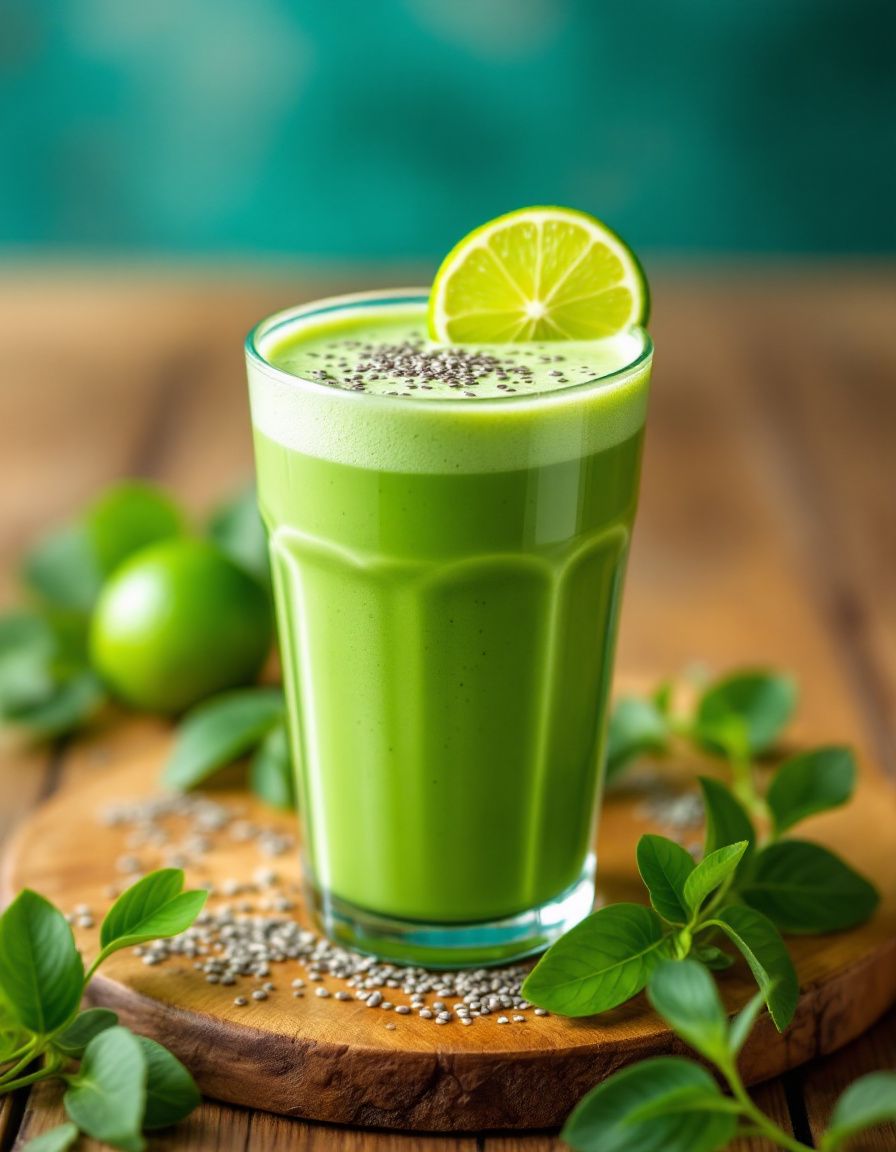
  • Visual Appeal: Bright colors, frothy toppings, and artisanal garnishes make each drink Instagram-worthy.
  • Skill Level Needed: Perfect for beginners; no advanced barista skills are necessary!
  • Special Equipment: Just your trusty blender and a selection of outer Starbucks ingredients.

Recipe Overview

  • Difficulty Level: Most of these drinks are easy to make and require only a few ingredients, perfect for any home barista.
  • Category: This recipe falls under beverages but could easily accompany breakfast or a snack.
  • Cuisine: While inspired by Starbucks’ classic drinks, these recipes lean towards modern, health-conscious options.
  • Cost: Enjoying a drink at home saves you money compared to buying it at Starbucks regularly.
  • Season: Enjoy these drinks year-round, with fruity options for summer and cozy flavors in the winter.
  • Occasion: Perfect for gatherings, study breaks, or leisurely brunches!

Why You’ll Love This Recipe

These 15 Healthy Starbucks Secret Menu Drinks are not only delicious but they also push the boundaries of what we expect from typical coffee shop offerings. Each drink is crafted with an emphasis on flavor and nutrition, allowing you to indulge guilt-free. The convenience of whipping up these beverages at home means you can enjoy a refreshing treat any time of the day.

Incorporating nutrient-rich ingredients, these drinks support a healthy lifestyle without sacrificing taste. Whether you’re looking for something rich in antioxidants or simply pure fruit flavors, these recipes leverage the best ingredients Starbucks has to offer. Entertaining friends or simply craving a tasty drink? These beverages will impress beyond just the visual appeal.

Moreover, these drinks are exceptionally cost-effective. With just a few ingredients and some creativity, you can recreate your favorite Starbucks orders for a fraction of the price. The accessibility of ingredients means that anyone can enjoy these drinks, making them a great option for a cozy gathering or a refreshing solo treat.

Lastly, the social aspect of these drinks cannot be overlooked. Sharing unique beverage creations can spark conversations and make gatherings more enjoyable. From summer picnics to winter gatherings, these drinks add a touch of fun and creativity that will have everyone asking for the recipe!

Historical Background and Cultural Significance

The Starbucks Secret Menu is a phenomenon that began organically among coffee lovers who wanted to customize their drinks beyond the standard offerings. As people began experimenting, a wealth of flavors and combinations surfaced, giving birth to a vibrant community of coffee enthusiasts. The yearly updates, like the one for 2020, reflect evolving tastes and health trends in the beverage industry.

This cultural significance extends beyond coffee; it showcases creativity and individual expression through food and drink. As more people became health-conscious, the trend shifted towards better-for-you ingredients, prompting the rise of the secret menu items that cater to these evolving preferences.

Additionally, regional variations became significant as fans of Starbucks began to explore culturally-inspired drinks, integrating local flavor preferences into the secret menu. From fruity flavors to exotic spices, every new recipe is a nod to diverse culinary traditions.

Over the years, the popularity of these creative drinks has led not just to new concoctions, but also a broader understanding of what coffee and tea can be. This allows drinkers to explore outside traditional boundaries and embrace flavors from around the world in their caffeine fix.

Ingredient Deep Dive

Almond Milk: This nut-based milk offers a creamy texture while remaining low in calories compared to traditional dairy. It’s rich in vitamin E and is a good source of healthy fats. When selecting almond milk, opt for unsweetened options to avoid added sugars.

Almond milk is versatile for drinks and can be stored in the fridge for up to a week once opened. If you’re unable to find it, try substituting with coconut milk for a different flavor profile.

Matcha Powder: Matcha is a finely ground powder made from specially grown green tea leaves, rich in antioxidants. Its unique flavor offers a natural sweetness and depth that pairs beautifully in drinks. When selecting matcha, choose high-quality brands for the best flavor and health benefits.

Store matcha in a cool, dry place to maintain its freshness. If you need a quick substitute, consider green tea powder, though the flavor profile will differ slightly.

Common Mistakes to Avoid

  • Not asking for specific customization: Many Starbucks employees are familiar with the secret menu, but it’s crucial to clearly communicate your desires to avoid any misunderstandings.
  • Overloading ingredients: Adding too many ingredients can lead to overwhelming flavors. Stick to a few key components to maintain balance.
  • Ignoring temperature: Always be mindful of how hot or cold you want your drink to be; specify temperature preferences to the barista.
  • Choosing low-quality ingredients: For the best flavor, always opt for premium ingredients when available.
  • Forgetting to request modifications: Many drinks can be further customized; don’t hesitate to ask for more or less sweetness, or for specific substitutions.
  • Ordering off the secret menu in a hurry: Take the time to decide on your drink to avoid disappointment.
  • Assuming all baristas know the secret menu: If a barista seems unfamiliar, be prepared to explain your drink.
  • Neglecting to specify cup size: Starbucks offers different sizes, and forgetting to specify could lead to receiving a drink that’s either too big or too small.
  • Limited to one variation: Don’t shy away from trying different variations; explore flavors you haven’t experienced yet!
  • Ignoring seasonal specials: The secret menu evolves; make sure to ask for any seasonal variations that could enhance your drink experience.

Essential Techniques

Mastering the art of requesting drinks off the Starbucks Secret Menu is essential for getting your desired beverage just right. To perfect the technique, familiarize yourself with how drinks are typically made at Starbucks and think creatively in terms of blending flavors.

Pay attention to visual cues; each drink has a unique appearance. Ensure your requested drink matches the aesthetic you’re after, cultivating the experience of authentic barista craftsmanship right at home.

Pro Tips for Perfect Healthy Starbucks Secret Menu Drinks

1. **Experiment with Flavors**: Don’t be afraid to mix and match ingredients. The beauty of these drinks lies in customization.

2. **Use Quality Ingredients**: Whenever possible, opt for organic or local products to enhance the flavor of your drinks.

3. **Stay Seasonal**: Incorporate seasonal fruits and spices to elevate your drinks throughout the year.

4. **Adjust Sweetness**: Many recipes can be adjusted in terms of sweetness. Start with less and gradually add more to find the perfect balance.

5. **Think Visuals First**: Presentation can make a difference. Use layers of colors for visual appeal.

6. **Serve Chilled**: If it’s an iced drink, make sure the glasses are pre-chilled for maximum refreshment.

7. **Invest in Good Tools**: Having the right blender and measuring tools can make a world of difference in your beverage creations.

8. **Share Your Creations**: Encourage others to join in on the fun by sharing your secret menu drink experiences and recipes!

Variations and Adaptations

Regional variations in the Starbucks Secret Menu reflect local flavor preferences, such as incorporating local fruits or spices. Additionally, seasonal adaptations allow for the use of ingredients that are fresh at certain times of the year, like pumpkin spice in fall.

For those with dietary restrictions, there are easy modifications to explore, like using oat milk for a creamier texture that remains dairy-free. Flavor variations could include adding flavor syrups or substituting traditional flavors with fruit purees for a healthier twist.

Serving and Presentation Guide

Serving your drinks in clear, aesthetically pleasing glasses not only enhances the visual appeal but also showcases the beautiful colors of your ingredients. Creating layers with your drinks can add an extra flair to presentation.

Garnishing with fresh herbs or fruits welcomes creativity; consider mint leaves or cinnamon sticks for different flavor accents. Temperature is also vital; serve iced drinks over crushed ice for a refreshing experience and hot drinks in pre-warmed mugs for the perfect slow sip.

Wine and Beverage Pairing

When it comes to enjoying your healthy drinks with meals, pairing can enhance the experience. For fruity options, consider a light white wine or sparkling water with a splash of citrus. Alternatively, for richer or coffee-based drinks, a deep red wine could complement the flavors well.

If you prefer non-alcoholic alternatives, craft mocktails using complementary fruit flavors. Also, coffee or tea pairings can elevate your experience; explore herbal teas that mirror the flavor notes in your drinks.

Storage and Shelf Life

To maintain the freshness of your ingredients, store them in airtight containers in the fridge. Generally, homemade drinks can last for up to 48 hours before losing their flavor profile.

If you wish to keep your drinks longer, consider freezing fruit purees or optional creamy ingredients in ice cube trays for easy access. To reheat any warmed beverages, gently warm them on the stove or in a microwave, being cautious not to overheat.

Make Ahead Strategies

One of the best strategies for enjoying these secret menu drinks regularly is to prepare ingredients ahead of time. Pre-slicing fruits or blending fruit purees in bulk allows for quick assembly when you’re ready to enjoy your beverage.

Think about storing blends separately and assembling on the day you plan to indulge; this can preserve the fresh flavor and texture that is oh-so-important in drinks.

Scaling Instructions

Scaling these drinks is easy. To halve the recipe, simply divide each ingredient by two. Alternatively, if you want to double or triple the quantity, ensure your equipment can handle larger volumes and adjust blending time accordingly for a smoother consistency.

When adjusting the timing for larger batches, remember to allow more time for blending if necessary. Store any leftovers in airtight containers for easy access later!

Nutritional Deep Dive

Understanding the nutritional content of your secret menu drinks can help you make informed choices. Daily macro breakdowns reveal beneficial components like healthy fats from nut milks and antioxidants from fruits.

Micronutrient analyses show how incorporating ingredients like matcha boosts overall health. Each ingredient has its health benefits, so it’s essential to mix and match based on dietary needs.

Dietary Adaptations

The versatility of the Starbucks Secret Menu allows for numerous dietary adaptations. If you’re gluten-free, simply ensure that no gluten-containing ingredients are included in your drinks. Dairy-free options can seamlessly incorporate nut or plant-based milks.

For vegan enthusiasts, using plant-based proteins or fibers in your drinks can add crucial nutrients while keeping the recipe aligned with lifestyle choices. Exploring keto or paleo adaptations is also simple by substituting sugars with natural sweeteners.

Troubleshooting Guide

If you run into texture issues, ensure you’re blending for long enough to smooth out lumps. Failing to balance flavors can be remedied by adjusting sweetness or acidity to reach the desired taste.

For temperature-related problems, always taste your drinks before serving to check if they’re too hot or cold. If an ingredient just doesn’t match, feel free to swap it out for something that better fits your theme.

Recipe Success Stories

Many fans of the Starbucks Secret Menu have shared their experiences recreating drinks at home, highlighting how simple modifications can lead to delightful results. Individual variations, like adding unique flavor syrups or crafting beautiful layered presentations, showcase how versatile and fun these recipes can be.

Photography tips abound in the community, emphasizing the appeal of Instagram-worthy drinks. Sharing successful attempts and variations keeps the spirit of the secret menu alive and inspires others to venture into their drink-making adventures.

Frequently Asked Questions

1. What are Starbucks Secret Menu drinks? These drinks are customizable options created by customers and fans, going beyond the standard Starbucks menu.

2. Are these drinks available year-round? Some ingredients may vary by season, and not all drinks are available at all times.

3. Can I order these drinks at any Starbucks? While many baristas are familiar with secret menu items, it’s best to explain your drink customization in detail.

4. What are some popular secret menu drinks? Favorites often include customized lattes and fruity refreshers, but creativity is key!

5. How can I find new secret menu drinks? Explore social media and recipe blogs for inspiration and community-created drinks.

6. Can I make these drinks vegan? Yes, by using non-dairy milks and ensuring no animal-derived ingredients are included.

7. What’s a good way to sweeten these drinks? Natural sweeteners like honey, agave syrup or even stevia can be used depending on your preference.

8. How do I make these drinks healthy? Opt for low-calorie or sugar-free syrups and substitute milk with lighter versions like almond or oat.

9. Can I freeze leftovers? Yes! Freezing can preserve flavors; just be mindful of texture changes.

10. What should I do if my drink doesn’t taste right? Adjust ingredients to find the right balance and remember to taste as you go!

Additional Resources

For those looking to dive deeper into the world of copycat recipes, exploring similar beverage recipes can reveal more unique creations. Technique guides can offer insight into mastering skills needed for blending and customizing flavors.

Ingredient information is also vital for understanding the best options to enhance your drinks. Be sure to check out equipment recommendations that could further elevate your beverage-making skills.

Join the Conversation

Engaging with fellow coffee enthusiasts on social media is a fantastic way to share your take on these Starbucks Secret Menu drinks. Encourage others by showcasing your photos, sharing your successes, and providing feedback on different variations.

Offering recipe reviews and making suggestions can also encourage more exploration within the community, fostering a supportive environment for all drink lovers!

The Recipe

15 Healthy Starbucks Secret Menu Drinks

Serves: 1

Prep Time: 5 mins

Cook Time: 0 mins

Total Time: 5 mins

Kitchen Equipment Needed

  • Blender
  • Measuring cups and spoons
  • Glass for serving

Ingredients

  • 1 cup of almond milk
  • 1-2 tablespoons of matcha powder (optional)
  • Fruits of choice (like strawberries, mango, or blueberries)
  • Sweetener to taste (honey or agave syrup)
  • Ice cubes (for iced drinks)

Directions

  1. Add all ingredients into the blender.
  2. Blend until smooth and well combined.
  3. Taste and adjust sweetness if necessary.
  4. If making an iced drink, serve over ice in a glass.
  5. Garnish as desired and enjoy your delightful drink!

Recipe Notes

  • You can adjust the sweetness based on personal preference.
  • Different milk alternatives can be used for added flavor.
  • Feel free to experiment with various fruits for different flavor profiles!

Savory Garlic Butter Bacon Cheeseburger Rollups for Ultimate Flavor

Garlic Butter Bacon Cheeseburger Rollups: A Savory Twist on Comfort Food

⚖️
Difficulty
Easy

⏲️
Prep Time
15 mins

🕒
Cook Time
20 mins

⏱️
Total Time
35 mins

🍽️
Servings
4

Indulge in the ultimate comfort food experience with these Garlic Butter Bacon Cheeseburger Rollups. Imagine the rich flavors of garlic butter enveloping crispy bacon, melted cheese, and perfectly seasoned ground beef—all rolled up in a warm, golden crust. This delightful combination not only tantalizes your taste buds but also brings a feeling of warmth and satisfaction that only a hearty dish can provide. These rollups are perfect for family gatherings, game day, or as a simple weeknight meal that everyone will love.

These Garlic Butter Bacon Cheeseburger Rollups offer a savory explosion of flavors in every bite. The combination of garlic, butter, and bacon creates an irresistible aroma that fills your kitchen, inviting everyone to the table. When you pull these golden rollups out of the oven, they’re sure to impress with their crispy exterior and luscious, cheesy filling. Perfectly portioned, they can be served as an appetizer, a main course, or even as a fun finger food during your next get-together.

Quick Recipe Highlights

  • Flavor Profile: Expect a blissful marriage of savory, buttery garlic with salty bacon and gooey cheese.
  • Texture: Crispy on the outside with a soft, cheesy, and meaty center that melts in your mouth.
  • Aroma: The aroma is irresistible, combining rich garlic butter and smoky bacon scents that waft through the air.
  • Visual Appeal: These rollups are golden brown, invitingly gooey, and visually appealing in their neat presentation.
  • Skill Level Needed: Ideal for beginners, this recipe requires minimal cooking skills yet delivers impressive results.
  • Special Equipment: A baking sheet and parchment paper will help achieve perfect crispiness.

Recipe Overview

  • Difficulty Level: The easy preparation method makes this recipe accessible to everyone, allowing for a fun cooking experience.
  • Category: This recipe falls under comfort food and finger foods, making it a versatile dish for any occasion.
  • Cuisine: Fusing American and classic barbecue flavors, it reflects indulgent culinary trends that appeal to many.
  • Cost: The estimated cost per serving is quite reasonable, primarily featuring affordable ingredients like ground beef and bacon.
  • Season: A year-round favorite, these rollups can be enjoyed in any season, but they are especially comforting in cooler months.
  • Occasion: Perfect for game day, casual gatherings, or a cozy family dinner, they fit right in on any relaxed occasion.

Why You’ll Love This Recipe

The delightful combination of garlic butter, bacon, and melted cheese makes these Garlic Butter Bacon Cheeseburger Rollups a true indulgence for your taste buds. Each bite is a flavor-packed surprise, bursting with the savory essence of well-seasoned ground beef, complemented by the crunch of crispy bacon and the richness of cheese. This dish offers a comfort that reminds us of home, instantly bringing warmth and satisfaction to those who enjoy it.

Not only are these rollups incredibly delicious, but they are also remarkably convenient to prepare. With just a handful of ingredients, you can whip up a batch in under 35 minutes. This means fewer hours in the kitchen and more time to enjoy with family and friends, making it ideal for busy weeknights or spontaneous gatherings. Plus, the fact that they can be made in advance and simply reheated adds to their convenience.

On the nutritional front, you can customize these rollups to meet your dietary needs. Opt for lean ground beef or turkey to cut down on fat, and add additional vegetables for a healthier twist. This not only enriches the nutritional profile but also enhances the flavor and texture of the dish, giving you the best of both worlds—taste and health.

These rollups are also a fantastic social dish. Whether it’s a casual get-together or a big game night, they are easy to share and make a perfect finger food option. Their impressive presentation and delightful taste will surely be a talking point among guests, encouraging laughter and conversation around the table—truly what gatherings are all about.

Lastly, the affordability of this recipe is hard to beat. With everyday ingredients that won’t break the bank, it’s a practical option that ensures everyone can indulge without guilt. The easily accessible nature of the ingredients also makes it a great recipe to keep in your rotation, offering deliciousness without straining your wallet.

Historical Background and Cultural Significance

The roots of the cheeseburger can be traced back to the early 20th century, evolving from the classic hamburger. This iconic American dish has become synonymous with comfort food, often enjoyed at backyard barbecues or diners across the United States. The addition of garlic butter and bacon to the cheeseburger has created a new variation that embodies the essence of indulgence, resonating with modern culinary trends.

In many cultures, the concept of wrapping foods in dough or bread is commonly found, coming from utilitarian cooking traditions where portability and ease of eating were essential. These Garlic Butter Bacon Cheeseburger Rollups represent a contemporary twist on this tradition, combining beloved American flavors with an easy-to-eat format that is perfect for sociable settings.

Over the years, recipes like these have evolved, adopting various ingredients and preparation methods based on regional preferences. The incorporation of garlic butter and bacon reflects a growing trend towards maximizing flavor and indulgence in everyday meals, appealing to busy families and culinary enthusiasts alike.

Regional variations of this dish may include different types of cheese—such as pepper jack or cheddar—or additional toppings like jalapeños or guacamole. This flexibility keeps the recipe versatile, allowing people to personalize their rollups and showcase local preferences, making it a dish that can be enjoyed across diverse culinary landscapes.

Ingredient Deep Dive

Ground Beef: Ground beef is a foundational ingredient in many cuisines, providing flavor and protein. It is essential to select high-quality grass-fed or organic options for the best taste and nutritional benefits. Ensure to season well to elevate its flavor, and keep in a sealed container in the refrigerator or freezer to maintain freshness.

Bacon: Bacon is not just a flavorful addition; it also serves a cultural significance, often representing indulgence and comfort in culinary traditions. Rich in fats, it adds a desirable crunch to any dish. When selecting bacon, look for nitrate-free or organic varieties to elevate the nutritional factor and flavor. Store it in the fridge and make sure to use it within a week for the best quality.

Cheese: Cheese provides creaminess and depth to the rollups, with options ranging from sharp cheddar to creamy mozzarella. Its history spans centuries, making it a beloved ingredient across many cultures. Choose your favorites to personalize the dish. Cheese can be tricky to store; keep it in an airtight container in the fridge to prevent dryness, and remember to let it come to room temperature before using for optimum flavor.

Common Mistakes to Avoid

  • Overcooking the beef: Overcooked meat can become dry and unappetizing. Cook just until browned and season afterward for moisture.
  • Not letting the dough rest: Allowing the dough to rest for a few minutes ensures a better texture and eases rolling.
  • Using too much filling: Overfilling can lead to messy rollups that are hard to seal and often burst during cooking.
  • Ineffective sealing: Ensure the edges are properly sealed before baking to avoid leakage.
  • Skipping the garlic butter: The garlic butter massively contributes to flavor; don’t skip it!
  • Choosing the wrong cheese: Make sure to select cheese that melts easily, as this enhances the overall experience.
  • Not preheating the oven: A well-preheated oven is essential for even cooking and achieving that desired crispiness.
  • Ignoring leftovers: These rollups can be repurposed; don’t hesitate to freeze and reheat for future meals!

Essential Techniques

Rolling the Dough: Properly rolling the dough is key for even cooking. Start by flattening it into a rectangle to ensure uniformity in cooking. Use a light touch to prevent tearing, and ensure the filling is distributed evenly.

Meat Seasoning: Seasoning the beef while cooking is crucial for optimal flavor. Use salt, pepper, and optional spices like garlic powder or onion powder. Taste and adjust as needed, remembering that the other ingredients will also bring flavor.

Sealing the Rollups: Ensuring the edges of the rollups are sealed tightly prevents the filling from leaking out while baking. Use a bit of water to moisten the edges before pressing down to create a seal that holds during cooking.

Baking for Crispiness: For the best texture, bake rollups until they achieve a golden-brown color. Pay attention to the visual cues; they will appear puffy and crispy when ready, indicating that the dough has cooked through properly.

Pro Tips for Perfect Garlic Butter Bacon Cheeseburger Rollups

  • Use a high-quality cheese for deeper flavor and better melting properties.
  • Experiment with different meats, such as turkey or chicken, to create healthy alternatives.
  • Try adding diced vegetables to the filling for an extra crunch and nutritional boost.
  • For an extra flavor infusion, brush the rollups with garlic butter before baking.
  • Allow the rollups to cool slightly before serving to avoid burning your mouth on the molten cheese!
  • Consider prepping extra rollups for freezing—just bake them directly from the freezer when you’re craving comfort food.
  • Adjust spice levels by adding hot sauce or crushed red pepper flakes to the filling if you enjoy some heat.
  • Pair with a dipping sauce, such as ranch or barbecue, for added flavor!

Variations and Adaptations

Regional variations can play a fun role in customizing your rollups. For a Tex-Mex twist, consider incorporating jalapeños and pepper jack cheese to turn up the spice level! Seasonal adaptations may involve incorporating pumpkin or spinach to highlight fresh, in-season produce during fall and spring.

For dietary modifications, you can opt for gluten-free wraps made from almond or coconut flour. If you’re looking for lower-carb alternatives, try using zucchini slices or eggplant instead of dough. Vegan options can include plant-based cheese and meat substitutes with the same delicious ingredients that maintain the savoriness of the recipe.

Texture variations can include using puff pastry for a lighter, flaky option or even experimenting with phyllo dough for a crunchier bite. Different garnish techniques can elevate your presentation; try drizzling a balsamic reduction or adding fresh herbs for a pop of color.

Serving and Presentation Guide

For an impressive presentation, arrange the rollups on a serving platter, followed by a sprinkle of freshly chopped parsley or chives. This adds a touch of color and freshness. You can slice them in half or keep them whole for a fun, interactive dining experience.

Consider garnishing with sauce and serve alongside a fresh salad or coleslaw to balance the richness of the rollups. This not only adds acidity but also provides a contrast in texture and flavor.

Serve the rollups warm and offer a selection of dipping sauces to enhance the tasting experience. Encourage guests to mix and match flavors, creating a lively social atmosphere around the meal.

Wine and Beverage Pairing

For a delightful wine pairing, consider a robust red like a Cabernet Sauvignon that can stand up to the rich flavors of the rollups. Its tannins will beautifully complement the savory notes of the bacon and cheese.

If you prefer a lighter option, a crisp lager or a pale ale makes for an excellent non-wine alternative, balancing the richness with refreshing bubbles.

For a non-alcoholic option, sparkling water with a squeeze of lemon can cleanse the palate between bites while keeping the meal light.

Storage and Shelf Life

To store leftover Garlic Butter Bacon Cheeseburger Rollups, let them cool completely before placing them in an airtight container. They will last safely in the fridge for about 3-4 days.

If you’re looking to extend their shelf life, consider freezing them. Place rolled-up leftovers in a freezer-safe container, separating layers with parchment paper to prevent sticking, and they can last for up to three months.

To reheat, bake directly from frozen at 350°F until heated through, ensuring the filling gets warm while keeping the exterior crisp. If reheating from the fridge, a quick bake at 375°F for 10-15 minutes should suffice.

Make Ahead Strategies

Prepping your rollups in advance is easy! You can assemble them the night before and keep them covered in the fridge until you’re ready to bake them. This allows the flavors to meld together, enhancing the overall taste of your dish.

When making ahead, consider separating the garlic butter into small portions. You can brush some on the rollups just before baking for that fresh, melted flavor, giving you the best of both worlds—convenience and freshness.

For quality impact, avoid baking too far in advance; the ideal timeframe for baking is within 24 hours of assembly. You want to maintain the crispiness of the dough while ensuring the filling is perfectly cooked.

Scaling Instructions

If you’re looking to serve a larger crowd, doubling the recipe is simple. Just make sure you have enough baking trays and spread the rollups out to avoid overcrowding, which can lead to uneven cooking.

When halving the recipe, using a smaller baking dish can help keep the rollups snug, ensuring they cook evenly and maintain their shape.

Take note of baking times which may slightly vary with different quantities—keep an eye on them and use color as your guide for doneness.

Nutritional Deep Dive

Your Garlic Butter Bacon Cheeseburger Rollups are high in protein, thanks to the beef and cheese, making them a filling entree or snack. The use of lean beef can help keep the fat content reasonable while still providing those hearty flavors.

With bacon included, it is essential to consider the balance of saturated fats; however, the flavor it brings often compensates for this. You can easily adjust the nutrition profile by selecting all-natural options and measuring cheese and bacon portions.

For those looking to watch their calorie intake, consider serving with light sides alongside the rollups, such as a garden salad or fresh vegetables, to help manage your overall meal composition.

Dietary Adaptations

For gluten-free diets, you can substitute traditional dough with gluten-free bread or tortillas, allowing those who need to avoid gluten to enjoy these comforting rollups without fuss.

If seeking dairy-free alternatives, options like vegan cheese can easily replace regular cheese, and plant-based butter can be swapped into the garlic butter mixture.

For low-carb or keto diets, you could utilize cauliflower or zucchini for a healthier wrap option, dramatically reducing carbs while still providing great flavor.

Troubleshooting Guide

If your rollups come out soggy, it may be that the filling was too watery or that they needed longer baking time. To fix this, ensure that any moisture is drained from your ingredients before assembly and keep an eye on them while baking.

For flavor imbalance, increase spices in the meat mixture to meet personal taste. Always taste as you go, if possible, to ensure the best flavor combination.

If the exterior of the rollups is cooking faster than the inside, consider covering them with foil partway through baking to prevent over-browning while allowing the interior to thoroughly heat through.

Recipe Success Stories

Many home cooks have reported incredible success with this recipe! Readers rave about how easy it is to prepare and how everyone at their gatherings appreciates the flavors. Feedback emphasizes its crowd-pleasing nature, with many suggesting it pairs well with various sauces.

Community members have shared their variations, swapping out ingredients for personal favorites like pulled pork or adding unexpected elements like jalapeños for a spicy kick. These unique adaptations enhance the dish’s versatility and show how it can fit into various culinary preferences.

Photography tips for sharing this Instagram-worthy dish have been highly sought after, with many users excited to share their results, showcasing the rollups’ golden appearance and oozy cheese on their feeds. It’s a testament to how appealing the end product is!

Frequently Asked Questions

Can I use pre-cooked bacon for this recipe?

Yes, using pre-cooked bacon can save time. However, be sure to chop it into small pieces to ensure it mixes well with the other ingredients and provides flavor.

Is there a vegetarian version of this recipe?

Absolutely! Substitute the ground beef with a mix of mushrooms, lentils, or other plant-based proteins, and keep the bacon out for a delightful vegetarian dish.

Can these rollups be frozen?

Yes, you can freeze uncooked rollups before baking them. Just assemble them, wrap them tightly in foil or plastic wrap, and store them in a freezer-safe bag. Bake from frozen when ready to eat.

What dipping sauces pair well with these rollups?

Ranch dressing, barbecue sauce, or honey mustard make excellent dipping options that enhance the flavors of the rollups and cater to various taste preferences.

How do I make these rollups spicy?

Add diced jalapeños or crushed red pepper flakes to the meat mixture for a spicy kick. Hot sauce can also be served alongside for those who enjoy extra heat.

What’s the best way to reheat leftovers?

Bake leftovers in the oven at 350°F for about 10-15 minutes or until thoroughly heated. This helps maintain their crispiness compared to microwaving.

How can I customize the flavors in the filling?

Feel free to add your favorite herbs, spices, or vegetables to the ground beef mixture. Ingredients like green onions, bell peppers, or Italian seasoning can elevate the flavor profile.

Can I use a different type of bread or wrap?

Definitely! Experiment with different types of bread or wraps, such as whole wheat, gluten-free, or even pastry dough for a delightful twist.

Is it possible to make these rollups ahead of time?

Yes, assemble the rollups ahead of time and store them in the fridge for up to 24 hours before baking. This allows for a quick meal!

What’s the best cheese to use?

Cheddar, mozzarella, or pepper jack cheese are all great options as they melt beautifully and complement the bacon and beef flavors well.

Additional Resources

Looking for more mouthwatering recipes? Check out our collection of comfort food favorites that are perfect for weeknight dinners or special occasions.

If you want detailed guides on culinary techniques, don’t hesitate to dive into our kitchen strategies section, where we cover essential skills that elevate your cooking.

For ingredient information, our in-depth resources on meats, vegetables, and spices will help you find what you need to make every dish successful.

Join the Conversation

We love to see your versions of Garlic Butter Bacon Cheeseburger Rollups! Share photos on social media and tag us to showcase your creations and variations too. Your feedback helps others in the community, fostering engagement and creativity!

Leave your recipe reviews and let us know how you customized your rollups for your family. The shared experiences create a vibrant community around cooking.

The Recipe

Garlic Butter Bacon Cheeseburger Rollups

Serves: 4

Prep Time: 15 mins

Cook Time: 20 mins

Total Time: 35 mins

Kitchen Equipment Needed

  • Mixing bowl
  • Baking sheet
  • Parchment paper
  • Rolling pin
  • Knife and chopping board

Ingredients

  • 1 pound ground beef
  • 4 slices of bacon, cooked and chopped
  • 1 cup shredded cheddar cheese
  • 1 package refrigerated crescent roll dough
  • 4 tablespoons garlic butter
  • Salt and pepper to taste
  • Optional: Chopped parsley for garnish

Directions

  1. Preheat your oven to 375°F (190°C). Line a baking sheet with parchment paper.
  2. In a skillet over medium heat, cook the ground beef until browned. Season with salt and pepper to taste.
  3. Remove from heat, add the chopped bacon and shredded cheese, and mix until combined.
  4. On a floured surface, roll out the crescent dough and separate it into triangles.
  5. Place a spoonful of the beef mixture at the wide end of each triangle, then roll up tightly.
  6. Brush with garlic butter before placing on the prepared baking sheet.
  7. Bake for 15-20 minutes or until golden brown and the cheese is melted.
  8. Remove from the oven and let cool slightly before serving. Garnish with chopped parsley if desired.

Recipe Notes

  • For a spicier version, add jalapeños to the beef mixture.
  • Leftovers can be stored in the refrigerator for up to 4 days or frozen for up to 3 months.
  • Feel free to substitute ground turkey or chicken for a lighter option.

Best Mocha Iced Coffee Recipe with Creamy Chocolate Flavor

The Best Mocha Iced Coffee Recipe: A Refreshing Pick-Me-Up

⚖️
Difficulty
Easy

⏲️
Prep Time
5 mins

🕒
Cook Time
0 mins

⏱️
Total Time
5 mins

🍽️
Servings
2 servings

Welcome to the ultimate refreshment for coffee lovers! This mocha iced coffee recipe is not only a delectable treat but also a delightful way to kickstart your day or reinvigorate your afternoon. Infused with rich, aromatic coffee blended with creamy chocolate, it offers a flavor experience that’s both indulgent and satisfying. Every sip encapsulates the perfect balance of bold espresso and sweet mocha – a little touch of heaven that keeps you cool during those warm sunny days.

This recipe is incredibly simple and quick, making it a perfect choice for those busy mornings or a last-minute pick-me-up. With just a few ingredients, you can enjoy a café-quality drink right at home. Imagine the smoothness of chilled coffee meeting the lovely sweetness of chocolate, topped with an optional dollop of whipped cream. You’ll find yourself craving this refreshing drink over and over again!

Quick Recipe Highlights

  • Flavor Profile: Rich coffee with sweet chocolate notes, balanced by a hint of creaminess.
  • Texture: Smooth and satisfying with a slight froth from the whipped cream or milk, creating a luxurious mouthfeel.
  • Aroma: Inviting blend of roasted coffee and decadent chocolate that fills the air, awakening the senses.
  • Visual Appeal: Gorgeous layers of dark coffee and luscious cream with an optional sprinkle of cocoa or chocolate shavings on top.
  • Skill Level Needed: Very easy, suitable for all skill levels, even beginner home cooks.
  • Special Equipment: All you need is a blender and a glass – simple yet effective!

Recipe Overview

  • Difficulty Level: This recipe is rated easy because it requires no complex techniques and is perfect for quick preparation.
  • Category: Great as a breakfast drink or afternoon refreshment, making it versatile for any time of the day.
  • Cuisine: An American twist on classic Italian café culture where coffee and dessert flavors are popular.
  • Cost: This recipe is budget-friendly, with a total cost of around $5 for two servings, making it affordable for everyone.
  • Season: Ideal for summer days when iced drinks are a craving – however, it can also be enjoyed year-round.
  • Occasion: Perfect for backyard barbecues, brunch gatherings, or simply a quiet moment to yourself.

Why You’ll Love This Recipe

When it comes to taste and texture, this mocha iced coffee is a standout. The intense flavor of freshly brewed coffee combined with smooth chocolate creates a delightful sip that’s both energizing and comforting. Each sip offers a luxuriously creamy texture, especially when garnished with whipped cream, elevating your coffee drinking experience to new heights. It’s a coffee drink that feels indulgent without the need for high-end café prices.

This mocha iced coffee recipe is incredibly convenient. With just five minutes of prep time, you can whip up this delicious beverage even on the busiest of mornings. It allows you to enjoy a café-style drink without ever leaving the house, saving you both time and money. You can easily adjust the sweetness to your preference, making it a customizable drink that caters to your taste buds.

In terms of nutritional advantages, this recipe incorporates coffee, which can boost your metabolism and enhance focus. The chocolate adds a touch of sweetness, and if you opt for dairy alternatives, it can cater to different dietary needs. Best of all, it provides a refreshing and caffeinated treat without the unnecessary additives found in many store-bought options.

Serving this delightful drink can become a social affair as well. Picture a summer gathering where you prepare this mocha iced coffee for friends and family – it’s guaranteed to be a hit! With its visually appealing layers and rich flavors, it’s a conversation starter that brings people together over their shared love for coffee.

Finally, cost-effectiveness is a huge plus. By preparing this mocha iced coffee at home, you avoid the premium prices of coffee shops. All of the ingredients can be found easily in your local grocery store, making it accessible for everyone. Enjoying your favorite drink without breaking the bank is always an appealing option!

Historical Background and Cultural Significance

The origin of mocha iced coffee can be traced back to the coffee culture of the Middle East, where coffee was first discovered. The term “mocha” itself comes from the port of Mocha in Yemen, an early coffee trading center. Over the years, the preparation methods evolved, leading to the incorporation of chocolate into coffee drinks, giving rise to the beloved mocha flavor we enjoy today.

Culturally, coffee has always held a significant role in social interactions globally. It acts as a catalyst for conversation, relaxation, and connections among friends and family. The addition of chocolate in tradition reflects the indulgence often sought in coffee experiences, merging two favorites into one comforting beverage.

Through the decades, recipes for iced coffee have evolved, especially with the café culture boom in the United States. As more coffee shops began offering cold beverages, the mocha iced coffee quickly gained popularity, marking its place as a favorite among coffee enthusiasts and casual drinkers alike.

Regional variations of mocha iced coffee can be found worldwide. In Italy, for example, espresso is often the base, while Latin American influences may incorporate spices such as cinnamon or vanilla to enhance the flavor. Each area adds its unique twist, showcasing the versatility of this classic beverage.

Ingredient Deep Dive

Coffee: As the star of our recipe, coffee has a rich cultural significance in many traditions. It not only serves as a staple beverage but also acts as a social lubricant across the globe. Nutritionally, coffee offers antioxidants and has been linked to various health benefits, such as improved cognitive function and enhanced calorie burning. Selection tips include opting for quality, freshly roasted beans. Store coffee in a cool, dark place to maintain freshness and consider alternatives like cold brew for a smoother flavor.

Chocolate: The addition of chocolate plays a crucial role in this recipe, adding both sweetness and depth. Historically, chocolate originated from the cacao bean, which has been celebrated for centuries for its flavor and potential health benefits. Look for high-quality chocolate to enhance your drink. Store it in a cool location, and if you’re looking to reduce sugar content, consider using dark chocolate or cocoa powder as a substitute.

Common Mistakes to Avoid

  • Not brewing enough coffee: Ensure you brew enough coffee to keep the flavor strong. Weak coffee can dilute the experience.
  • Using water instead of milk: For a creamy consistency, always use milk or cream instead of water.
  • Overloading on sweeteners: Balance is key! Start with a small amount of sugar and adjust to your taste.
  • Skipping the chilling process: Allowing the coffee to cool is essential to prevent diluting the drink with melting ice.
  • Ignoring ingredient quality: Premium ingredients make a noticeable difference in flavor and overall enjoyment.
  • Not blending thoroughly: Blend until smooth for the best texture and consistency.
  • Serving too warm: Iced coffee should be served cold; if it’s warm, it defeats the purpose!
  • Not garnishing: A simple garnish can elevate your drink visually and flavor-wise, so don’t skip this step.
  • Using old coffee: Always use freshly brewed coffee for the best taste and aroma.
  • Not experimenting: Don’t be afraid to try different types of chocolate to create unique flavor profiles!

Essential Techniques

Brewing Coffee: Brewing coffee is the foundation of creating a delicious iced coffee. Master the brewing method that suits your taste: whether it’s using a French press, drip coffee maker, or espresso machine. Aim for a rich extraction to ensure a flavored base. Over-extraction can lead to bitterness, while under-extraction might yield a sour coffee; always taste and adjust your brewing time.

Blending: Blending ingredients is pivotal for achieving the right texture in your mocha iced coffee. A powerful blender can break down ice chunks and combine flavors smoothly. Watch for consistency; blend until you achieve a creamy finish without any gritty texture. Avoid over-blending, which can alter the temperature and dilute your drink.

Pro Tips for Perfect Mocha Iced Coffee

1. Use cold brew coffee for a smoother, less acidic flavor profile.

2. Experiment with flavored syrups to add unique twists like vanilla or hazelnut.

3. Try whipping heavy cream to add a decadent topping; it adds an indulgent mouthfeel.

4. Use a chocolate shaver for garnish for an aesthetically pleasing finish.

5. Mix in a pinch of salt to enhance the chocolate flavor and cut bitterness.

6. To reduce sweetness, replace sugar with natural sweeteners like honey or agave.

7. Incorporate an espresso shot for an extra caffeine kick!

8. Chill your glasses ahead of time for an added touch of luxury.

Variations and Adaptations

For those looking to mix things up, consider regional variations such as adding cinnamon for a subtly spiced mocha. Seasonal adaptations can be made by incorporating pumpkin spice during fall or peppermint extract during winter holidays for festive flair. If you’re following a special diet, this recipe can easily be adapted to fit low-carb or gluten-free lifestyles by using sugar-free syrups or alternative milk options.

For flavor variations, try swapping the chocolate for caramel for a unique twist, or incorporate nut-flavored syrups like almond or hazelnut for added richness. Texture modifications can include using crushed ice for a slush-like consistency or adding a scoop of vanilla ice cream for a dessert-inspired mocha iced coffee. Presentation can be enhanced with colorful straws or fun glassware for an eye-catching display.

Serving and Presentation Guide

To create a gorgeous presentation, be sure to layer components in your glass for visual appeal. Use a clear glass to showcase the beautiful layers of chocolate and coffee. For garnishing, sprinkle cocoa powder or drizzle chocolate syrup on top of the whipped cream. Seasonal decorations, such as festive straws or mint leaves, can enhance the aesthetic for parties. Remember to serve it with a straw for convenience and enjoyment!

Wine and Beverage Pairing

Add a fun twist by pairing this mocha iced coffee with dessert wines like a rich Port or a sweet Moscato that enhances the flavor of chocolate. Alternatively, for a refreshing non-alcoholic option, consider pairing it with sparkling water or coconut water to cleanse the palate. If you prefer tea, an unsweetened iced chai can beautifully complement the flavors of your mocha iced coffee. Always serve your coffee chilled to maintain its refreshing quality!

Storage and Shelf Life

To store mocha iced coffee, keep it in an airtight container in the refrigerator. It’s best consumed fresh, but you can store it for up to two days. To maintain quality, avoid adding ice until serving to prevent dilution. If you plan to save it, separate the coffee and any cream components as they may separate over time. Realistically, aim to consume it as soon as possible for the best flavor experience.

Make Ahead Strategies

To streamline your mornings, make coffee ahead of time and store it in the refrigerator. Allow it to cool completely, then blend it with the chocolate before serving. If desired, you can prepare whipped cream in advance and refrigerate it in a sealed container. For optimum freshness, mix everything together right before serving, and consider incorporating a fresh element like mint or chocolate shavings as a finishing touch!

Scaling Instructions

If you want to double this recipe for a crowd, simply increase the ingredients proportionately. For a smaller batch, halving the recipe is just as easy. Ensure you have a blender capable of accommodating larger volumes or blend in batches. Keep in mind to adjust ice levels to maintain that perfect consistency and chilling effect.

Nutritional Deep Dive

This mocha iced coffee primarily derives its benefits from coffee and milk. It offers a low-calorie option without compromising flavor. The macro breakdown includes carbohydrates from the chocolate and milk, with proteins if using dairy. Nutritionally, coffee provides antioxidants, while milk offers calcium, depending on the type you choose. Always consider portion sizes to manage overall calorie intake, especially if adding whipped cream or chocolate syrup.

Dietary Adaptations

For a gluten-free version, ensure all ingredients, especially any syrups used, are certified gluten-free. To make it dairy-free, simply swap cow’s milk with almond, oat, or coconut milk. Vegans can replace dairy-based whipped cream with coconut whipped cream for that luscious finish. Anyone on a low-carb diet can use sugar-free chocolate for sweetness without the carbs, and keto adaptations can utilize MCT oil for added fat without sugar.

Troubleshooting Guide

For issues with texture, ensure all ingredients are blended until smooth without any graininess. If flavors aren’t balanced, adjust sweetness gradually, tasting after each addition. Should you find your coffee too warm, ensure your iced coffee is chilled adequately, and use plenty of ice to keep your beverage cool. If you face problems with equipment, check your blender’s settings to ensure it’s on the right speed. For ingredient substitutions, always adjust accordingly with total volume in mind, especially when altering dairy products.

Recipe Success Stories

Many readers have shared their enthusiasm for home-making this mocha iced coffee, emphasizing its easy preparation and delicious outcome. Stories of gatherings where the drink became a highlight have been frequent. Users have enjoyed experimenting with different flavor variations and have shared beautiful photographs of their creations on social media. Suggestions for additional garnishes have inspired many others to take their mocha iced coffee experience to the next level!

Frequently Asked Questions

Q: Can I use instant coffee for this recipe?
A: Yes! While freshly brewed coffee offers the best flavor, instant coffee can be a quick alternative. Simply dissolve it in hot water and let cool before blending with other ingredients.

Q: What type of chocolate is best to use?
A: Dark chocolate or high-quality cocoa powder works best as they provide a richer flavor that balances nicely with coffee’s bitterness.

Q: Can I make this mocha iced coffee dairy-free?
A: Absolutely! Substitute cow’s milk with almond, soy, oat, or coconut milk for a delicious dairy-free version.

Q: How do I adjust the sweetness?
A: Start with small amounts of sugar or sweetener, blending and tasting until you achieve your desired sweetness.

Q: Can I add alcohol to this drink?
A: Yes! Consider adding a splash of coffee liqueur for an adult version of this drink.

Q: What should I do with leftovers?
A: Store any leftover iced coffee in the refrigerator, and consume it within two days for the best freshness.

Q: Is it possible to prepare this recipe ahead of time?
A: Yes! Brew your coffee and blend all ingredients in advance, then store them separately until ready to serve.

Q: Can I use flavored syrups?
A: Certainly! Flavored syrups can enhance the drink’s sweetness and add exciting new flavors.

Q: What’s a good garnish for mocha iced coffee?
A: Whipped cream, chocolate shavings, or a drizzle of chocolate syrup are perfect garnishes!

Q: Is this drink kid-friendly?
A: Yes! This mocha iced coffee can be made without any alcohol, and is suitable for kids when made with less caffeine.

Additional Resources

For those seeking more coffee-related recipes, consider checking out our guides on making homemade cold brew or experimenting with flavored iced teas. Additionally, explore our technique guides for perfecting your coffee brewing skills. Our equipment recommendations can help you choose the right blender or coffee maker to suit your needs!

Join the Conversation

We’d love to see your mocha iced coffee creations! Share your photos on social media and tag us. Feedback on recipe variations and personal adaptations are encouraged, helping to build a community of coffee lovers. Join the discussion with fellow food enthusiasts by leaving a comment and sharing your experience with this recipe.

The Recipe

The Best Mocha Iced Coffee

Serves: 2 servings

Prep Time: 5 mins

Cook Time: 0 mins

Total Time: 5 mins

Kitchen Equipment Needed

  • Blender
  • Measuring cups
  • Glass for serving

Ingredients

  • 2 cups brewed coffee, cooled
  • ½ cup milk (any kind)
  • ¼ cup chocolate syrup
  • Ice cubes
  • Whipped cream (optional)

Directions

  1. Brew your coffee according to your preference and allow it to cool.
  2. In a blender, combine the cooled coffee, milk, chocolate syrup, and a handful of ice cubes.
  3. Blend on high until smooth and frothy.
  4. Pour into glasses and top with whipped cream, if desired.
  5. Serve immediately, garnished with chocolate syrup or shavings, if you like!

Recipe Notes

  • For a richer flavor, use dark chocolate syrup.
  • Consider adding a touch of vanilla extract for an extra flavor dimension.
  • If you prefer a stronger coffee flavor, add an espresso shot before blending.

Indulge in Creamy Spicy Buffalo Ranch Pasta Tonight

Creamy Spicy Buffalo Ranch Pasta: A Flavor Explosion on Your Plate

⚖️
Difficulty
Easy

⏲️
Prep Time
10 mins

🕒
Cook Time
15 mins

⏱️
Total Time
25 mins

🍽️
Servings
4 servings

Pasta lovers, prepare to elevate your dinner game with this Creamy Spicy Buffalo Ranch Pasta! This dish merges the rich and creamy flavors of ranch with the fiery kick of Buffalo sauce, creating an irresistible combination that will tantalize your taste buds. In just 25 minutes, you’ll have a delightful meal that is perfect for weeknight dinners or entertaining guests. The creamy, spicy sauce clings to every strand of pasta, making each bite a flavor explosion.

Not only does this pasta dish bring an exciting twist to traditional pasta recipes, but it’s also incredibly easy to prepare. With accessible ingredients and minimal cooking time, you can whip up this comforting meal without any fuss. Whether you’re a culinary novice or a seasoned chef, the combination of zesty ranch seasoning and robust Buffalo sauce will leave everyone asking for seconds. Let’s dive into the details of this creamy, spicy delight!

Quick Recipe Highlights

  • Flavor Profile: This Creamy Spicy Buffalo Ranch Pasta features a perfect blend of tangy ranch dressing, spicy Buffalo sauce, and a hint of garlic, creating an addictive flavor combination.
  • Texture: The creamy sauce envelops the tender pasta, providing a luscious mouthfeel that contrasts beautifully with the fiery heat from the Buffalo sauce.
  • Aroma: Aromatic notes of garlic and spices waft through your kitchen, making this dish an inviting choice for gatherings and family dinners.
  • Visual Appeal: Vibrant orange and creamy white hues come together to create a visually enticing dish that’s sure to impress your guests.
  • Skill Level Needed: This recipe is simple and requires basic cooking skills, making it suitable for novice cooks and experts alike.
  • Special Equipment: A large pot for boiling pasta and a skillet for preparing the sauce are all you need to create this dish.

Recipe Overview

  • Difficulty Level: The Creamy Spicy Buffalo Ranch Pasta is classified as easy, allowing cooks of all skill levels to create a delicious meal without stress. The recipe includes straightforward steps, making it accessible for everyone.
  • Category: This recipe falls under the category of comfort food, perfect for busy weekdays or cozy family dinners.
  • Cuisine: Inspired by American culinary traditions, particularly the popular flavors of Buffalo chicken dishes, this pasta provides a comforting twist that embodies vibrant and layered tastes.
  • Cost: The ingredients for this dish are budget-friendly, making it an economical choice for families or those looking for delicious meals without breaking the bank.
  • Season: Creamy Spicy Buffalo Ranch Pasta can be enjoyed year-round but is especially comforting during colder months when you crave warm and fulfilling meals.
  • Occasion: This dish is ideal for casual gatherings, potlucks, or a simple weeknight dinner that doesn’t compromise on flavor or satisfaction.

Why You’ll Love This Recipe

Indulging in the Creamy Spicy Buffalo Ranch Pasta presents an irresistible taste and texture appeal. Each bite delivers a delightful kick from the Buffalo sauce, perfectly balanced by the creamy ranch dressing. This captivating combination will please anyone seeking bold flavors. The velvety sauce seamlessly coats the pasta, ensuring that every strand delivers maximum mouthwatering delight.

The convenience of this recipe stands out, as it takes just 25 minutes from start to finish. With simple instructions, you can effortlessly create a restaurant-quality meal right at home, making it ideal for weeknight dinners or last-minute gatherings. The straightforward steps allow even the busiest of cooks to enjoy a satisfying meal that doesn’t skimp on flavor or presentation.

Additionally, the nutritional advantages of this dish should not be overlooked. By incorporating whole-grain pasta, you can add extra fiber to your meal, promoting healthy digestion. With balanced protein from the ranch and optional chicken additions, this dish can contribute to your daily nutrient intake without sacrificing that sought-after creamy texture.

Social gatherings become more enjoyable with this pasta as it serves as a great conversation starter. The unique flavors and presentation make it a crowd-pleaser, encouraging friends and family to share their own culinary variations or experiences. Hosting a dinner party is an excellent opportunity to showcase your cooking skills and impress your guests with a delicious homemade dish.

Lastly, this recipe’s cost-effectiveness is an added bonus. With ingredients you may already have stocked in your pantry, it transforms simple items into a gourmet meal. It offers a sensational culinary experience that won’t strain your budget, allowing you to treat yourself without any guilt.

Historical Background and Cultural Significance

The origin of buffalo sauce can be traced back to Buffalo, New York, where it gained popularity in the 1960s. The classic buffalo wing creation led to a local specialty that reached status far beyond its humble beginnings. Over the years, the tangy and spicy sauce made its way into various cuisines, transitioning from a simple wing accompaniment to a versatile flavoring component in pastas, pizzas, and sandwiches.

Culturally, Buffalo sauce holds a cherished status among American comfort foods. It embodies a sense of celebration and gatherings, frequently appearing at sporting events and parties. The introduction of ranch dressing into this flavorful gambit represents an evolution, merging two beloved flavors into one harmonious dish that captures the essence of casual American dining.

The Creamy Spicy Buffalo Ranch Pasta offers a modern twist on classic flavors, showcasing the ongoing evolution of American cuisine. As culinary techniques evolve, so do preferences, leading to innovative combinations such as this pasta dish. Chefs and home cooks continuously explore ways to integrate popular flavors into everyday meals, ensuring that Buffalo sauce remains a staple in kitchens around the country.

Across different regions, the fascination with Buffalo-inspired dishes has resulted in numerous variations, showcasing local ingredients or preferences in seasoning. Whether it’s incorporating different cheeses or vegetables, the core essence of the buffalo flavor remains intact, allowing each region to add its personal touch while maintaining a connection to its origins.

Ingredient Deep Dive

Pasta
Pasta is a staple that has transcended borders, originating from Italy. It serves as a hearty base for countless recipes, from sauces to hearty baked dishes. Its versatility allows for various shapes and types to accommodate different cuisines. Whole grain or gluten-free options are widely available, making it an inclusive ingredient for diverse dietary needs.

Nutritionally, pasta provides carbohydrates essential for energy, while incorporating fiber from whole grain versions aids digestion. When selecting pasta, opt for brands with minimal ingredients to ensure quality. Store pasta in a cool, dry place away from moisture to maintain its best quality. Should you need substitutes, consider zoodles (zucchini noodles) for a low-carb option or spiralized vegetables.

Buffalo Sauce
Buffalo sauce emerged as a sensational addition to American cuisine, originating in the late 1960s. Its signature blend of spice and tang has made it a beloved component for wings and various dishes. The versatility of buffalo sauce has gained it admiration across different cooking styles, with many experimenting and adapting it to their taste.

On the nutritional side, buffalo sauce offers a low-calorie option for adding flavor without hefty calories. It’s commonly made from simple ingredients, primarily hot sauce, butter, and vinegar. When purchasing buffalo sauce, check labels for artificial additives; homemade versions are easily customizable. For storage, keep in the refrigerator after opening and be mindful of separation; a shake before use will reintegrate the ingredients. If you’re looking for alternatives, consider using sriracha or other hot sauces adjusted with similar spices.

Common Mistakes to Avoid

  • Overcooking the pasta: Ensure you cook the pasta al dente to avoid a mushy texture. Follow package instructions closely and taste at the suggested time.
  • Not using enough salt when boiling pasta: Salt enhances flavor; water should resemble sea water in salinity. This step is crucial for flavor absorption.
  • Adding Buffalo sauce too early: Incorporate buffalo sauce towards the end of cooking to maintain its distinct flavor. Heat can diminish its spiciness, so use caution.
  • Neglecting to taste during preparation: Tasting your food at different cooking stages is essential for balancing flavors. Adjust seasoning as needed for a well-rounded dish.
  • Skipping the garnishing: A sprinkle of chopped herbs or cheese adds visual appeal and enhances flavors. Don’t overlook this final touch!
  • Using low-quality ingredients: For the best flavor, select high-quality pasta, sauce, and ranch dressing. These ingredients significantly impact overall taste.
  • Inadequate mixing of the sauce: Properly whisking the buffalo sauce with ranch ensures even distribution of flavors throughout the pasta.
  • Not letting the dish rest: Allow the pasta to sit briefly after cooking to let flavors meld. This step enhances the overall taste experience.

Essential Techniques

Cooking Pasta
Cooking pasta correctly is fundamental for achieving the desired texture. Always begin with boiling a substantial amount of salted water to allow the pasta to move freely. Cook until al dente and reserve some cooking water for adding creaminess to your sauce later. This technique ensures that your pasta will hold up without becoming gummy or overcooked.

Preparing the Sauce
When preparing the sauce, combining ranch dressing and buffalo sauce should be done in a separate bowl to ensure even mixing. Heat the mixture gently, keeping an eye on the texture before merging it with the pasta. Avoid boiling the sauce too aggressively, as this may break down the consistency. A smooth, creamy sauce that clings perfectly to the noodles is what you want.

Pro Tips for Perfect Creamy Spicy Buffalo Ranch Pasta

1. Use freshly grated cheese for a more flavorful and creamy texture, rather than pre-packaged varieties that may contain anti-caking agents.
2. Adjust the spice level by experimenting with various brands of buffalo sauce; some brands may offer milder options or different flavor profiles.
3. Consider adding cooked chicken, shrimp, or vegetables for added protein and nutrients, making the dish even more filling.
4. For a tangy twist, sprinkle some freshly squeezed lemon juice over the pasta before serving to enhance the overall flavor profile.
5. Always save a bit of pasta cooking water to use when tossing the pasta with the sauce, as it can help the sauce adhere better and bring everything together nicely.
6. Don’t rush the cooking process; allowing the pasta to rest for a few minutes after mixing with the sauce allows flavors to meld beautifully.
7. For an added crunch, top the pasta with crumbled blue cheese or toasted breadcrumbs to provide a delightful textural contrast.
8. If preparing ahead, store the sauce and pasta separately to maintain the pasta’s optimal texture when reheating.

Variations and Adaptations

This Creamy Spicy Buffalo Ranch Pasta can be modified in numerous ways to suit your palate or dietary needs. If you’re seeking a vegetarian variation, consider substituting the pasta with zoodles or quinoa for a healthy twist while retaining the same delicious flavors. For a lighter option, swap traditional ranch dressing with a lighter version or homemade yogurt-based ranch.

Seasonal adaptations can also bring fresh ingredients into play. Adding grilled vegetables like zucchini or bell peppers not only enhances flavors but also provides a burst of nutrition in the warmer months. For a gourmet touch during the holidays, consider incorporating roasted butternut squash, balancing the spice of the buffalo sauce with sweetness.

For those looking for a unique flavor twist, try blending in a spoonful of cream cheese or sour cream into the sauce for an extra creamy experience. Alternatively, experimenting with different cheeses like pepper jack or feta can enhance both flavor and presentation.

Texture can also be modified by varying the cooking time of the pasta; a slightly crunchier texture can be achieved instead of the typical soft pasta. Finally, garnishing with fresh herbs or chopped scallions can add a refreshing note and vibrant color to the final dish.

Serving and Presentation Guide

Presentation plays a vital role in enticing your guests or family members to dive into your delicious Creamy Spicy Buffalo Ranch Pasta. Start by choosing an elegant pasta bowl or plate that complements the colors of your dish. Use a simple plating technique by twirling the pasta around a fork and placing it in the center, allowing the sauce to cascade around the pasta for a visually appealing effect.

Garnish with a sprinkle of finely chopped parsley or chives for freshness, and consider crumbling blue cheese on top for an added burst of flavor. Drizzling a bit of ranch dressing can also enhance the visual appeal while inviting tastes.

For accompaniments, consider serving your pasta with garlic bread or a light salad for contrast and balance. Make sure to consider serving temperature, as creamy pasta dishes are best served piping hot to fully enjoy the flavors, so serve immediately after preparation. Finally, for portion control, a typical serving size is about 1.5 cups per person, making it easy for guests to serve themselves.

Wine and Beverage Pairing

When it comes to selecting the perfect wine to accompany your Creamy Spicy Buffalo Ranch Pasta, consider a white wine with crisp acidity, such as Sauvignon Blanc or Pinot Grigio. These options will complement the creamy and spicy elements of the dish nicely, providing a refreshing contrast that enhances the overall dining experience.

If you prefer an orange or rosé wine, seek out those with a good balance of fruitiness and acidity to ensure they harmonize with the richness of the sauce. For non-alcoholic alternatives, a sparkling water infused with lemon or cucumber will cleanse the palate beautifully without overpowering the dish. Alternatively, an iced tea or lemonade can provide a thirst-quenching balance to the meal.

For coffee or tea pairings, consider a lighter roast coffee or a herbal tea, both of which can enhance the flavor profile without overwhelming the palate. Serving beverages at an appropriate temperature will allow the nuances of flavor to shine through, creating an enjoyable dining experience.

Storage and Shelf Life

Proper storage methods for your Creamy Spicy Buffalo Ranch Pasta can help maintain its freshness and quality. Allow the pasta to cool completely before transferring it to an airtight container. It can be stored in the refrigerator for up to 3-5 days. When reheating, do so on the stovetop at low heat, adding a splash of milk or reserved pasta water to prevent it from drying out or becoming clumpy.

For longer storage, this creamy pasta dish can also be frozen for up to 2-3 months. Place the cooled pasta into freezer-safe containers, ensuring to leave space for expansion. To reheat from frozen, let it thaw in the refrigerator overnight before reheating gently on the stovetop.

Signs of spoilage include an off smell, discoloration, or separation of the creamy sauces. Always discard any leftovers if in doubt regarding their freshness. Avoiding these issues will ensure that you enjoy every last bite of your delicious meal!

Make Ahead Strategies

Planning ahead can simplify the preparation of your Creamy Spicy Buffalo Ranch Pasta. To save time, consider making the sauce in advance; it can be stored in the fridge for up to a week. Just give it a good stir before combining it with the freshly cooked pasta.

Another approach is to chop vegetables or proteins a day before to streamline the cooking process. If adding ingredients such as chicken or veggies, these can be grilled or sautéed ahead of time, allowing them to develop flavors and making the final assembly quicker.

When assembling the sauce and pasta, consider storing them separately if preparing for a dinner party. This keeps the pasta from becoming overly soft and allows guests to enjoy a fresh dish. Lastly, set aside any fresh garnishes until just before serving to maintain their visual appeal and texture.

Scaling Instructions

Scaling the Creamy Spicy Buffalo Ranch Pasta recipe is a breeze, allowing you to modify the number of servings based on your needs. To halve the recipe, simply reduce each ingredient by 50%, since the sauce and pasta are both easily adjustable without impacting flavor or texture.

If you wish to double or triple the servings, be mindful of your cooking equipment. Using a larger pot may be necessary when cooking the pasta, as it needs ample water to glide smoothly while cooking. When scaling, it’s helpful to monitor the cooking time, as larger quantities may require slightly more time to come to a boil.

For storage, consider using multiple containers or meals to distribute portions instead of one large batch. By doing this, you can enjoy leftovers easily without reheating the entire dish. This approach maintains freshness and saves time for future meals.

Nutritional Deep Dive

The nutritional content of Creamy Spicy Buffalo Ranch Pasta varies based on ingredients and portion sizes, yet it delivers a well-rounded profile. On average, a serving provides around 400-500 calories, primarily derived from carbohydrates, protein, and fats. The pasta serves as an excellent source of energy due to its carbohydrate content.

Examining micronutrients, this dish can provide essential vitamins and minerals based on the ingredients used, particularly if incorporating vegetables or protein sources. The creamy ranch dressing adds a bit of fat from dairy, which can be balanced by using lower-fat options as desired.

For those focusing on portion control, a good rule of thumb is to aim for one and a half cups of pasta per serving, keeping overall calorie intake in moderation. By being mindful of ingredient selections and portions, you can enjoy Creamy Spicy Buffalo Ranch Pasta as a delicious yet balanced meal that satisfies.

Dietary Adaptations

Dietary modifications for Creamy Spicy Buffalo Ranch Pasta can accommodate various lifestyle choices. For a gluten-free option, simply substitute standard pasta with gluten-free alternatives such as quinoa or chickpea pasta, which will ensure no compromise on taste or texture.

For dairy-free adjustments, consider using non-dairy cream alternatives for the sauce and vegan ranch dressing. Dairy-free options like cashew cream or coconut milk can yield a creamy texture without using traditional dairy products. These adaptations can make this dish accessible to a wider audience.

If you’re focused on low-carb options, consider using spiralized vegetables in place of pasta or a cauliflower-based substitute. Additional adaptations can also cater to keto or paleo diets by minimizing high-carb ingredients and keeping the sauce low in sugars.

Implementing these dietary adaptations can help create a dish that fits nicely into various culinary lifestyles while still embracing the unique flavors of the original recipe.

Troubleshooting Guide

Experiencing texture issues with your Creamy Spicy Buffalo Ranch Pasta can be frustrating. To achieve the perfect creaminess, avoid letting the cream sauce boil vigorously as it may separate. If this happens, incorporating a bit of reserved pasta water can help re-emulsify the sauce.

If the flavors come across too mild, consider bolstering the dish with additional buffalo sauce or seasoning it with paprika and garlic powder to enhance the overall taste profile. Ensuring your seasoning is adjusted while cooking can also lead to a well-balanced dish.

Temperature problems, such as a cold meal, can be resolved by ensuring proper reheating techniques. If reheating leftovers, always warm on medium-low heat and add a bit of liquid to keep it creamy.

If you find yourself with timing concerns, preparation ahead of time can offer a buffer. Preparing ingredients or the sauce beforehand can alleviate the rush during meal time, leaving more room for cooking confidently.

Finally, if substitutions are needed, keep in mind that flavors and textures may vary slightly. Always test a small batch with substitutions to determine compatibility before proceeding with the entire dish.

Recipe Success Stories

Community feedback highlights the versatility and appeal of Creamy Spicy Buffalo Ranch Pasta. Many home cooks have embraced this recipe, sharing their variations and adaptations that cater to family preferences. From adding more vegetables to incorporating proteins, success stories abound, reinforcing the dish’s adaptability to different diets.

Readers have expressed satisfaction over the ease of preparation and the dish’s bold flavors, frequently returning for seconds and thirds. The dish’s appeal also stems from how well it satisfies a range of palates – even those typically averse to spicy foods often find themselves enjoying this creamy twist.

Inspiring photography tips have been shared alongside successful cooking experiences, encouraging home cooks to snap their final creations. When plating, the addition of colorful garnishes captures the eye, compelling onlookers to try their hand at the recipe.

Variations such as adding in leftover grilled chicken or sautéed veggies have proven successful, offering a comforting yet new culinary experience whenever it’s made. Each of these stories underscores the joy of cooking and sharing food amongst friends and family.

Frequently Asked Questions

Can I use different types of pasta?

Absolutely! While traditional pasta works beautifully in this recipe, feel free to substitute whole grain pasta, gluten-free varieties, or even vegetable-based noodles. Each type will deliver a unique texture and flavor while ensuring that the creamy buffalo sauce ties everything together.

Is there a way to reduce the spiciness?

If you prefer a milder flavor, you can certainly reduce the amount of buffalo sauce used. Mixing the buffalo sauce with more ranch dressing can help tame the heat, but be sure to taste as you go to achieve your desired spiciness level.

What kind of chicken can I add to the pasta?

Grilled or shredded rotisserie chicken works great with this dish, adding extra protein while complementing the rich flavors of the sauce. Just stir it into the pasta at the end for an added layer of deliciousness.

Can I make this dish vegan-friendly?

Yes! To make this Creamy Spicy Buffalo Ranch Pasta vegan, use plant-based pasta, a non-dairy ranch dressing, and a dairy-free cream substitute. You can also add chickpeas or tofu for protein. The flavor will still be phenomenal!

How long does the leftover pasta last?

Store any leftovers in an airtight container in the refrigerator for 3-5 days. To keep it fresh, avoid letting it sit out at room temperature for prolonged periods.

Can I freeze this pasta dish?

Yes! To freeze Creamy Spicy Buffalo Ranch Pasta, allow it to cool completely before placing it in a freezer-safe container. It can be stored for up to 2-3 months. Reheat after thawing for a convenient meal.

What’s the best way to reheat this dish?

The best way to reheat creamy pasta dishes is to use the stovetop at low heat, adding a splash of milk or reserved pasta water to keep the sauce creamy. Stir frequently to ensure even heating.

Can I add vegetables to this recipe?

Absolutely! Adding vegetables such as bell peppers, broccoli, or spinach can enhance the nutritional profile and add delightful textures to your dish. Simply sauté or steam them and mix them in with the pasta.

Is this dish suitable for kids?

Yes! The creamy and mildly spicy flavors make this pasta a kid-friendly option. You can even adjust the spice level further to suit younger taste buds while maintaining its delish appeal.

Can I use store-bought ranch dressing?

Yes, store-bought ranch dressing can be used in this recipe to save time. Just ensure it’s a flavor you enjoy, as it will greatly impact the final taste of your dish.

What can I serve this pasta with?

This pasta pairs well with garlic bread, sliced baguette, or a fresh salad. Feel free to get creative with your accompaniments to complement the richness of the creamy buffalo sauce.

Additional Resources

For more delicious pasta recipes, check out our collection that explores various flavors and styles. Experimenting with techniques will also help elevate your culinary skills. We recommend a guide on selecting quality ingredients, alongside our equipment recommendations for home cooks looking to upgrade their kitchen.

Discover seasonal variations that highlight the best produce and flavors of each season, ensuring you have access to fresh and tasty components for your dishes!

Join the Conversation

Engage with our community by sharing your own variations of the Creamy Spicy Buffalo Ranch Pasta. We love to see your creative twists and the beautiful meals you create in your kitchens. Share your recipe reviews and comments on social media, or feel free to discuss photography tips to capture your culinary adventures. Community engagement is essential, and we encourage all of you to participate in sharing ideas and experiences!

The Recipe

Creamy Spicy Buffalo Ranch Pasta

Serves: 4 servings

Prep Time: 10 mins

Cook Time: 15 mins

Total Time: 25 mins

Kitchen Equipment Needed

  • Large pot for boiling pasta
  • Skillet for preparing the sauce
  • Measuring cups and spoons
  • Whisk or spoon for mixing
  • Airtight storage containers for leftovers

Ingredients

  • 8 oz pasta of your choice
  • ½ cup ranch dressing
  • ½ cup buffalo sauce
  • 1 tbsp olive oil
  • 1 minced garlic clove
  • Salt and pepper to taste
  • Optional: cooked chicken, vegetables for mix-in
  • Fresh parsley or chives for garnish

Directions

  1. Cook pasta according to package directions in a large pot of salted boiling water. Drain and set aside.
  2. In a skillet, heat olive oil over medium heat. Add minced garlic and sauté until fragrant, about 1 minute.
  3. Stir in ranch dressing and buffalo sauce. Mix well, heating gently until warmed through.
  4. Add the cooked pasta to the sauce, mixing to coat all the noodles. If too thick, add reserved pasta water to achieve desired creaminess.
  5. Optional: Add in cooked chicken or vegetables, stirring to combine.
  6. Season with salt and pepper to taste. Serve immediately, garnishing with fresh herbs.

Recipe Notes

  • For extra creaminess, you can add in some cream cheese or a dollop of sour cream.
  • Feel free to adjust the heat by playing around with the buffalo sauce quantity.
  • Leftovers can be stored in the refrigerator for up to 5 days and reheated gently.