Delicious Cajun Honey Butter Salmon Recipe You Must Try

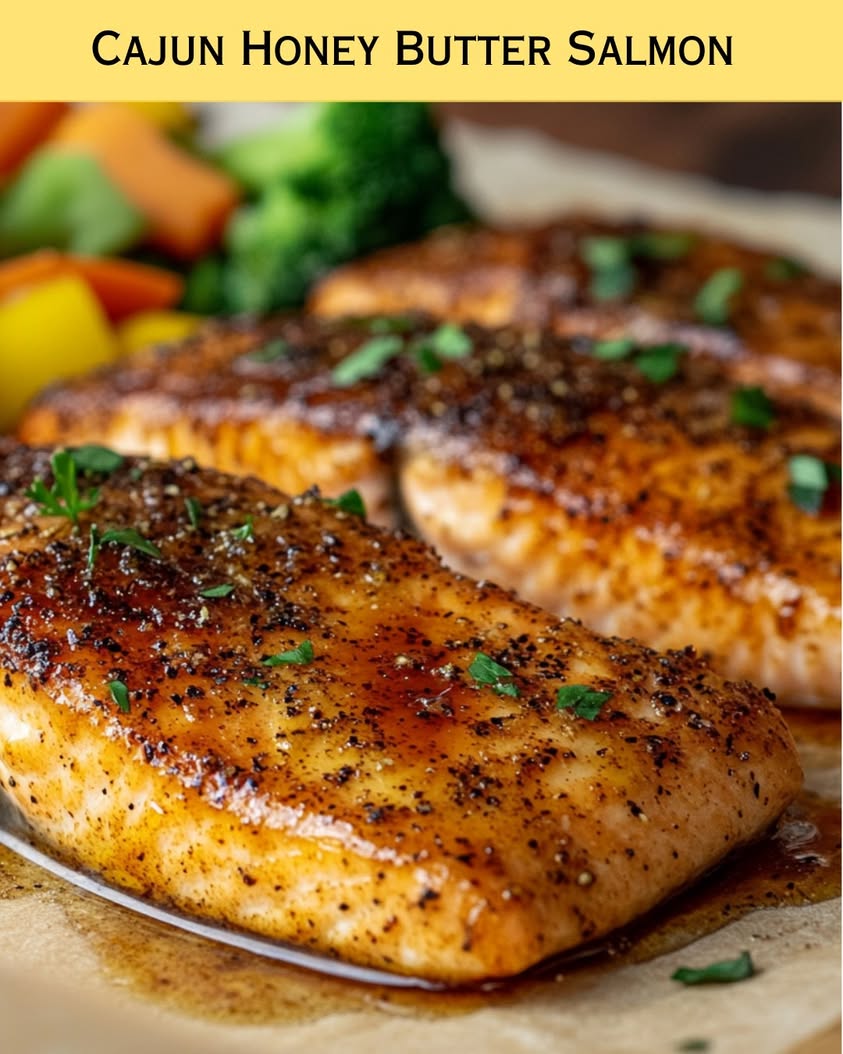
Cajun Honey Butter Salmon: A Flavorful Delight

⚖️
Difficulty
Easy

⏲️
Prep Time
10 mins

🕒
Cook Time
15 mins

⏱️
Total Time
25 mins

🍽️
Servings
4

Are you looking to indulge in a delicious yet straightforward recipe that brings together a burst of flavors? Cajun Honey Butter Salmon is the perfect dish that combines the spicy warmth of Cajun seasoning with the sweet touch of honey, creating a beautifully balanced meal. This recipe showcases perfectly cooked salmon that is both flaky and juicy, enhanced by a glossy honey butter glaze that caramelizes beautifully when cooked. This dish is sure to please palates and make any dinner feel special!

Imagine being welcomed by the tantalizing aroma of Cajun spices mingling with the sweetness of honey wafting from your kitchen. Your family will gather around the table, drawn in by the golden brown salmon glistening under the soft light. The first bite reveals a crisp exterior followed by meltingly tender fish, taking your taste buds on an unforgettable journey. This dish does not just delight the senses—it also brings warmth and connection to those who share it.

Quick Recipe Highlights

  • Flavor Profile: The combination of Cajun spices provides a warm, zesty kick, while the honey adds a sweet, rich undertone, creating a delightful contrast.
  • Texture: The salmon is perfectly tender and flaky, while the glaze contributes a buttery richness that coats each piece beautifully.
  • Aroma: The dish is fragrant with a harmonious blend of spices, honey, and buttery goodness, creating an inviting atmosphere.
  • Visual Appeal: The salmon presents with a stunning golden brown hue, glistening with the honey butter glaze that makes it enticing.
  • Skill Level Needed: This recipe is suitable for beginners, requiring basic techniques such as seasoning, sautéing, and baking.
  • Special Equipment: A baking sheet and a frying pan are the only specialized tools required, making this an accessible recipe.

Recipe Overview

  • Difficulty Level: This recipe is rated as easy, making it perfect for novice cooks and those looking to impress dinner guests without complicated steps.
  • Category: This dish fits well in weeknight dinners or special occasions, providing a quick yet elegant meal option.
  • Cuisine: The Cajun flair is inspired by Southern cooking traditions, showcasing vibrant spices and bold flavors typical of Louisiana cuisine.
  • Cost: This recipe is cost-effective, with the main ingredients being salmon, honey, and spices, all of which can be sourced at an affordable price.
  • Season: Enjoy this dish year-round, but it’s especially delightful in fall and winter when warm, hearty flavors are most comforting.
  • Occasion: Perfect for family meals, date nights, or gatherings; it makes any occasion feel festive and luxurious.

Why You’ll Love This Recipe

The balance of taste and texture in Cajun Honey Butter Salmon is truly remarkable. The spicy, zesty Cajun seasoning elevates the dish, ensuring a memorable dining experience. Each bite of salmon reveals the intensely buttery glaze mingled with sweet honey, creating a perfect harmony that anyone can appreciate.

Convenience and preparation come together seamlessly in this recipe. With a total cooking time of just 25 minutes, it’s ideal for busy weeknights or last-minute meal prep. The straightforward steps ensure that even those with limited cooking experience can create a show-stopping dish without feeling overwhelmed.

Nutritionally, this salmon recipe is packed with benefits. Salmon is known for being rich in Omega-3 fatty acids, which promote heart health, while the honey adds natural sweetness without the refinement found in sugar. It’s a dish that nourishes both body and soul, truly satisfying while being wholesome.

When hosting a gathering, this dish shares an inviting allure that encourages conversation and connection. The combination of flavors and aroma creates a warm environment that makes your guests feel welcome. It’s a staple that performs beautifully on any dinner table, leaving lasting impressions.

From a financial perspective, this recipe is accessible. The main components are budget-friendly and relatively easy to find, making it simple to whip up a gourmet meal without breaking the bank. The versatility of Cajun Honey Butter Salmon allows you to pair it with various sides, ensuring a cost-effective yet impressive meal plan.

Historical Background and Cultural Significance

Cajun cuisine has deep roots in the southern regions of the United States, particularly in Louisiana, where French-speaking Acadians settled after being exiled from Canada. The culinary practices brought from France evolved, incorporating local ingredients and spices, creating a bold, unique flavor profile that we see in dishes like Cajun Honey Butter Salmon today.

The significance of Cajun food is not just in its taste but also in its cultural legacy. It represents resilience, community, and the blend of different cultures—French, Spanish, and African—that shaped the region’s culinary landscape. This recipe symbolizes a celebration of these rich traditions, bringing together sweetness and spice in every bite.

Over time, recipes like Cajun Honey Butter Salmon have evolved. Originally focused on simplicity and sustainability, home cooks started experimenting with flavors, leading to modern interpretations available in homes today. The recipe showcases both traditional Cajun elements and contemporary cooking techniques, making it beloved by new generations of food lovers.

Regional variations of this dish can be found throughout the South, with different families adding their own twist to the flavors, perhaps by incorporating additional spices or local ingredients like pecans or citrus. Each version tells a story of its surroundings and heritage, providing a delightful range of flavors and approaches.

Ingredient Deep Dive

Salmon

Salmon stands out in many culinary traditions for its rich flavor and health benefits. This fish has a long history of consumption, prized by indigenous peoples for its nutritional value and versatility. Loaded with Omega-3 fatty acids, salmon promotes heart health while offering a delectable taste. When selecting salmon, look for firm, bright-colored fillets with minimal odor. For storage, keep it refrigerated and consume within a couple of days, or freeze for longer preservation.

Cajun Seasoning

Cajun seasoning is a blend of spices that reflects the vibrant culture of Louisiana. Commonly consisting of paprika, garlic powder, onion powder, and cayenne pepper, it adds a bold taste to any dish. This blend is an integral part of many Southern recipes, offering both heat and depth of flavor. When purchasing, opt for fresh blends for the best taste. Store in a cool, dark place, and consider homemade blends for complete control over spice levels.

Honey

Honey has been used for centuries as a natural sweetener and remedy. It brings a unique floral flavor to this recipe, complementing the spiciness of Cajun seasoning. Nutritionally, honey contains antioxidants and has antibacterial properties. When sourcing honey, determine your preferred flavor profile, as different floral sources create unique characteristics. For ideal storage, keep it in a cool area and away from sunlight. If you need alternatives, consider maple syrup or agave nectar as substitutes.

Common Mistakes to Avoid

  • Overcooking the salmon is a frequent mistake; aim for medium-rare to achieve that delicious, flaky texture.
  • Not seasoning adequately can result in bland salmon; remember to coat generously with Cajun seasoning for the best flavor.
  • Using old or expired spices can diminish the taste of your dish; always check the freshness of your seasoning mix.
  • Neglecting to check the honey’s consistency can lead to an uneven glaze; ensure it’s at room temperature for the right texture.
  • Inefficiently preparing the pan beforehand may lead to sticking; ensure it’s properly greased before cooking.
  • Forgetting to glaze during the cooking process can result in a less flavorful fish; brush it on halfway through cooking for maximum impact.
  • Using cold salmon straight from the fridge can prevent even cooking; allow it to come to room temperature prior to cooking.
  • Rushing the resting time after cooking can lead to loss of juices; always allow the salmon to rest for a few minutes before serving.
  • Not balancing the sweetness with the Cajun seasoning can lead to an unbalanced flavor profile; taste as you go to ensure harmony.
  • Skipping the garnishing step can make the plate less appealing; fresh herbs or lemon zest add a perfect finishing touch.

Essential Techniques

Proper Seasoning

Seasoning is critical in bringing out the flavors of salmon. To master this technique, learn the balance of spices that complements the natural flavors of the fish. Common pitfalls include under-seasoning or using too much salt. Look for a vibrant color change on the fish to indicate proper seasoning.

Glazing

Glazing enhances both the flavor and appearance of the dish. Mastering this technique involves brushing on the glaze during cooking without overpowering the fish. Watch for a caramelized finish that indicates proper glazing. Steam rising and a shiny exterior are good visual cues for success.

Cooking Times

Understanding cooking times is essential for achieving the desired doneness. For salmon, cook until it flakes easily with a fork or reaches an internal temperature of 145°F. The thickness of the salmon will determine timing; visually checking for opacity can also guide you.

Pro Tips for Perfect Cajun Honey Butter Salmon

1. Use fresh, high-quality salmon for the best flavor; farm-raised or wild-caught options both bring unique profiles.
2. Let the salmon sit at room temperature for 15-20 minutes before cooking to ensure even cooking throughout.
3. For an extra kick, mix some cayenne pepper directly into the honey butter glaze to elevate the spice level.
4. Always taste your glaze before applying it to the salmon; adjust sweetness or spice levels based on personal preference.
5. Consider grilling the salmon instead of baking for a smokier flavor and beautiful char marks.
6. Pair with a zesty lemon wedge to brighten the dish and offer a refreshing contrast to the richness.
7. Use a meat thermometer to check for doneness without cutting into the fish, preserving its juiciness.
8. Rest the salmon for a few minutes after cooking to allow juices to redistribute for a succulent result.

Variations and Adaptations

For regional variations, you could try different spice blends such as blackened seasoning for a different flavor twist. Seasonal adaptations might include adding fresh fruits like mango or pineapple to complement the honey glaze during summer months. For dietary modifications, try using tofu cubes seasoned with Cajun spices for a vegan alternative while still keeping the essence of the dish.

Flavor variations can be introduced by incorporating citrus, such as lemon or lime juice, into the honey butter for an added brightness. Texture modifications can be achieved by broiling the salmon at the end for a crispier exterior. Finally, presentation alternatives, such as serving the salmon on a bed of sautéed greens or with a colorful side salad, enhance visual appeal while adding nutritional diversity.

Serving and Presentation Guide

Plating techniques can elevate your meal presentation significantly. For Cajun Honey Butter Salmon, consider arranging on a large platter with garnished herbs like parsley or cilantro for a splash of color. Garnishing with lemon wedges adds a fresh pop and invites diners to squeeze for extra flavor. Traditional accompaniments like rice or a salad can complement the dish beautifully, while modern serving suggestions could include grain bowls or tacos.

Temperature considerations are essential; serve the salmon warm, along with sides at a similar temperature to create a harmonious dining experience. Portion control can be managed by cutting the salmon into equal servings prior to plating, ensuring each guest receives a fair share while also making for easy servings.

Wine and Beverage Pairing

A delightful pairing with Cajun Honey Butter Salmon is a crisp Sauvignon Blanc. The acidity of the wine complements the rich, buttery texture of the fish, cutting through the sweetness of the glaze. Alternatively, a light-bodied red like Pinot Noir adds depth without overwhelming the dish.

For non-alcoholic alternatives, consider iced herbal tea infused with citrus for a refreshing contrast. If opting for coffee, a lightly brewed blend can elevate the meal without overshadowing the flavors. Temperature consideration is also crucial; serve whites chilled and reds slightly below room temperature for optimal enjoyment.

Storage and Shelf Life

For optimal storage, refrigerate leftover salmon in an airtight container for up to 3 days. Ensure the container is sealed tightly to preserve flavor and prevent drying out. For longer storage, consider freezing the salmon; it can last for up to three months when properly sealed.

Checking for spoilage involves examining the salmon for any off-odors or discoloration. When reheating, do so gently in the oven or microwave to avoid overcooking. If freezing, portion leftovers into individual servings for easy meal prep later.

Make Ahead Strategies

To make your Cajun Honey Butter Salmon ahead of time, prep the honey butter glaze and store it in the refrigerator up to one week prior. You can also season the salmon in advance, allowing the flavors to soak in; just remember to bring it back to room temperature before cooking.

If you have a busy schedule, consider preparing side dishes ahead of time; they can be refrigerated and quickly reheated when it’s time to serve. Incorporating fresh elements, such as sliced avocado or herbs, just before serving will enhance flavor and presentation without compromising quality.

Scaling Instructions

When halving or doubling the recipe, adjust the cooking times slightly, as larger batches might require additional time to ensure even cooking. For equipment adjustments, consider using larger baking sheets or pans to accommodate larger quantities without overcrowding.

Timing modifications may also be necessary based on your cooking method. Monitor the salmon closely, especially when increasing the serving size, to ensure ideal doneness. For leftovers, store any excess wisely; it will maintain quality if well-sealed, regardless of the quantity.

Nutritional Deep Dive

Cajun Honey Butter Salmon is not only delicious but full of beneficial nutrients. A typical serving size offers a balance of protein, healthy fats, and essential vitamins derived from both the salmon and accompanying ingredients. The macro breakdown shows a significant amount of Omega-3 fatty acids, promoting cardiovascular health while providing energy.

Micronutrient analysis reveals valuable components such as vitamin D and selenium found in salmon. These nutrients contribute to overall wellness, supporting functions like immune health and bone strength. For those mindful of dietary considerations, portion control can guide servings while still savoring the richness of the dish.

Dietary Adaptations

For gluten-free adaptations, ensure all ingredients are certified gluten-free, particularly any packaged seasonings. Dairy-free options can substitute the butter with vegan alternatives, maintaining creamy richness without dairy.

Low-carb and keto dieters can serve this salmon with non-starchy vegetables, like zucchini or mushrooms, instead of traditional starchy sides. Those following paleo diets can keep the core ingredients while ensuring all additions align with paleo principles. Seasonal modifications can introduce local, in-season vegetables, enhancing freshness and nutrient variety throughout the year.

Troubleshooting Guide

If you encounter textural issues with the salmon, ensure you are using fresh, high-quality fish. Overcooking can also lead to a dry texture; keep a close eye on the cooking process to avoid overdoing it.

Balancing flavor is crucial; if the dish ends up too sweet, consider adding a pinch of salt or additional spices to rectify. For temperature problems, a meat thermometer is ideal; always check the internal temperature before removing salmon from heat.

In case you need to adjust for ingredient substitutions, keep in mind the flavor profiles of different spices or types of vinegar; aim for similar taste structures to maintain dish integrity. If timing concerns arise, plan and prep ahead to allow ample time for marinating, cooking, and resting.

Recipe Success Stories

Community feedback has highlighted the joyous experience of preparing Cajun Honey Butter Salmon. Warm stories of gatherings where this dish was the star centerpiece demonstrate its ability to connect people and create lasting memories. Many readers have successfully adapted the salmon, trying variations and sharing their creative twists and flavor iterations.

Photography tips often emphasize capturing the dish when it’s freshly plated, focusing on the glistening glaze and vibrant colors. Viewer engagement on social media reflects a desire to experiment with the recipe, leading to unique presentations that inspire others.

Frequently Asked Questions

Can I use frozen salmon for this recipe?

Yes, you can use frozen salmon. Just be sure to thaw it completely in the refrigerator before cooking to ensure even cooking and the best texture.

What can I serve with Cajun Honey Butter Salmon?

It pairs beautifully with roasted vegetables, rice, or a fresh salad. Consider a side of quinoa or pasta for a more filling meal.

Can I make the honey butter glaze ahead of time?

Absolutely! The glaze can be prepared and stored in the refrigerator for up to a week, making it perfect for quick meal prep.

How do I know when my salmon is cooked?

Salmon should flake easily with a fork and reach an internal temperature of 145°F. If you’re unsure, using a meat thermometer provides the best accuracy.

Is Cajun Honey Butter Salmon spicy?

The spice level can vary based on the amount of Cajun seasoning used. Adjust to your personal taste by starting with less and adding more as desired.

What should I do with leftovers?

Store any leftovers in an airtight container in the refrigerator for up to three days. Reheat gently in the oven or microwave before serving.

Can I use another type of fish instead of salmon?

Yes! Other fish such as trout or tilapia can be substituted, though cooking times may vary; adjust accordingly based on their thickness.

How long will the salmon take to cook?

Cooking time will vary depending on the thickness of the salmon. Generally, it takes about 10-12 minutes for an average fillet in a preheated oven.

What is the best method for reheating salmon?

The best way to reheat salmon is in a low oven (around 275°F) until warmed through, which helps to retain moisture and flavor.

Can I make this dish spicy?

Definitely! For extra heat, you can add more cayenne or mix in diced jalapeños, enhancing the overall flavor profile without compromising the dish.

Additional Resources

For those interested in expanding their cooking repertoire, consider exploring related recipes such as spicy shrimp tacos or blackened catfish. Technique guides on mastering sauces can further enhance your culinary experience, providing added depth to future meals.

Understanding the ingredients better allows for creative substitutions and variations, enhancing home cooking skills. Equipment recommendations, such as a good quality fillet knife or a non-stick frying pan, can also elevate your cooking. Lastly, exploring seasonal variations helps in utilizing fresh produce that complements Cajun flavors beautifully.

Join the Conversation

Engage with a community of fellow cooking enthusiasts by sharing your experiences and variations of Cajun Honey Butter Salmon on social media platforms. Photography is a fun way to showcase your culinary journey; don’t hesitate to capture and share your successful dishes!

Recipe reviews also contribute to the evolving stories connected to this dish. Engage in the comments to exchange ideas about potential adaptations, recommendations, and what you loved most about the recipe.

The Recipe

Cajun Honey Butter Salmon

Serves: 4

Prep Time: 10 mins

Cook Time: 15 mins

Total Time: 25 mins

Kitchen Equipment Needed

  • Baking sheet
  • Frying pan
  • Meat thermometer
  • Brush for glazing
  • Spatula

Ingredients

  • 4 salmon fillets
  • 2 tablespoons Cajun seasoning
  • 1/4 cup honey
  • 1/4 cup unsalted butter
  • Juice of 1 lemon
  • Salt and pepper to taste
  • Chopped fresh parsley for garnish

Directions

  1. Preheat your oven to 400°F (200°C).
  2. Season the salmon fillets with Cajun seasoning, salt, and pepper on both sides.
  3. In a frying pan, melt the butter over medium heat.
  4. Add the honey and lemon juice to the melted butter, stirring until combined.
  5. Place seasoned salmon fillets on a baking sheet lined with parchment paper.
  6. Brush the honey butter glaze generously over each salmon fillet.
  7. Bake in the preheated oven for 12-15 minutes or until cooked through and flaky.
  8. Remove from the oven and let rest for a few minutes before serving.
  9. Garnish with chopped fresh parsley and serve warm.

Recipe Notes

  • Feel free to adjust the amount of Cajun seasoning to your spice tolerance.
  • This glaze can also be used for chicken or vegetables.
  • Leftovers can be stored in an airtight container for up to three days.
  • Consider pairing with a side of garlic sautéed spinach or rice for a complete meal.

Homemade Starbucks Drinks – Easy Recipes to Try at Home

Ultimate Starbucks Copycat Drinks Recipe: Savor the Flavors at Home

⚖️
Difficulty
Medium

⏲️
Prep Time
10 mins

🕒
Cook Time
15 mins

⏱️
Total Time
25 mins

🍽️
Servings
2

Starbucks drinks have become a beloved part of many people’s daily routines. The rich and creamy textures, along with the bold flavors of coffee and various syrups, make them irresistible. Imagine being able to enjoy these delightful beverages right in the comfort of your own home. This ultimate Starbucks copycat drinks recipe will walk you through the process of creating your favorite beverages, allowing you to customize your drinks to your own palate. Whether it’s the iconic Caramel Macchiato or a refreshing Iced Matcha Latte, you can now recreate these enchanting flavors and experience that café ambiance without paying for it!

The beauty of making Starbucks drinks at home is that you can adjust each ingredient to meet your personal taste preferences. Want it sweeter? Go ahead and add more syrup! Prefer a creamier texture? Substitute milk for your favorite plant-based alternative. With this recipe, you can mix and match flavors, control your ingredients, and create a drink that’s tailored just for you. Get ready to impress your friends and family with these delicious homemade Starbucks drinks that are sure to satisfy your cravings and elevate your beverage game.

Quick Recipe Highlights

  • Flavor Profile: This recipe features balanced sweetness combined with rich coffee and milk, offering a delightful medley that tantalizes your taste buds.
  • Texture: Each drink boasts a creamy mouthfeel with just the right amount of froth for an authentic barista-style experience.
  • Aroma: You’ll be greeted by the delightful aroma of freshly brewed coffee and flavored syrups that fill your kitchen.
  • Visual Appeal: The drinks are visually stunning, layered beautifully with vibrant colors that make them a feast for the eyes as well.
  • Skill Level Needed: This recipe is manageable for both beginners and those with some kitchen experience, as it involves simple blending and assembling techniques.
  • Special Equipment: You will need a blender, milk frother, and measuring cups for precise preparation.

Recipe Overview

  • Difficulty Level: This recipe is categorized as medium difficulty due to the precision in measurements and techniques like frothing milk.
  • Category: These drinks fall under beverages and are perfect for breakfast, brunch, or as a pick-me-up throughout the day.
  • Cuisine: Rooted in modern American café culture, this recipe draws inspiration from popular coffeehouse menus worldwide.
  • Cost: The total cost of ingredients is minimal compared to store-bought drinks, providing a cost-effective solution to your caffeine cravings.
  • Season: Enjoy these drinks year-round, whether it’s a hot summer day or a cozy winter evening.
  • Occasion: Perfect for any occasion, from casual gatherings to special celebrations, impressing guests with your homemade Starbucks drinks.

Why You’ll Love This Recipe

Get ready to indulge in the captivating taste and texture of these homemade Starbucks drinks. Each sip will transport you to your favorite coffee shop, yet you can enjoy it in the tranquility of your home. The rich flavors combined with the velvety smoothness will leave you craving more, making it the perfect treat anytime during the day.

Not only do these drinks have an enticing taste, but they are also incredibly convenient to make. You can prepare them within minutes, utilizing simple techniques that allow for quick assembly. This means you’ll never have to settle for mediocre coffee again as you can whip up a delicious beverage whenever the craving strikes.

From a nutritional standpoint, these drinks can be tailored to accommodate various dietary needs, making them suitable for nearly everyone. You have control over the ingredients, allowing you to utilize low-fat milk, sugar alternatives, or even entirely plant-based options for a healthier version that still satisfies your cravings.

Socially, these Starbucks copycat drinks look fantastic and can be a conversation starter when serving guests. Imagine hosting a brunch and delighting your friends with your amazing skills in recreating their favorite café drinks! They’ll be amazed and certainly impressed.

Moreover, the cost-effectiveness of this recipe is a cherry on top. You’ll save a significant amount over time compared to purchasing similar drinks at Starbucks. Making your favorites at home not only fulfills those cravings but also aligns with a savvy and budget-friendly lifestyle.

Historical Background and Cultural Significance

The origin of coffee drinks has deep historical roots, with coffee consumption dating back to as early as the 15th century. The phenomenon of coffeehouses began in the Middle East, spreading first through Europe and then into America. As these establishments formed, special blends and methods emerged, leading to the variety of drinks we now savor worldwide, including the famous concoctions from Starbucks.

Culturally, coffee drinks serve as more than just a beverage; they are a ritual in many societies. From the Italian espresso to the frothy cappuccinos, each culture has added a unique twist. Starbucks capitalizes on this by bringing global flavors to its menu, creating an inclusive experience through coffee, tea, and seasonal specialties that cater to diverse palates.

Over time, the Starbucks menu has evolved, adapting to the growing demand for creative and customizable beverages. This evolution underscores how coffee shops aim to meet the desires of consumers, bridging tradition with innovation. Regional flavors and specialties also have their place, as Starbucks incorporates local tastes to resonate with customers around the world.

Finally, the recipe for these drinks has taken on a new life in recent years as home brewing has surged. With the rise of DIY culture, making Starbucks-like beverages in home kitchens has become a trendy activity, allowing coffee lovers to discover their inner barista. Everyone can now explore their creativity while enjoying a delicious cup that mirrors, or surpasses, café standards.

Ingredient Deep Dive

Coffee is the heart of this recipe, and its cultural significance cannot be overstated. Originating from Ethiopia, coffee has transcended its humble beginnings to become a global phenomenon. It’s beloved for its stimulating properties, energizing those around the world. When brewing coffee at home, opt for whole beans and grind them just before use to preserve maximum flavor and aroma.

Milk is another essential component that undeniably affects the drink’s texture and taste. The tradition of adding milk to coffee beverages began centuries ago, and it has since evolved with varying types of milk gaining popularity. From whole to skim and plant-based alternatives like almond and oat, the options available today cater to numerous dietary preferences. When using milk, frothing it to the right consistency enhances the overall experience, making it creamy and luxurious.

Syrups add the final burst of flavor to your drinks. Starbucks is famous for its variety of flavored syrups, which can easily be replicated at home with basic ingredients. Many syrup options allow for individual taste preferences, such as vanilla, caramel, or seasonal options like pumpkin spice. Homemade syrup can be made with natural sweeteners or adjusted for sugar-free alternatives, ensuring that you customize your beverage just the way you like it.

For toppings like whipped cream or seasonal spices, the selection is endless. These finishing touches are not just about aesthetics; they enhance flavor and aroma while adding a delightful contrast in texture. Incorporating fresh spices, such as nutmeg or cinnamon, adds an aromatic layer that transforms the drinking experience.

When selecting your ingredients, prioritize freshness and quality to create the best possible homemade Starbucks drinks. By carefully choosing your coffee beans, milk, and flavorings, you’ll elevate your beverages. Additionally, consider storage recommendations for each ingredient to maintain their peak flavor and nutrition.

Common Mistakes to Avoid

  • Not using fresh coffee: Always choose freshly ground coffee for optimal flavor and freshness. Purchasing pre-ground coffee diminishes quality.
  • Incorrect milk frothing: Frothing milk too long or too short can result in undesirable textures. Aim for a velvety, smooth consistency.
  • Ignoring ingredient measurements: Precision in measurements is key for balance. Too much or too little syrup can overpower or dilute your drink.
  • Using inadequate temperature: Ensure your coffee is brewed at the correct temperature, ideally between 195°F to 205°F, to extract rich flavors.
  • Overcomplicating flavors: Avoid using too many syrups or flavors at once, as they can clash. Keep it simple for a harmonious taste experience.
  • Neglecting presentation: Take the time to garnish and present your drink well. A visually appealing drink enhances the overall experience.
  • Skipping the taste test: Always taste your drink before serving. Adjust sweetness or flavors as needed for your desired profile.
  • Using low-quality ingredients: Invest in good quality coffee and syrup for the best results. Cheap ingredients will lead to inferior flavor.
  • Not cleaning equipment: Ensure your blender and frother are clean after use to avoid flavor contamination next time.
  • Focusing solely on recipes: Feel free to experiment beyond the recipe, discovering unique flavor combinations that suit your taste.

Essential Techniques

Frothing milk is an essential technique that separates a good coffee drink from a great one. Understanding the science of aerating milk helps achieve the desired consistency. Use a frother or steam wand, and focus on creating microfoam that is silky and stable. Common pitfalls include overheating the milk, which can create a burnt flavor, and failing to create sufficient foam for a cappuccino-like finish. Look for visual cues such as a glossy sheen that indicates proper frothing.

Another important technique is brewing the perfect cup of coffee. Choose high-quality beans and ensure your brewing equipment is set correctly. Grind size and brewing time play significant roles in flavor extraction. A coarser grind works best for cold brews, while fine grinds are ideal for espresso. Pay attention to brewing time and temperature; the right combination will yield a rich, flavorful cup.

Pro Tips for Perfect Starbucks Copycat Drinks

Choose high-quality, freshly roasted coffee beans for maximum flavor.
Experiment with different milk types—almond, soy, or oat—to find your favorite.
Invest in a milk frother to achieve a professional texture for your beverages.
Add a pinch of salt to your syrup for enhanced sweetness and reduced bitterness.
Customize your drink by adding spices like cinnamon or nutmeg for a seasonal twist.
Make your own flavored syrups to avoid artificial additives and enhance freshness.
Change the sweetness level based on preference; taste and adjust as you go.
Use a high-quality blender for mixed beverages to create a smoother consistency without chunks.

Variations and Adaptations

Regional variations are abundant; consider making a traditional Italian Macchiato by skipping milk for a pure espresso treat. Seasonal adaptations can easily transform your recipe for fall-themed drinks by incorporating pumpkin spice syrups and whipped cream. For dietary modifications, use dairy-free milk alternatives to cater to lactose-free guests. Flavor variations like hazelnut or chocolate mocha open up an array of possibilities, while texture modifications can be achieved by adjusting frothing techniques. Lastly, presentation alternatives can enhance the visual appeal, using colored sprinkles or fruit garnishes.

Serving and Presentation Guide

Plating techniques for coffee drinks can elevate the overall experience significantly. Consider using clear glass mugs to showcase the beautiful layers of your drinks. Garnishing ideas like drizzling caramel or chocolate syrup add visual flair. Traditional accompaniments, such as biscotti or pastries, can provide a delightful side pairing. Modern serving suggestions include adding a fresh mint sprig or citrus twist for a refreshing edge. Always serve beverages at the right temperature to enhance the drinking experience. Lastly, monitor portion control to avoid overwhelming guests with oversize servings.

Wine and Beverage Pairing

Pairing your drinks with complementary wines can elevate gatherings. Consider serving a lightly fruity Pinot Grigio alongside sweetened coffee drinks. For a cozy night, a robust dessert wine can balance chocolate flavors in variations like mocha lattes. When opting for non-alcoholic alternatives, try pairing your drinks with herbal teas that harmonize with sweet coffee notes. Coffee pairings can include a rich roast or flavored teas, depend on personal preference. Keep temperature in mind; warm beverages contrast beautifully against chilled wine.

Storage and Shelf Life

Proper storage methods ensure your ingredients remain fresh. Store coffee in an airtight container in a cool, dark place to maintain flavor. Milk should be kept refrigerated and consumed within a week of opening. Syrups often retain shelf life longer but should be stored properly in cool conditions and checked for separations. For finished drinks, consume within a few hours for optimal freshness. Signs of spoilage include off-smells, curdled milk, or mold. If freezing, consider that texture may change upon reheating; use a microwave or stovetop to gradually warm your drinks.

Make Ahead Strategies

To simplify preparation, you can pre-make certain elements such as coffee or flavored syrups. Brew your coffee in batches and store in the fridge for easy access during busy mornings. Prepare syrups and keep them in airtight containers—this ensures flavor is locked in for weeks. Also, assemble your drink components by batching together necessary ingredients to streamline the assembly process later on. Quality won’t diminish if stored correctly, but freshness is always best. Reheat your coffee gently or utilize chilled coffee for iced versions to retain texture.

Scaling Instructions

Scaling your recipe is a breeze, allowing you to adjust ingredients based on the number of servings desired. If halving the recipe, maintain the same ingredient proportions for balanced flavors. Doubling or tripling requires careful consideration of equipment; ensure you have larger containers or multiple brewing cycles to handle the volume. Timing modifications may also be necessary; larger batches may take longer to cool or cool down. Ensure proper storage of any excess to enjoy later, emphasizing the freshness of all ingredients used.

Nutritional Deep Dive

Breaking down the nutrients in coffee drinks reveals surprising benefits. Coffee is rich in antioxidants and can provide cardiovascular health advantages. When choosing milk, factor in the calorie and fat content in relation to your dietary goals. Flavor syrups, however, can add sugar and calories, so it’s beneficial to monitor usage. When adjusted for health-conscious plans, homemade versions allow more control over sugar and sweeteners. Each drink can provide a satisfying balance of fuel and indulgence, making it an appropriate part of any diet when enjoyed in moderation.

Dietary Adaptations

Dietary adaptations cater to many lifestyles. For gluten-free options, ensure syrups and flavorings are certified gluten-free. Dairy-free alternatives can be easily utilized; almond, coconut, or oat milk can replace traditional dairy without losing quality. Vegan variations use plant-based alternatives across all components, including whipped toppings. Low-carb or keto drinkers should limit syrup use, focusing on naturally flavored beverages. Paleo and low-FODMAP options encourage natural ingredients without processed additives, making your drinks as healthy as they are indulgent.

Troubleshooting Guide

In case of texture issues, adjust frothing time to achieve the desired creaminess without over-aeration. For flavor balance, taste your drink at various stages; under-sweetened beverages can be remedied with small syrup increments. Temperature problems can arise if coffee is overly hot or cold; brewing method should ensure the right temperature range. Equipment challenges may include malfunctioning frothers; if so, seek troubleshooting guides or replace when necessary. Lastly, ingredient substitutions should be monitored, as different brands and types may yield varied outcomes in flavor and texture.

Recipe Success Stories

Community feedback shines a light on the joy of recreating these drinks. Many have shared how their customized versions exceeded their expectations, encouraging the experimentation with flavor profiles. Success stories often involve perfecting whipped cream techniques or discovering unique spice combinations that enhance familiar drinks. Adaptation stories reflect creativity within communities as readers showcase personal takes on beloved recipes. Photography tips often arise in discussions, inspiring others to present their creations beautifully and share the experience on social media.

Frequently Asked Questions

Can I use decaf coffee for these recipes?

Yes! Decaf coffee can be used without compromising flavor, making it ideal for late-night enjoyment without caffeine.

What if I don’t have a milk frother?

If a frother isn’t available, shake warm milk in a jar or whisk vigorously to achieve a creamy consistency suitable for your drinks.

How long can I store homemade syrups?

Homemade syrups can typically last in the fridge for about 2-3 weeks. Be sure to check for mold or changes in smell.

Can I make these drinks hot or iced?

Absolutely! Each recipe can be tailored; simply serve hot for a comforting experience or pour over ice for a refreshingly cool option.

What are some good substitutes for sugar in the syrups?

Consider using honey, agave syrup, or stevia as alternative sweeteners. They add sweetness without the added calories from processed sugars.

Can I use flavored coffee beans?

Yes! Flavored beans can enhance your drink further. Look for quality sources to ensure the best flavor infusion.

What’s the best way to froth non-dairy milk?

Non-dairy milks typically froth well when heated. Use almond or oat milk for better results; always check for barista versions for optimal frothing.

How do I know if my milk is too hot?

For milk, a good temperature is around 150-160°F. Any hotter can risk compromising the taste of your drink.

What is the best way to reheat coffee drinks?

Reheat gently on the stovetop or in a microwave until warm. Avoid boiling to maintain flavor quality.

Can I prepare these drinks in advance for guests?

Yes! Prepare syrups and batch-brew coffee ahead of time. Just assemble the drinks right before serving for freshness.

Are there any sugar-free options available?

Many sugar-free syrups exist that can be substituted. Look for options available at grocery stores or even create your own by controlling sweetness.

What’s the best type of blender for these drinks?

A high-speed blender works best, especially for frappes or blended drinks. Look for one capable of handling ice and frothing milk efficiently.

Additional Resources

To enhance your culinary repertoire, explore our collection of related recipes perfect for your next gathering. Discover technique guides for brewing the perfect cup and delve into comprehensive ingredient information to make informed choices. Our recommendations for equipment will ensure you have the right tools needed in your kitchen, while seasonal variations can inspire exciting new twists on classic drinks, allowing for continued experimentation and enjoyment in recreating your favorites.

Join the Conversation

We would love for you to share your experiences with making these drinks! Join the conversation on social media and showcase your beautiful creations by photographing your drinks. Don’t be shy to leave reviews or share feedback about variations you have tried, as well as any tips you may have for fellow coffee lovers. Engage with our community to exchange creative ideas and culinary triumphs surrounding these delicious homemade Starbucks drinks.

The Recipe

Starbucks Copycat Drinks

Serves: 2

Prep Time: 10 mins

Cook Time: 15 mins

Total Time: 25 mins

Kitchen Equipment Needed

  • Blender
  • Milk frother or whisk
  • Measuring cups
  • Airtight containers

Ingredients

  • 2 cups of strong brewed coffee
  • 1 cup of milk (or dairy-free alternative)
  • 2 tablespoons of flavored syrup (caramel, vanilla, etc.)
  • Ice or whipped cream (optional for serving)

Directions

  1. Brew your coffee as desired and let it cool.
  2. Froth your milk using a frother or whisk.
  3. Combine brewed coffee and flavored syrup in a glass.
  4. Add ice if desired, then pour frothed milk over the coffee.
  5. Top with whipped cream and additional syrup if desired.
  6. Enjoy your personalized coffee drink at home!

Recipe Notes

  • Adjust the sweetness by varying the syrup amount used.
  • Feel free to experiment with different flavors to create your perfect drink.
  • For an iced beverage, blend ice into the drink for a creamy frappe.

Best Cookie Butter Latte Recipe – Creamy and Homemade Delight

Cookie Butter Latte: A Cozy Cup of Comfort

⚖️
Difficulty
Easy

⏲️
Prep Time
5 mins

🕒
Cook Time
5 mins

⏱️
Total Time
10 mins

🍽️
Servings
2

Indulging in a Cookie Butter Latte is like wrapping yourself in a warm blanket on a chilly day. This delightful drink, blending the rich flavors of cookie butter, espresso, and steamed milk, creates a cozy experience that is both comforting and satisfying. Imagine each sip bursting with caramelized sweetness paired with the warmth of coffee, making it a perfect treat for mornings or afternoons alike. Whether enjoyed alone or shared, this drink is bound to uplift your spirits.

The Cookie Butter Latte not only tempts the palate with its satisfying sweetness but also provides a nostalgic essence that evokes fond memories of childhood treats. The combination of creamy milk and spicy cookie butter creates a luscious texture that envelops your taste buds, leaving you craving more. It’s not just a drink; it’s a moment of bliss, an escape from the everyday hustle, and a chance to savor life’s simple pleasures.

Quick Recipe Highlights

  • Flavor Profile: A delectable blend of sweet, buttery flavors with a hint of spice, making each sip a memorable experience.
  • Texture: Smooth and creamy with a lovely froth on top, this latte satisfies both sweet and creamy cravings.
  • Aroma: Inviting scents of freshly brewed coffee fused with the warm, comforting smell of cookie butter fill the air.
  • Visual Appeal: Beautiful layers of espresso and frothed milk topped with a sprinkle of cookie crumbs create a tempting look.
  • Skill Level Needed: Even beginners can whip up this drink surprisingly easily, making it accessible to everyone.
  • Special Equipment: A simple espresso machine or a strong coffee maker paired with a milk frother ensures perfect results.

Recipe Overview

  • Difficulty Level: Easiest to prepare, the Cookie Butter Latte requires minimal steps and equipment, making it perfect for anyone.
  • Category: This delicious drink is categorized as a beverage and fits wonderfully into breakfast or brunch menus.
  • Cuisine: While it features elements of traditional coffee culture, this recipe brings a unique twist influenced by cookie butter’s popularity.
  • Cost: This recipe remains budget-friendly, using common pantry ingredients that won’t break the bank.
  • Season: Best enjoyed during fall or winter, when cozy drinks are most appealing, though it’s delightful year-round.
  • Occasion: Ideal for holiday gatherings, cozy mornings, or an afternoon pick-me-up with friends or family.

Why You’ll Love This Recipe

First, the Cookie Butter Latte is a truly indulgent treat that will please any sweet tooth. The unique combination of cookie butter and coffee creates a beautiful balance that is both rich and satisfying while avoiding being overly sweet. Each sip offers a comforting warmth that embraces you, making it perfect for sipping on a chilly day or during a cozy evening at home.

Second, ease of preparation makes this latte a breeze to make. Taking only 10 minutes from start to finish, it’s perfect for busy mornings or unexpected guests. You can quickly whip this delightful drink at home, avoiding costly coffee shop visits and long lines, making it a smart choice for your wallet and schedule.

Furthermore, this recipe packs a punch with its uniqueness. While traditional lattes are great, this cookie butter-infused version elevates your coffee experience, allowing you to impress friends and family with your barista skills. It’s a delightful way to introduce something new and exciting to the usual beverage offerings.

Additionally, Cookie Butter Lattes can be a part of nutritional balance when consumed in moderation. While indulgent, you can adjust the sweetness by controlling the amount of cookie butter and enhance the flavors with lower-caloric options, making it a treat you can feel good about enjoying.

Lastly, sharing this latte with friends creates memorable moments, whether it’s a warm gathering during the holidays or simply a catch-up session with a friend over coffee. The comforting nature of this drink lends itself beautifully to social experiences, encouraging connection and warmth in every cup.

Historical Background and Cultural Significance

The origins of cookie butter can be traced back to Belgium, where it became a beloved spread made primarily from crushed speculoos cookies. Its unique flavor profile quickly gained popularity, inspiring a range of desserts and drinks worldwide, ultimately leading to the delightful Cookie Butter Latte that we enjoy today. The invention and rise of cookie butter in mainstream markets reflect a growing trend toward combining nostalgic flavors with modern culinary techniques.

Cookie butter holds a special place in many hearts, reminiscent of cozy childhood memories spent enjoying cookies. Over the years, this simple spread has transformed into a multi-functional ingredient that is embraced by bakers and coffee enthusiasts. The evolution of cookie butter into the coffee scene showcases its versatility and ability to enhance the traditional coffee experience.

As more people become aware of cookie butter, variations have emerged to incorporate it into drinks, creating delicious creations that appeal to a wide audience. The Cookie Butter Latte is not just a drink; it represents a fusion of cultures and flavors that highlights how traditional treats can find new life in modern recipes.

Regional variations of this drink can also be found based on local tastes, preferences, and available ingredients. Coffee culture around the world frequently innovates popular drinks, leading to endless possibilities for delicious adaptations and creative recipes inspired by original concepts.

Ingredient Deep Dive

Cookie Butter: A sweet, spiced spread made predominantly from crushed cookies, cookie butter is beloved for its sweet and caramel-like flavor. It’s versatile in use—not only for toasting but as an ingredient in various recipes like desserts, cakes, and beverages. When selecting cookie butter, aim for brands with fewer additives for the most authentic flavor.

In terms of nutrition, cookie butter does contain sugar and fat, so it’s best enjoyed in moderation. Look for options with natural ingredients to maintain a healthier profile. Storing your cookie butter in a cool, dry place can prolong its freshness, and always check for signs of spoilage.

Espresso: Espresso forms the base of this latte, delivering a strong coffee flavor. The coffee beans used for espresso are finely ground, often ranging from Arabica to Robusta depending on taste preference. Always choose high-quality beans for the best flavor. Freshly brewed espresso provides a bold backdrop that blends wonderfully with cookie butter.

Espresso is packed with antioxidants and can showcase numerous health benefits, including improved mental alertness. To ensure the freshest taste, store your coffee beans in an airtight container away from light and heat. You can substitute with strong brewed coffee if necessary, although the flavors may vary slightly.

Common Mistakes to Avoid

  • Using cold milk: It’s crucial to use milk that is properly steamed for optimal foam and taste. Cold milk won’t froth well, leading to a less satisfying latte.
  • Adding too much or too little cookie butter: Balancing is key; too much can make the drink overly sweet, while too little may lack flavor depth.
  • Not using fresh ingredients: Using stale cookie butter or old coffee can significantly diminish the quality of your latte.
  • Skipping the espresso shot: The foundation of the latte is the espresso; omitting it results in a different beverage altogether.
  • Overheating the milk: Heating the milk too quickly or at too high a temperature can burn it, resulting in an unpleasant taste.
  • Frothing the milk incorrectly: Proper frothing techniques are essential. Too much air can create a dry foam, while not frothing enough may leave the milk too flat.
  • Not adjusting sweetness: Taste your latte before serving, as different cookie butter brands have varying sweetness levels.
  • Ignoring presentation: A well-presented drink enhances the experience. Take a moment to garnish appropriately.

Essential Techniques

Frothing Milk: Properly frothing milk is vital for achieving that luxurious texture. Use cold milk and a steam wand or frother to incorporate air into the milk gradually. Common pitfalls include overheating and creating bubbles instead of foam, which can ruin the texture. Look for visual cues like silky smoothness and glossy appearance.

Brewing Espresso: Understanding how to brew the perfect espresso is foundational. Use freshly ground beans and the right pressure and temperature settings – typically around 190°F. A common issue is using too coarse a grind, which results in weak coffee. Aim for a rich and creamy consistency to complement the cookie butter.

Pro Tips for Perfect Cookie Butter Latte

1. Use fresh espresso for the best flavor—quality matters, so select premium coffee beans.

2. Experiment with different types of milk; almond or oat milk can create interesting flavor profiles.

3. Consider adding a sprinkle of cinnamon or nutmeg on top for additional warmth and flavor.

4. Use a blender for a smooth, integrated blend if you prefer a less frothy texture.

5. Adjust the amount of cookie butter if you desire a more subtle flavor.

6. For an iced version, chill the espresso beforehand and serve over ice with cold milk.

7. If you have leftover cookie butter, it’s fantastic on toast for a quick snack.

8. Pair with a small pastry on the side for a delightful breakfast or snack experience.

Variations and Adaptations

Many regional variations exist for the Cookie Butter Latte. For example, adding pumpkin spice creates a fall-inspired version that’s ideal for seasonal festivities. In warmer months, consider an iced latte with cookie butter mixed in after blending cold milk and espresso over ice.

Seasonal adaptations can enhance your latte experience. During the winter, add peppermint syrup for a festive feel, whereas in spring, a splash of vanilla extract can lighten the drink’s overall profile.

Dietary modifications are simple as well. Opt for dairy-free alternatives such as coconut or almond milk for a vegan-friendly version, adjusting cookie butter brands to ensure they meet dietary needs.

Flavor variations can play a significant role as well. Explore different cookie butters, like speculoos or chocolate cookie butter, to switch things up. You can also blend in other flavorings such as caramel or hazelnut.

Texture modifications are also worth considering. For a creamier experience, whip a small amount of heavy cream and fold it into your drink before serving. Alternatively, using a thicker yogurt in your latte could give it a unique twist.

Presentation alternatives can elevate your drink. Consider clear glass cups to showcase the lovely layers of your latte. Adding a dusting of crushed cookies or whipped cream on top can make it even more enticing.

Serving and Presentation Guide

When serving your Cookie Butter Latte, consider using clear glass mugs to display the beautiful layers of coffee and foam. A dusting of crushed cookie crumbs or a light sprinkle of cinnamon can enhance the visual appeal and add an aromatic element. For added flair, a dollop of whipped cream on top elevates the presentation and satisfies sweeter palettes.

Garnishing ideas include drizzling a bit of cookie butter over the whipped cream or using a cinnamon stick as a stirring tool for both aesthetics and flavor. Serve your latte at warm temperatures, ideally around 150°F to preserve the comfort of the drink without risking burns.

Portion control is important if you’re serving at gatherings. Consider preparing a larger batch in a carafe for self-service, allowing guests to enjoy as much or as little as they prefer. Pairing with a light breakfast pastry or some cookies can also complement the flavors beautifully and make for a delightful experience.

Wine and Beverage Pairing

The Cookie Butter Latte is best enjoyed on its own due to its rich flavors, but it can also pair beautifully with a light dessert wine such as Moscato or a spiced wine like Gluhwein during the holidays. If you’re opting for a non-alcoholic alternative, consider offering a selection of herbal teas that complement its sweetness.

Coffee enthusiasts might pair it with a straight espresso shot to contrast the sweetness with bold coffee notes that cleanse the palate. Iced versions are lovely with fruit-infused water or smoothies that offer light, refreshing flavors during warm months.

For those who enjoy tea, consider chai lattes, which share similar warm spice notes and create a cozy drink experience, making for an enjoyable contrasting pair when entertaining.

Storage and Shelf Life

Cookie Butter Lattes are best enjoyed fresh, however, if you have leftovers, store any prepared latte in an airtight container in the refrigerator for up to 24 hours. Reheating is simple; gently warm in the microwave or on the stovetop, but avoid boiling to maintain quality.

Cookie butter itself has a long shelf life when stored properly. Keep it in a cool, dry area away from direct sunlight. After opening, use it within a few months, ensuring to keep it tightly sealed to prevent moisture from affecting its texture and flavor.

Signs of spoilage in cookie butter include any off odors, separation, or unusual discoloration. If you notice these changes, it’s best to discard it. You can freeze cookie butter for longer storage, allowing you to scoop out what you need as you go.

Make Ahead Strategies

If you’re planning to serve Cookie Butter Lattes at breakfast gatherings, consider making a strong batch of espresso ahead of time. Brew the espresso and refrigerate it so that you can quickly assemble lattes in the morning.

You can also pre-froth your milk and store it in a thermos to maintain heat, ensuring you only need to combine the ingredients when ready to serve, enhancing efficiency while maintaining quality.

Keep cookie butter stored near your coffee setup, as this will prompt you to mix and create lattes effortlessly. If you’re timing prep, we recommend assembling your cups right before serving to ensure that everything remains warm and delightful.

Scaling Instructions

Scaling your Cookie Butter Latte recipe is simple! If you want to double or triple the batch, the equipment you use should accommodate the increased volume—this may involve brewing espresso in larger portions or using a bigger milk frother.

For smaller servings, halving the recipe works just as well; portions can be made in individual cups. Just remember to maintain the proportions for espresso and milk to keep the flavors balanced.

Pacing is important, especially when preparing for larger gatherings. You may need to adjust your timing for brewing extra coffee, but with efficient organization, you can serve multiple guests very quickly.

Nutritional Deep Dive

This delightful Cookie Butter Latte can be a guilty pleasure, but it can also fit into a balanced lifestyle. Depending on your ingredient choices, the macro breakdown generally includes carbohydrates from the cookie butter, protein from milk, and fat from both. This mixture can create energy-boosting benefits while also satisfying your cravings.

Especially with the use of different milk types and substitutes, you can modify the nutritional profile to suit your goals—like choosing low-fat milk or sugar alternatives. Nutritionally, cookie butter typically contains sugars and fats, so moderation is key, but there are variations that use less sugar or natural sweeteners.

For those watching their portions, be mindful of how many servings are consumed and read the nutrition labels carefully! Adjusting your recipe with lower calorie options can significantly influence your health goals while allowing you to still enjoy sweet lattes.

Dietary Adaptations

For gluten-free adaptations, confirm that your cookie butter is certified gluten-free, and utilize gluten-free alternatives in lattes. The beauty of this recipe is its versatility, making it easy to suit various dietary restrictions.

Dairy-free options are available with a range of non-dairy alternatives like almond, coconut, or oat milk. All of these will create a unique flavor profile—just ensure your cookie butter aligns with your dietary needs.

If you’re following a vegan regimen, select vegan cookie butter and consider plant-based whipped cream for an indulgent twist. There are also many low-carb or keto-friendly options available nowadays for those seeking to watch their carbohydrate intake without sacrificing the enjoyment of this tasty latte.

Other specific diets like Paleo or Low-FODMAP can be accommodated as well by choosing compliant cookie butter alternatives and structuring the recipe according to their guidelines, allowing everyone to relish this enjoyable drink.

Troubleshooting Guide

If your latte turns out too frothy, ensure you’re controlling the air intake while frothing the milk to reach the desired consistency. On the other hand, if it’s too flat, consider using a different milk that froths better, like whole milk or oat milk.

Flavor balance is critical, and if your latte tastes too sweet, you can always add more espresso to counter the sweetness of cookie butter, creating that perfect balance of rich and sweet flavors.

During the brewing phase, if your espresso runs cold, make sure to brew it just before assembling the drink. Alternatively, you can warm up your milk before pouring it over the espresso to retain the temperature.

For ingredient challenges, always check for the quality of your cookie butter, as stale ingredients can affect the overall taste and texture significantly. Ensuring freshness will keep all flavors intact.

Recipe Success Stories

Many readers have shared delightful experiences with this Cookie Butter Latte recipe, often modifying it to fit their tastes and needs. From adding a dash of nutmeg for warmth or the use of almond milk for a creamy texture, the personable touch inspires creative experimentation.

Feedback indicates that family and friends particularly enjoy the rich flavor differences when someone brews this latte at social gatherings. Presentation is equally applauded, with the visual layers impressing guests every time.

Numerous readers report that this recipe became their go-to for every cozy occasion, tying in sentiments of warmth and nostalgia with each sip. Visual documentation in social media posts shows beautiful servings enjoyed on chilly mornings and festive celebrations alike.

Frequently Asked Questions

Can I make this latte without an espresso machine?
Yes, strong brewed coffee works as a substitute for espresso; just adjust the amount used to maintain the flavor balance.

How do I store leftover latte?
Attempts to store lattes are best avoided; it’s best to make fresh. If necessary, store it in an airtight container in the refrigerator and reheat it gently.

Is there a non-dairy alternative for the cookie butter?
Many brands offer non-dairy cookie butters made with coconut and almonds; check labels for quality and nutritional values.

How can I adjust the sweetness of my latte?
You can use less cookie butter or incorporate a sugar substitute to find the perfect sweetness level according to your personal taste.

Can I serve a large batch of these lattes?
Absolutely! Brew the espresso and steam a larger quantity of milk to serve at gatherings to keep things running smoothly.

What are other flavors I can incorporate?
Consider flavors like vanilla, caramel, or even a chocolate cookie butter variant for an exciting twist.

How do I make it more seasonal?
Incorporate seasonal spices like pumpkin spice during fall or peppermint during the winter season for a holiday touch.

Can I make an iced version?
Definitely! Brew espresso, allow it to chill, and mix with cold milk and cookie butter over ice.

What is cookie butter made of?
Cookie butter is typically made from crushed cookies, sugar, and oils, giving it a creamy texture with rich flavors.

Where can I find cookie butter?
You can find cookie butter in most grocery stores, particularly in the international or specialty food aisle.

Additional Resources

Related recipes like a Pumpkin Spice Latte or a decadent Mocha can offer exciting variations to your beverage lineup. For technique guides, learning about proper espresso brewing or milk frothing methods will perfect your coffee-making skills.

Ingredient information is crucial; understanding the qualities of different milk types and cookie butters can enhance your adventures in coffee. Equipment recommendations like purchasing a quality espresso machine or milk frother can elevate your drink-making to café standards.

Seasonal variations may include festive recipes throughout holidays that align with flavor profiles, allowing your drink repertoire to continuously expand. Check back often for new and exciting ideas!

Join the Conversation

We love hearing from our readers! Share your cookie butter latte experiences and tips on social media, or join our community for more culinary inspiration. Showcasing your homemade latte creations can spark discussions and ideas and connect you with fellow coffee lovers.

Don’t forget to leave a review or suggestion! Your feedback helps us refine our recipes and offer the best possible experience for all. Share photos of your lattes and feel free to tag our community—let’s inspire each other with culinary creativity!

The Recipe

Cookie Butter Latte

Serves: 2

Prep Time: 5 mins

Cook Time: 5 mins

Total Time: 10 mins

Kitchen Equipment Needed

  • Espresso machine or strong coffee maker
  • Milk frother or steam wand
  • Measuring spoons
  • Heatproof glass or mugs

Ingredients

  • 2 shots of espresso (or strong coffee)
  • 1/4 cup cookie butter
  • 1 cup milk (any kind)
  • Whipped cream (optional)
  • Cookie crumbs (for garnish)

Directions

  1. Brew 2 shots of espresso or strong coffee into heatproof mugs.
  2. In a small saucepan, warm the milk until steaming but not boiling.
  3. Remove from heat and use a frother to froth the milk until light and airy.
  4. Stir in the cookie butter until well combined.
  5. Pour the frothed milk mixture over the espresso shots.
  6. Add whipped cream on top if desired and sprinkle with cookie crumbs.

Recipe Notes

  • Sugar can be adjusted based on the sweetness of the cookie butter used.
  • Add seasonal spices to customize flavors—pumpkin spice is a festive touch in the fall.

Delicious Street Corn Chicken Rice Bowl Recipe for Quick Meals

Street Corn Chicken Rice Bowl: A Flavorful Fiesta in a Bowl

⚖️
Difficulty
Moderate

⏲️
Prep Time
20 mins

🕒
Cook Time
25 mins

⏱️
Total Time
45 mins

🍽️
Servings
4 servings

Indulging in a Street Corn Chicken Rice Bowl is like taking a mini-vacation to the vibrant streets of Mexico. This dish is a marvelous blend of flavors and textures with a fiesta of bright, colorful ingredients. Each bite of tender chicken sets off a cascade of flavors from the smoky, spiced corn, fresh cilantro, and creamy avocado dressing, harmoniously mingling with the earthy undercurrents of the rice. The pleasing contrast between the crisp toppings and the warm, soft components creates an irresistible and satisfying meal sure to delight any palate.

Making this Street Corn Chicken Rice Bowl is not just a culinary experience, but a sensory journey. As you sauté fresh corn with chili powder, the kitchen fills with the enchanting aroma reminiscent of street food vendors. The golden, charred bits on the corn add a visual appeal that is hard to resist, capturing the essence of summer in every forkful. Perfect for busy weeknights or casual gatherings, this dish is both comforting and impressive, presenting a flavorful meal that can be on the table in just under an hour.

Quick Recipe Highlights

  • Flavor Profile: The creamy dressing complements the zesty, smoky street corn and savory marinated chicken, creating a delightful balance.
  • Texture: Crispy corn juxtaposed with the tender chicken and fluffy rice ensures a fulfilling mouthfeel.
  • Aroma: The intoxicating scent of grilled corn seasoned with spices will draw you in.
  • Visual Appeal: The vibrant colors of fresh ingredients make this dish as beautiful as it is delicious.
  • Skill Level Needed: This recipe requires moderate cooking skills, ideal for home cooks looking to expand their repertoire.
  • Special Equipment: All you need are basic kitchen tools such as a skillet, measuring cups, and mixing bowls.

Recipe Overview

  • Difficulty Level: This Street Corn Chicken Rice Bowl is rated moderate due to the various cooking techniques involved, such as marinating and grilling.
  • Category: It falls under hearty meals, perfect for lunch or dinner, providing a wholesome option for busy families.
  • Cuisine: Drawing inspiration from Mexican street food, this dish highlights the rich flavors associated with Latin American cooking.
  • Cost: The ingredients are budget-friendly, typically costing around $15 for a family of four.
  • Season: Enjoy this vibrant dish all year round, though it shines brightest in summer when corn is at its peak.
  • Occasion: Ideal for casual get-togethers, weeknight dinners, or as a party dish that impresses guests.

Why You’ll Love This Recipe

The appeal of the Street Corn Chicken Rice Bowl begins with its tantalizing taste and texture. The combination of juicy, seasoned chicken and charred corn delivers a mouthwatering experience that keeps diners coming back for more. Plus, the diverse ingredients like avocado and lime add freshness that elevates the entire dish. Each forkful bursts with flavor, making it a favorite among family members of all ages, ensuring it becomes a recurring recipe in your kitchen rotation.

Convenience is another significant benefit of this Street Corn Chicken Rice Bowl. With a prep time of just 20 minutes and a cook time of 25 minutes, it’s perfect for those busy evenings when you still want to serve something homemade and delicious. Everything can be prepared in one pot or skillet, minimizing cleanup and maximizing flavor. This makes it an exceptional choice for home cooks who crave deliciousness without the fuss.

Nutritionally, this bowl is packed with wholesome ingredients. The inclusion of grilled chicken provides a great source of protein, while the corn adds fiber and essential vitamins. The vibrant vegetables included contribute necessary antioxidants and nutrients, making it both a satisfying and nutritious meal option that promotes health without compromising on flavor.

Socially, the Street Corn Chicken Rice Bowl serves as an excellent dish for entertaining. Its colorful nature and bold taste make it perfect for gatherings and brunches alike. Guests can customize their bowls, adding a personal touch to the meal and engaging everyone in the cooking process, fostering connection and conversation around the dinner table.

Cost-effectiveness is another reason to love this dish. The ingredients are affordable and readily available at most grocery stores, without sacrificing quality or flavor. By preparing this recipe at home, you not only save money compared to dining out but also have control over the ingredients, ensuring a fresh and satisfying meal that doesn’t break the bank.

Historical Background and Cultural Significance

The tradition of street corn in Mexican cuisine, known as Elote, dates back centuries and is often enjoyed by locals at street stands across the country. This delicious dish typically features grilled corn on the cob topped with a mix of cheese, lime, and spices, embodying the vibrant flavors of Mexican cooking. This Street Corn Chicken Rice Bowl draws inspiration from this beloved street food, transforming it into an easy, hearty meal that pays homage to Mexican culinary traditions.

Mexican street food is an integral part of the country’s culture, representing not only delicious flavors but also community and social interactions. Vendors often serve food from markets and festivals, gathering people together, sparking conversations and sharing experiences. In creating a dish like the Street Corn Chicken Rice Bowl, we bring these communal vibes into our homes, allowing family and friends to come together amidst delicious food and vibrant flavors.

Over the years, the concept of street corn has evolved, with various adaptations highlighting the diverse culinary landscape across Mexico. From spicy sauces to unexpected garnishes, the modifications resonate with local tastes and preferences. This recipe captures these influences while maintaining the authentic essence of street corn, making it accessible for home cooks.

Lastly, regional variations of street corn and chicken dishes are prevalent across Latin America, showcasing local ingredients and flavors. From a tangy lemon-infused version in coastal regions to spicy interpretations in the interior, variations of street corn inspire creativity in home kitchens, allowing recipes to evolve.

Ingredient Deep Dive

Corn, as the star of this Street Corn Chicken Rice Bowl, holds significant cultural and historical importance throughout Latin America. This staple has provided sustenance for generations and is often celebrated in local festivals. Nutritionally, corn is rich in fiber, vitamins B and C, and antioxidants, promoting health. When selecting corn, look for firm, plump kernels and vibrant husks. Store it in the refrigerator for optimum freshness and use within a few days. If fresh corn is unavailable, frozen or canned corn makes excellent substitutes.

Chicken is another essential ingredient bringing protein and satisfaction to this dish. With roots in various cuisines worldwide, chicken is a versatile protein that adapts to numerous flavor profiles. Roasted and grilled chicken options are both nutritious and hearty. When selecting chicken, look for fresh, organic options. Proper storage in the fridge ensures the meat remains fresh until cooking, while marinating overnight allows for deeper flavors. Alternative proteins like turkey or plant-based options can also fit seamlessly into this recipe.

Rice serves as the perfect base for this bowl, and its significance in many cultures is profound. It completes the meal, providing a filling component that pairs beautifully with the vibrant toppings. Nutritionally, rice contributes carbohydrates for energy and essential nutrients for overall health. When purchasing rice, opt for quality varieties like jasmine, basmati, or brown rice for added nutrition. Store rice in a cool, dry place in airtight containers. Quinoa or cauliflower rice can serve as nutritious substitutes.

Common Mistakes to Avoid

  • Overcooking the corn: Ensure to grill just until charred to maintain the sweetness and crunch.
  • Undermarinating the chicken: Allow enough time for the chicken to soak in flavors for optimal taste.
  • Using too much or too little salt: Strike a balance to elevate flavors without overwhelming them.
  • Not allowing the rice to rest: Letting it sit after cooking helps prevent it from becoming sticky.
  • Skipping the fresh herbs: Fresh cilantro or parsley adds brightness you shouldn’t miss.
  • Rushing the process: Taking your time while prepping enhances flavor and enjoyment.
  • Using cold ingredients: Always bring components to room temperature before cooking for better results.
  • Neglecting texture diversity: Include a variety of toppings for an exciting mouthfeel in every bite.

Essential Techniques

Marinating the chicken is crucial as it infuses flavor throughout the meat. To master this technique, ensure adequate time is given for the marinade to penetrate the chicken, ideally overnight. Look for signs such as a transformed color and fragrant aroma which indicate the chicken is ready for cooking.

Grilling corn properly brings out its natural sweetness and enhances the taste. Aim for a high heat and rotate frequently for even cooking. Watch for charred spots, but avoid burning, as it can impart bitterness. Grilled corn should have a slightly smoky aroma that enhances the overall flavor of your dish.

Cooking rice seems straightforward, but attention is necessary. Use the right water-to-rice ratio for your specific type of rice. After boiling, cover the pot and let it sit undisturbed to allow steam to complete the cooking process. Look for fluffy grains that aren’t sticky as an indicator of success.

Pro Tips for Perfect Street Corn Chicken Rice Bowl

1. Always soak the skewers in water before grilling chicken to prevent burning.
2. For an extra smoky flavor, consider adding a few drops of liquid smoke to the chicken marinade.
3. Fresh lime juice squeezed just before serving enhances flavors and adds brightness.
4. Incorporate a mix of cheeses atop the bowl for a creamy, delicious finish.
5. For added crunch, include a sprinkle of crispy tortilla chips as a topping.
6. Experiment with different marinades to convert this dish into varied flavors each time.
7. Serve with a side of hot sauce for those who prefer an extra kick.
8. Enjoy leftovers in a wrap for a delicious lunch alternative the next day.

Variations and Adaptations

Regional variations of this Street Corn Chicken Rice Bowl can be easily experimented with. Incorporating different types of corn, such as grilled blue corn, can add a unique taste and texture twist. Seasonal adaptations could include using summer squash or zucchini to enhance the vegetable profile during the warmer months.

For dietary modifications, consider swapping chicken for grilled tofu or chickpeas, making it a filling vegan option without losing flavor. You can also introduce various spices like cumin or smoked paprika for different flavor profiles, reflecting personal tastes or bold preferences.

Presentation alternatives can transform the dish. Serve the bowl in handmade tortilla bowls for an exciting twist, or arrange the ingredients in vibrant layers for an artful display. Using seasonal vegetables can enhance the visual appeal and nutritional bounty simultaneously.

Serving and Presentation Guide

Plating techniques are essential for elevating your Street Corn Chicken Rice Bowl from simple to stunning. Start with a sturdy base of rice, and then layer on the grilled chicken and street corn. For garnishing, consider fresh cilantro, crumbled cheese, and lime wedges arranged attractively around the bowl.

Traditional accompaniments include fresh salsas, guacamole, or Mexican-style crema that complement this dish. To modernize your serving suggestions, use clear glass dishes to show off the colorful ingredients, making it visually tempting. Always serve warm and ensure that all components are at the appropriate temperature to maximize flavor.

Portion control tips can aid in serving size management without feeling deprived. When allowing guests to assemble their bowls, provide measuring cups to maintain a balanced approach to each component, ensuring everyone enjoys a delightful experience.

Wine and Beverage Pairing

When pairing wine with your Street Corn Chicken Rice Bowl, opt for a light, crisp white wine like Sauvignon Blanc or a fruity rosé, as they beautifully complement the dish’s fresh flavors. The citrus notes in the wine tend to enhance the lime and corn character in the meal.

For non-alcoholic alternatives, refreshing beverages such as iced hibiscus tea or lime-infused sparkling water would make excellent pairings, mirroring the zesty elements in the bowl. If coffee is on the table, many spicy, darker roasted varieties enhance the flavors without overpowering the meal, making for a balanced dining experience.

Serving temperatures are essential; white wines should be served chilled to accentuate their refreshing qualities. Always consider guests’ preferences and provide a range of options to create an inclusive dining experience.

Storage and Shelf Life

Proper storage of leftover Street Corn Chicken Rice Bowls can maintain flavor and freshness. Store each component separately in airtight containers in the refrigerator to prevent sogginess. Consume within 3 to 4 days for optimal quality.

Temperature requirements stipulate that food should be cooled to room temperature before refrigerating. For reheating, use a microwave or stovetop, ensuring even warming to avoid cold spots and preserve the meal’s integrity.

Freezing guidelines allow for extending shelf life for up to three months. Ensure that ingredients like the chicken and corn are well-wrapped to prevent freezer burn. Thaw overnight in the fridge before reheating to maintain taste and texture upon serving.

Make Ahead Strategies

To streamline your cooking process, consider prepping components of the Street Corn Chicken Rice Bowl a day in advance. Marinate chicken overnight and prep the corn and rice, keeping them stored separately until you’re ready to cook.

A prep timeline can vary; grill the corn and chicken shortly before serving to ensure everything remains fresh. Storing elements between steps is beneficial; keep cooked rice in a sealed container to maintain moisture.

Assess quality impacts by tasting components beforehand to ensure freshness. When the meal is ready, assemble all ingredients, allowing for individual customization right before serving to enhance the overall dining experience.

For fresh element additions, prepare a vibrant salad or zesty salsa to accompany the dish while elevating it with tantalizing flavors.

Scaling Instructions

When scaling the recipe, halving the ingredients can lead to equally delightful outcomes for smaller servings, adjusting the spices proportionately to maintain balance. For doubling or tripling, ensure you have adequate cooking space and equipment to handle increased volumes effectively.

Equipment adjustments will be necessary if significantly increasing batch sizes; consider using larger pots or pans to avoid crowding during cooking. Timing modifications should be anticipated, as larger quantities may require additional cooking time for marinated proteins.

Storage considerations remain vital; ensure available fridge space for extensive batches while allocating containers for portioning out the meal for later servings.

Nutritional Deep Dive

Delving deeper into nutritional analysis, the macro breakdown of the Street Corn Chicken Rice Bowl showcases protein-rich chicken, healthy fats from avocado, and carbohydrates from rice, combining to create a balanced meal.

Micronutrient analysis highlights significant vitamins and minerals from corn and fresh vegetables, including Vitamin C, folate, and magnesium, essential for maintaining overall health. Each ingredient plays a distinct role in contributing to overall wellness, emphasizing the benefits of homemade meals.

Health benefits arise from incorporating whole ingredients, promoting better digestion and energy levels. Dietary considerations pose important discussions—striking a balance between indulgence and nutrition through this flavorful bowl is key.

Portion analysis is essential for those monitoring intake; consider halving recommended serving sizes to align with dietary goals while highlighting the dish’s rich nutritional profiles.

Dietary Adaptations

For gluten-free diners, replace traditional components with certified gluten-free alternatives, such as specific rice brands or gluten-free sauces, ensuring that every mouthful remains delicious and safe.

Dairy-free modifications can include coconut cream or almond yogurt as an alternative to creamy dressings. This swap retains a similar texture without compromising the dish’s flavor.

For vegans, substitute chicken with marinated tofu or chickpeas, keeping the spirit of the bowl intact while making it plant-based. Low-carb consumers may employ cauliflower rice instead of traditional rice, offering a familiar base with fewer carbohydrates.

Keto adaptations can also feature cheese toppings rich in fats while avoiding starchy components, and paleo versions may exclude dairy and processed ingredients, focusing on fresh, whole elements.

Troubleshooting Guide

Texture issues can arise from overcooked rice absorbing too much moisture—ensuring a proper cooking ratio and allowing it to rest are critical to maintaining desired texture.

Flavor balance problems might occur with too much spice or salt; always start with smaller amounts, adjusting to taste gradually. Keep spare ingredients on hand to enhance flavors without overwhelming them.

Temperature problems often emerge from improperly heated ingredients; utilize thermometers if needed to check for proper temperatures throughout the dish.

Equipment challenges frequently happen with unfamiliar cookware or tools; ensure proper setups, preheat pans, and maintain organization in the kitchen for an effective cooking experience.

Ingredient substitutions can lead to unexpected results; understanding the roles of each ingredient helps maintain the integrity of the dish while adjusting as needed.

Timing concerns are often managed through proper meal prep; building a timeline during cooking keeps everything on track and ensures a cohesive meal.

Recipe Success Stories

Community feedback often emphasizes how the Street Corn Chicken Rice Bowl has become a go-to family favorite. Readers recount successfully adapting ingredients based on preferences, showcasing the dish’s flexibility.

Variation successes abound, with many home cooks enjoying spicy twists or incorporating seasonal vegetables that enhance the flavor while remaining true to the original recipe.

Adaptation stories highlight the ease with which families integrate the dish into their weeknight rotations, citing its simplicity and flavor appeal as making it an indispensable part of their cooking repertoire.

Readers share photography tips that elevate their bowl presentations, inspiring others to appreciate the vibrant colors and eye-catching arrangements that bring joy to meal-sharing.

Frequently Asked Questions

Can I use frozen corn instead of fresh? Yes, frozen corn can be a convenient alternative and works wonderfully in this recipe. Just make sure to thaw it before grilling to achieve the best texture.

How can I store leftovers? Store leftovers in airtight containers in the fridge for up to three days. Keep the chicken, corn, and rice separate to maintain optimal freshness.

Is this bowl meal customizable? Absolutely! You can mix and match ingredients and toppings according to your preferences or based on what you have on hand.

Can I meal prep this dish in advance? Yes, you can prep all components in advance and store them separately in the fridge until you’re ready to assemble and serve.

Can I make this dish vegetarian? Sure! Swap out the chicken for tofu or chickpeas to create a savory vegetarian version that is just as delightful.

What spices work best for marinating the chicken? Common spices include cumin, chili powder, and paprika. Feel free to experiment with adding herbs like oregano and freshly ground pepper for a personalized touch.

How can I make this dish spicier? To add heat, consider incorporating jalapeños into your bowl or using a spicy marinade for the chicken.

How do I know when the chicken is cooked through? The safest way to check is by using a meat thermometer. The internal temperature should reach 165°F (75°C) for safe consumption.

What is the best type of cheese to use? Queso fresco or crumbled feta works beautifully, but feel free to choose any cheese that you enjoy.

Can I freeze this dish? While it’s best served fresh, you can freeze cooked chicken and corn. Reheat separately before assembling your rice bowl for best results.

Additional Resources

If you enjoyed this recipe, explore related recipes like Mexican Street Tacos or Grilled Vegetable Quesadillas. These dishes share similar flavors and can be featured in a Mexican-themed meal.

Technique guides such as How to Perfectly Grill Corn or Mastering Marinades can enhance your culinary skills, making meal preparation even more enjoyable.

Ingredient information provides deeper insights into how staples like corn and chicken can feature in a healthy and diverse diet, showcasing their versatility throughout various cuisines.

For equipment recommendations, discover must-have kitchen tools that elevate your cooking experience, from quality pans to essential knives that make preparation easier.

Seasonal variations of this recipe can bring freshness to your plate, introducing new ingredients that complement the Street Corn Chicken Rice Bowl beautifully.

Join the Conversation

Become part of our cooking community by sharing your adaptations, asking questions, or providing feedback on this recipe. Follow us on social media and tag us to showcase your delicious creations!

Photography tips are welcome to make your culinary creations truly shine on your feed, inspiring fellow cooks to recreate your masterpiece.

We encourage recipe reviews and suggestions to foster engagement amongst our community members. Your comments can spotlight your favorite elements of the dish or share exciting modifications you’ve tried.

Engage in recipe variations and exchange ideas that elevate this dish while allowing your individual flair to shine through each bowl.

The Recipe

Street Corn Chicken Rice Bowl

Serves: 4 servings

Prep Time: 20 mins

Cook Time: 25 mins

Total Time: 45 mins

Kitchen Equipment Needed

  • Grill or grilling pan
  • Large mixing bowl
  • Measuring cups and spoons
  • Cutting board and knife
  • Food processor or blender (for dressing)

Ingredients

  • 2 cups cooked rice (white or brown)
  • 1 lb chicken breast, cut into strips
  • 2 cups corn, fresh or frozen
  • 1 tablespoon chili powder
  • 1 teaspoon cumin
  • Salt and pepper, to taste
  • 1 avocado, diced
  • 1/4 cup fresh cilantro, chopped
  • 1/2 cup crumbled queso fresco
  • 2 limes, cut into wedges
  • For dressing: 1/2 cup sour cream, 1/4 cup mayo, juice of 1 lime, salt to taste

Directions

  1. In a mixing bowl, marinate chicken strips with chili powder, cumin, salt, and pepper for at least 15 minutes.
  2. Grill chicken on medium heat until cooked through, about 6-7 minutes on each side. Ensure internal temperature reads 165°F.
  3. While the chicken cooks, grill corn for about 10 minutes until charred, turning occasionally.
  4. In a separate bowl, make the dressing by mixing sour cream, mayo, lime juice, and salt until smooth.
  5. Assemble the bowls: start with a base of rice, add grilled chicken and corn, and top with diced avocado, cilantro, and queso fresco.
  6. Drizzle with the creamy dressing and serve lime wedges on the side.

Recipe Notes

  • Feel free to adjust the spiciness by adding more chili powder or incorporating hot sauce.
  • This recipe is customizable—add your favorite toppings such as black beans or sautéed peppers.
  • For a vegan option, substitute chicken with grilled tempeh or portobello mushrooms.

Delicious My Chow Mein Recipe: A Quick and Easy Guide

Delicious Homemade Chow Mein: A Flavorful Stir-Fry Delight

⚖️
Difficulty
Easy

⏲️
Prep Time
10 mins

🕒
Cook Time
15 mins

⏱️
Total Time
25 mins

🍽️
Servings
4

Chow mein is a beloved Chinese dish that has captured the hearts and taste buds of food lovers around the globe. With its combination of tender noodles, crisp vegetables, and savory sauces, this dish offers a delightful balance of flavors and textures. It is the perfect meal for busy weeknights or cozy gatherings, as it is quick to prepare and incredibly versatile. Whether you prefer your chow mein loaded with protein or packed with vegetables, its adaptability makes it easy to customize to your liking.

As you indulge in this meal, the fragrant aroma of garlic and soy sauce wafts through the air, stimulating your senses and building anticipation. The vibrant colors of the stir-fried vegetables create a feast for the eyes, promising a satisfying and nourishing experience. Chow mein is not just a meal; it’s a way to bring friends and family together, as everyone gathers around the table to share in the joy of cooking and dining.

Quick Recipe Highlights

  • Flavor Profile: This chow mein recipe features a harmonious blend of umami-rich soy sauce, the crunch of fresh vegetables, and the fragrant notes of garlic and ginger.
  • Texture: Enjoy a delightful contrast between the chewy noodles and the crispy vegetables, creating an enjoyable mouthfeel with each bite.
  • Aroma: The dish is characterized by the warm, inviting aroma of stir-fried garlic and the distinctive scent of soy sauce.
  • Visual Appeal: The vibrant colors of carrots, bell peppers, and green onions make this chow mein incredibly visually appealing.
  • Skill Level Needed: A great dish for beginners, chow mein requires basic cooking techniques like chopping, stir-frying, and simmering.
  • Special Equipment: All you need are a sturdy wok or large skillet and a sharp knife for cutting the veggies.

Recipe Overview

  • Difficulty Level: This chow mein recipe is easy to follow, making it suitable for cooks of all skill levels. No advanced techniques are required, so even novice chefs can feel confident preparing this dish.
  • Category: Chow mein falls under the stir-fry category, known for its quick cooking methods that preserve the freshness of the ingredients.
  • Cuisine: Originating from China, chow mein has various regional adaptations, making it a popular dish in many cultures around the world.
  • Cost: This recipe is budget-friendly, requiring only a few inexpensive ingredients while delivering delicious results.
  • Season: Chow mein can be enjoyed year-round, however, it’s particularly satisfying during cooler months when hearty meals are desired.
  • Occasion: Perfect for both casual family dinners and festive gatherings, chow mein caters to diverse palates and is sure to please everyone at the table.

Why You’ll Love This Recipe

Chow mein is a delightful dish that brilliantly combines taste and texture. The soft noodles entwine perfectly with colorful, fresh vegetables, offering a vibrant and appetizing appearance that immediately stirs the appetite. Each bite encapsulates a rich umami flavor, thanks to the infusion of soy sauce and aromatic stir-frying. Coupled with the snap and crunch of vegetables, this makes for a satisfying meal that is both comforting and invigorating.

Convenience plays a significant role in the appeal of this chow mein recipe. Within just 25 minutes, you can create a wholesome and filling dish. The simple steps and quick cooking time mean that you can enjoy a homemade meal even on the busiest of days. Versatile enough to accommodate various proteins and dietary preferences, this recipe invites creativity without sacrificing flavor or nutrition.

Moreover, chow mein presents notable nutritional advantages. Bursting with colorful vegetables, your plate is filled with essential vitamins, minerals, and antioxidants. The inclusion of lean proteins, which you can customize according to your dietary needs, ensures that this dish is as nutritious as it is delicious. You’ll feel satisfied and nourished after a serving of this wholesome meal.

Socially and entertainingly, chow mein is an excellent choice for gatherings. Its shared nature invites conversation, as diners can serve themselves and choose their favorite components. This communal style fosters a sense of togetherness, making it a perfect centerpiece for family dinners or casual get-togethers with friends. Plus, its beautiful presentation adds elegance to any table setting, impressing your guests with minimal effort.

Finally, chow mein is highly cost-effective and accessible. With readily available ingredients, preparing this meal won’t break the bank. It’s a fantastic option for families looking to create delicious meals without financial strain. Thrive on simplicity while relishing the robust flavors that this homemade chow mein recipe delivers.

Historical Background and Cultural Significance

The origins of chow mein can be traced back to the Chinese immigrants who brought their culinary traditions to the United States in the late 19th century. As they adapted their recipes to include local ingredients, chow mein evolved into a dish that maintained its fundamental roots while reflecting the flavors of its new home. Over time, it became a staple in Chinese-American cuisine, representing a fusion of old and new styles of cooking.

Culturally, chow mein symbolizes more than just a meal; it stands for community and the mingling of diverse culinary practices. Within Chinese culture, food is often seen as a communal affair, where families come together to enjoy shared dishes. Similarly, chow mein has become a cherished dish that continues to bridge the gap between cultures, making it a popular choice at family gatherings and celebrations.

As the dish’s popularity grew, so did the infinite variations of chow mein in various regions. From the traditional Cantonese chow mein to American adaptations featuring crispy noodles and a variety of protein options, the dish has evolved. Each version maintains certain foundational elements while showcasing local tastes and preferences, allowing chow mein to resonate with a wide audience.

Regional variations of chow mein reflect not only the diversity of ingredients but also unique cooking techniques. For instance, in Hong Kong, the emphasis might be on crispy noodles stir-fried with an array of seasonal vegetables, whereas in India, you may find spicy adaptations infused with local spices. This versatility affirms chow mein’s status as not just a dish but a beloved cultural phenomenon.

Ingredient Deep Dive

Noodles: The key component of chow mein, noodles are traditionally made of wheat flour and water. The texture and thickness can vary based on the cooking technique used. Fresh egg noodles provide the best flavor and texture, while dry noodles can be used for convenience. When selecting noodles, look for those that are labeled as “chow mein” noodles for the authentic experience. Store fresh noodles in the refrigerator but use dried noodles in a cool, dry place. Substitute with rice noodles or gluten-free alternatives if necessary.

Vegetables: Chow mein is typically packed with colorful vegetables, including bell peppers, carrots, and bean sprouts. Each vegetable contributes its unique flavor and nutritional benefits. When choosing vegetables, opt for those that are fresh and vibrant in color, as this indicates ripeness. Store them in the fridge and use them as soon as possible to maintain their crispness. You can switch out specific vegetables for seasonal options or personal preferences, such as adding bok choy or snap peas.

Protein: Whether you choose chicken, beef, shrimp, or tofu, the protein in chow mein can significantly influence the dish’s flavor. Each protein variant brings a distinct taste and nutritional profile to the meal. When selecting proteins, look for fresh cuts with minimal additives. Proper storage is essential; keep meat and seafood in the coldest part of the refrigerator or freeze them for longer preservation. Tofu is a great plant-based alternative, offering versatility in flavor and texture; it can be pan-fried for a crispy finish.

Sauces: The sauce is crucial for tying all ingredients together. A mixture of soy sauce, oyster sauce, and sesame oil is commonly used. Each ingredient adds depth and richness to the overall dish. When purchasing sauces, opt for high-quality products without added preservatives for the best flavor. Store sauces in a cool, dark place or in the refrigerator once opened. Feel free to adjust sauce measurements according to your taste preference or dietary requirements; low-sodium or gluten-free options are available.

Common Mistakes to Avoid

  • Overcooking the noodles: Pampering your noodles will lead to a mushy texture. Follow the package directions for cooking times, then rinse them under cold water to halt the cooking process.
  • Not prepping ingredients: Failing to have ingredients ready before starting can result in uneven cooking. Always chop and measure everything before cooking to streamline the process.
  • Using too much sauce: Adding excess sauce can overpower the other flavors. Start with a small amount, then gradually add more to achieve your desired taste.
  • Not heating the wok or pan: Cooking at insufficient heat can lead to soggy ingredients and lack of browning. Preheat your skillet or wok thoroughly before adding food.
  • Ignoring the order of cooking: Different ingredients have varied cooking times. Begin with proteins, then add denser vegetables, finishing with quick-cooking elements like leafy greens.
  • Overcrowding the pan: Adding too many ingredients at once can lower the pan’s temperature, resulting in steaming instead of stir-frying. Cook in batches if necessary.
  • Skimping on oil: Insufficient oil can lead to sticking and uneven cooking. Use an adequate amount to ensure everything slides smoothly in the pan.
  • Failure to taste: Not tasting while cooking can result in a finished dish that doesn’t meet your flavor expectations. Adjust seasonings as necessary throughout the process.
  • Neglecting garnishes: A lack of garnishes can make your chow mein less appealing. Top with green onions, sesame seeds, or fresh herbs for a beautiful presentation.
  • Not allowing for resting time: Instant serving might compromise the flavor consistency. Allowing a few minutes of rest helps the flavors meld beautifully.

Essential Techniques

Stir-frying: Stir-frying is a foundational technique for creating this chow mein. It involves quickly cooking food in a hot wok or pan with a small amount of oil while continuously stirring. Mastering the heat level is crucial; too low will steam the ingredients rather than fry them, while too high can burn them quickly. Look for visual cues like a slight browning on ingredients to ensure you’re achieving that sought-after char while maintaining crunch.

Cutting and Chopping: Properly preparing your vegetables and proteins can create a cohesive dish that cooks evenly. Aim for uniform sizes to ensure they cook through at the same rate. Master the technique of using a sharp knife, and practice the “claw grip” to keep your fingers safe while chopping. A well-organized mise en place, or “everything in its place,” will help streamline your cooking process and prevent any last-minute rushing.

Pro Tips for Perfect Chow Mein

1. Use a wok for superior heat retention and distribution. Its shape allows for evenly cooked ingredients, enhancing texture and flavor.
2. Consider marinating your proteins beforehand for extra flavor. Simple condiments like soy sauce and garlic can enhance the richness and tenderness.
3. Add cold, cooked noodles into the hot wok without adding extra liquid. This keeps the chow mein from becoming soggy.
4. Experiment with different sauces, such as hoisin or sweet chili, for a unique twist. Customizing sauce choices can transform your chow mein completely.
5. Choose fresh, seasonal vegetables for the best flavor and nutrition. Vibrant, in-season produce will elevate your dish’s overall appeal.
6. To achieve that perfect glossy finish, add a touch of cornstarch or arrowroot mixed with water towards the end of cooking.
7. Always taste as you cook to ensure balance. Adjust seasoning incrementally until you achieve your desired flavor profile.
8. Keep leftovers in an airtight container to maintain freshness for later meals. Reheat gently in a skillet to preserve texture.

Variations and Adaptations

Chow mein can be adapted for different tastes and dietary preferences. For a spicy twist, add chili paste or chopped fresh chilies to the stir-fry. On the other hand, a kid-friendly version might feature milder vegetables like peas and carrots. To cater to a vegetarian audience, you can load the dish with tofu or additional vegetables in place of meat.

Seasonal modifications also enhance chow mein. In spring, consider adding fresh asparagus or snap peas, while fall might call for sautéed mushrooms or butternut squash. The ingredient’s seasonality not only boosts flavor but also encourages the use of local produce.

If dietary restrictions are a concern, chow mein can easily become gluten-free by substituting traditional noodles for rice noodles or spiralized vegetables. For a low-carb option, consider zucchini noodles or shirataki noodles, allowing the dish to meet various dietary needs without sacrificing flavor.

Texture modifications are exciting to experiment with, too. Consider adding crispy toppings like fried shallots or nuts for added crunch. Health-conscious diners might prefer steamed rather than fried components, emphasizing lightness and freshness while still being satisfying.

Finally, presentation alternatives can elevate your chow mein experience. Serve it in bowls, topped with fresh herbs, or layer it with garnishes like sesame seeds or crushed peanuts for a visually appealing dish. Creative serving methods can turn everyday meals into extraordinary culinary experiences.

Serving and Presentation Guide

Chow mein is often best enjoyed hot and freshly cooked. For plating techniques, consider using a large serving bowl to showcase the vibrant colors of the stir-fried vegetables and noodles. Tongs or a large spoon can help with serving, ensuring everyone gets an ample portion.

Garnishing is key. A sprinkle of green onions or sesame seeds adds flavor while enhancing visual appeal. For a finishing touch, serve lime wedges on the side, offering a burst of freshness when squeezed over the dish.

Traditional accompaniments like spring rolls or dumplings complement chow mein excellently, providing a complete meal experience. For modern presentations, consider serving chow mein in lettuce cups for a fun, hands-on dining experience. Serve it slightly warm to maintain the freshness of the ingredients and the overall experience.

Portion control is another aspect to consider. For family-style dining, encourage guests to serve themselves, allowing them to customize their bowls based on appetite. Alternatively, pre-plate servings for portion control in meal prep scenarios, making it easy to grab and go.

Wine and Beverage Pairing

For a delightful pairing with chow mein, consider an off-dry Riesling or a Pinot Grigio. Both white wines offer a crisp acidity that complements the savory flavors of the dish while enhancing its freshness. The fruity notes also balance well with any spice you may incorporate in your chow mein.

If you prefer non-alcoholic options, a refreshing iced green tea pairs beautifully with chow mein, creating a light and aromatic dining experience. For a more robust choice, try a ginger ale or lemon-lime soda that can cut through the richness of the stir-fry and cleanse the palate between bites.

If coffee or tea is more your style, a light oolong tea would harmonize nicely, bringing out the dish’s complex flavors. Always serve beverages chilled, especially on warm days, to maintain a refreshing dining atmosphere.

Storage and Shelf Life

To store leftover chow mein, place it in an airtight container and refrigerate it within two hours of cooking. Good storage practices prevent foodborne illnesses and keep your meal tasty. Properly stored, chow mein can last for 3 to 4 days in the fridge.

When reheating, use a skillet over medium heat, adding a splash of water or broth to maintain moisture and prevent the noodles from drying out. For longer-term storage, consider freezing chow mein in meal-sized portions; it can last 2 to 3 months. When ready to enjoy, thaw in the refrigerator overnight and reheat in a skillet or microwave.

Be mindful of signs of spoilage, such as off smells or discoloration. Discard any chow mein that shows these signs to ensure your health. Always aim to not leave leftover chow mein at room temperature for more than two hours to prevent bacterial growth.

Make Ahead Strategies

Prepare ingredients ahead of time for an even quicker chow mein experience. Chop vegetables a day in advance and store them in airtight containers in the refrigerator. Marinating proteins overnight also allows for deeper flavor absorption, significantly enhancing your dish.

You can cook noodles and store them separately, mixing them in during the last minutes of cooking to preserve their texture. Alternatively, create sauce mixtures and store them in the fridge for up to a week for a time-saving option at meal preparation time.

Assess the quality of the cooked components to impact overall taste; freshness and texture will play critical roles in the final dish. When assembling, warmth from the wok will reinvigorate other cold items seamlessly, creating a delightful finish. Add fresh herbs or aromatics just before serving for a burst of freshness.

Scaling Instructions

Want to enjoy chow mein for a larger gathering? Simply scale the recipe accordingly. For halving, remember that cooking times might decrease slightly when using less volume; keep an eye on your ingredients to ensure they don’t overcook.

When doubling or tripling the recipe, consider cooking in batches to avoid overcrowding the pan. This ensures that each component receives the necessary heat for optimal texture and flavor. Adjust seasoning levels according to your taste preference; larger quantities may require minor increases in flavor potency.

Equipment adjustments might entail using a larger skillet or wok, ensuring that all ingredients can be adequately stirred. For larger servings, portions can be prepared ahead and stored, allowing for easy reheating with minimal quality impact.

Nutritional Deep Dive

Chow mein offers a rich array of macros, making it an excellent balanced meal option. Carbohydrates from noodles provide energy, while incorporating proteins aids muscle repair and growth. Healthy fats from cooking oils enhance the nutritional profile without overindulgence.

The micronutrient analysis reveals a wealth of benefits from the variety of vegetables used. Ingredients like bell peppers and broccoli are high in vitamins A and C, supporting immune health. Each veggie brings its unique host of nutrients, contributing to a wholesome diet.

Health benefits of homemade chow mein extend to its fiber content, helping with digestive health. Loading your dish with an abundance of vegetables can promote satiety and lower overall calorie intake. Ideal for managing portions and weight, this dish can be perfectly satisfying without excessive calories.

Consider portion analysis for mindful eating practices. While chow mein can be filling, observe serving sizes to align with daily dietary goals. Eating mindfully can aid in making healthier choices while enjoying the delicious flavors of this classic dish.

Dietary Adaptations

For gluten-free options, substitute traditional wheat noodles with rice noodles or zoodles for a light and nutritious alternative. Ensure that all sauces used are certified gluten-free to maintain dietary integrity.

For those following a dairy-free regimen, chow mein is naturally suitable as it contains no dairy products. Utilize plant-based proteins such as tofu or tempeh for a fulfilling option while remaining open to vegan principles.

Low-carb enthusiasts can enjoy chow mein by replacing noodles with spiralized vegetables like zucchini or daikon radish. These alternatives maintain the essence of the dish and provide a refreshing twist while adhering to dietary constraints.

Individuals on keto or paleo diets can embrace this dish by using appropriate non-starchy vegetables and healthy fats. Avocado oil or coconut amino for sauce mixes can create a deliciously satisfying meal without compromising dietary choices.

Troubleshooting Guide

For texture issues, do not hesitate to adjust your cooking times according to ingredient specifics. Overcooked noodles become mushy, while undercooked proteins may be chewy. Always conduct a quick taste check to ensure your ingredients are at their best.

Balancing flavors can be challenging. Adjust seasoning gradually and keep tasting to find that equilibrium. If the dish is too salty, add an extra splash of lime juice or sugar to create a counterbalance. Keep adjusting until the flavors are just right.

Temperature problems can stem from an overcrowded pan or uneven heat. Always preheat and avoid adding too many ingredients at once. If you notice uneven cooking, extract ingredients that are done and allow others to cook longer.

In cases of ingredient substitutions causing new textures or flavors, revert to the original recipe or seek alternatives that align better with the dish’s nature. Researching common kitchen ingredient swaps can also enhance success in diverse cooking scenarios.

Timing concerns can result in over or under-cooked dishes. Always have a rough estimate of cooking times available, and consider prepping ingredients in advance to avoid rushing. Stay mindful of time, ensuring components reach their optimal cooking levels for the best outcome.

Recipe Success Stories

Our readers have shared countless success stories about their homemade chow mein experiences. Many have expressed how easy it is to incorporate family favorites, allowing children to taste and enjoy various vegetables. This adaptability has made chow mein a go-to dish for many households.

Several readers have shared their variations, showcasing the versatility of chow mein. From adding spicy Szechuan sauces to incorporating seasonal ingredients, community members have discovered exciting new flavors that have captured palates and hearts alike.

Adaptation stories often reveal how our readers have found ways to make chow mein fit their dietary constraints. By using gluten-free or keto options, they’ve found delicious ways to enjoy this classic dish without sacrificing flavor or enjoyment.

Additionally, photography tips have sparked a community of home cooks eager to share their chow mein creations on platforms like Instagram. A simple bowl of chow mein garnished with fresh herbs would inspire countless others to replicate the dish in their kitchens.

Frequently Asked Questions

1. Can I use different noodles for chow mein? Absolutely! While traditional chow mein uses egg noodles, you can experiment with rice noodles or even spiralized vegetables for a creative twist.

2. How can I store leftovers? Place leftover chow mein in an airtight container and refrigerate for up to four days. You can also freeze it for longer storage.

3. Is chow mein gluten-free? The traditional version is not gluten-free due to the wheat noodles. However, you can easily substitute with rice noodles to accommodate dietary needs.

4. Can I add meat to my chow mein? Yes! Chicken, beef, shrimp, or even tofu are great additions that deepen the flavor and make your meal heartier.

5. How do I keep my chow mein from becoming soggy? Ensure your wok or pan is hot before adding the noodles and cook them for a minimal time to prevent soaking up too much moisture.

6. What vegetables are recommended? Common vegetables include bell peppers, carrots, bean sprouts, cabbage, and green onions. Feel free to get creative with seasonal options!

7. Can I prepare chow mein ahead of time? Yes, you can prep your ingredients in advance and store them. However, it’s best to stir-fry right before serving for optimal freshness.

8. What is the best oil to use for stir-frying? High smoke point oils, such as vegetable oil, peanut oil, or canola oil, are best for stir-frying to achieve the right temperature without burning.

9. Can I make a vegetarian version of chow mein? Yes, simply omit any meat and substitute it with additional vegetables or tofu. It’s just as delicious and satisfying.

10. How do I enhance the flavor of my chow mein? Experimenting with different sauces and spices can elevate your dish. Adding ginger, garlic, and a splash of sesame oil will add a brilliant flavor boost.

Additional Resources

For more delicious meals similar to this chow mein, check out our collection of stir-fry recipes that explore various flavors and ingredients. Expand your culinary skills with our guides on essential cooking techniques that can benefit your everyday cooking. Explore ingredient-focused articles that dive deep into seasonal produce and its health benefits, enriching your knowledge and recipe repertoire.

Utilize equipment recommendations to ensure you have the right tools for efficient cooking without the fuss. Keeping these resources on hand will ease your journey in the kitchen, making cooking enjoyable and straightforward.

Join the Conversation

We’d love to hear about your chow mein experiences! Share your cooking successes on social media using our recipe hashtag, and don’t forget to tag us with photos of your creations. Engaging with others can lead to new inspiration and insights into preparing this beloved dish. Write a recipe review to share your feedback or suggest adaptations you’ve made that we can feature in our community.

The beauty of homemade cooking lies in variations and shared experiences; let’s celebrate them together! Reach out with your favorite tips, and explore our vibrant community as we continue to create and enjoy cooking from around the globe.

The Recipe

Chow Mein

Serves: 4

Prep Time: 10 mins

Cook Time: 15 mins

Total Time: 25 mins

Kitchen Equipment Needed

  • Wok or large skillet
  • Sharp knife
  • Cutting board
  • Measuring cups and spoons
  • Spatula or wooden spoon

Ingredients

  • 8 oz chow mein noodles
  • 2 tablespoons vegetable oil
  • 1 cup sliced carrots
  • 1 cup bell peppers, sliced
  • 1 cup bean sprouts
  • 2 green onions, chopped
  • 2 cloves garlic, minced
  • 3 tablespoons soy sauce
  • 1 tablespoon oyster sauce (optional)
  • Salt and pepper to taste

Directions

  1. Cook chow mein noodles according to package instructions; drain and set aside.
  2. Heat vegetable oil in a wok or large skillet over medium-high heat.
  3. Add minced garlic and cook until fragrant, about 30 seconds.
  4. Add carrots and bell peppers; stir-fry for 3-4 minutes until they begin to soften.
  5. Add the cooked noodles, bean sprouts, soy sauce, and oyster sauce; stir-fry for another 3-4 minutes, mixing well.
  6. Season with salt and pepper to taste.
  7. Garnish with chopped green onions and serve hot.

Recipe Notes

  • Feel free to add your choice of protein, such as chicken or tofu.
  • To keep it gluten-free, replace soy sauce with tamari and use rice noodles.
  • You can also add other vegetables according to your preference or seasonal availability.